| Bernie | P1_sm | 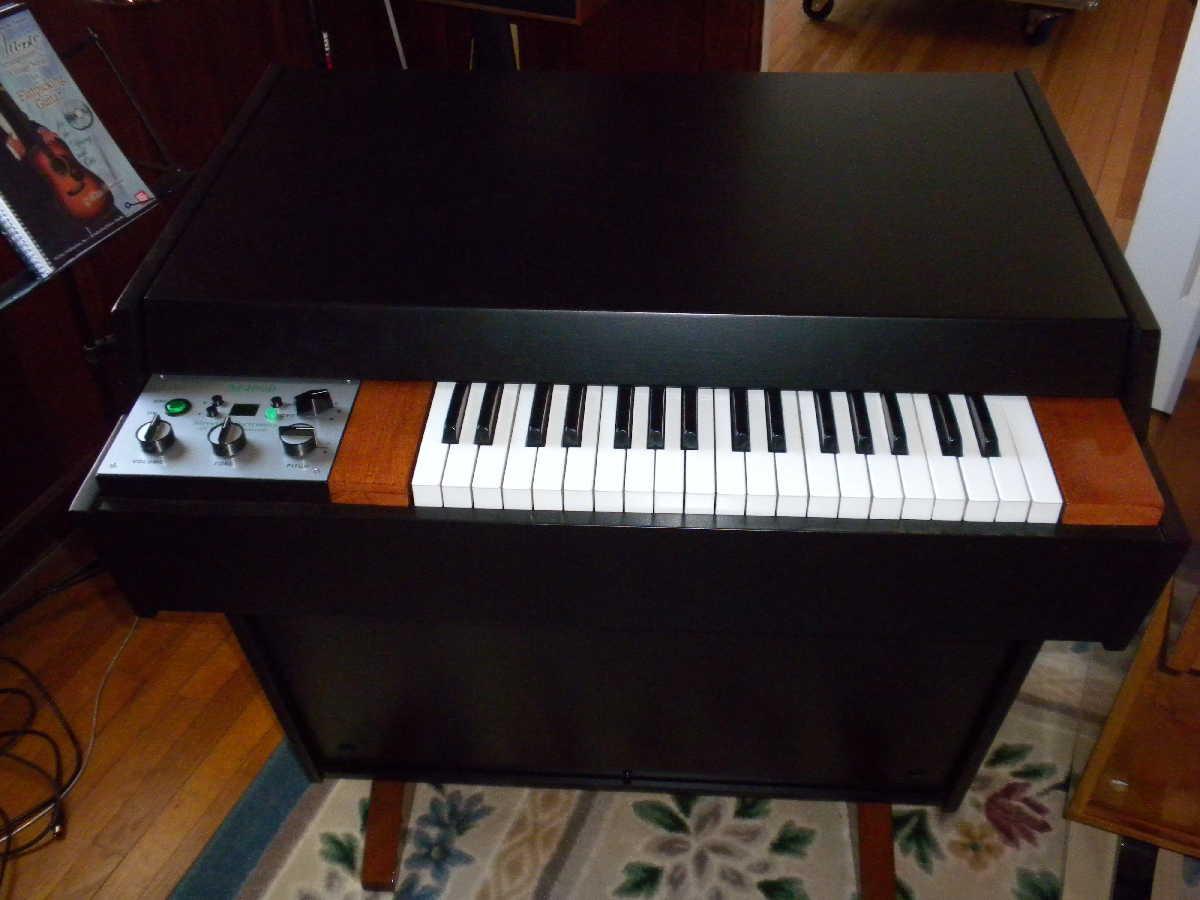 | |
| Bernie | P2_sm | 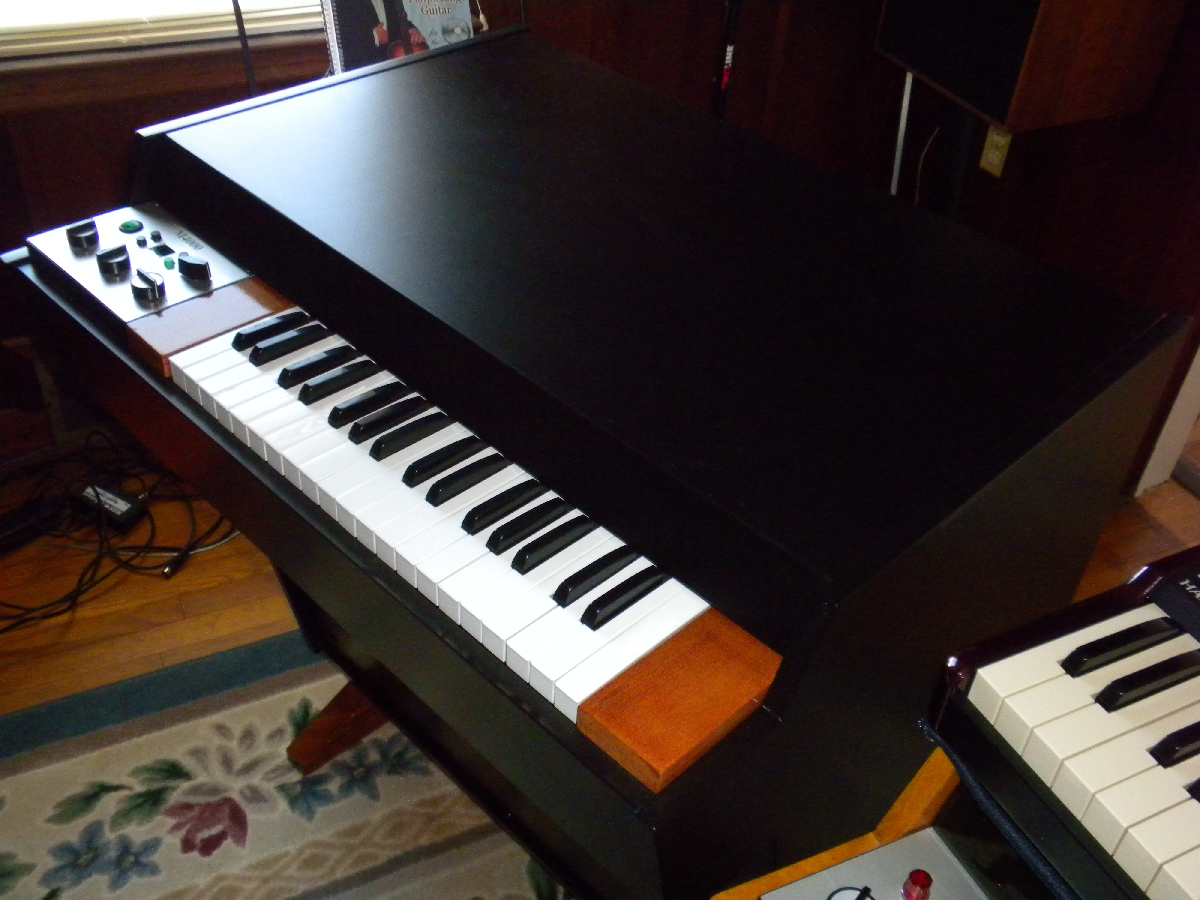 | |
| Bernie | P3_sm | 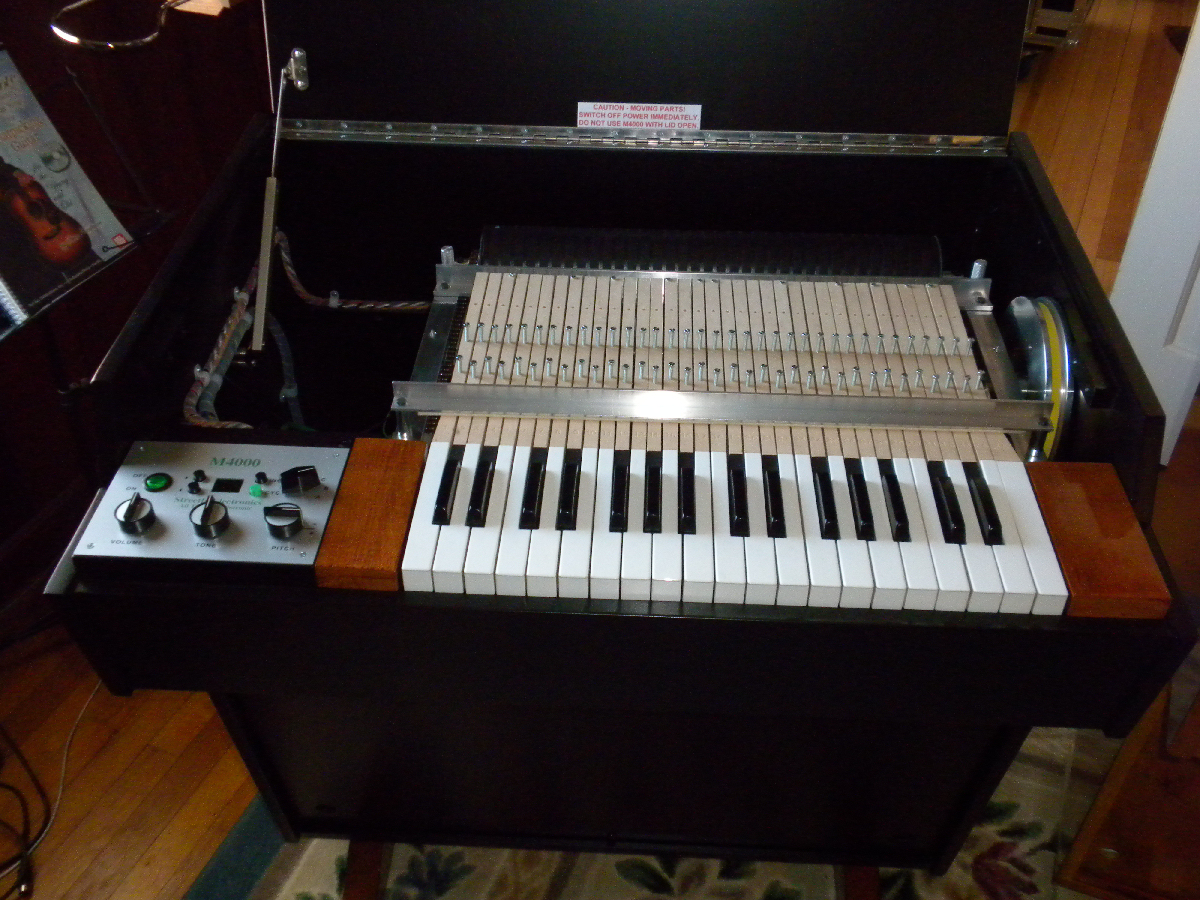 | |
| Chamberlin photos and promo brochures | Riviera Model 800 A | 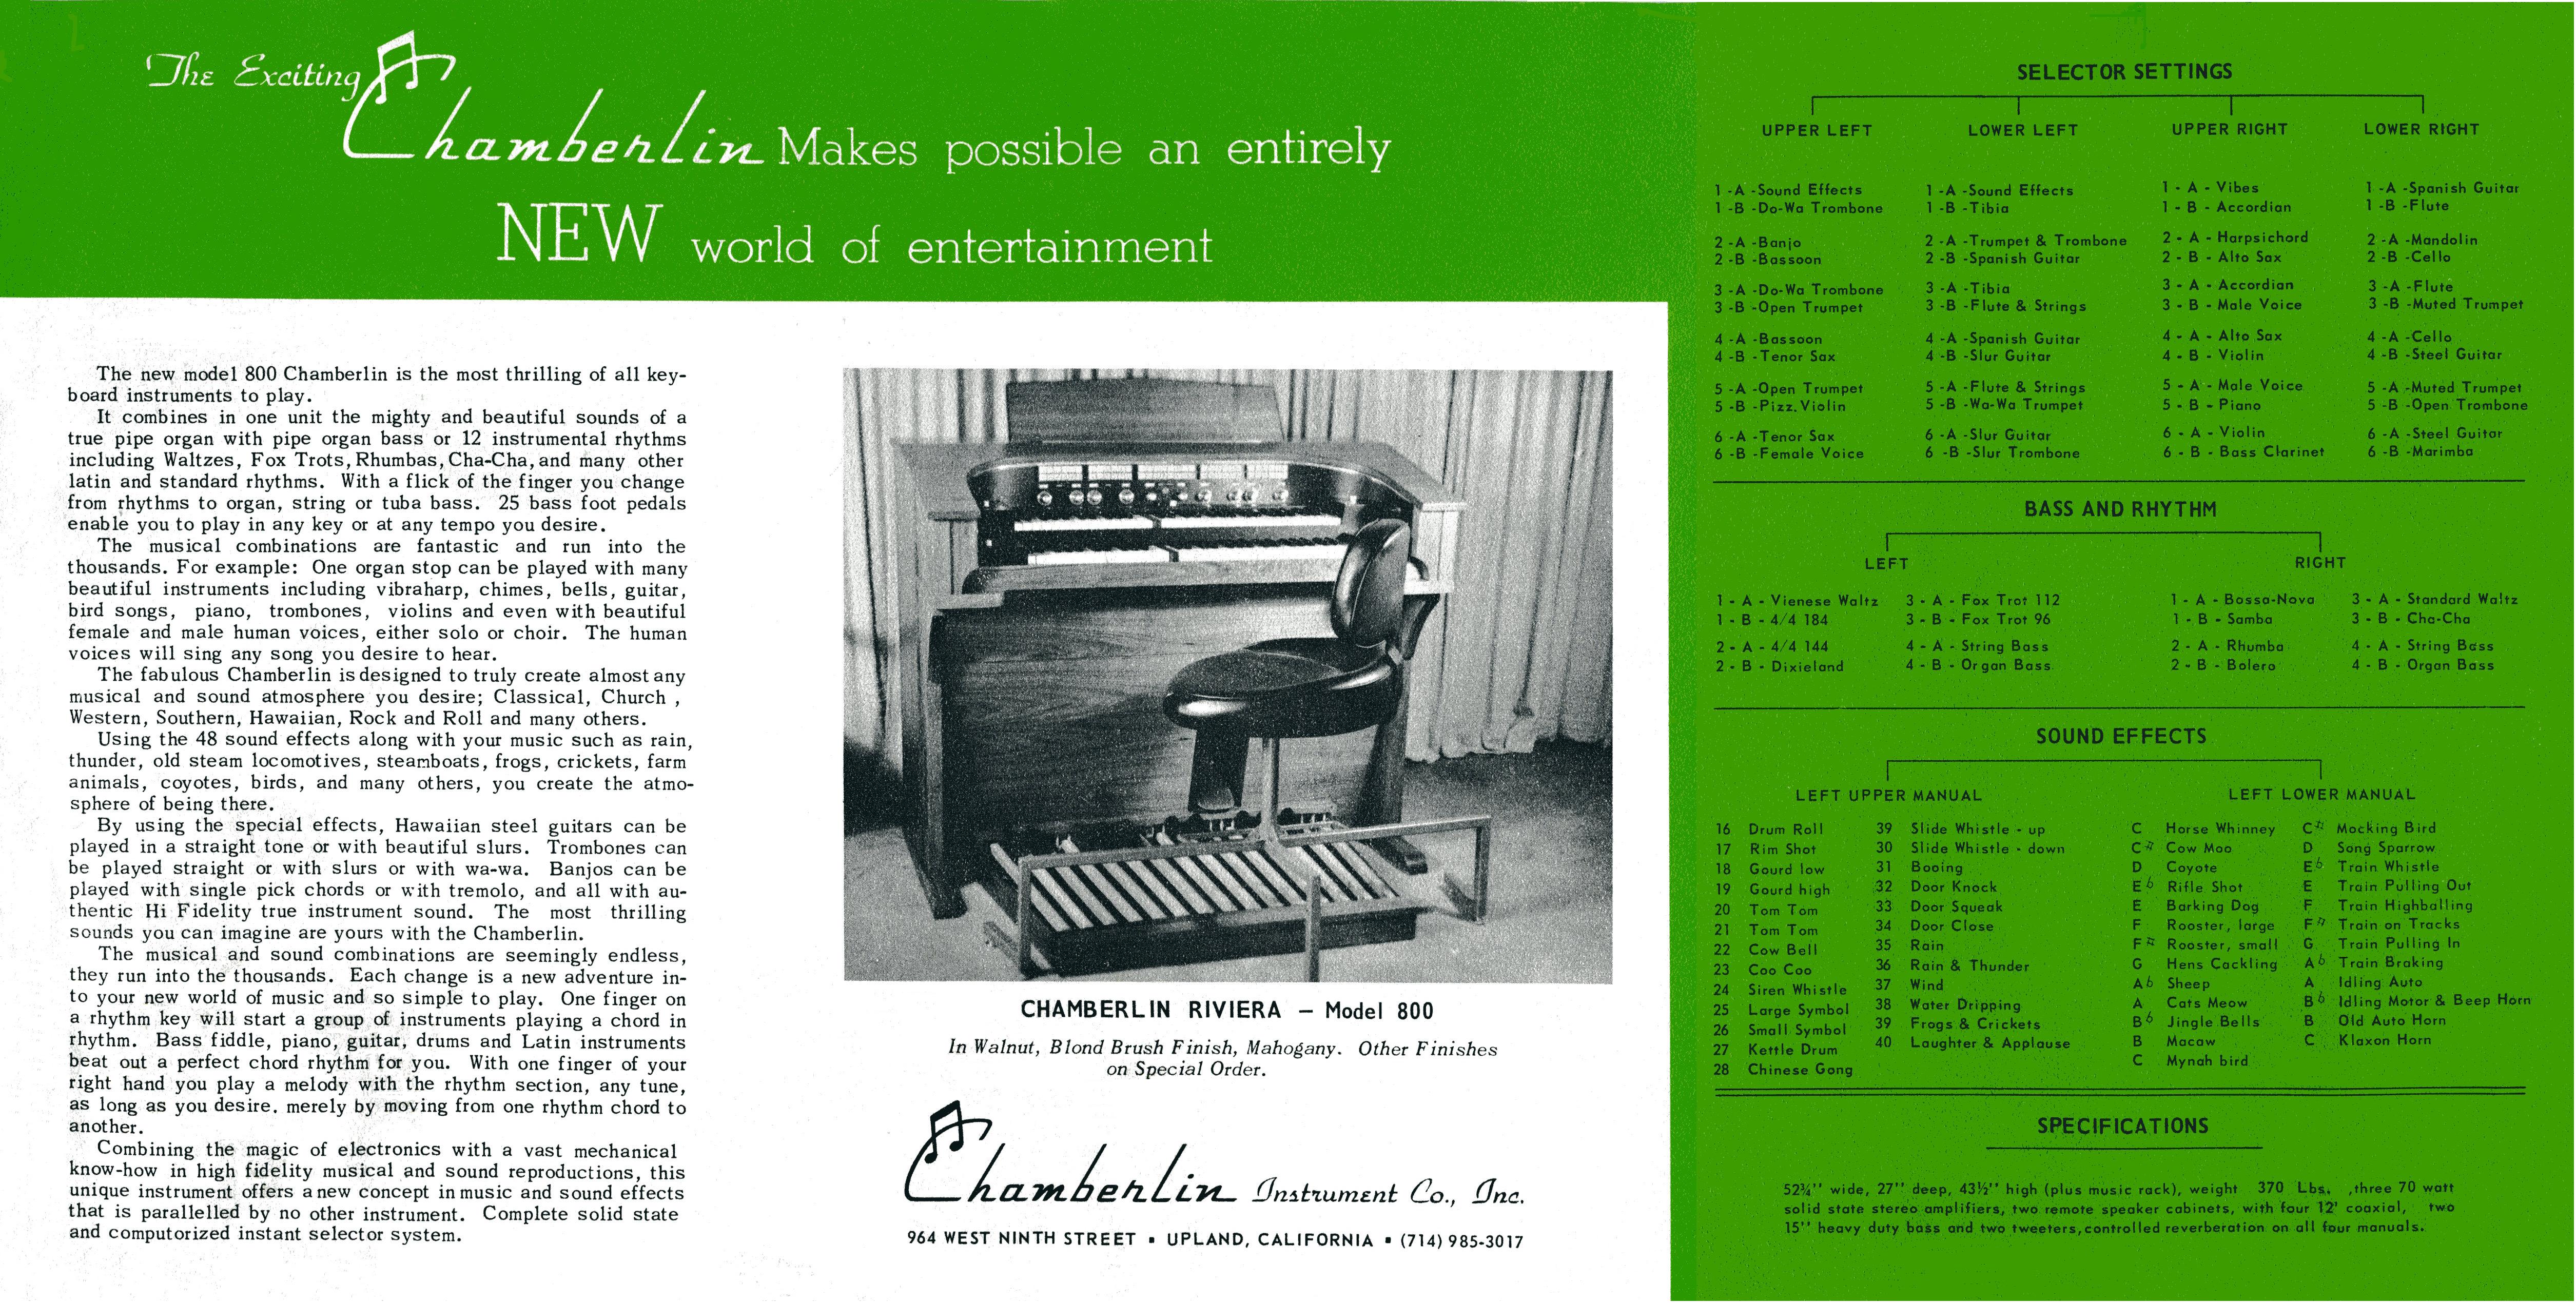 | |
| Chamberlin photos and promo brochures | Riviera Model 800 B | 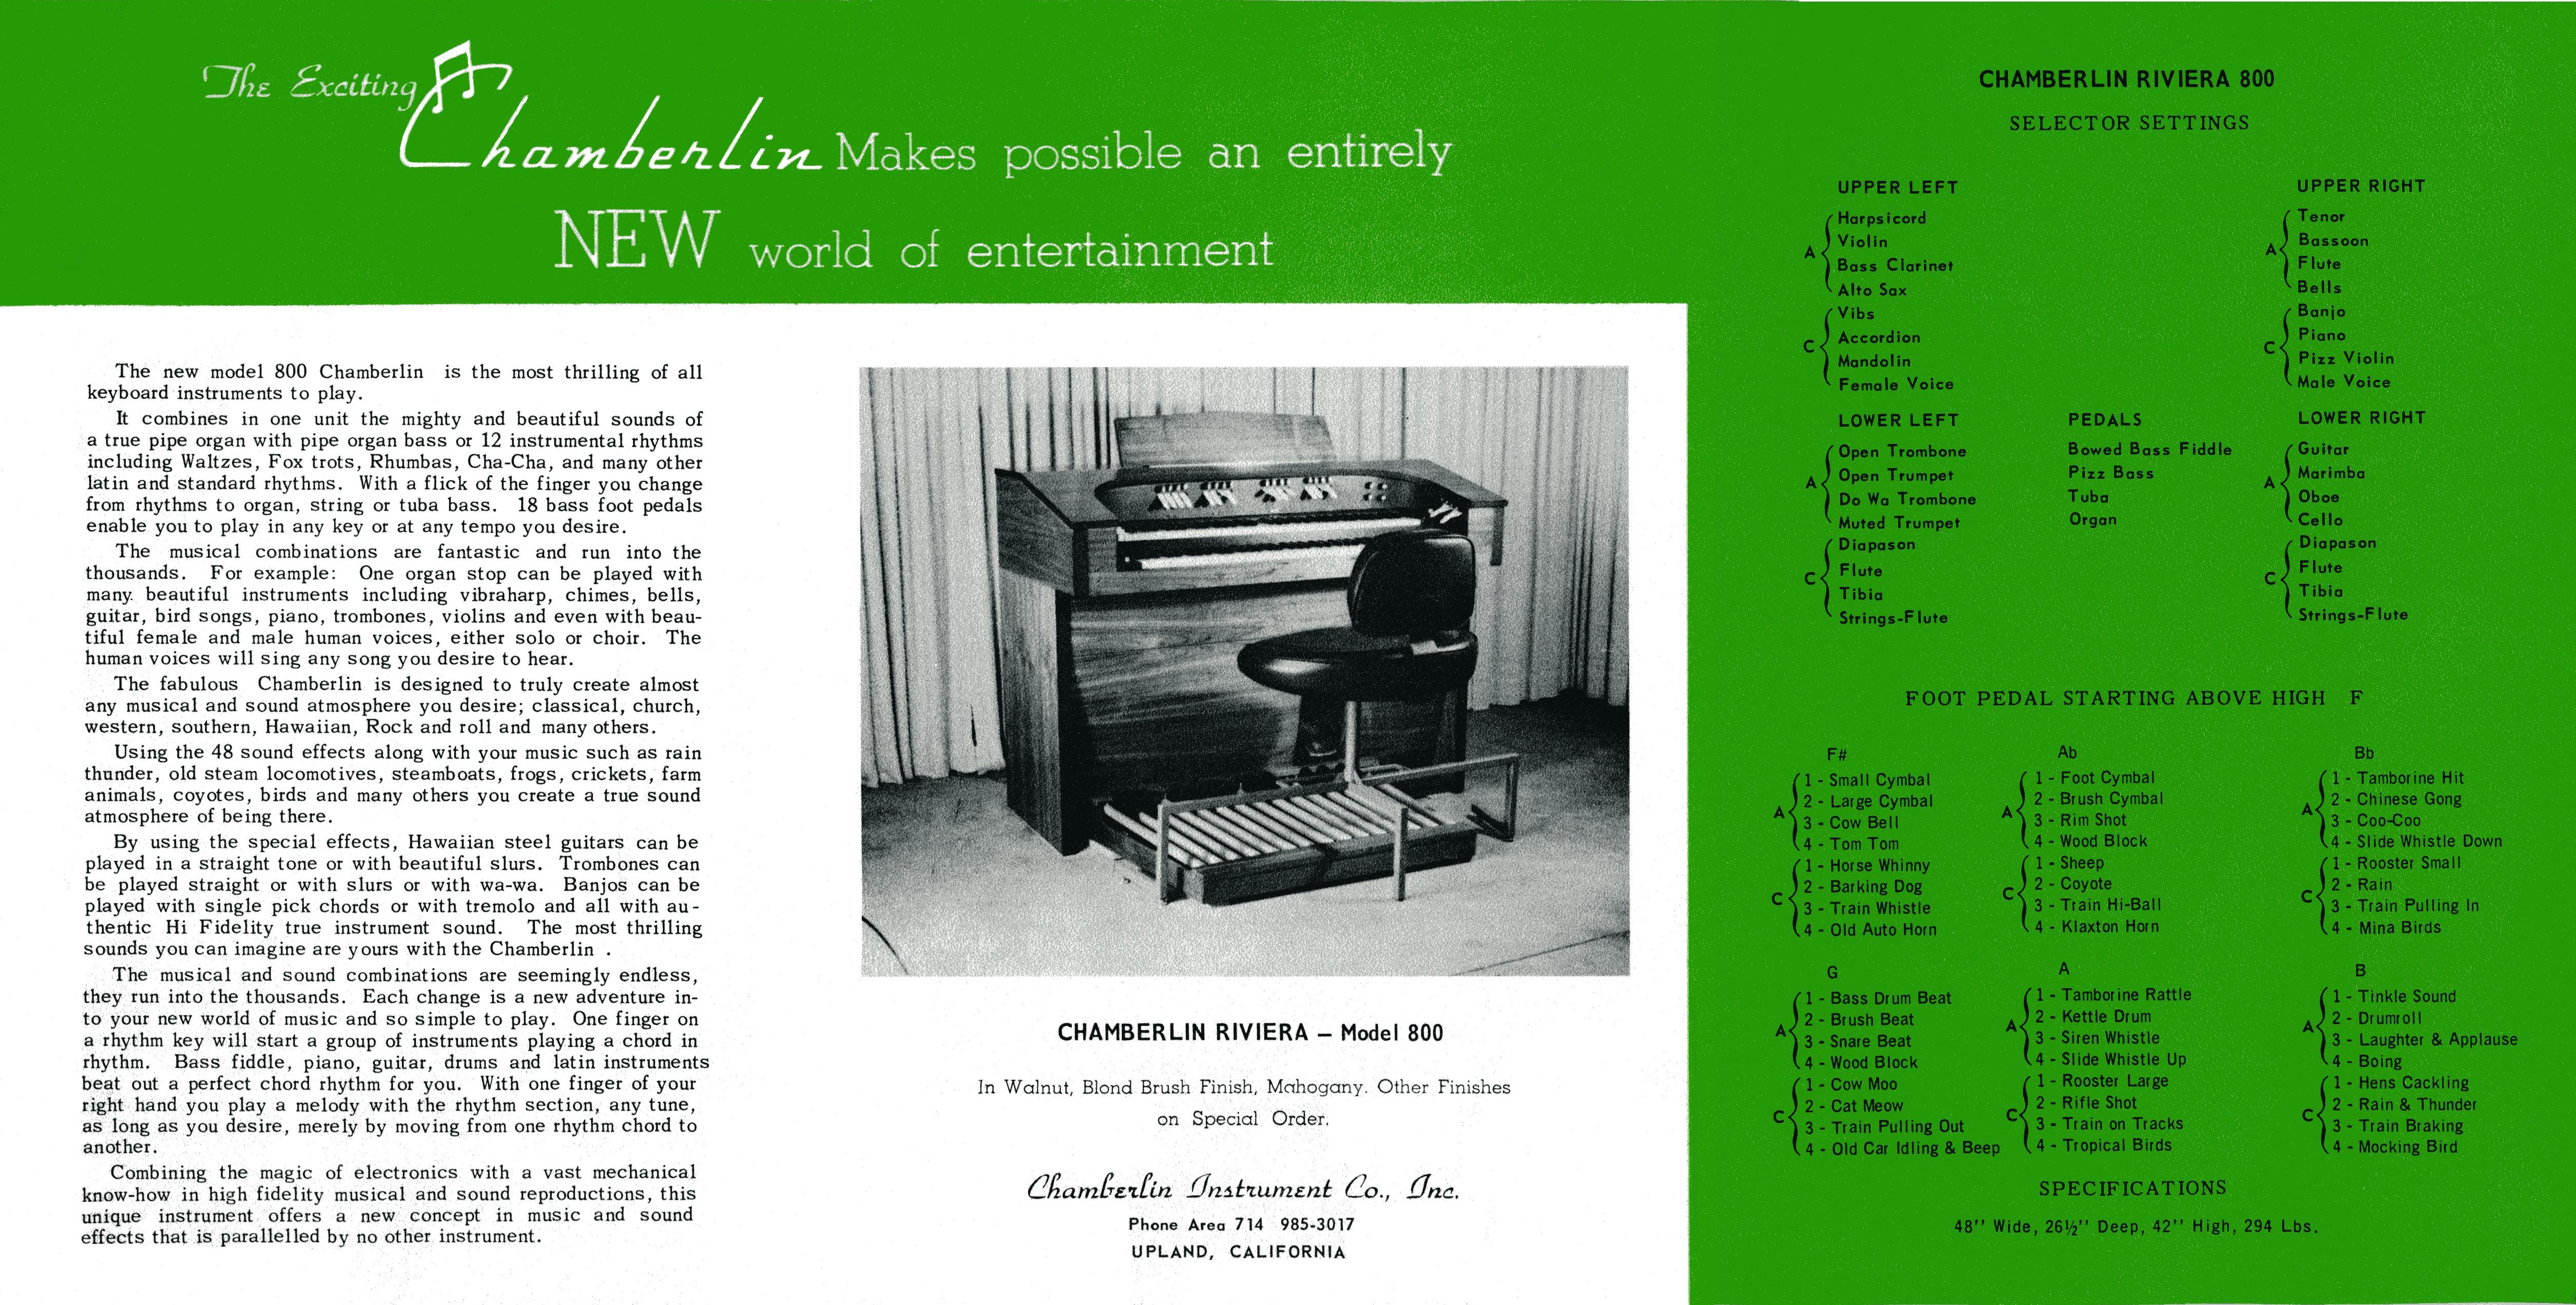 | |
| Gizmotron, owned by Jim Parthun | Gizmotron | 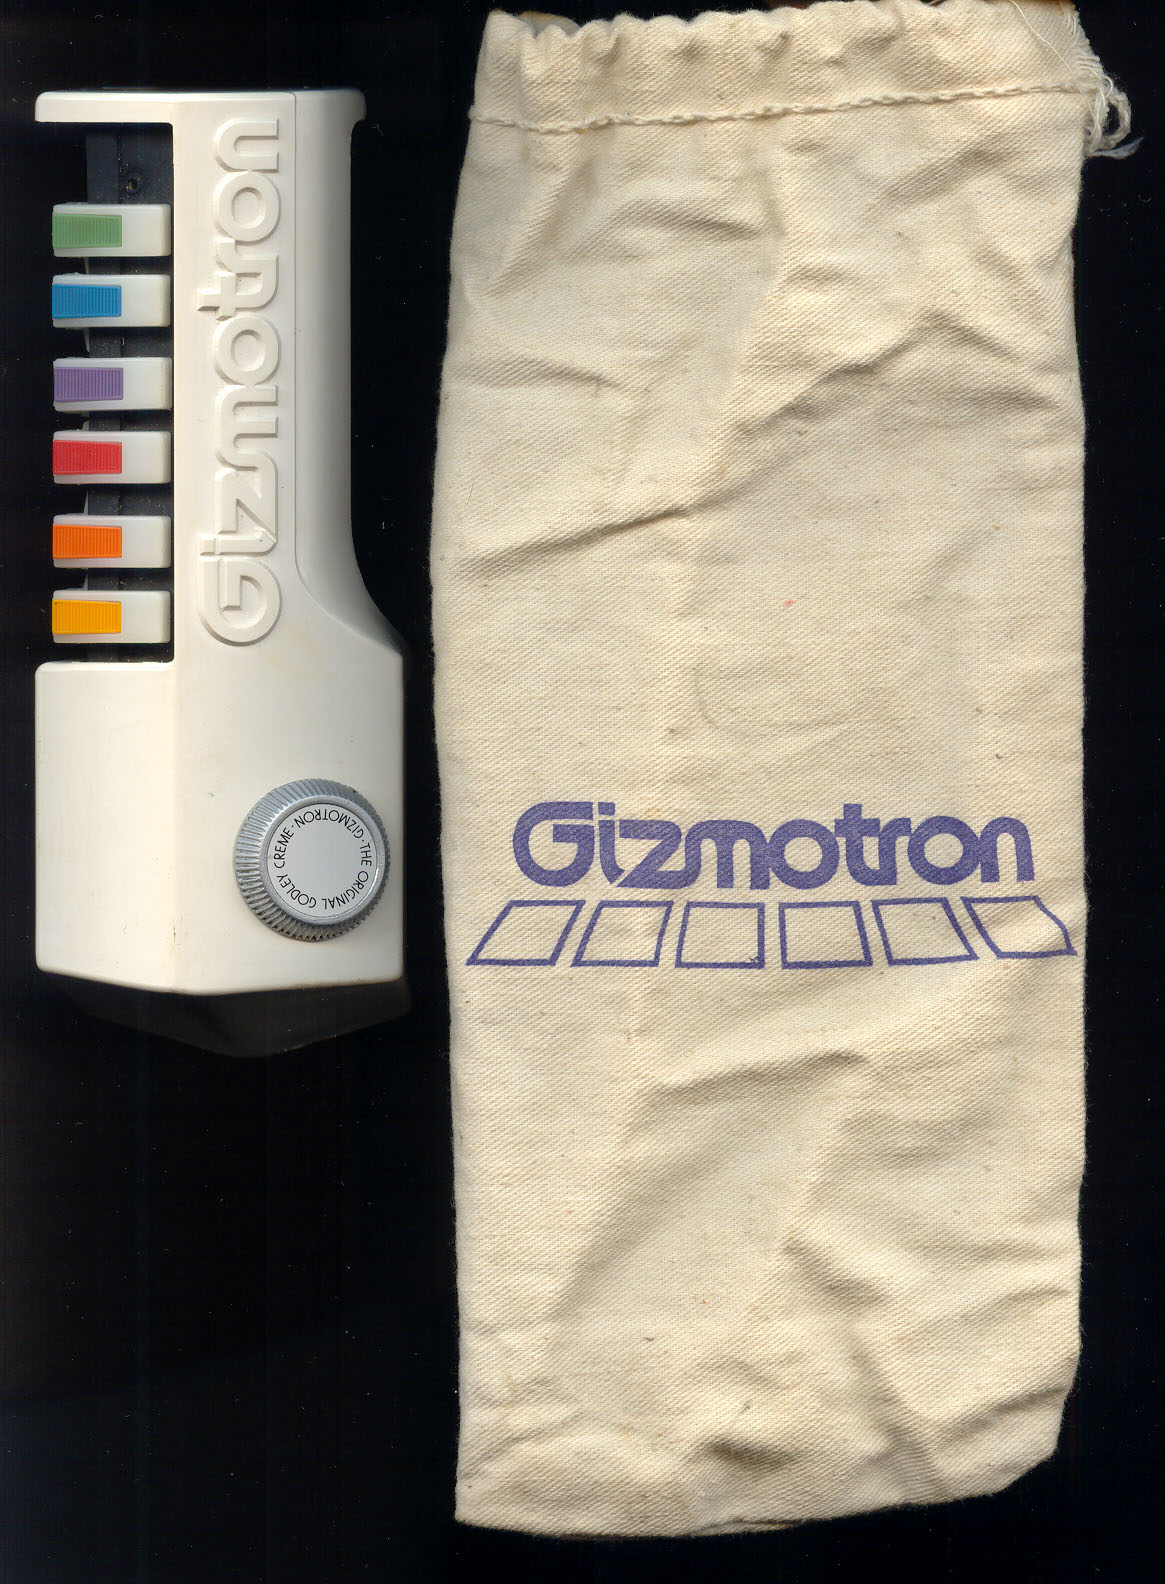 | |
| JMcTron | Mellotron1 |  | |
| JMcTron | Mellotron2 | 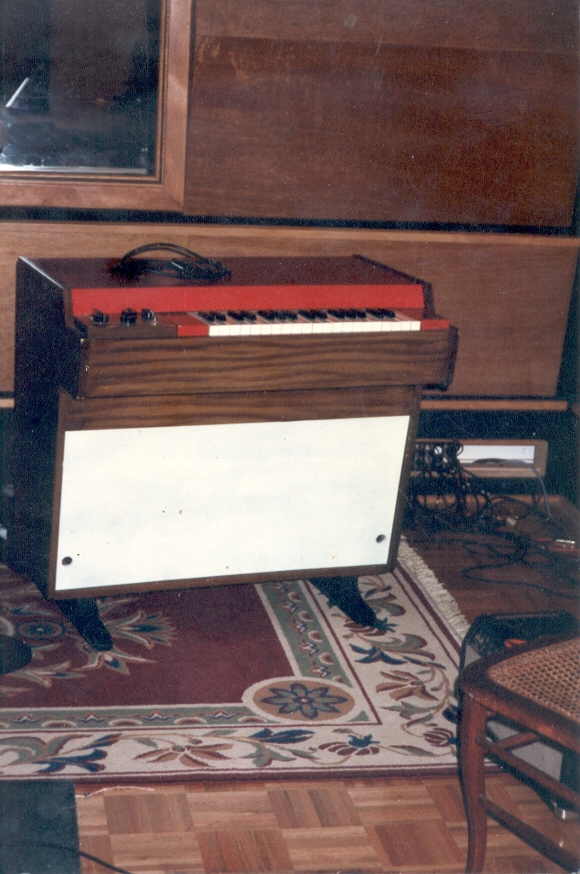 | |
| Jones Alley | west wall | 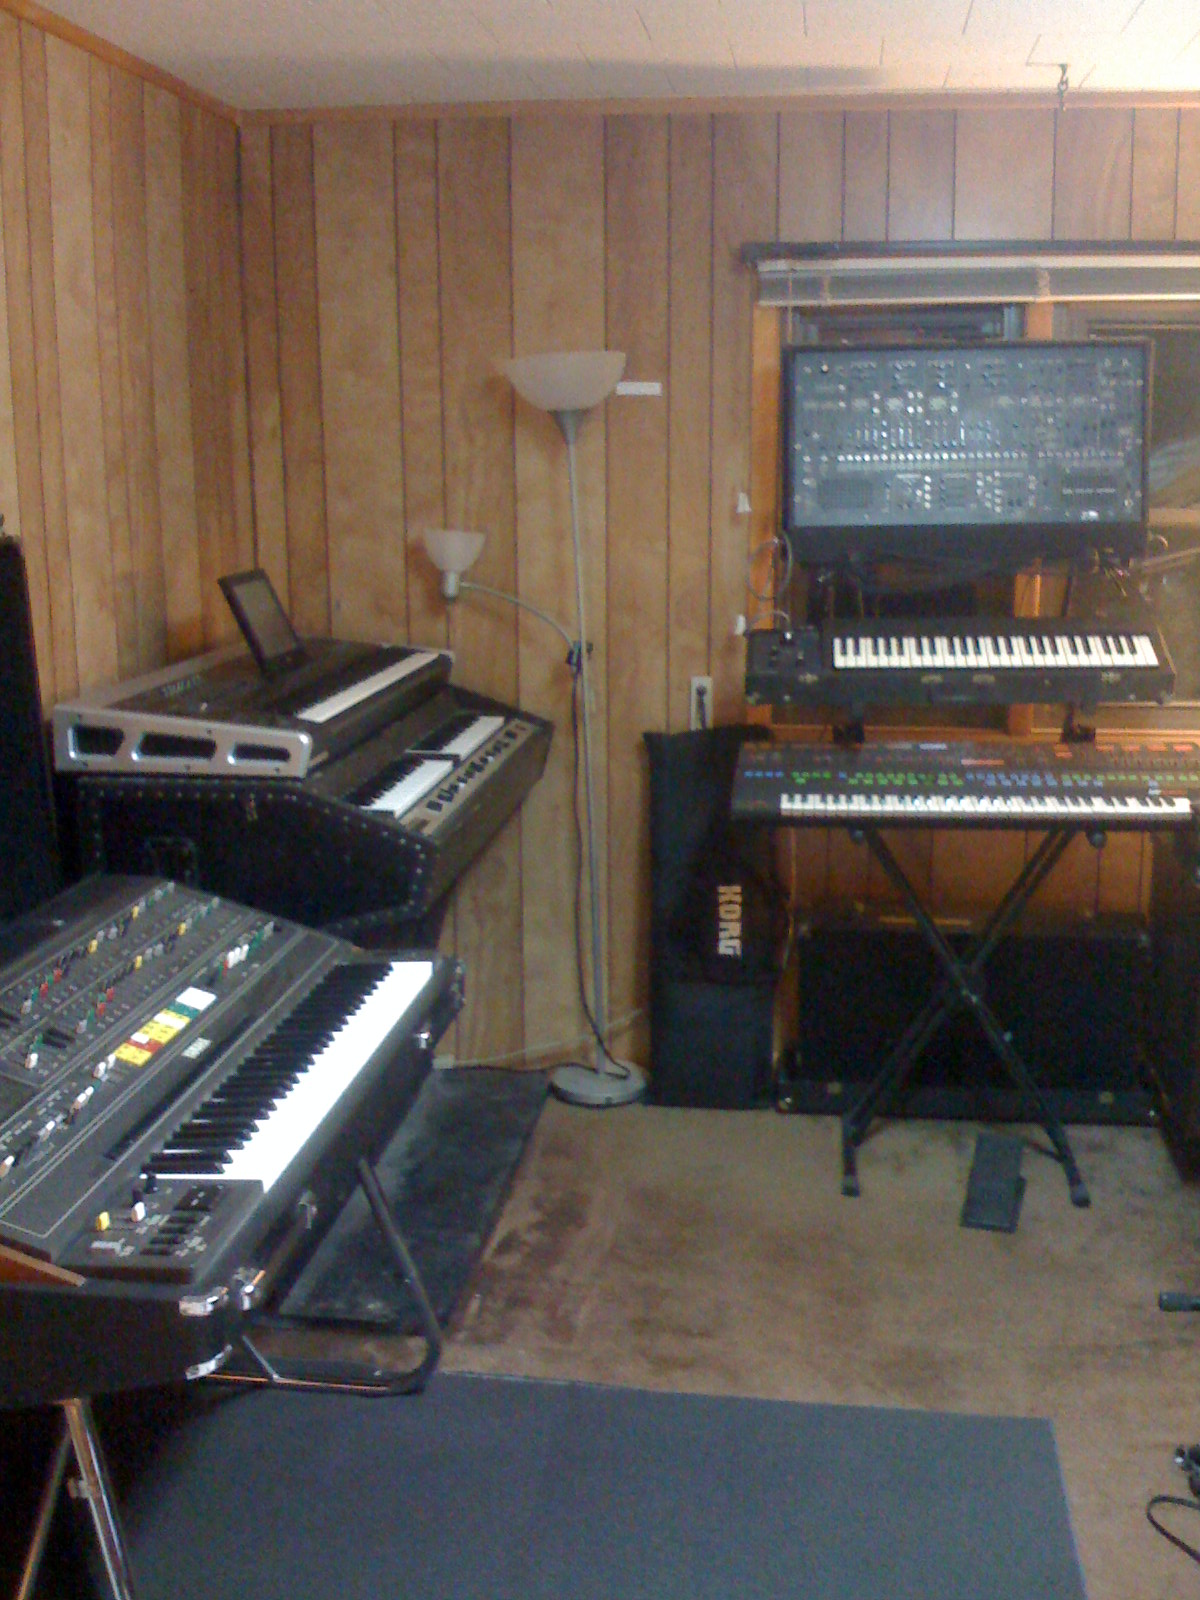 | |
| M4000 | My M4000 and his new friends... | 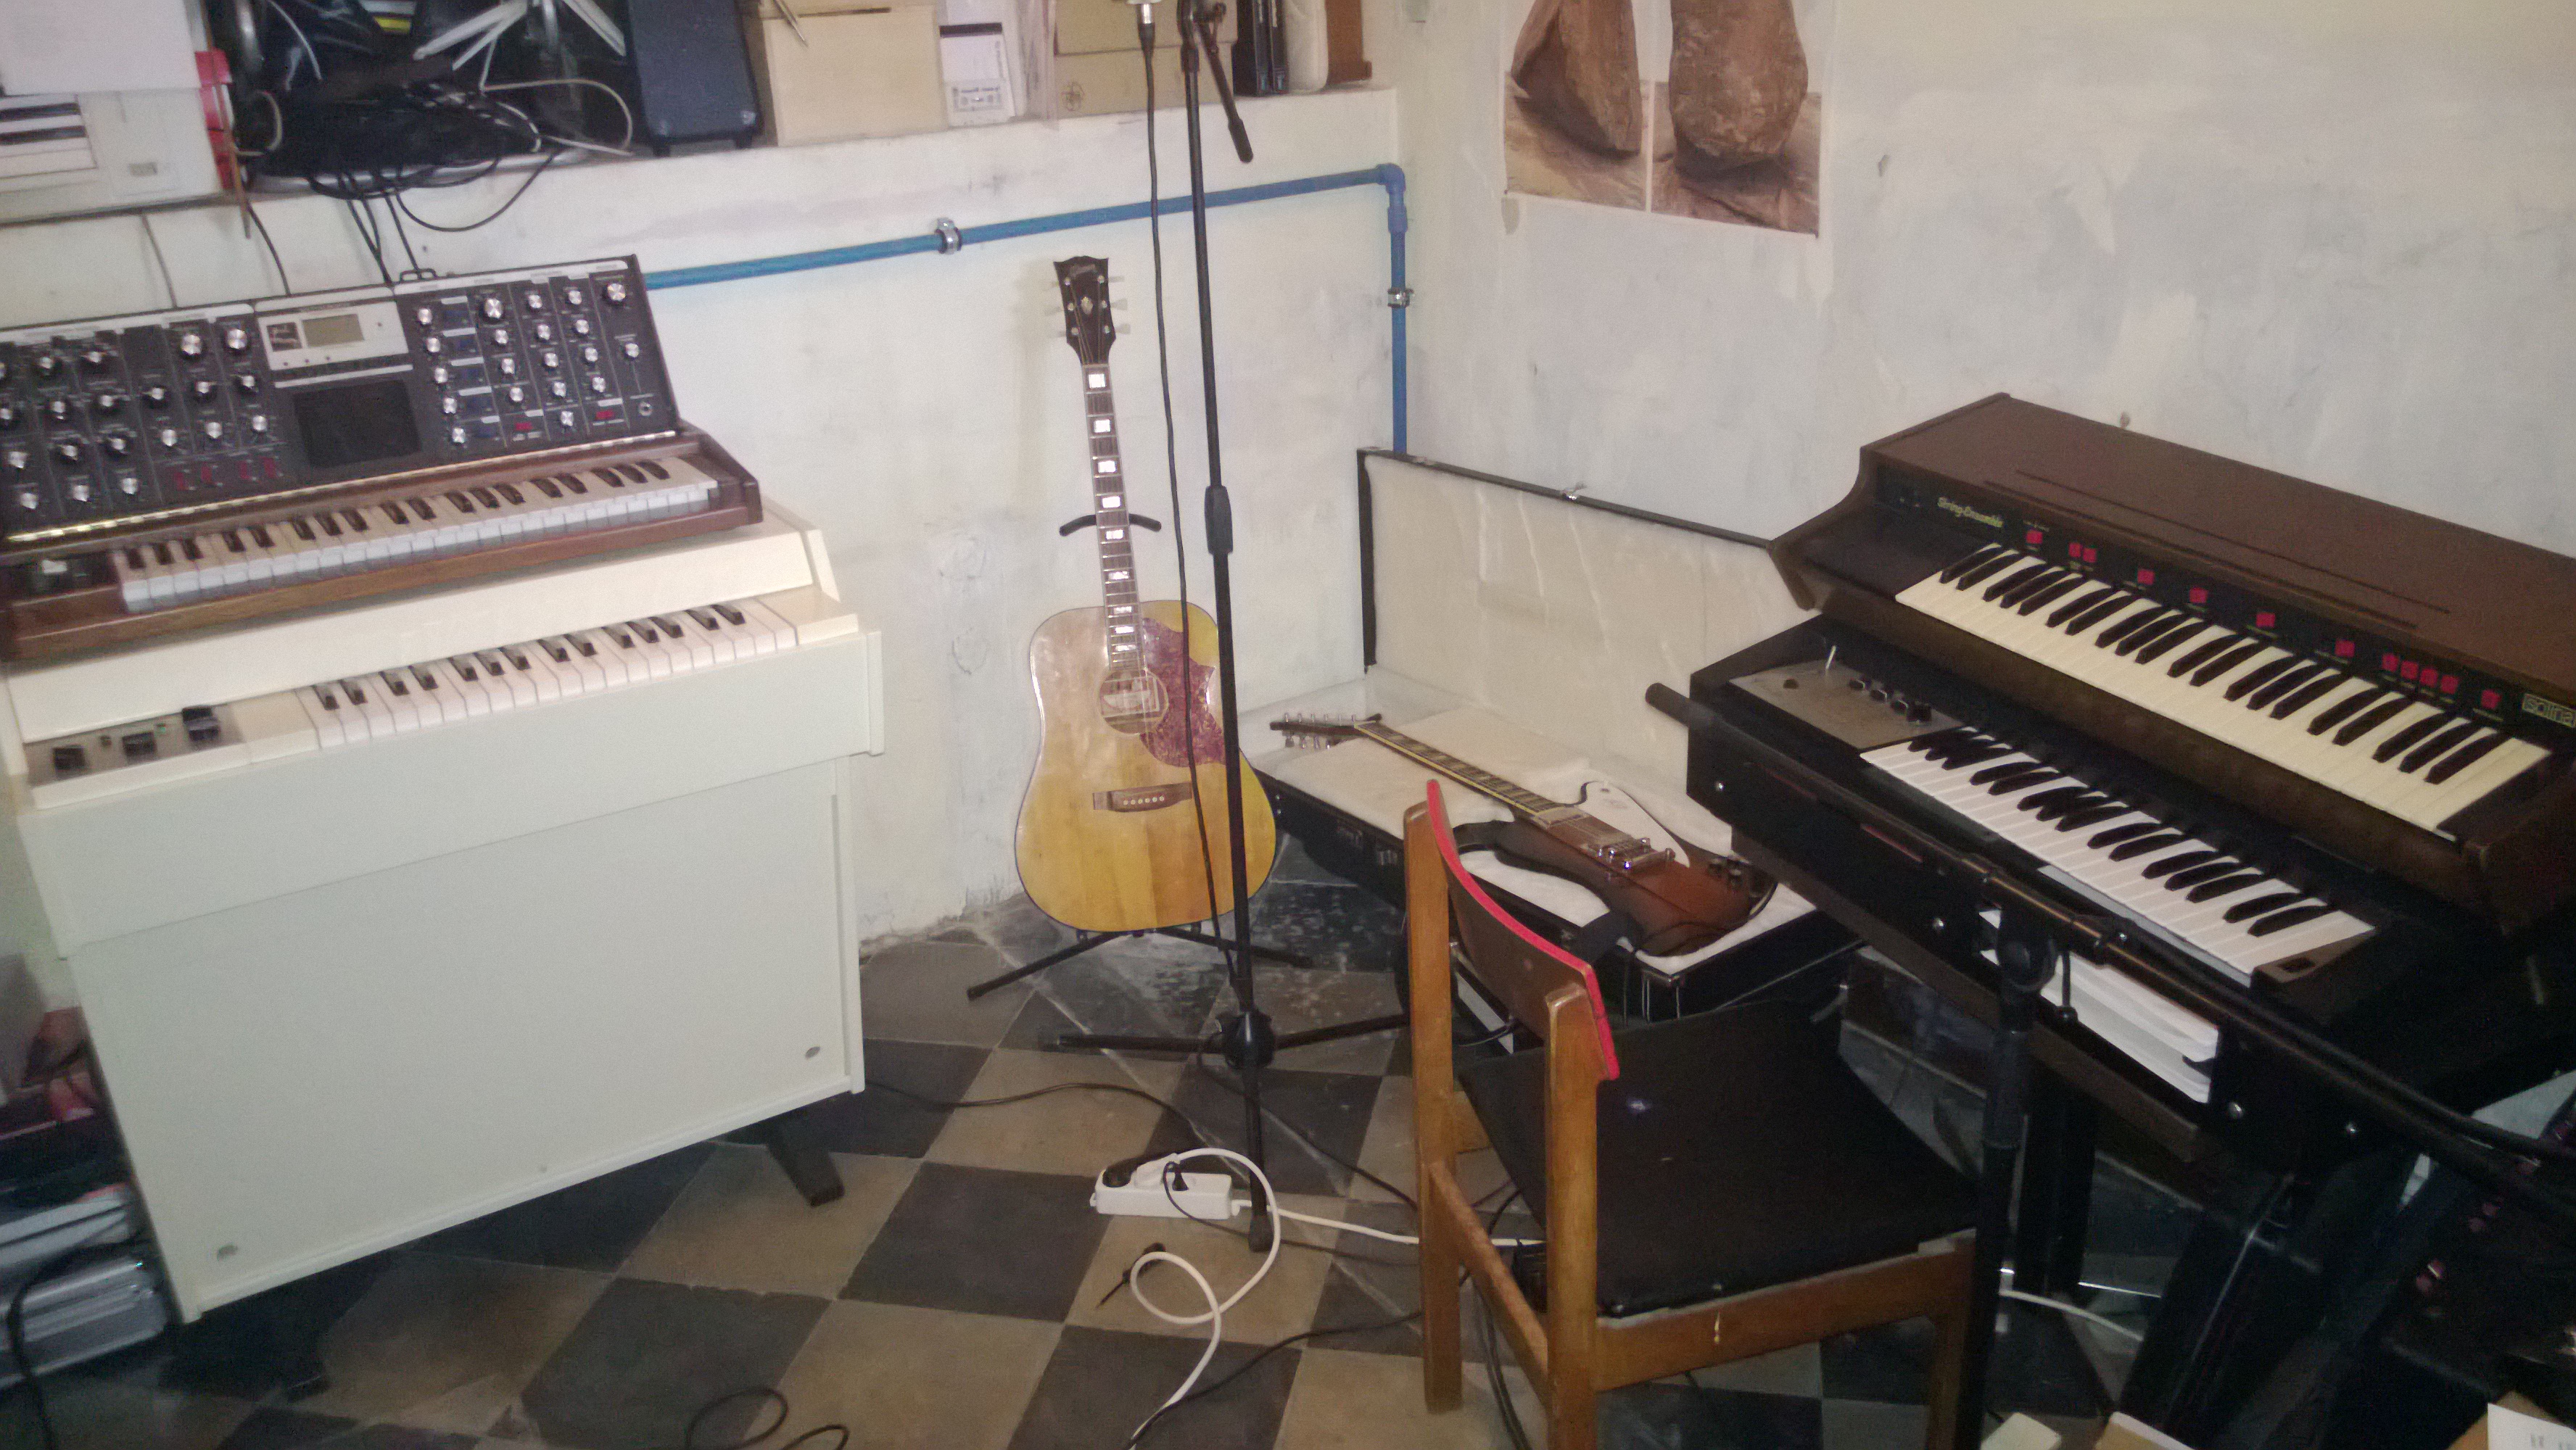 | |
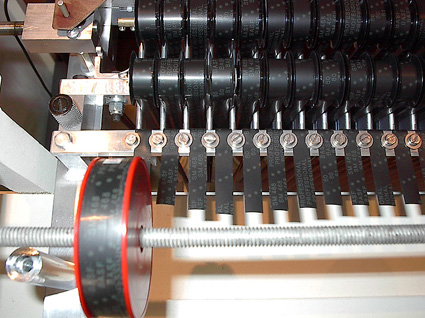
| M4000D | P1000509 |  | |
| M4000D | P1000496 | 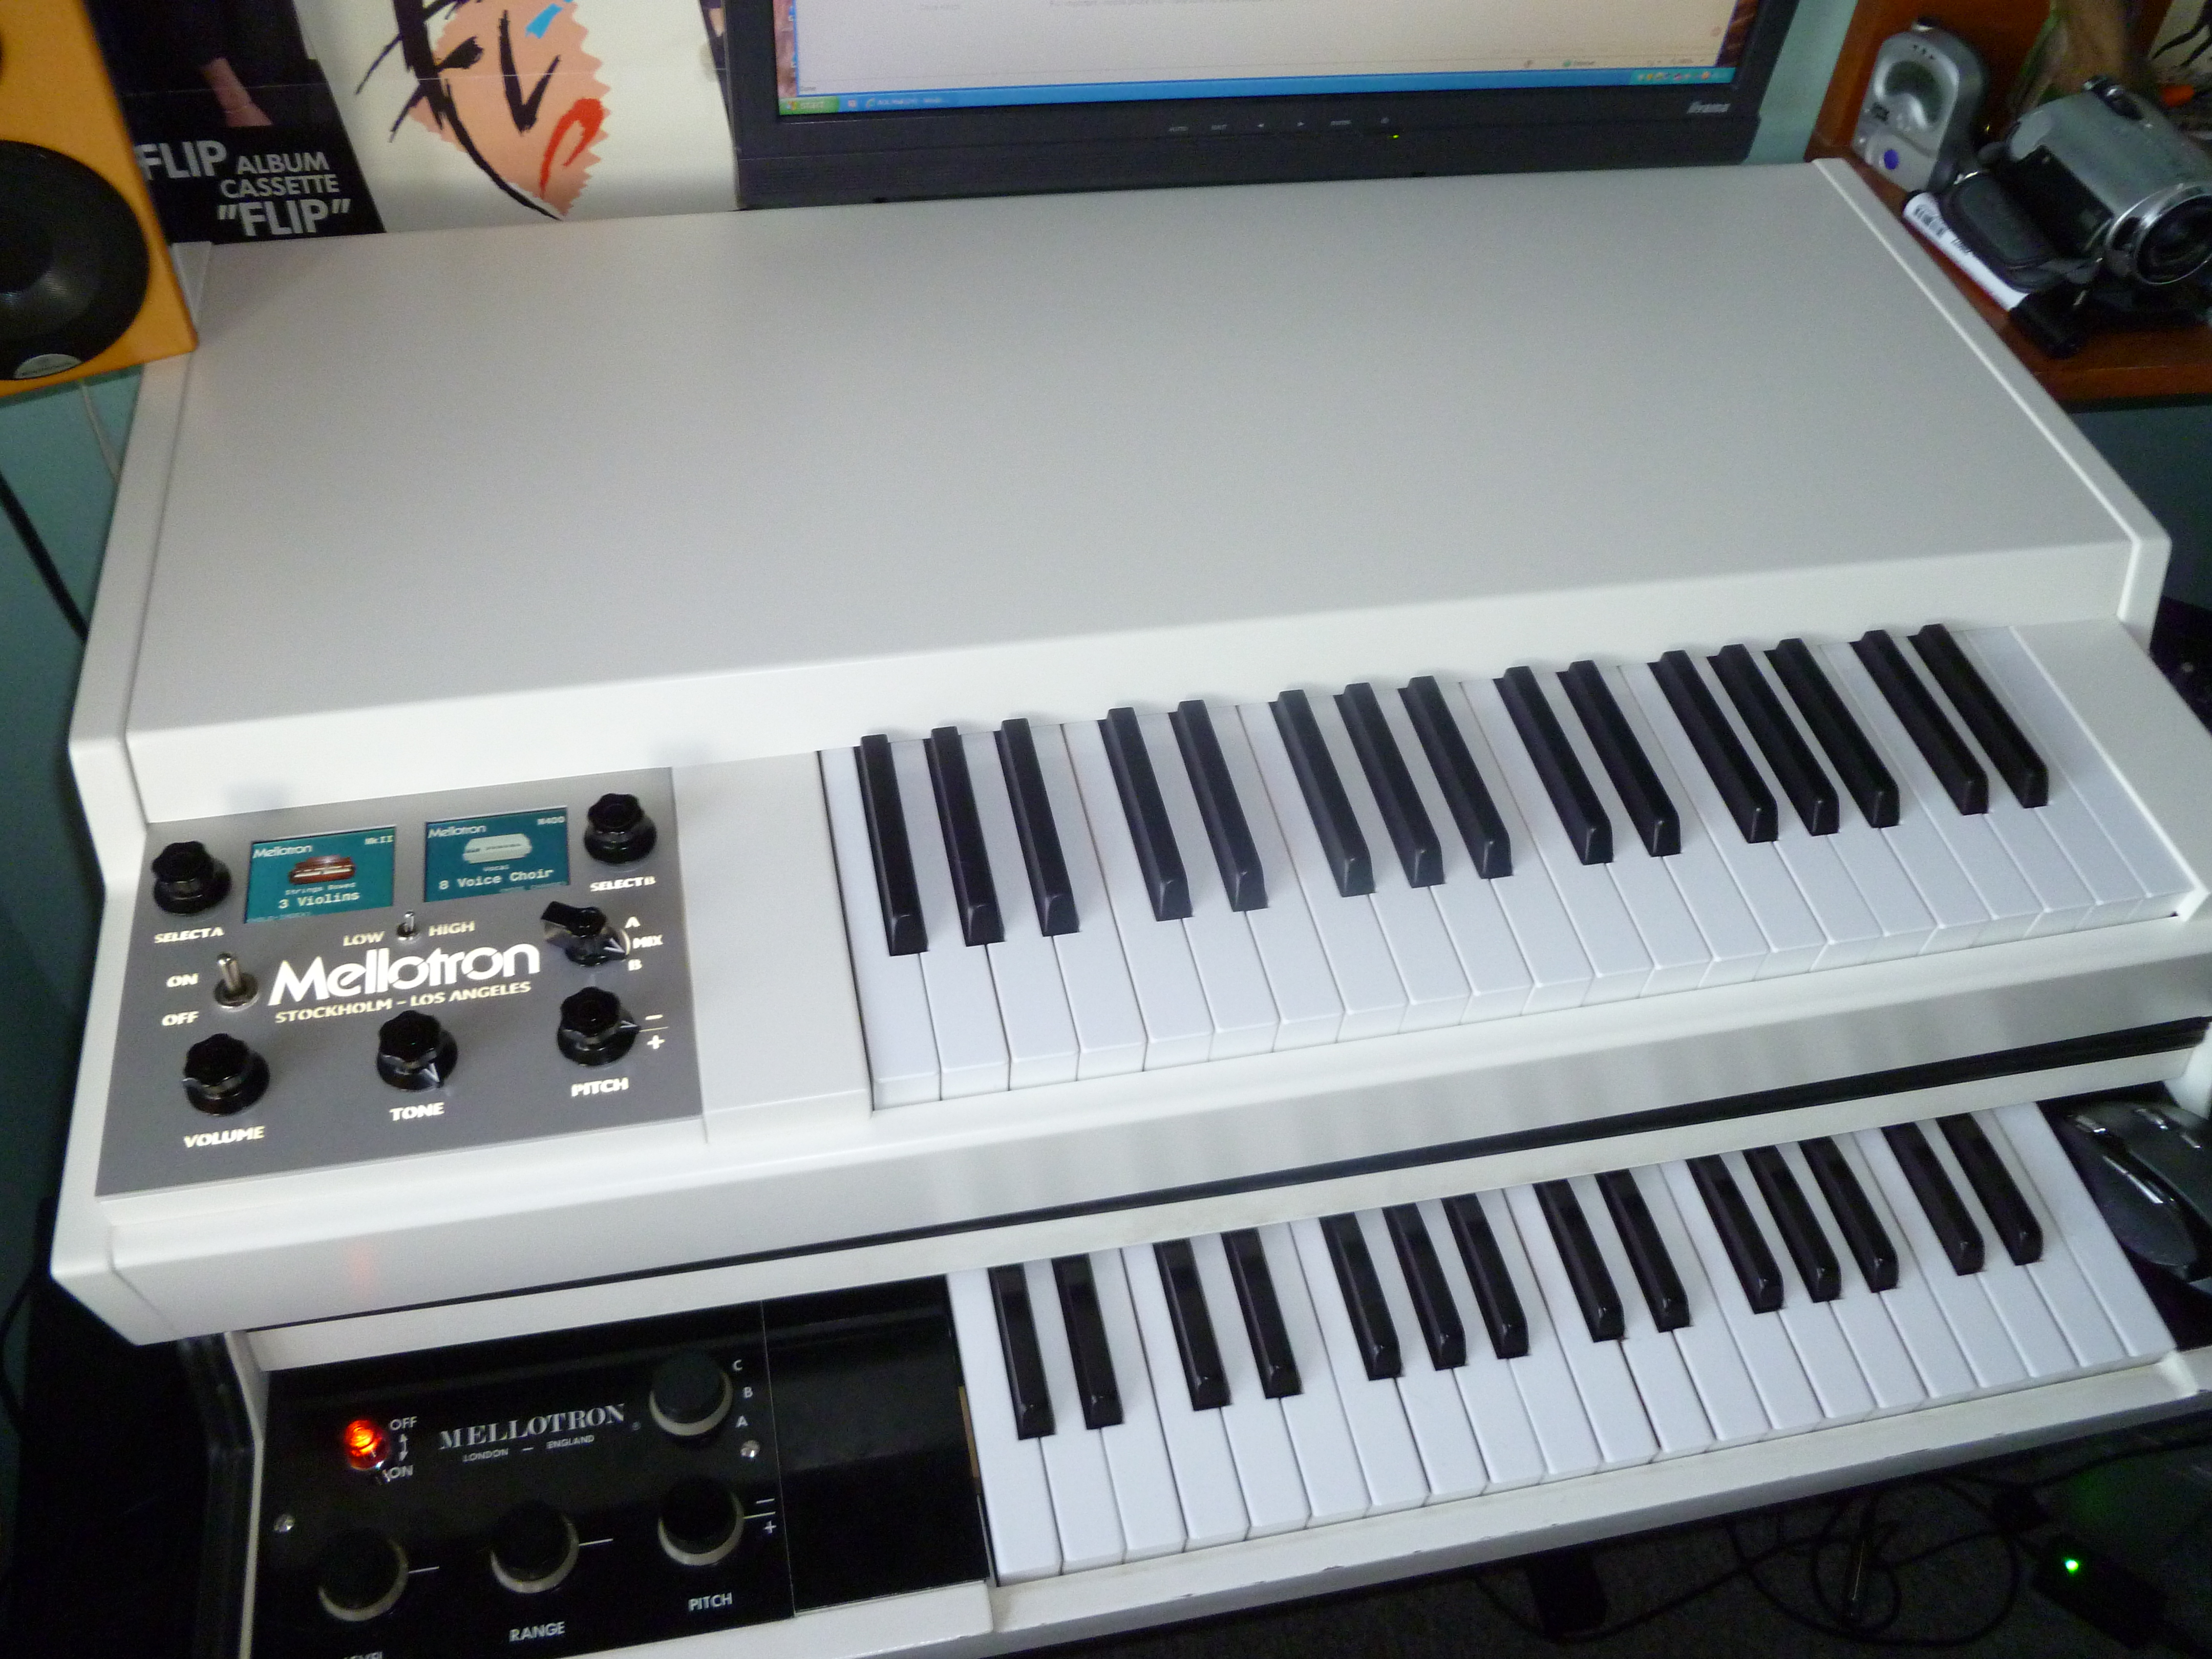 | |
| M4000D | P1000507 |  | |
| M4000D | P1000508 | 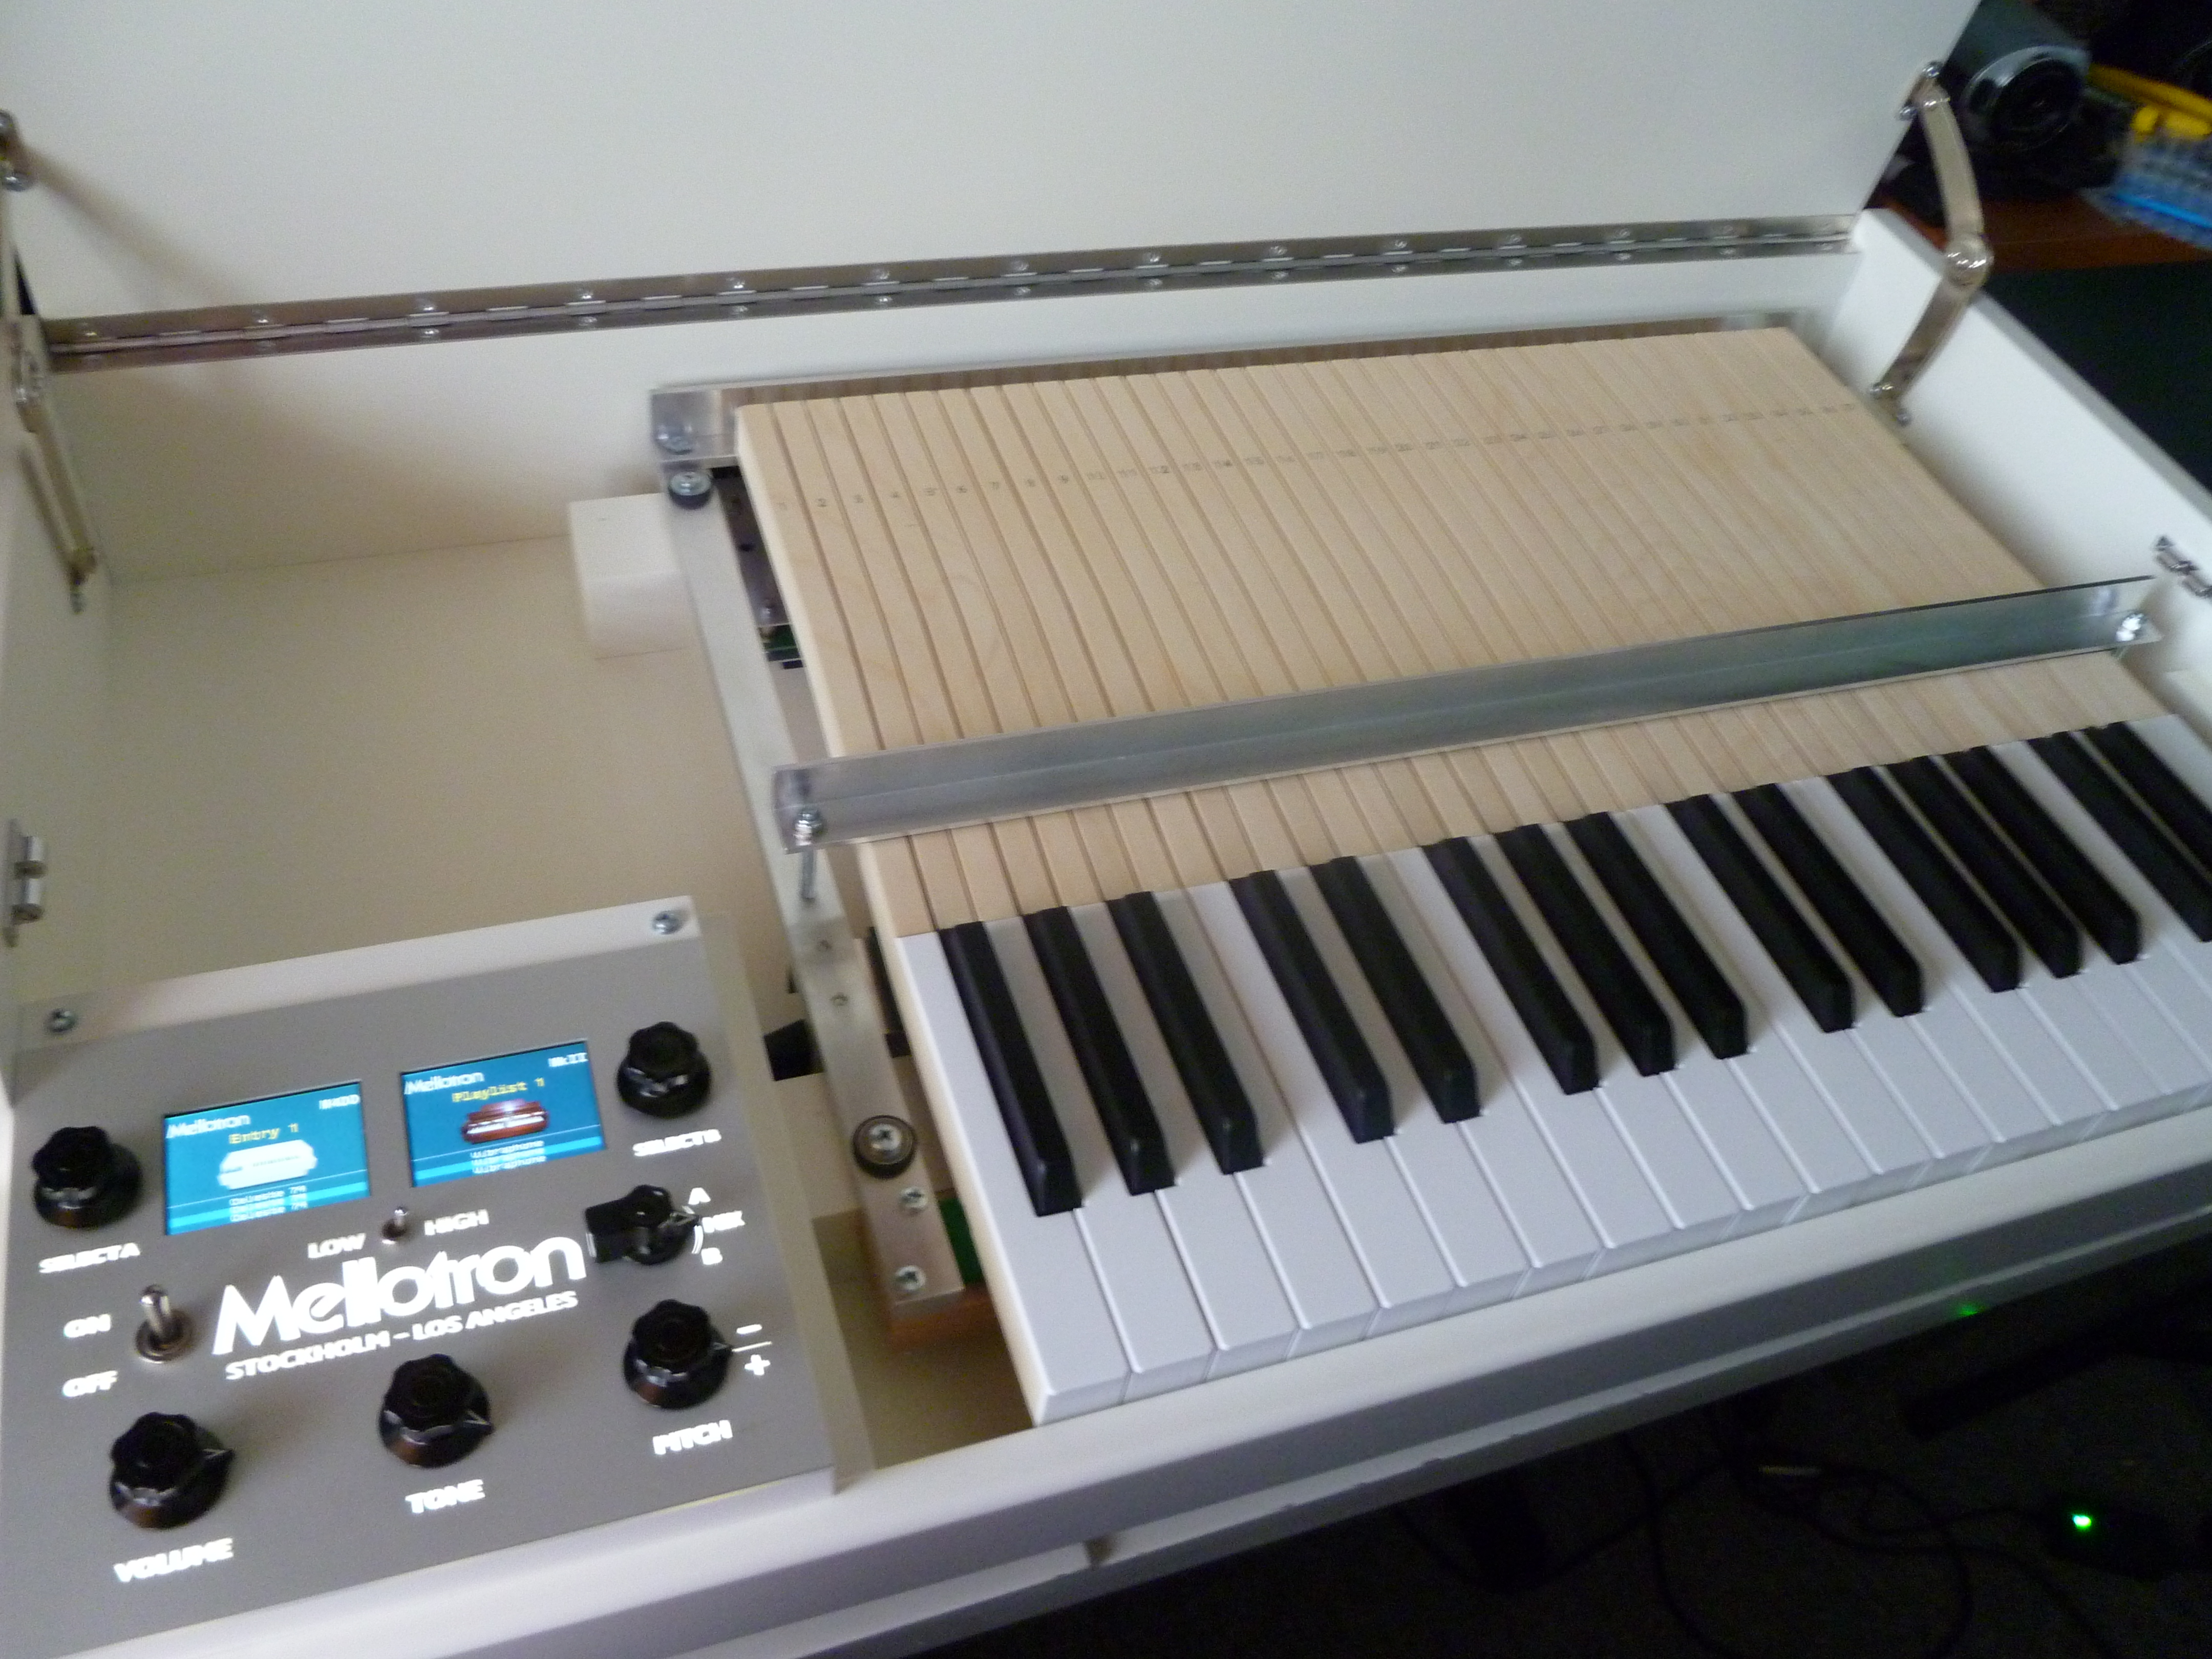 | |
| M400S # 885/674 | The Beginning | 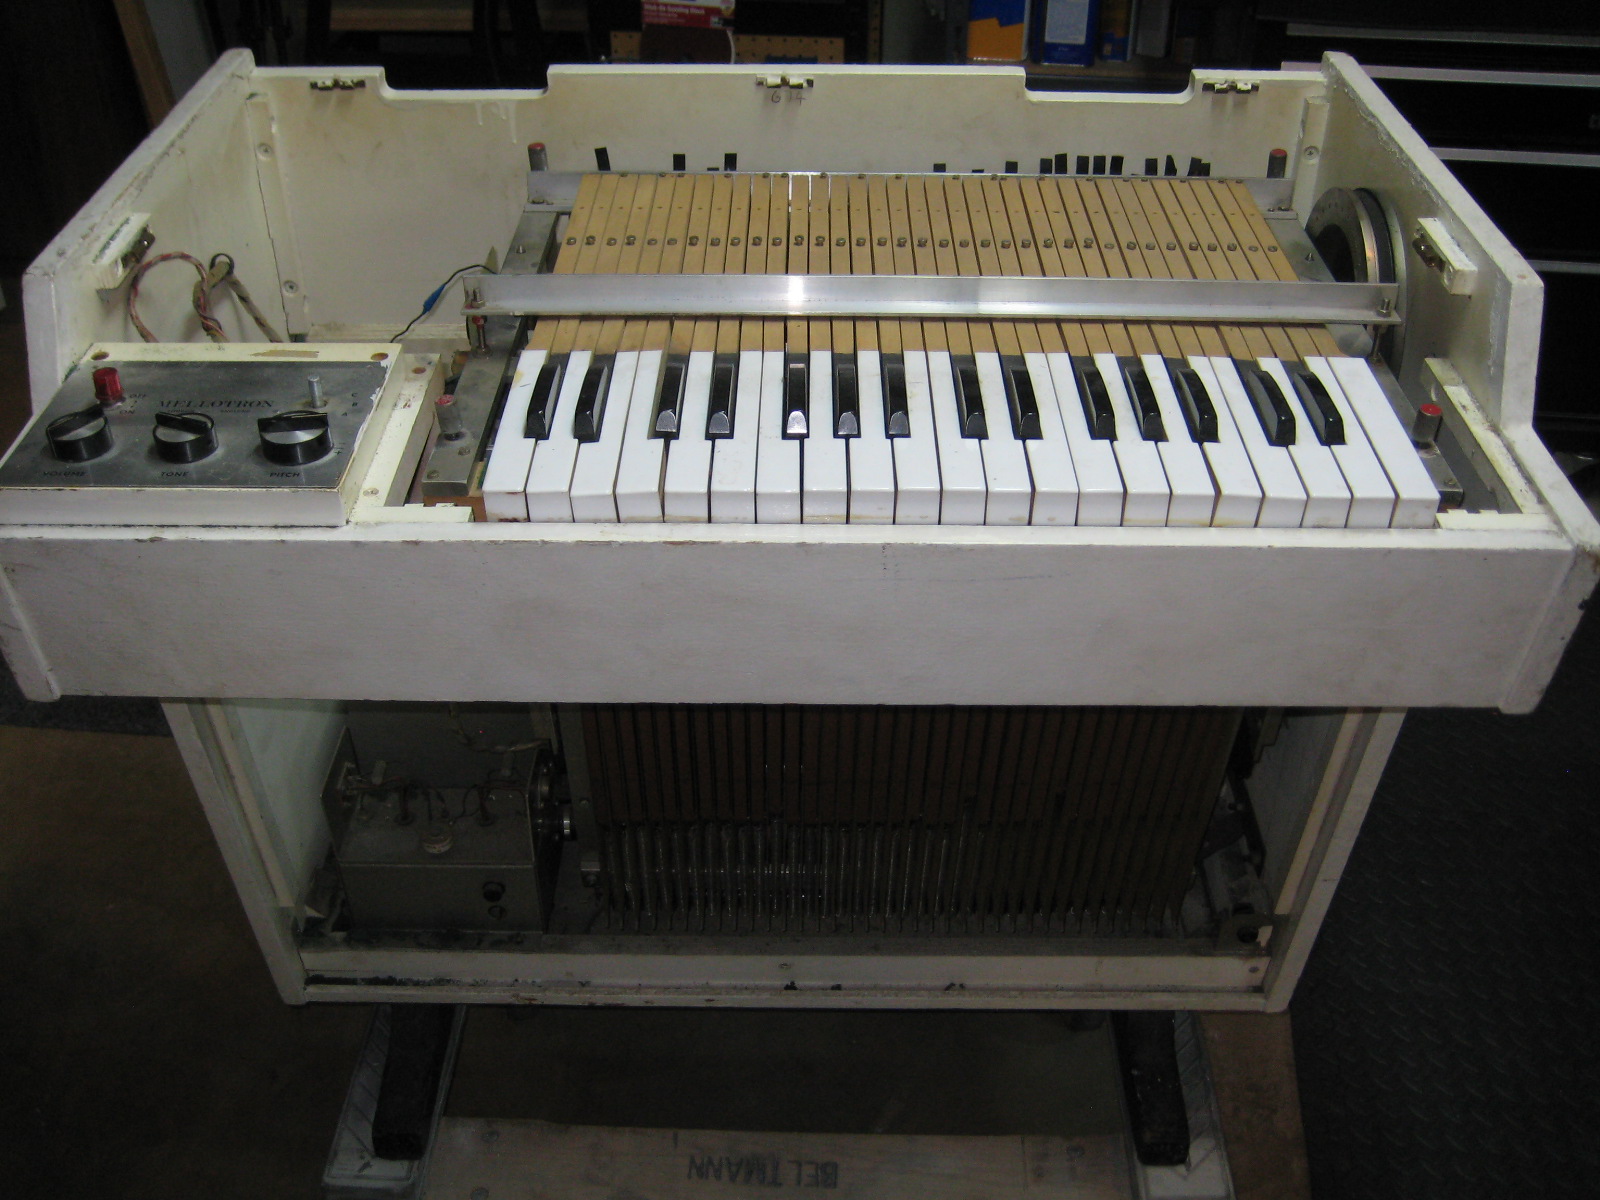 | This machine hasn';t been played in a loooong time. |
| M400S # 885/674 | Poor maintenance! | 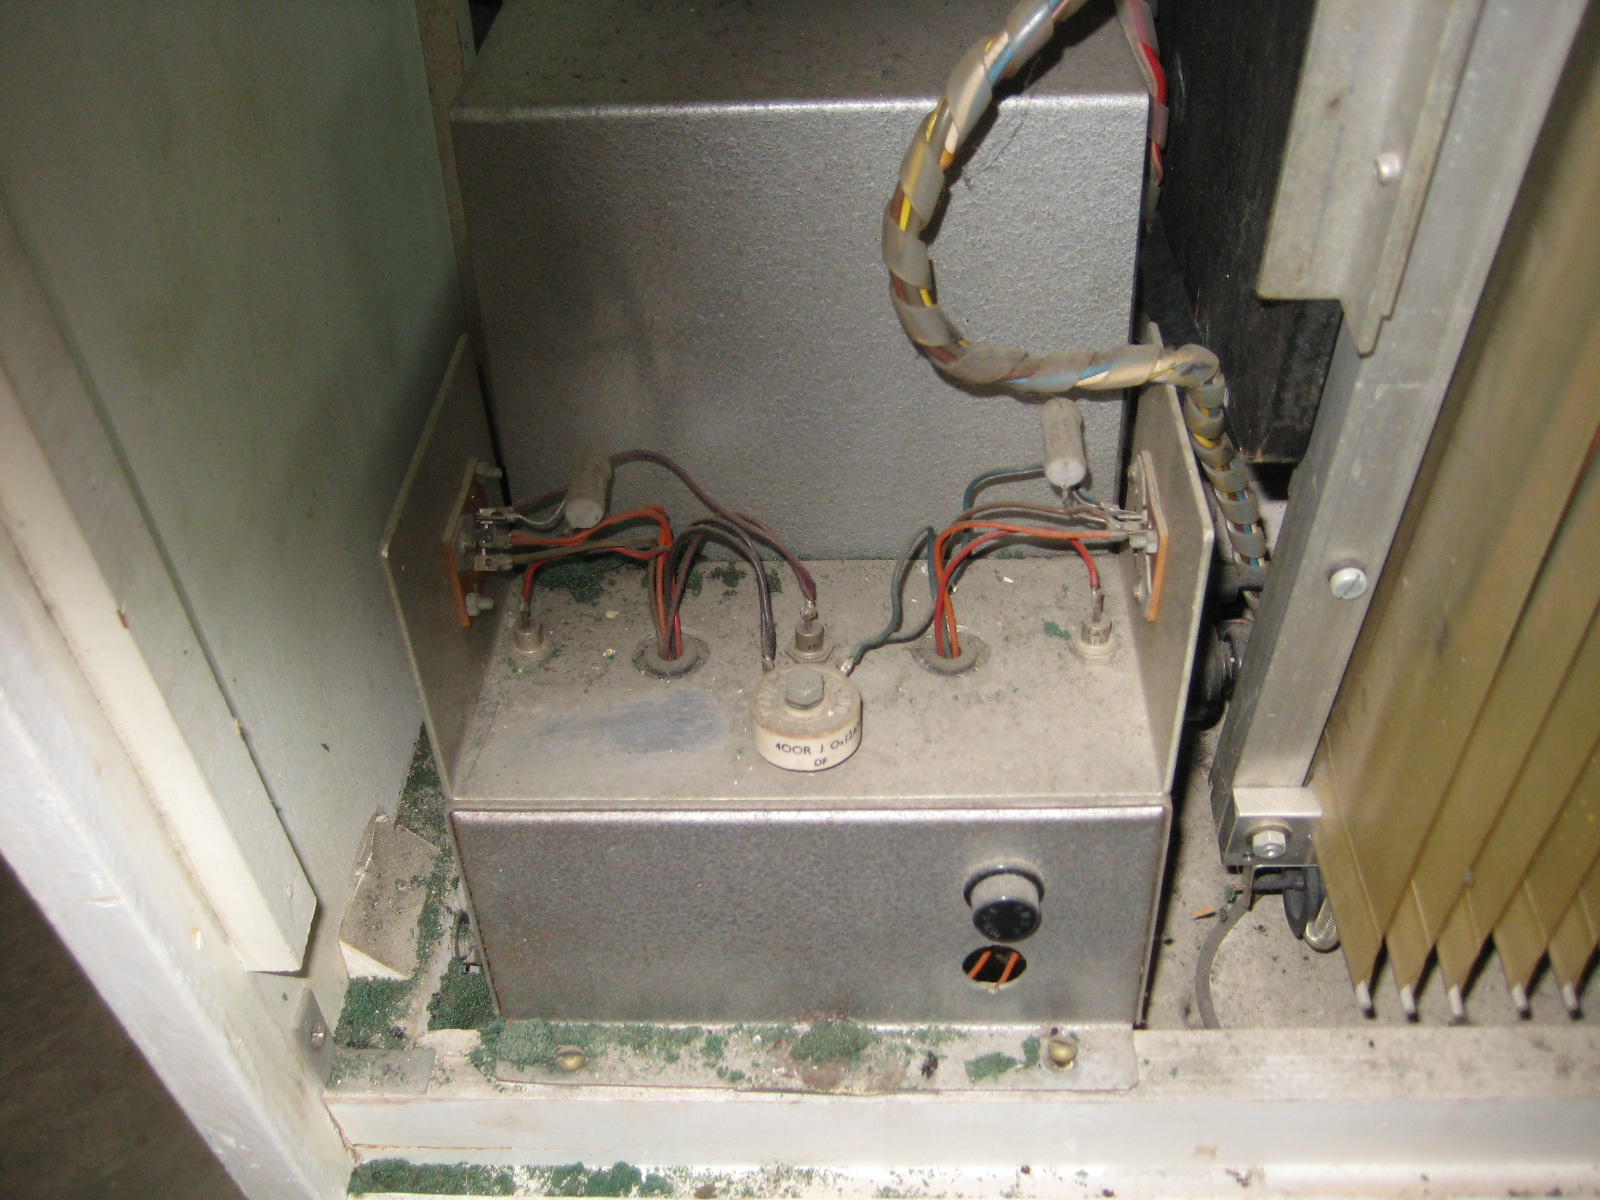 | |
| M400S # 885/674 | Top view | 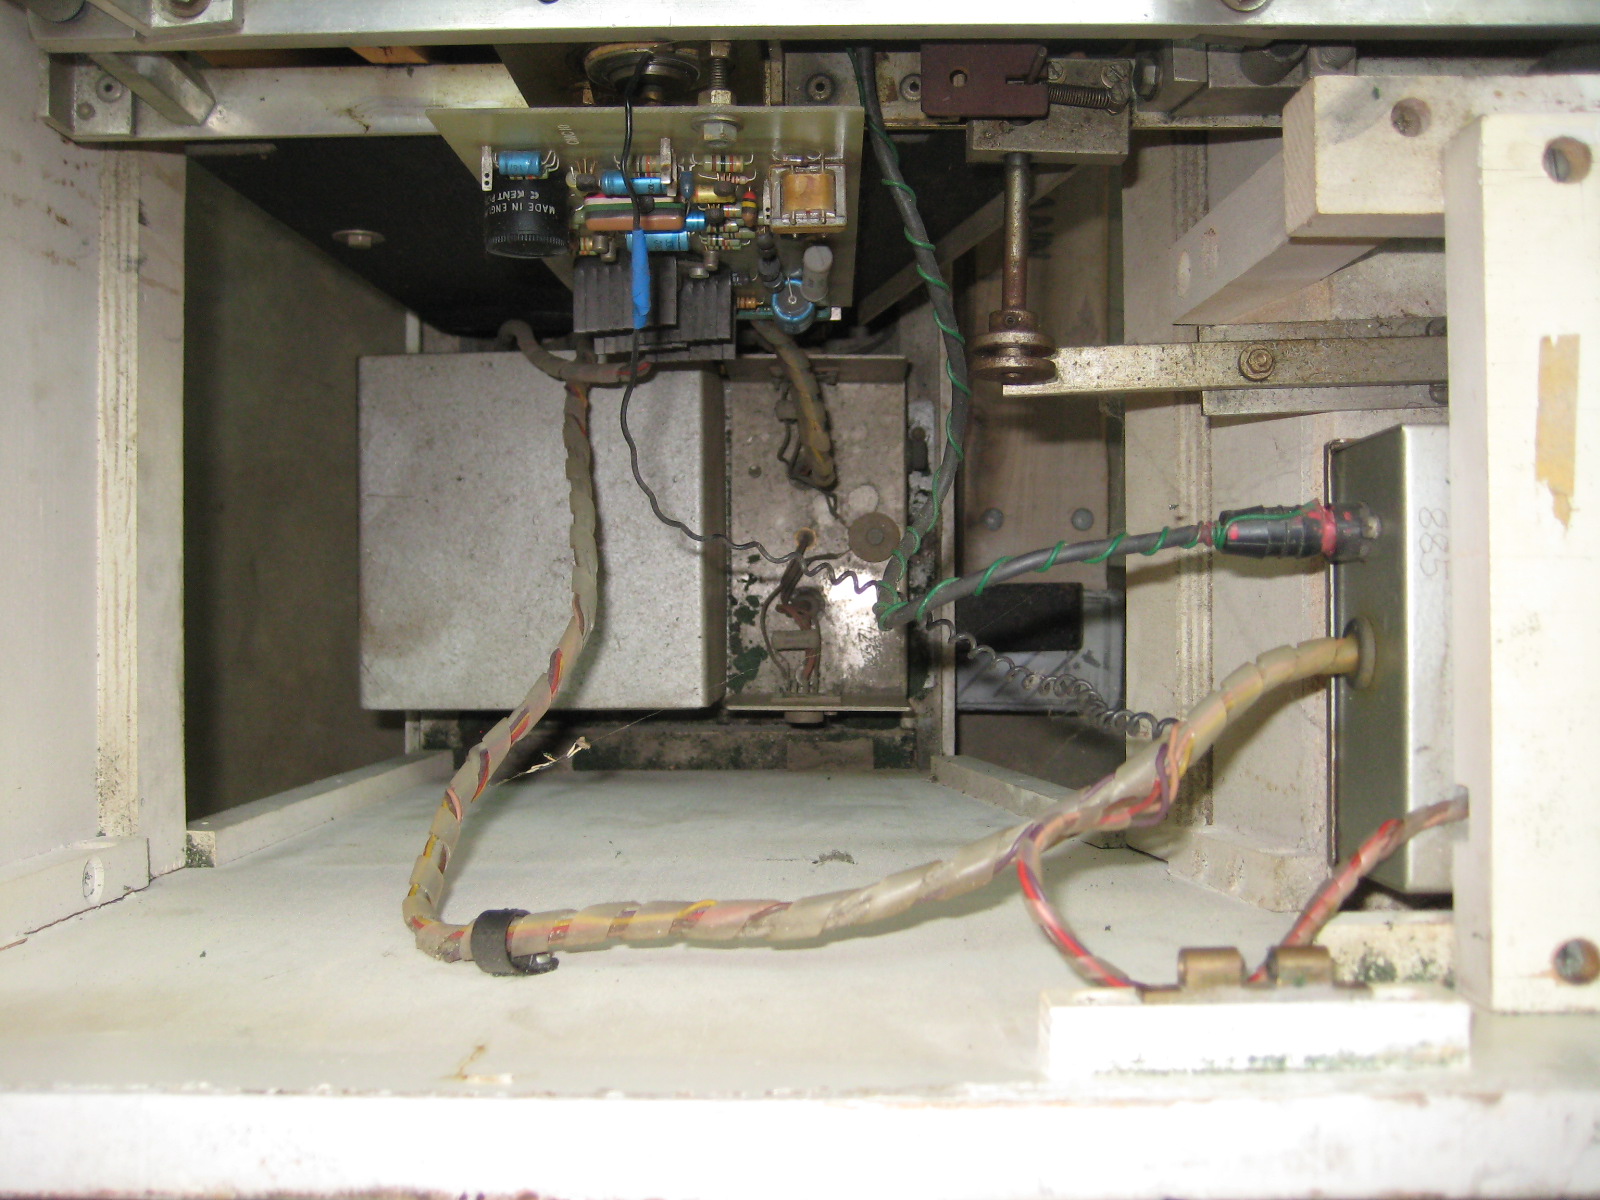 | You can';t begin to imagine the wiring and electrical problems |
| M400S # 885/674 | Keyboard removed | 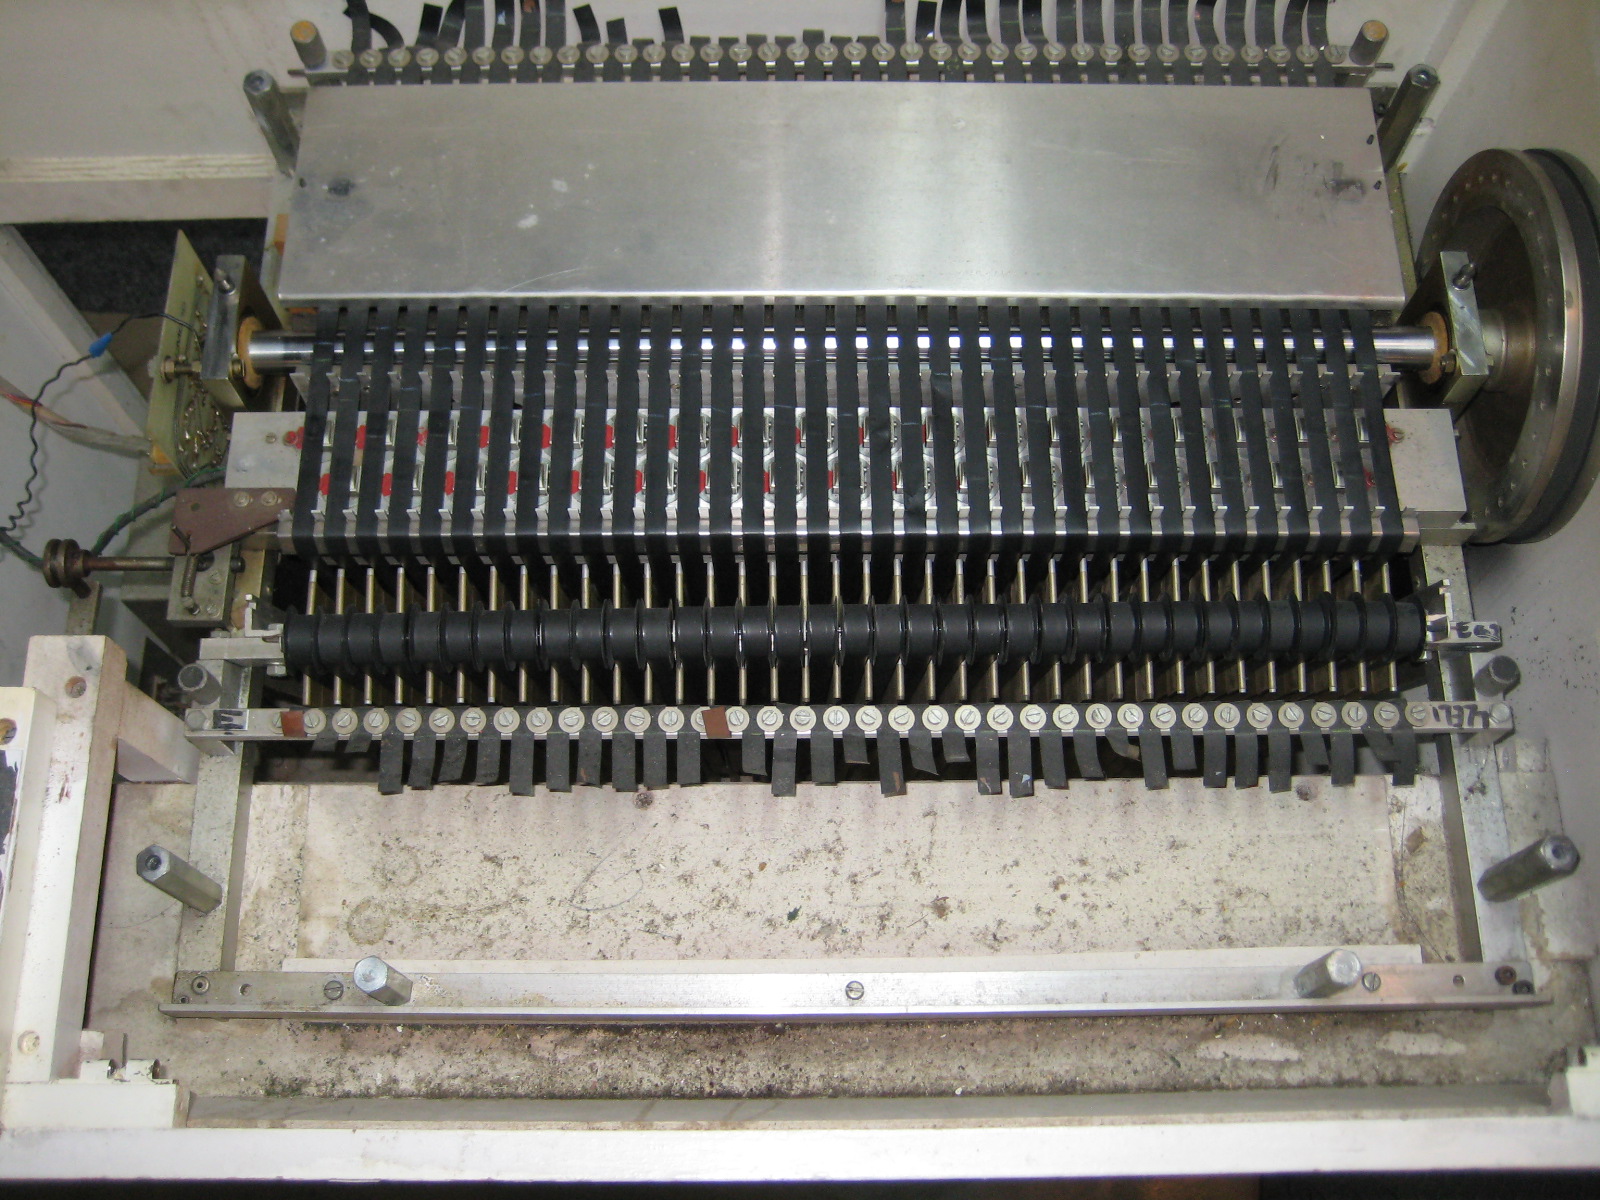 | The tapes were no better than the rest of it. |
| M400S # 885/674 | Empty Cabinet | 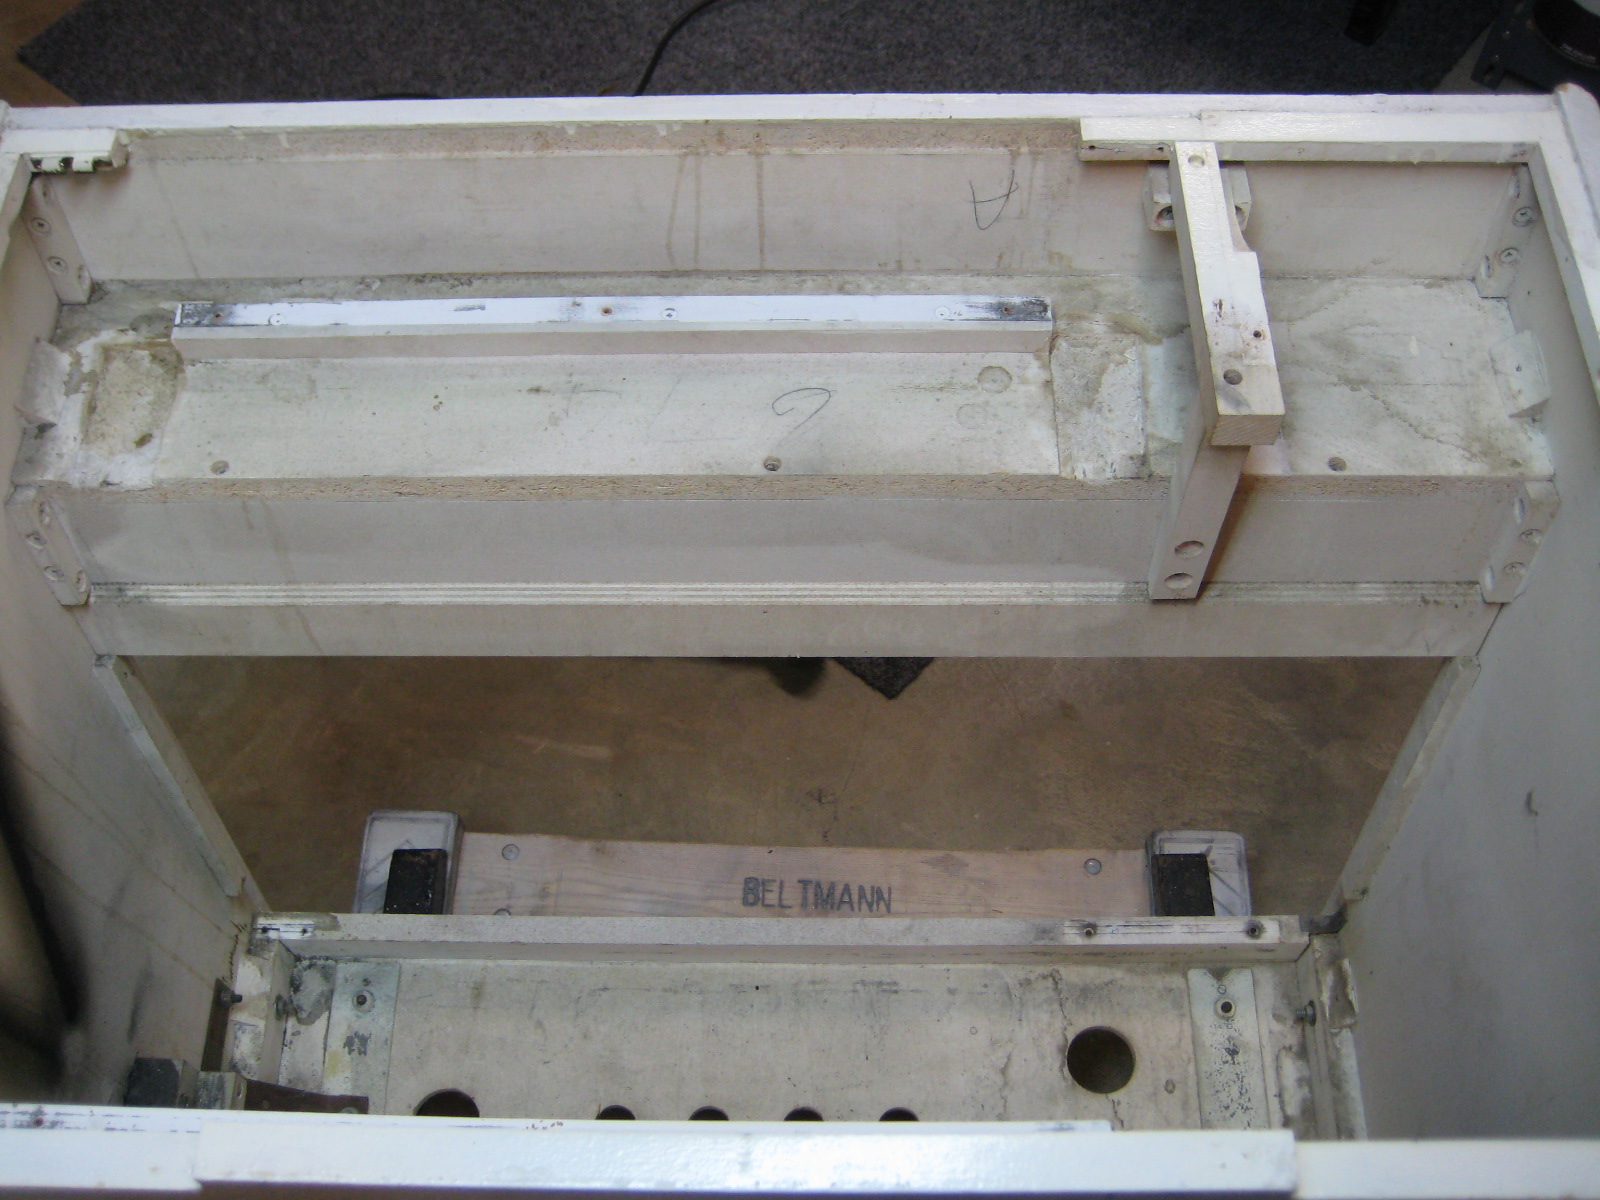 | After a thorough vacuuming this is what you get |
| M400S # 885/674 | More dirt and sadness | 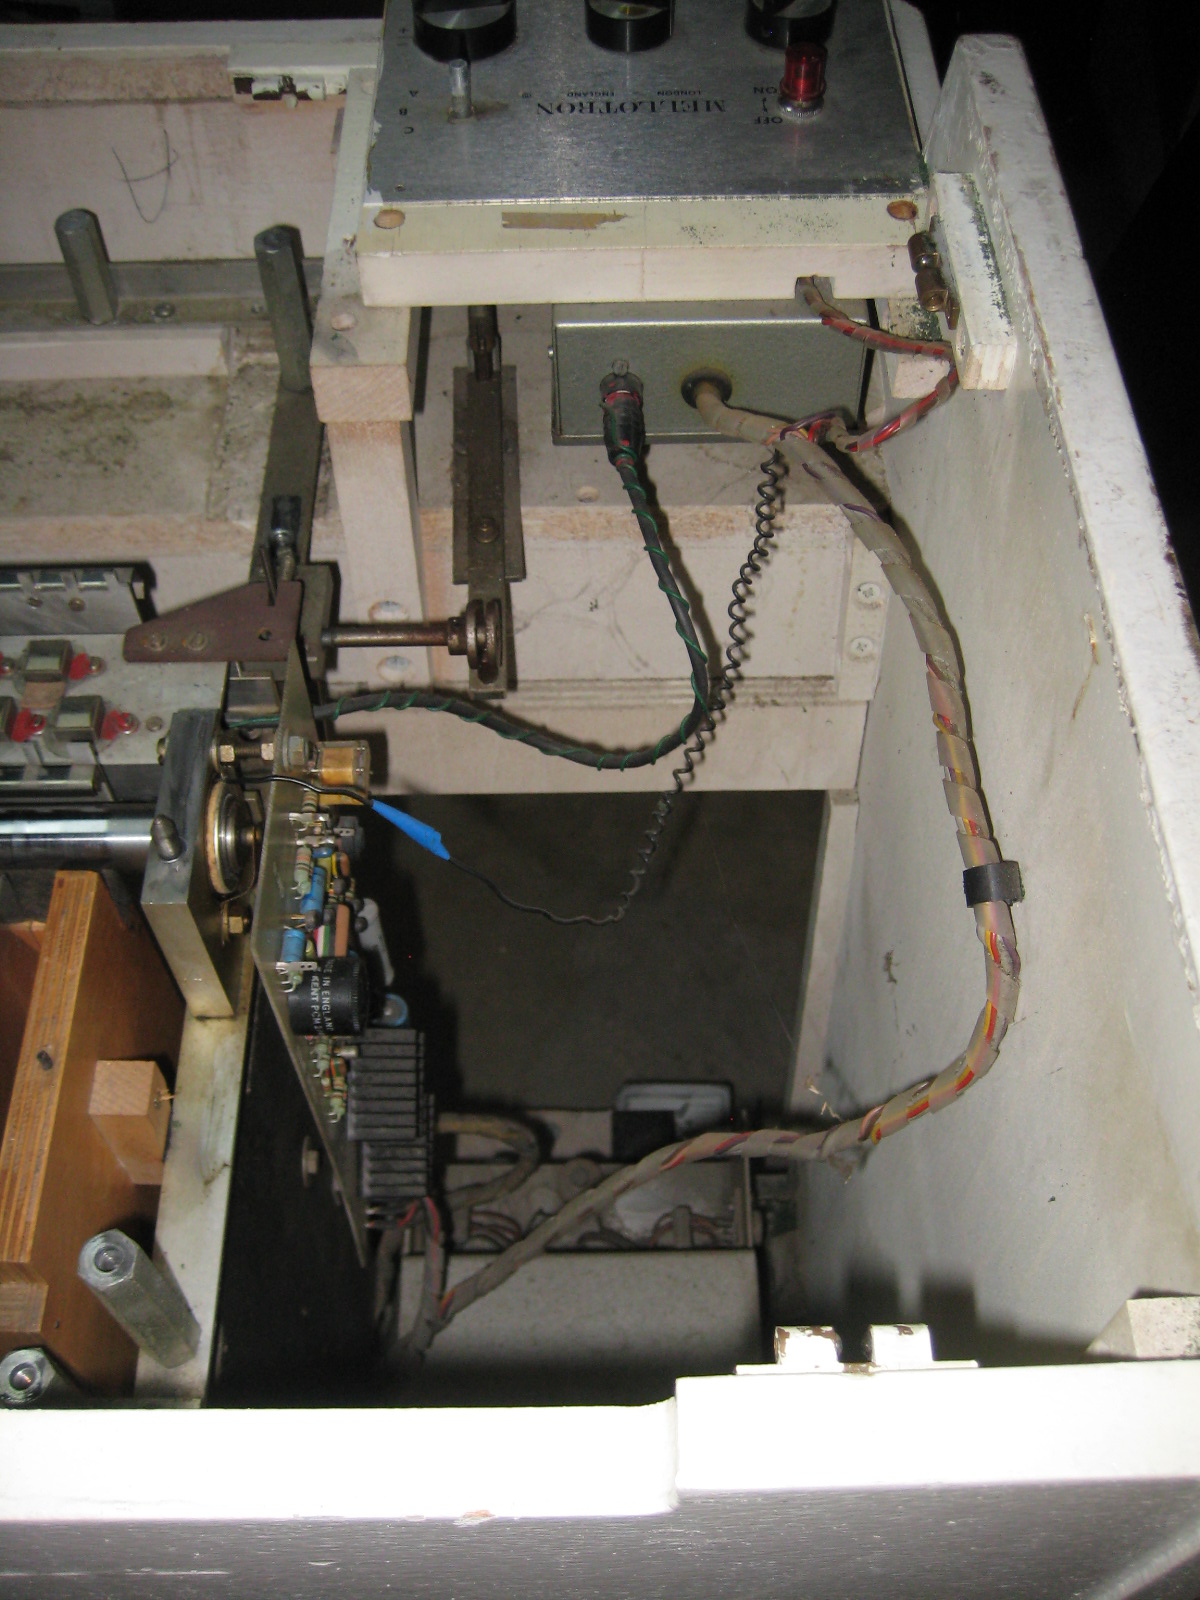 | This defies description |
| M400S # 885/674 | The Motor | 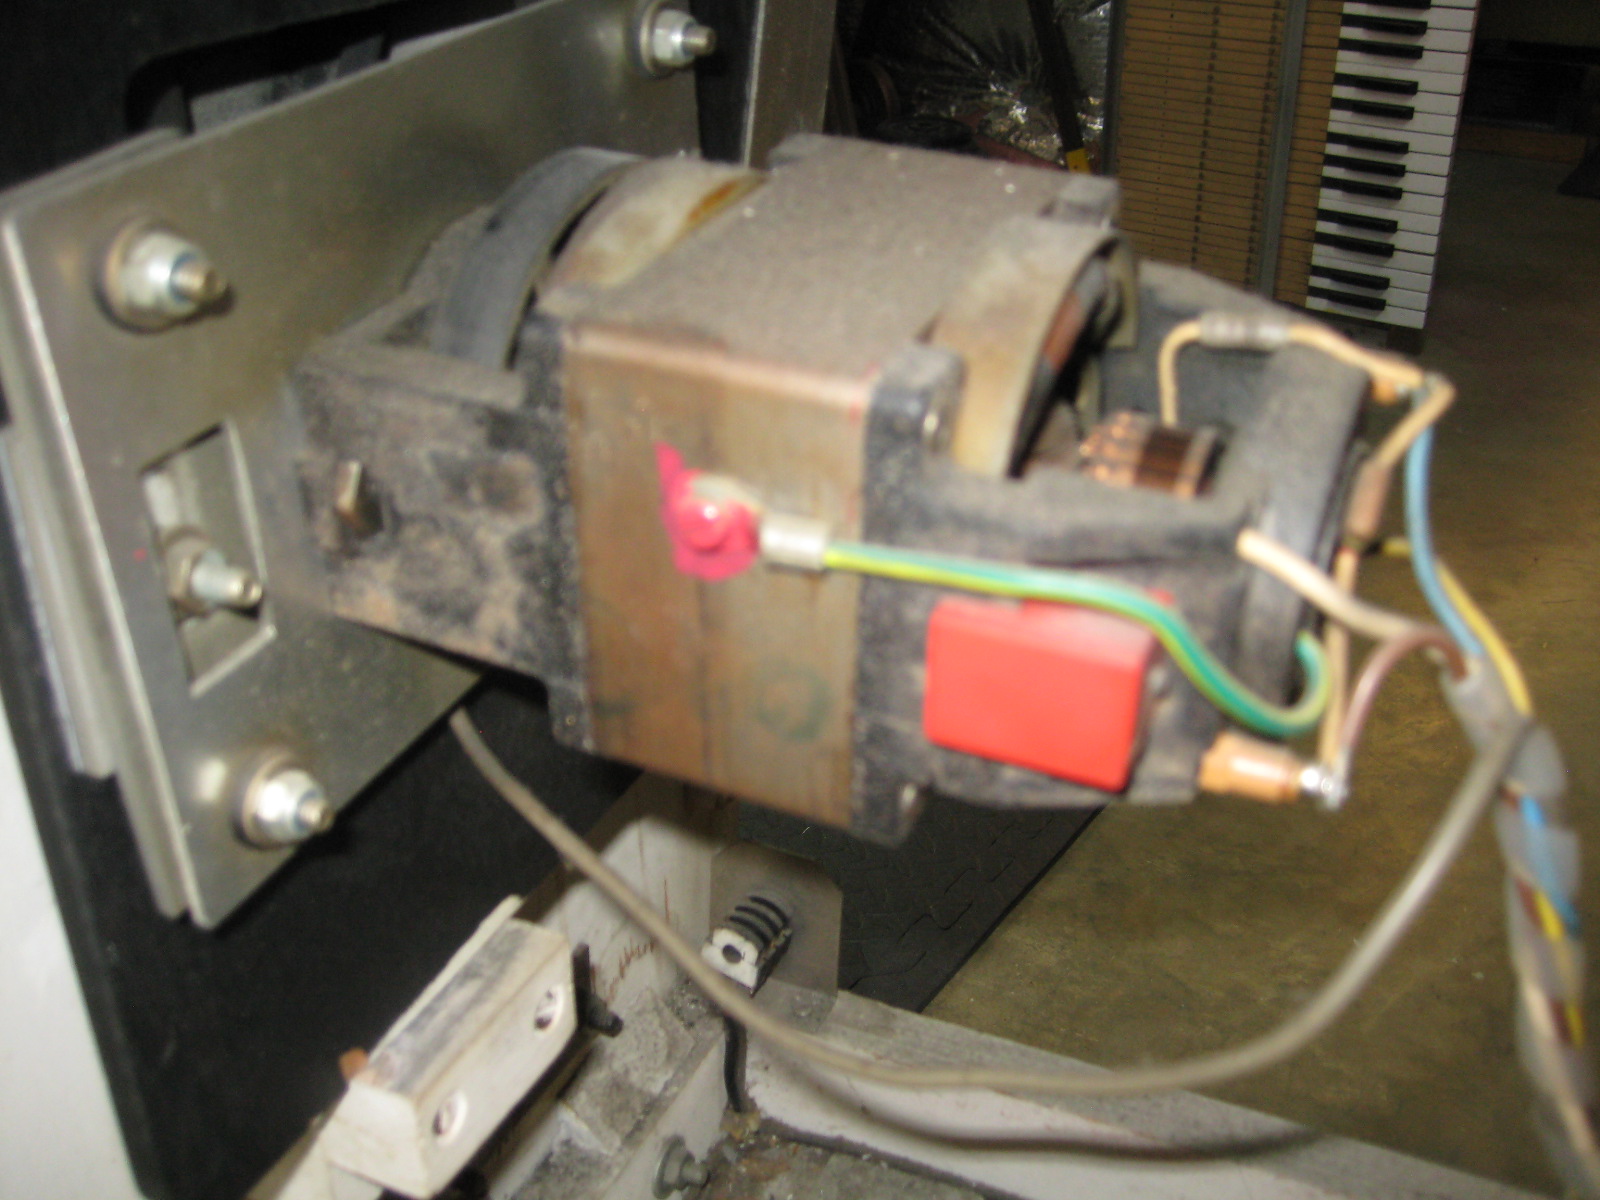 | It didn';t work at all |
| M400S # 885/674 | View of Power supply | 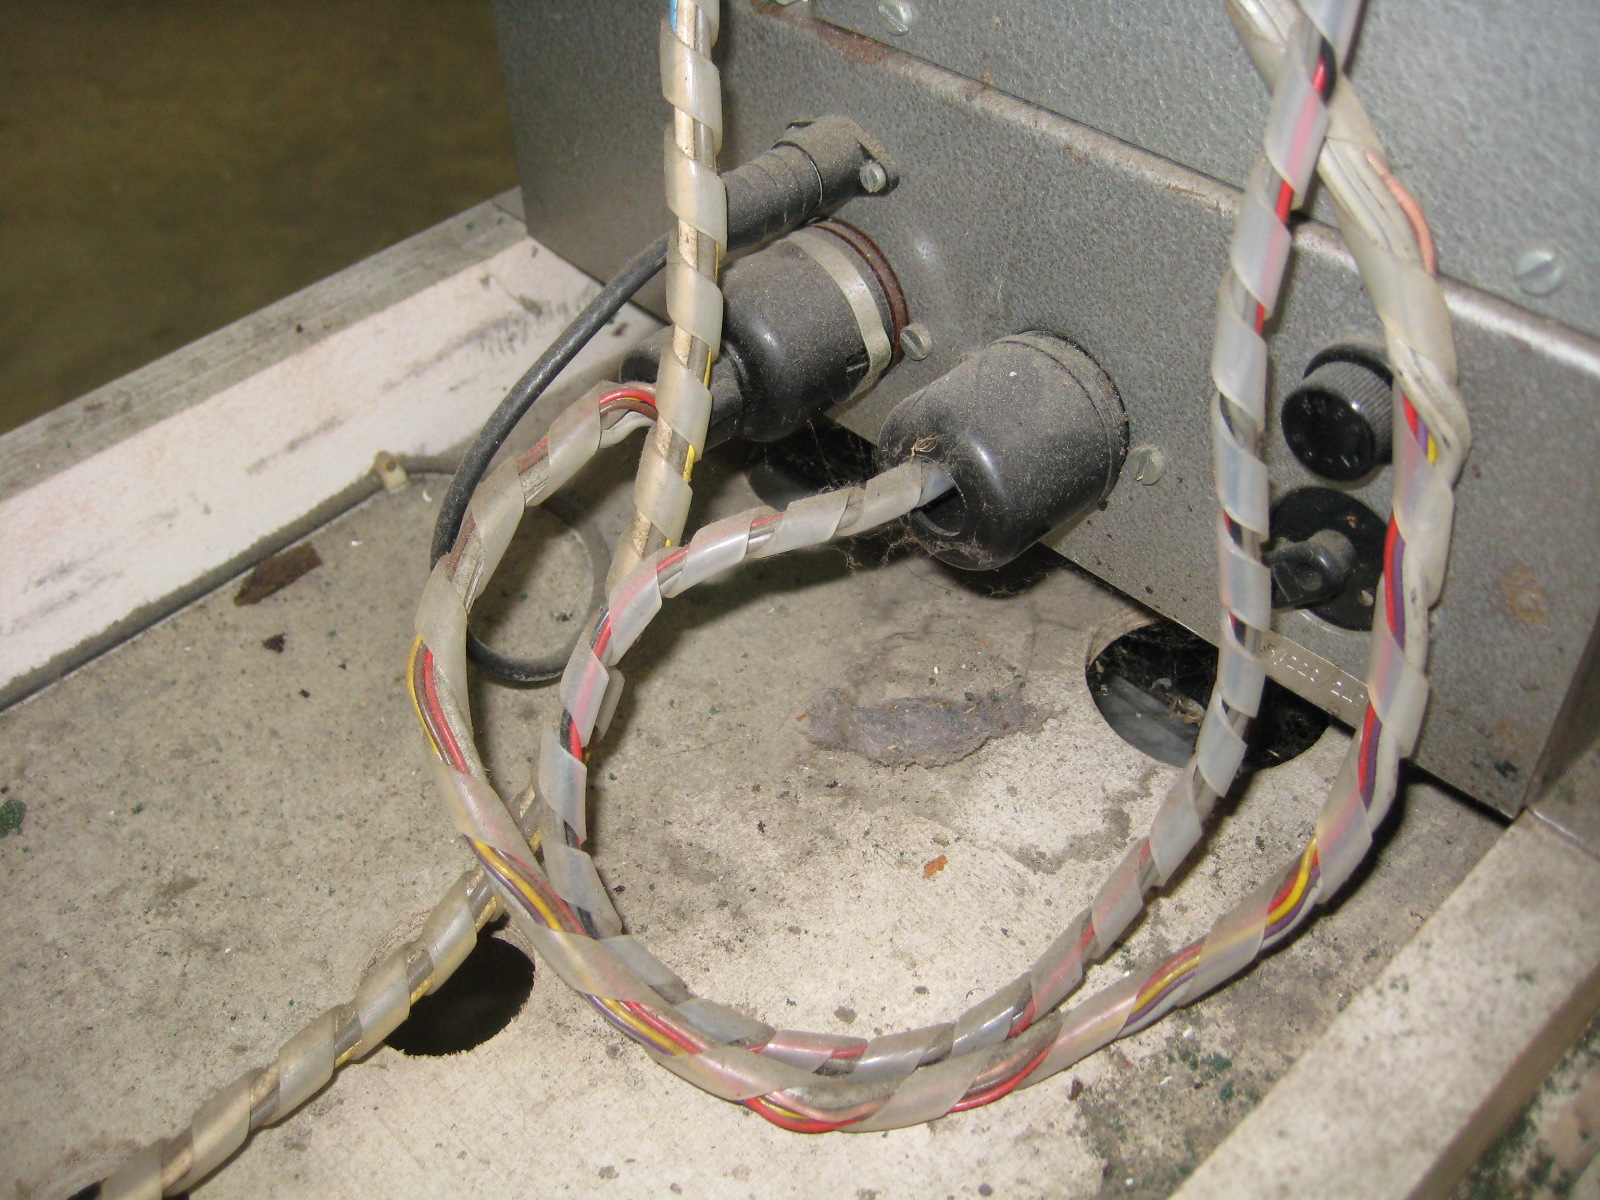 | Can you imagine putting tapes inside this? |
| M400S # 885/674 | Frame missing rivets | 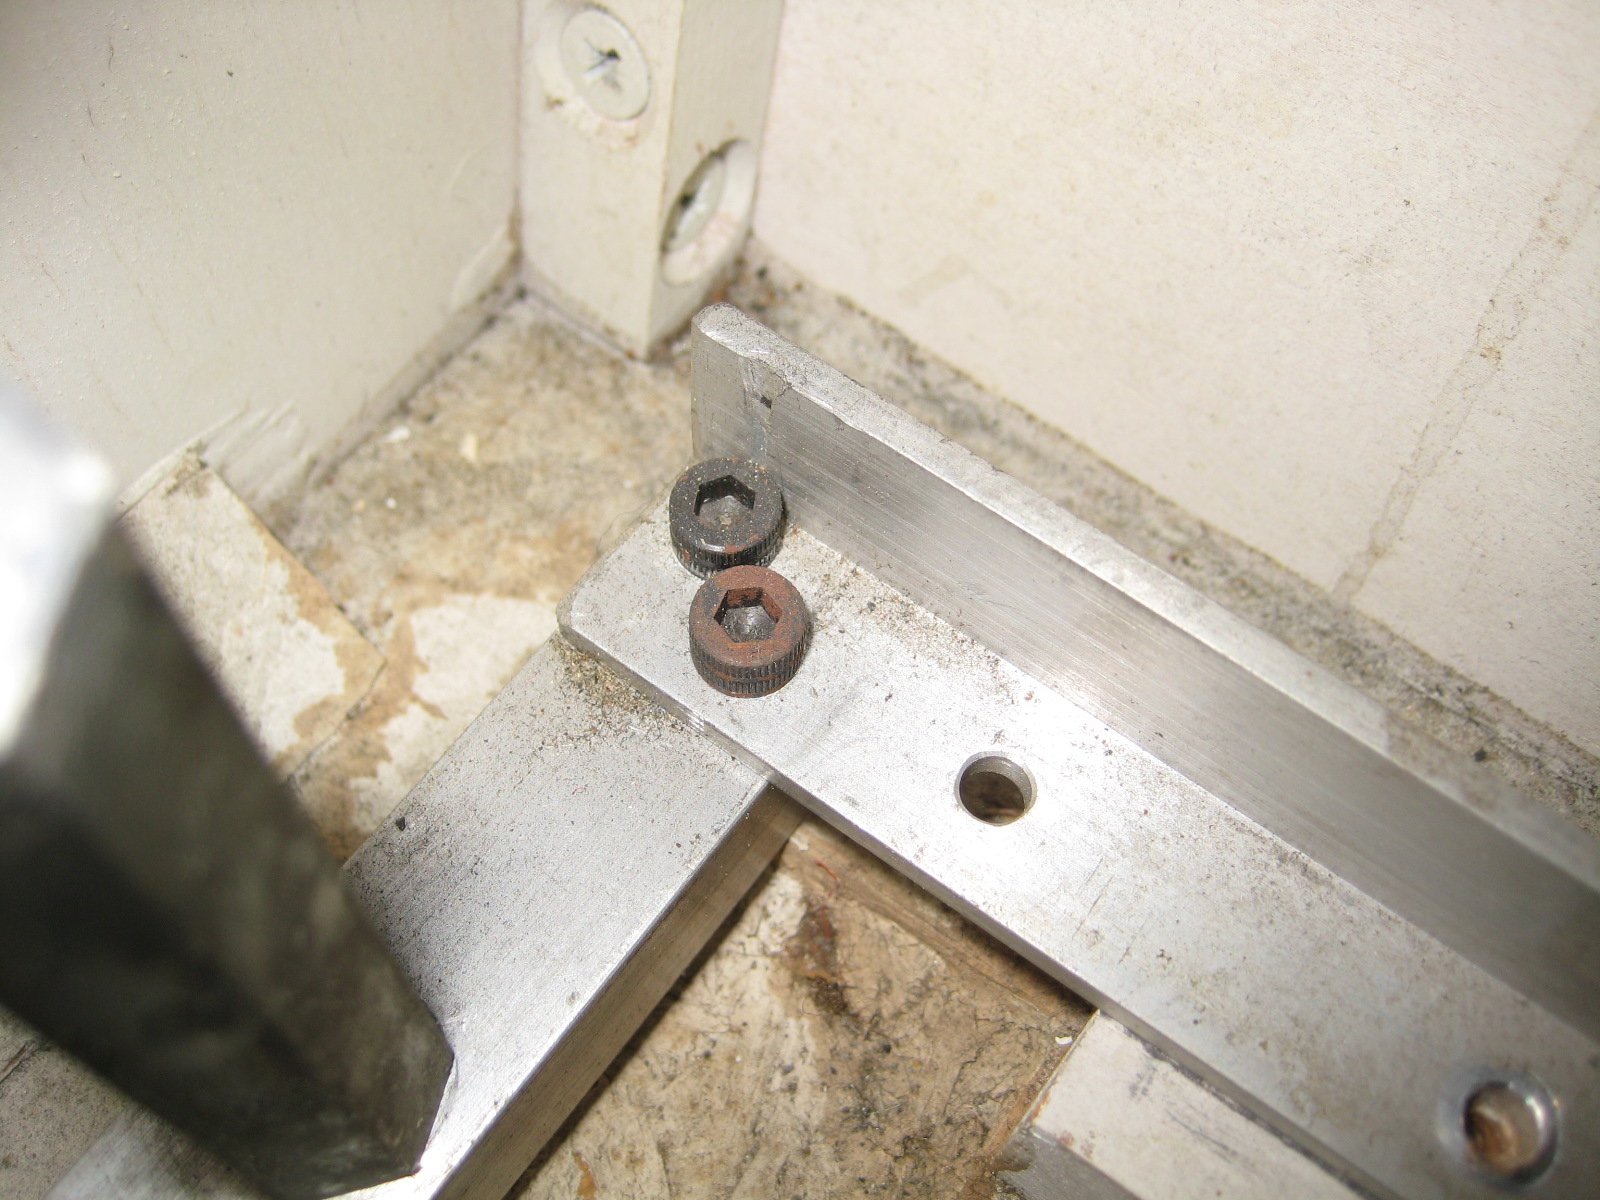 | One whole side of the frame was missing rivets. I wonder why. |
| M400S # 885/674 | Cabinet wall and floor brace | 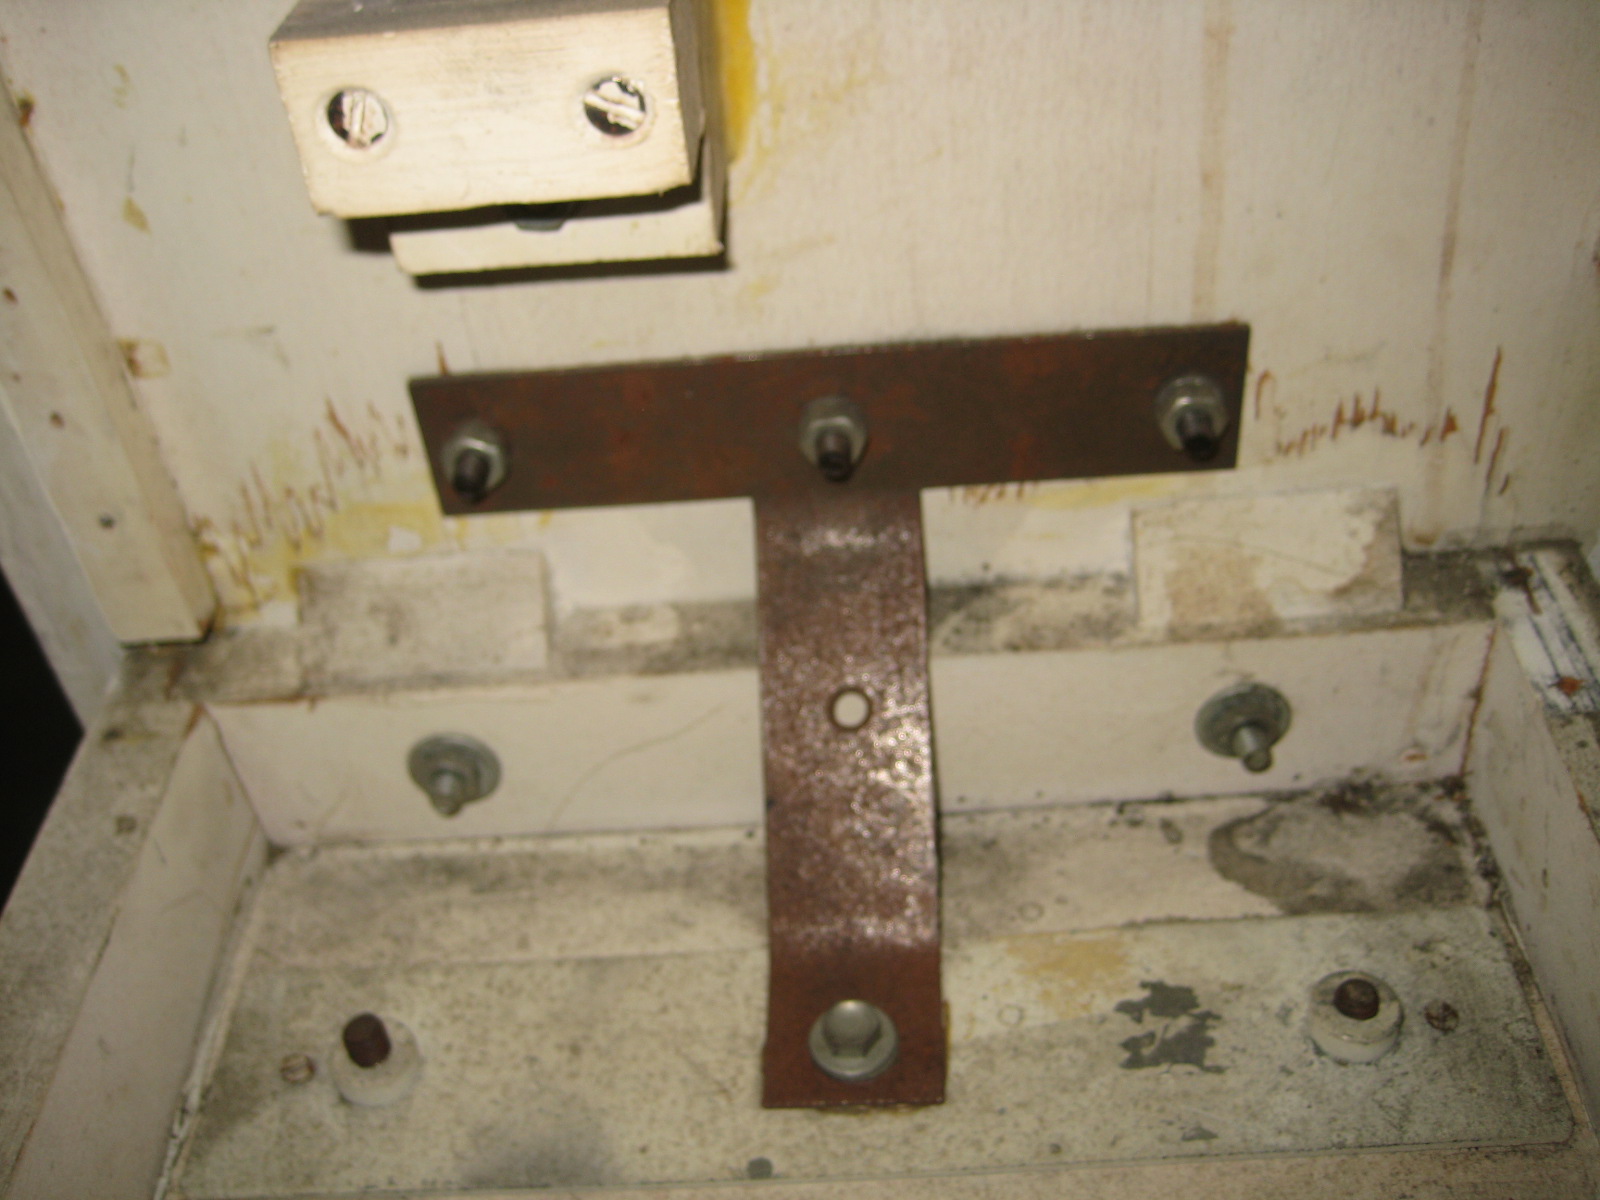 | The inelegant solution to a simple problem |
| M400S # 885/674 | Upper Spill Box Brace | 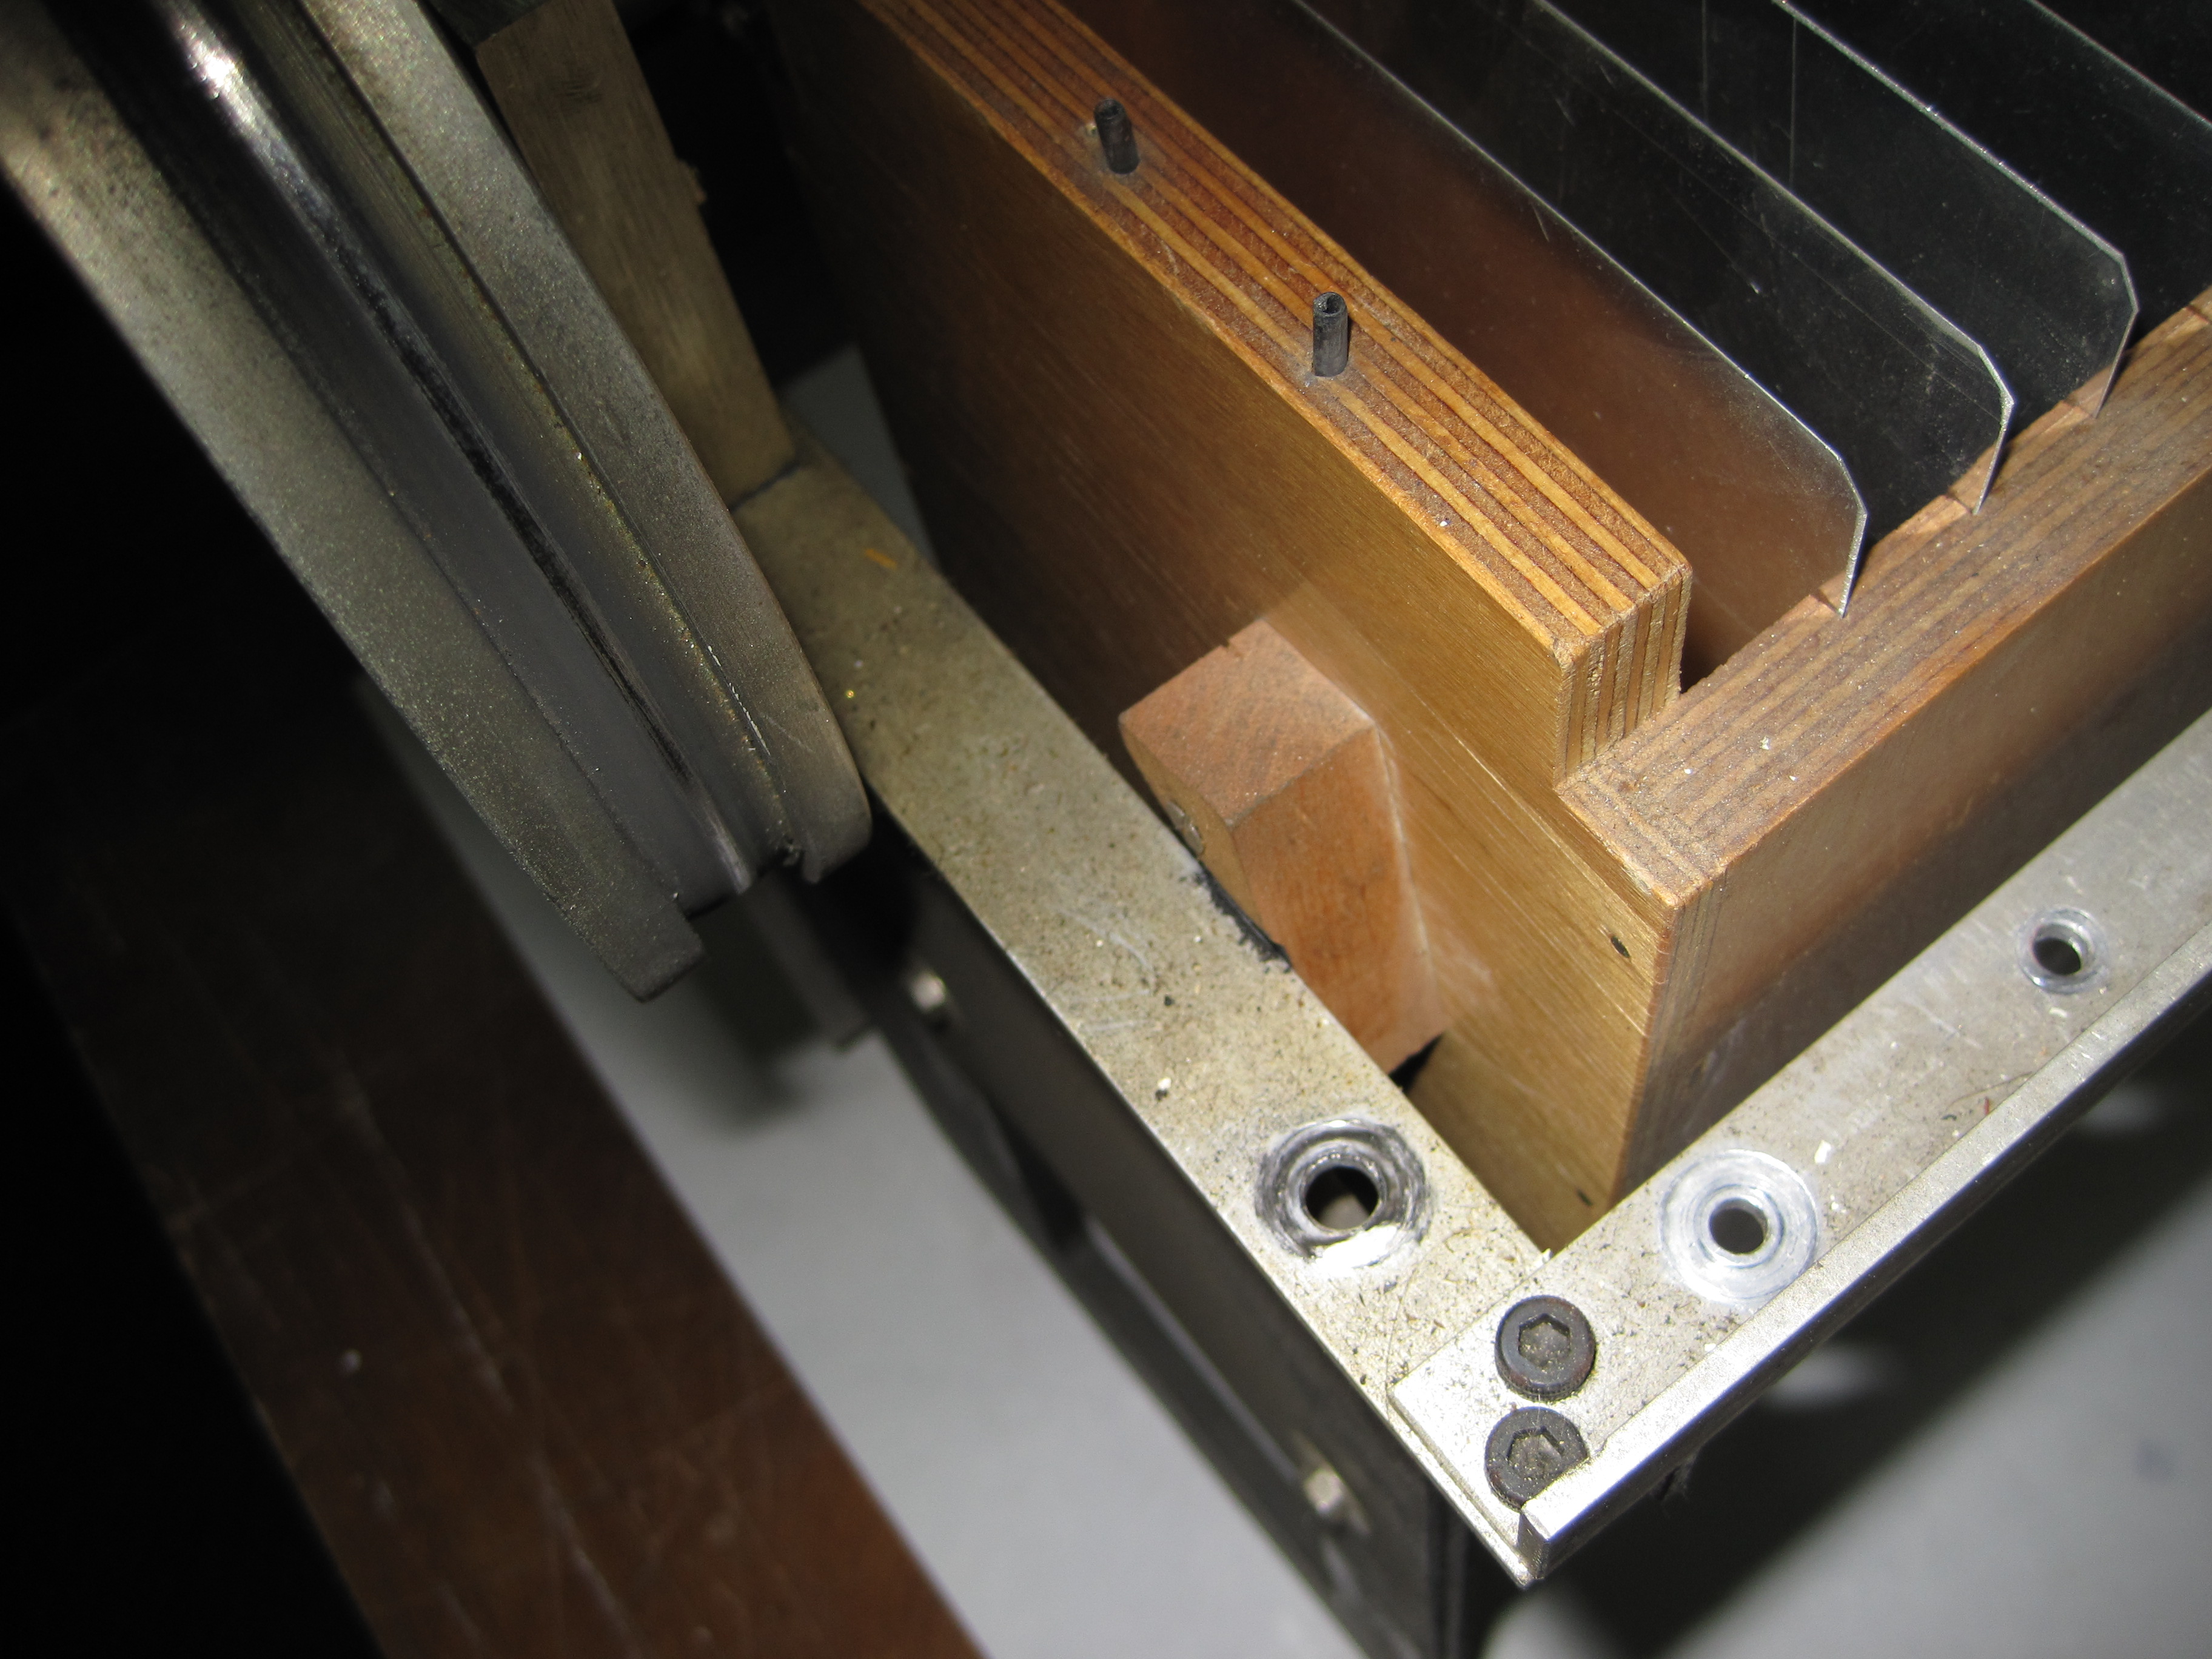 | If you have these in your Tron, replace them with metal brackets |
| M400S # 885/674 | The disassembled Mellotron | 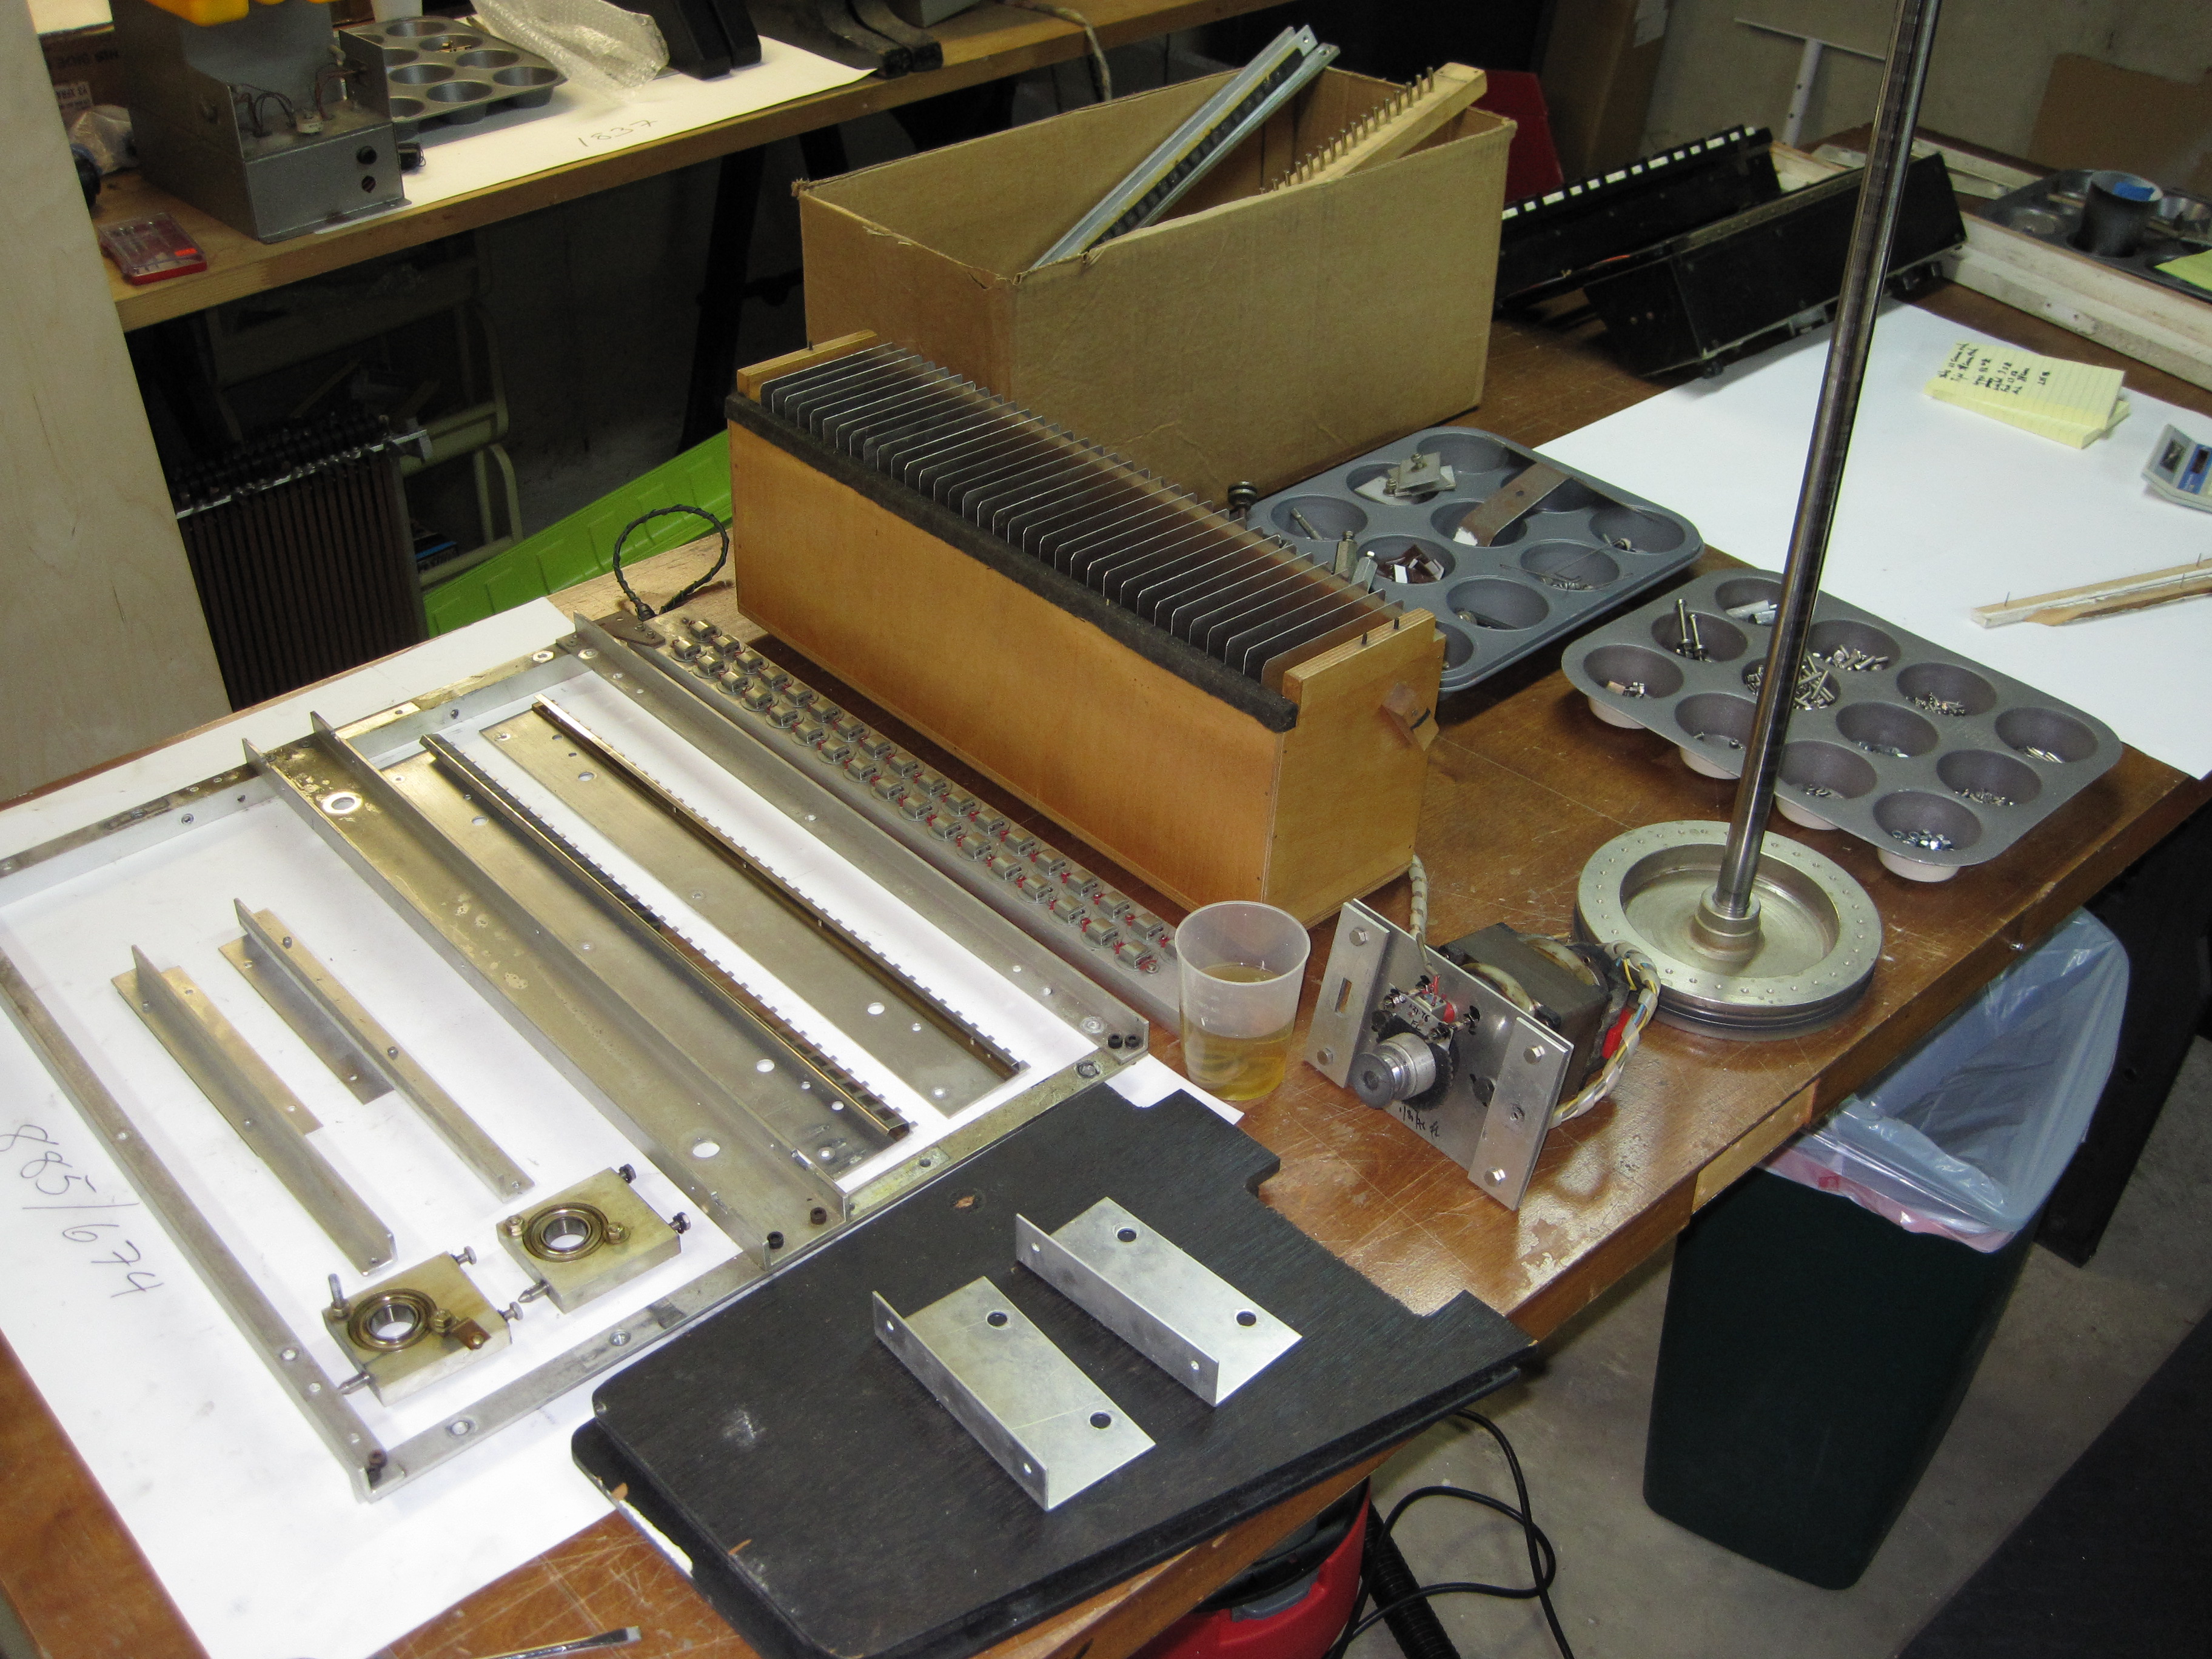 | Now for the details |
| M400S # 885/674 | Keyboard close-up | 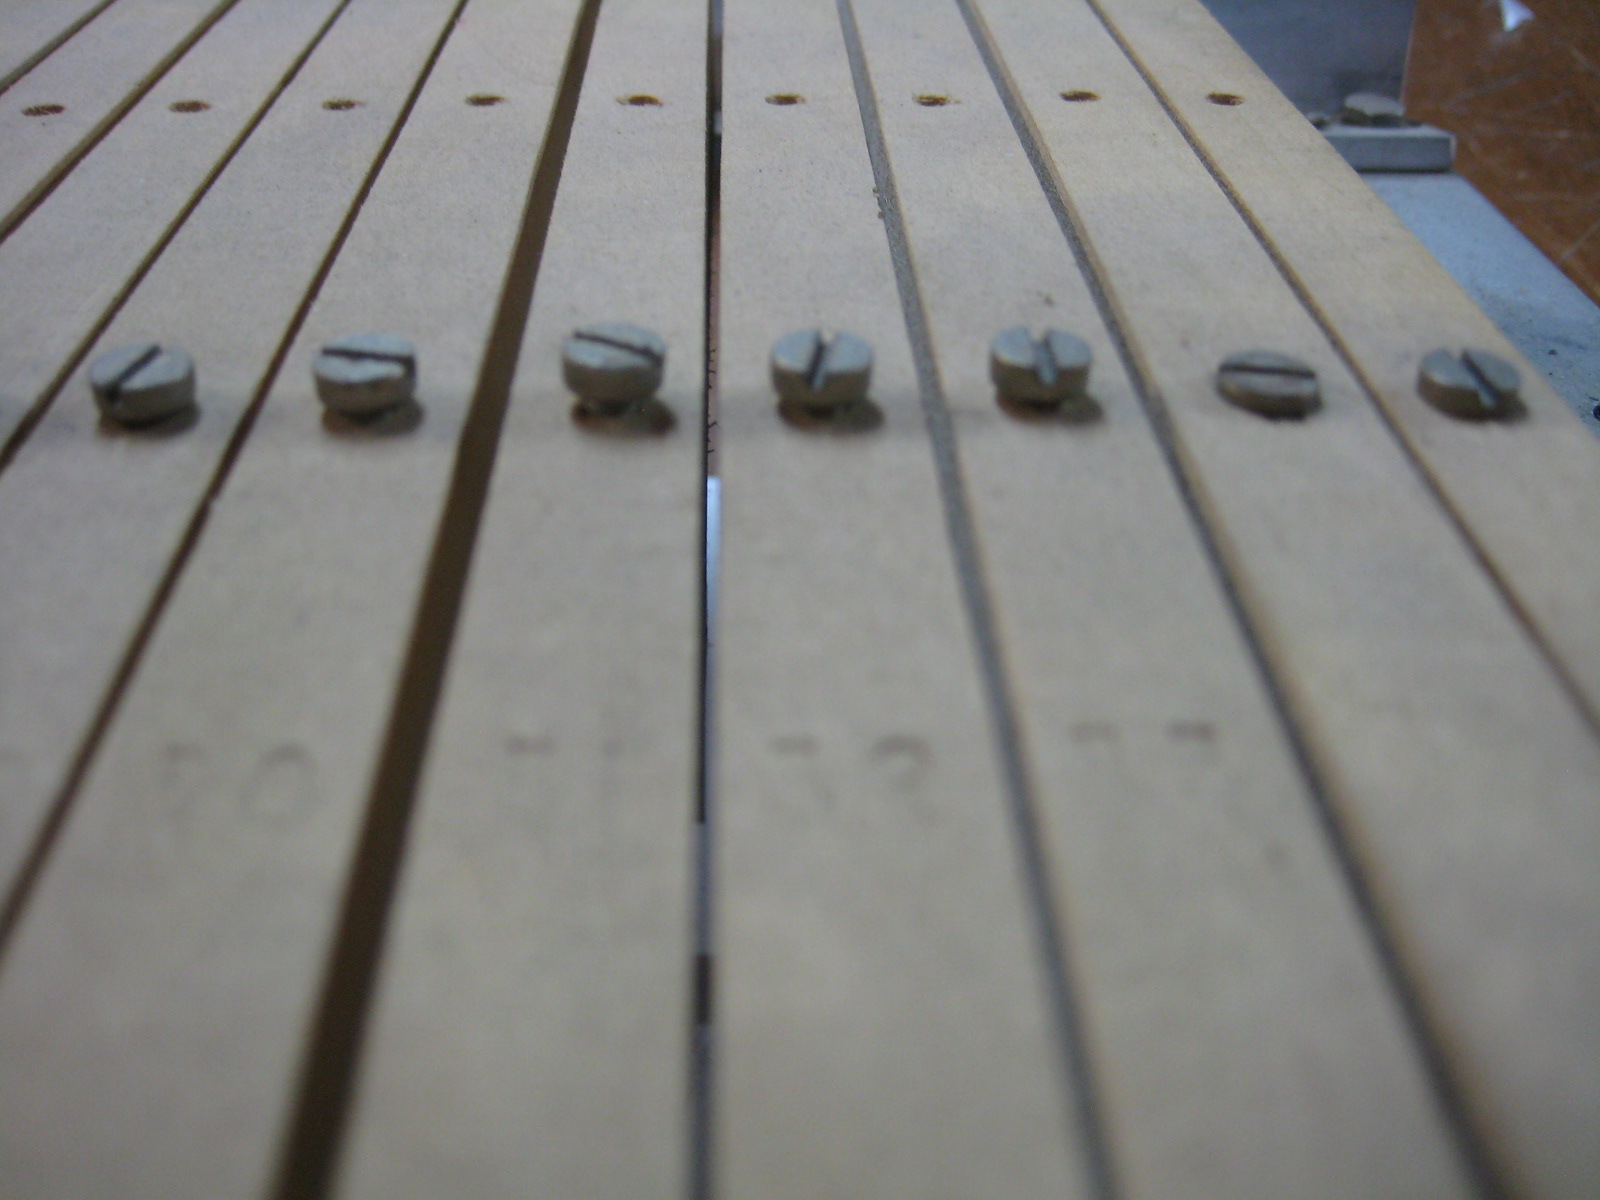 | Someone needed to learn how to adjust the keyboard. |
| M400S # 885/674 | The keyboard | 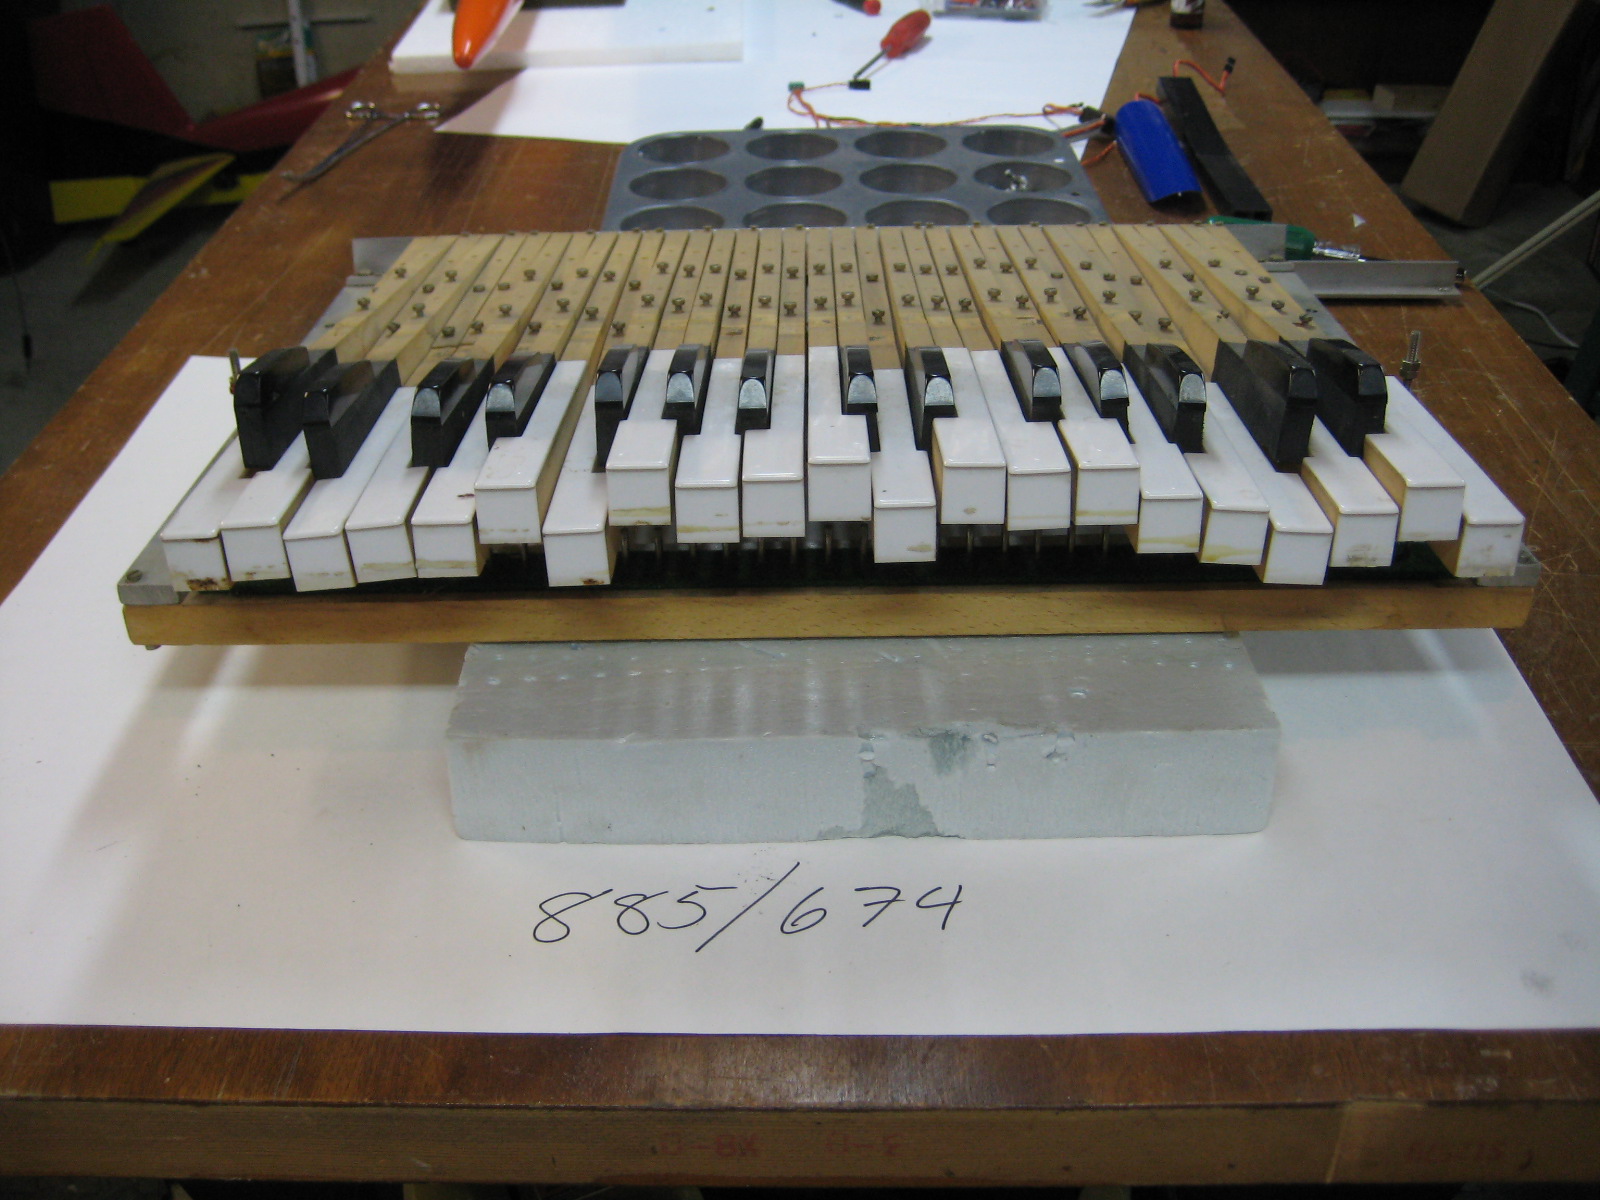 | You can see that this was going to be a fun project |
| M400S # 885/674 | Disassembled keyboard | 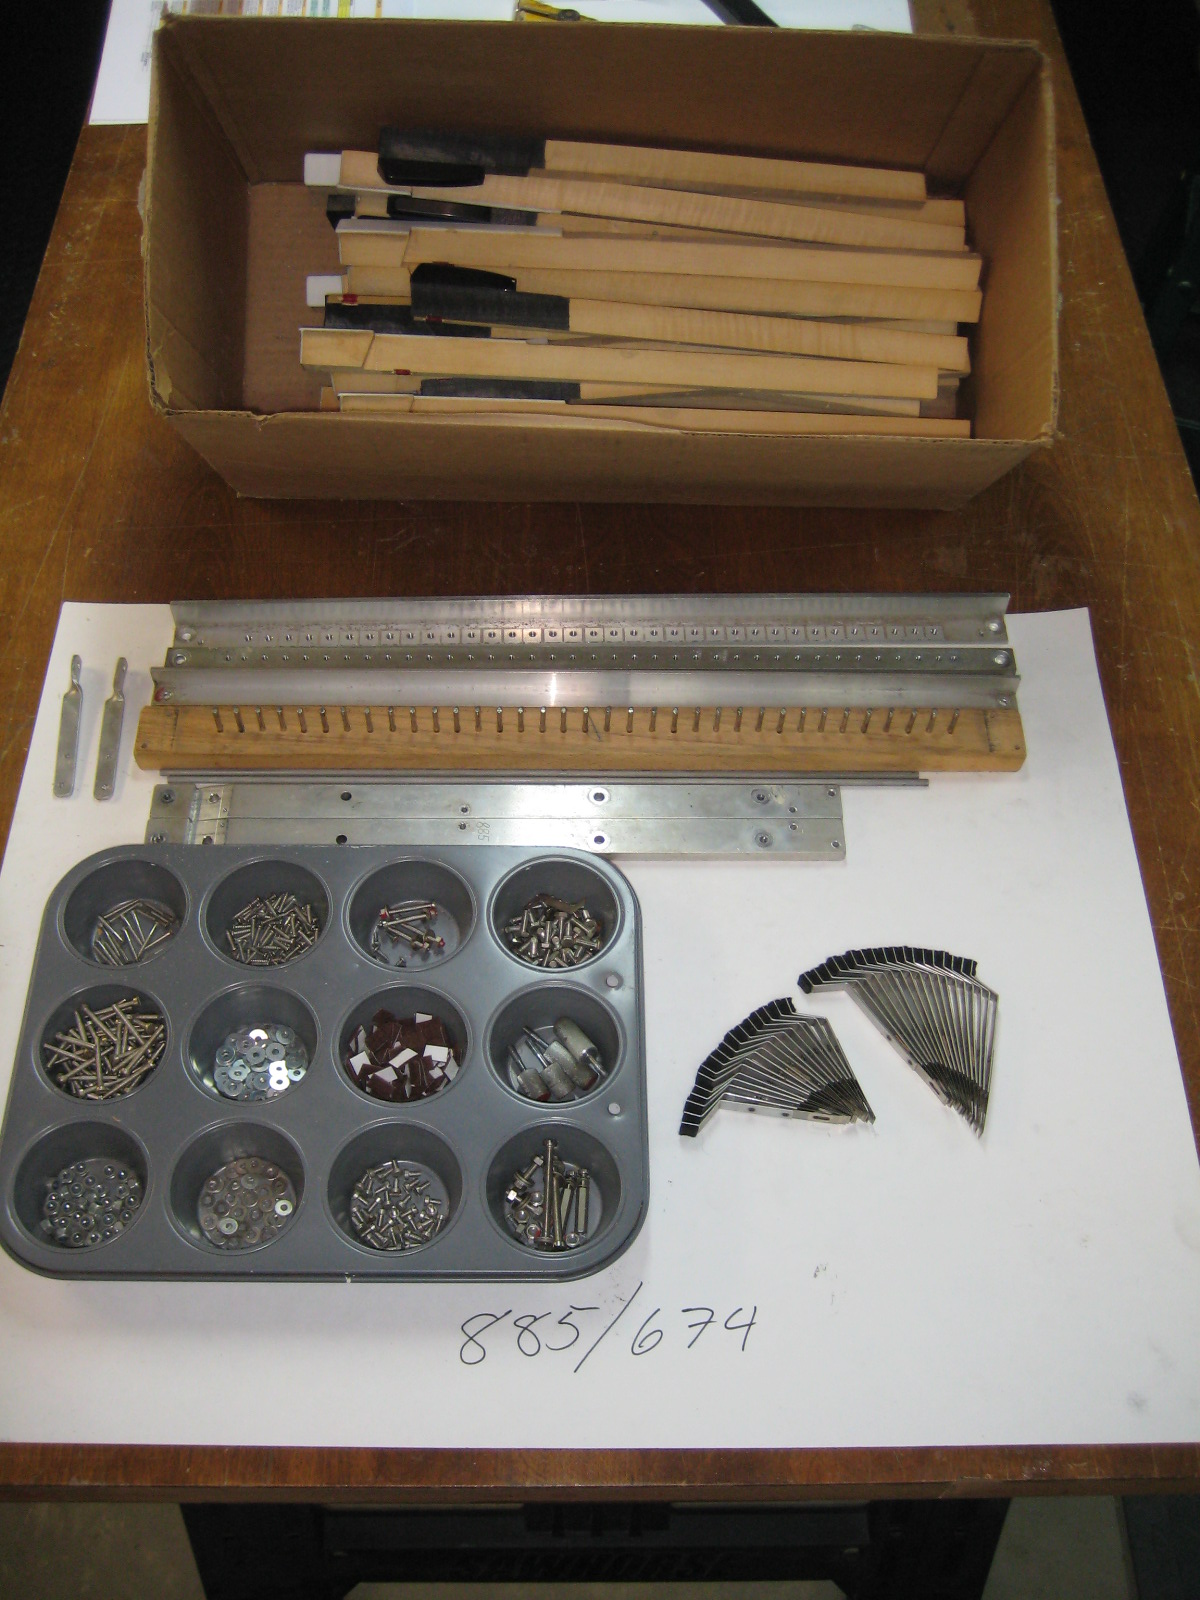 | This was the last thing to get attention |
| M400S # 885/674 | Keyboard is built on the Mellotron... | 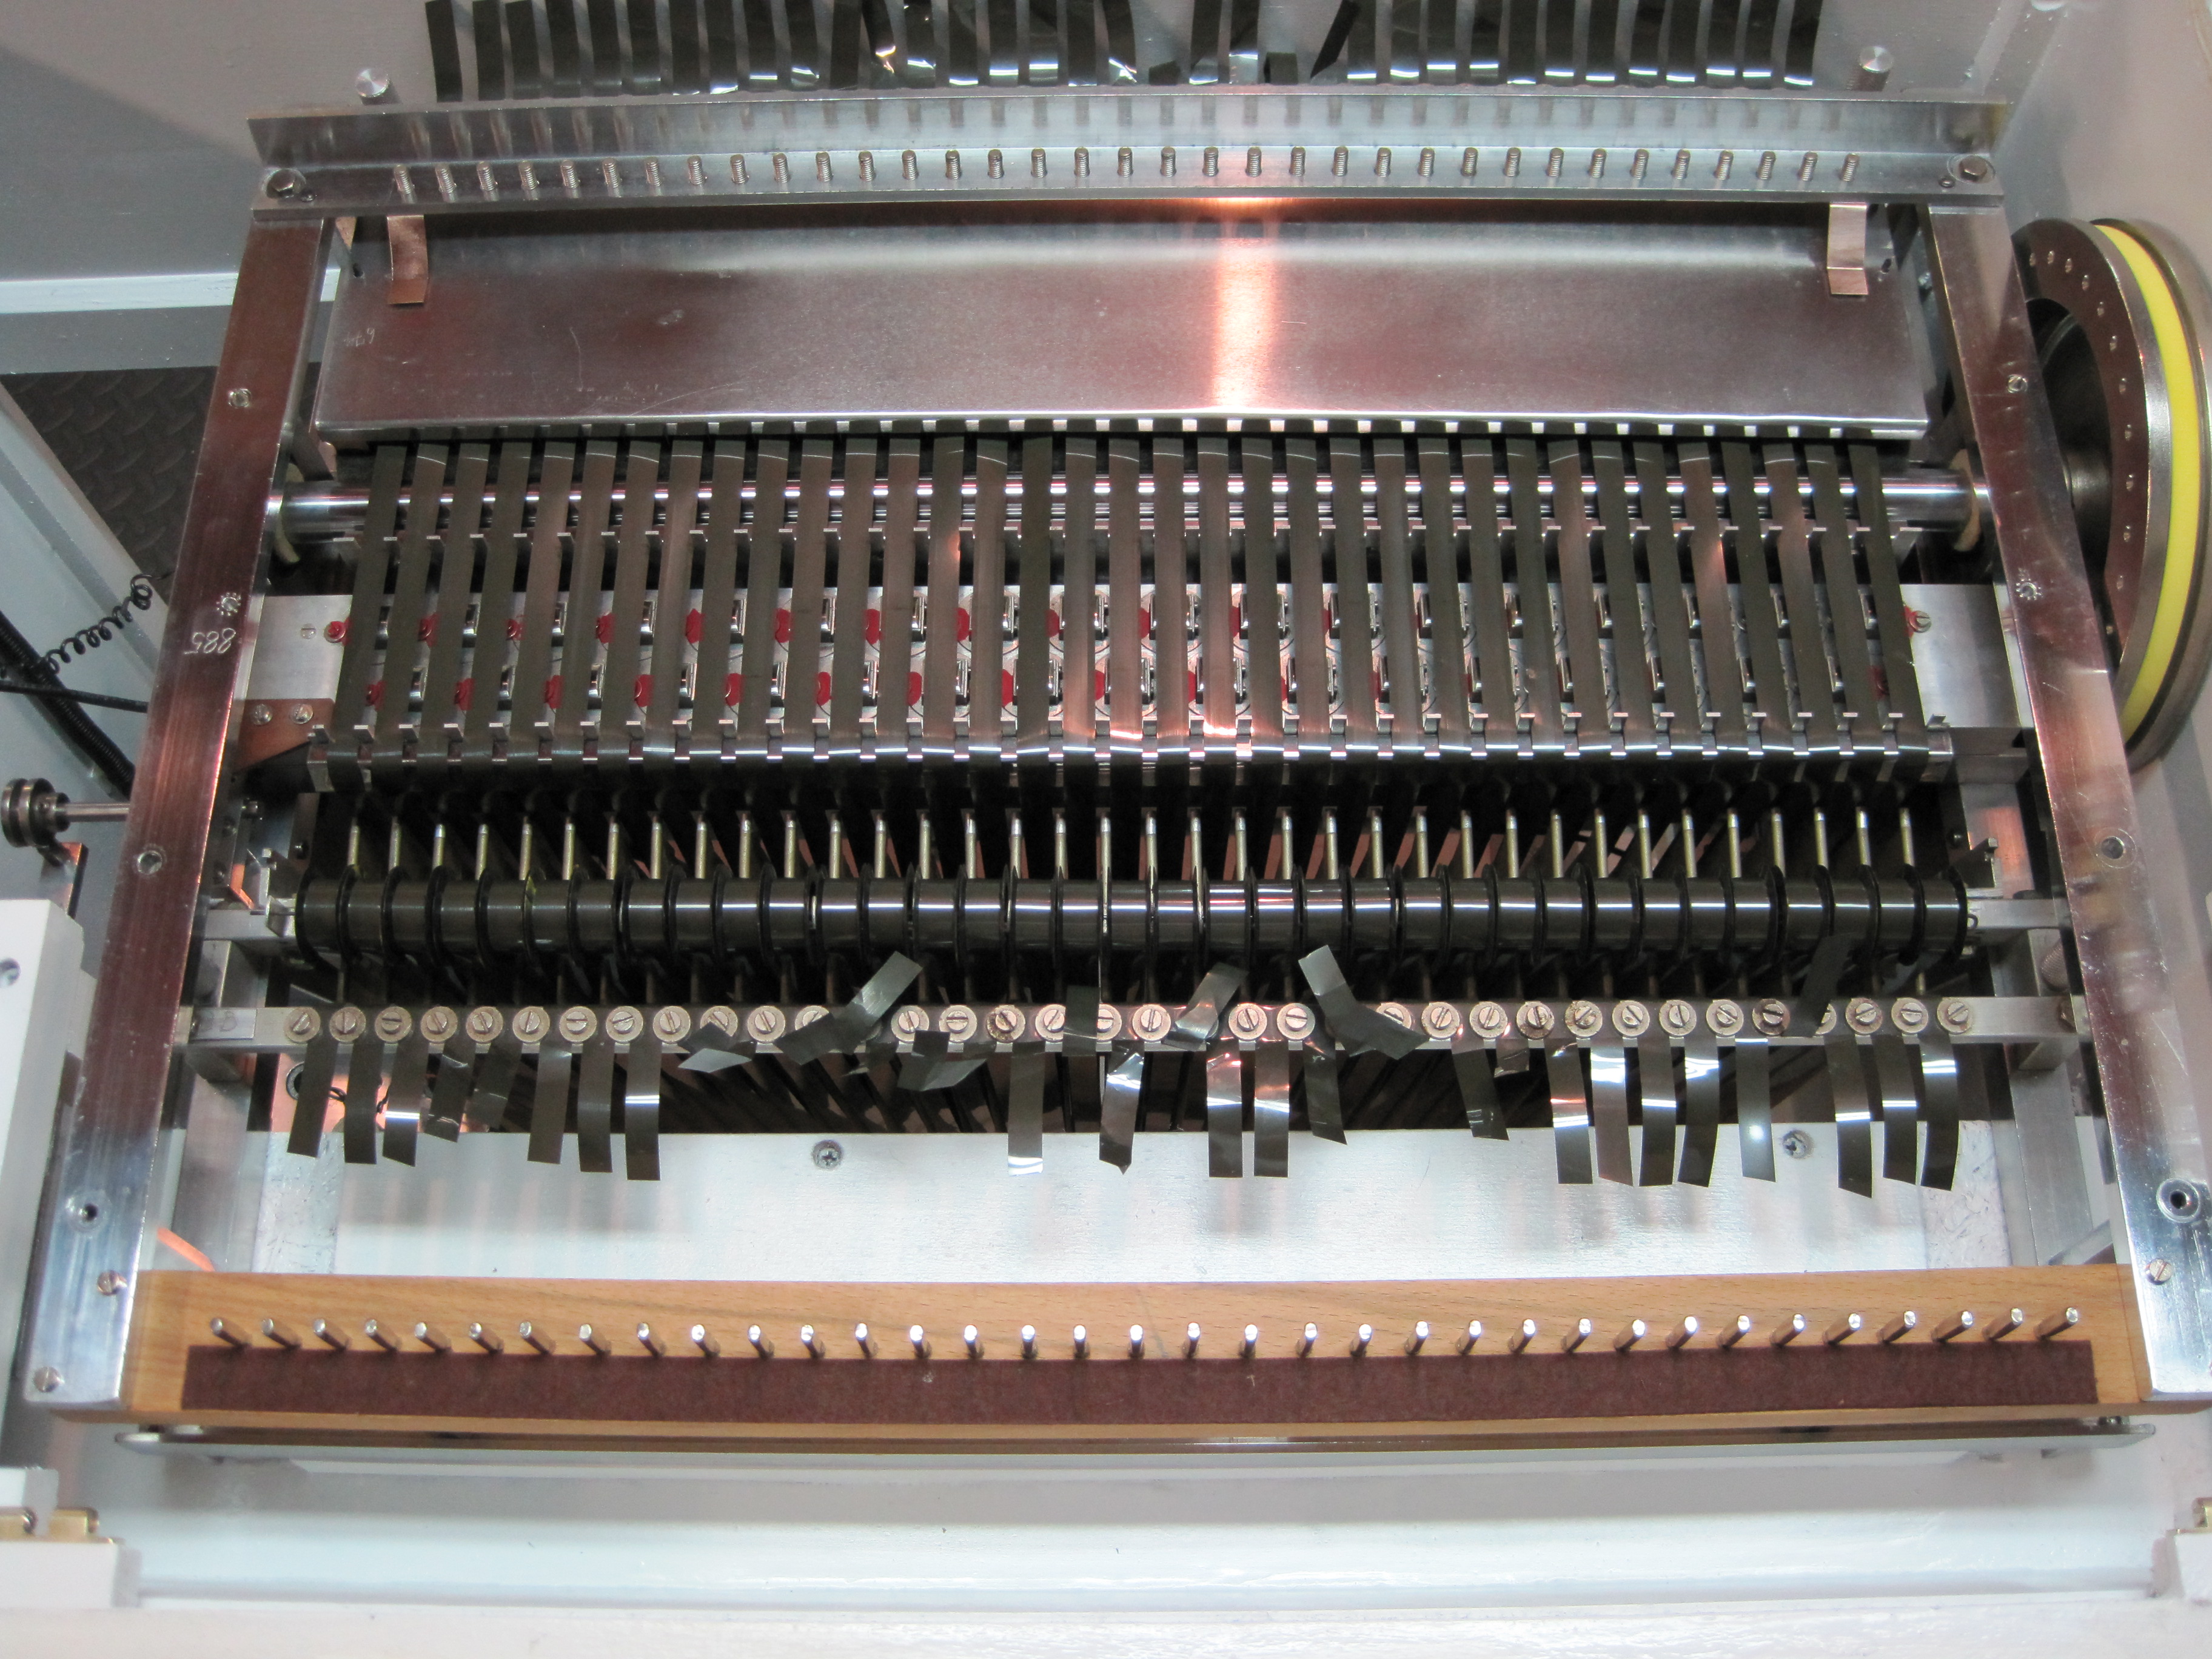 | |
| M400S # 885/674 | Installing upper spill box brackets | 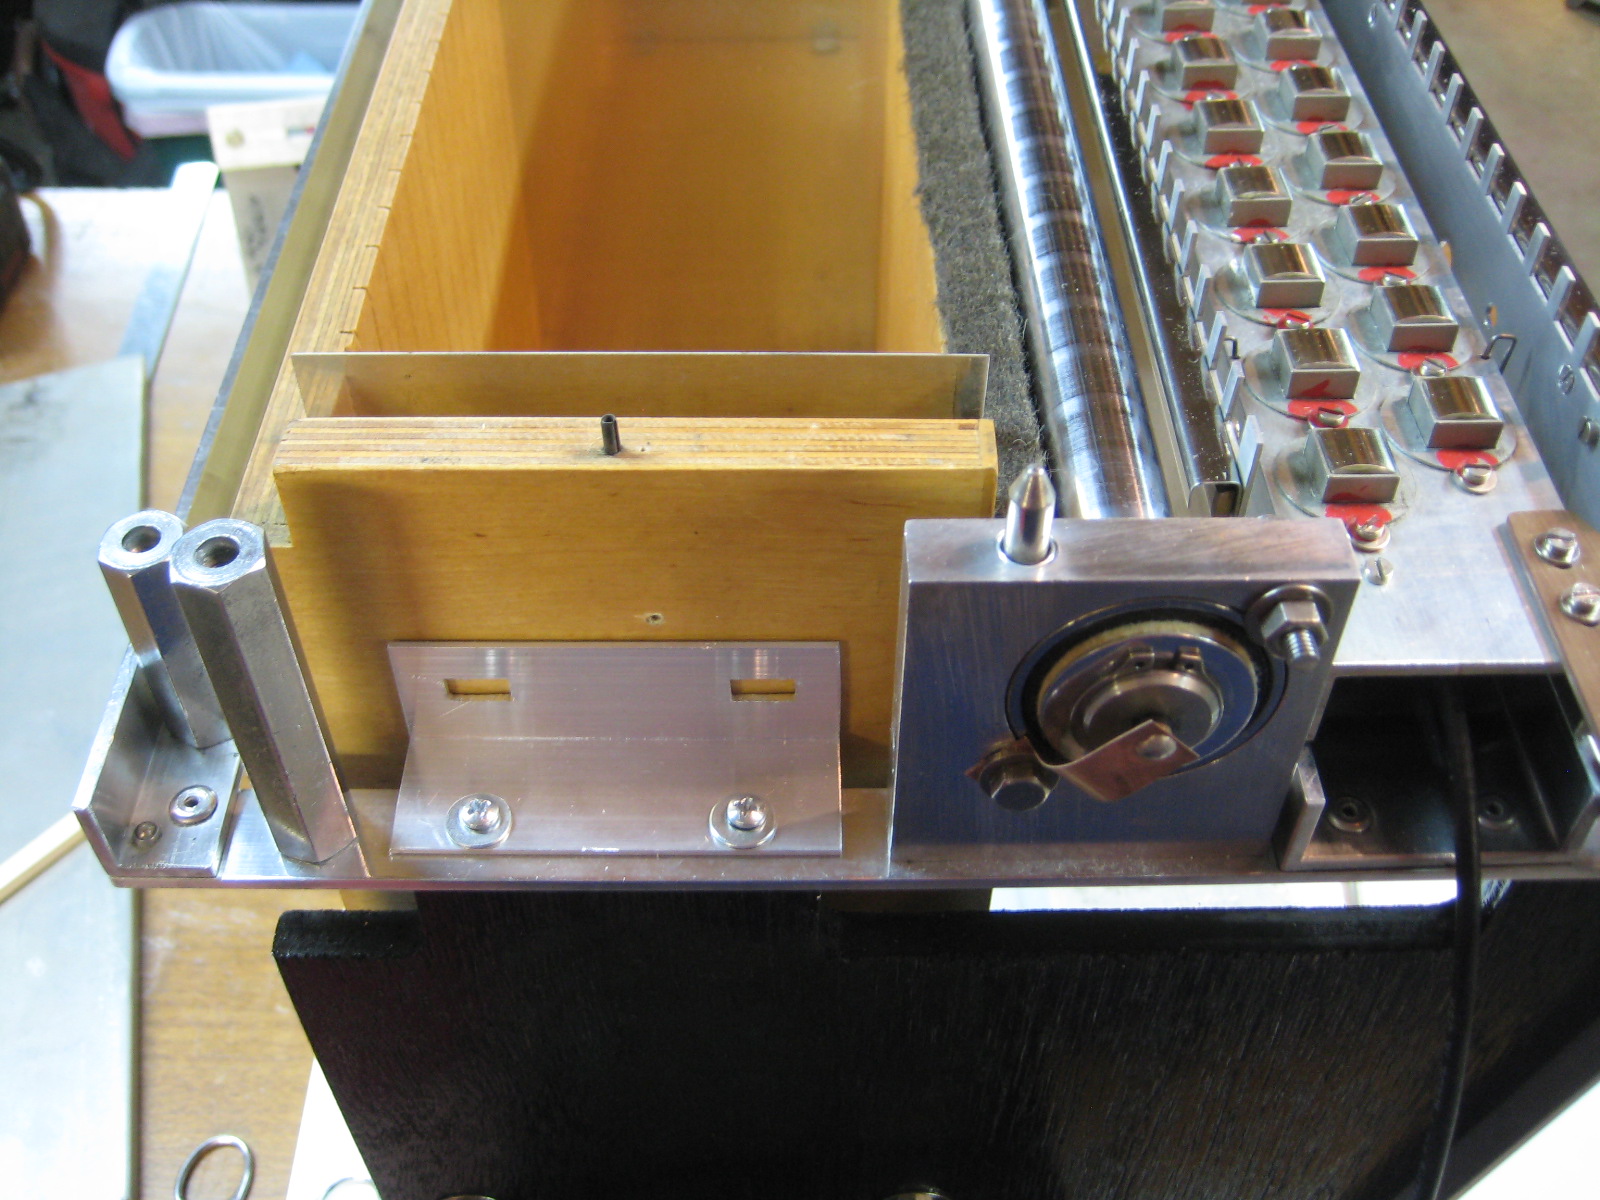 | |
| M400S # 885/674 | Motor ready for installation | 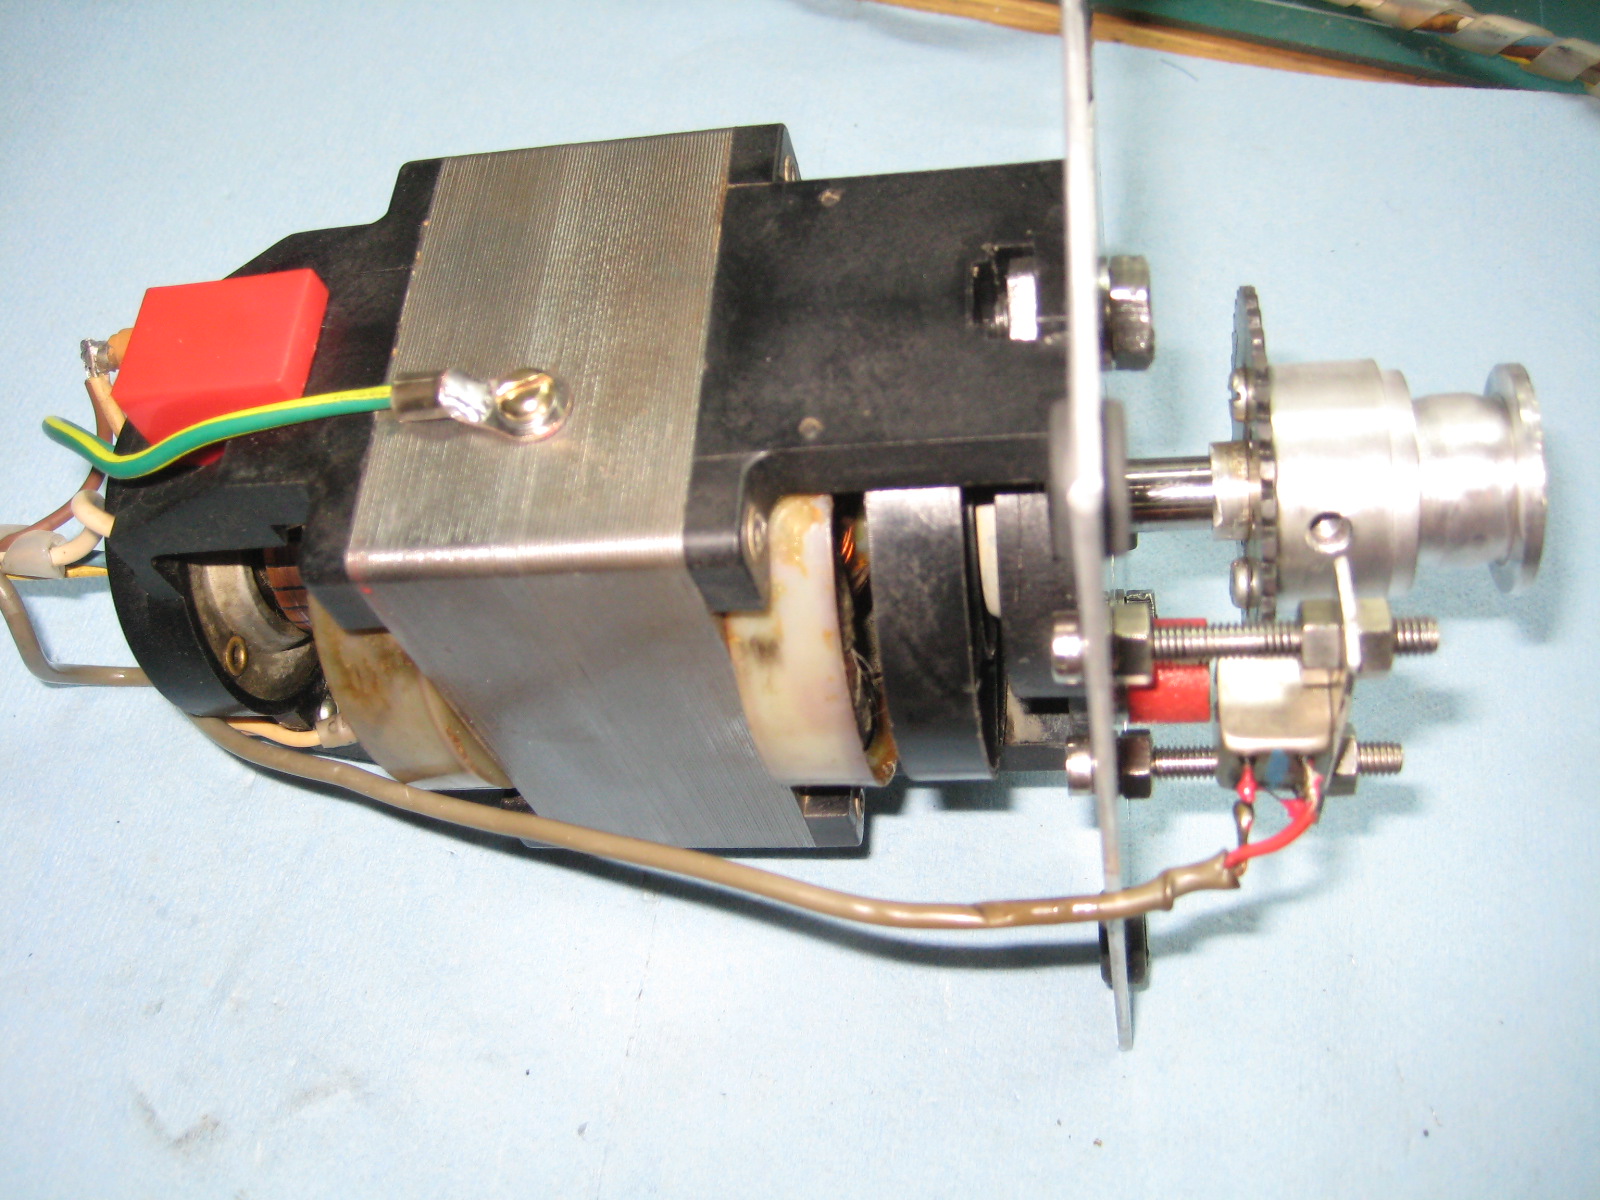 | |
| M400S # 885/674 | Beginning the power supply clean-up | 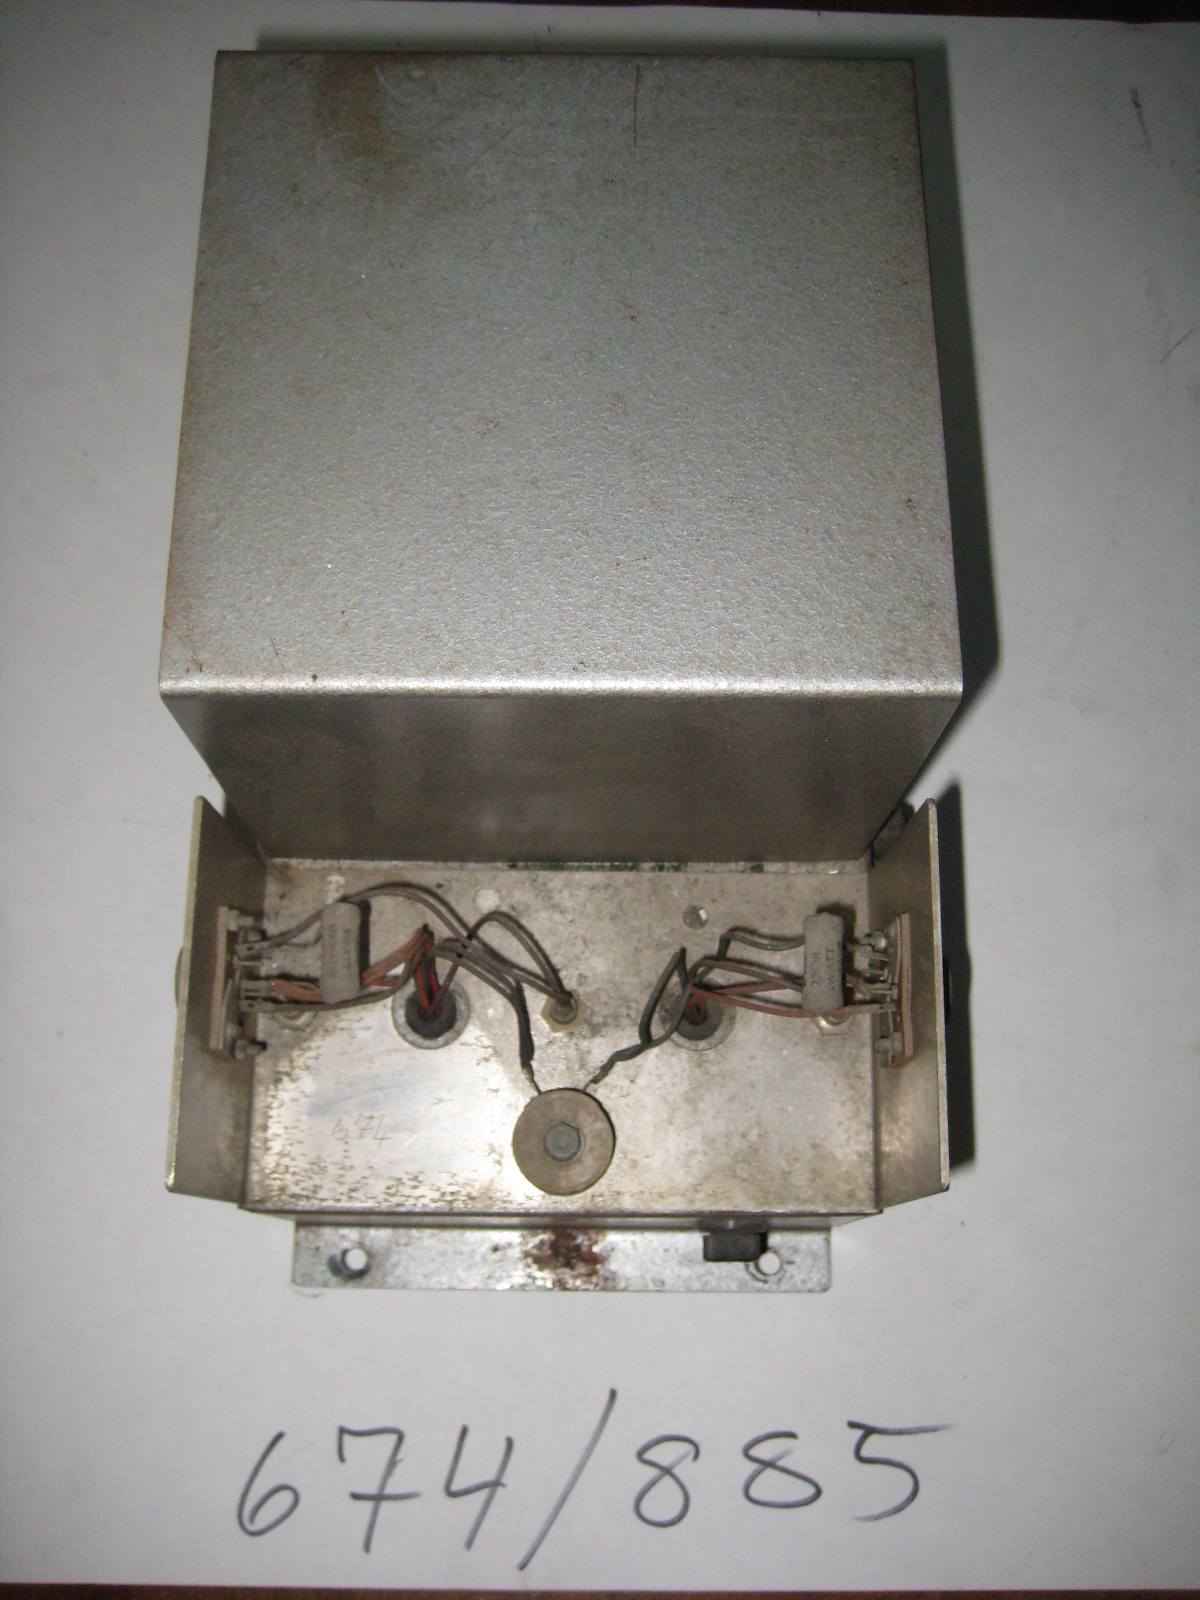 | |
| M400S # 885/674 | Installing cabinet wiring & feet | 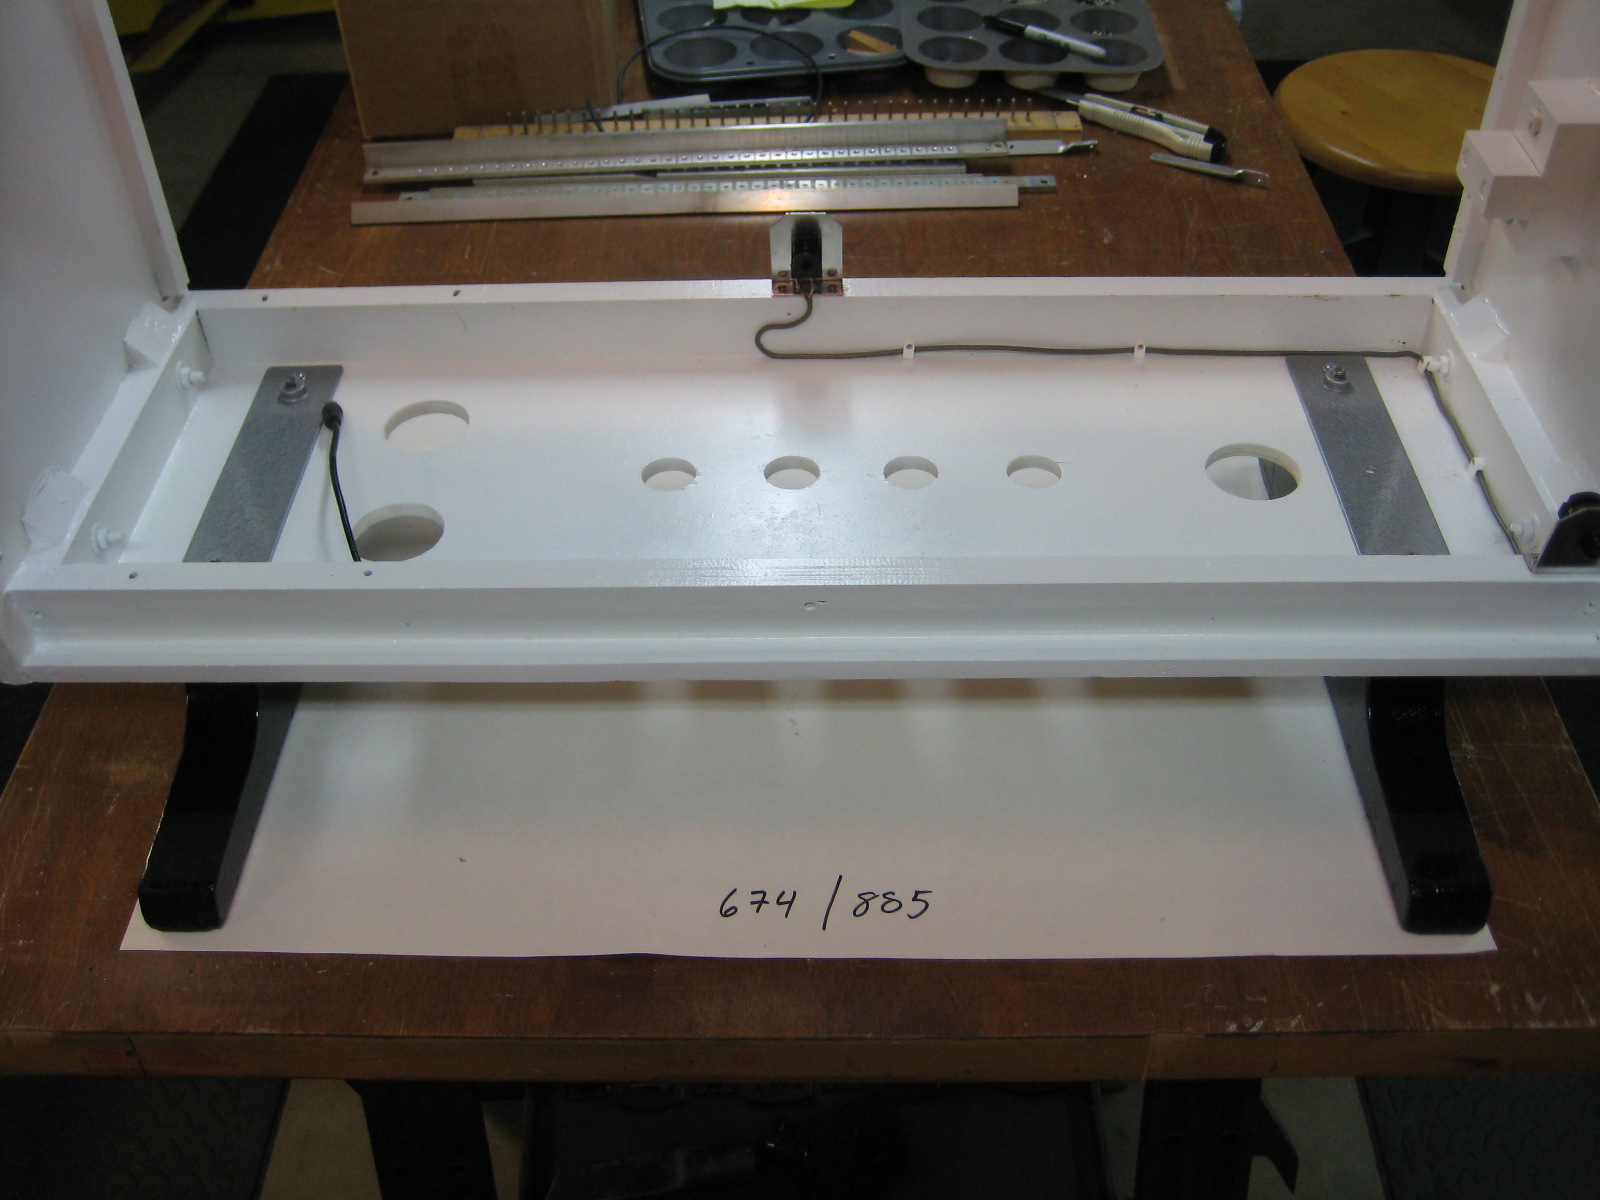 | |
| M400S # 885/674 | ... one key & one pressure pad at a time | 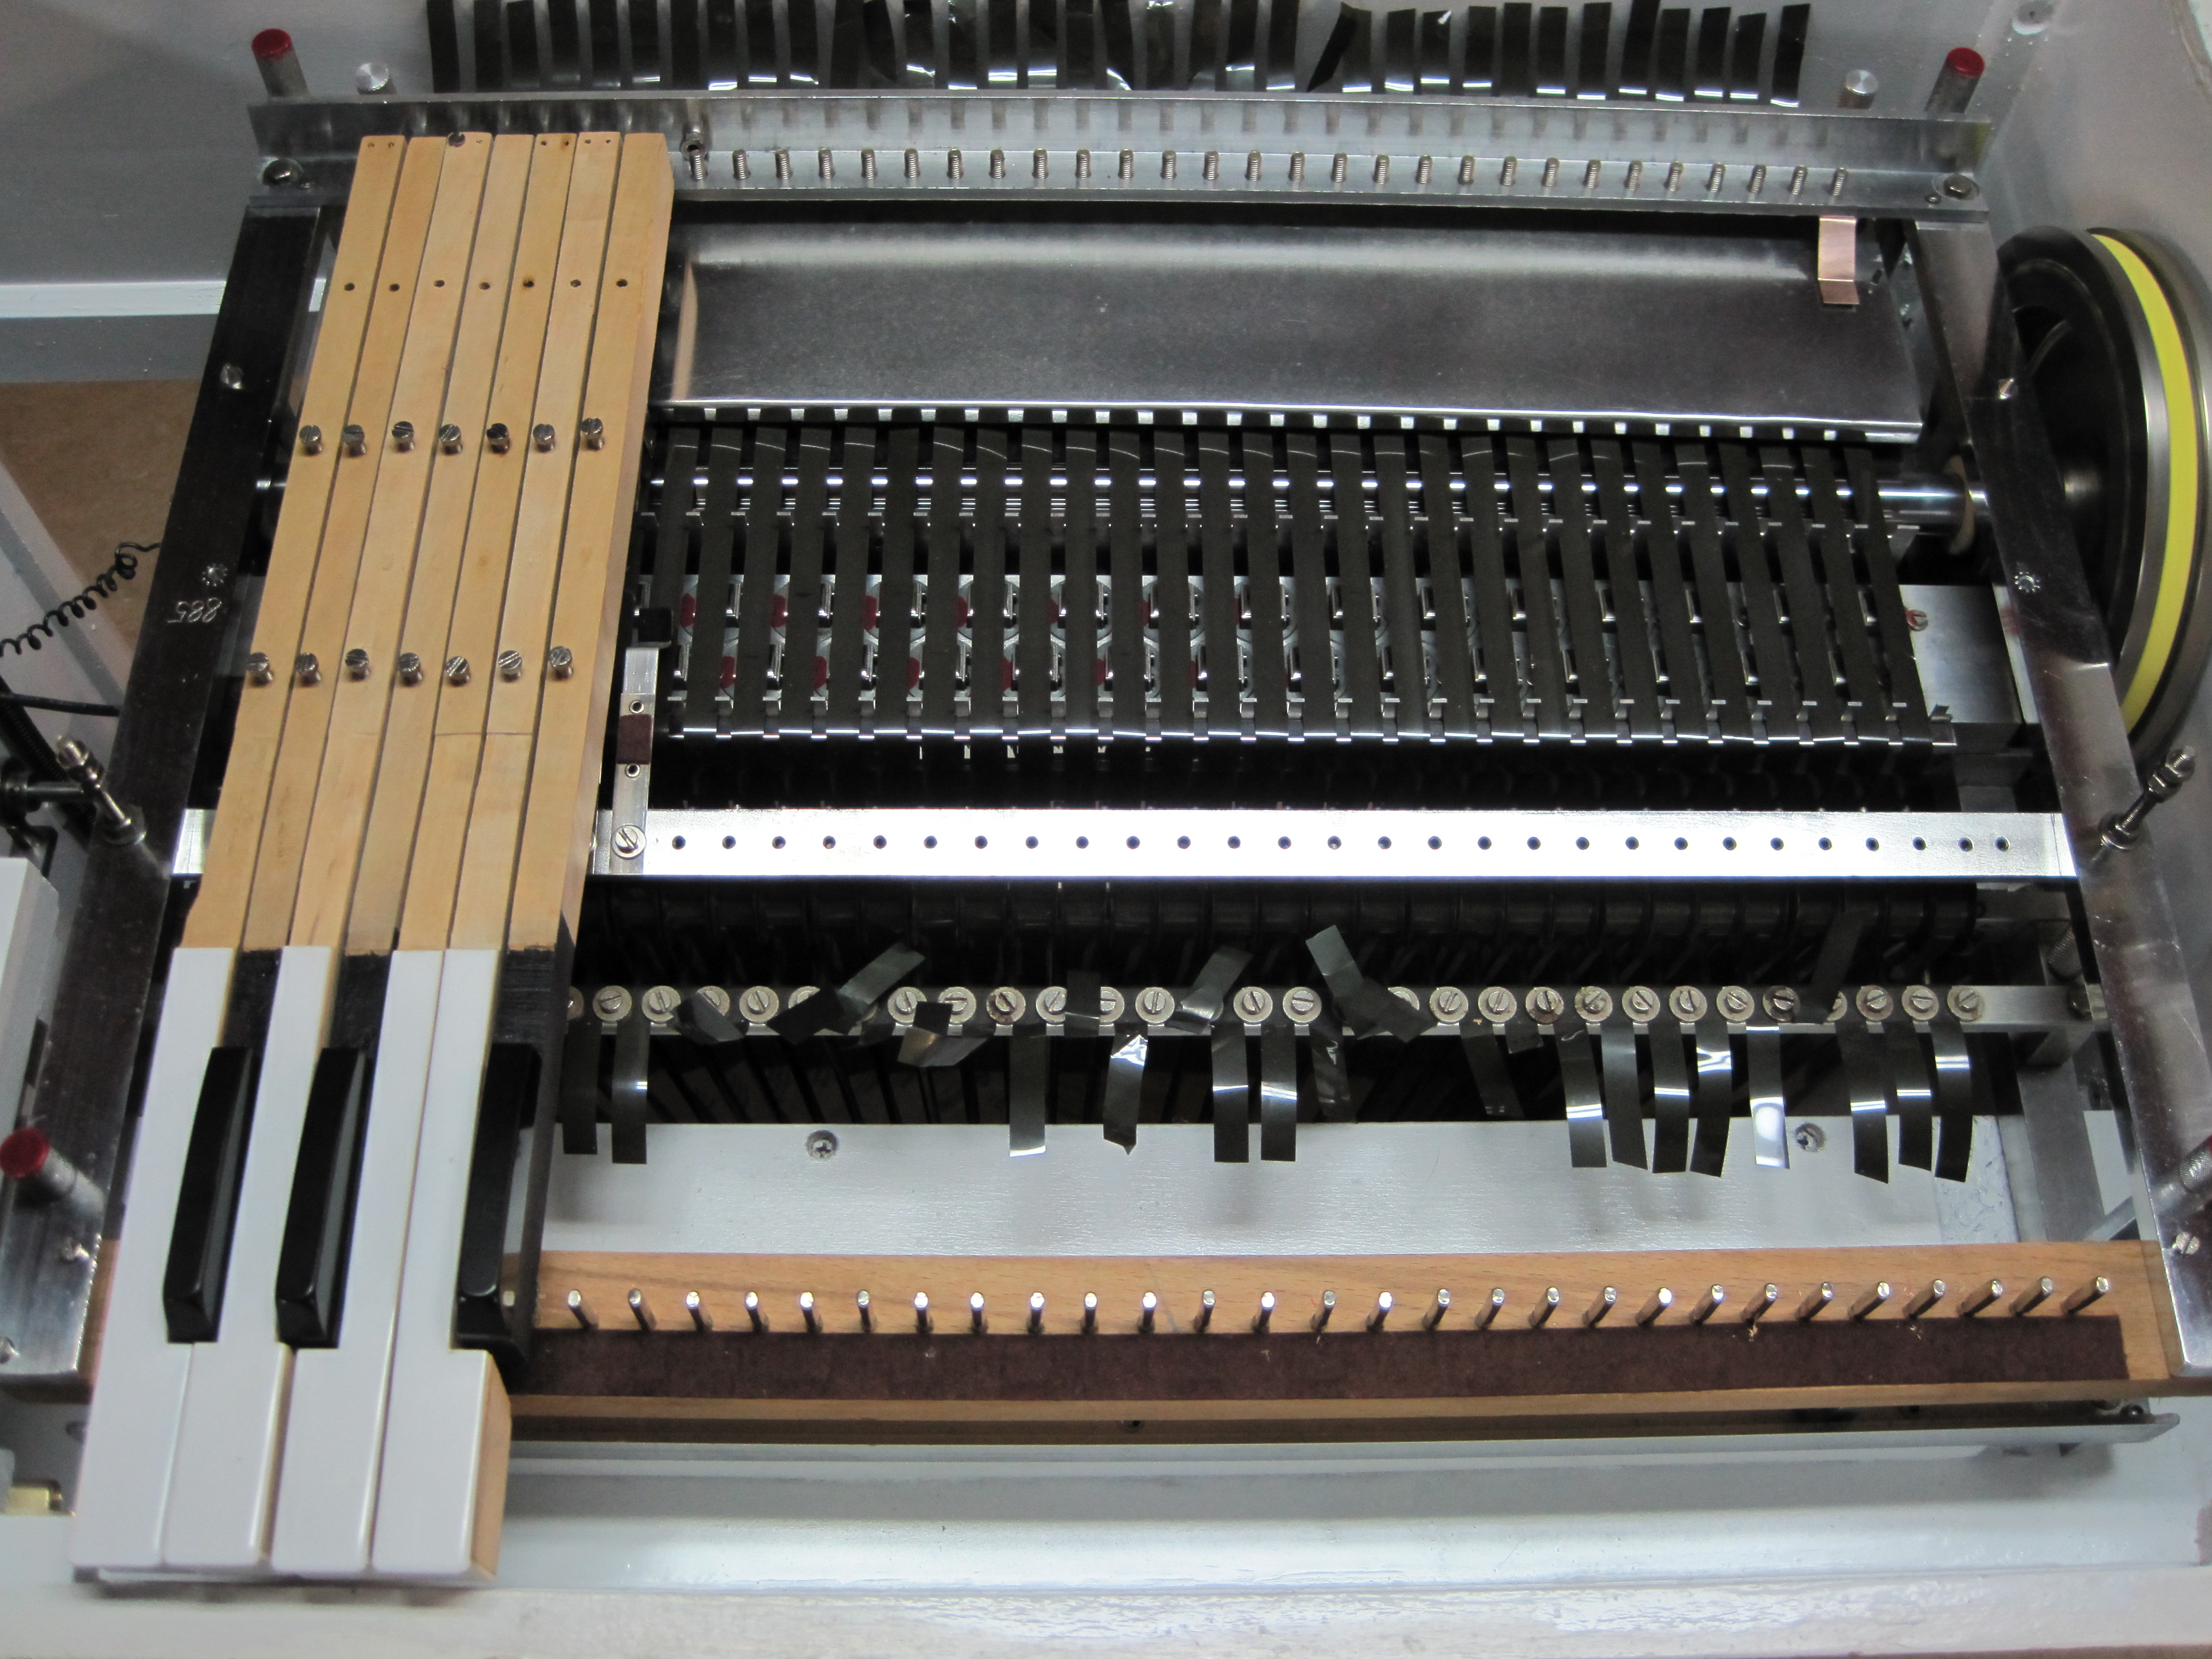 | |
| M400S # 885/674 | New upper spill box brackets | 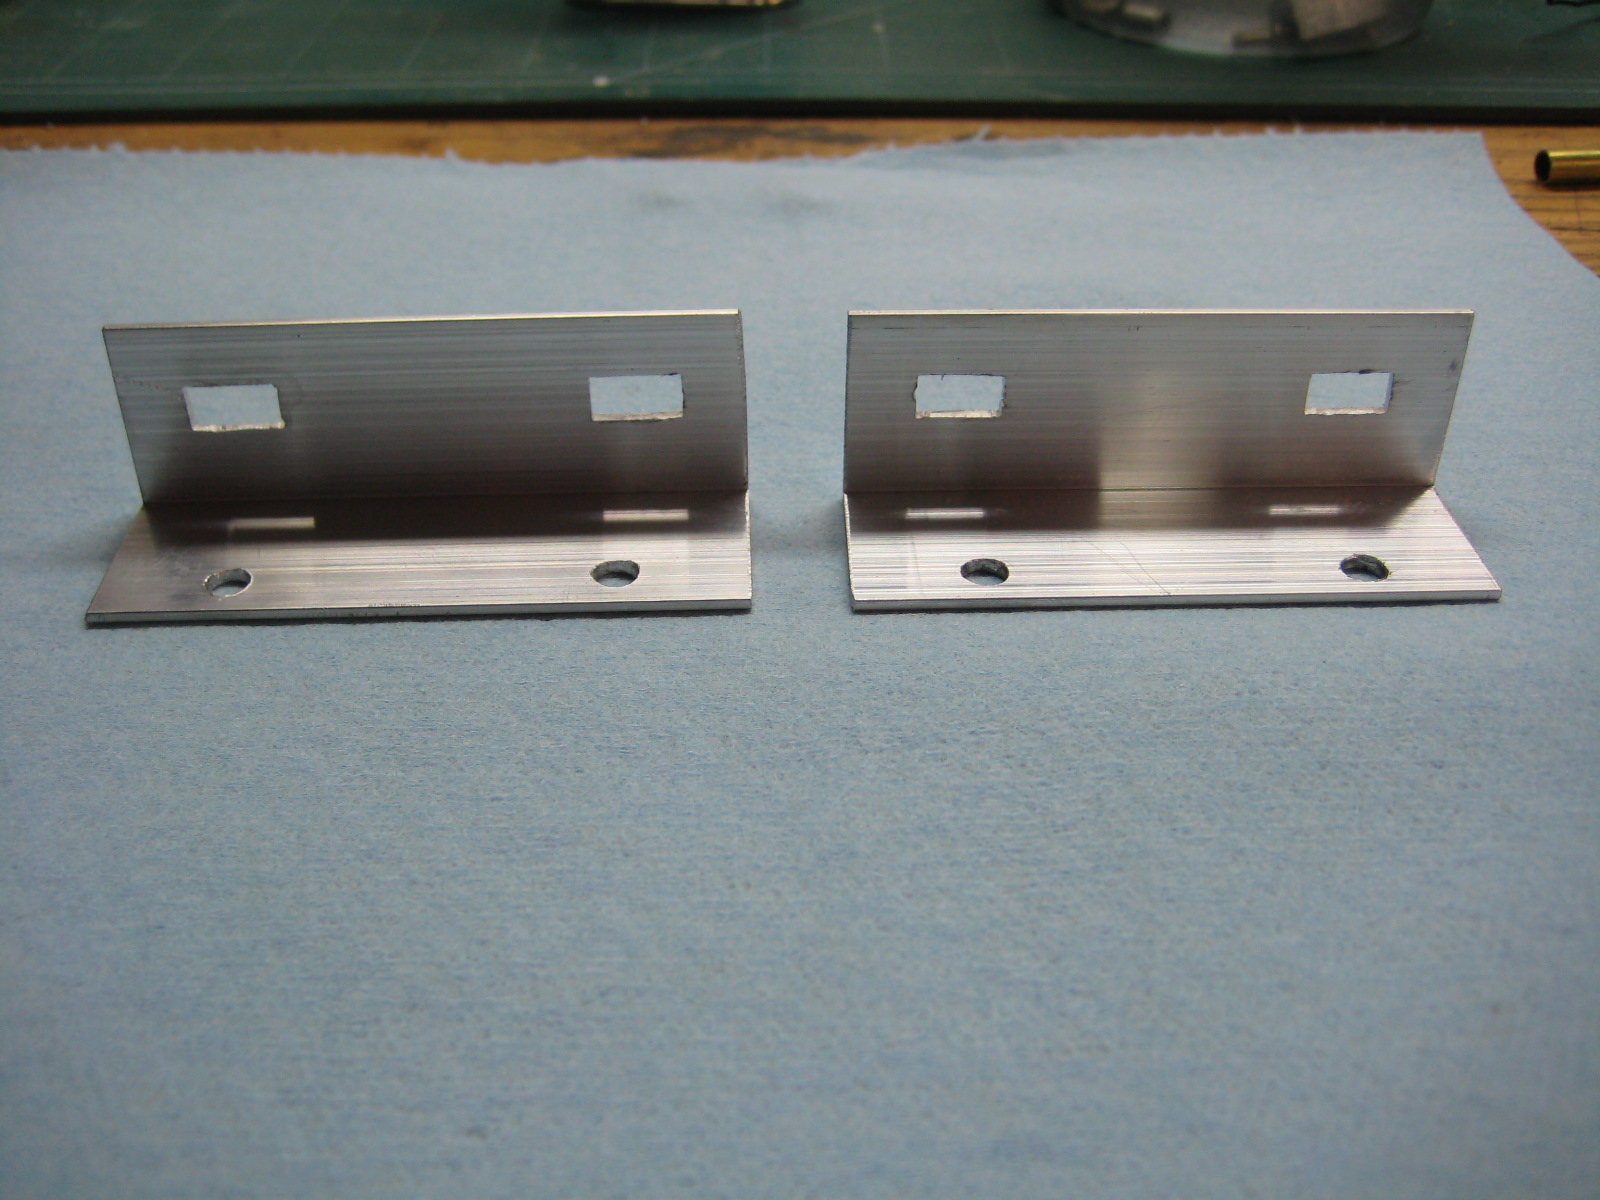 | |
| M400S # 885/674 | Repaired cabinet split | 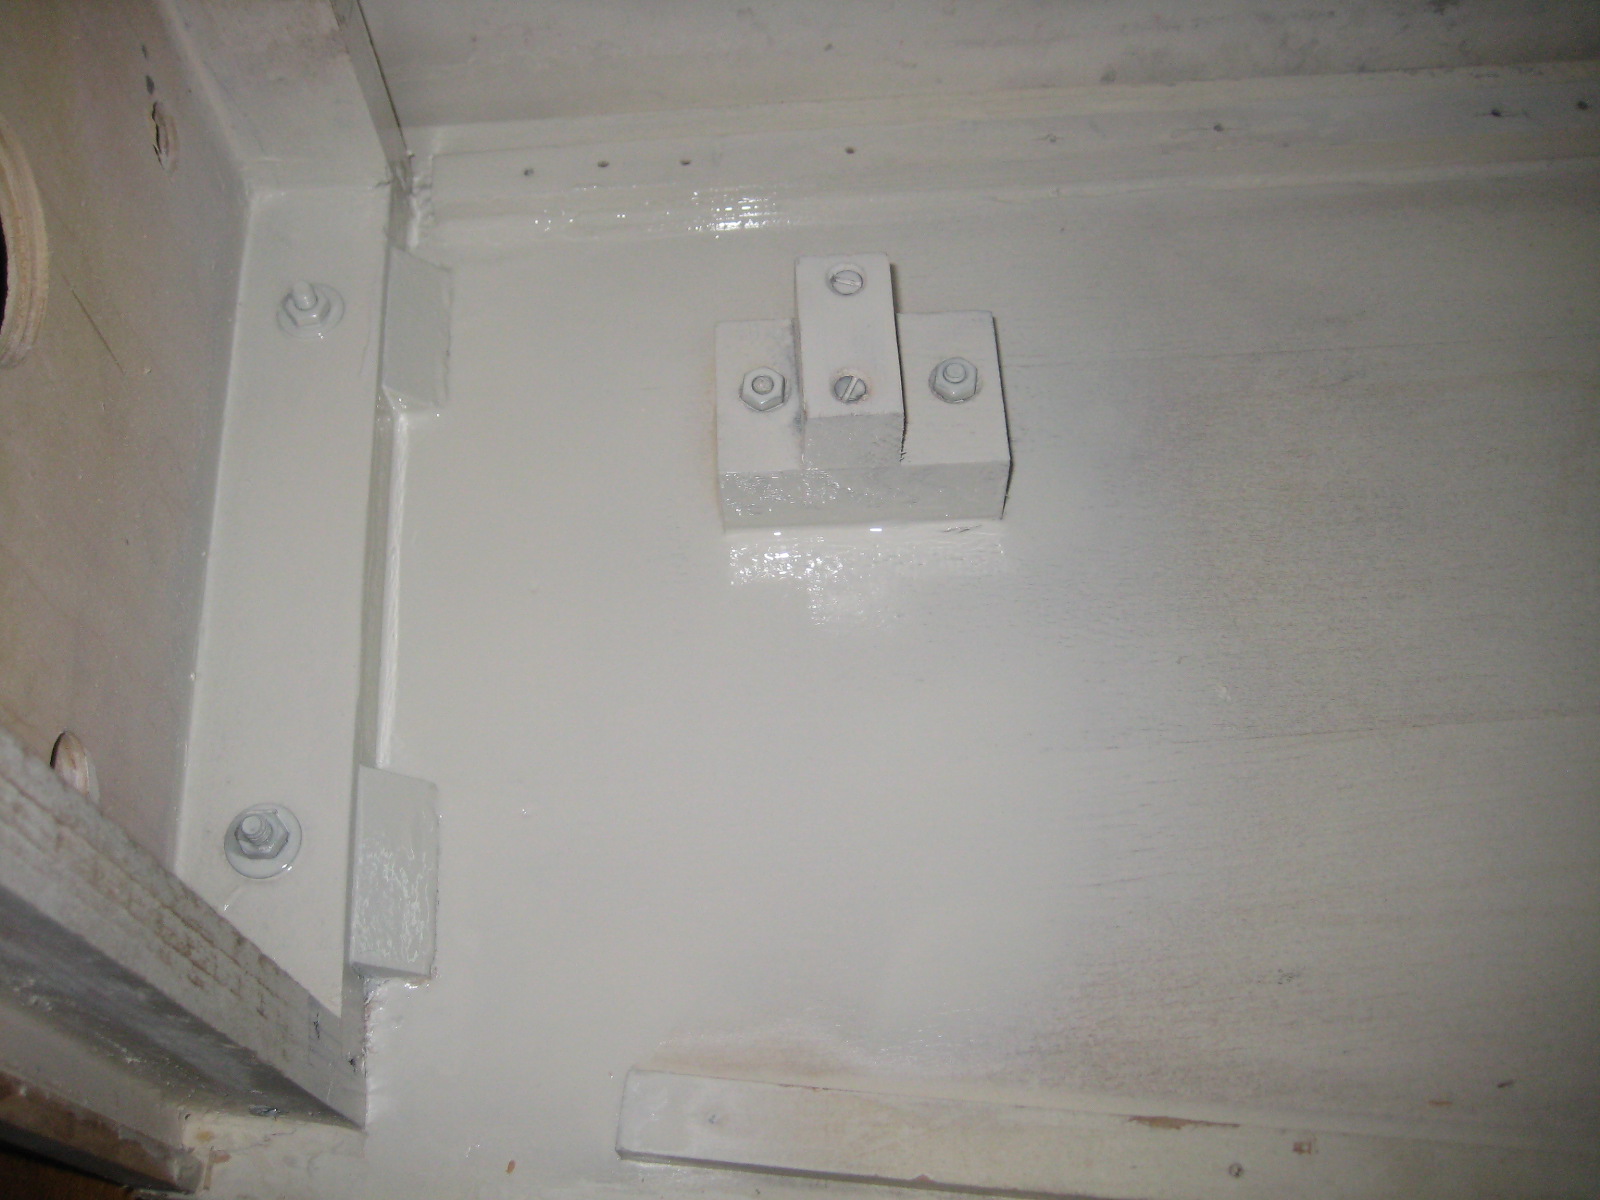 | |
| M400S # 885/674 | Screwing on the bottom | 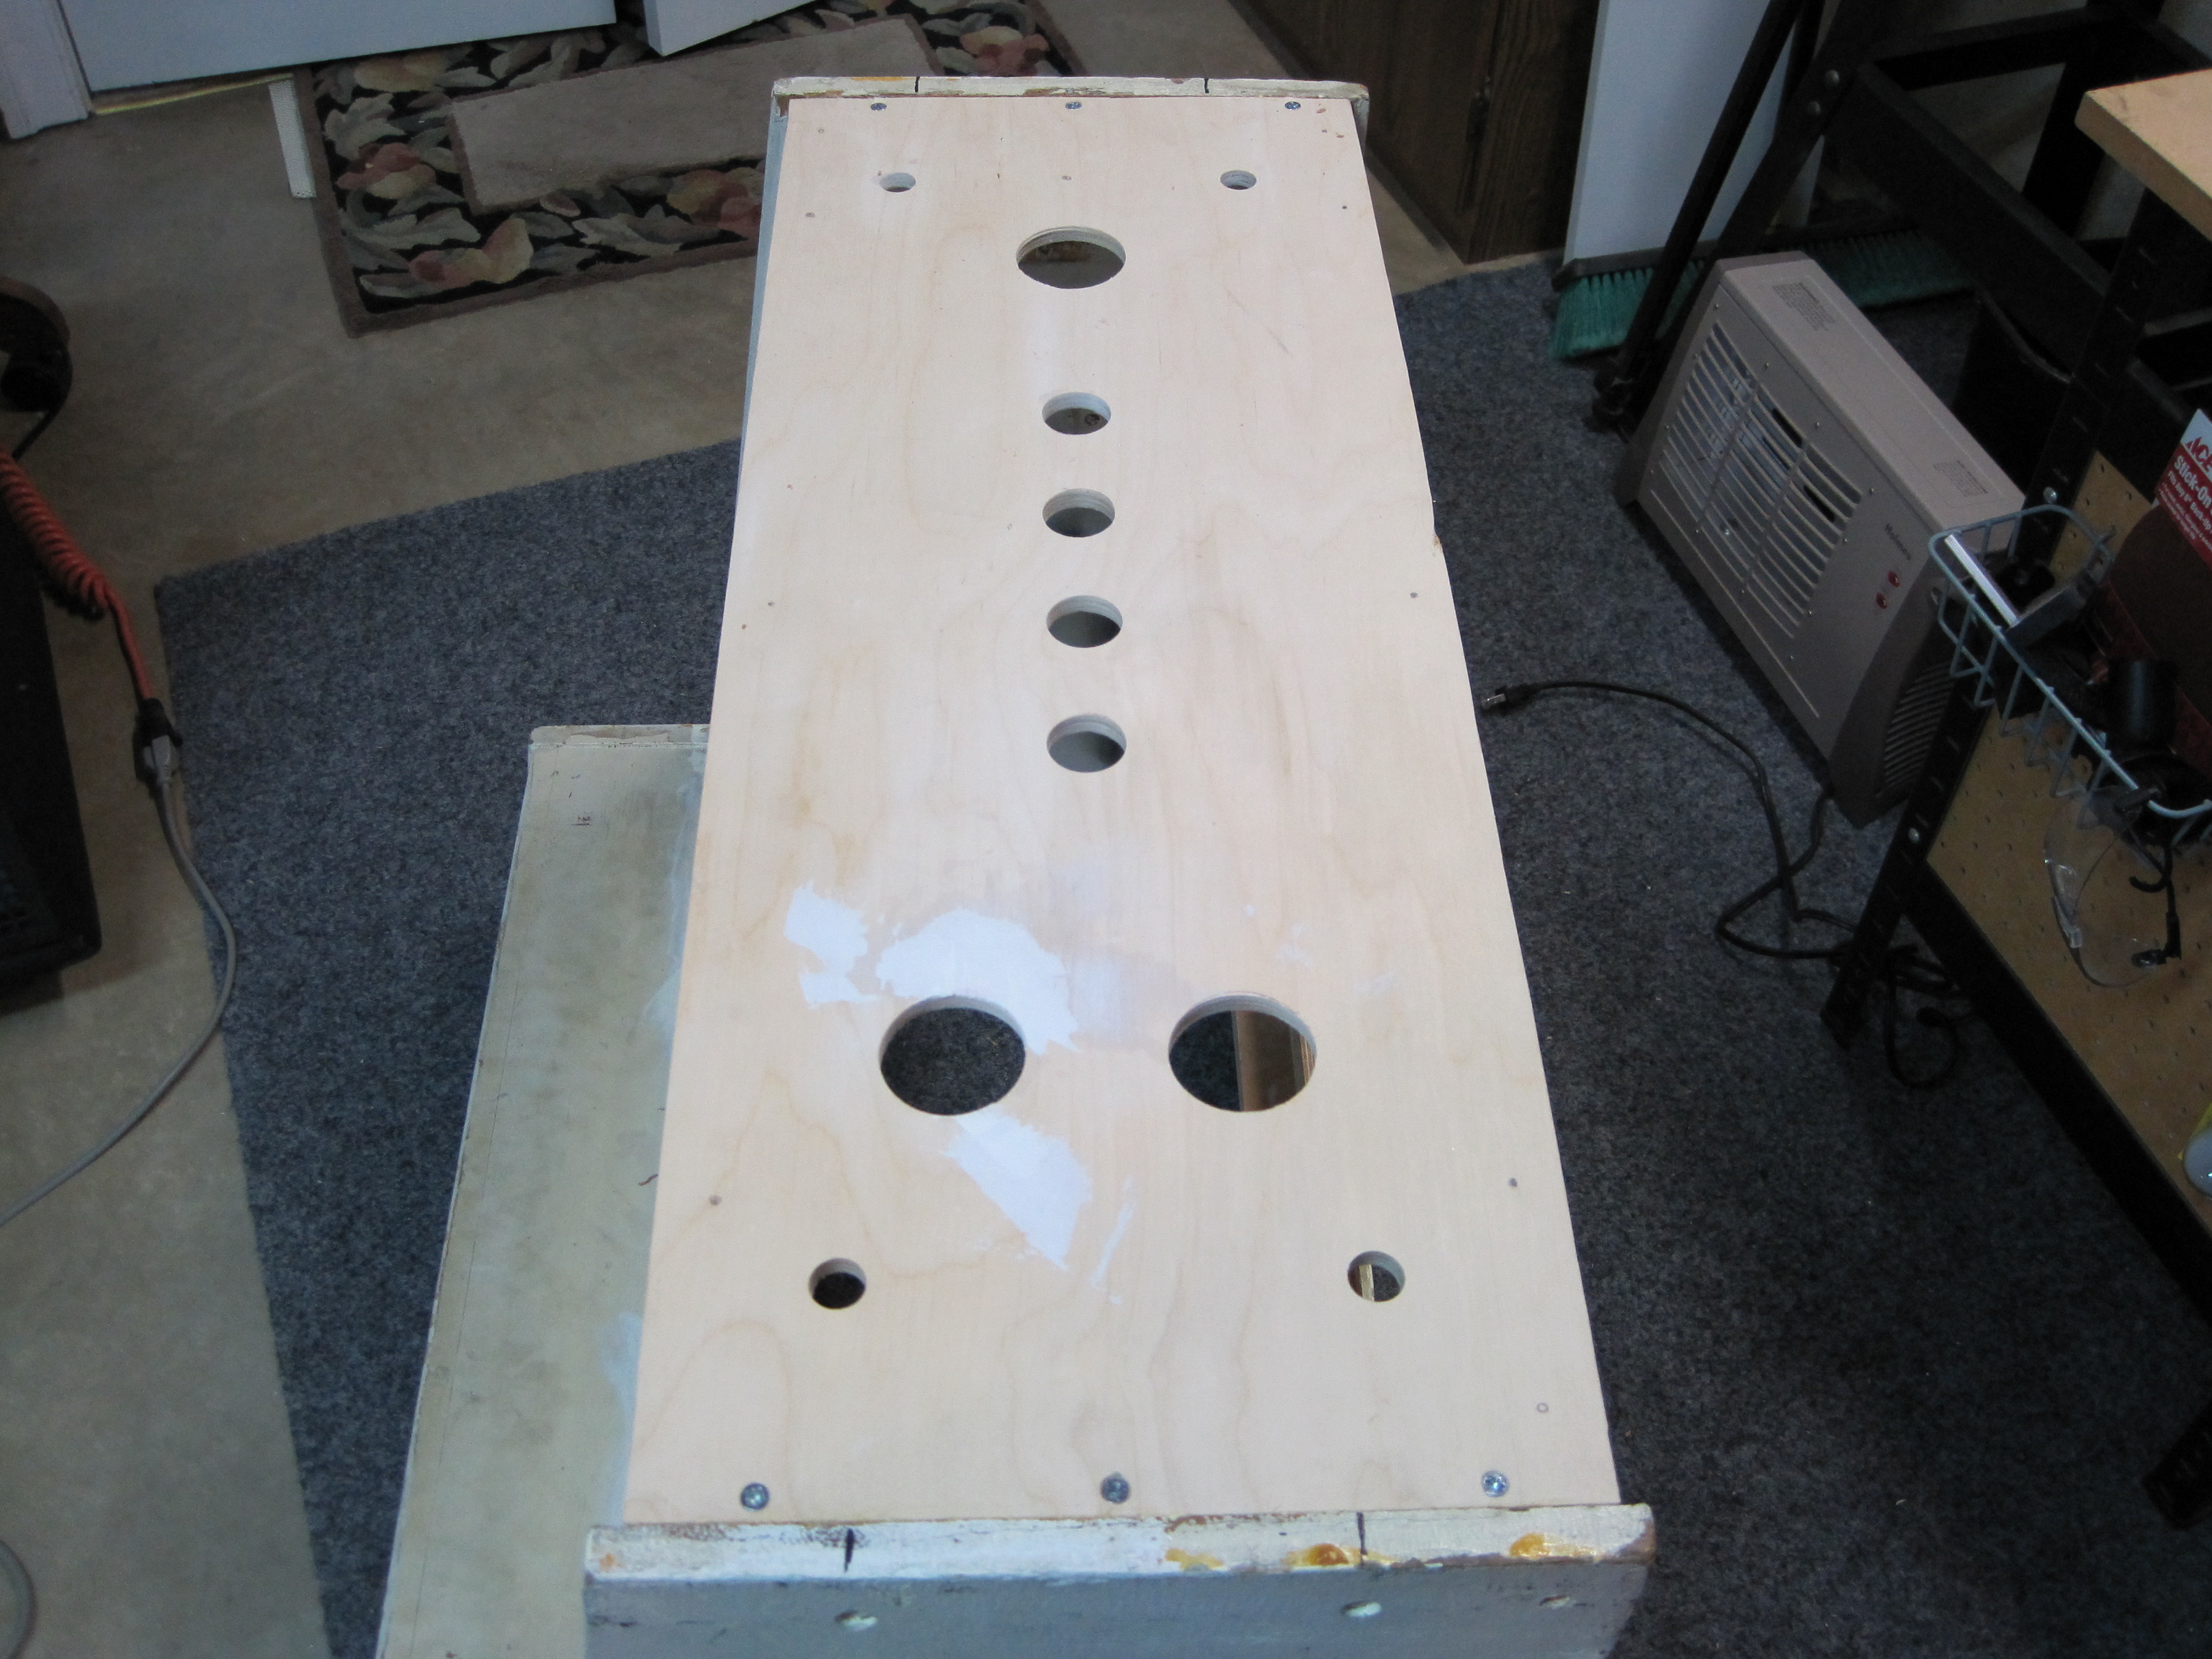 | |
| M400S # 885/674 | Tools of the trade | 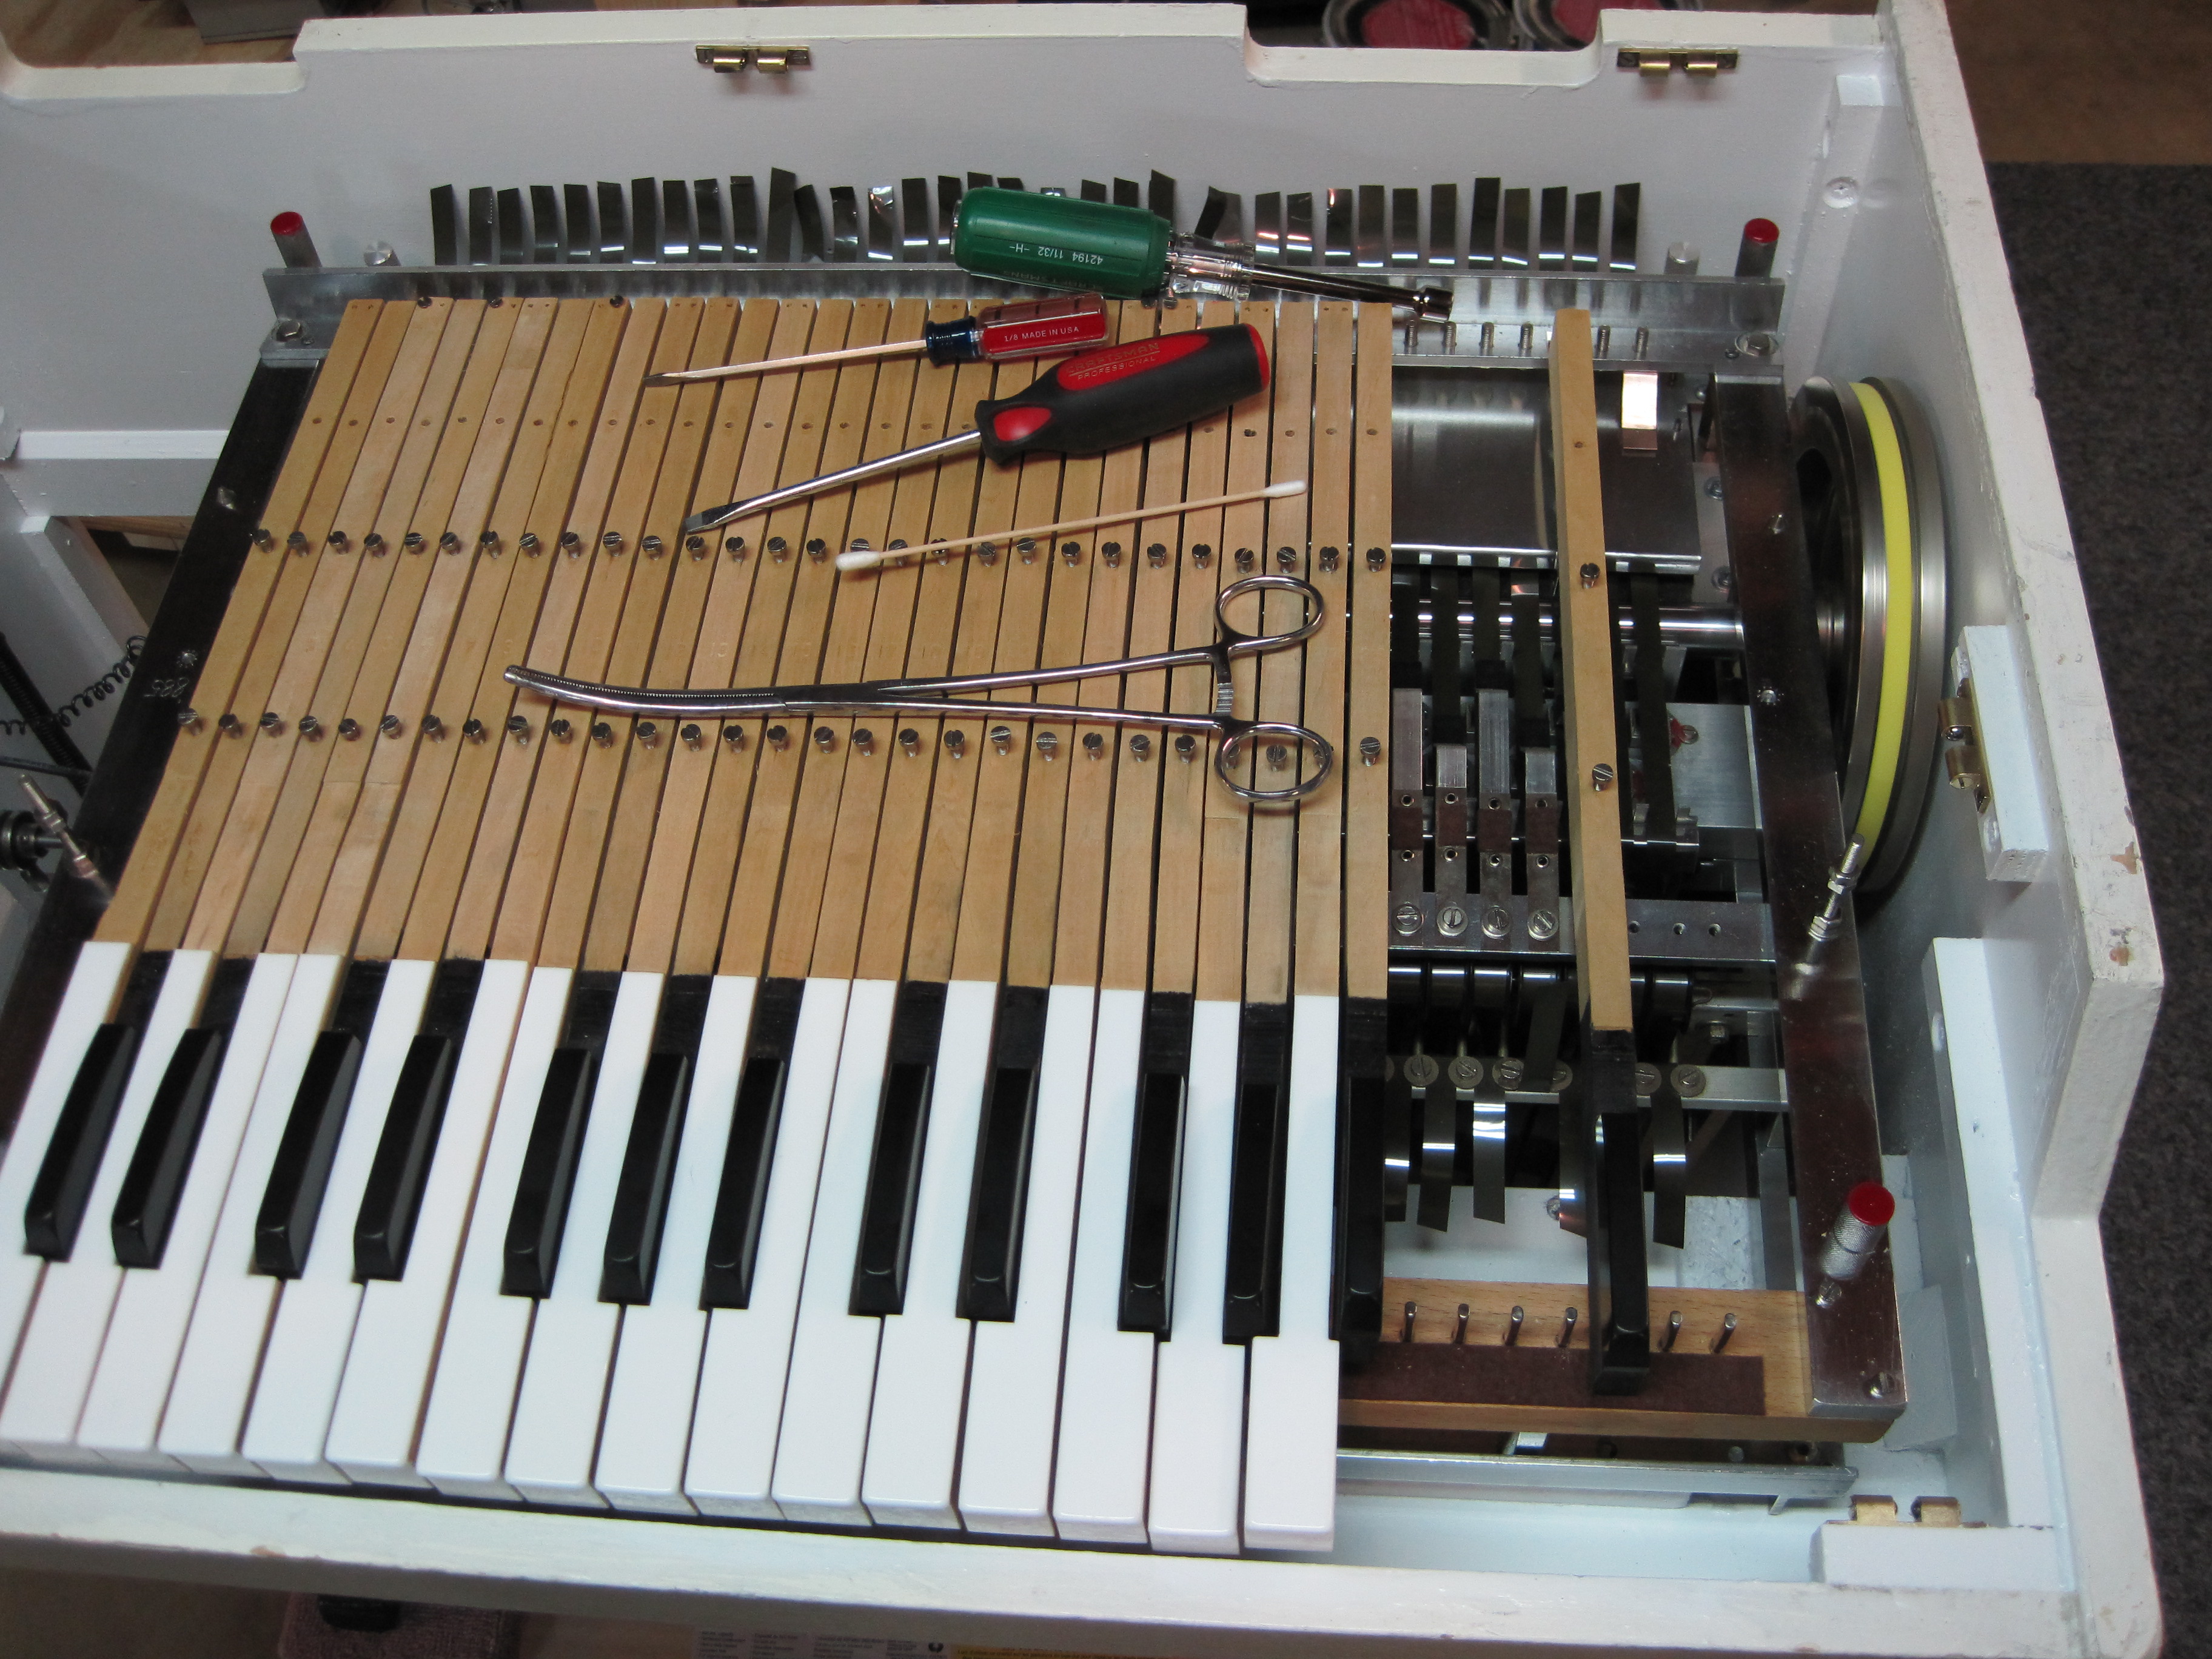 | |
| M400S # 885/674 | SMS-5, new bearings & capstan installed | 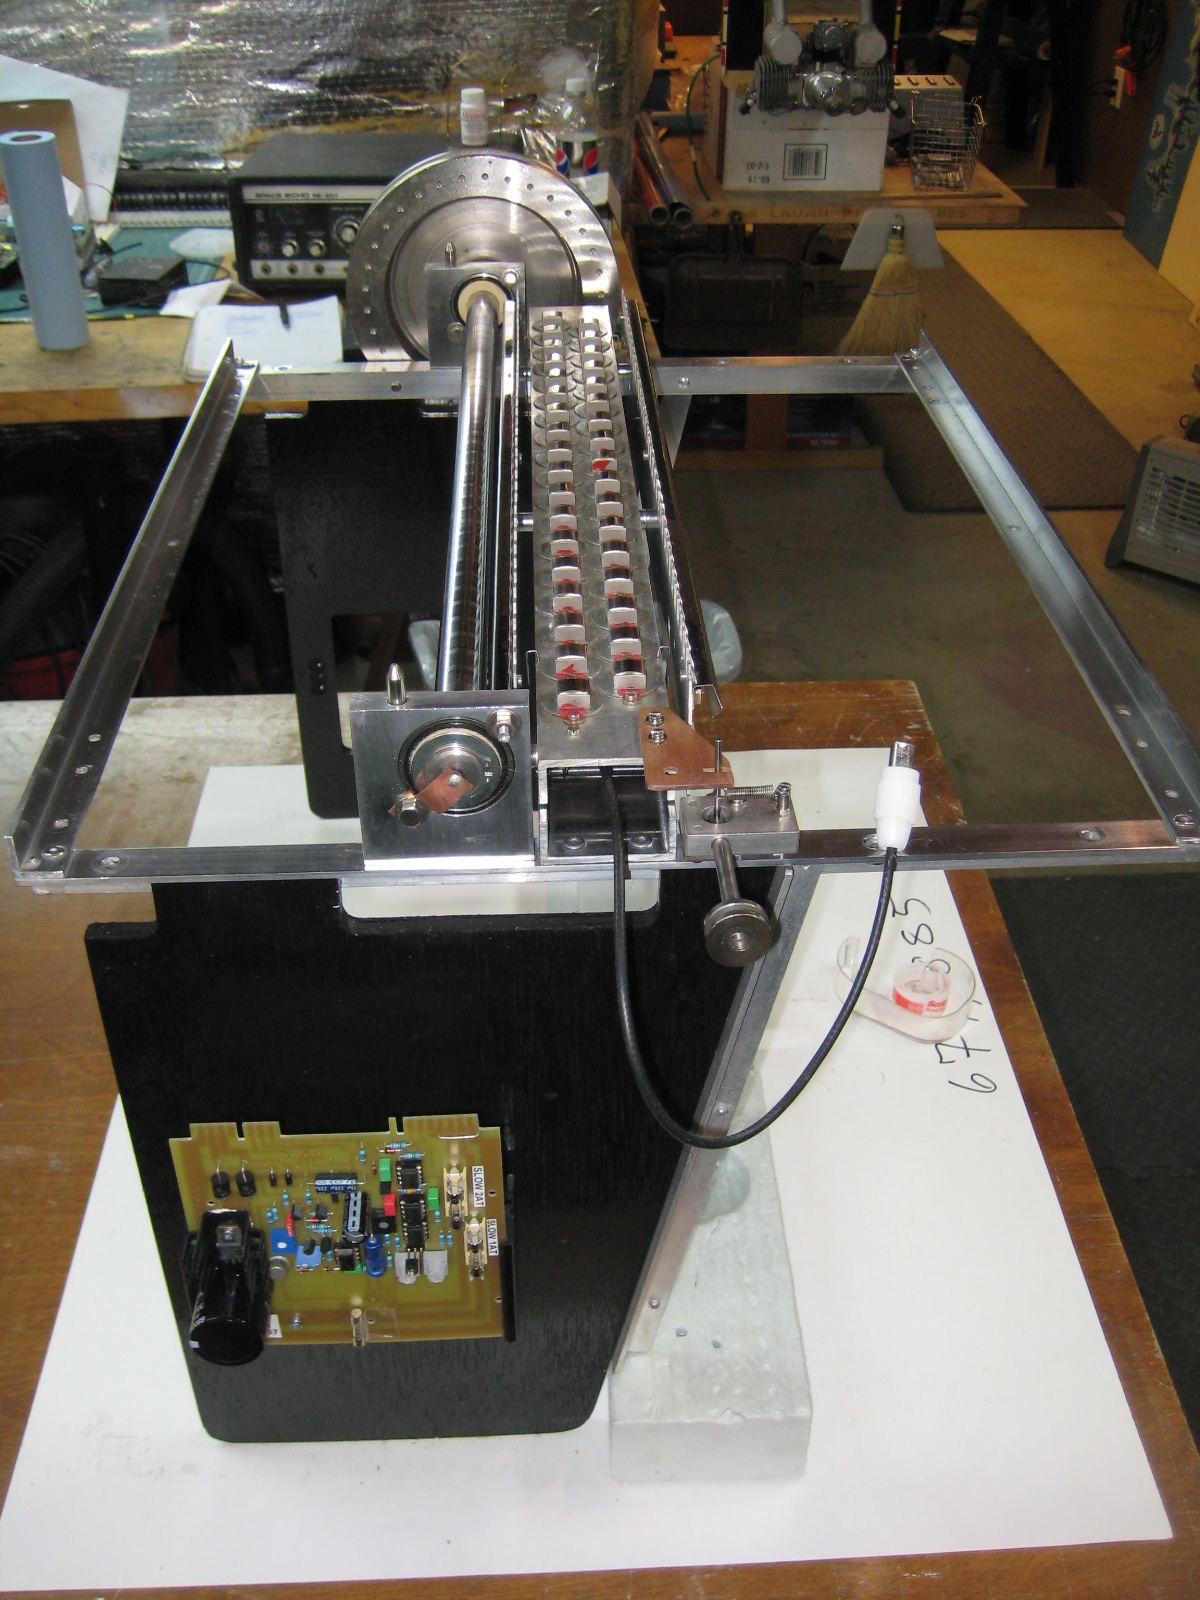 | |
| M400S # 885/674 | Cabinet interior | 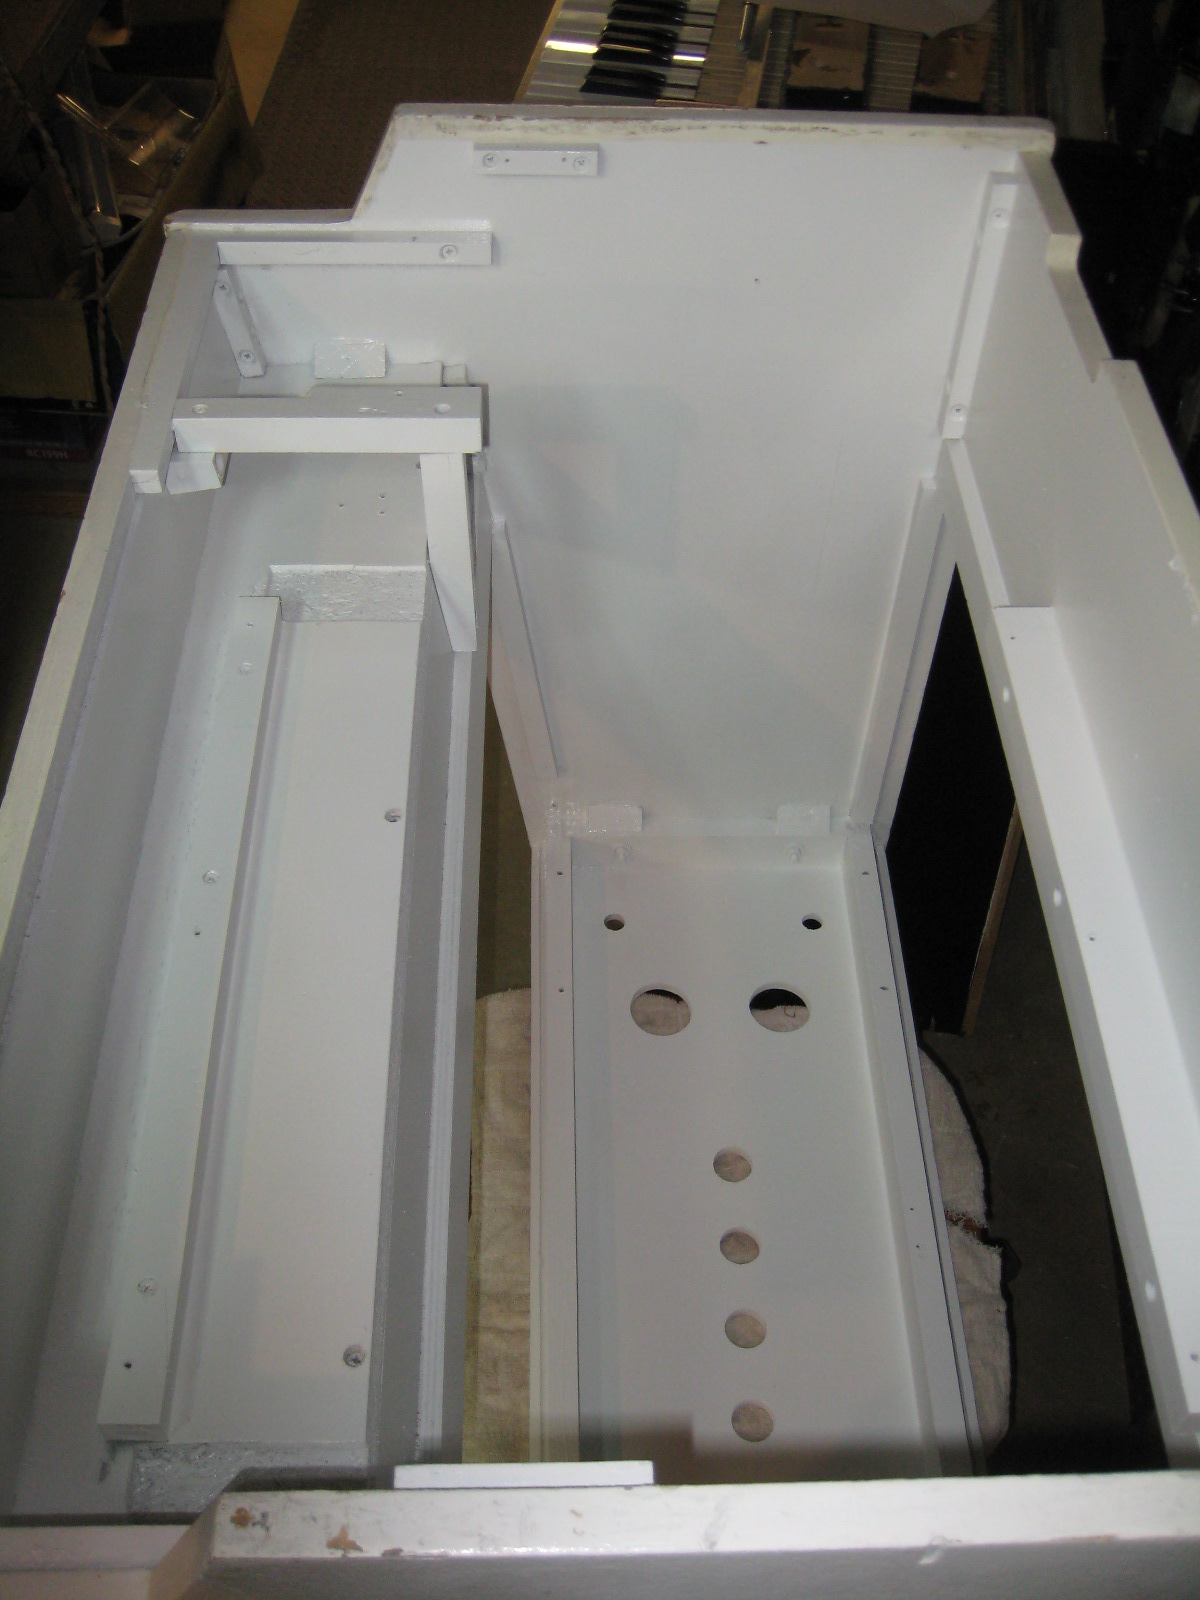 | |
| M400S # 885/674 | Installing controll panel | 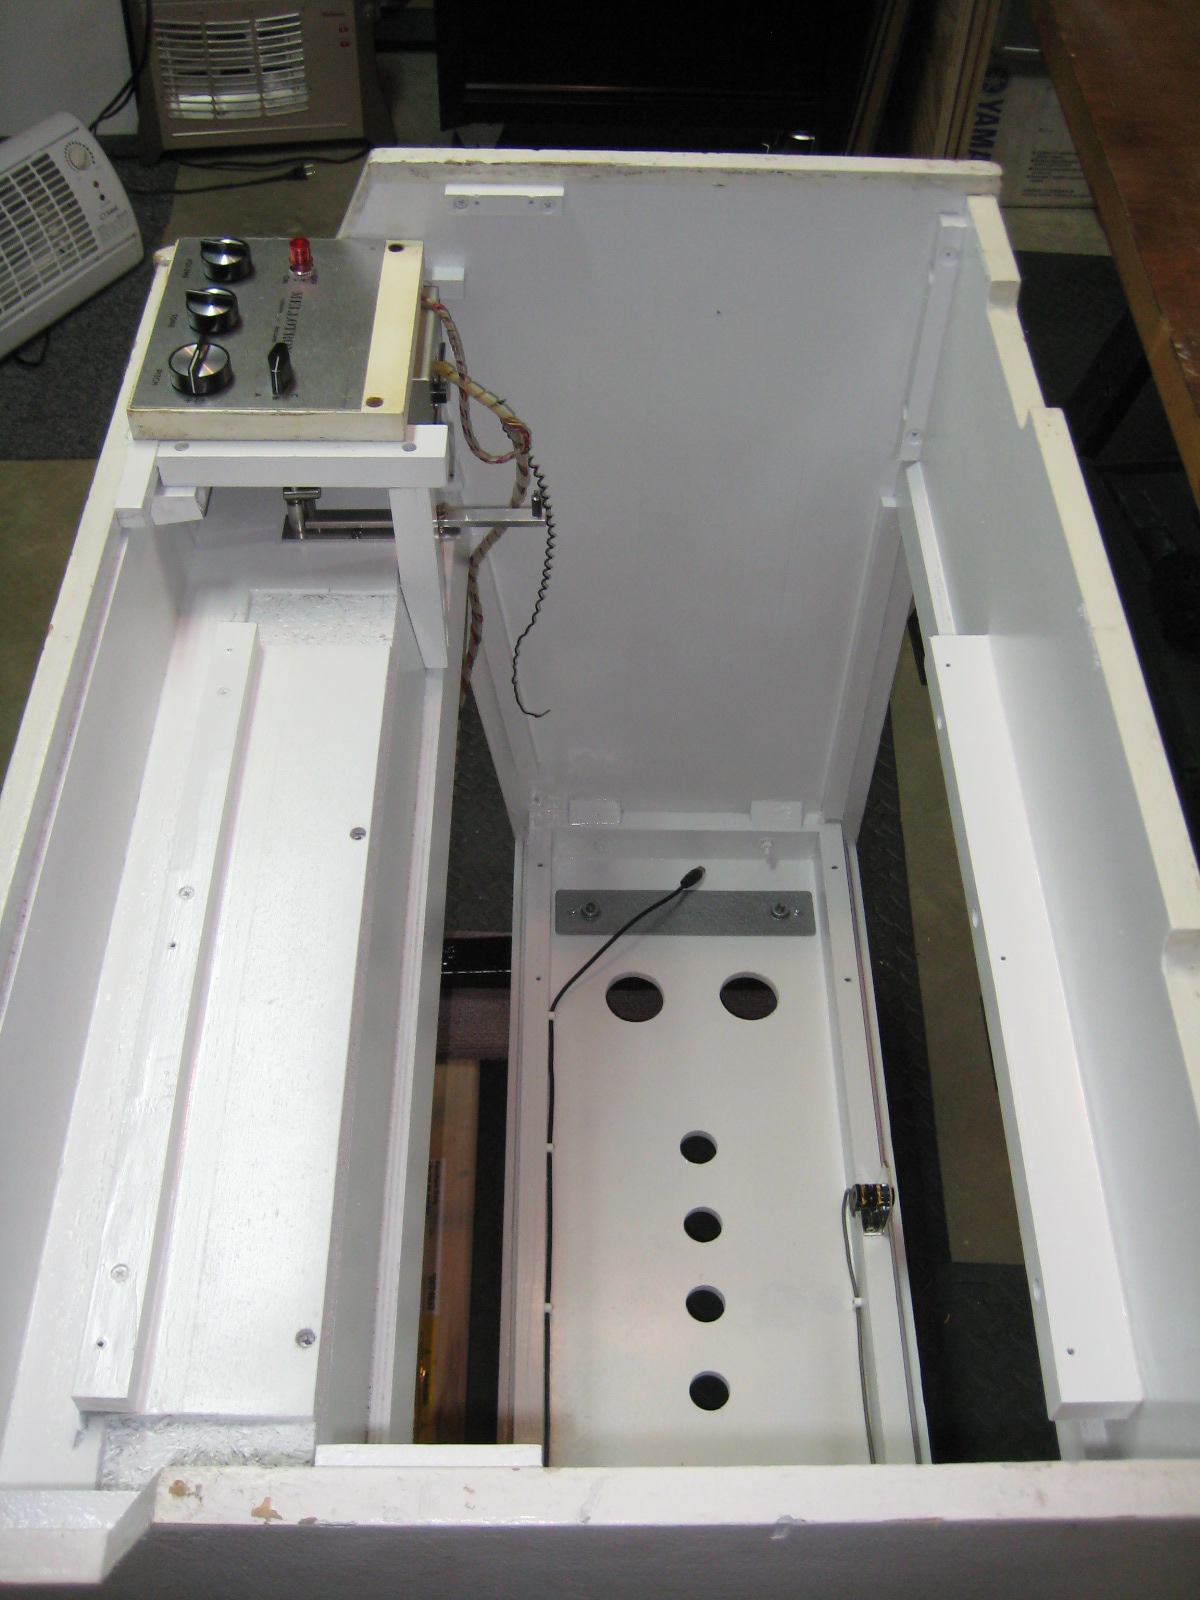 | |
| M400S # 885/674 | Beginning the cabinet repair | 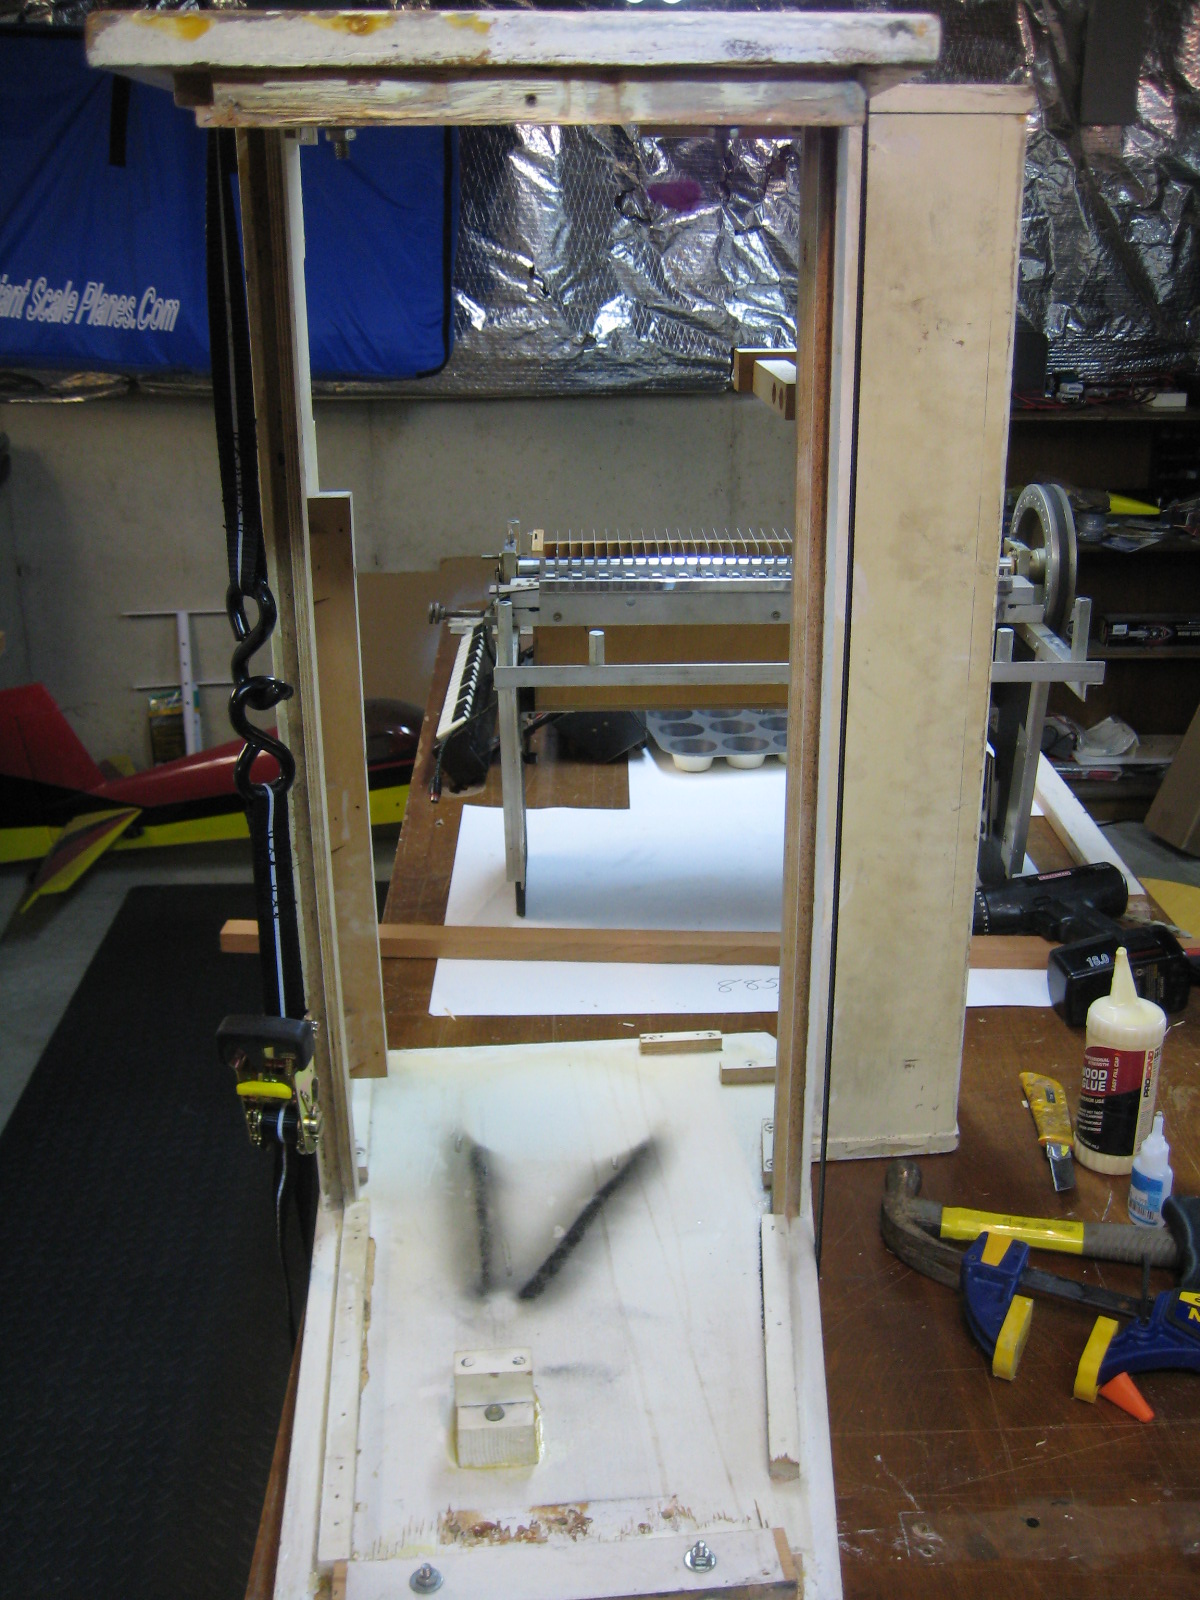 | |
| M400S # 885/674 | Keyboard nearly done | 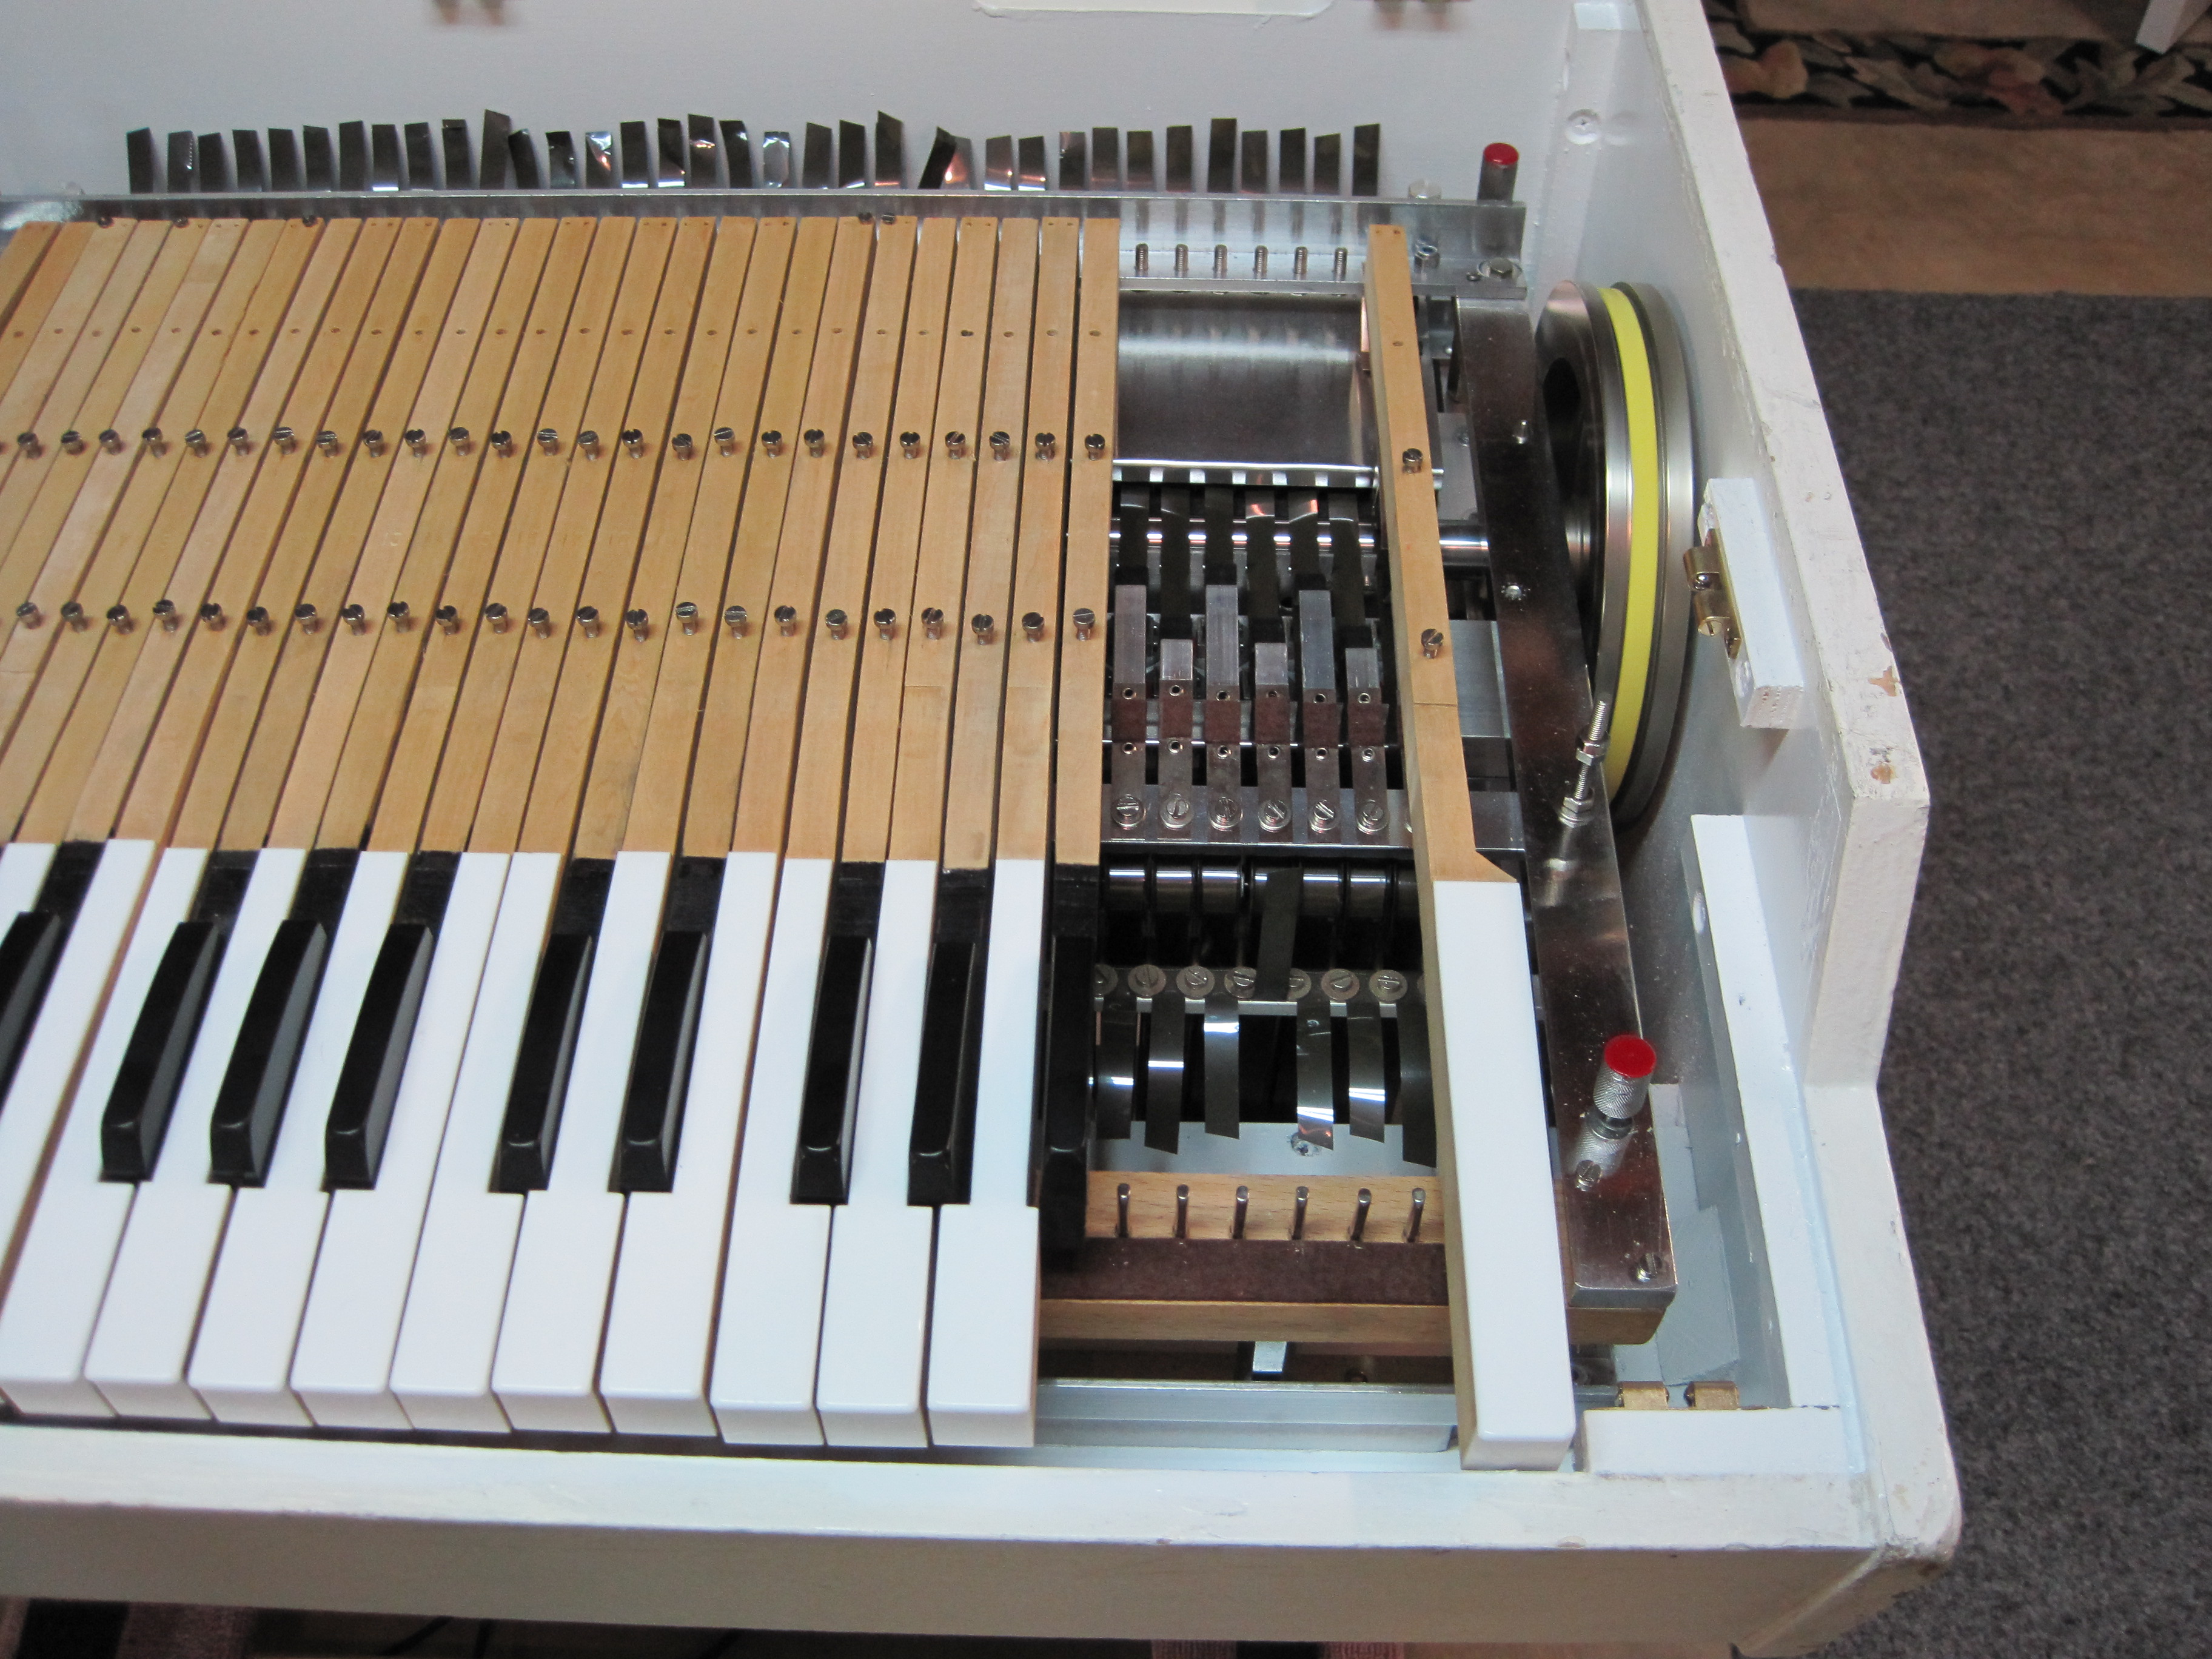 | |
| M400S # 885/674 | Frame rebuild - tape guides | 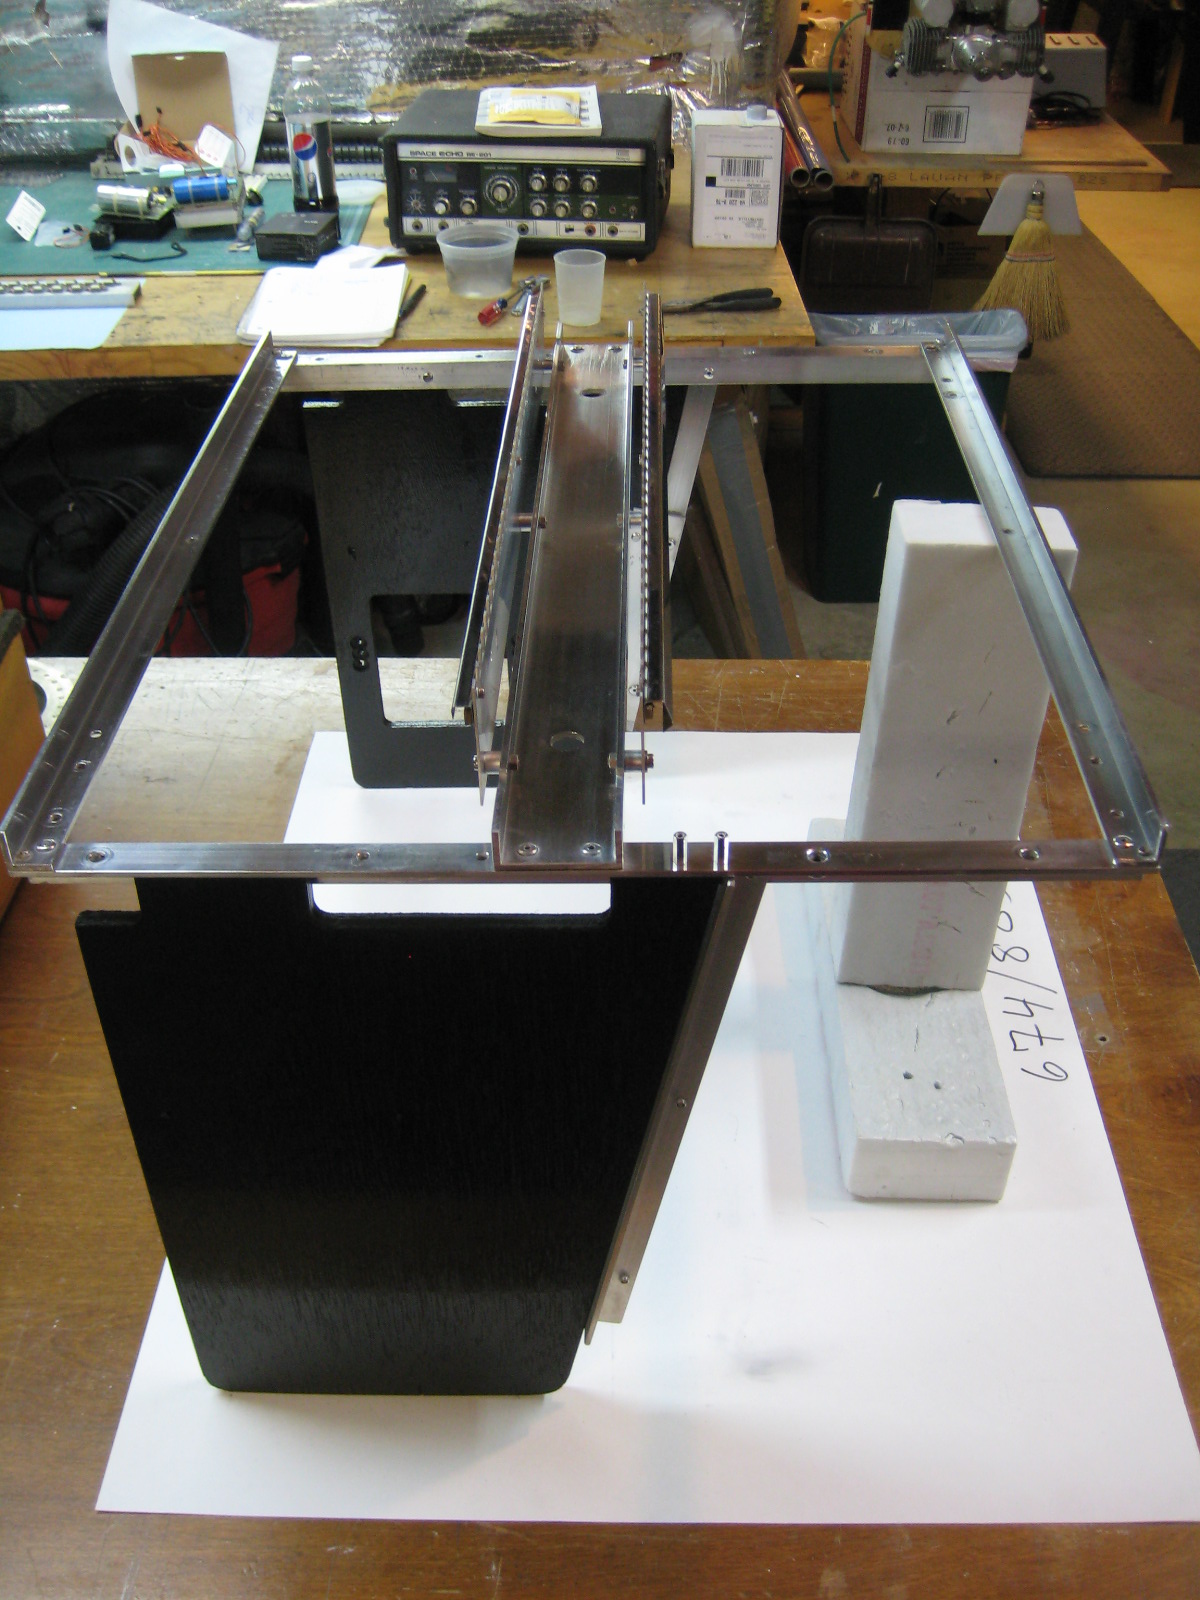 | |
| M400S # 885/674 | Testing the #885/674 with #386 keyboard | 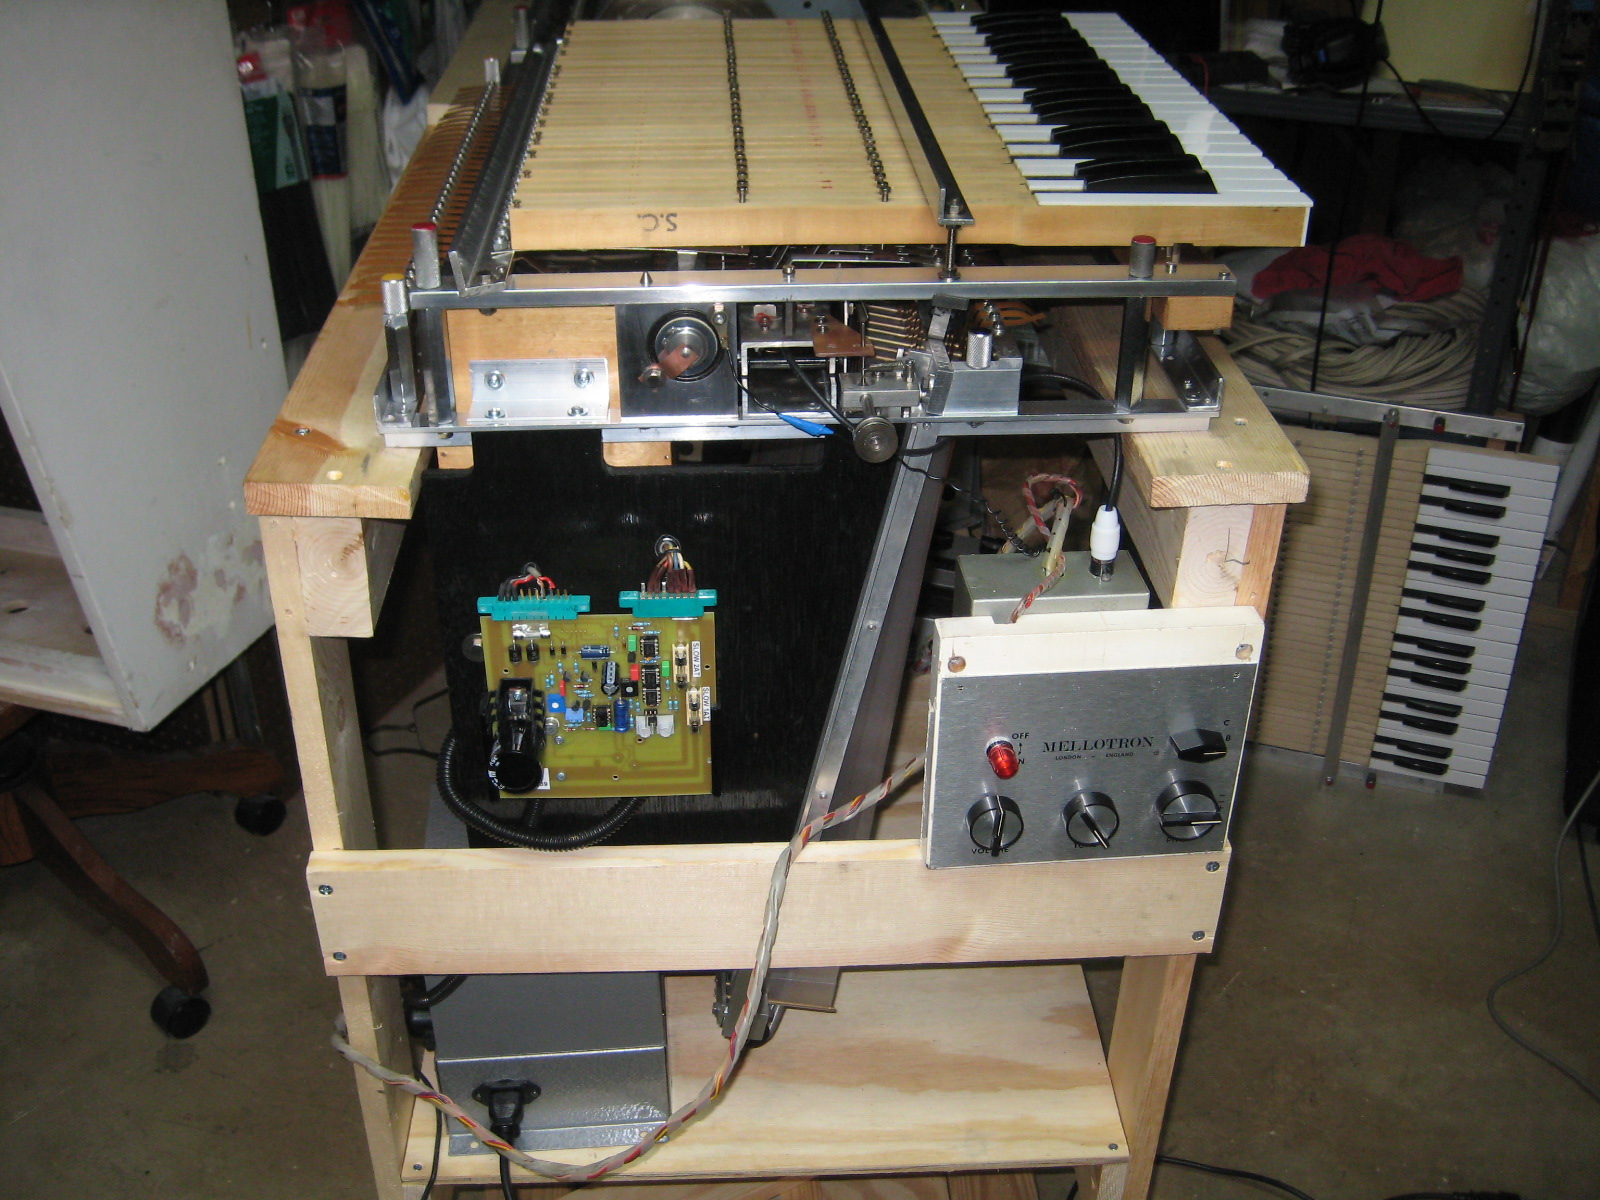 | |
| M400S # 885/674 | Control panel close-up | 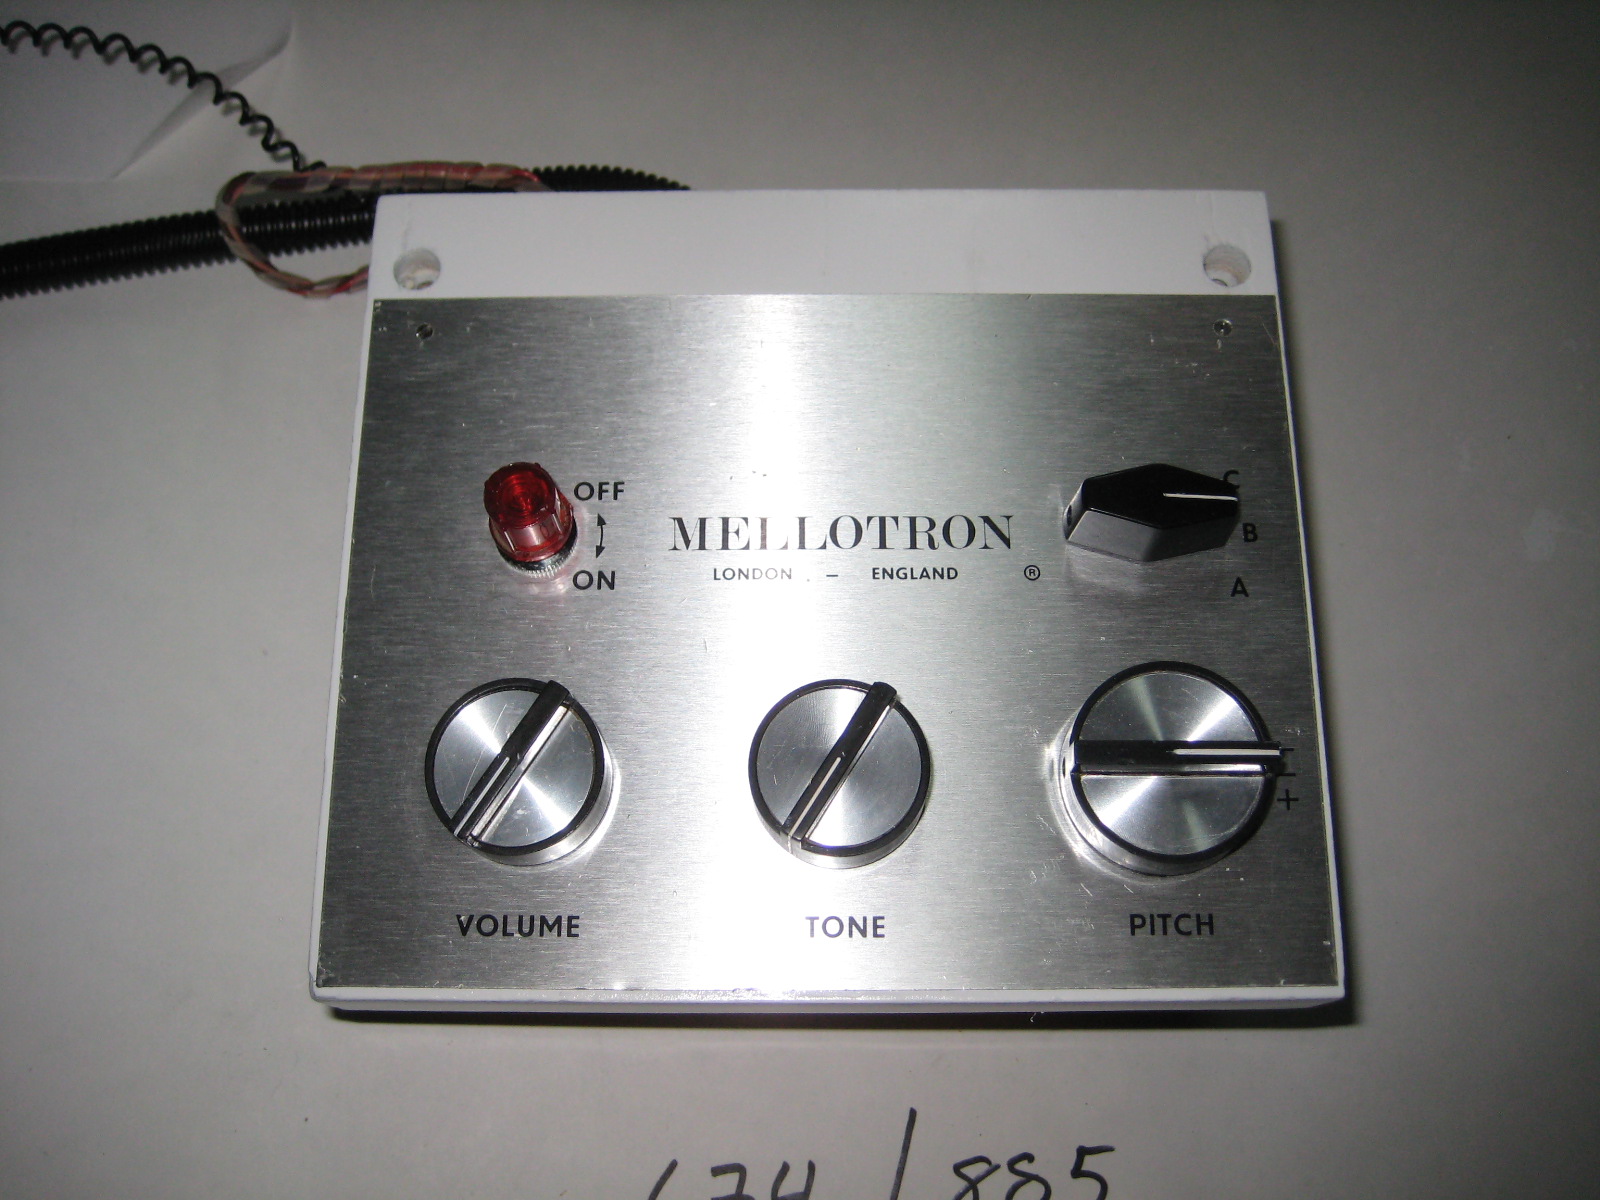 | |
| M400S # 885/674 | Motor installed to main frame | 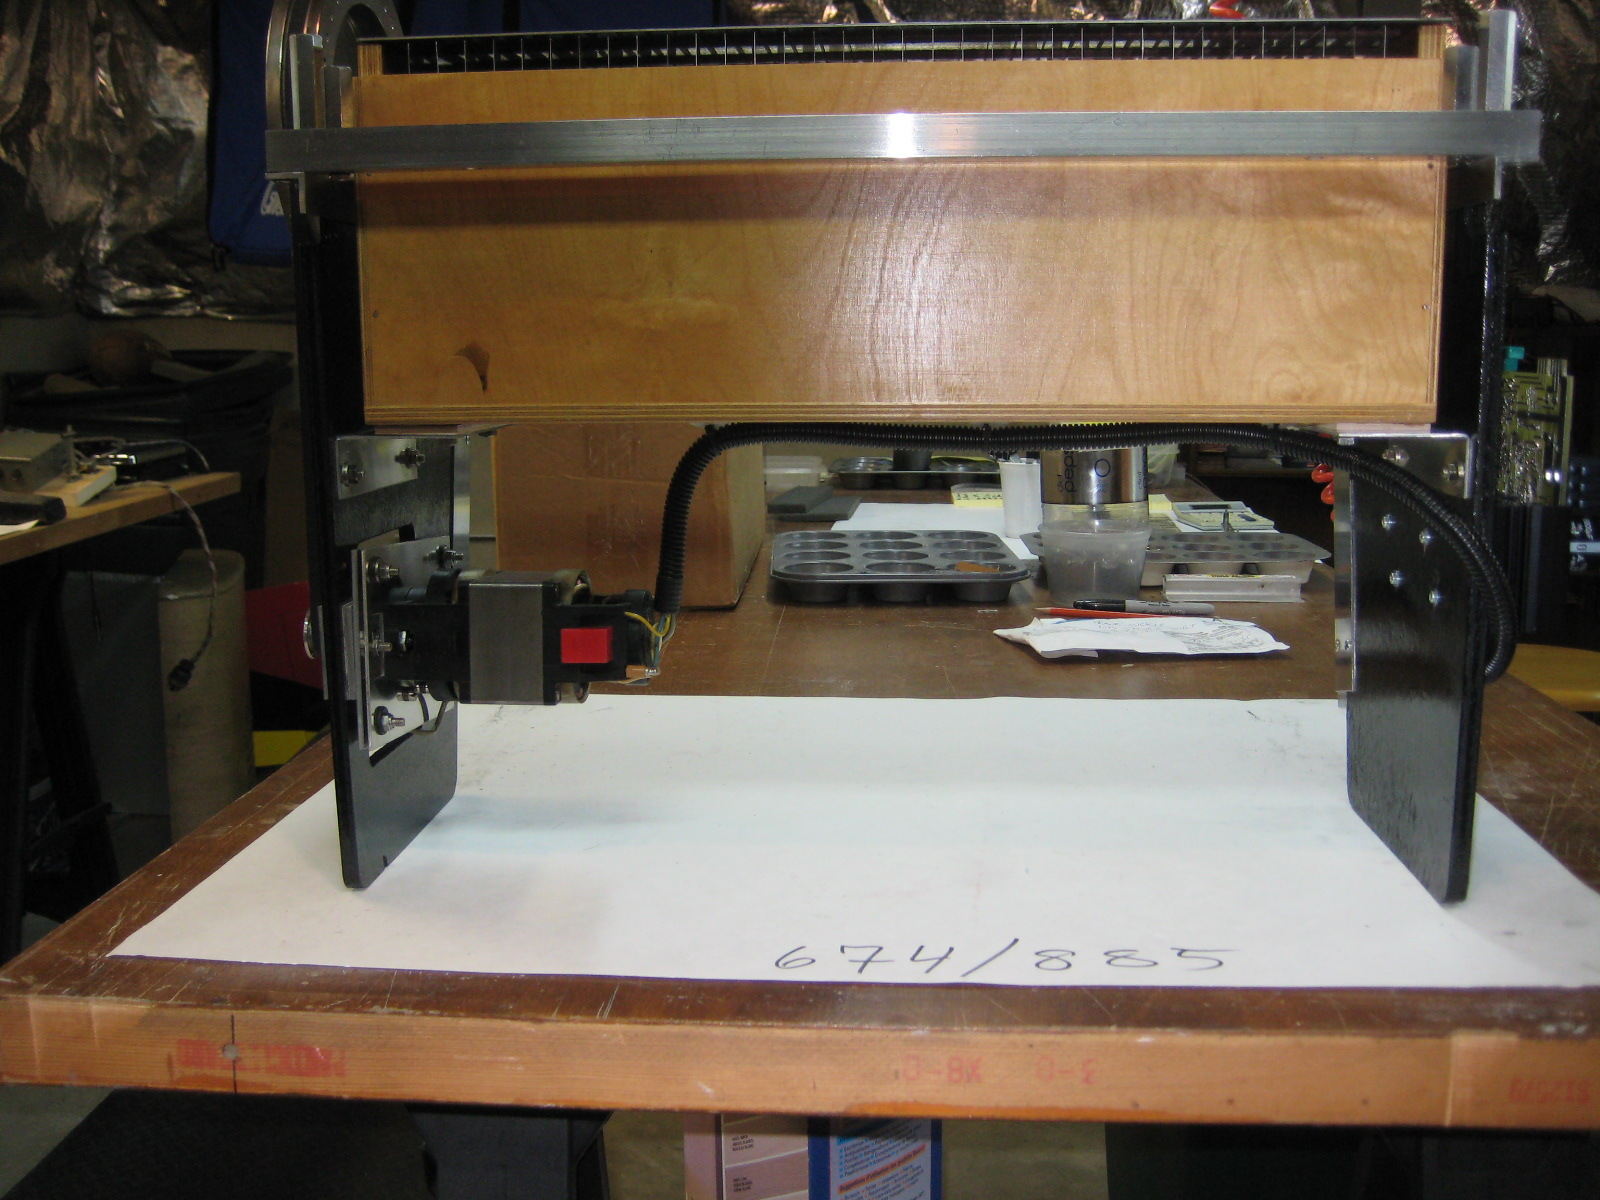 | |
| M400S # 885/674 | Mellotron ready for testing | 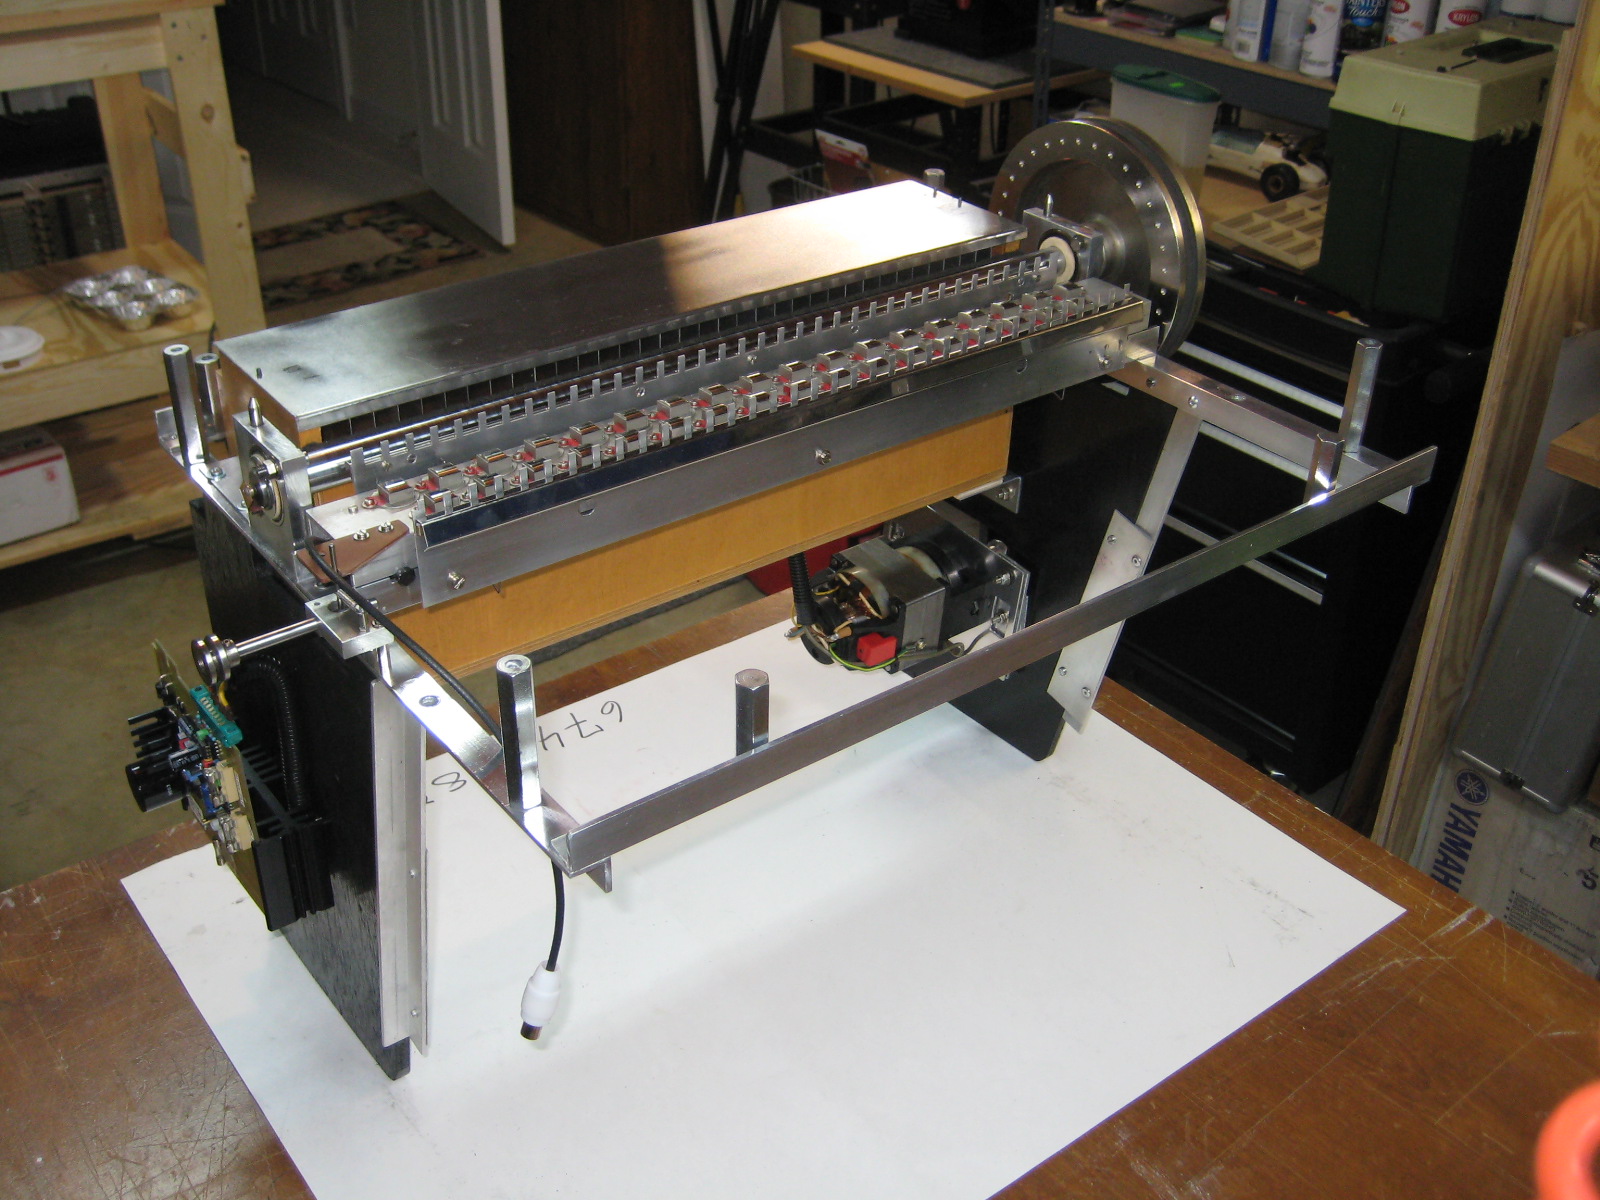 | |
| M400S # 885/674 | Power supply & wiring loom installed | 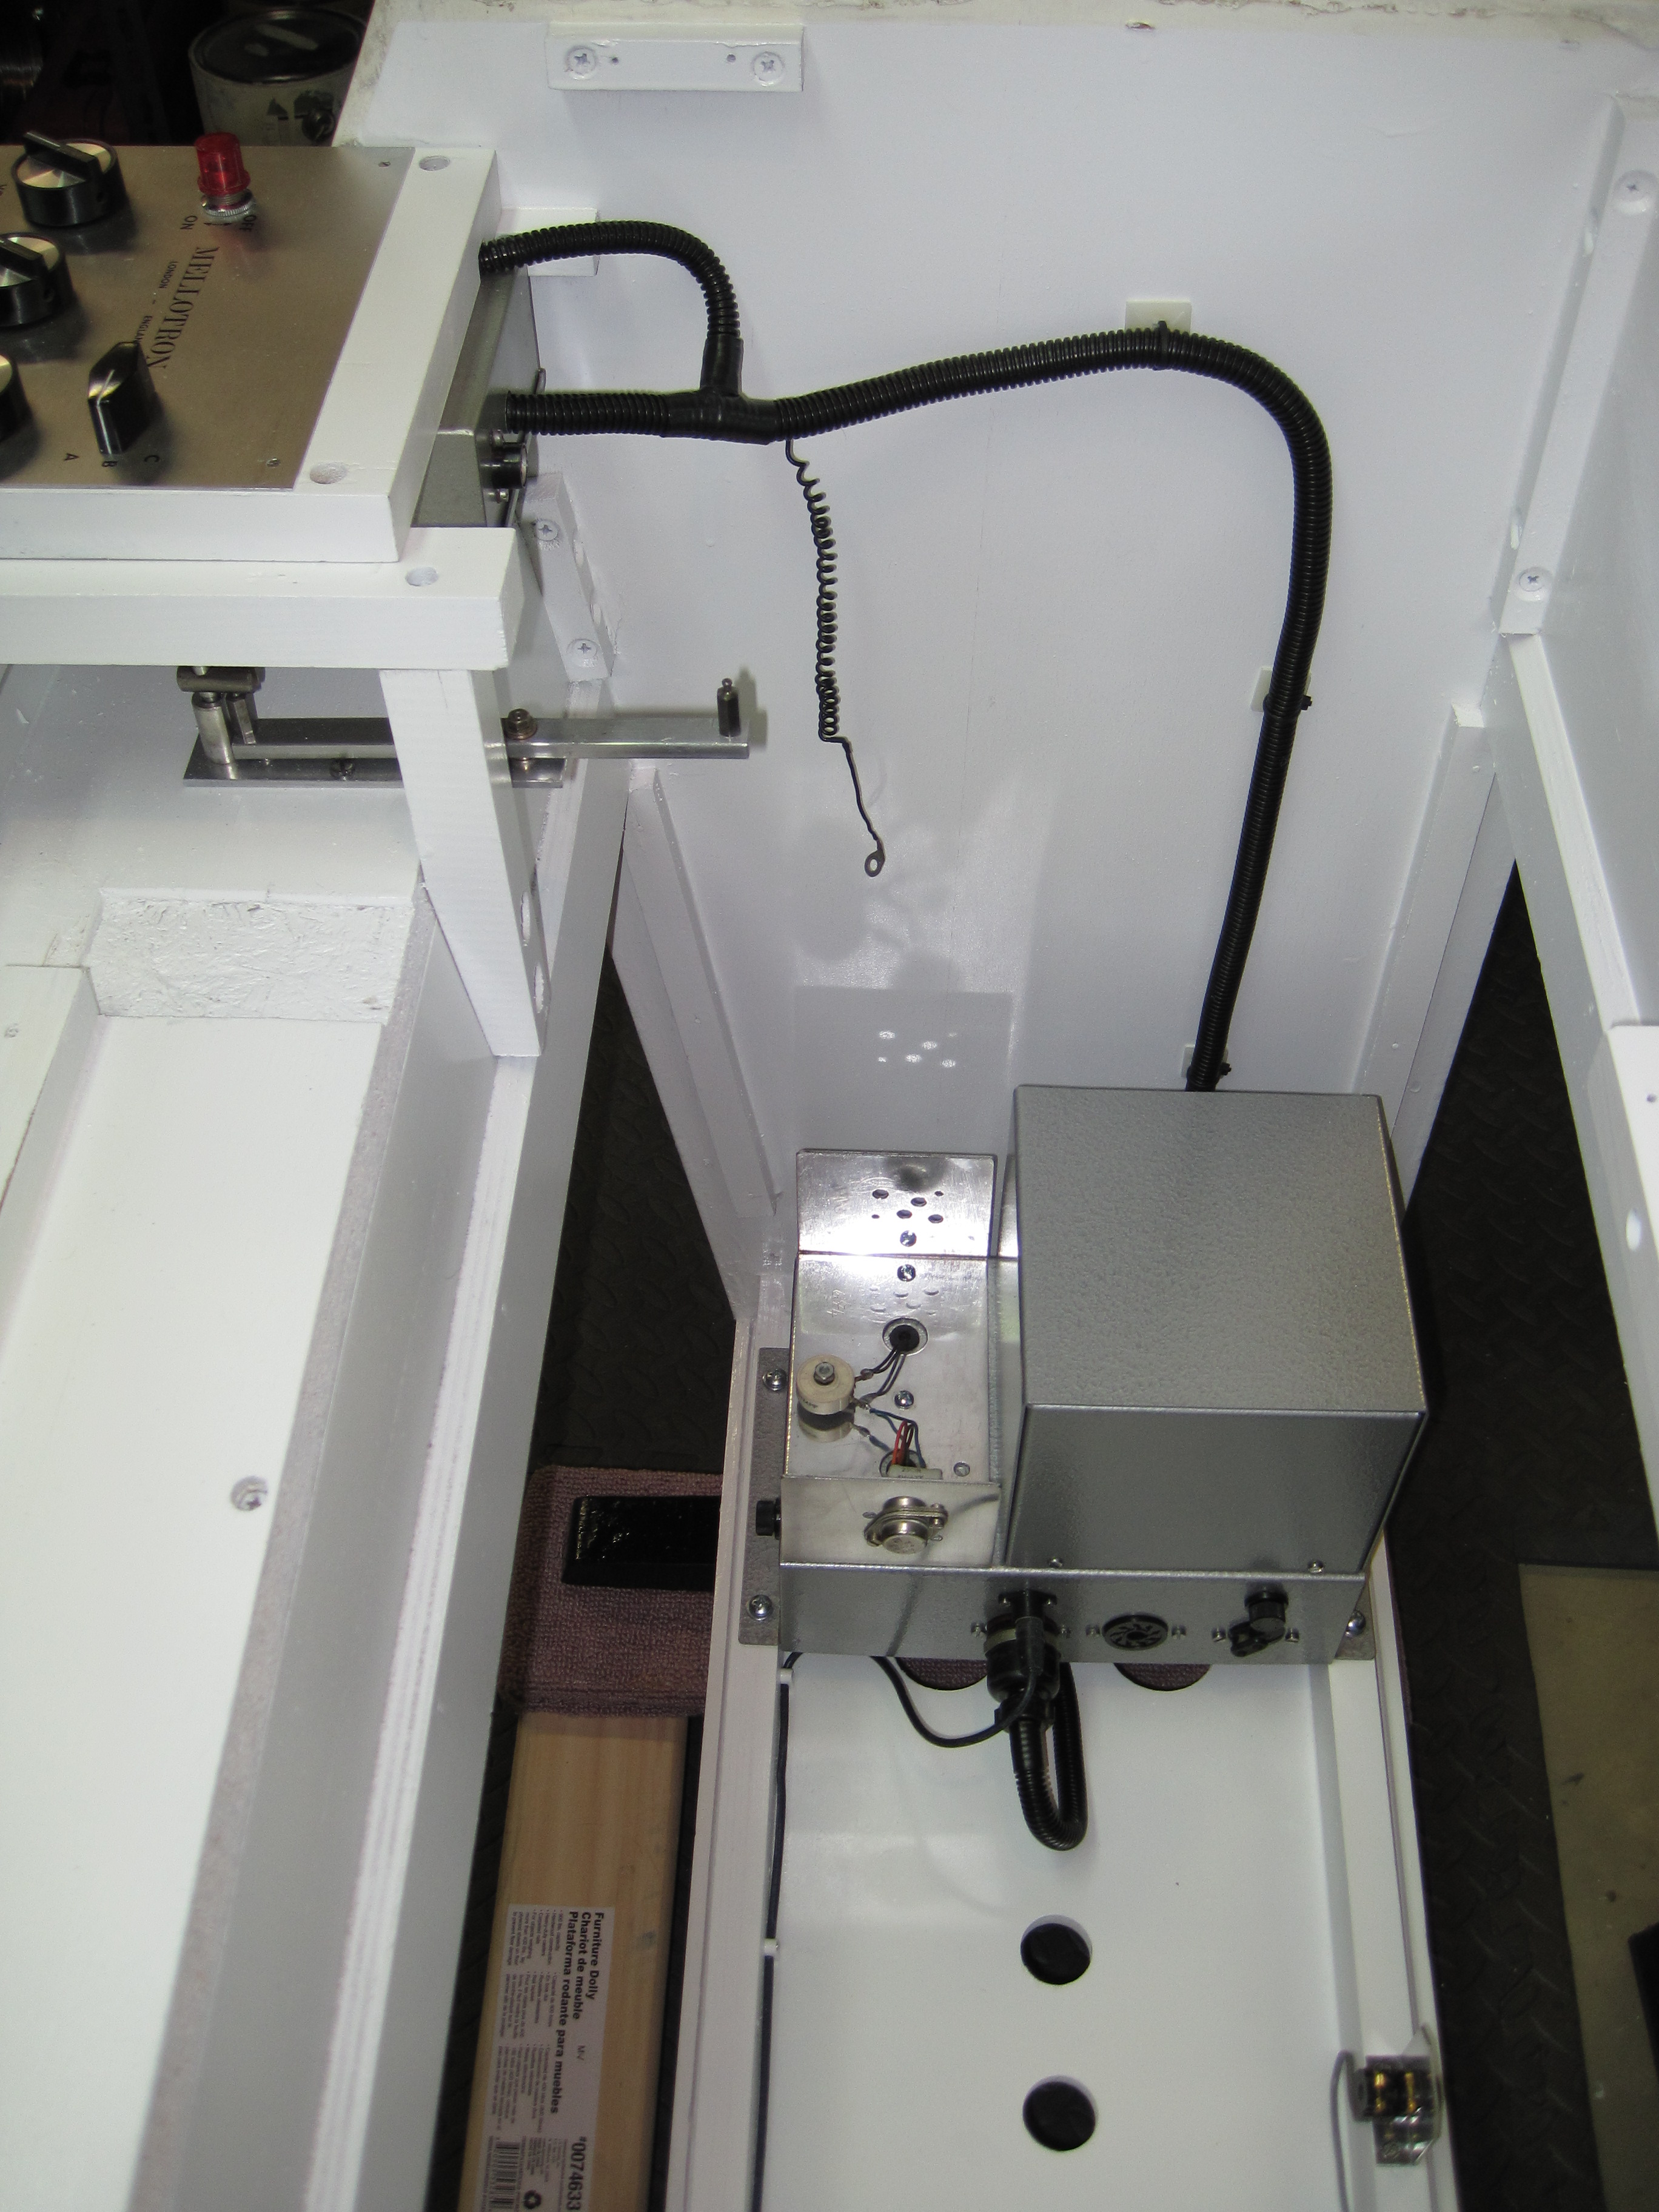 | |
| M400S # 885/674 | These 4 keys nearly made me crazy | 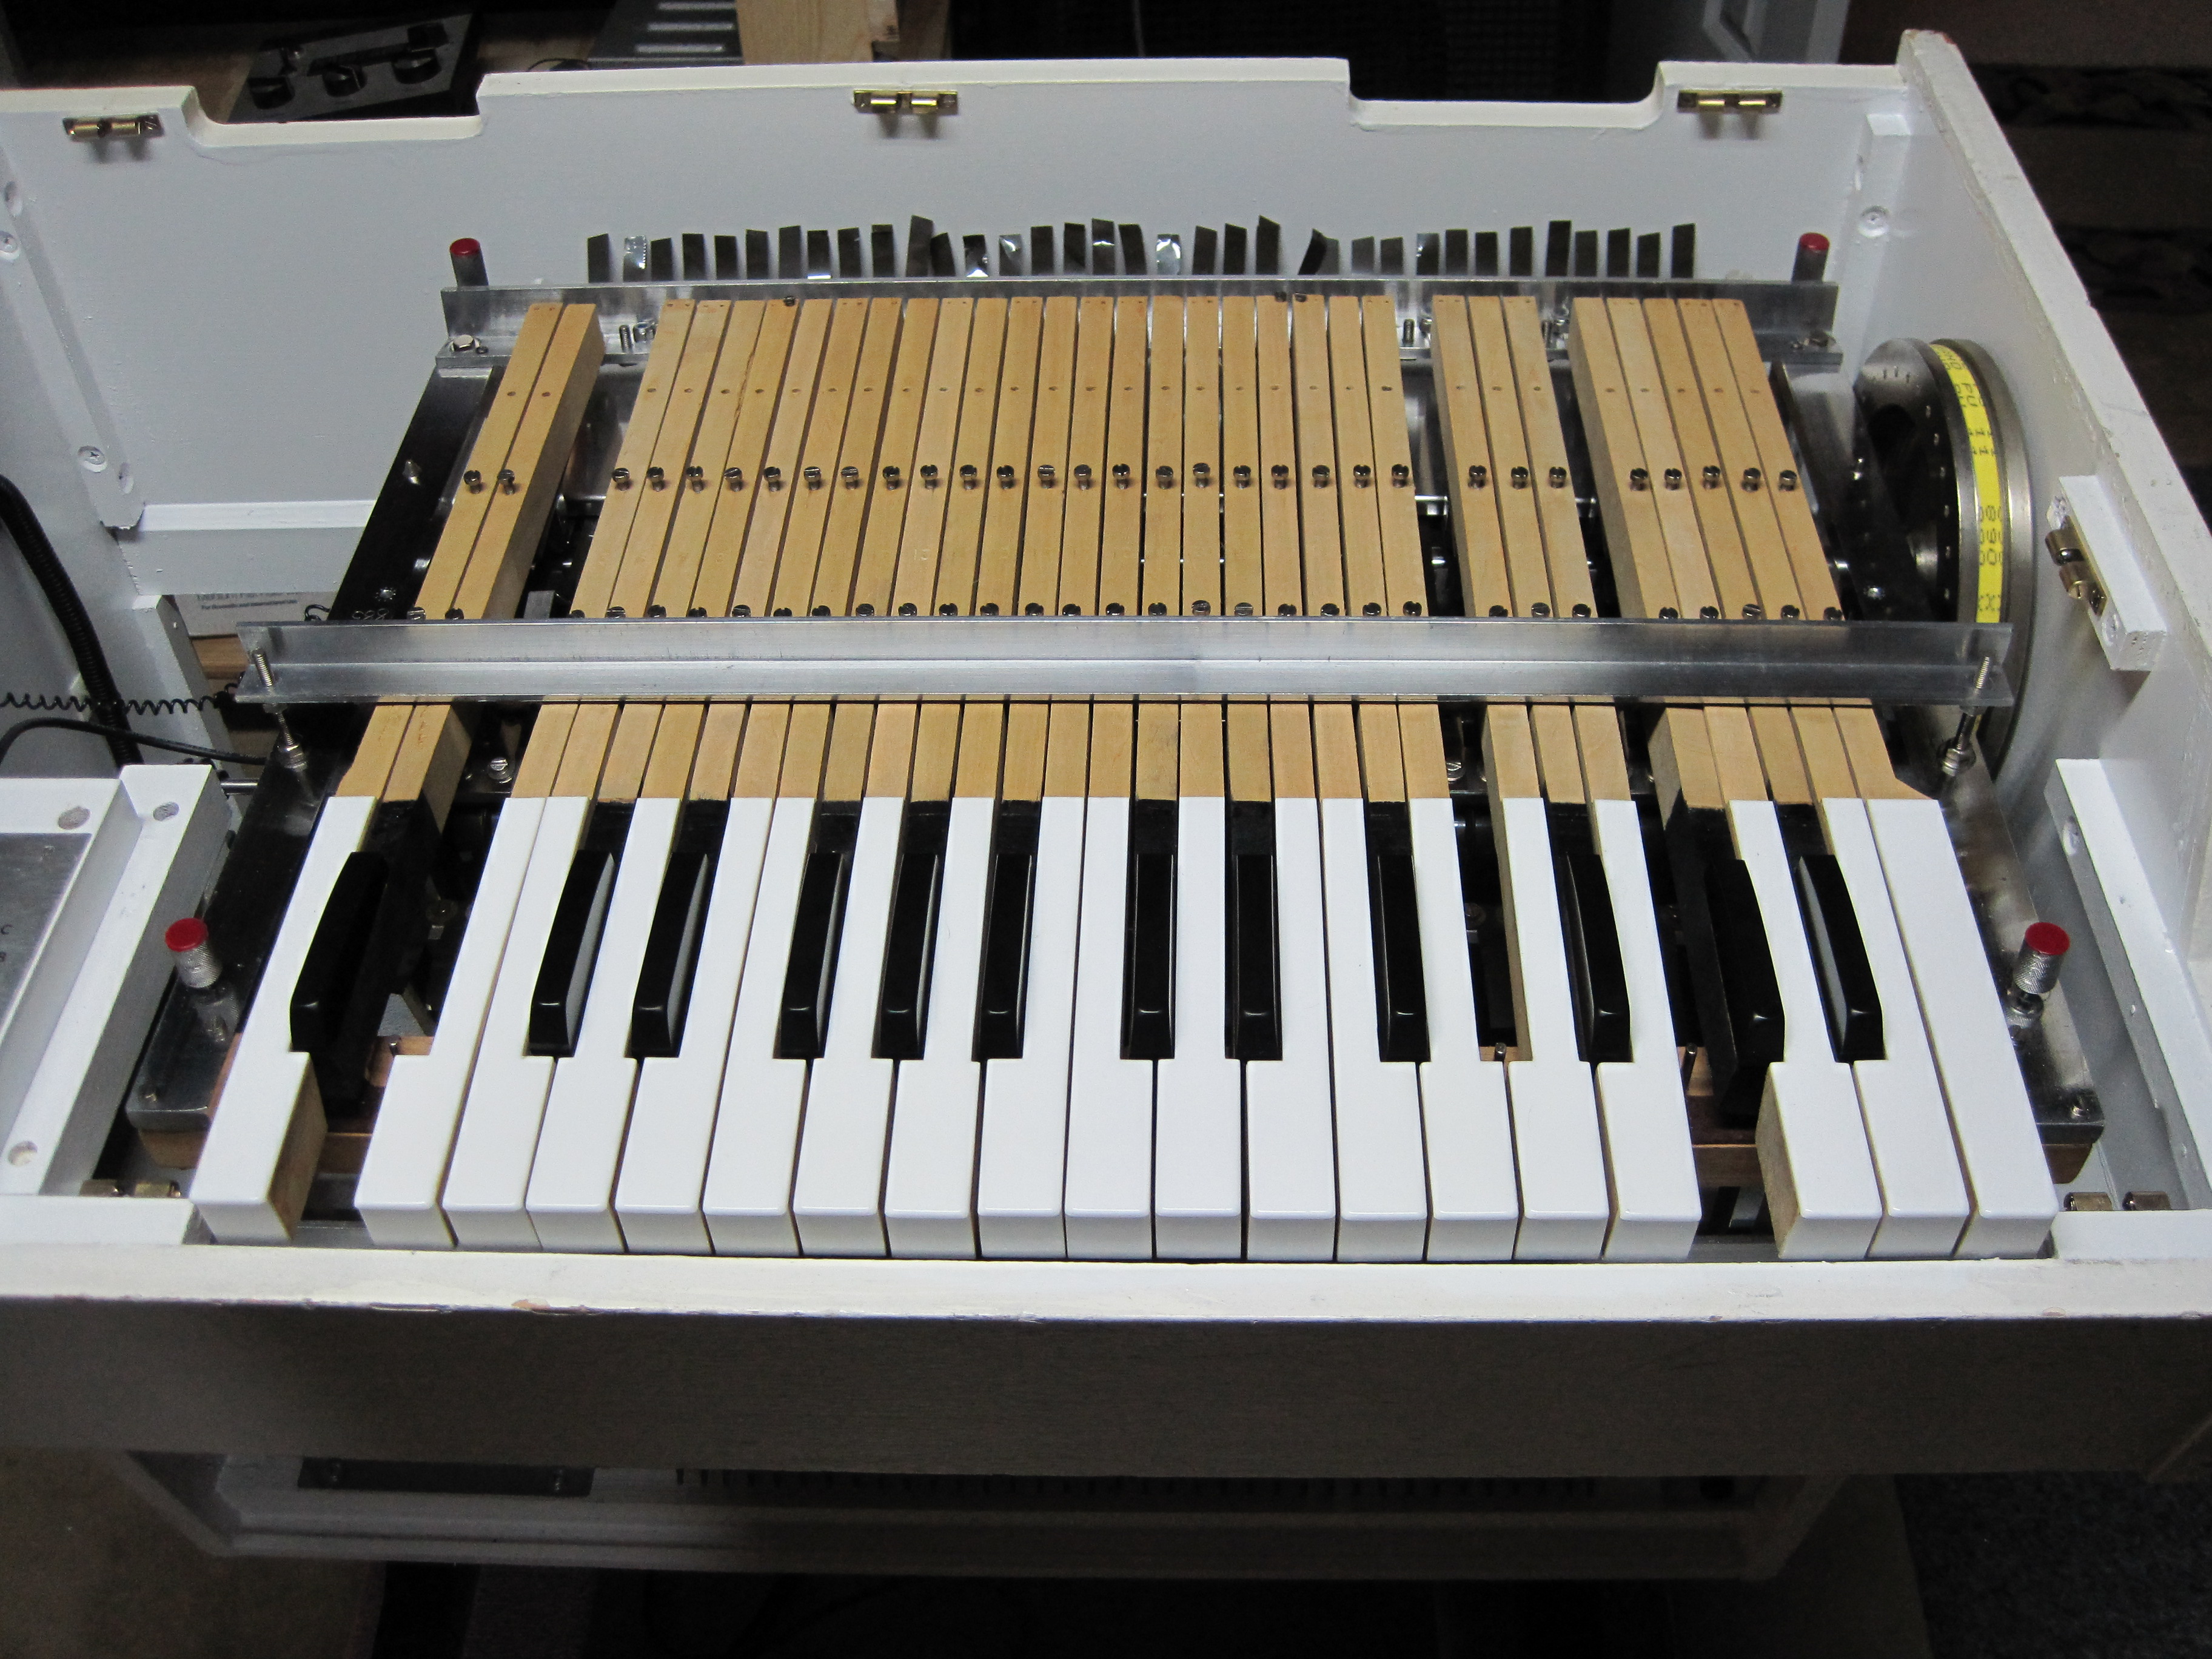 | |
| M400S # 885/674 | New floor from Baltic Birch plywood |  | |
| M400S # 885/674 | Close-up of installed power supply | 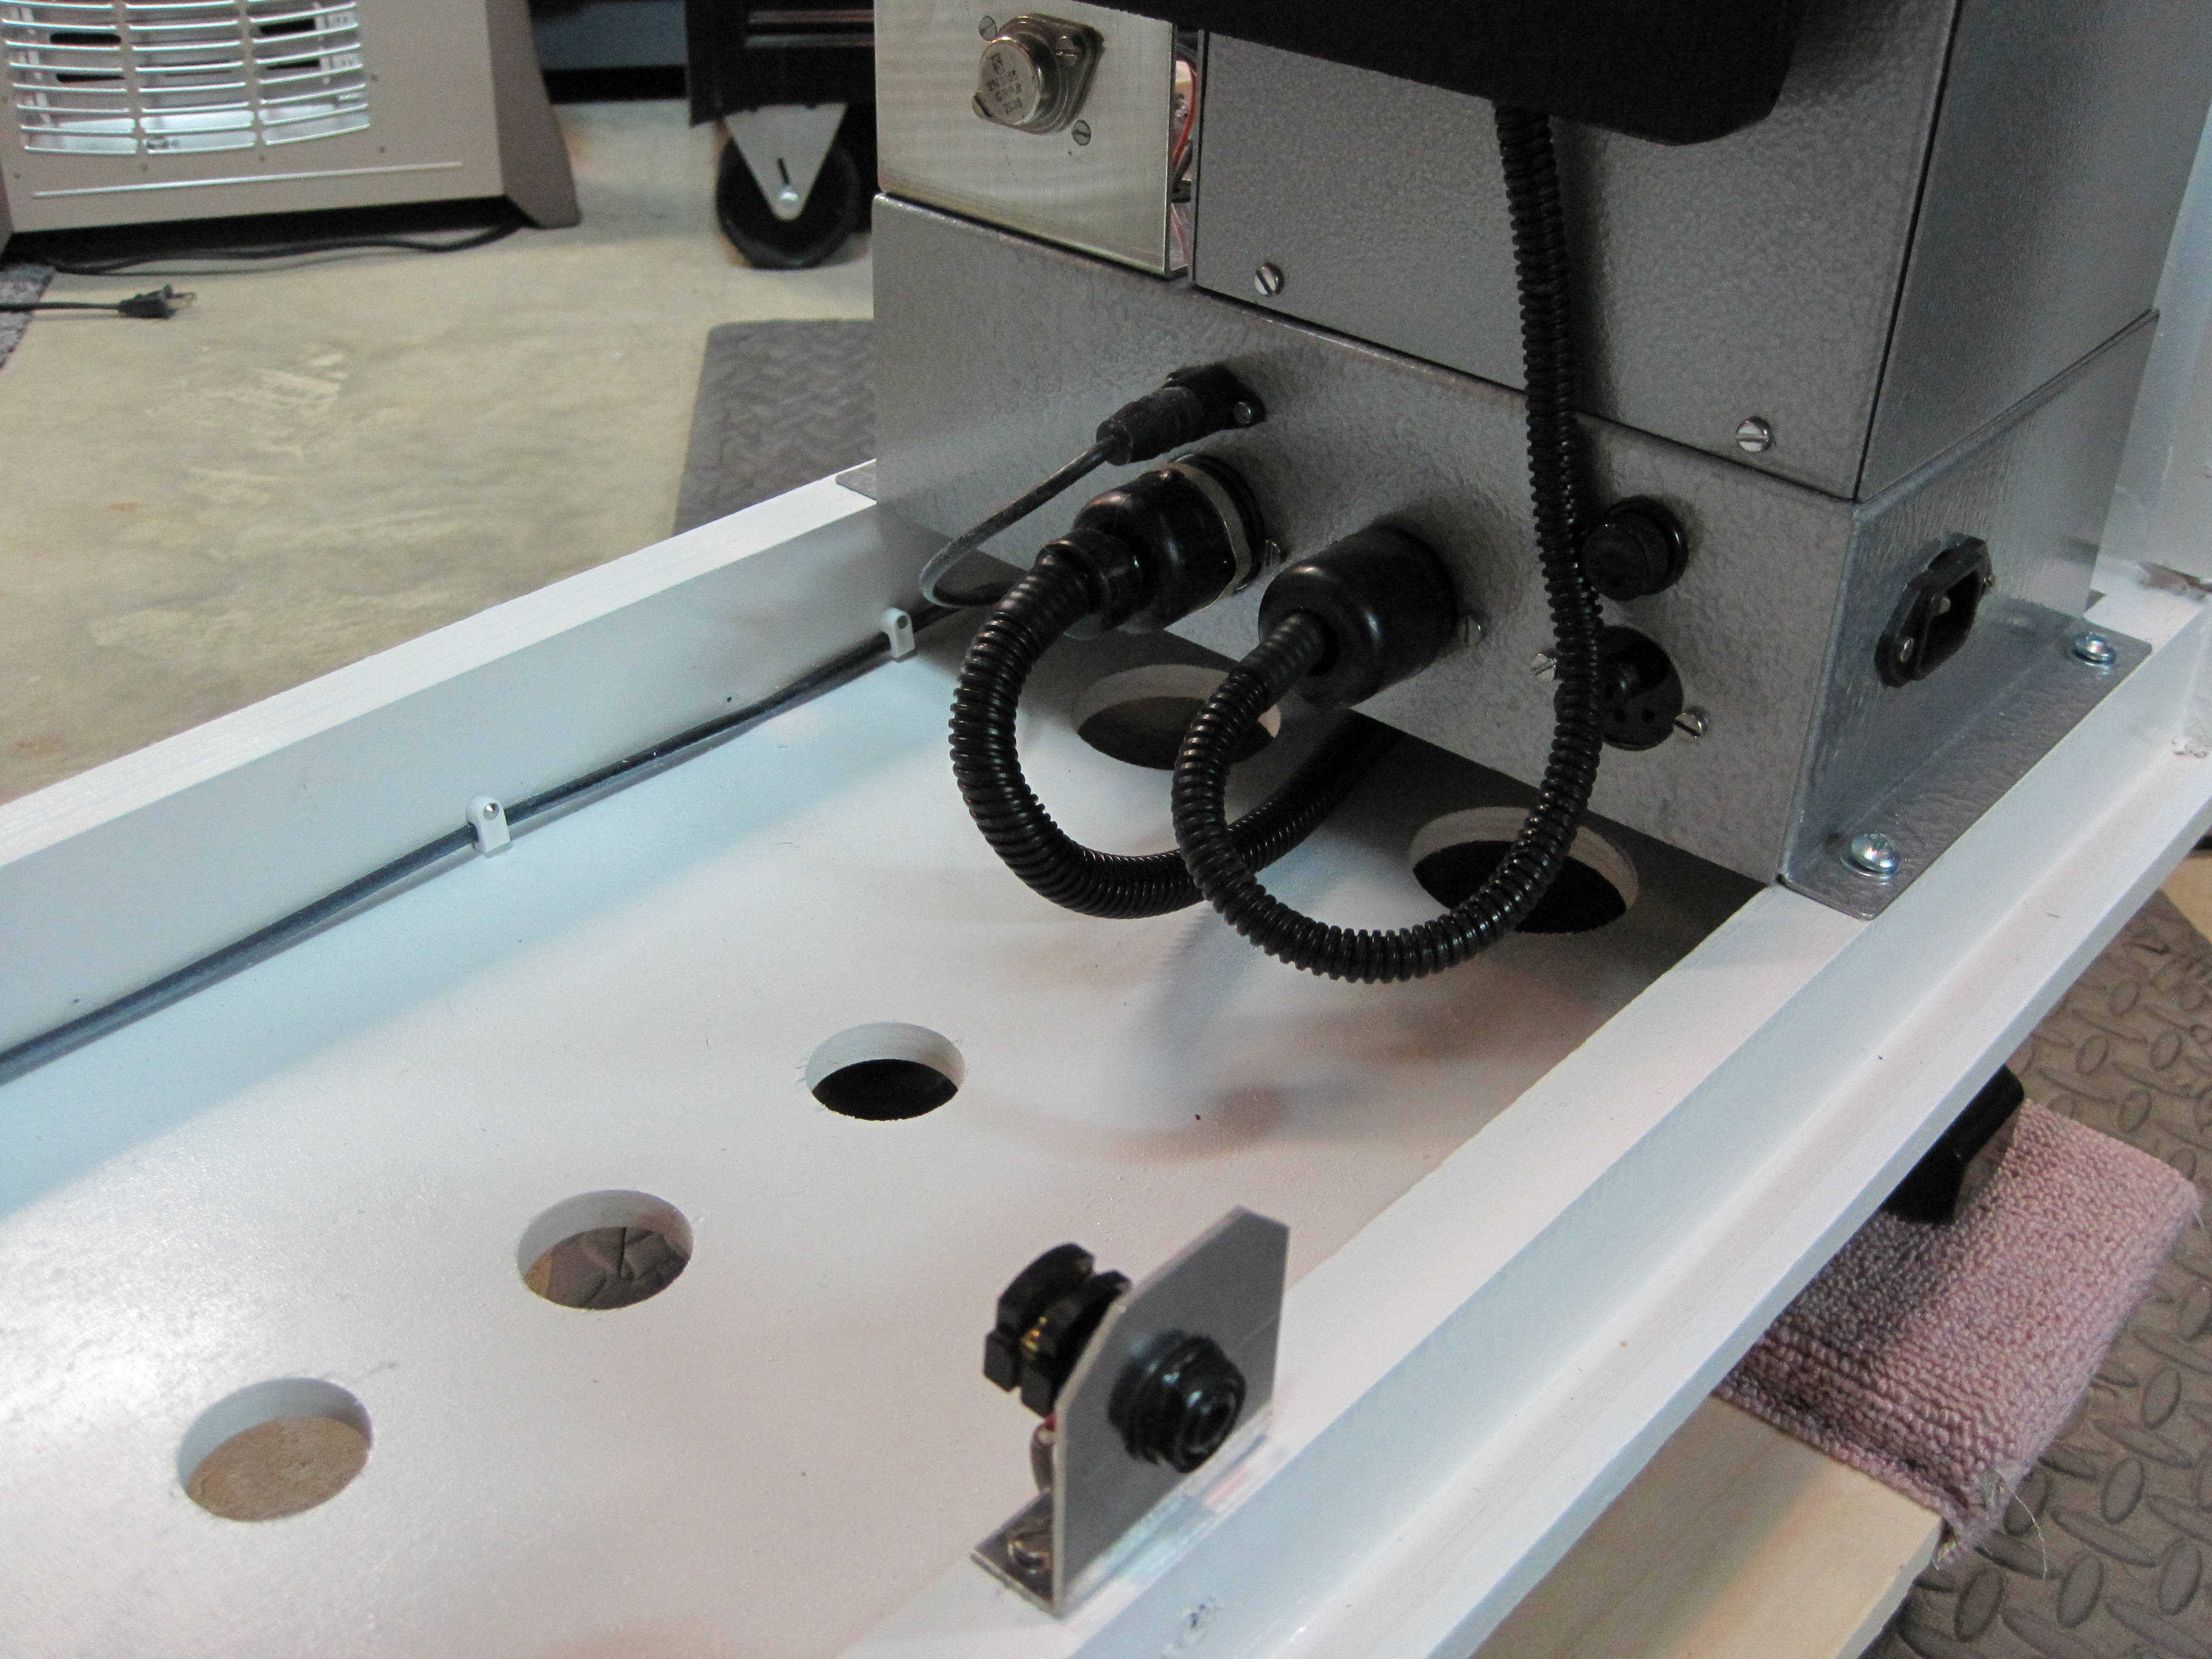 | |
| M400S # 885/674 | Some keys required more drastic measures | 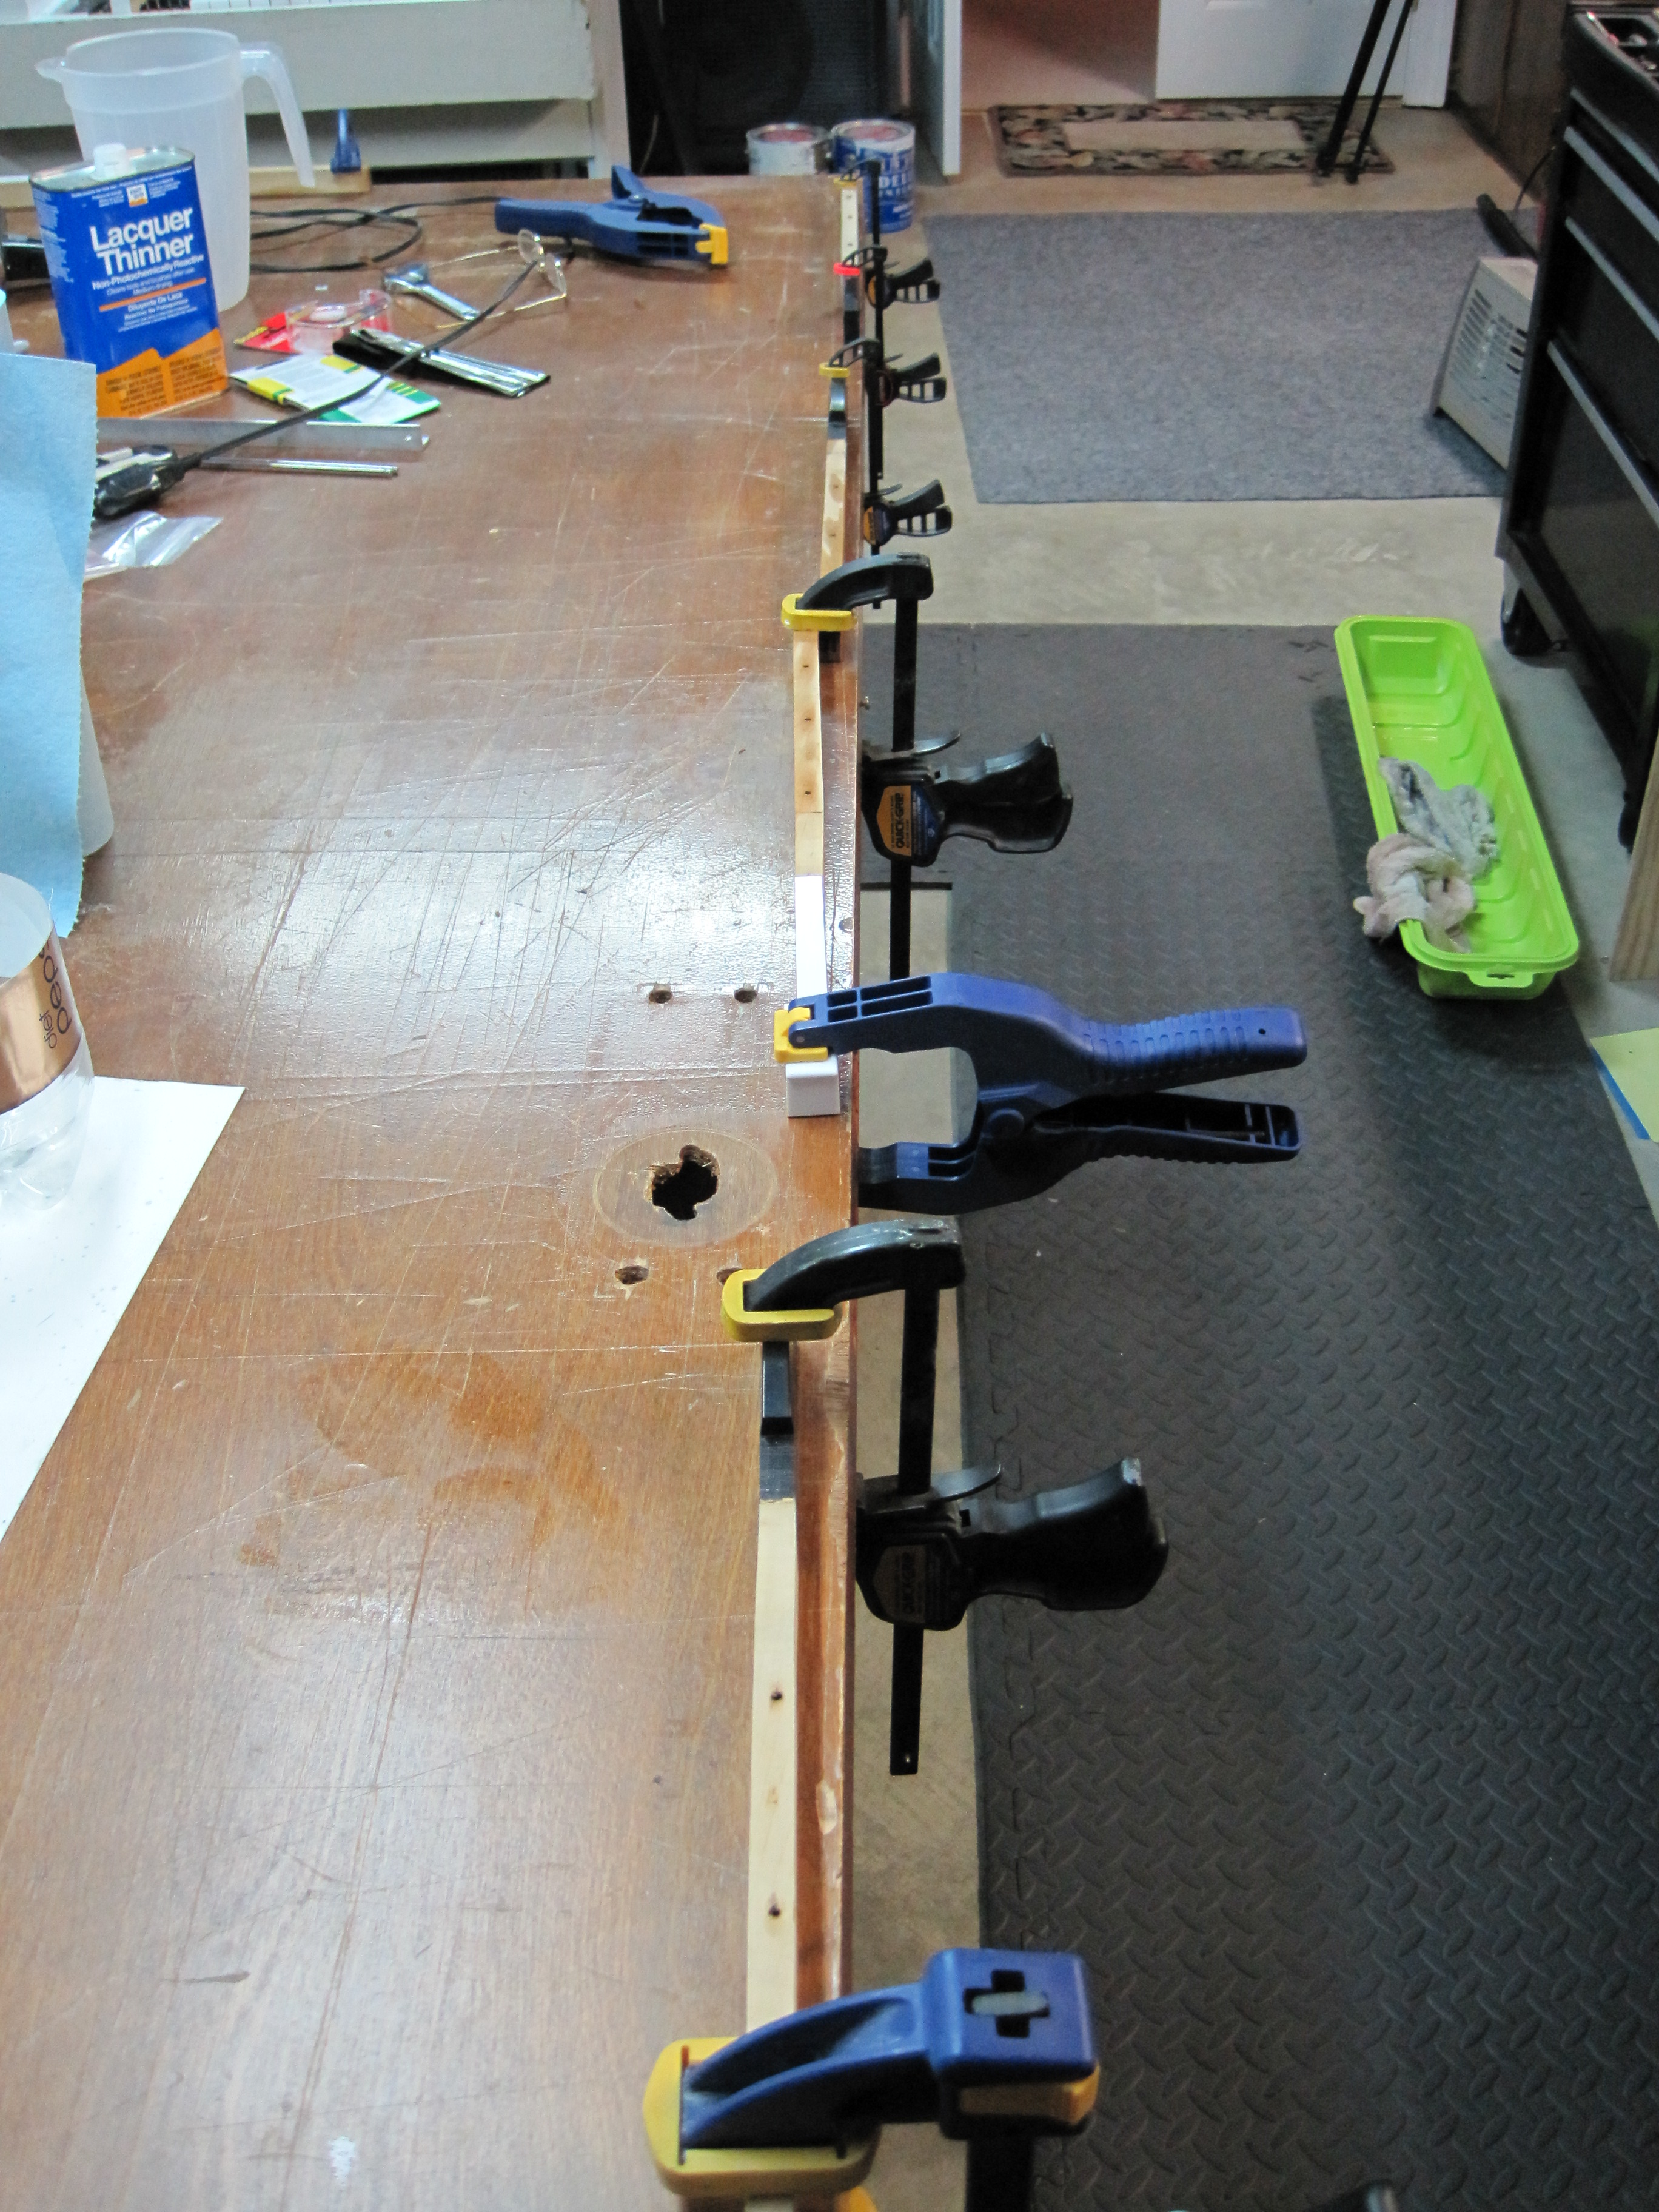 | |
| M400S # 885/674 | Installing the cross rails | 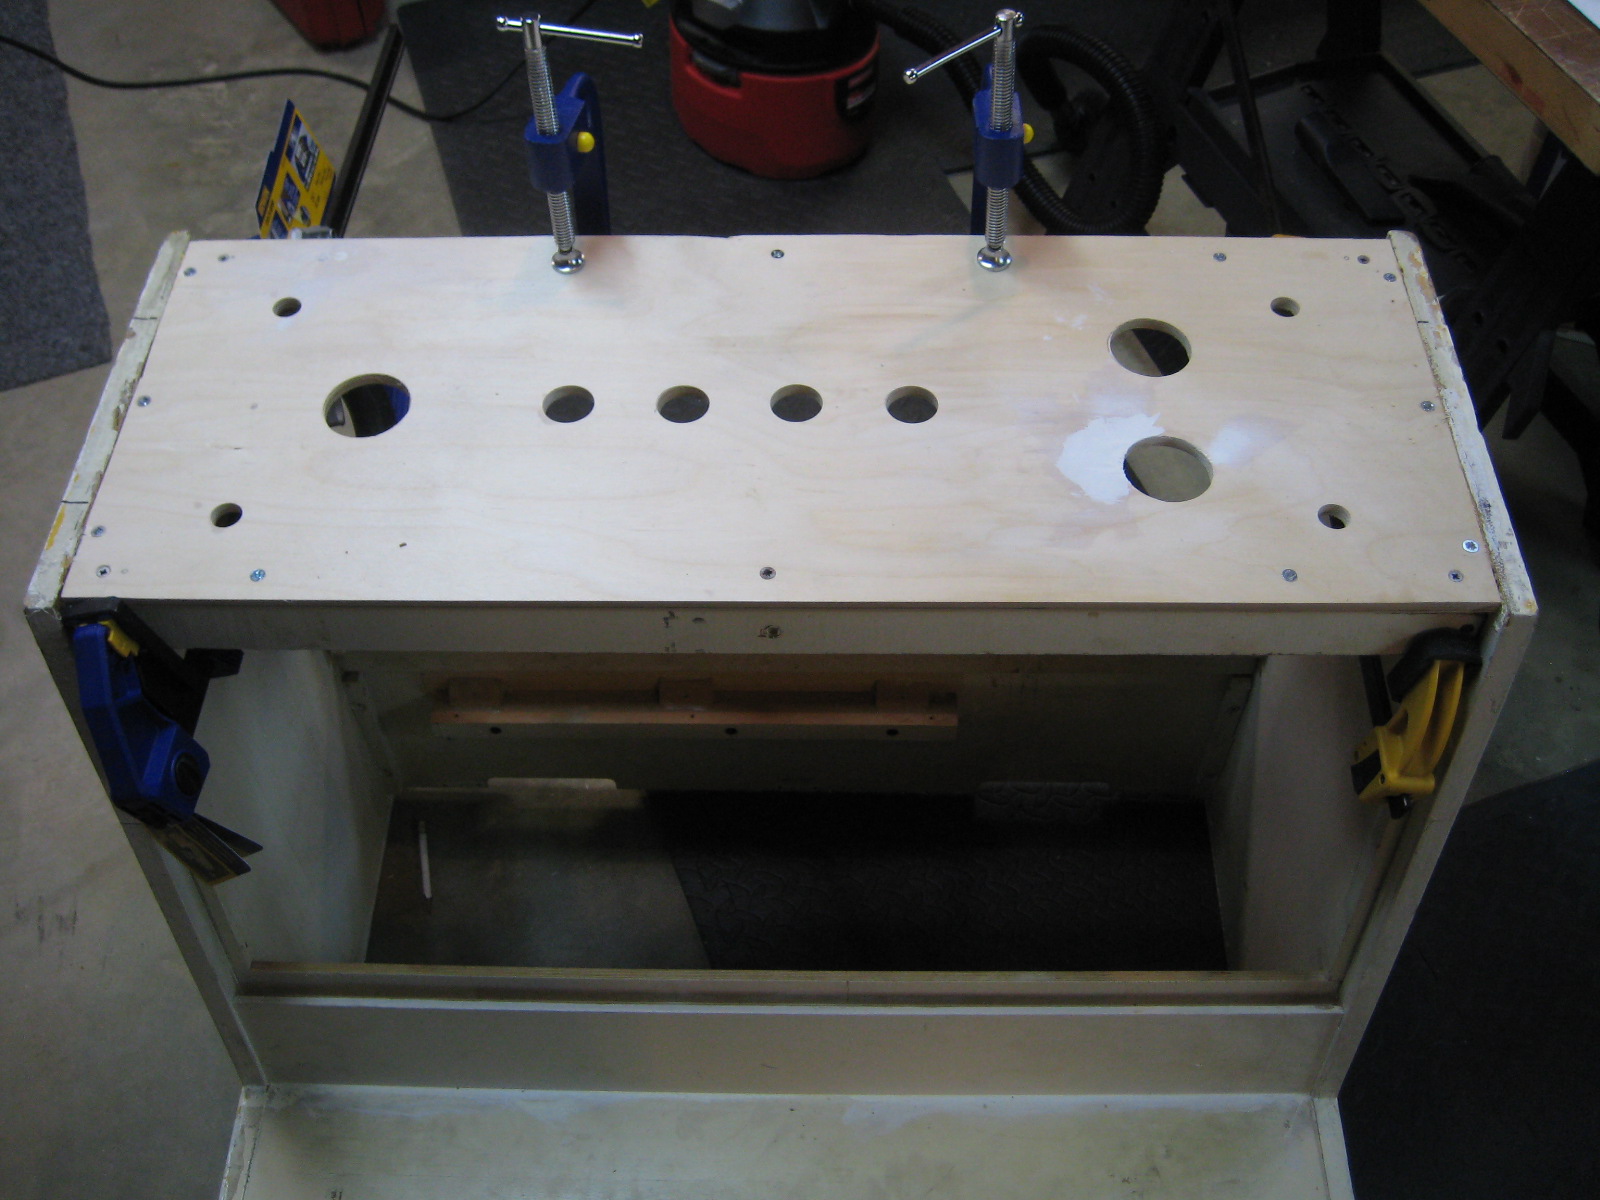 | |
| M400S # 885/674 | Cabinet interior painted | 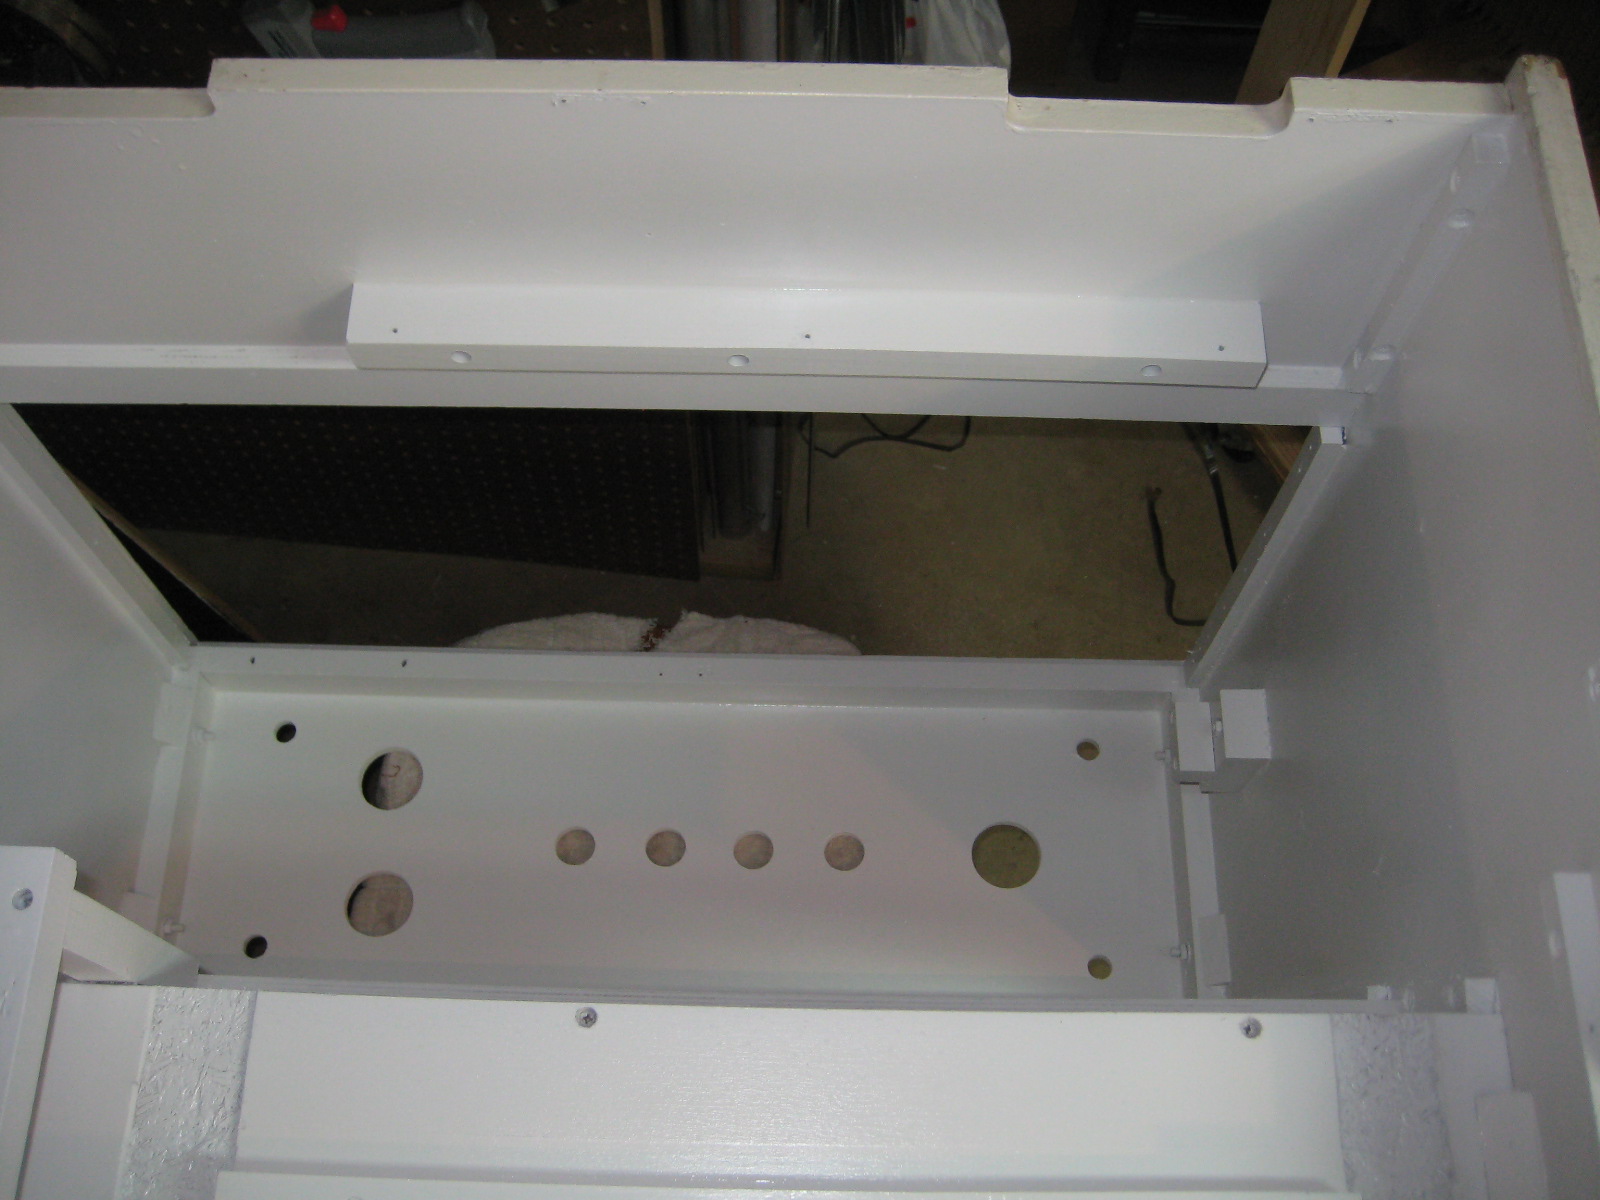 | |
| M400S # 885/674 | Beginning the frame rebuild | 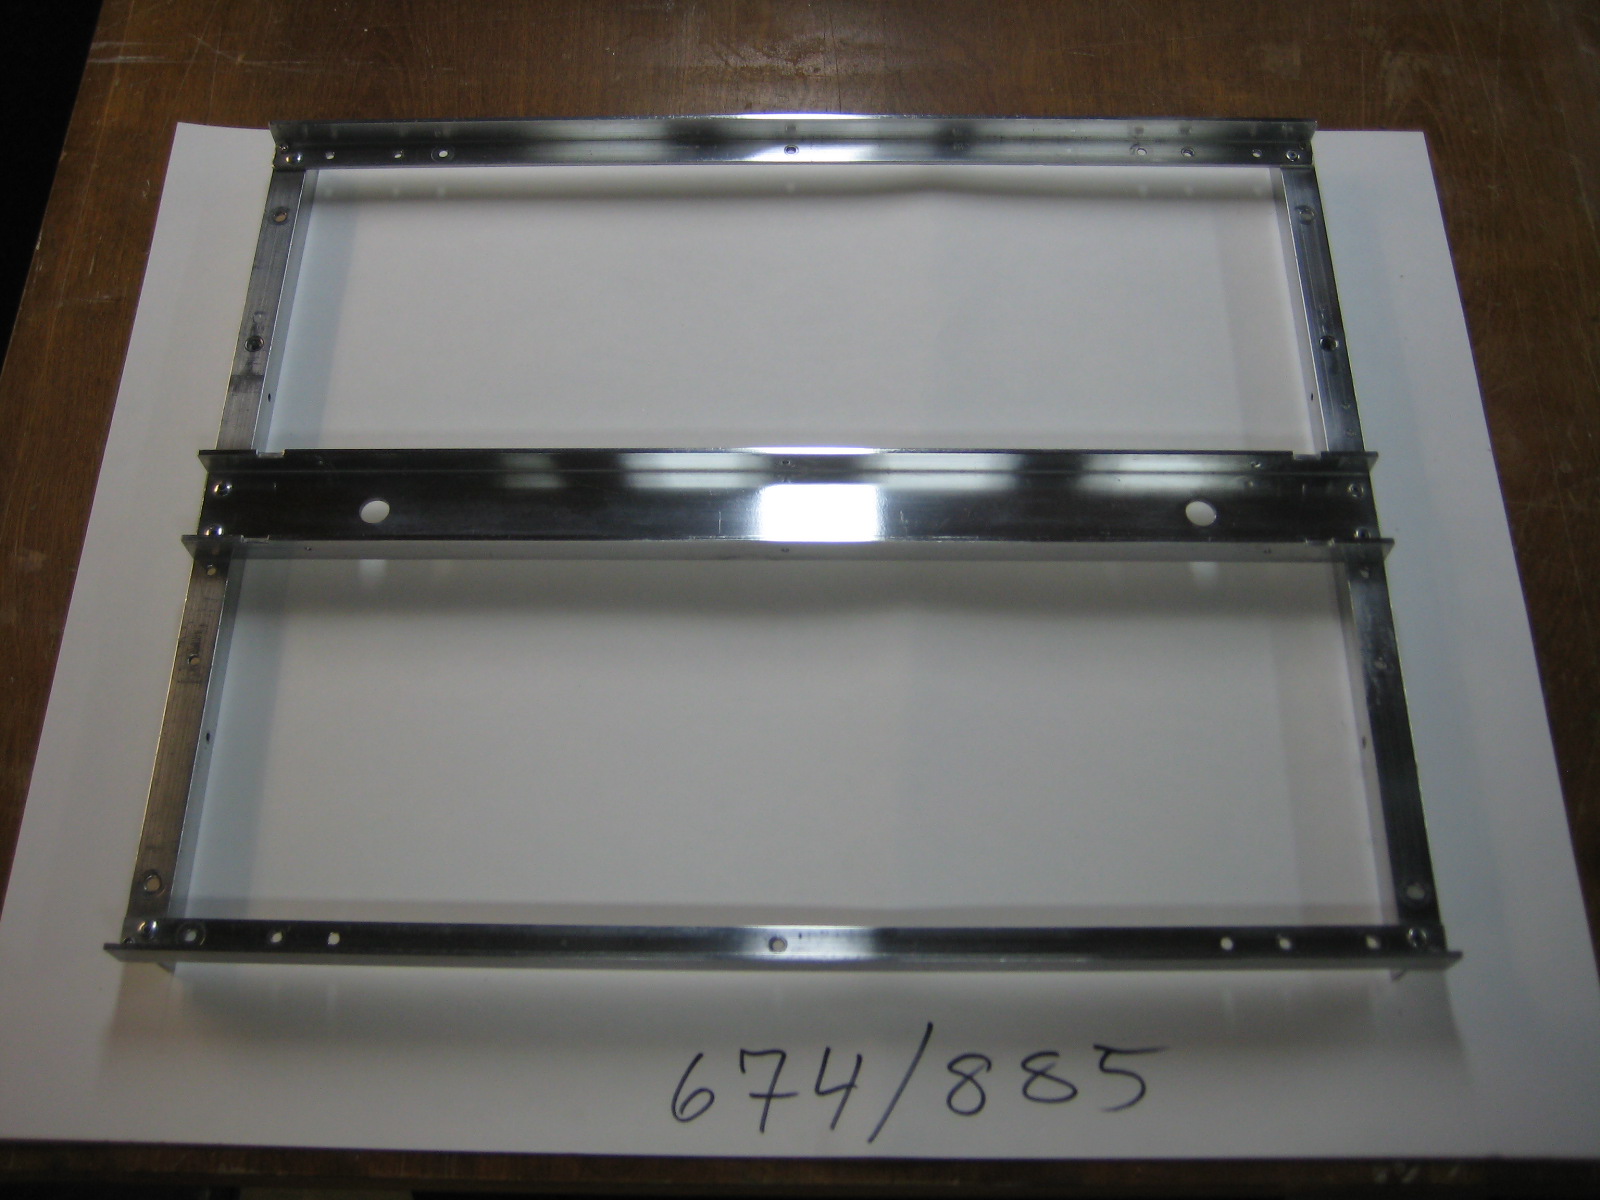 | |
| M400S # 885/674 | Mellotron installed to cabinet | 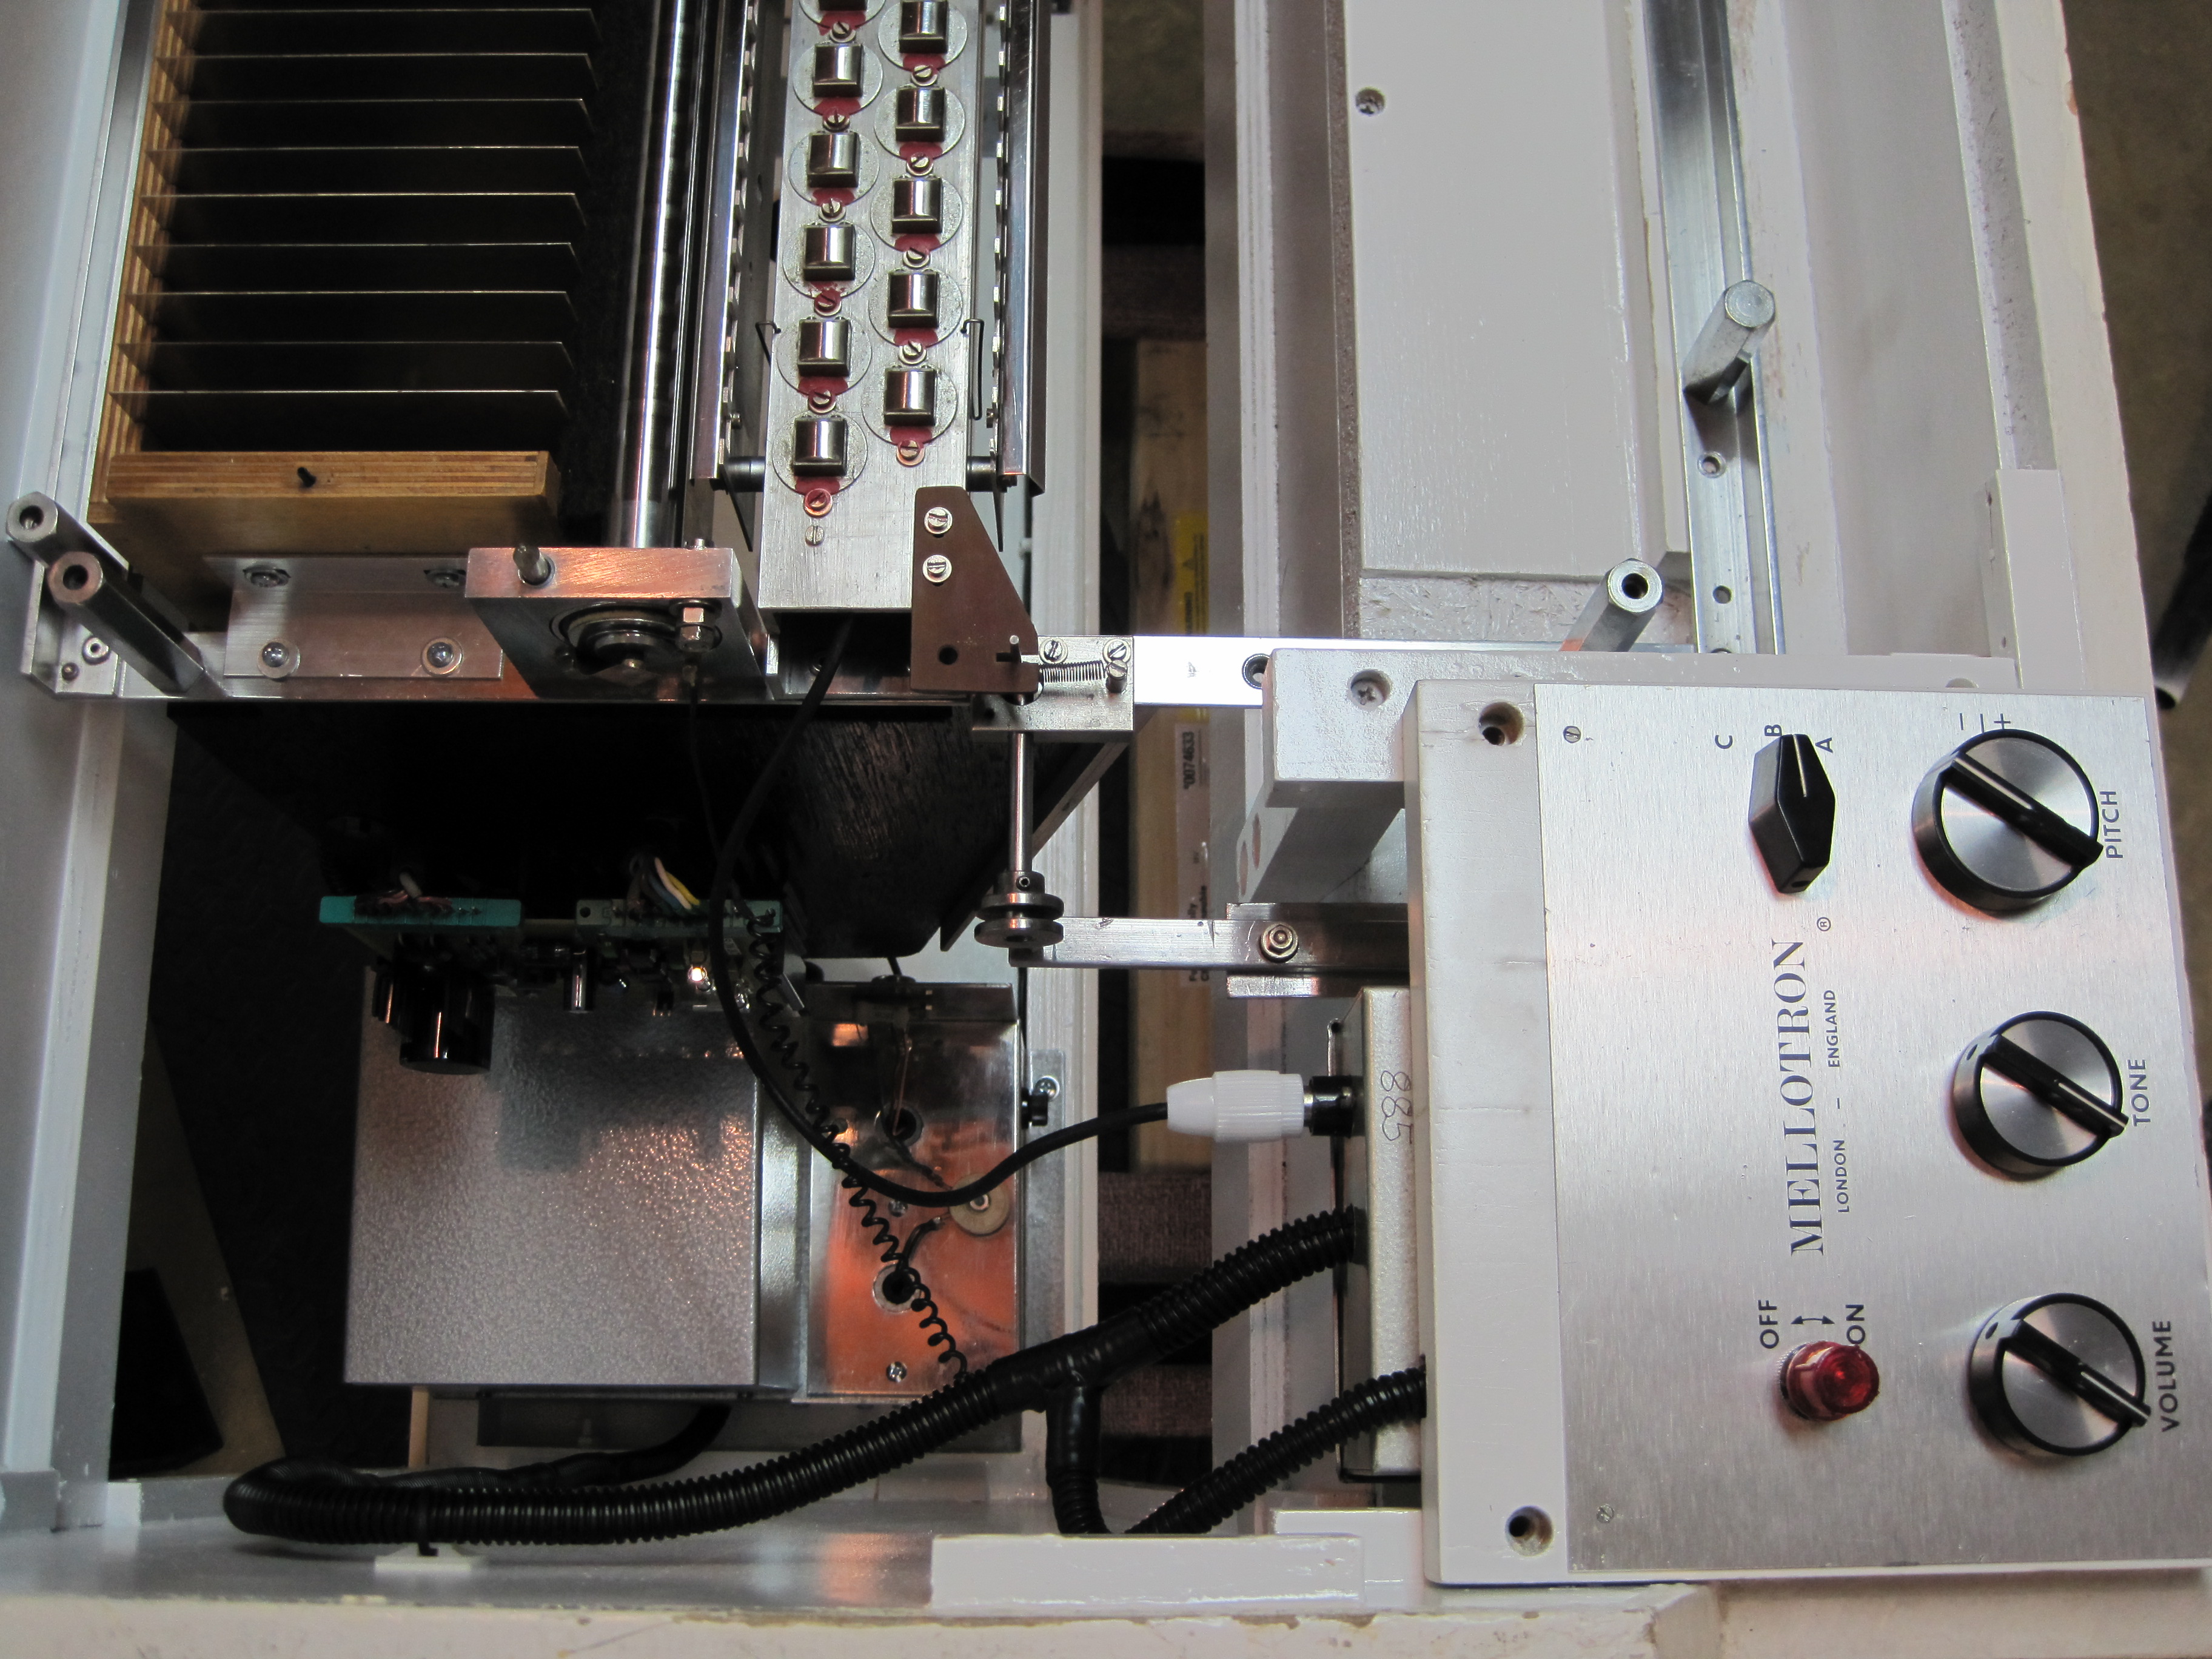 | |
| M400S # 885/674 | Floor close-up | 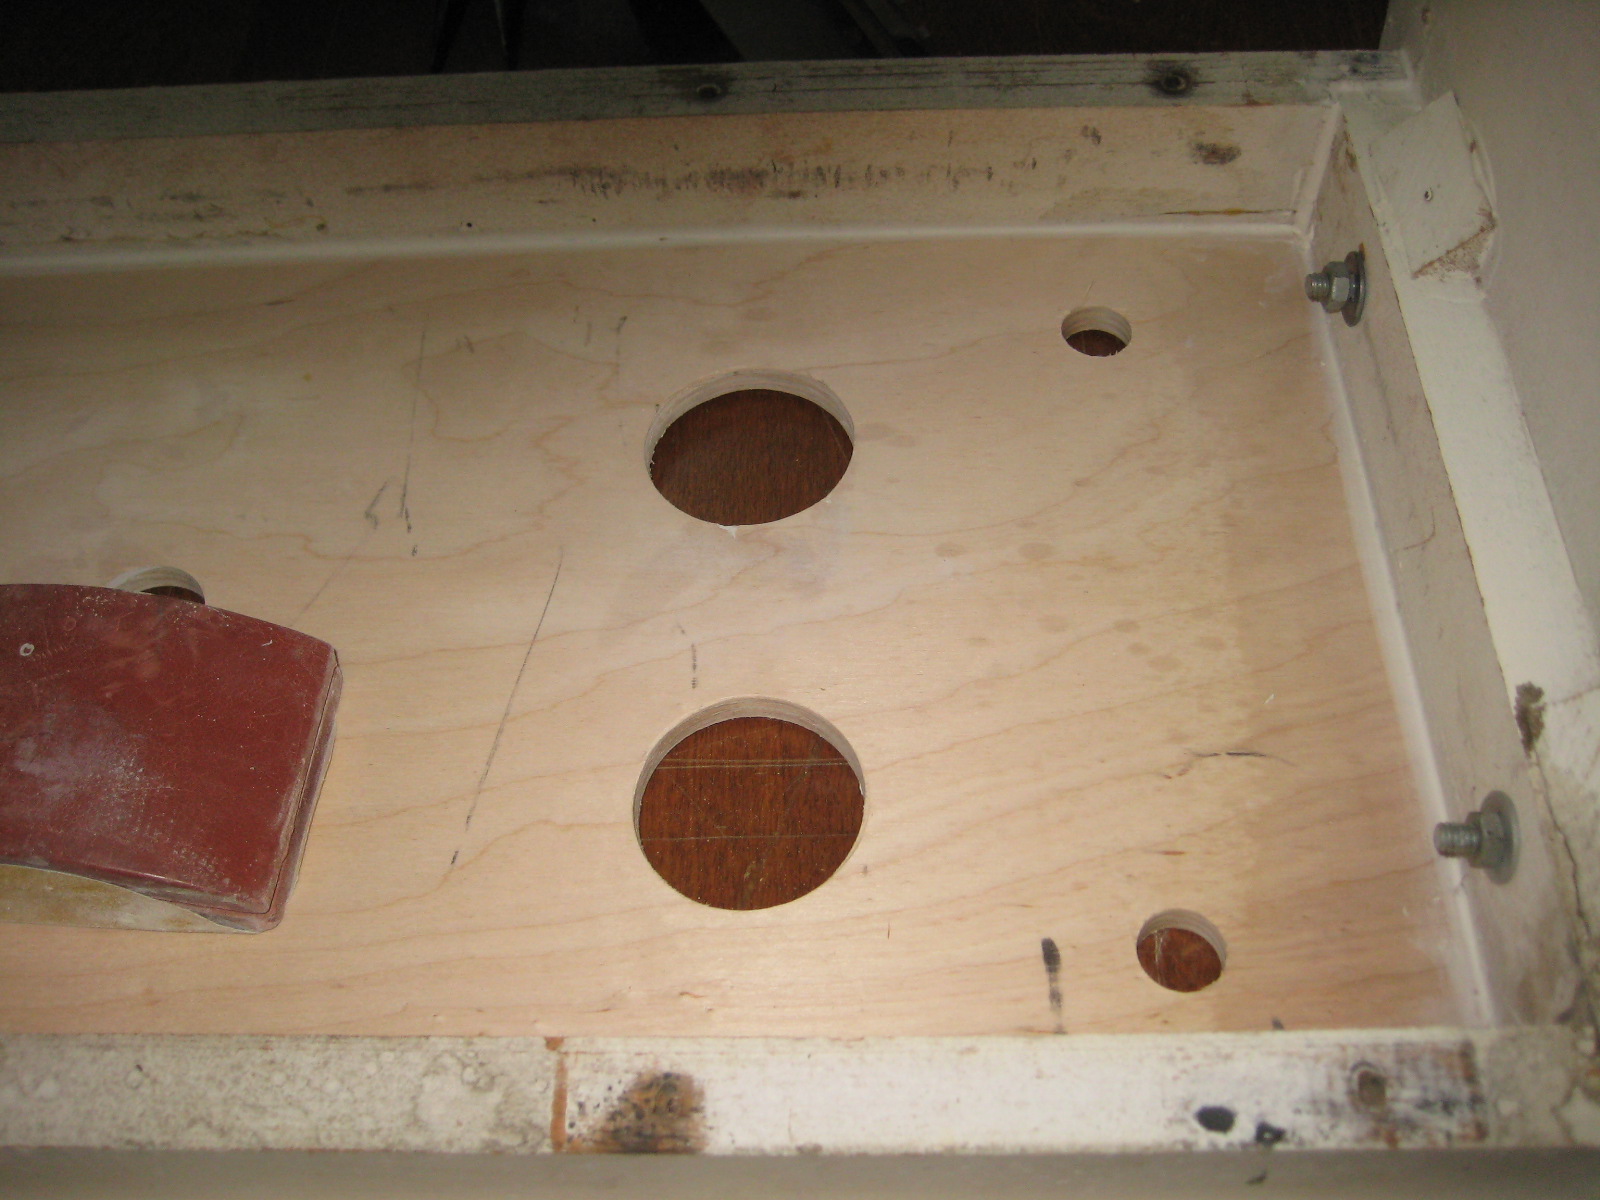 | |
| M400S # 885/674 | Done | 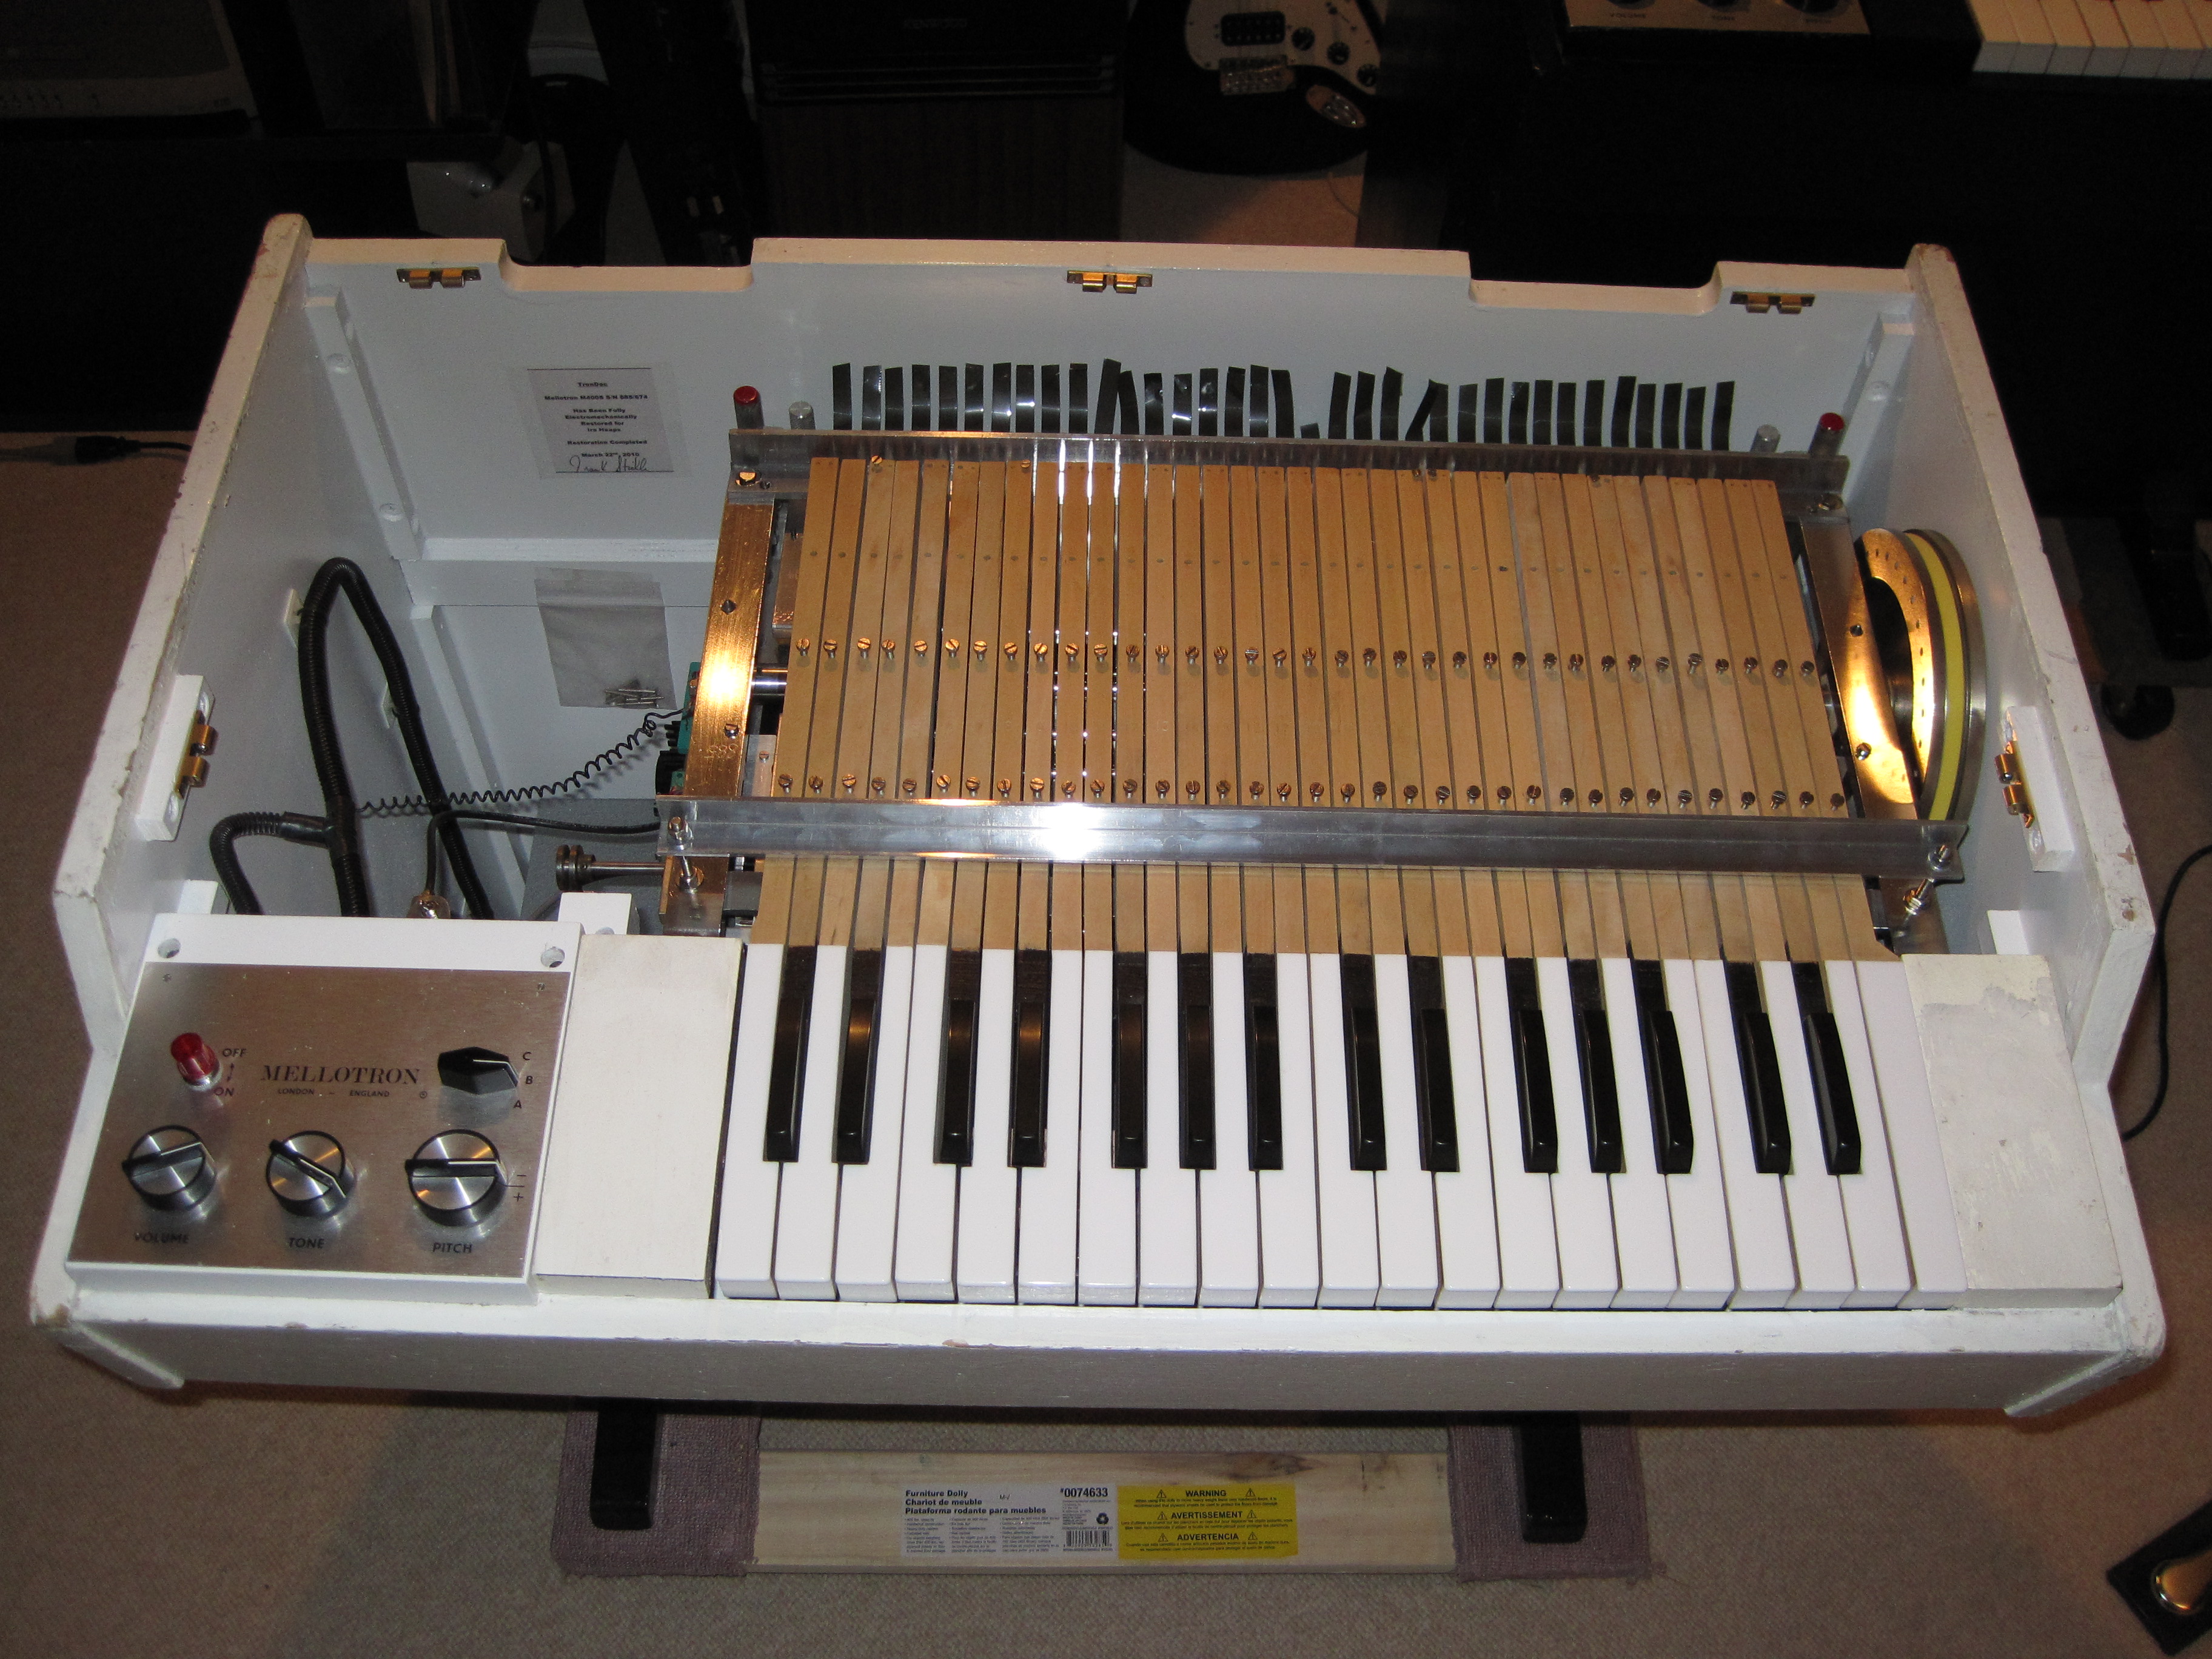 | |
| M400S # 885/674 | Completed keyboard | 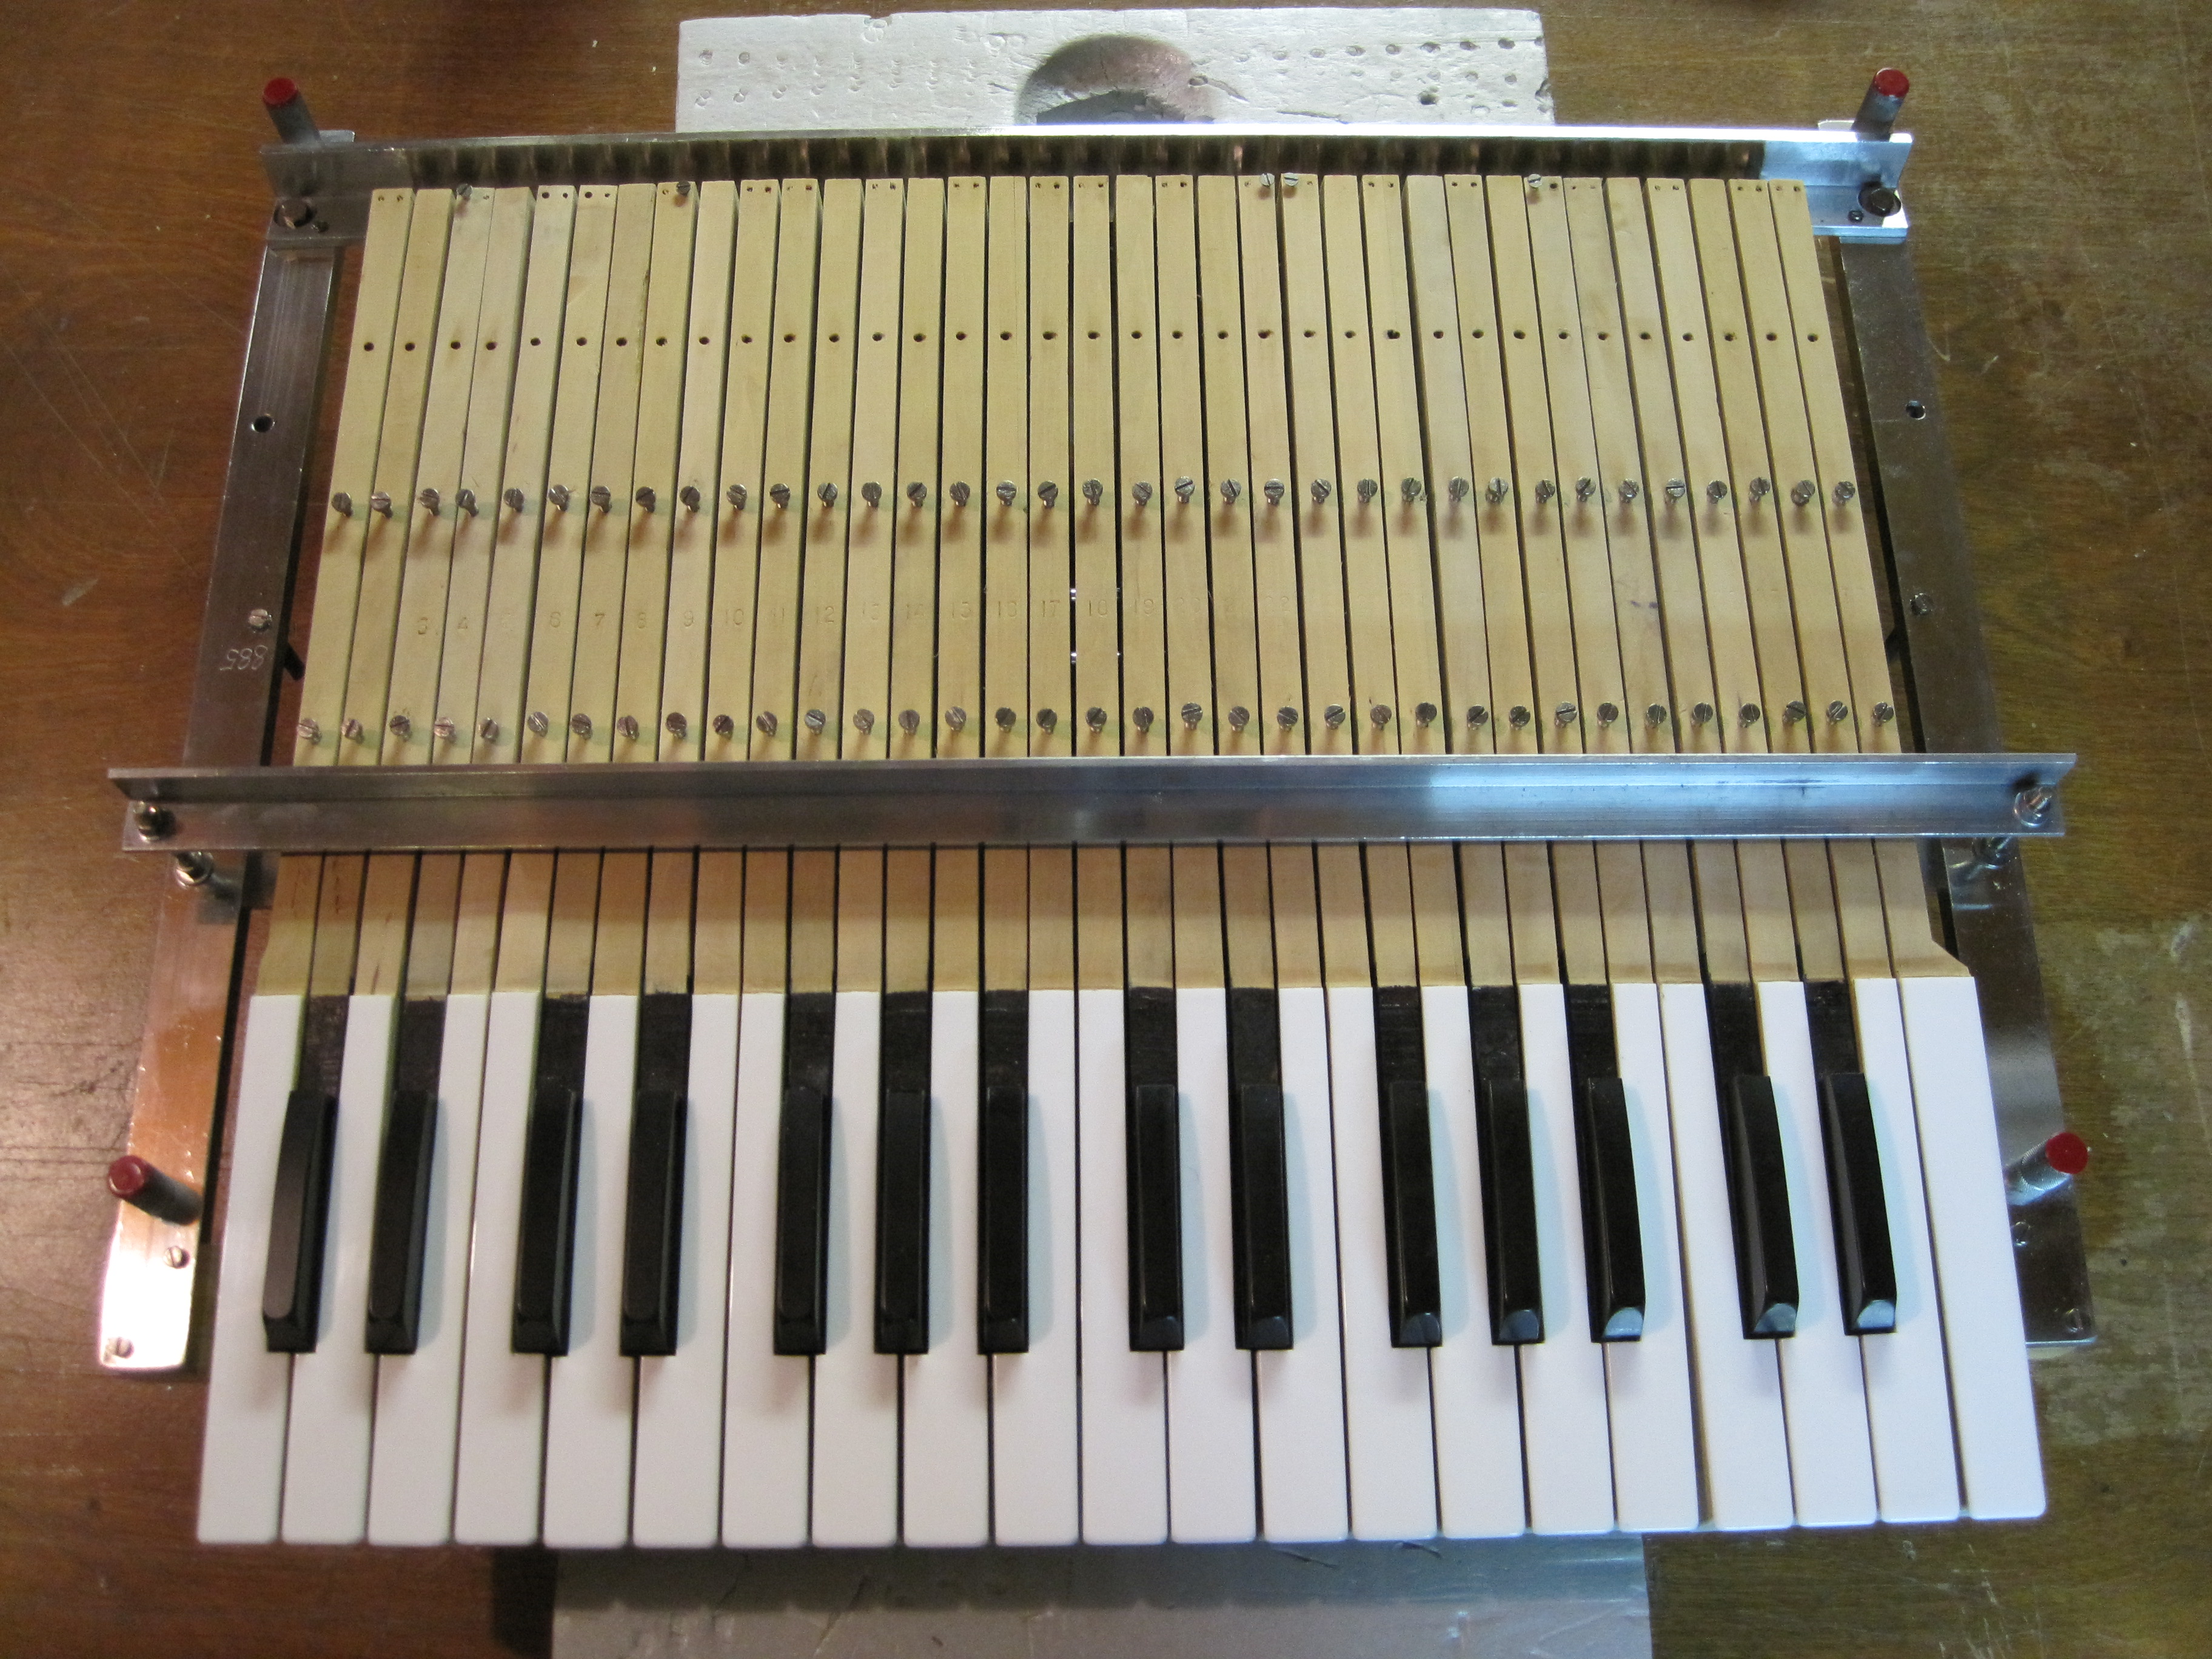 | |
| M400S # 885/674 | Cabinet with new floor | 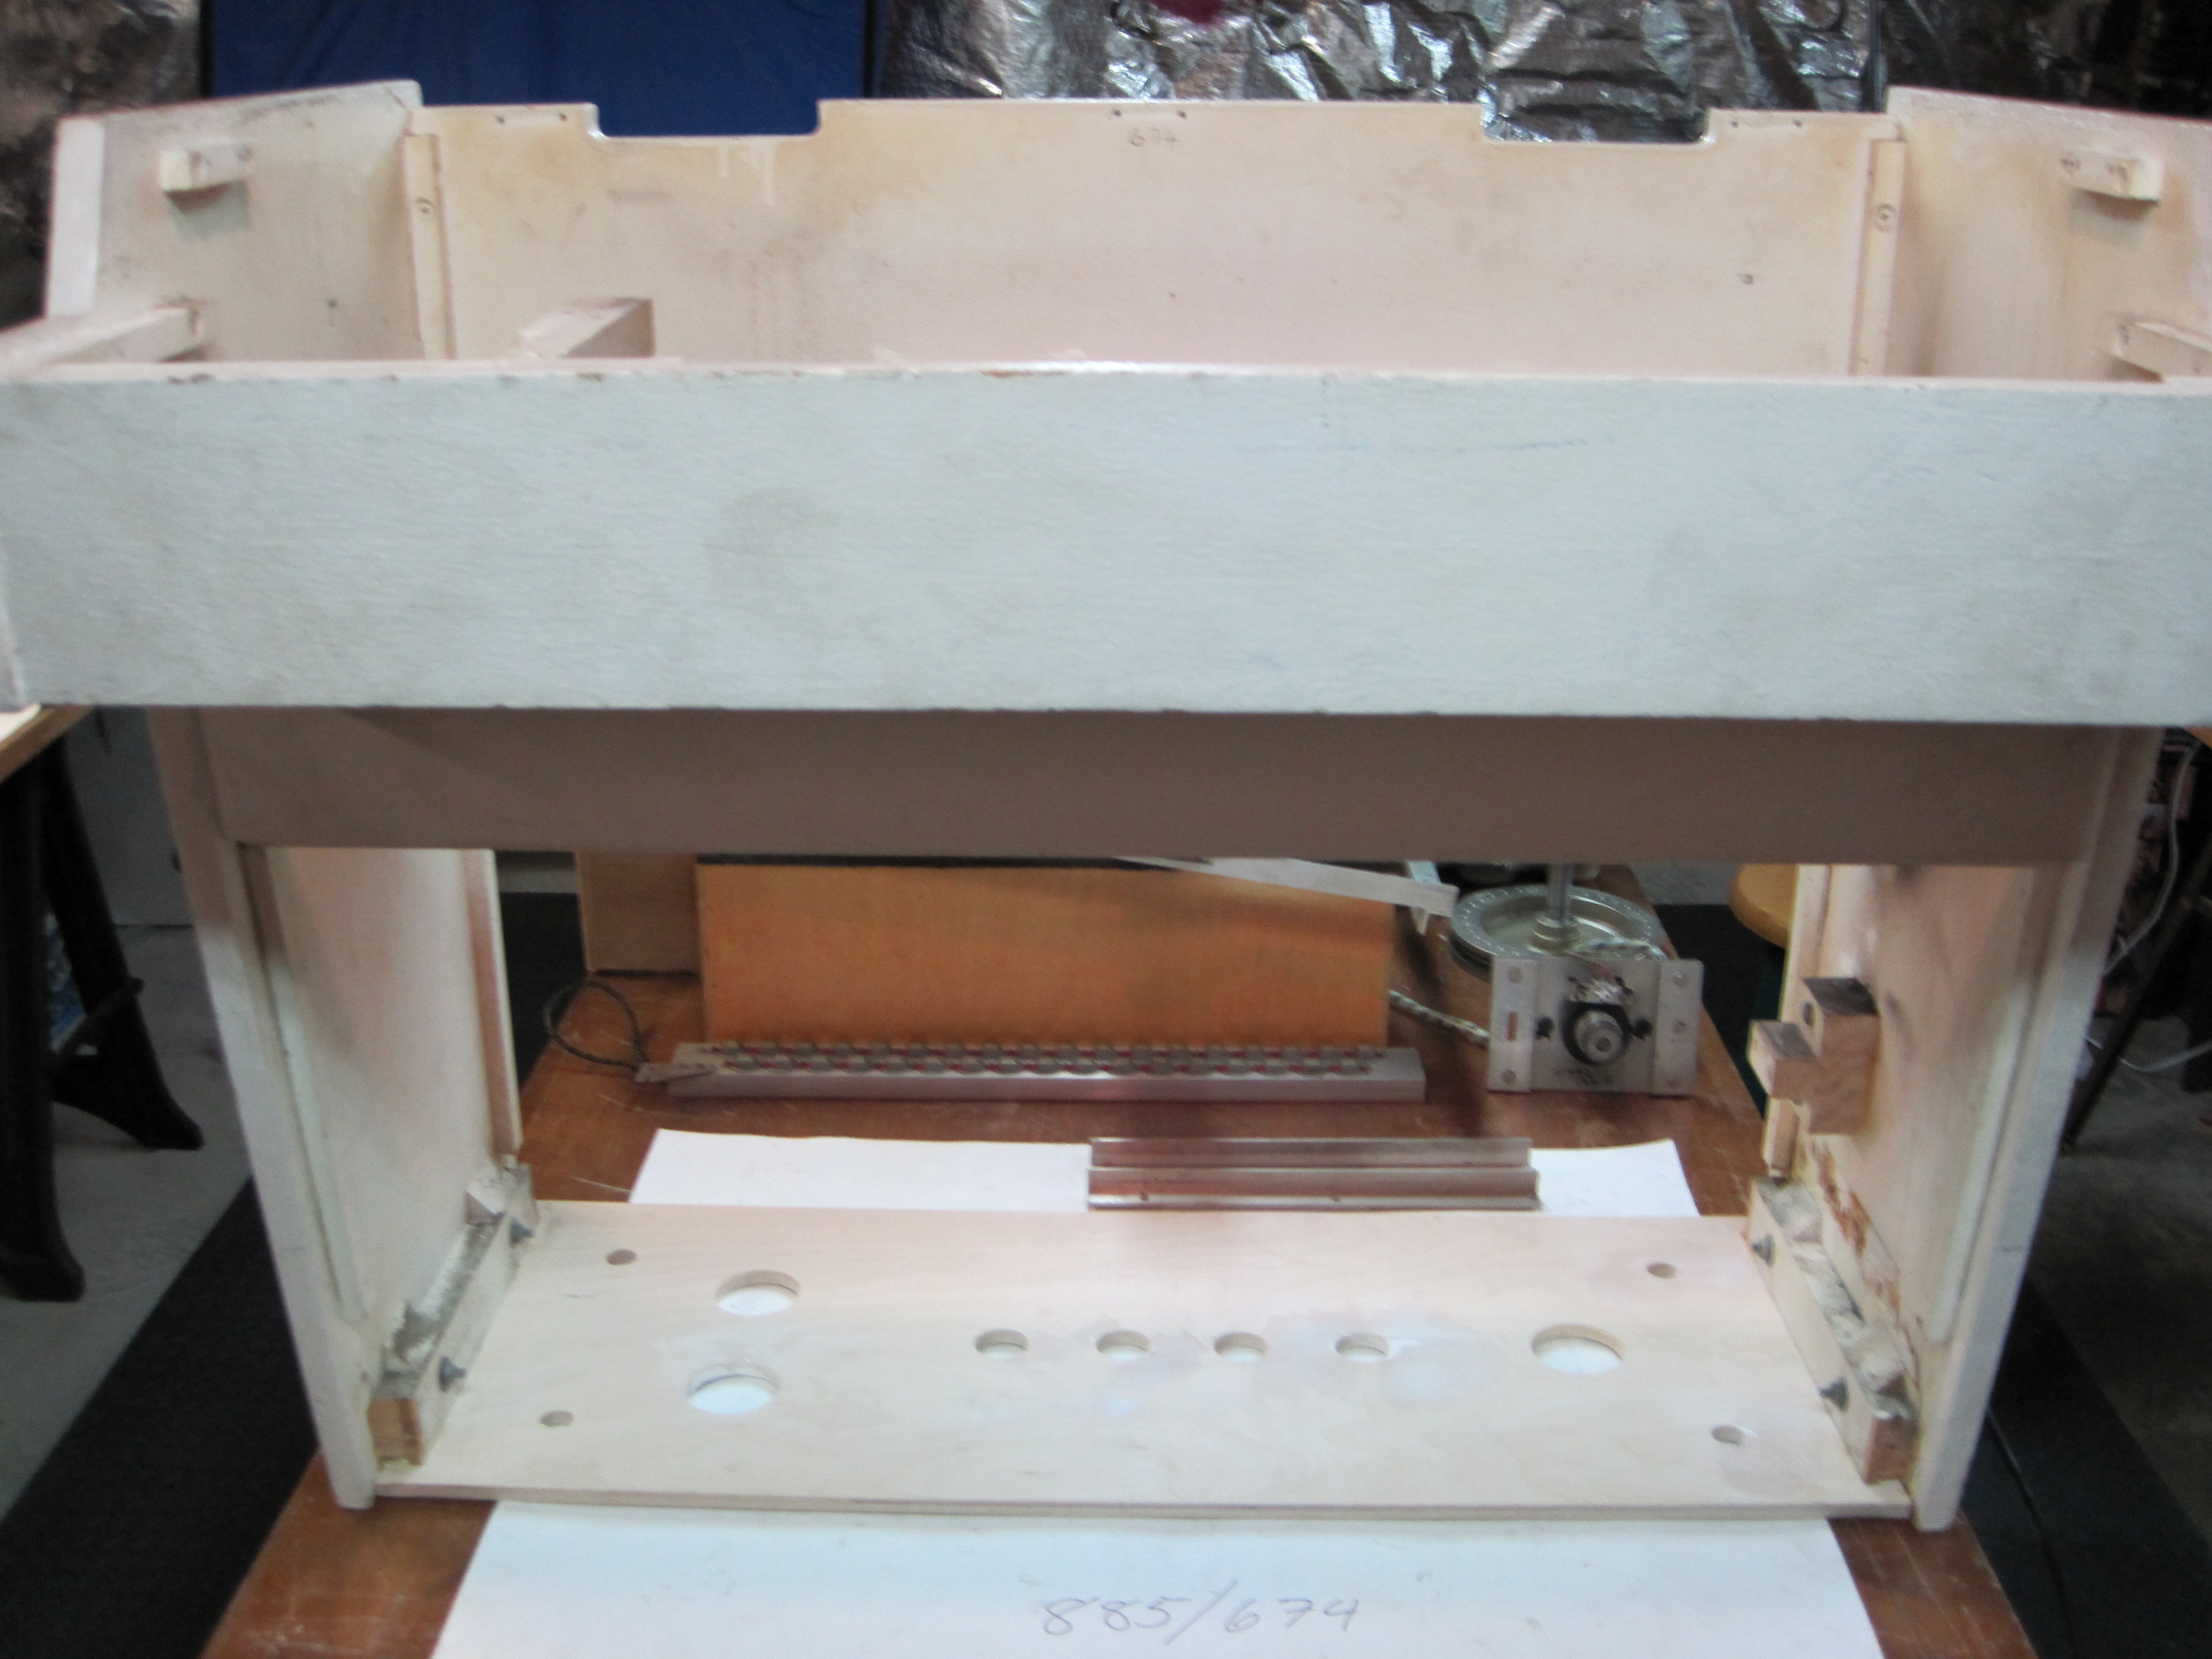 | |
| M400S # 885/674 | Power supply before rewiring | 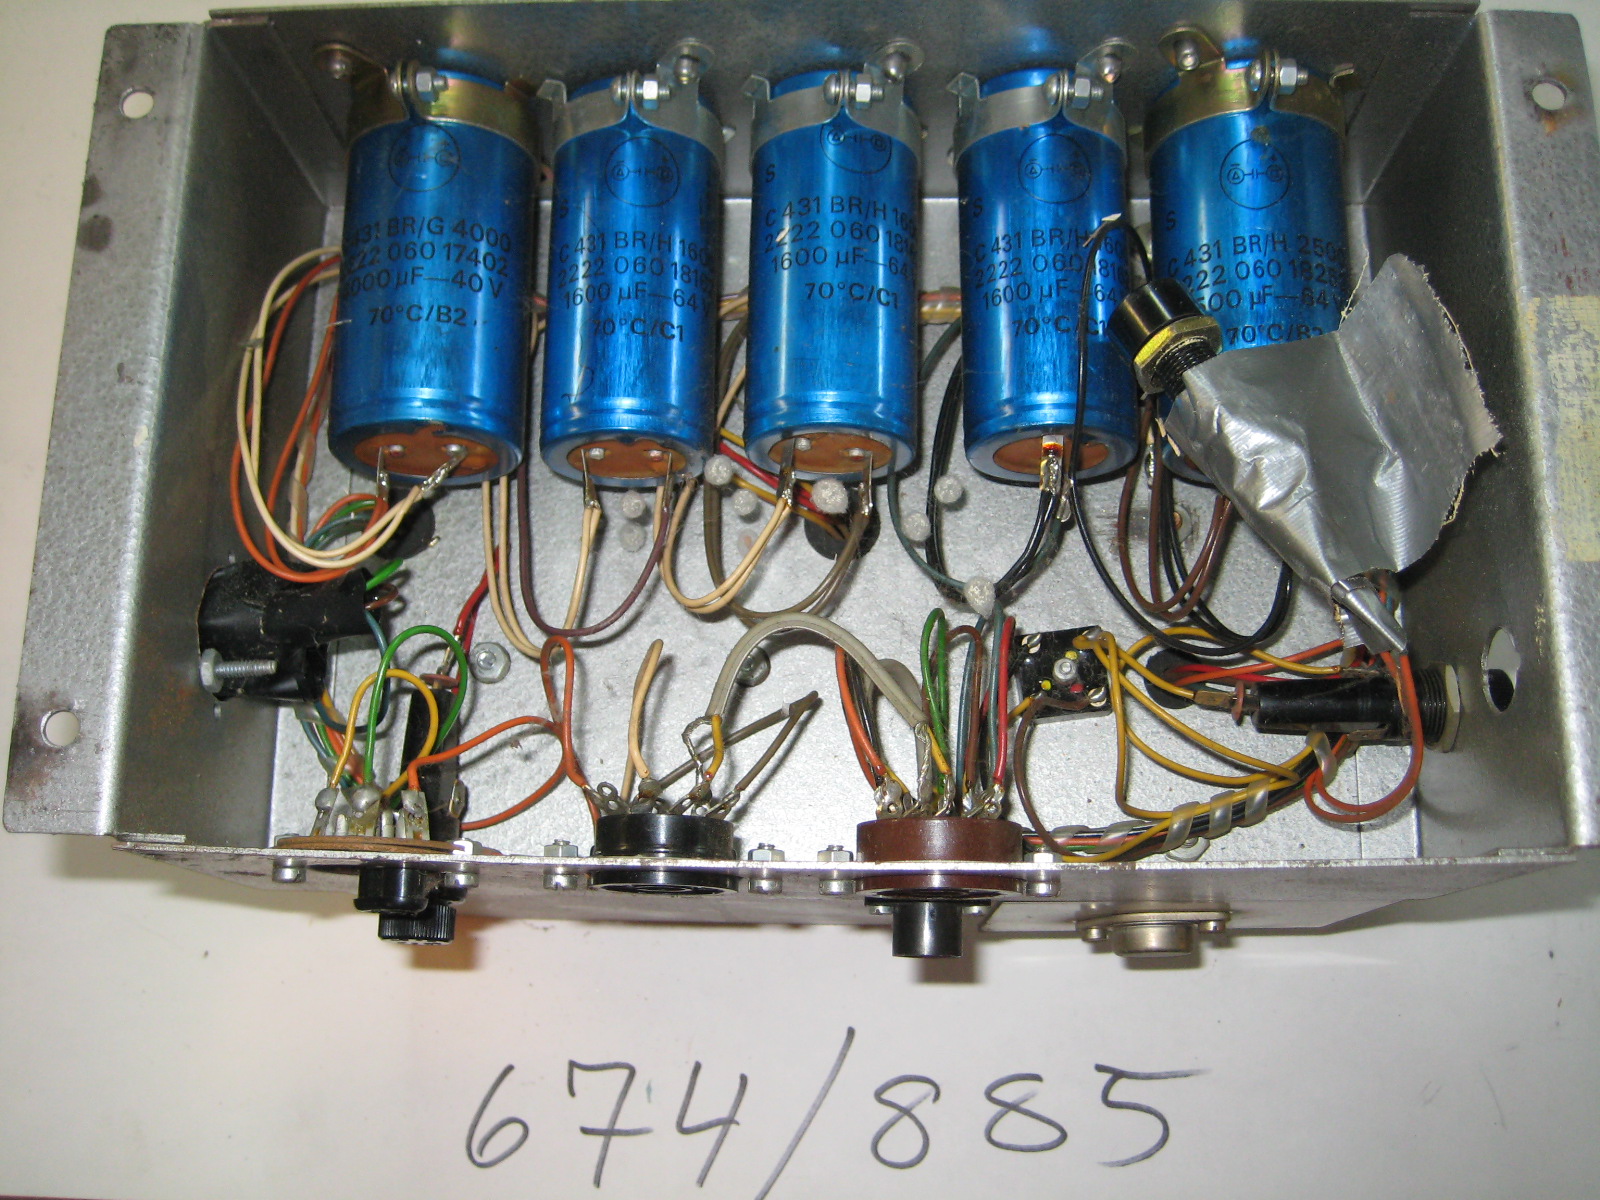 | |
| M400S # 885/674 | Top view of Mellotron installation | 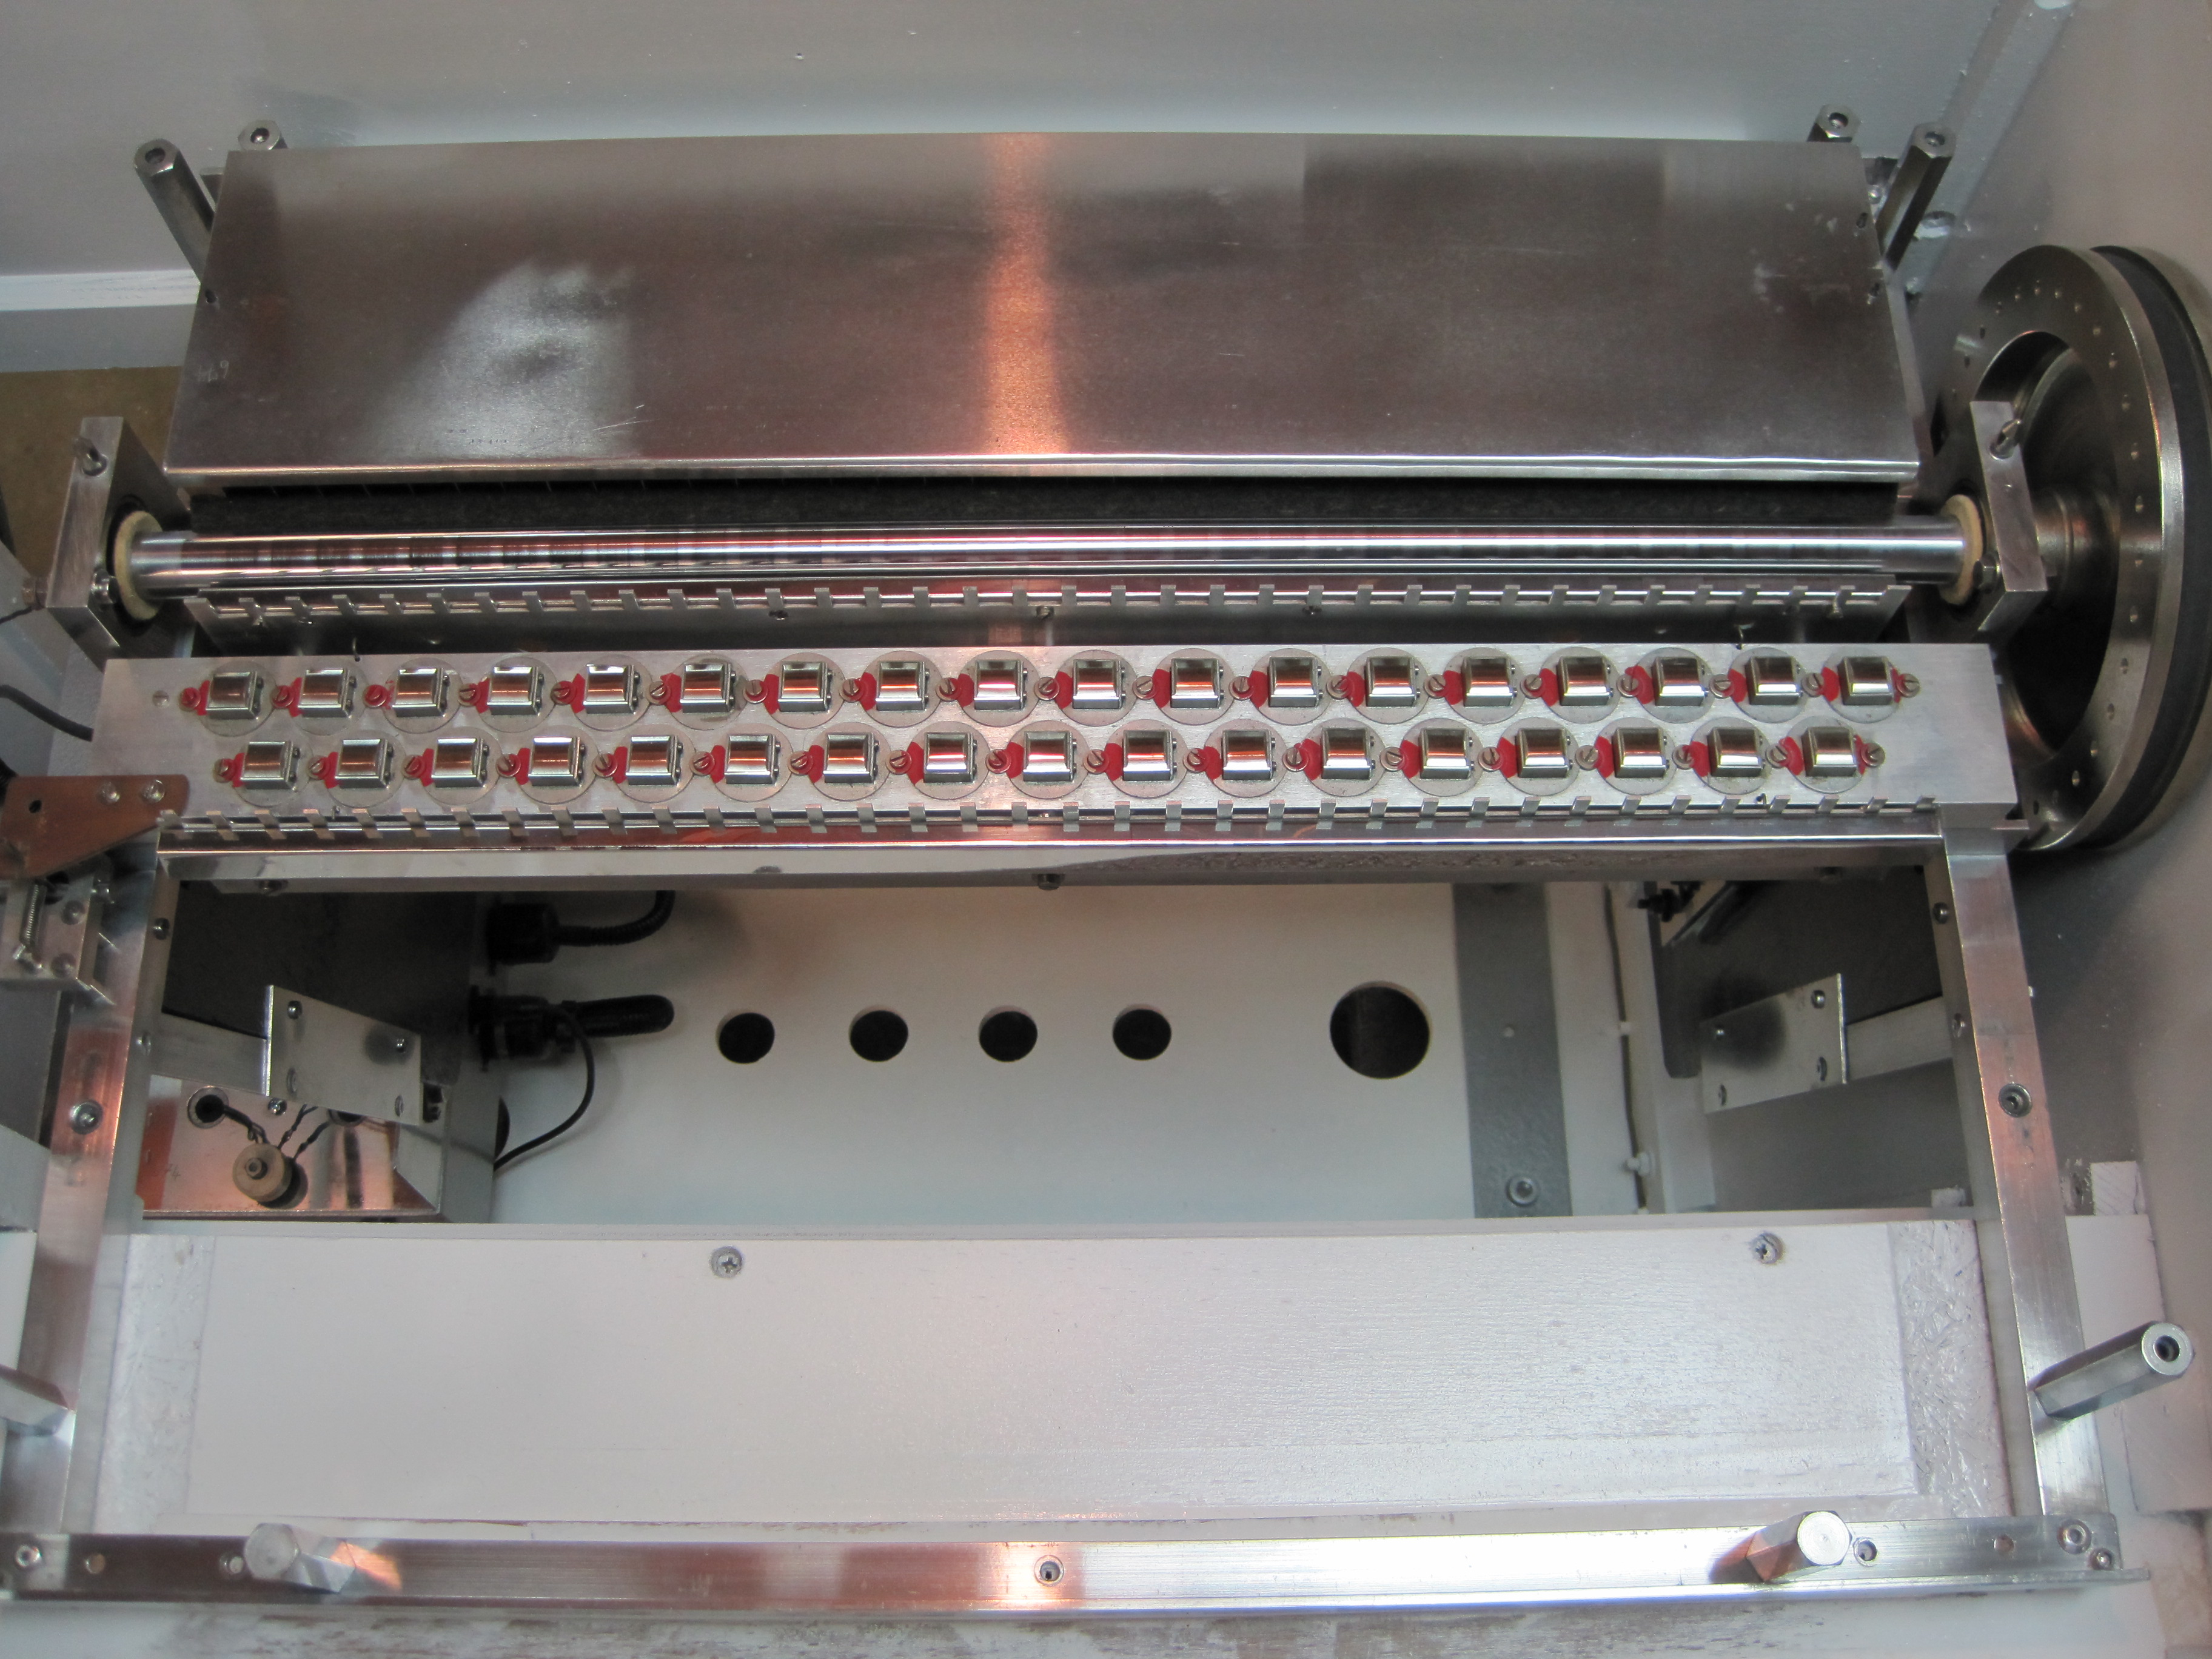 | |
| M400S # 885/674 | Out of place nut ruined the tach head | 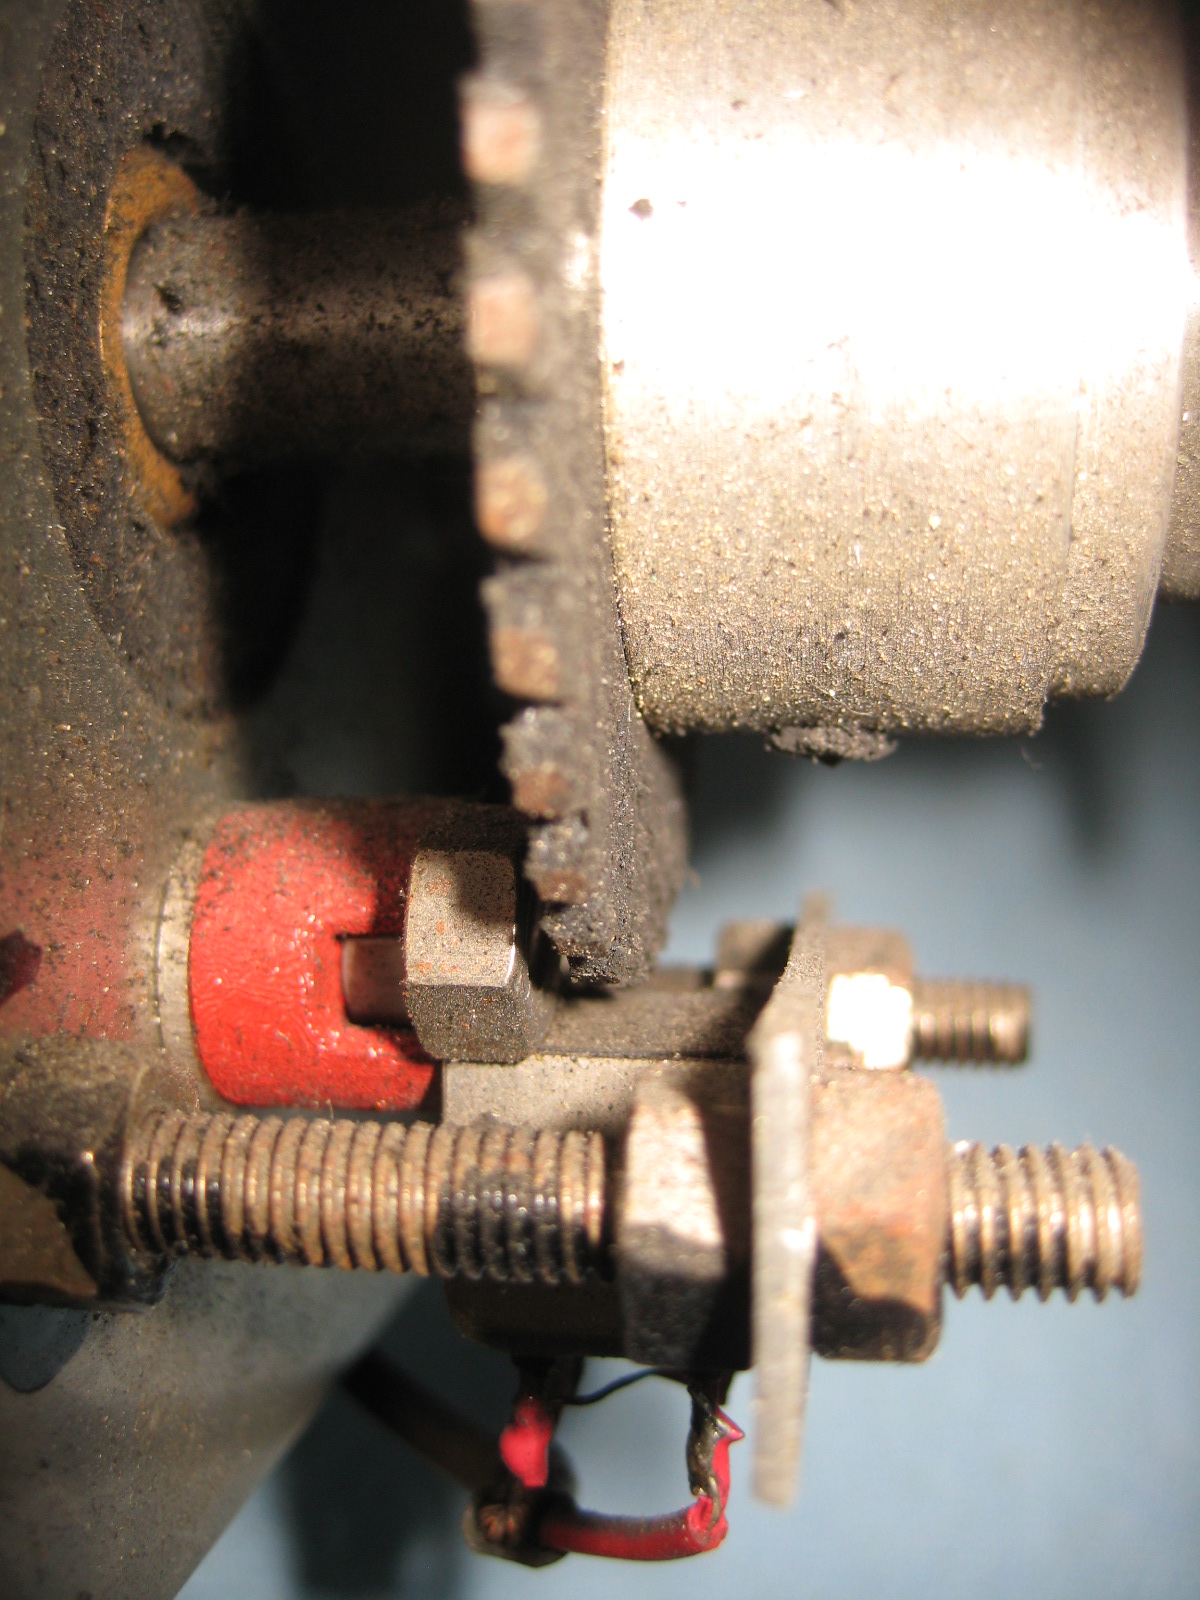 | |
| M400S # 885/674 | How to wreck a motor |  | |
| M400S # 885/674 | Waiting for the glue to dry | 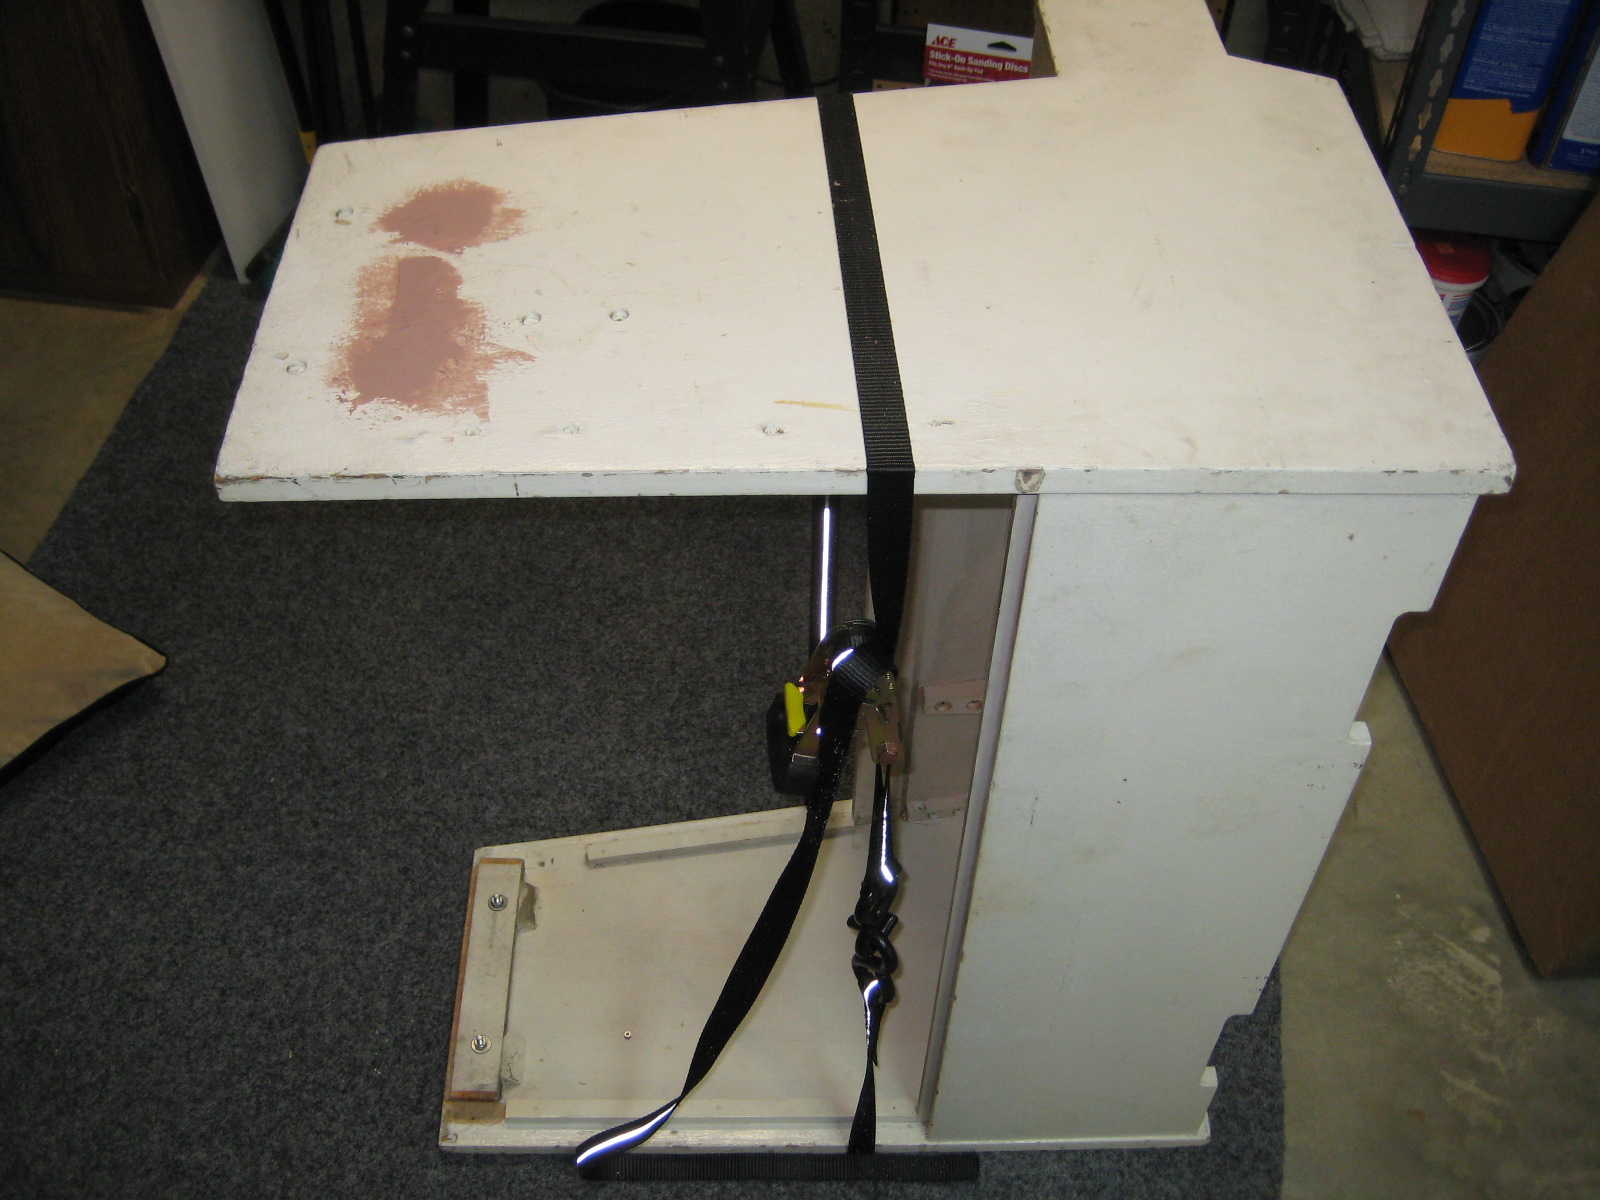 | |
| M400S # 885/674 | Rewired power supply | 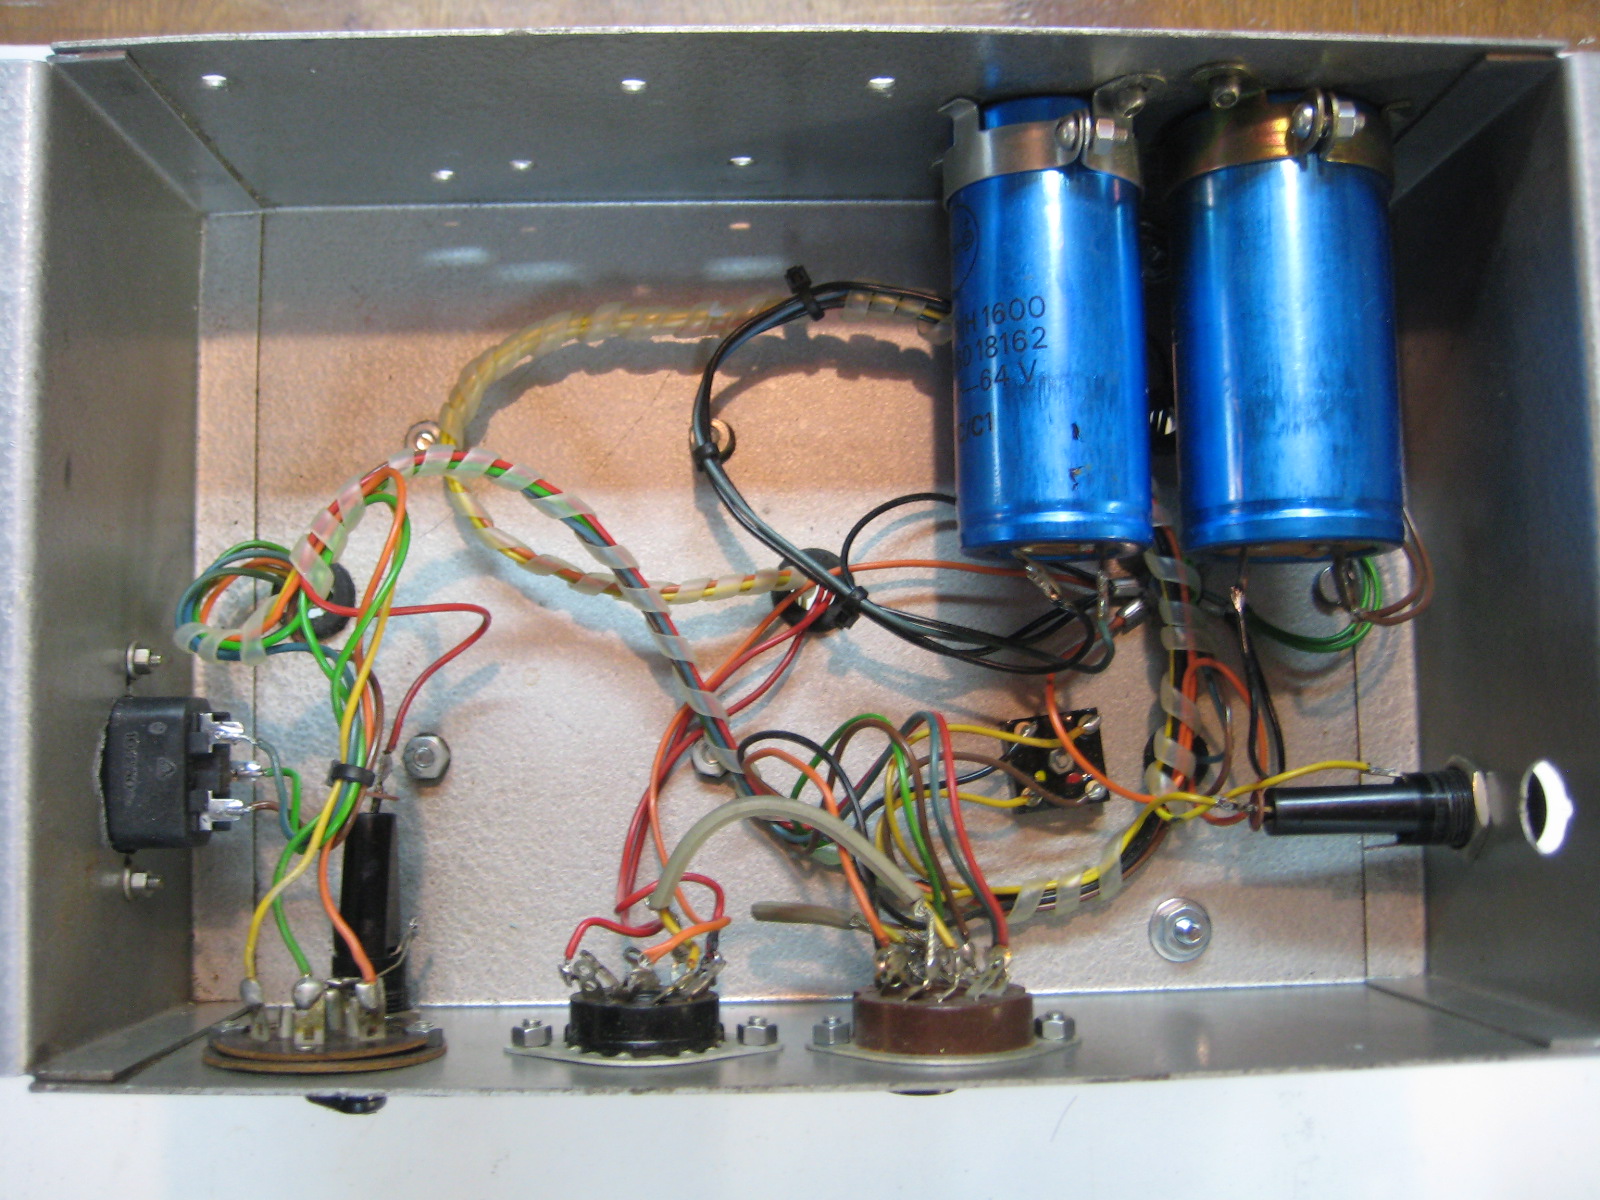 | |
| M400S # 885/674 | View of lower cabinet interior | 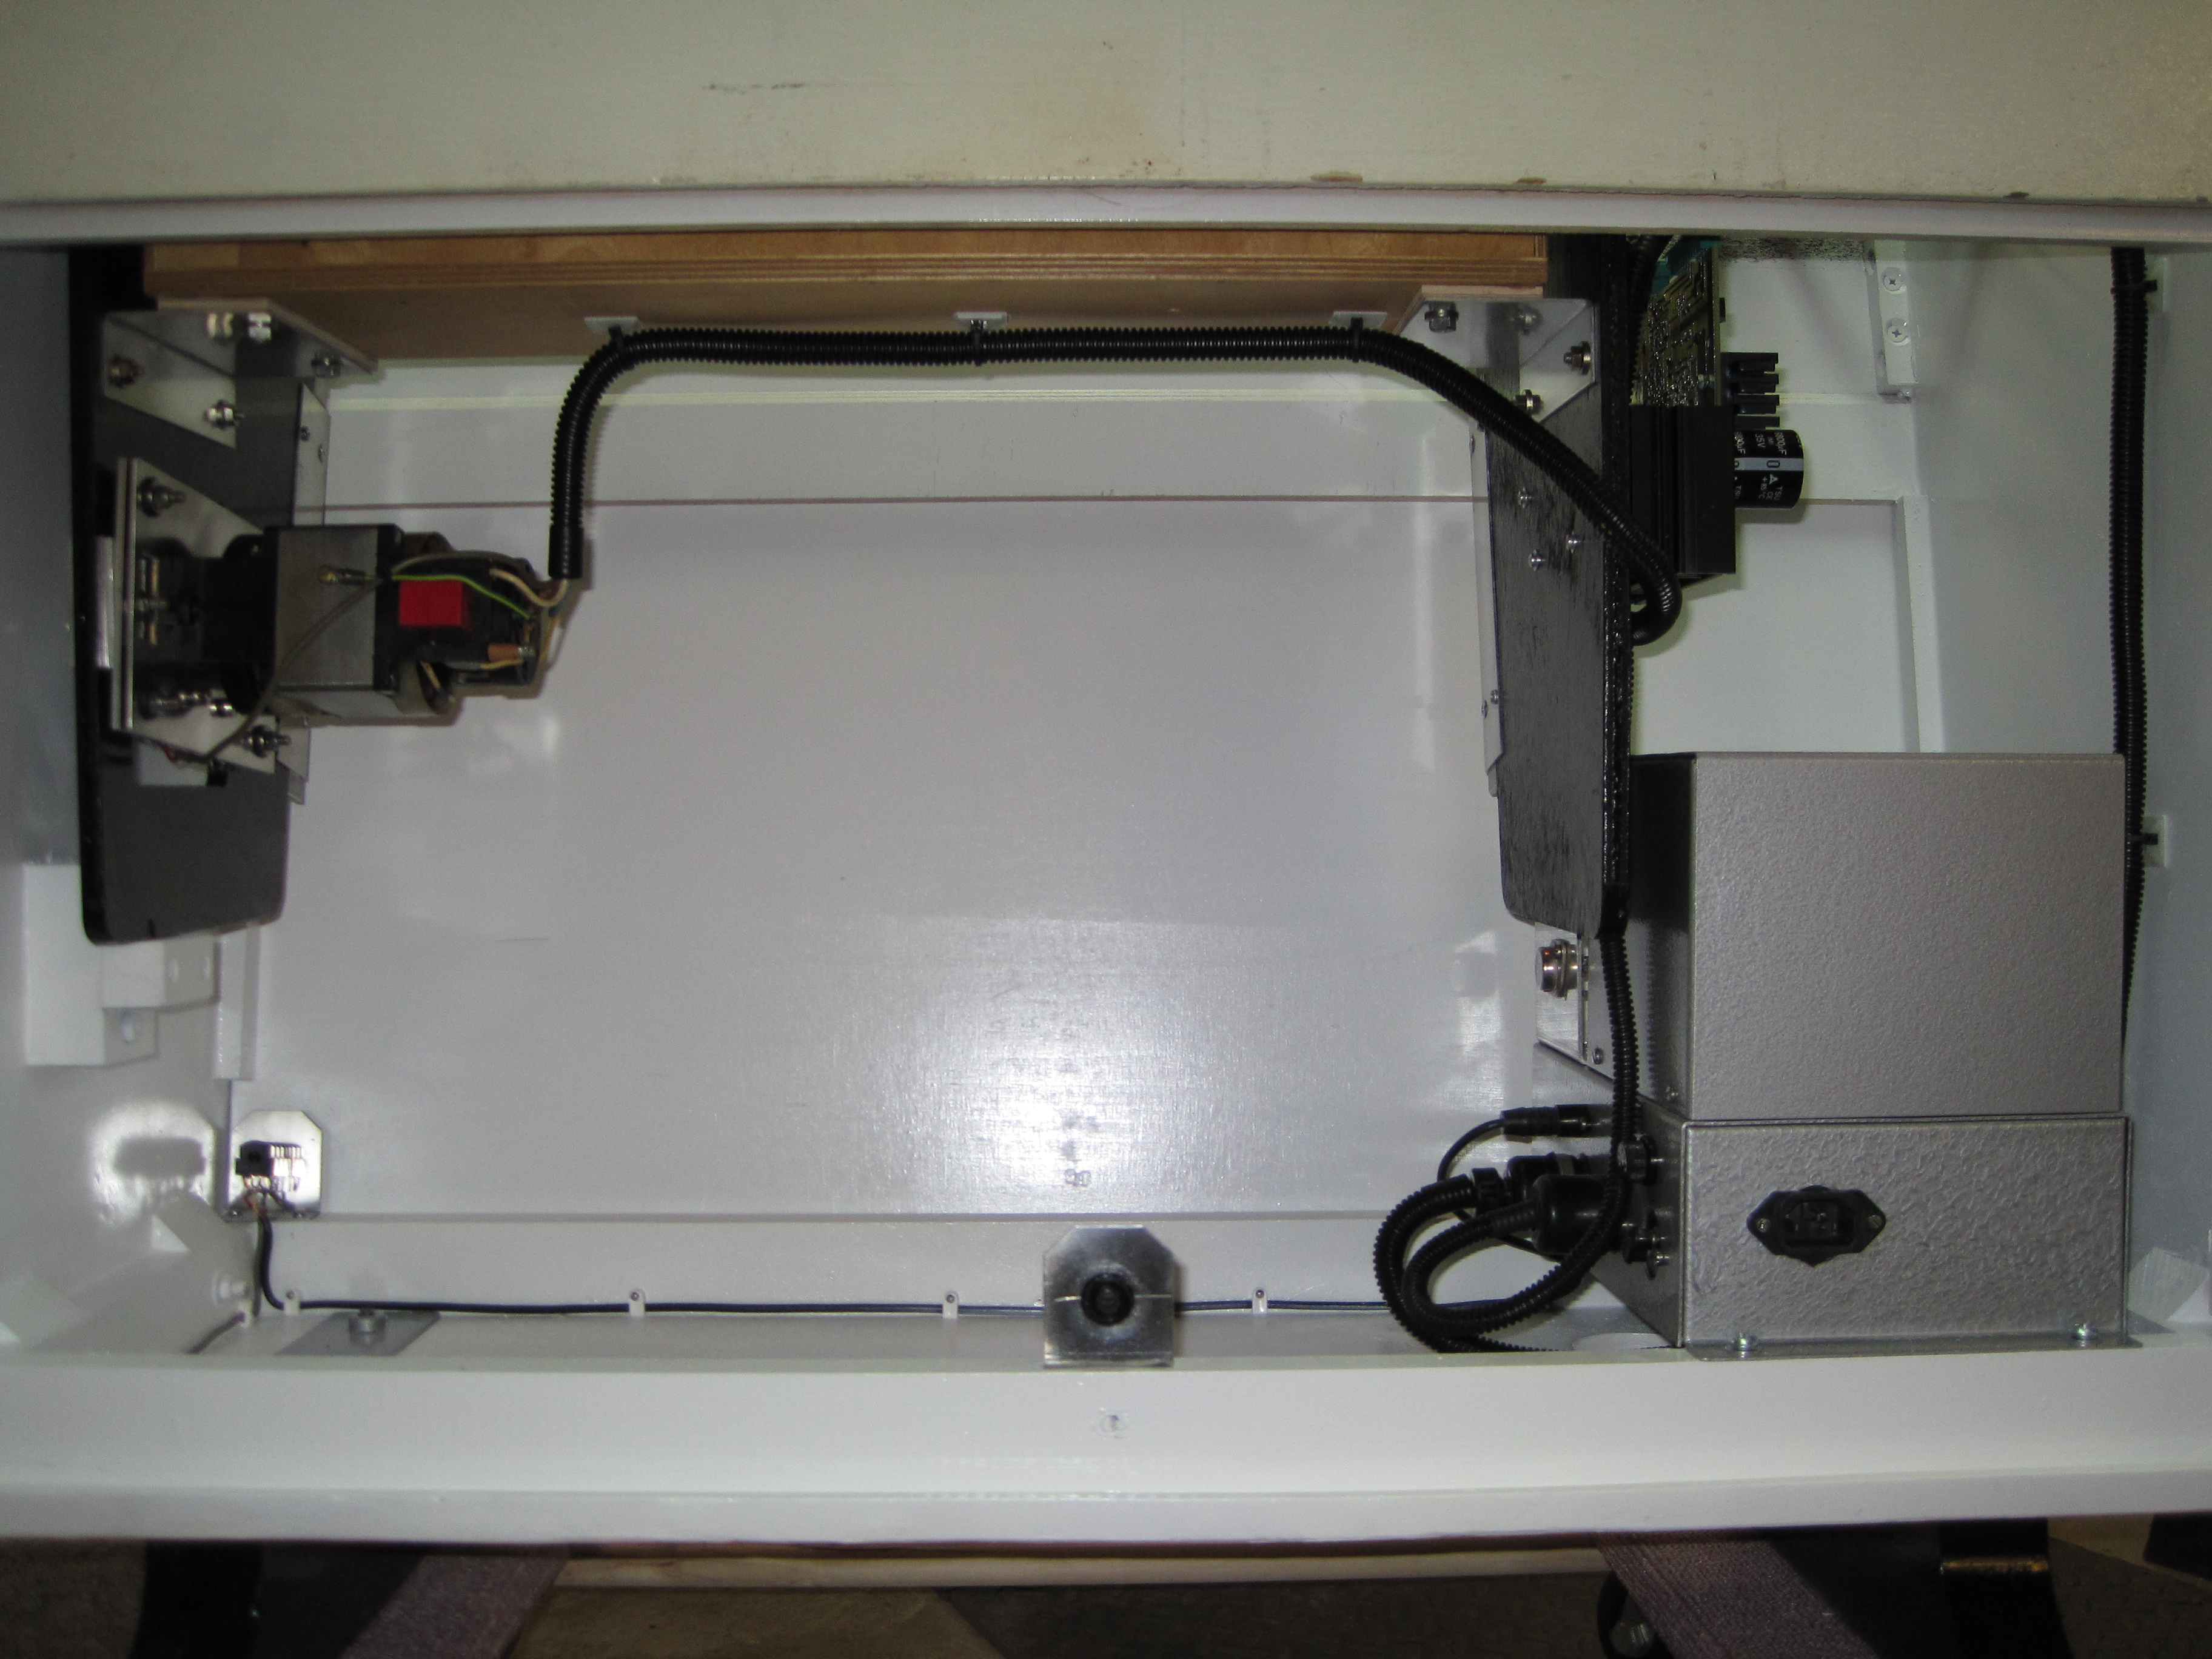 | |
| M400S # 885/674 | Frozen filthy motor | 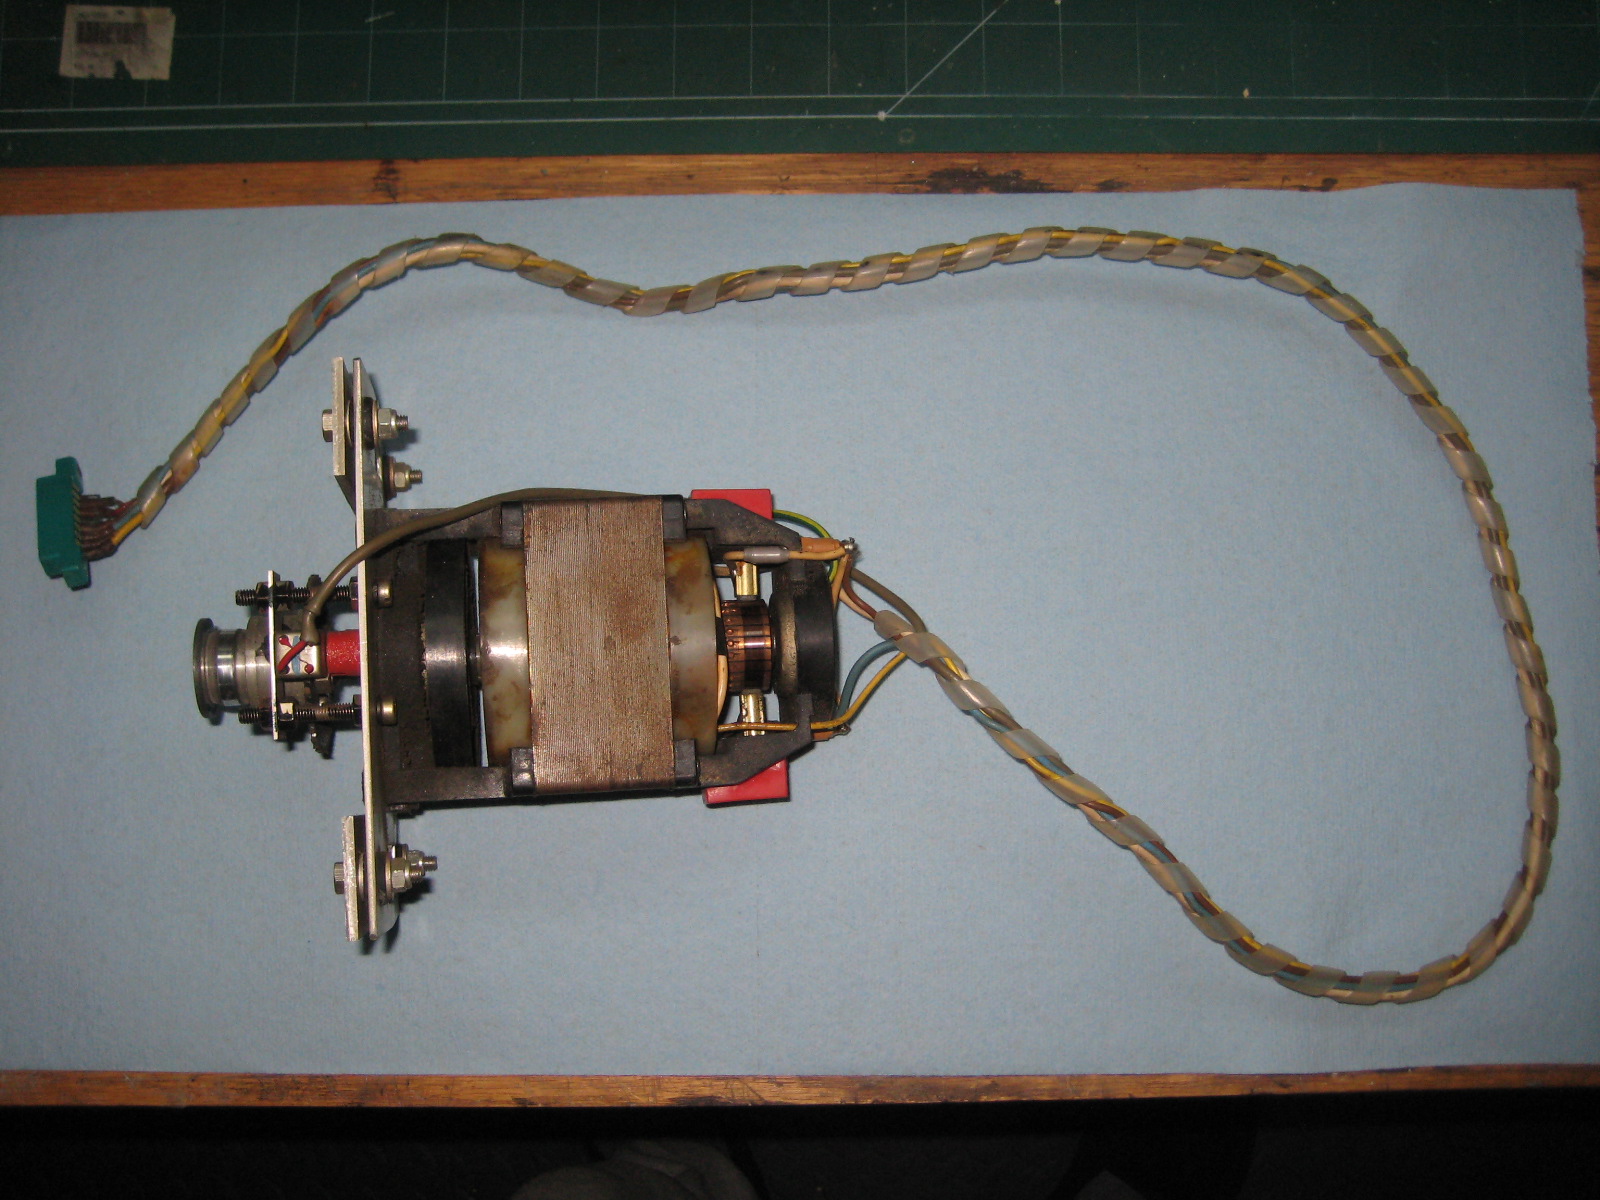 | |
| M400S # 885/674 | Rebuilt motor | 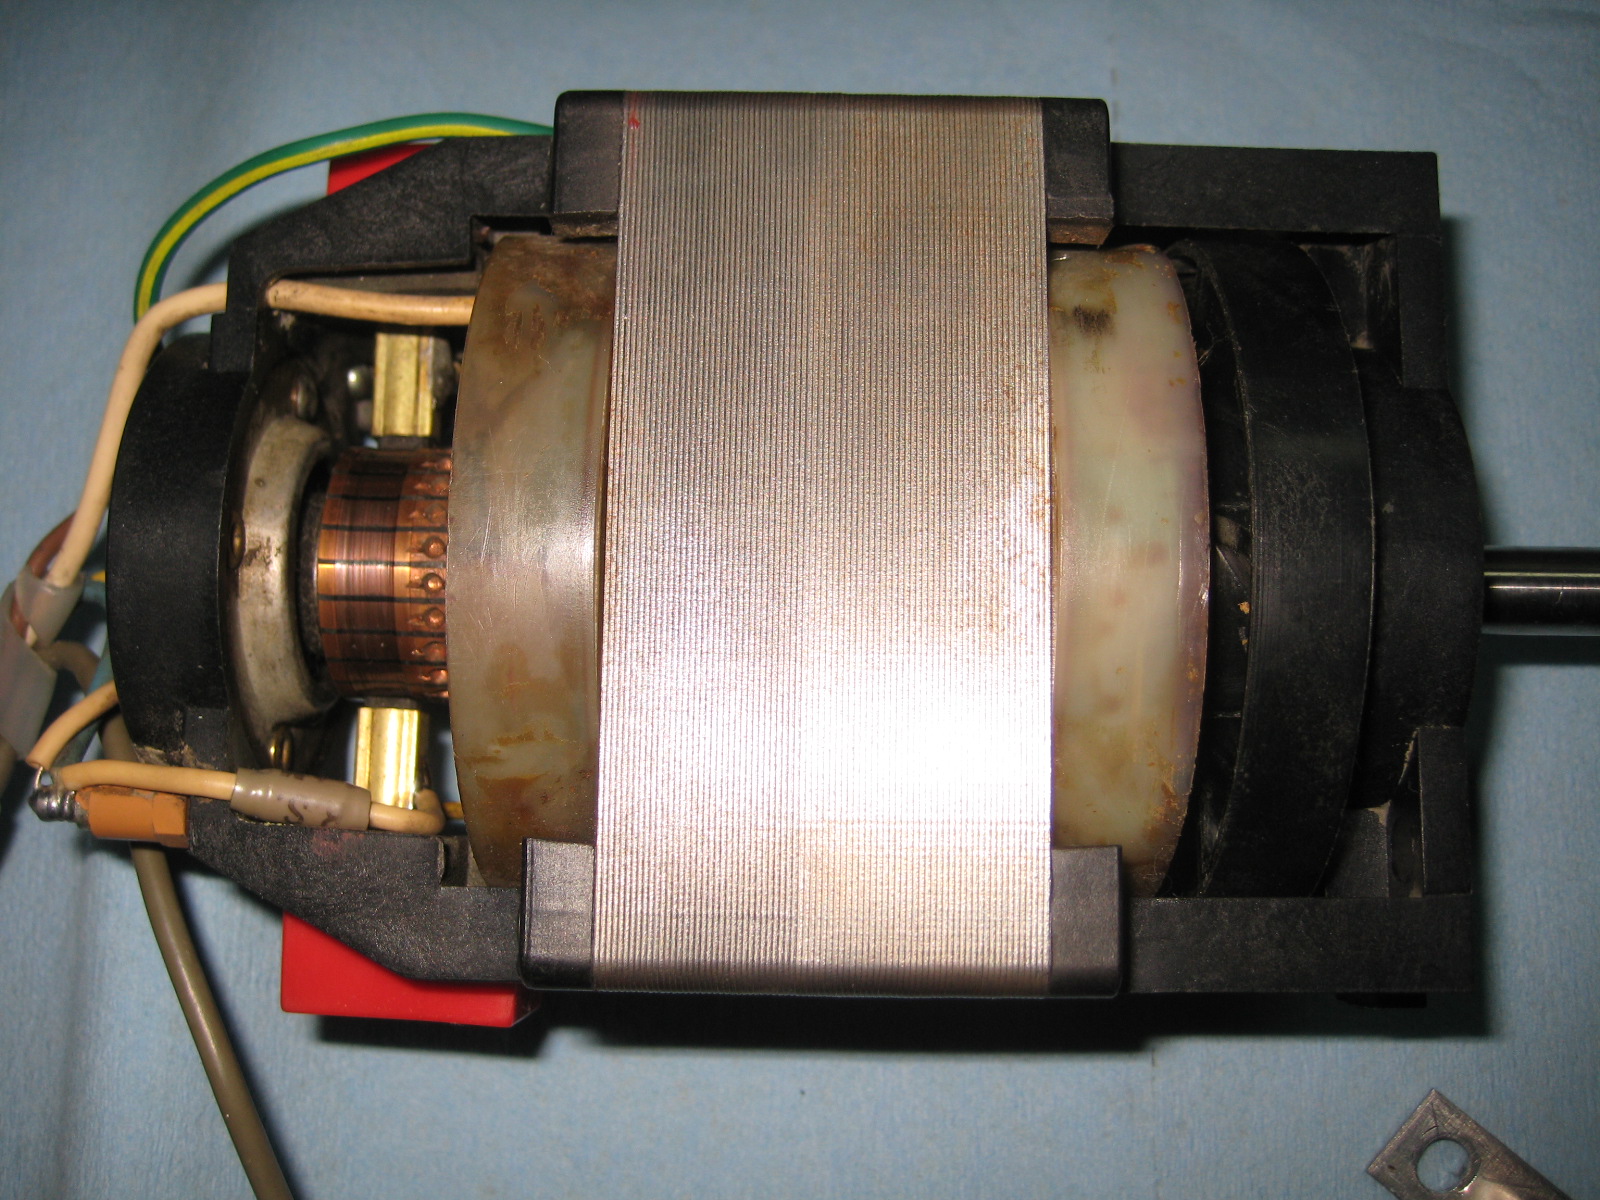 | |
| M400S # 885/674 | Another view | 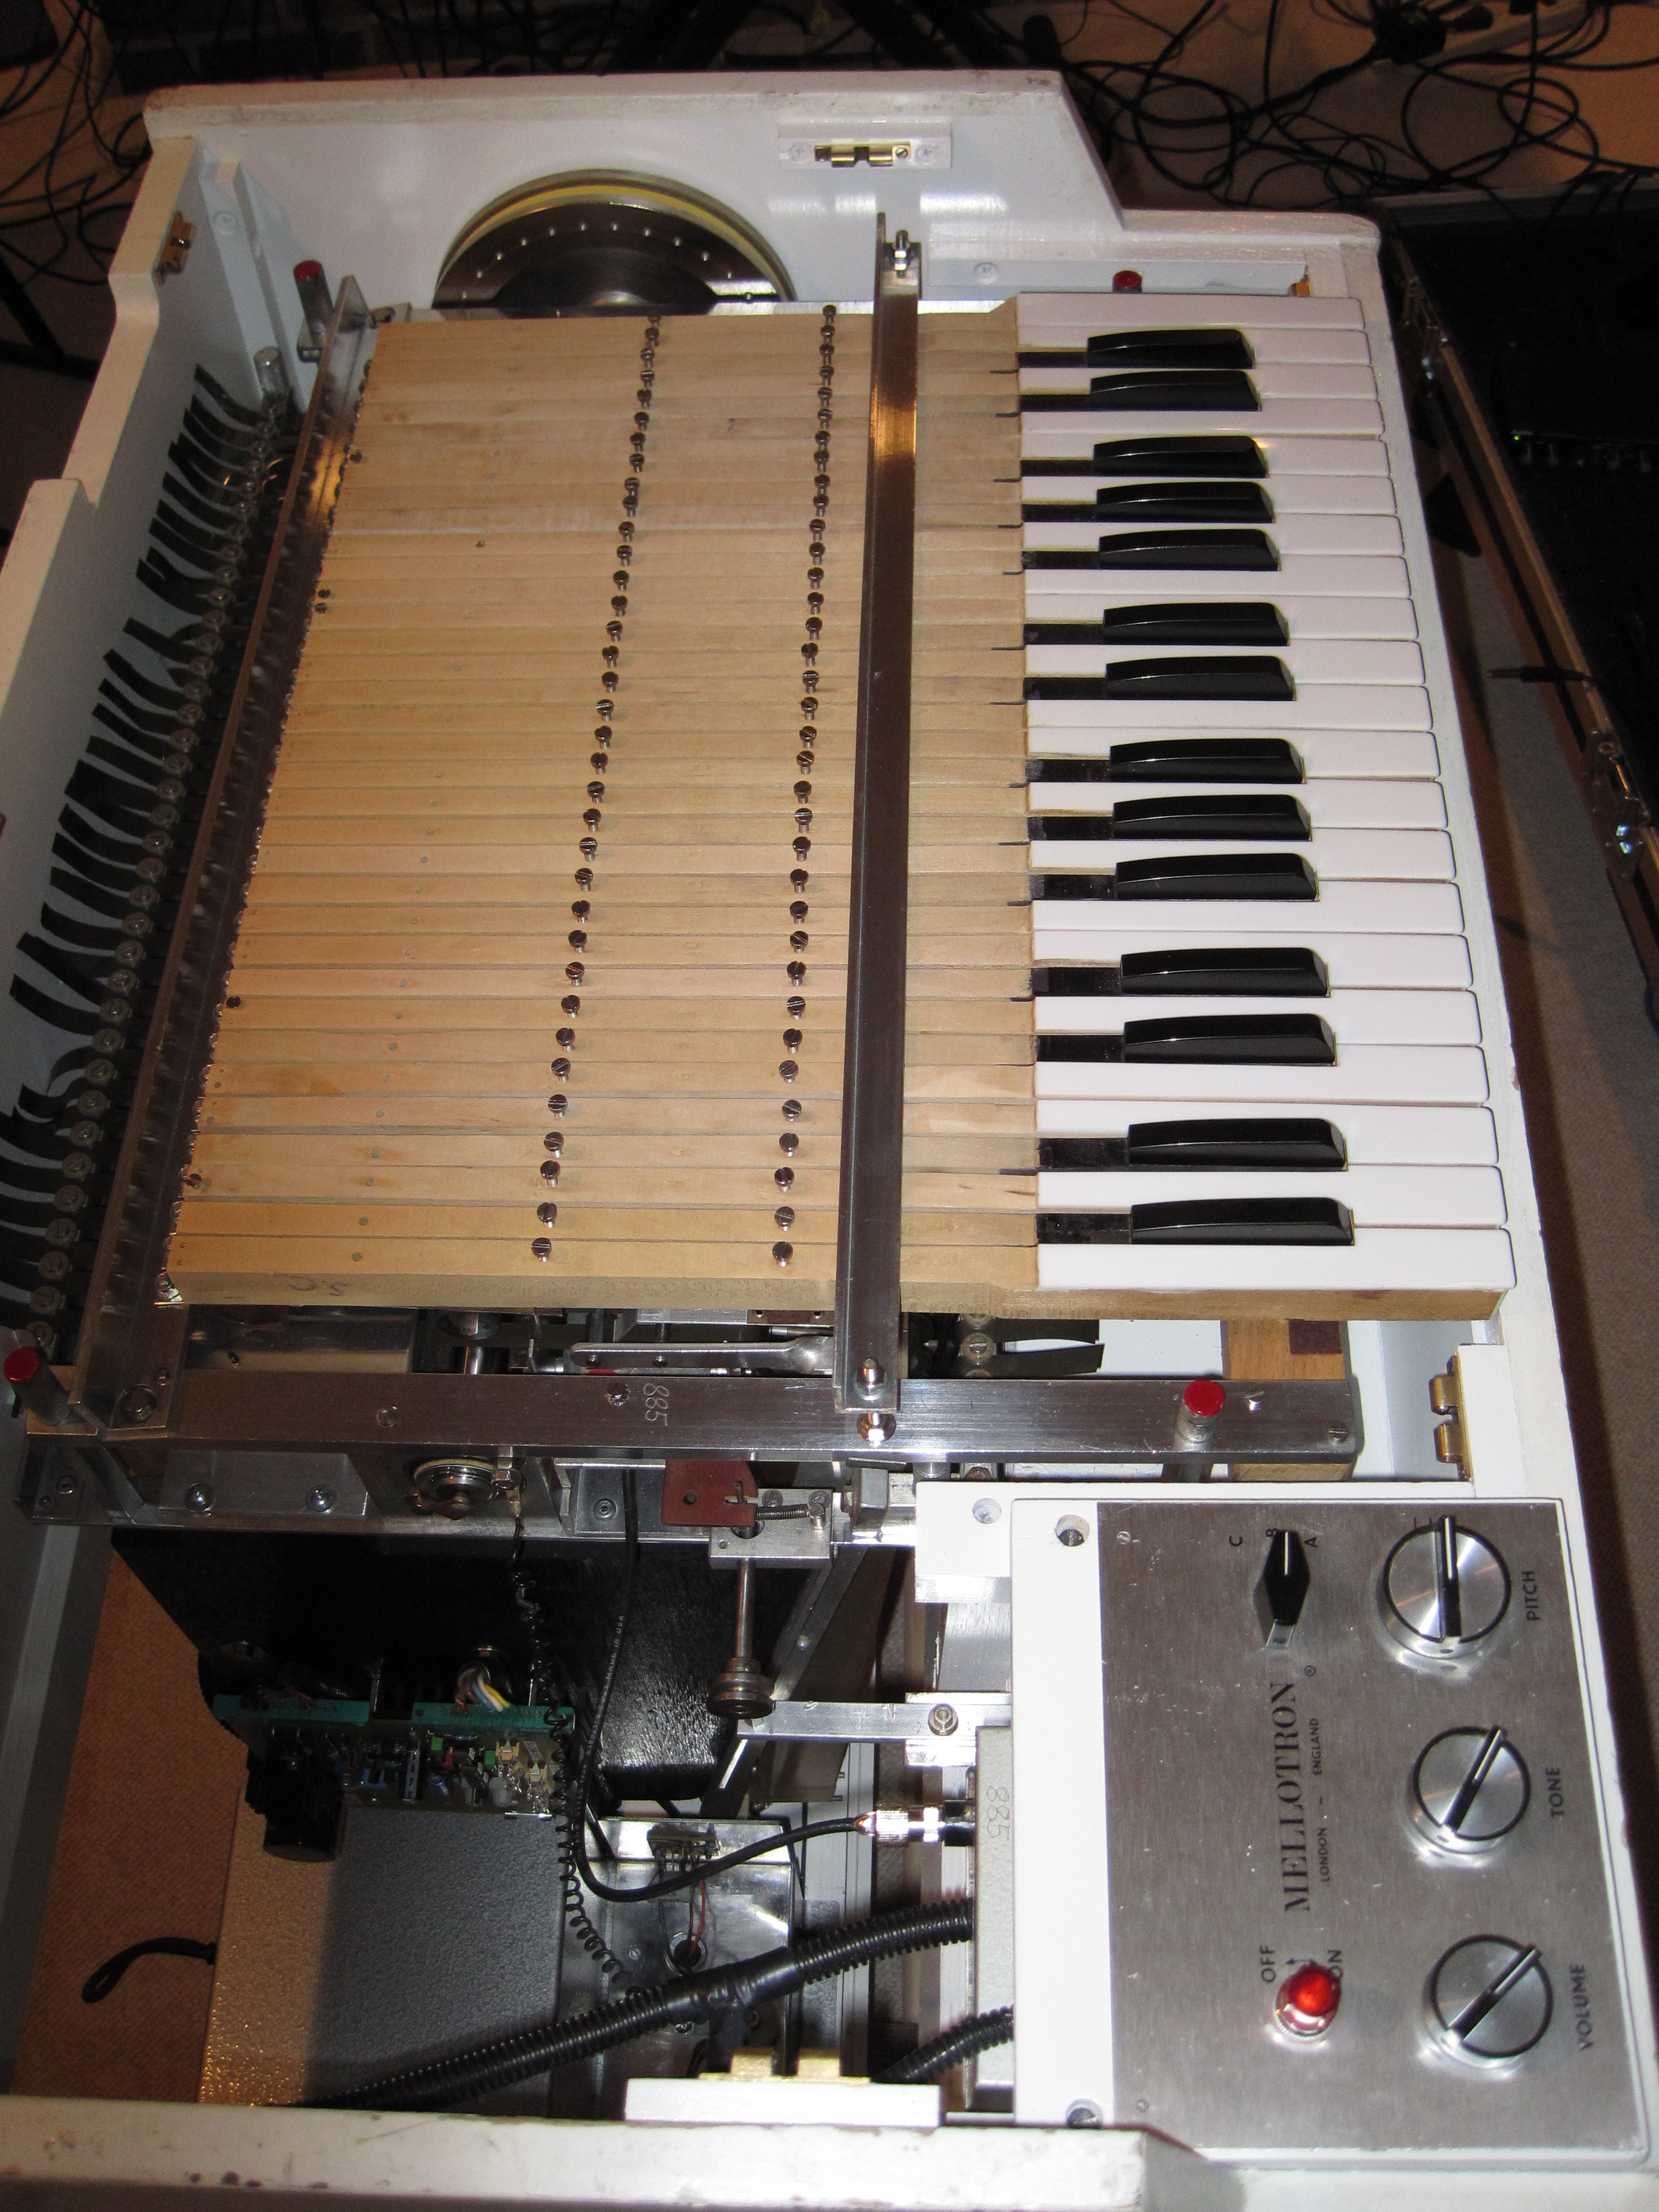 | |
| M400S # 885/674 | Cabinet with cross rails | 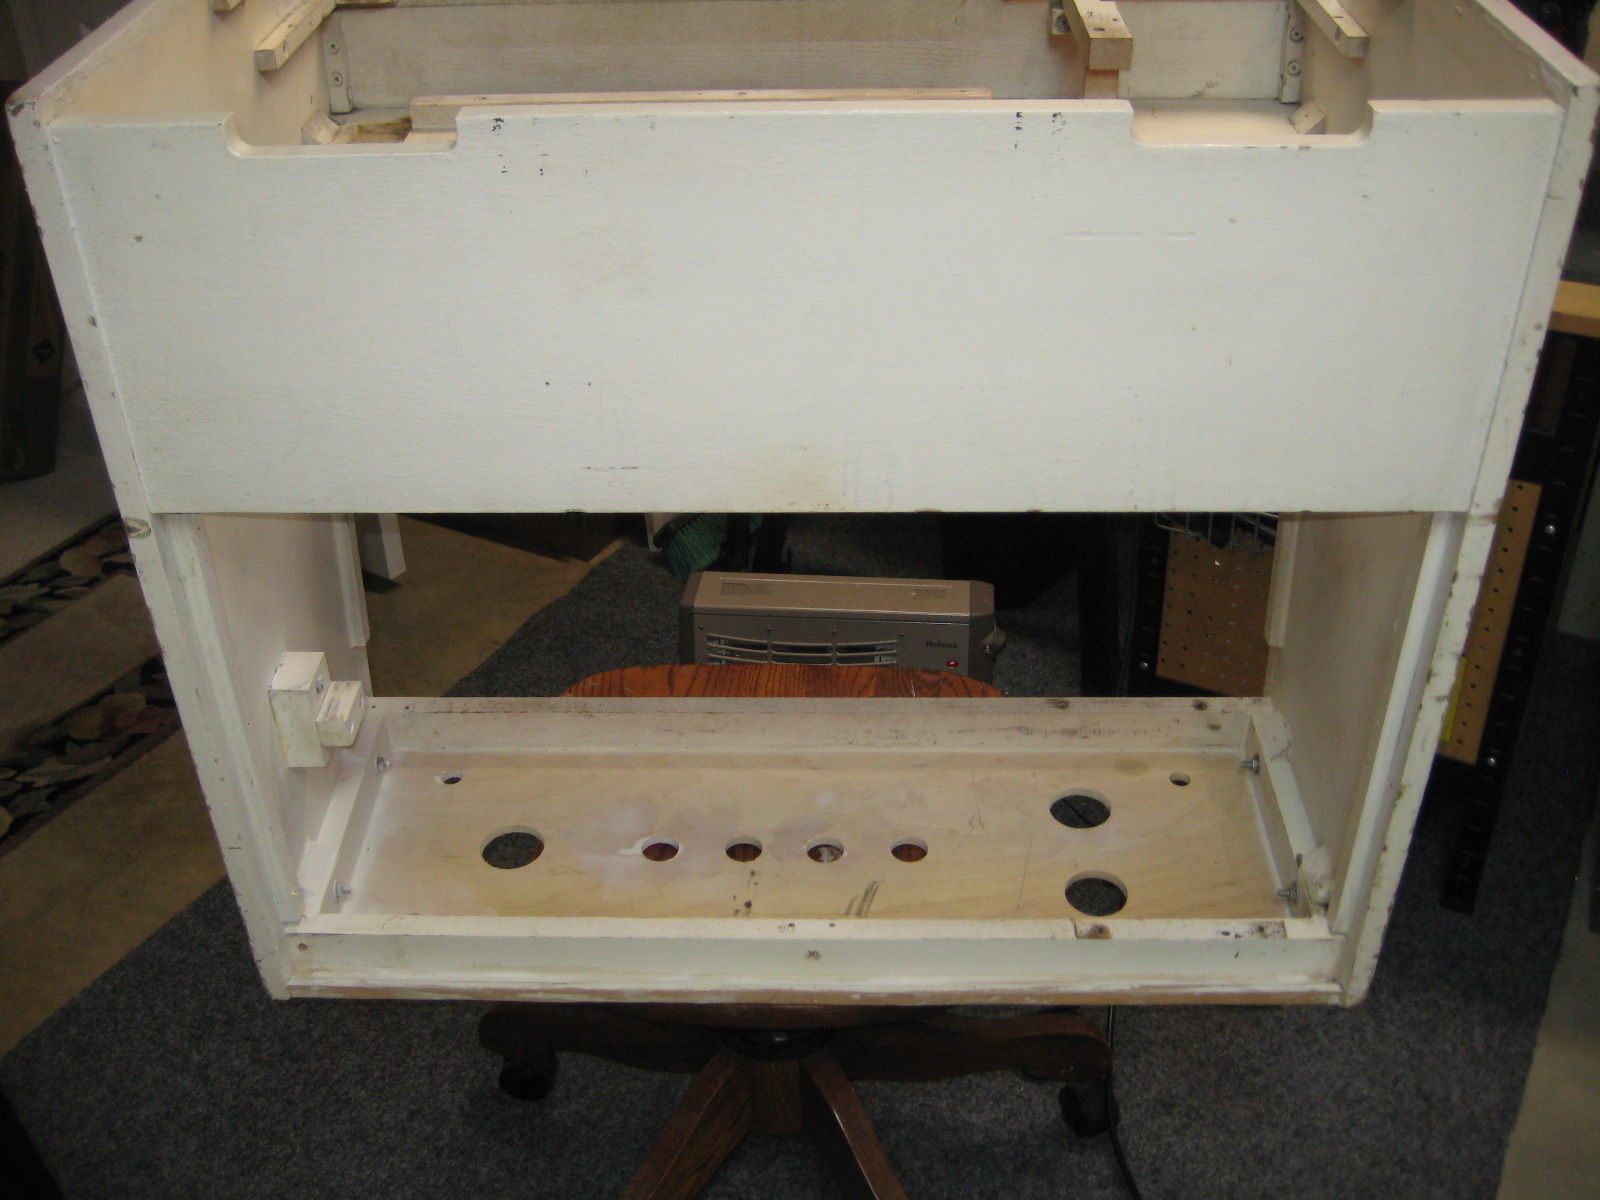 | |
| M400S # 885/674 | Completed power supply | 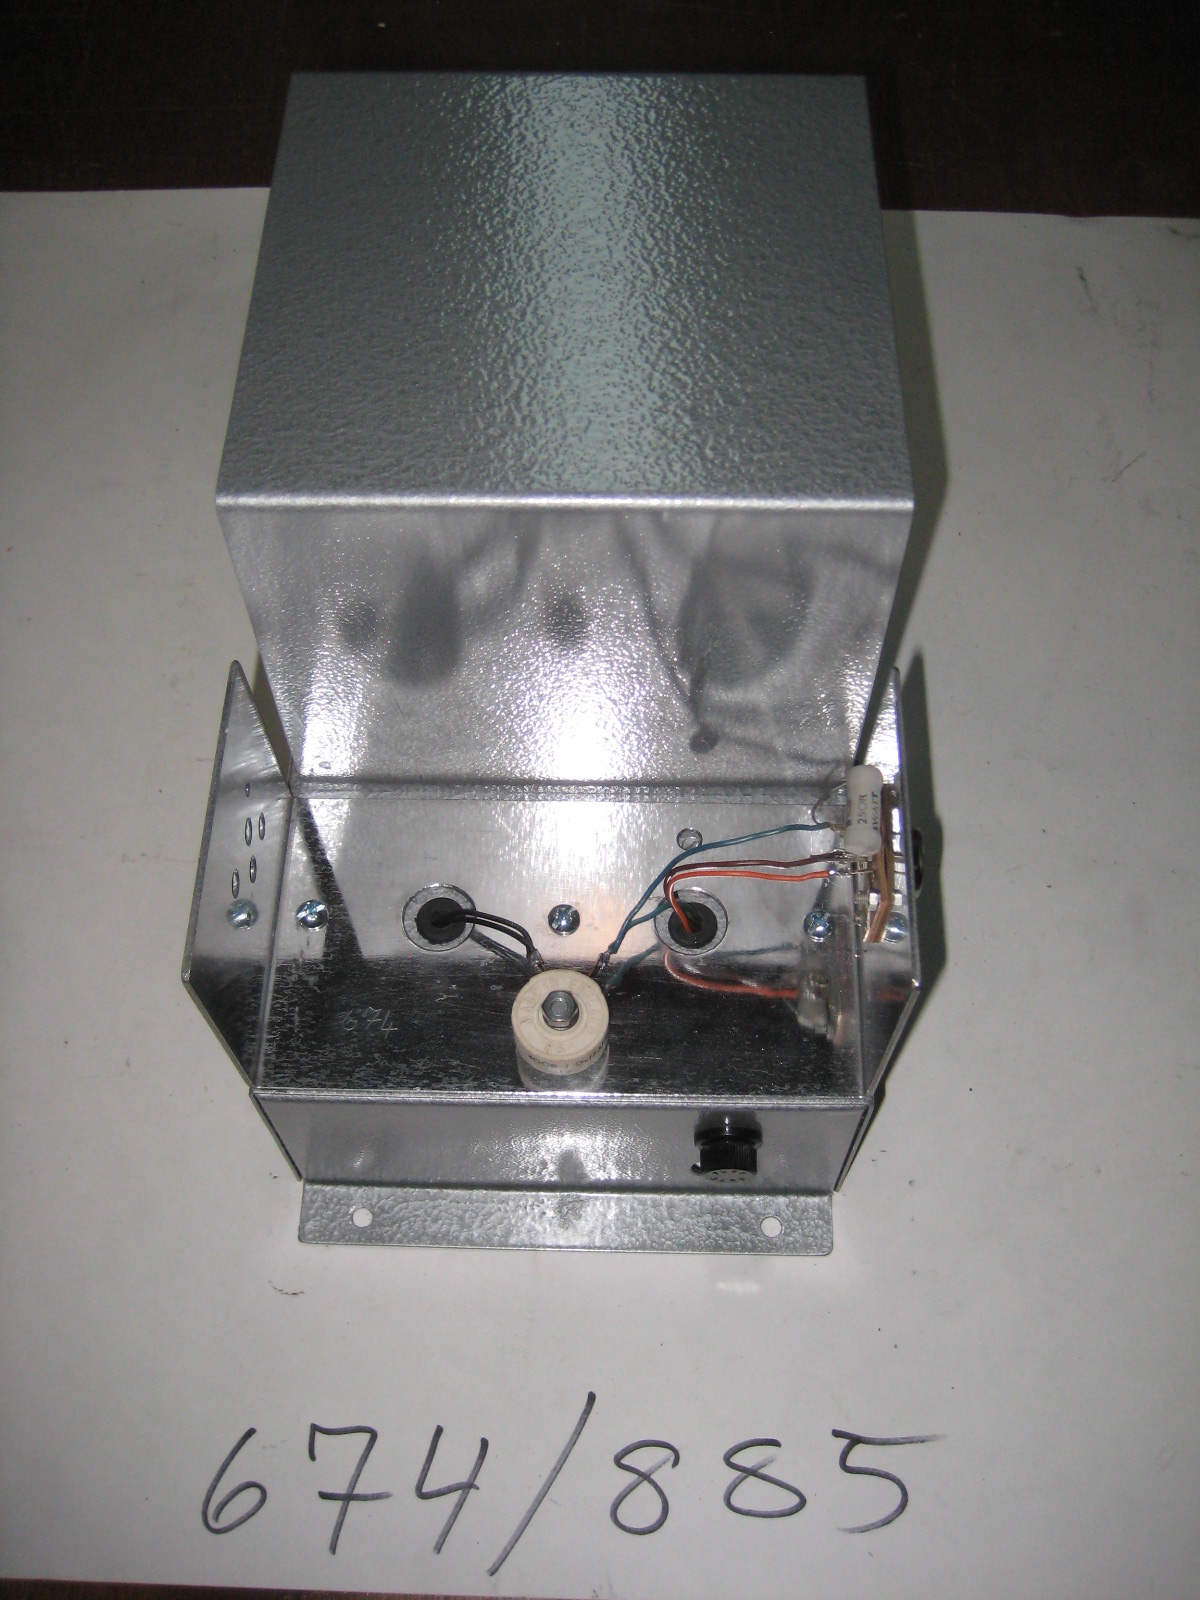 | |
| M400S # 885/674 | Beginning the keyboard rebuild | 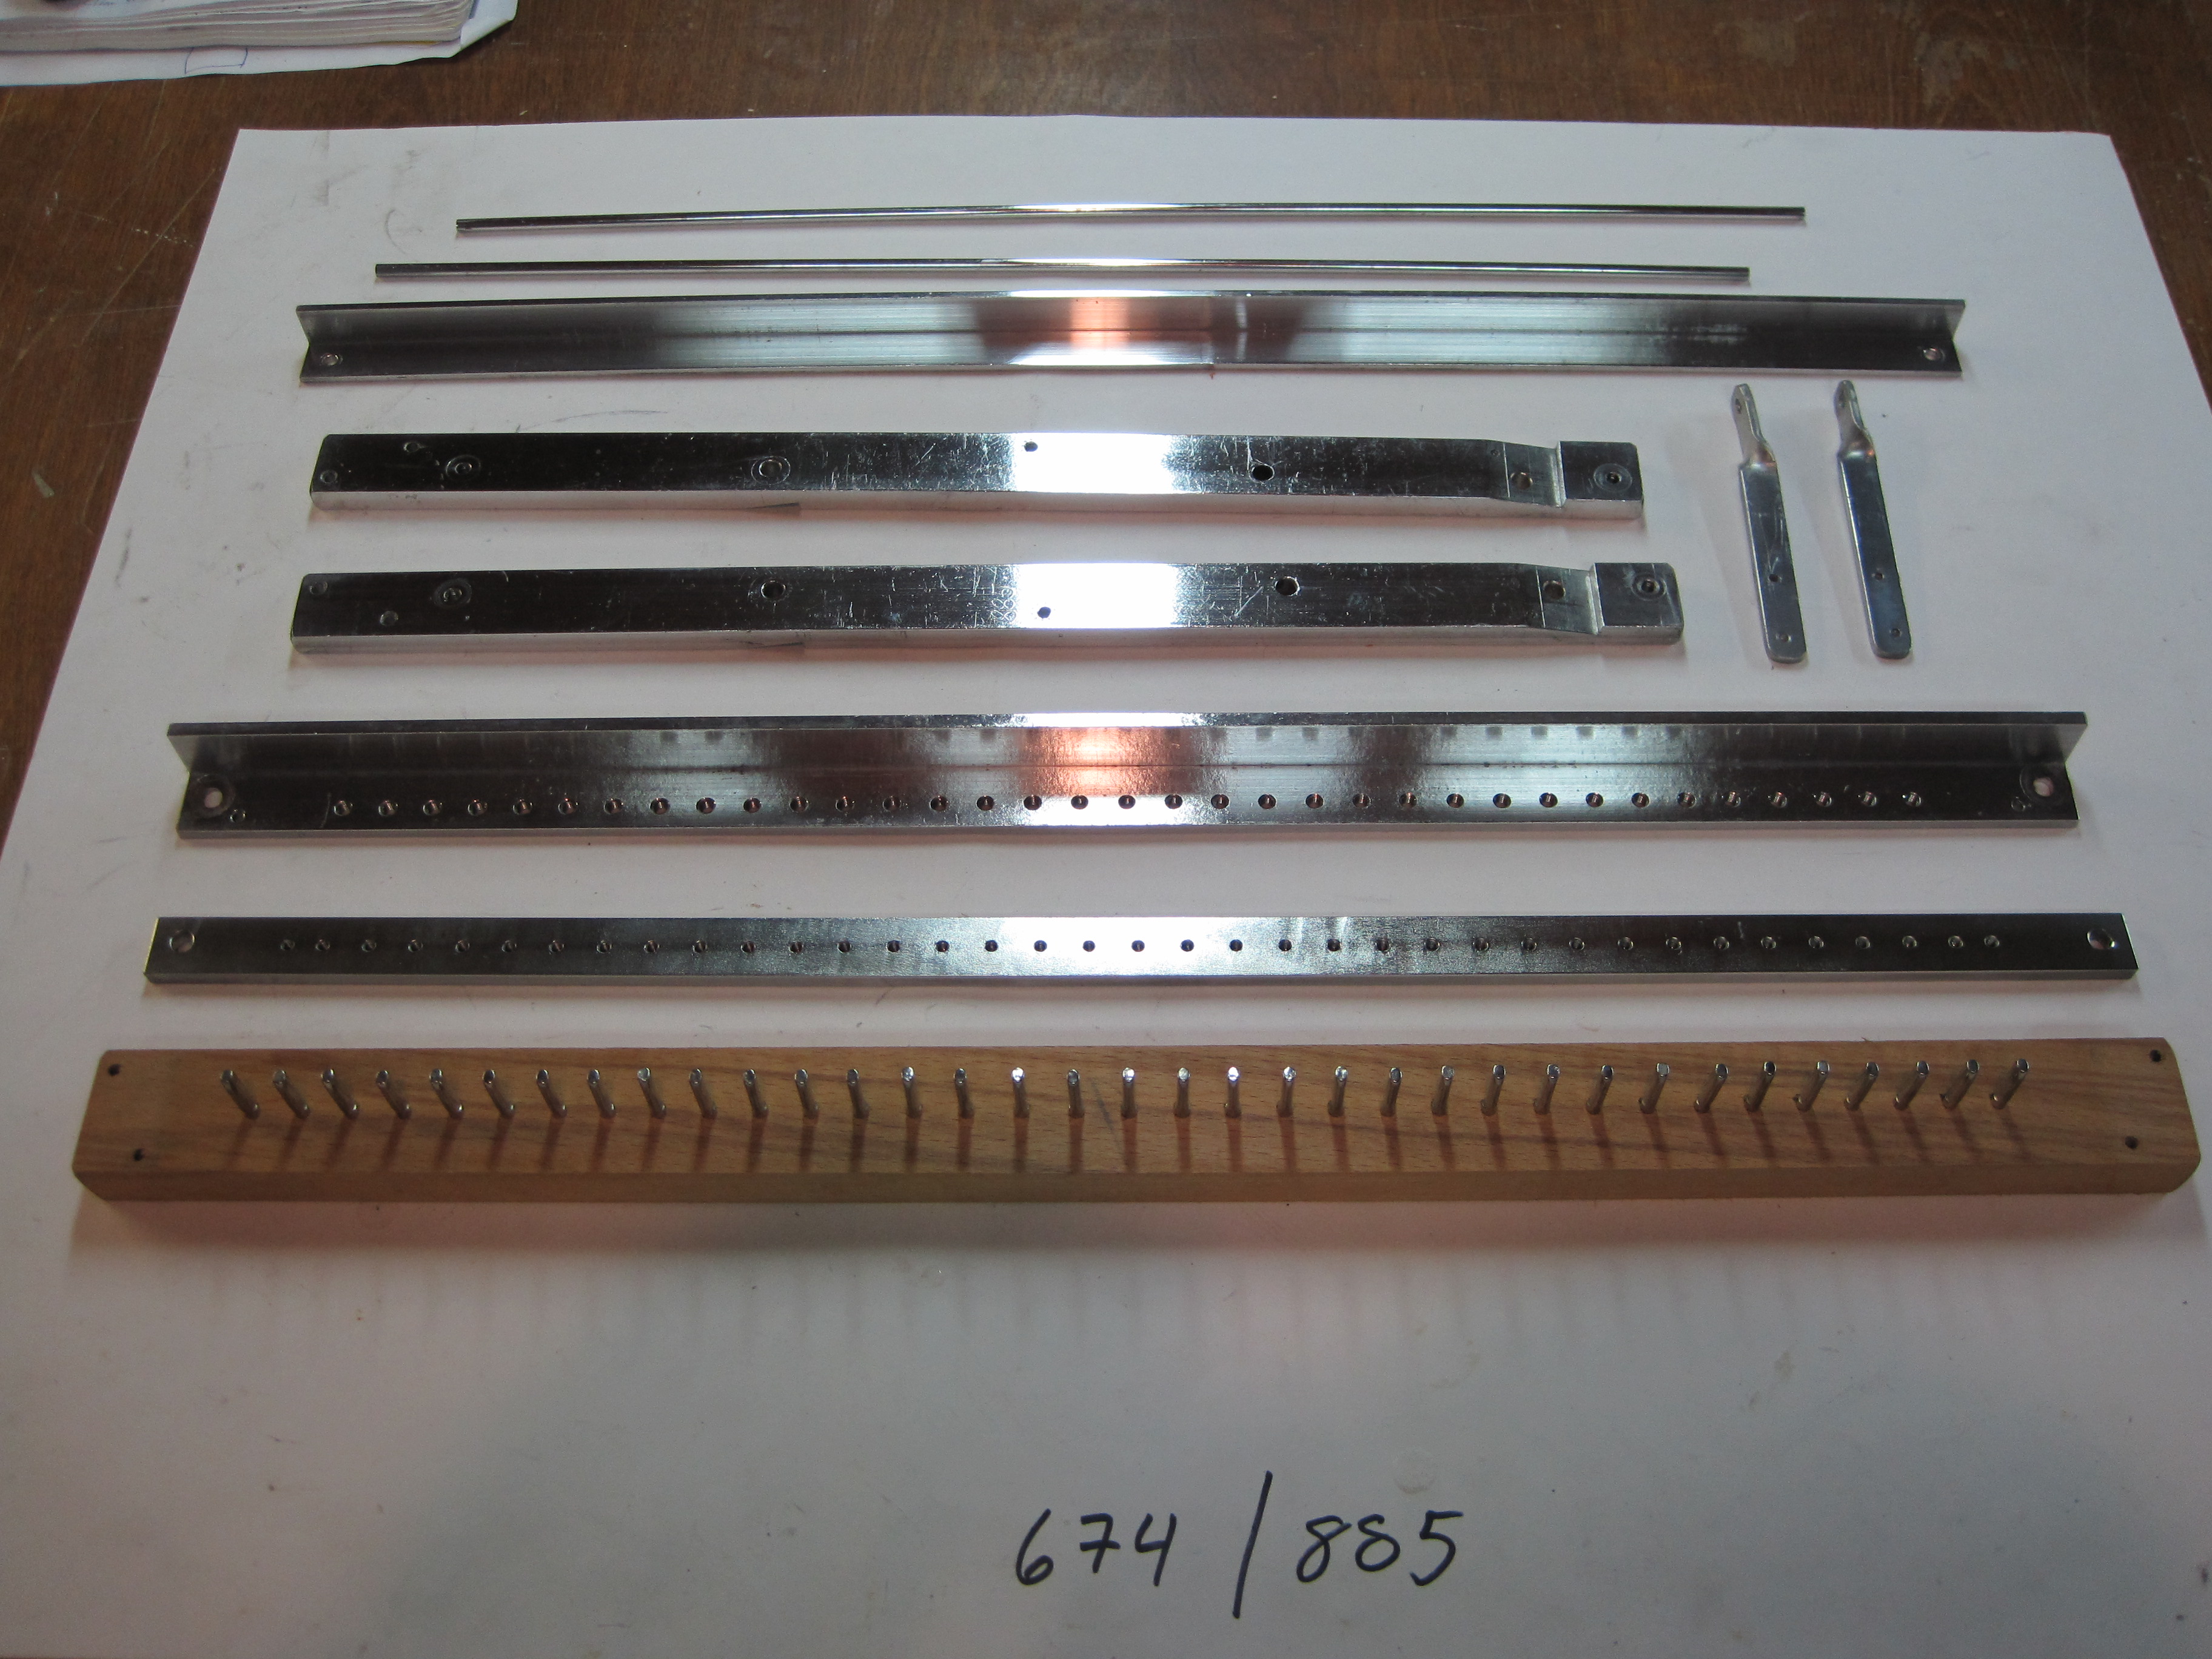 | |
| M400S # 885/674 | Cabinet interior | 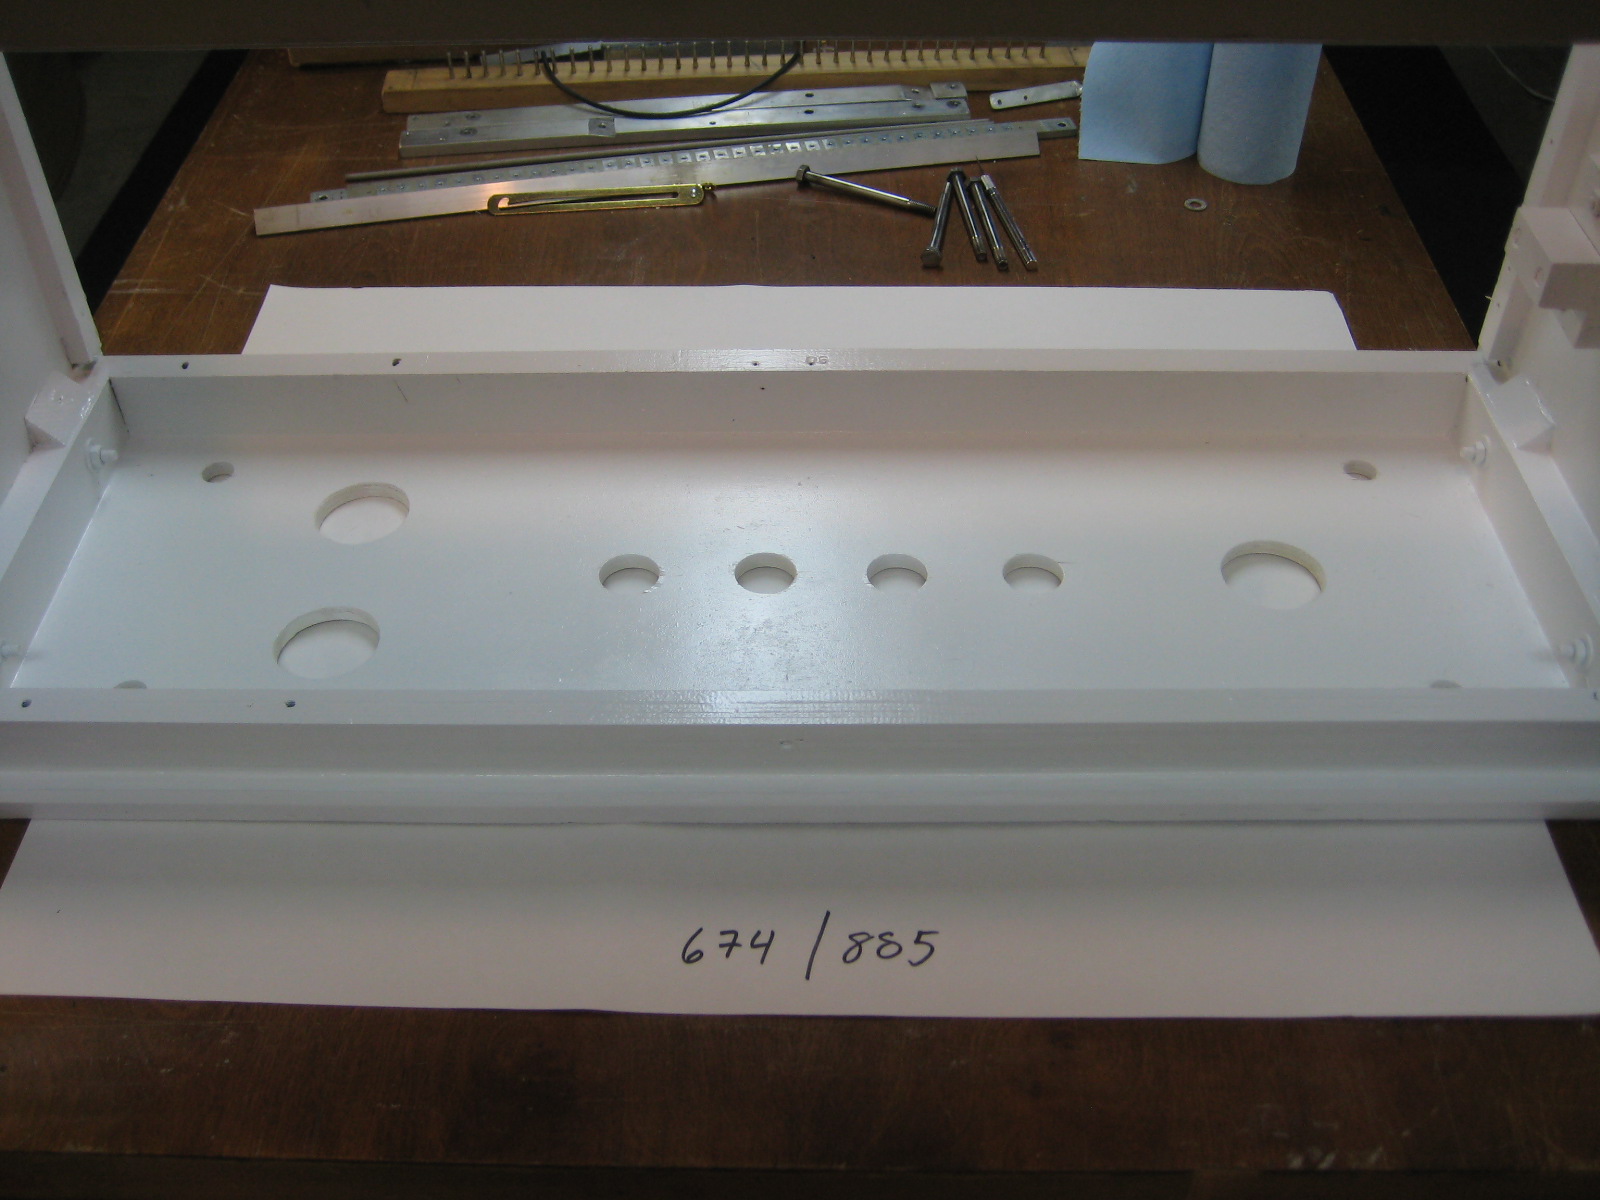 | |
| M400S # 885/674 | Drilling the floor |  | |
| M400S # 885/674 | IEC Mains Socket | 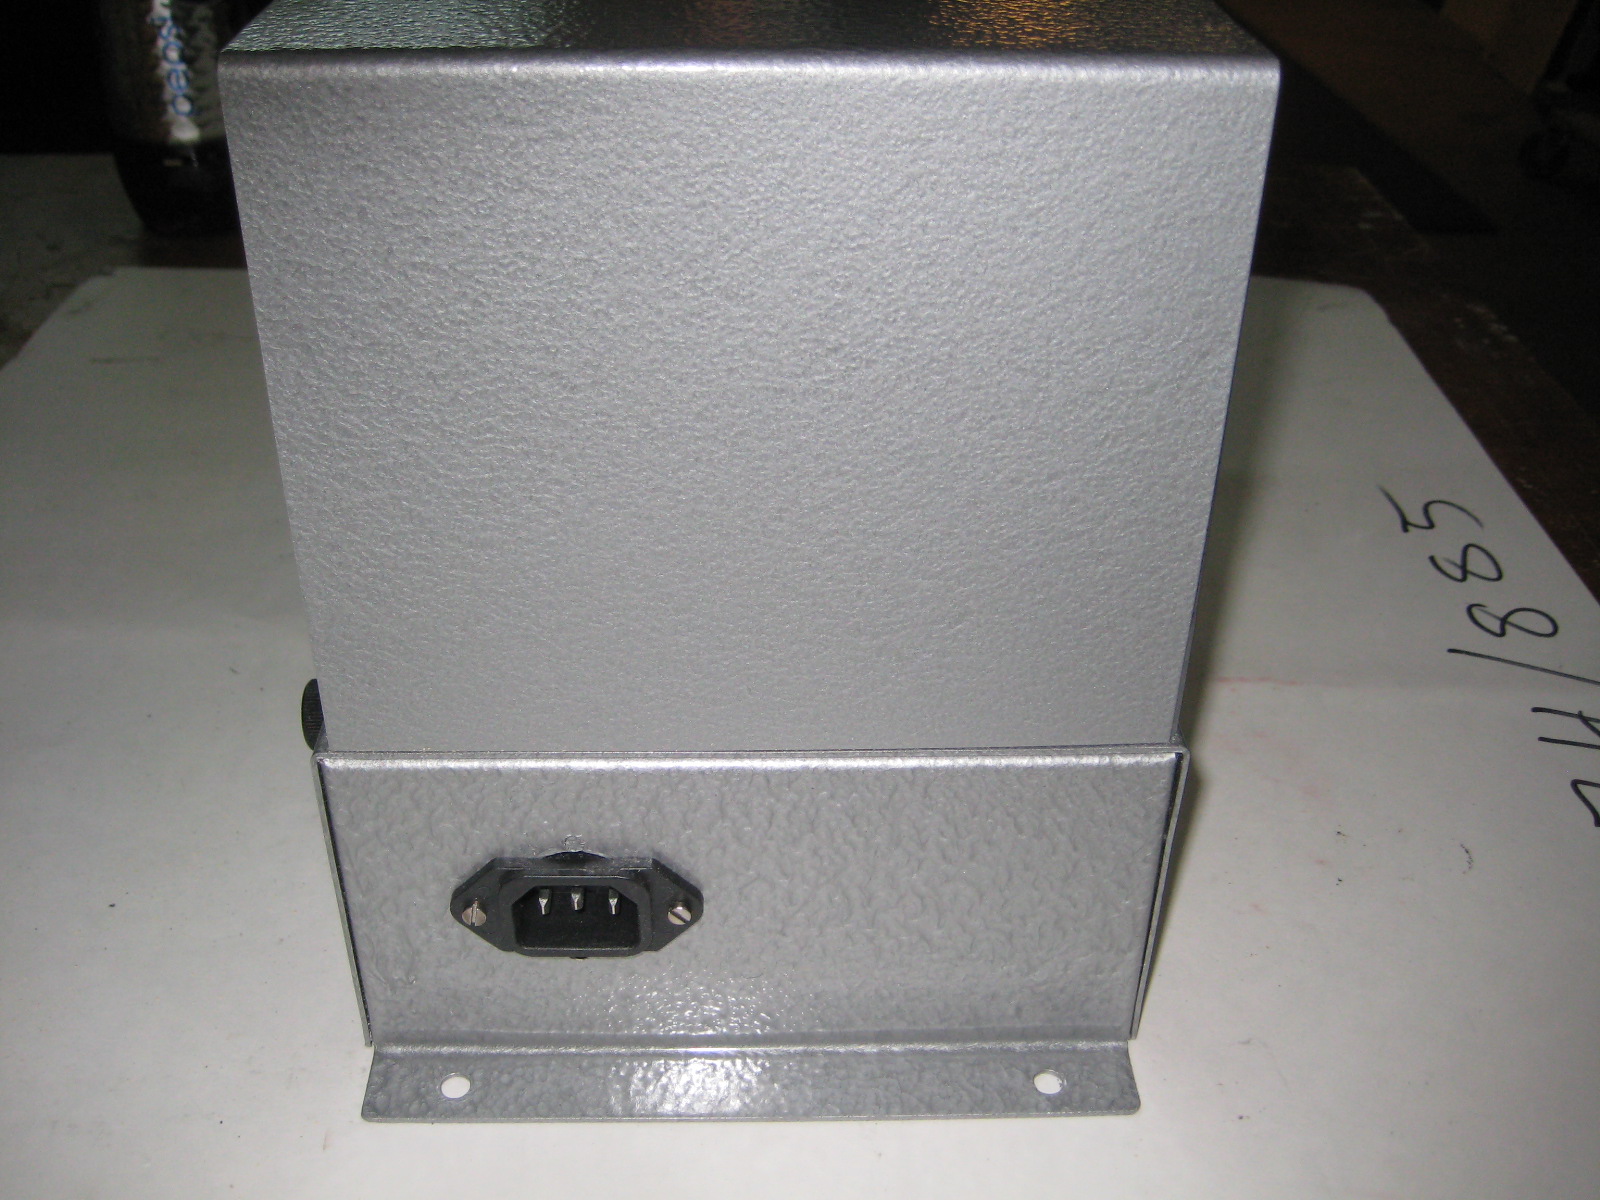 | |
| M400S # 885/674 | Basic frame ready to go | 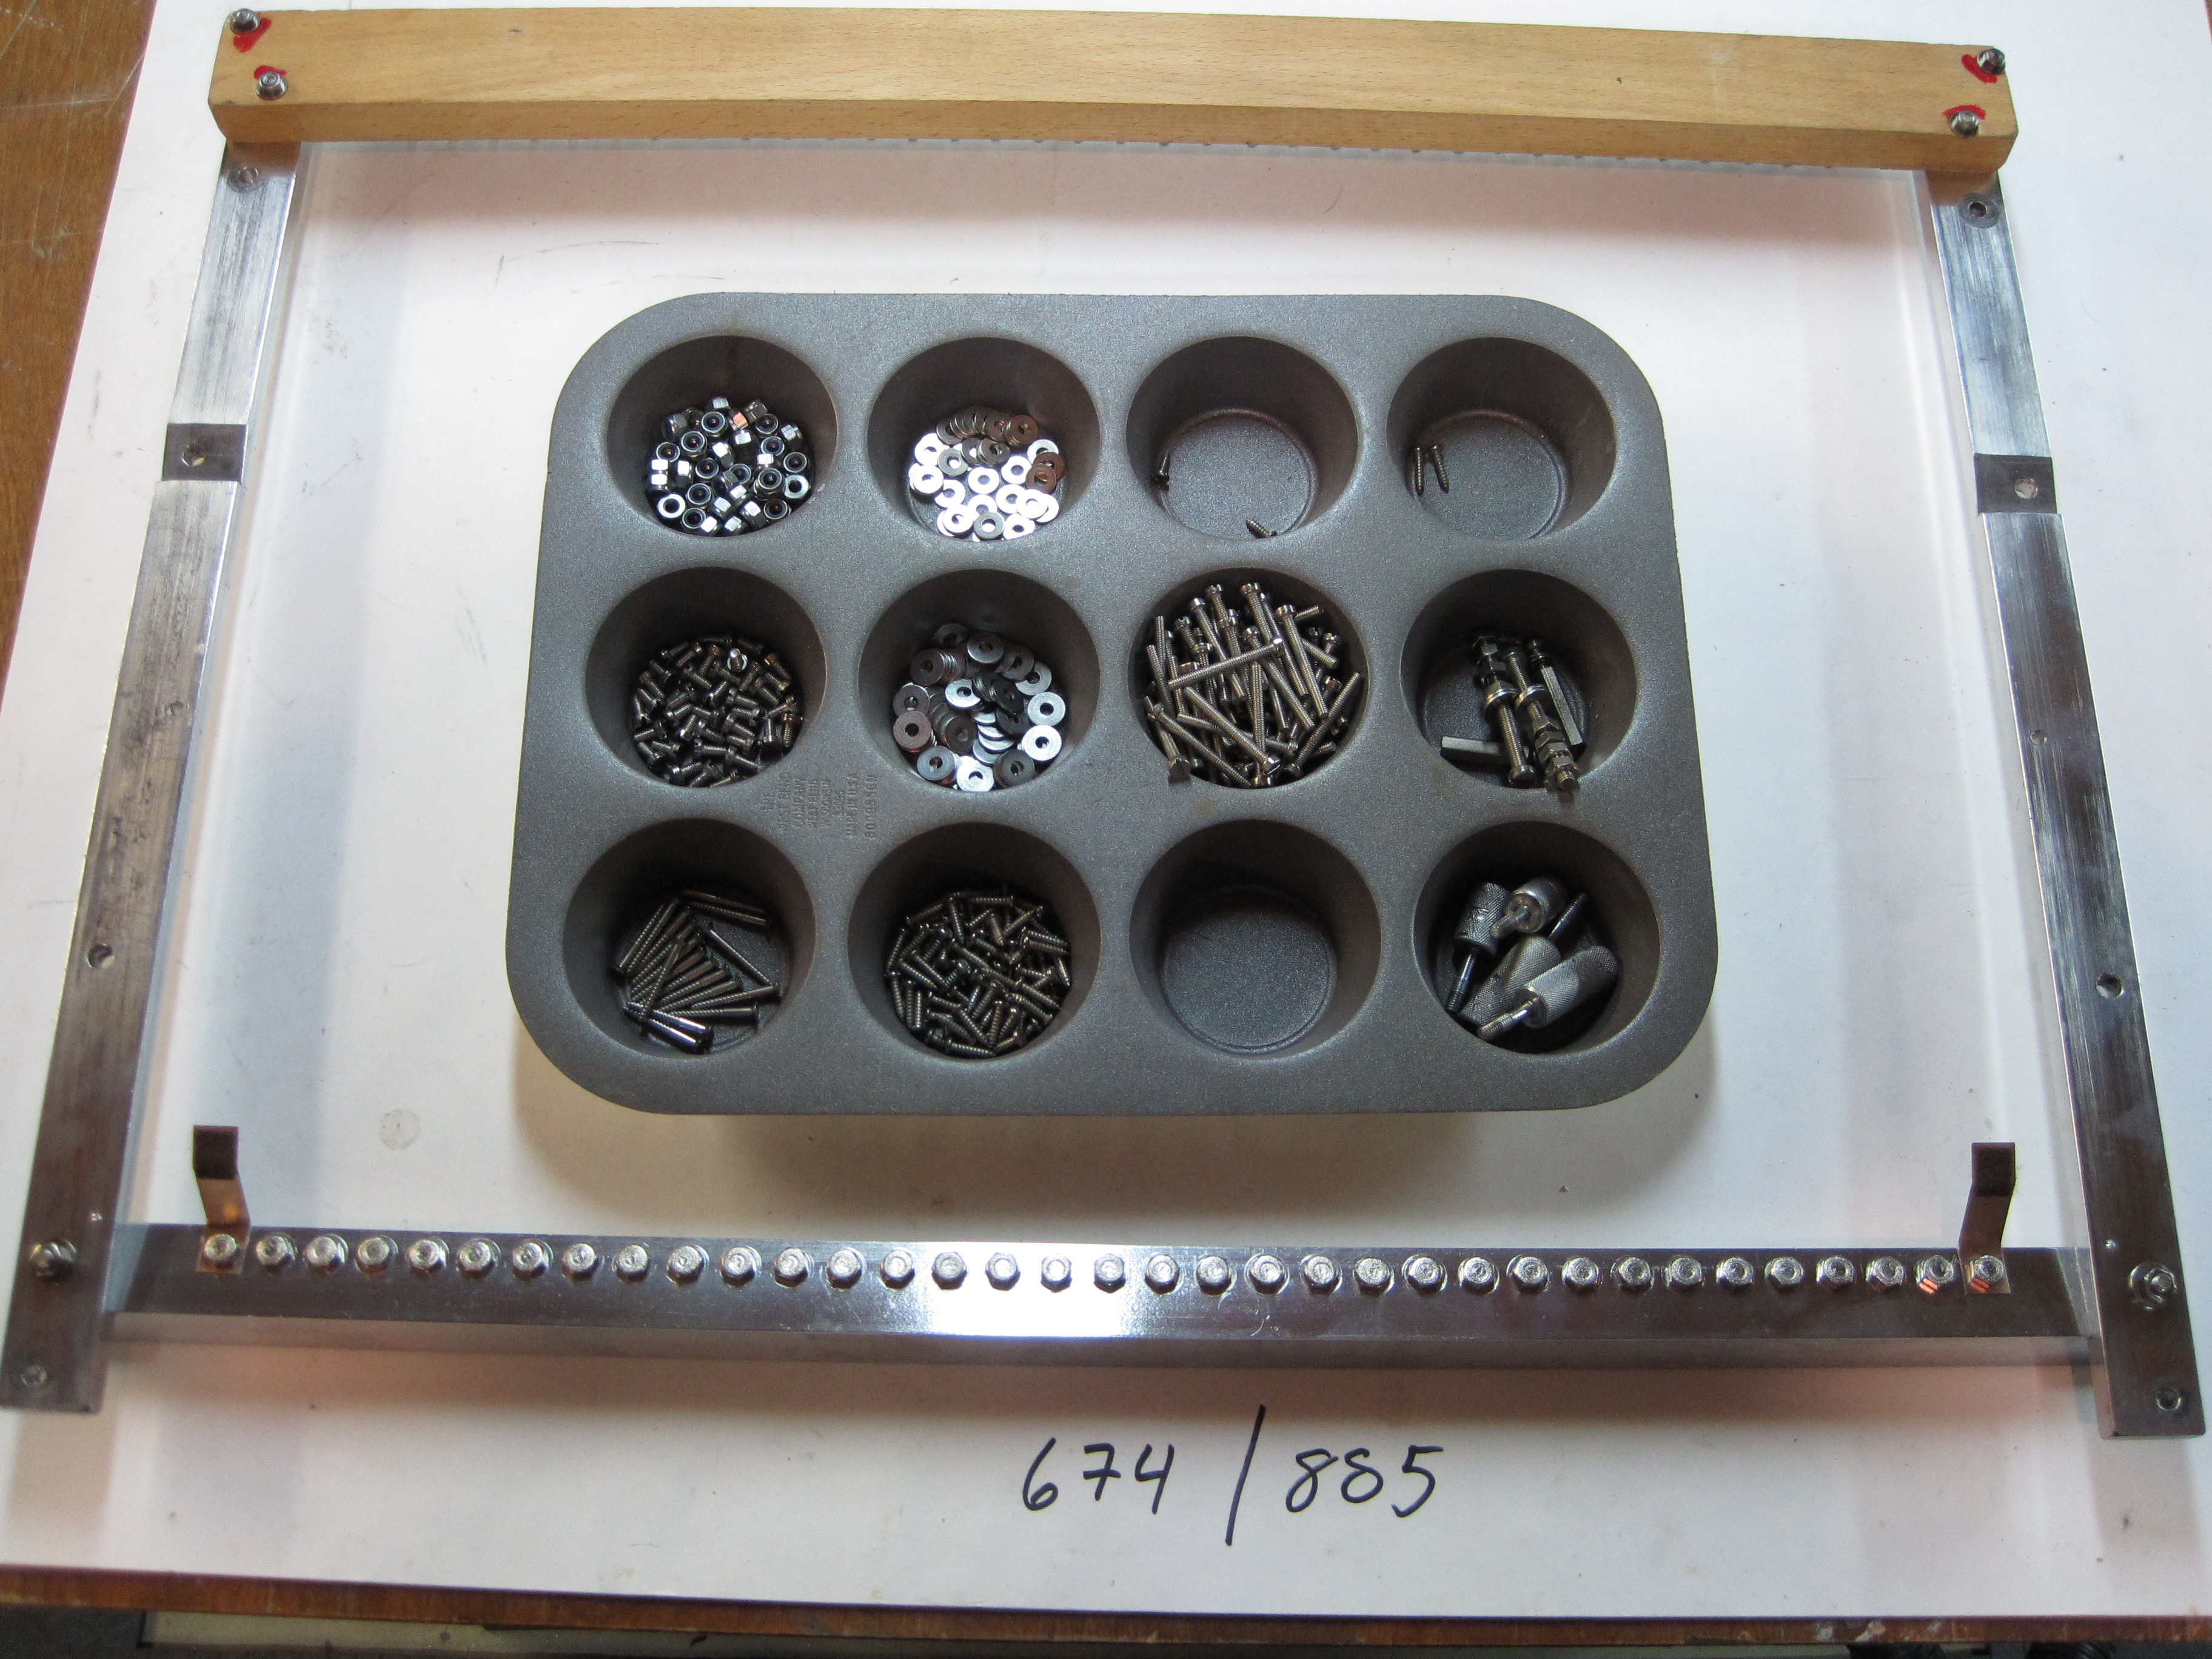 | |
| M400S # 885/674 | Alligning the spill box | 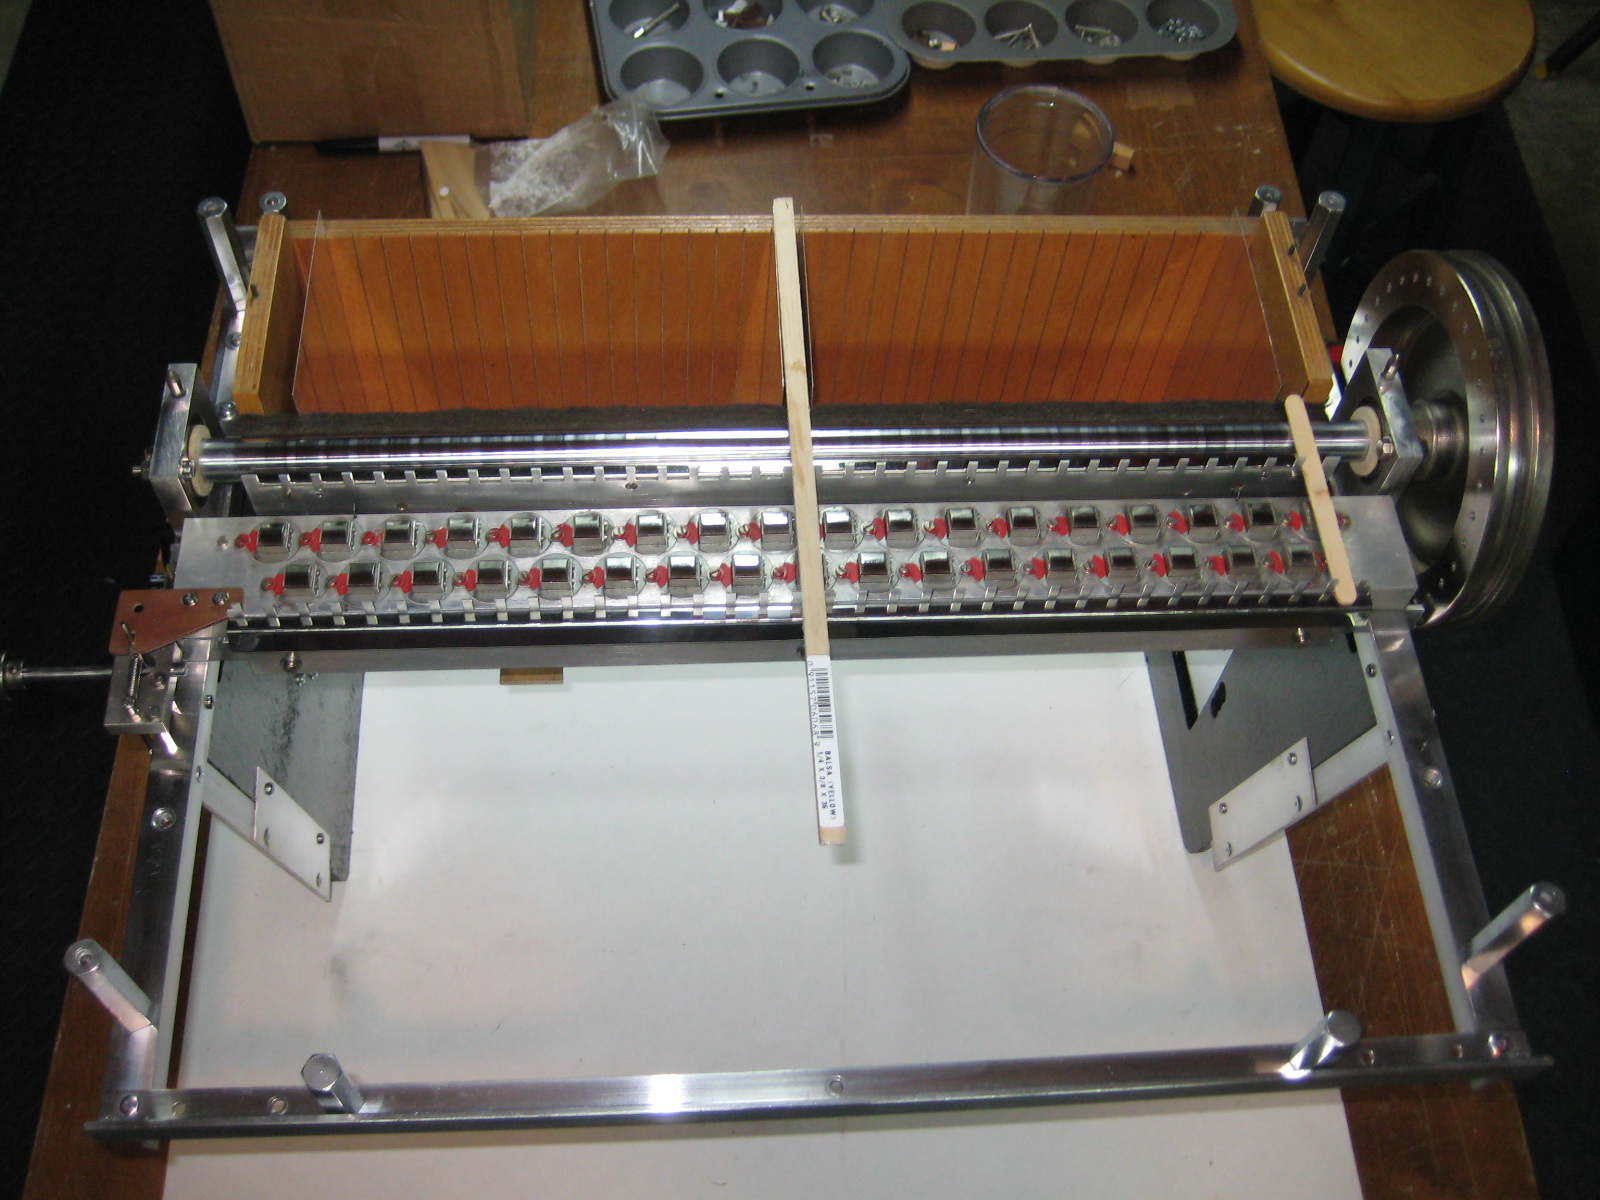 | |
| M400S # 885/674 | Main frame awaiting motor | 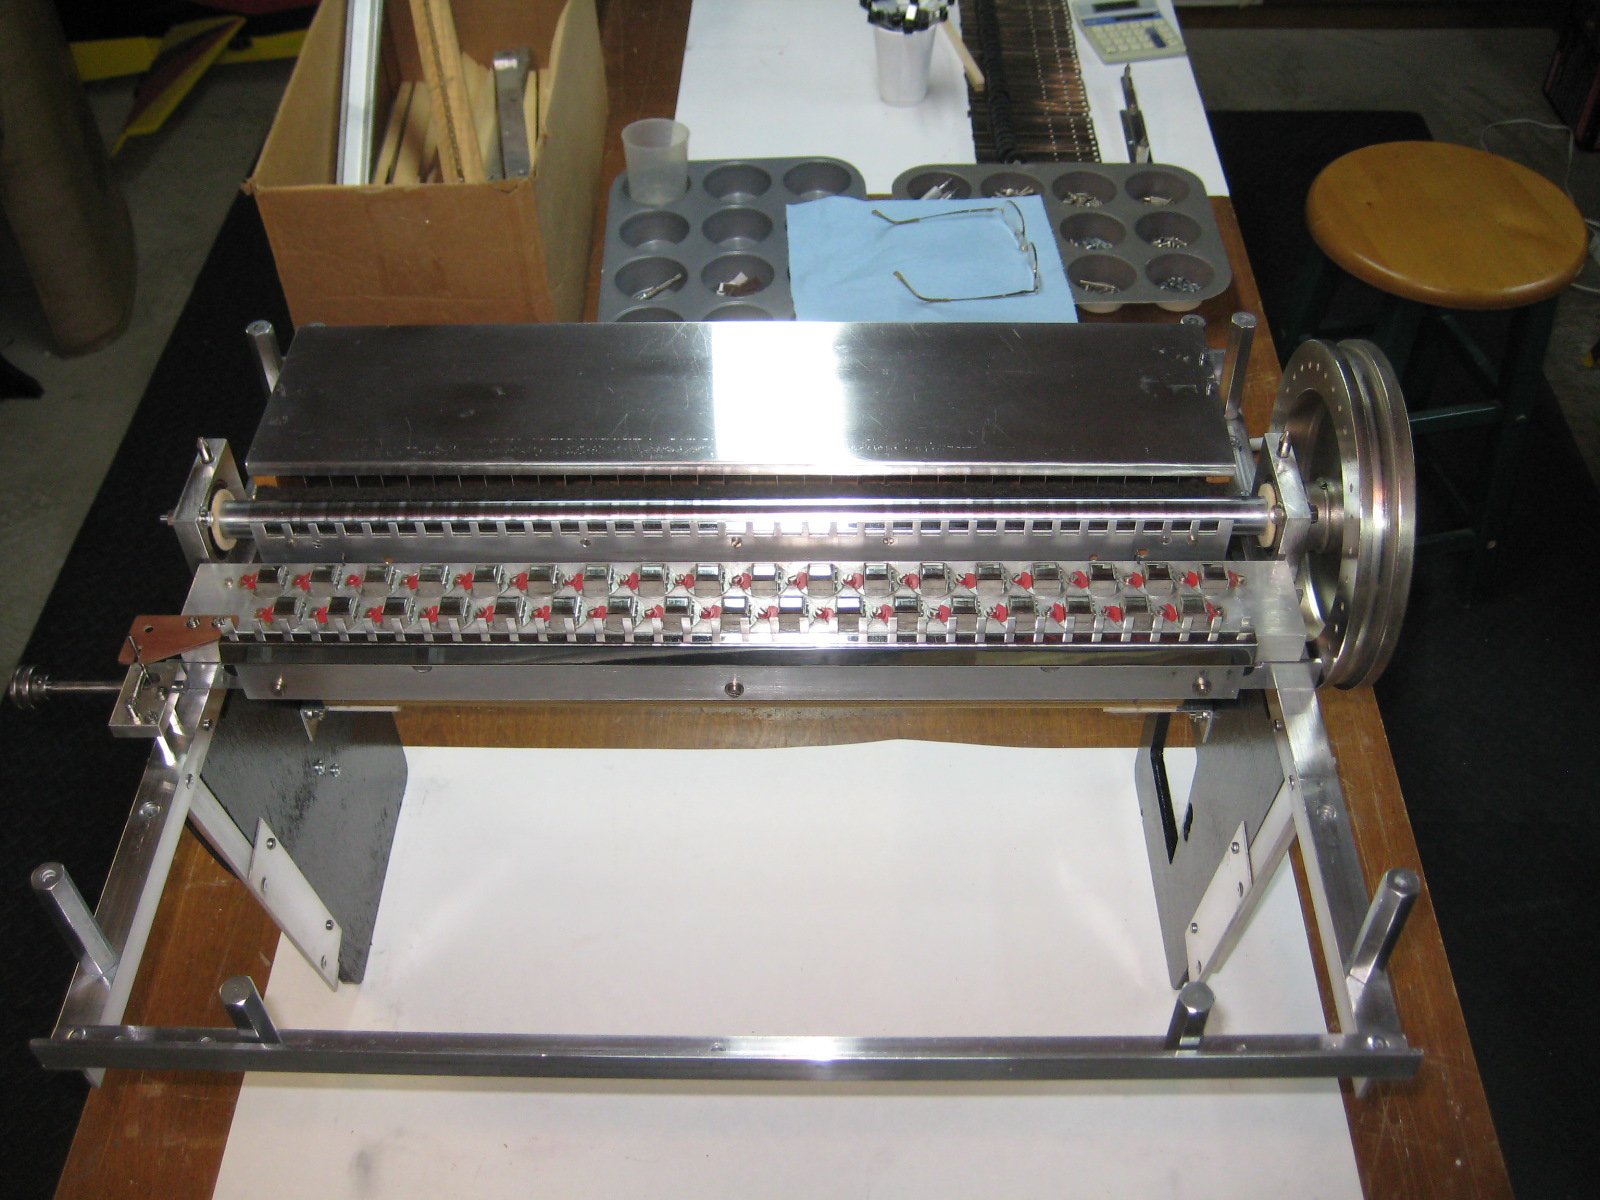 | |
| M400S # 885/674 | Properly cleaned and gapped tach head. | 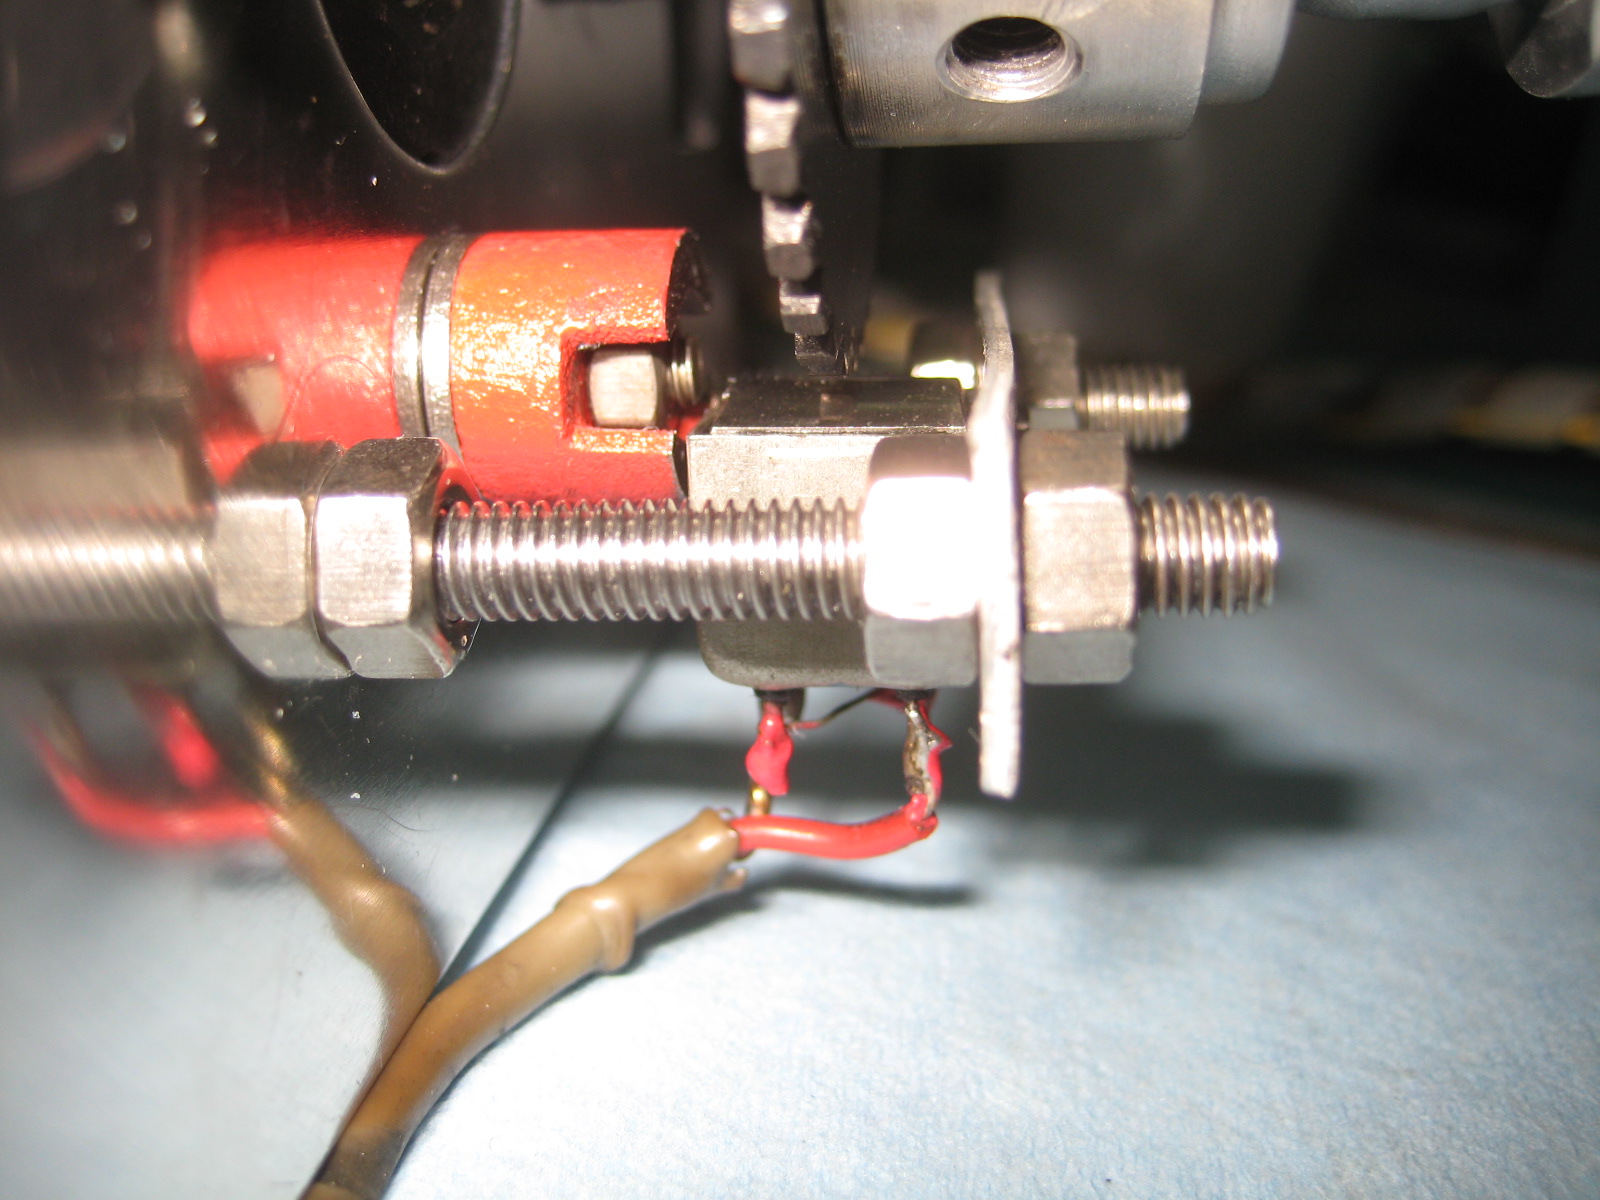 | |
| M400S # 885/674 | Close-up | 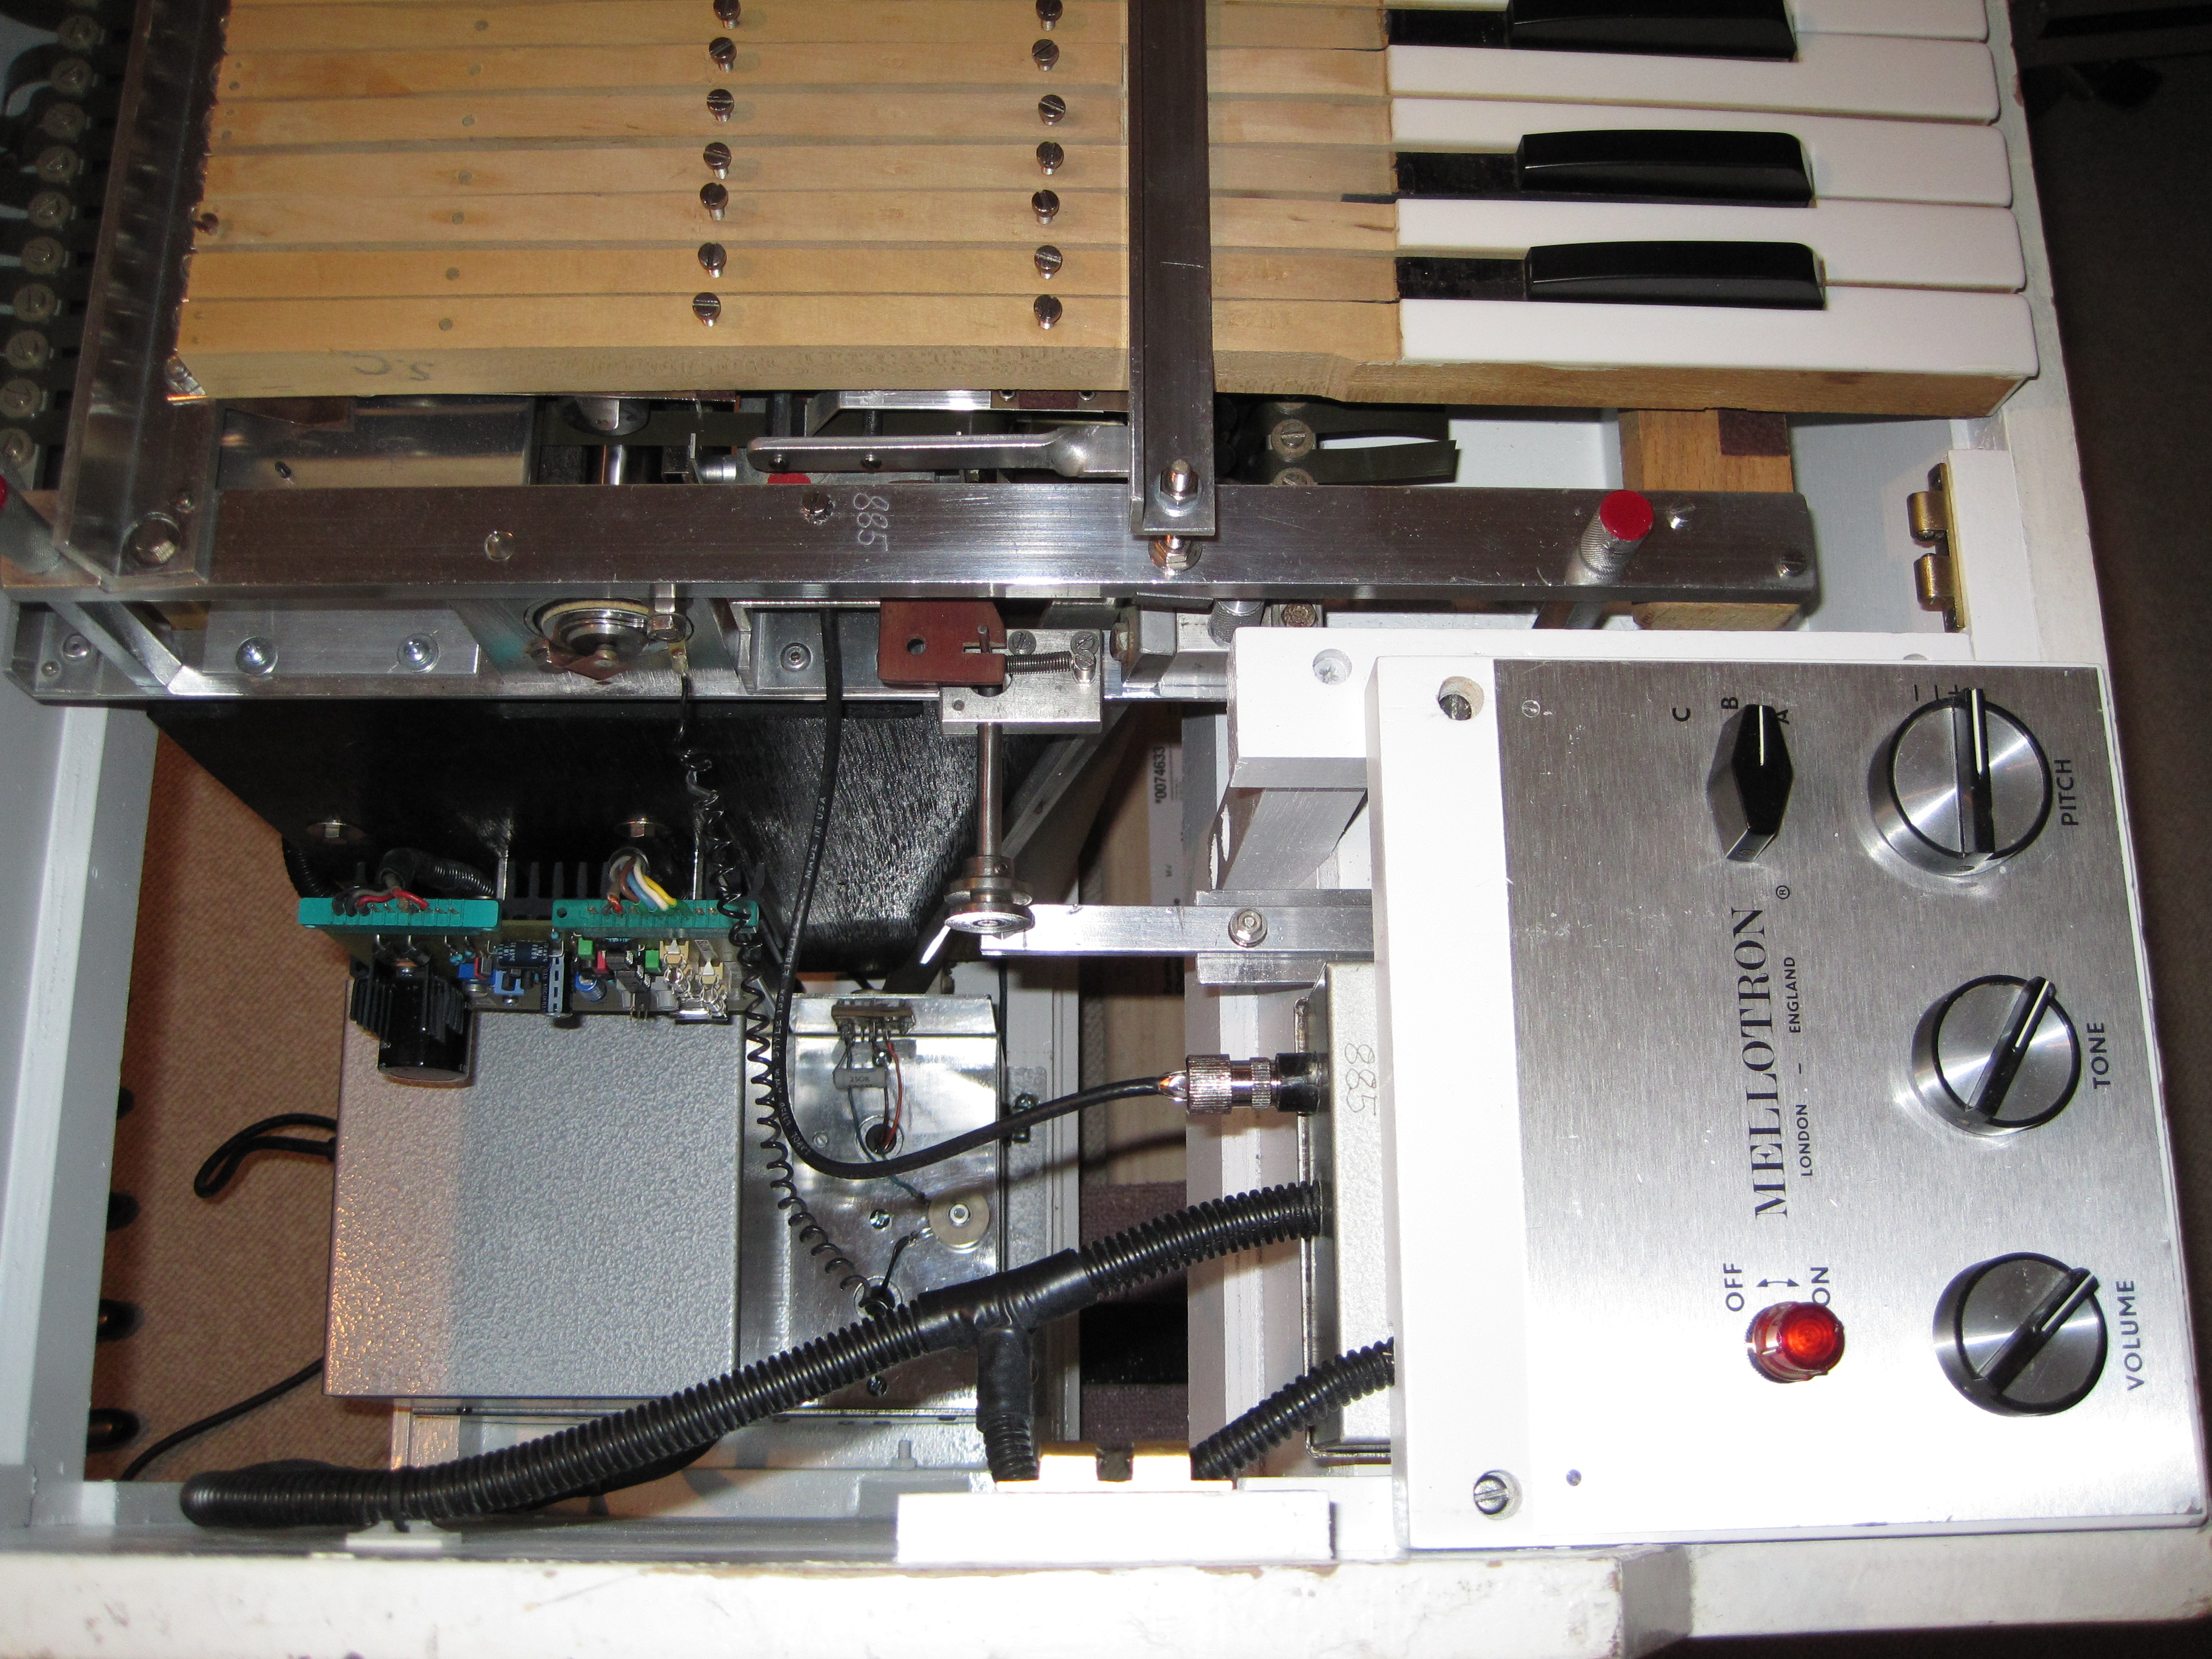 | I installed a better PAL plug. |
| M400S # 885/674 | The happy (but exhausted) owner | 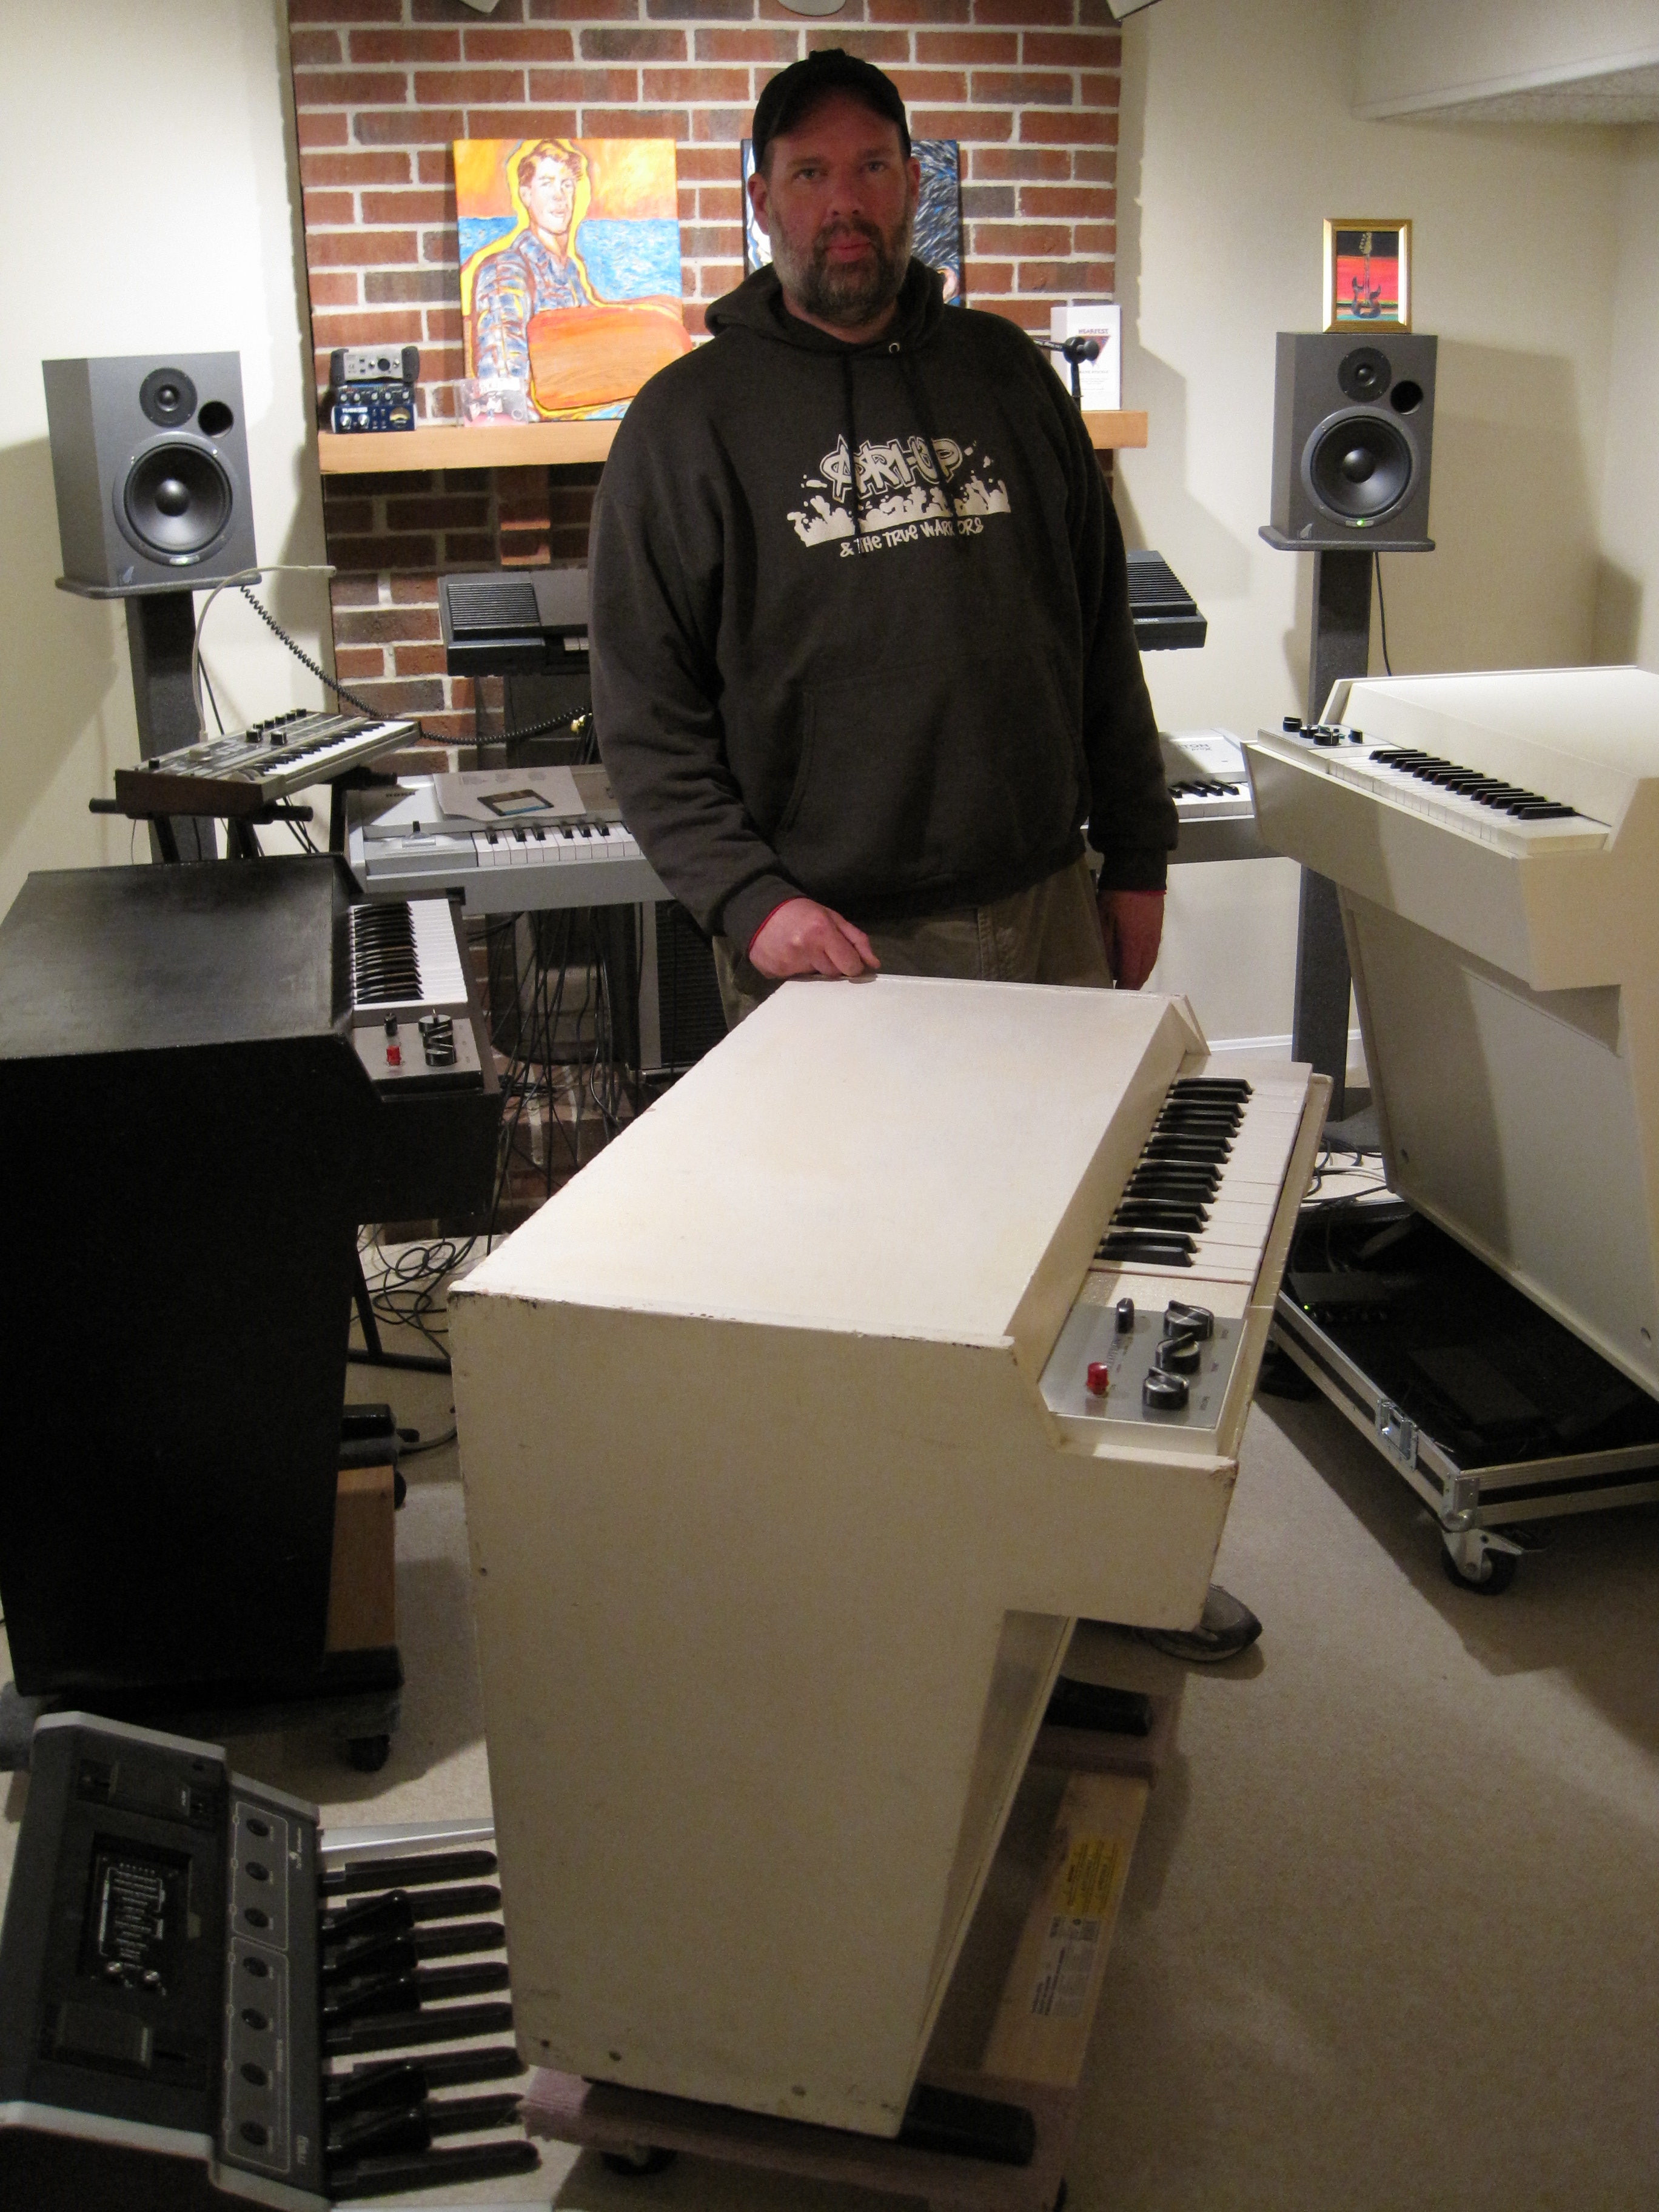 | I wasn';t allowed to refinish the exterior |
| M400_911 | Tron talk at Carmel H.S. | 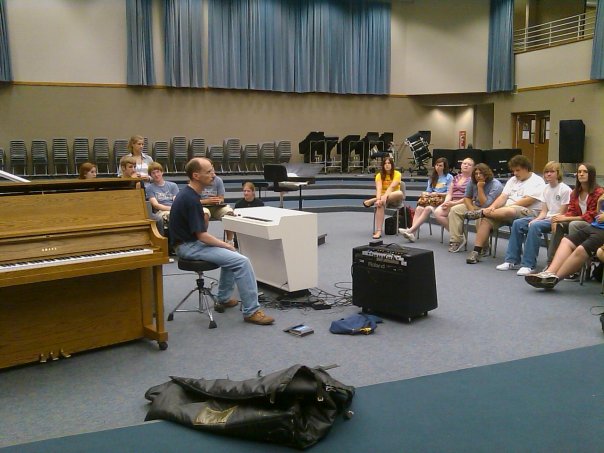 | |
| Mel-O-Tron | Mel-o-tron Revenge3 |  | |
| Mellotron #525 - Mr. Neel | One Happy Camper! |  | |
| Mellotron #525 - Mr. Neel | Right before delivery | 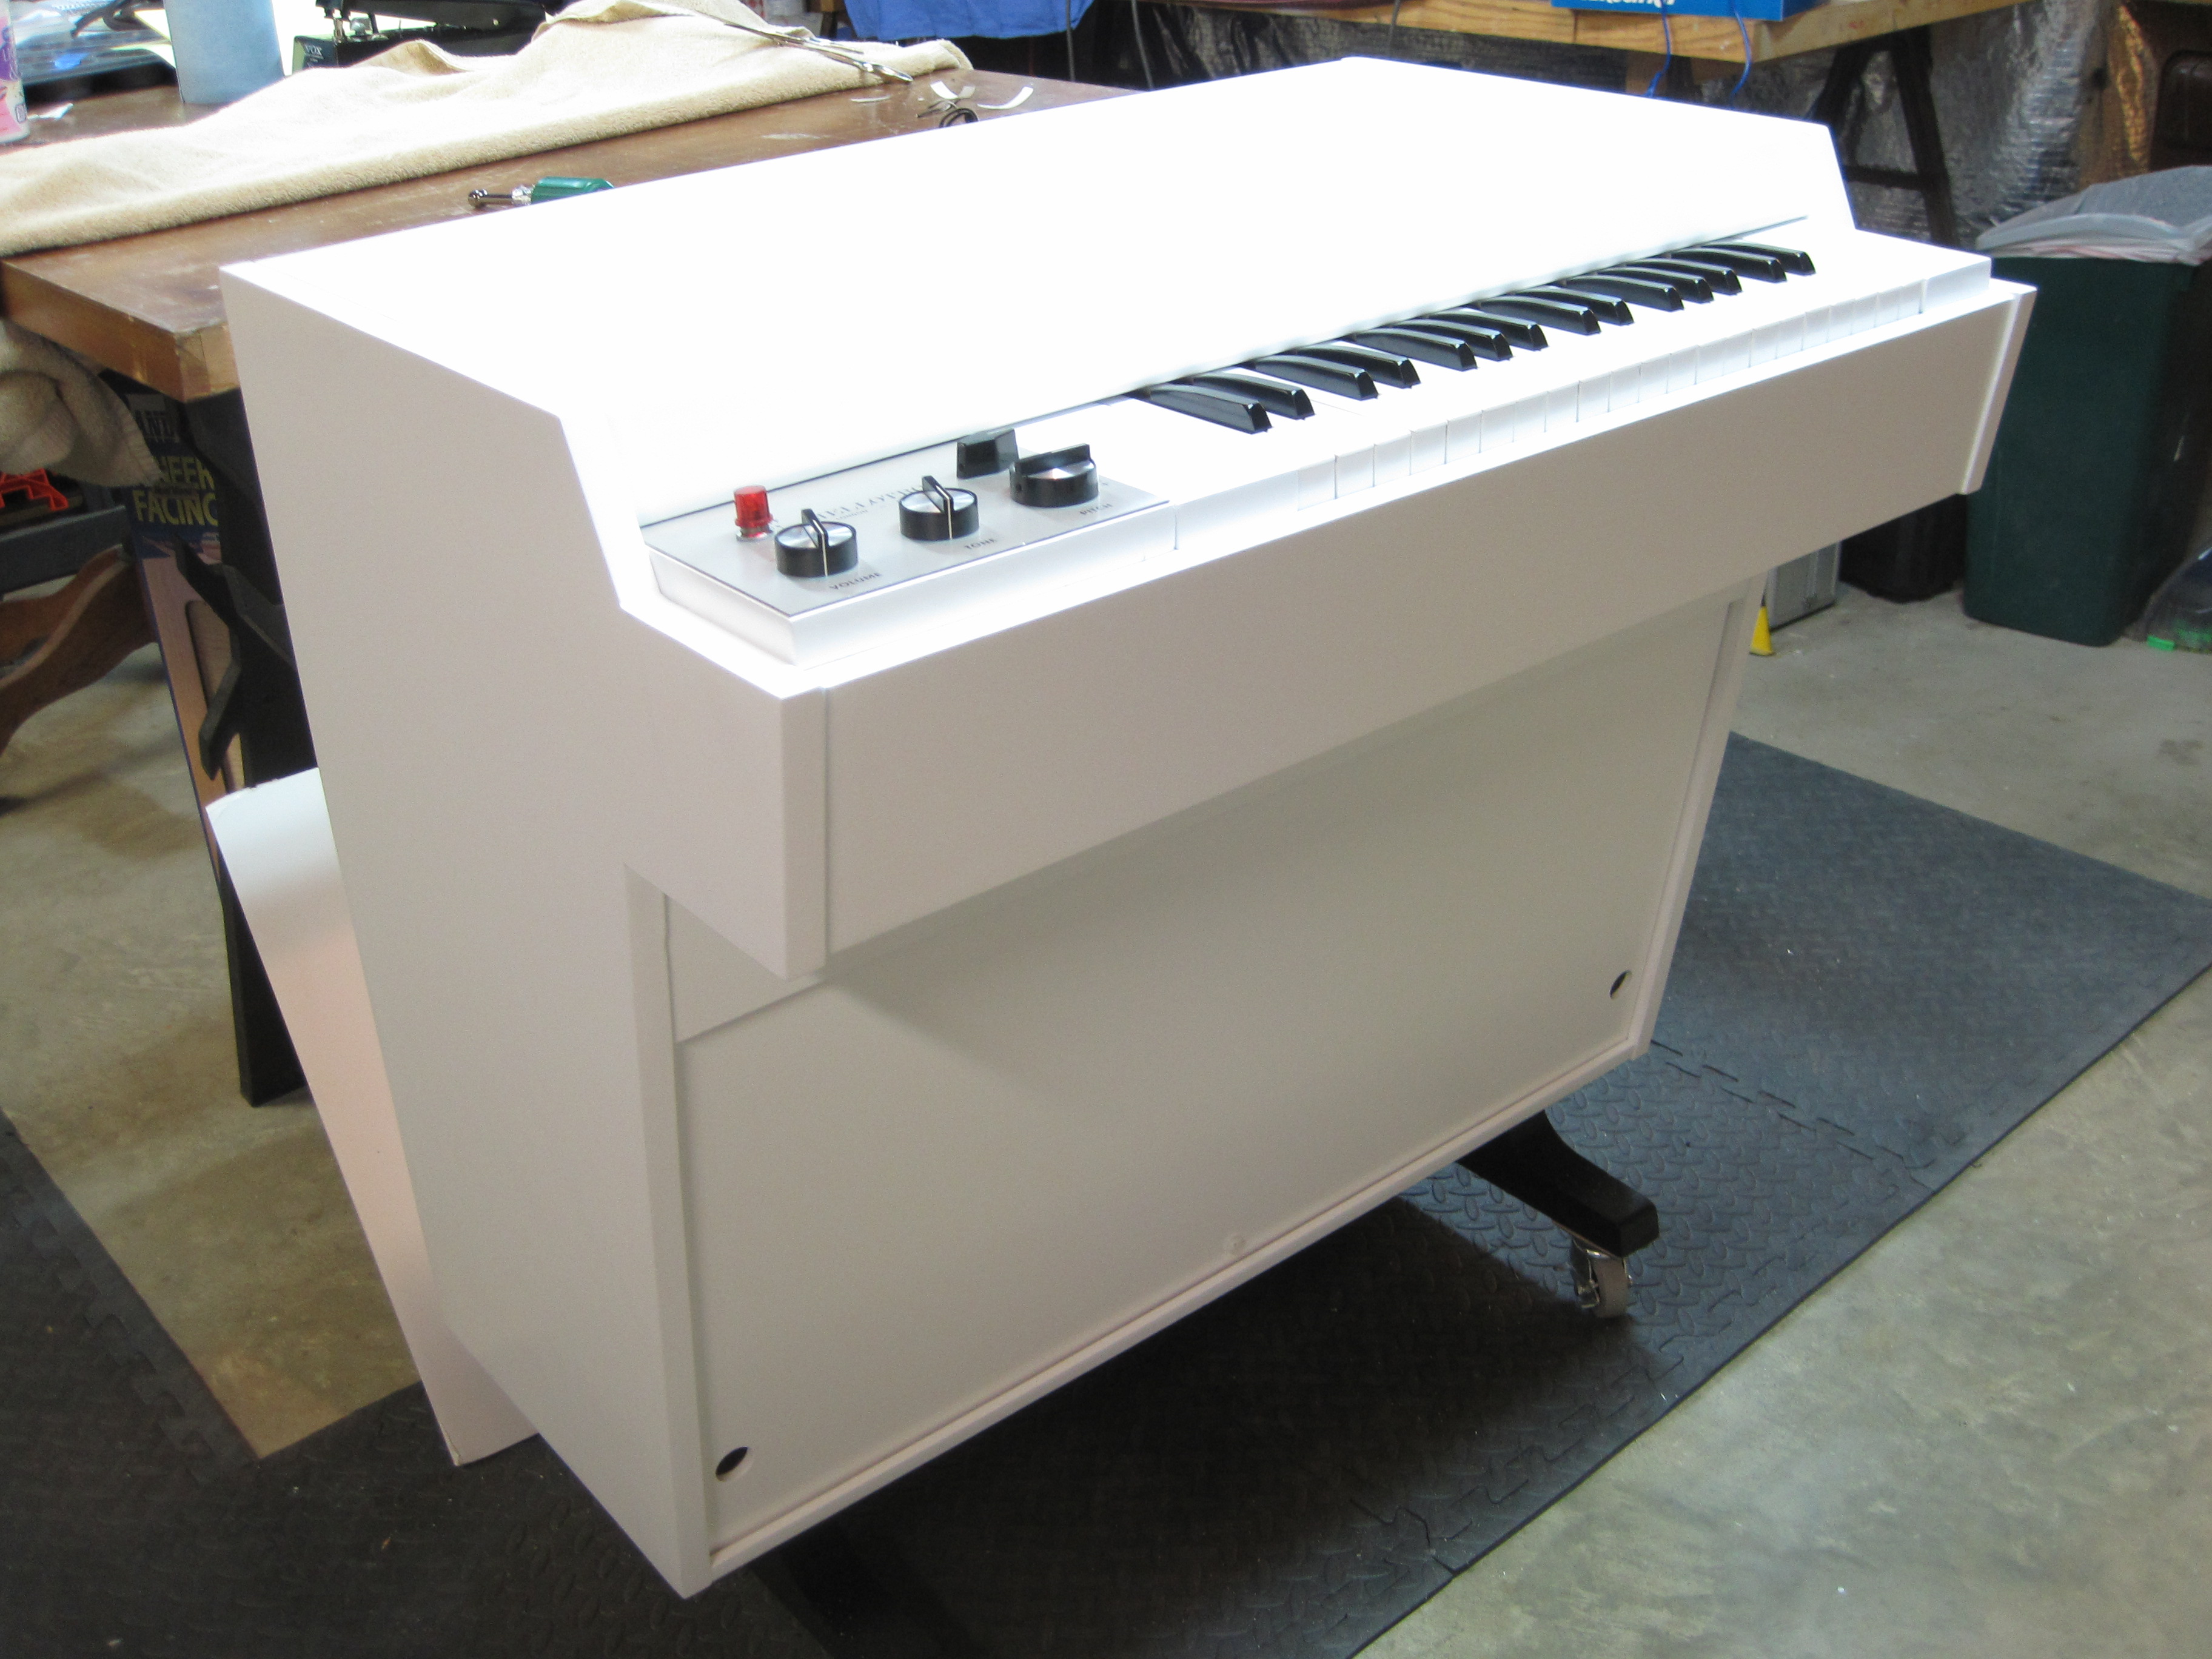 | |
| Mellotron #525 - Mr. Neel | Rescued from a dank shed | 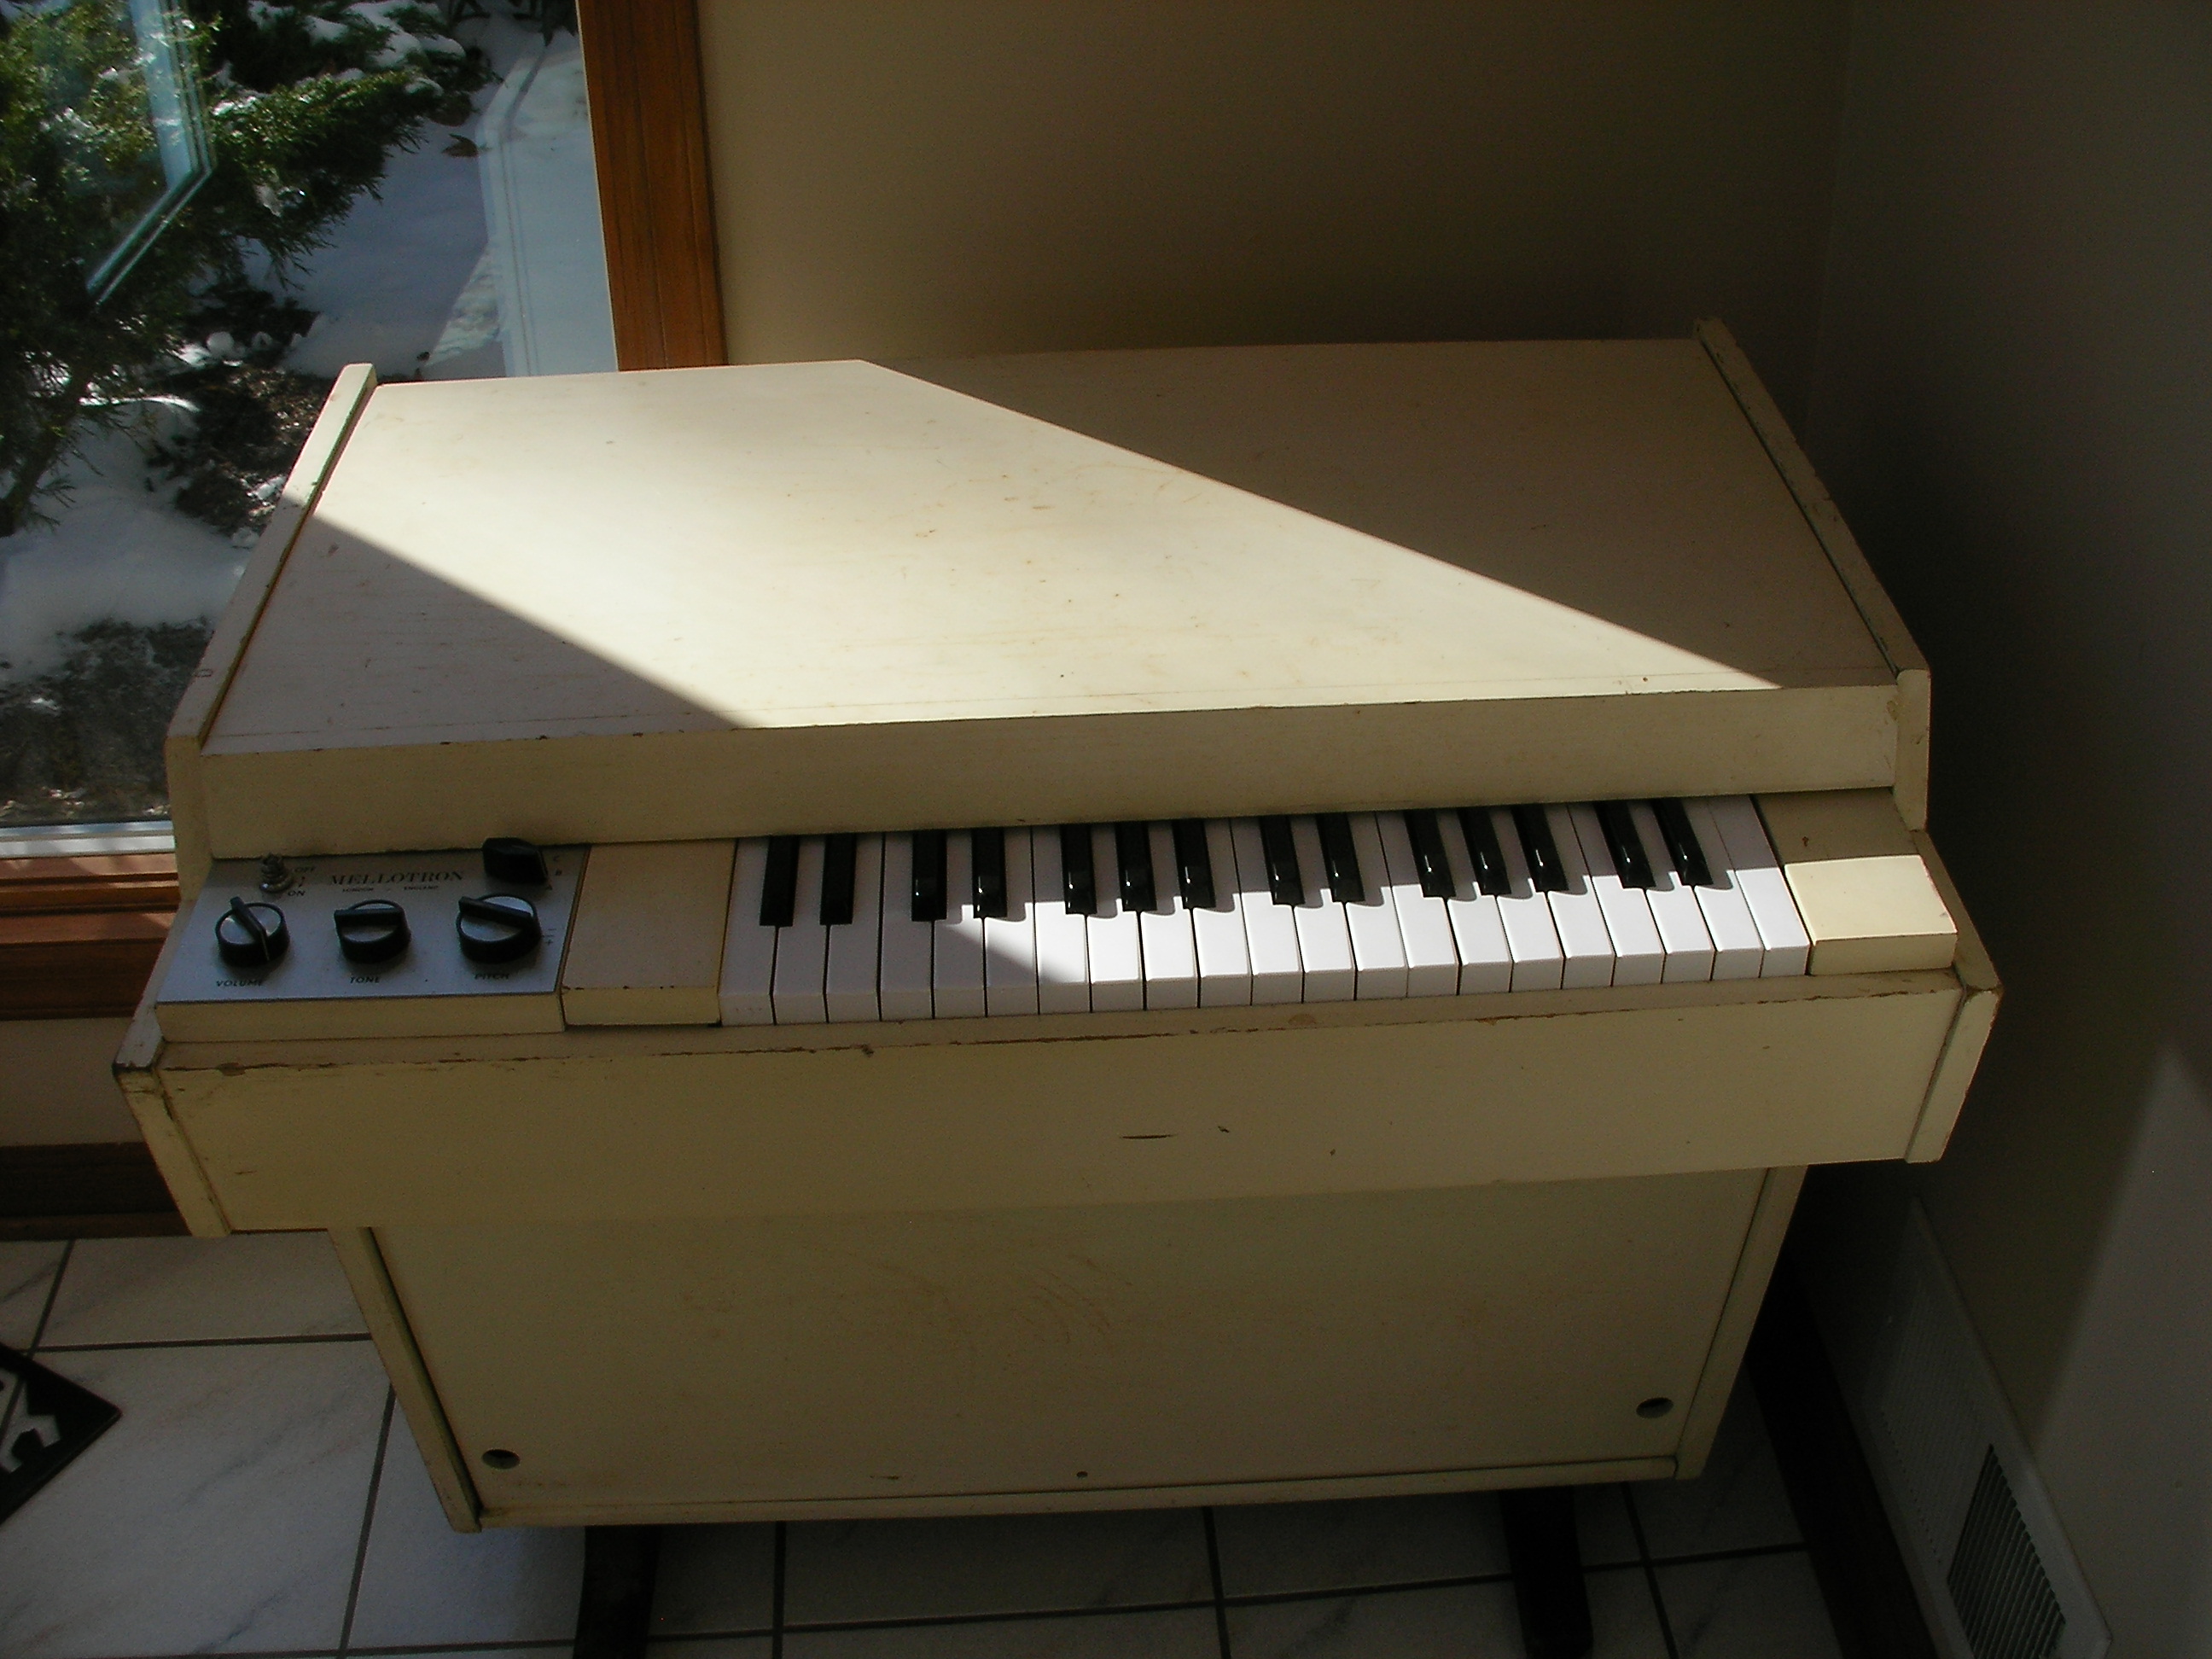 | |
| Mellotron #525 - Mr. Neel | Uh Huh | 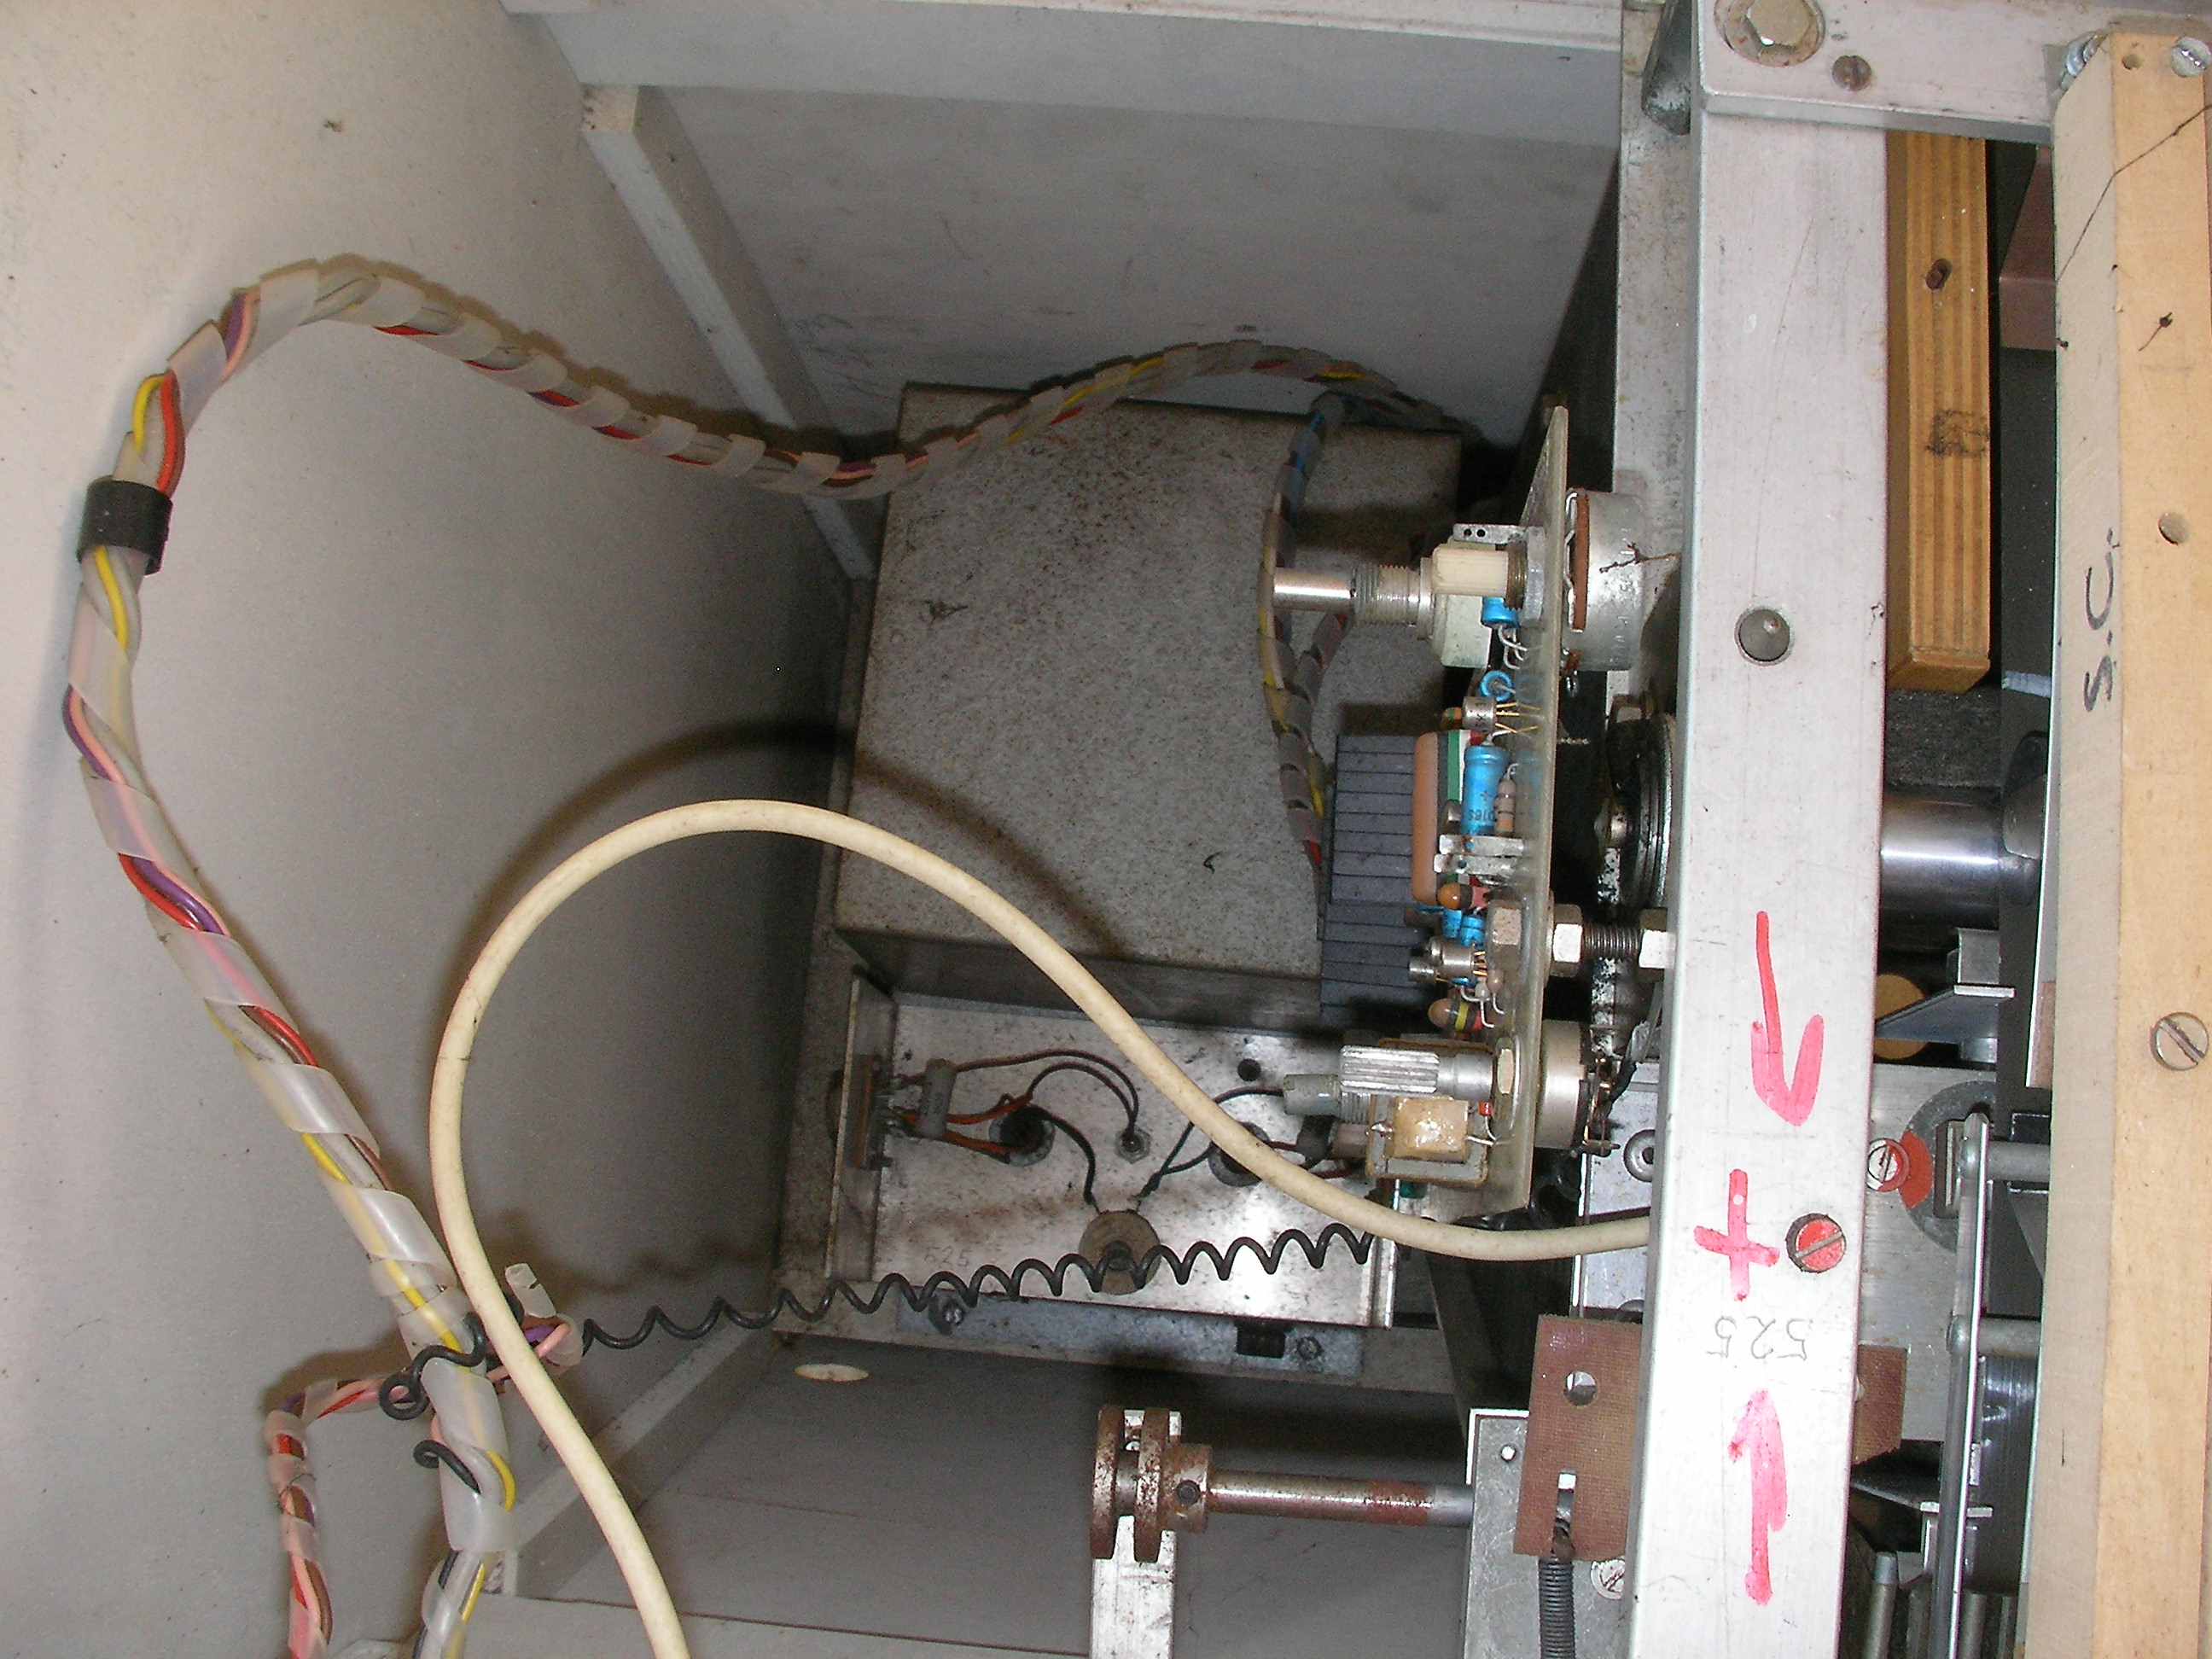 | |
| Mellotron #525 - Mr. Neel | Frame and New Tapes 010 | 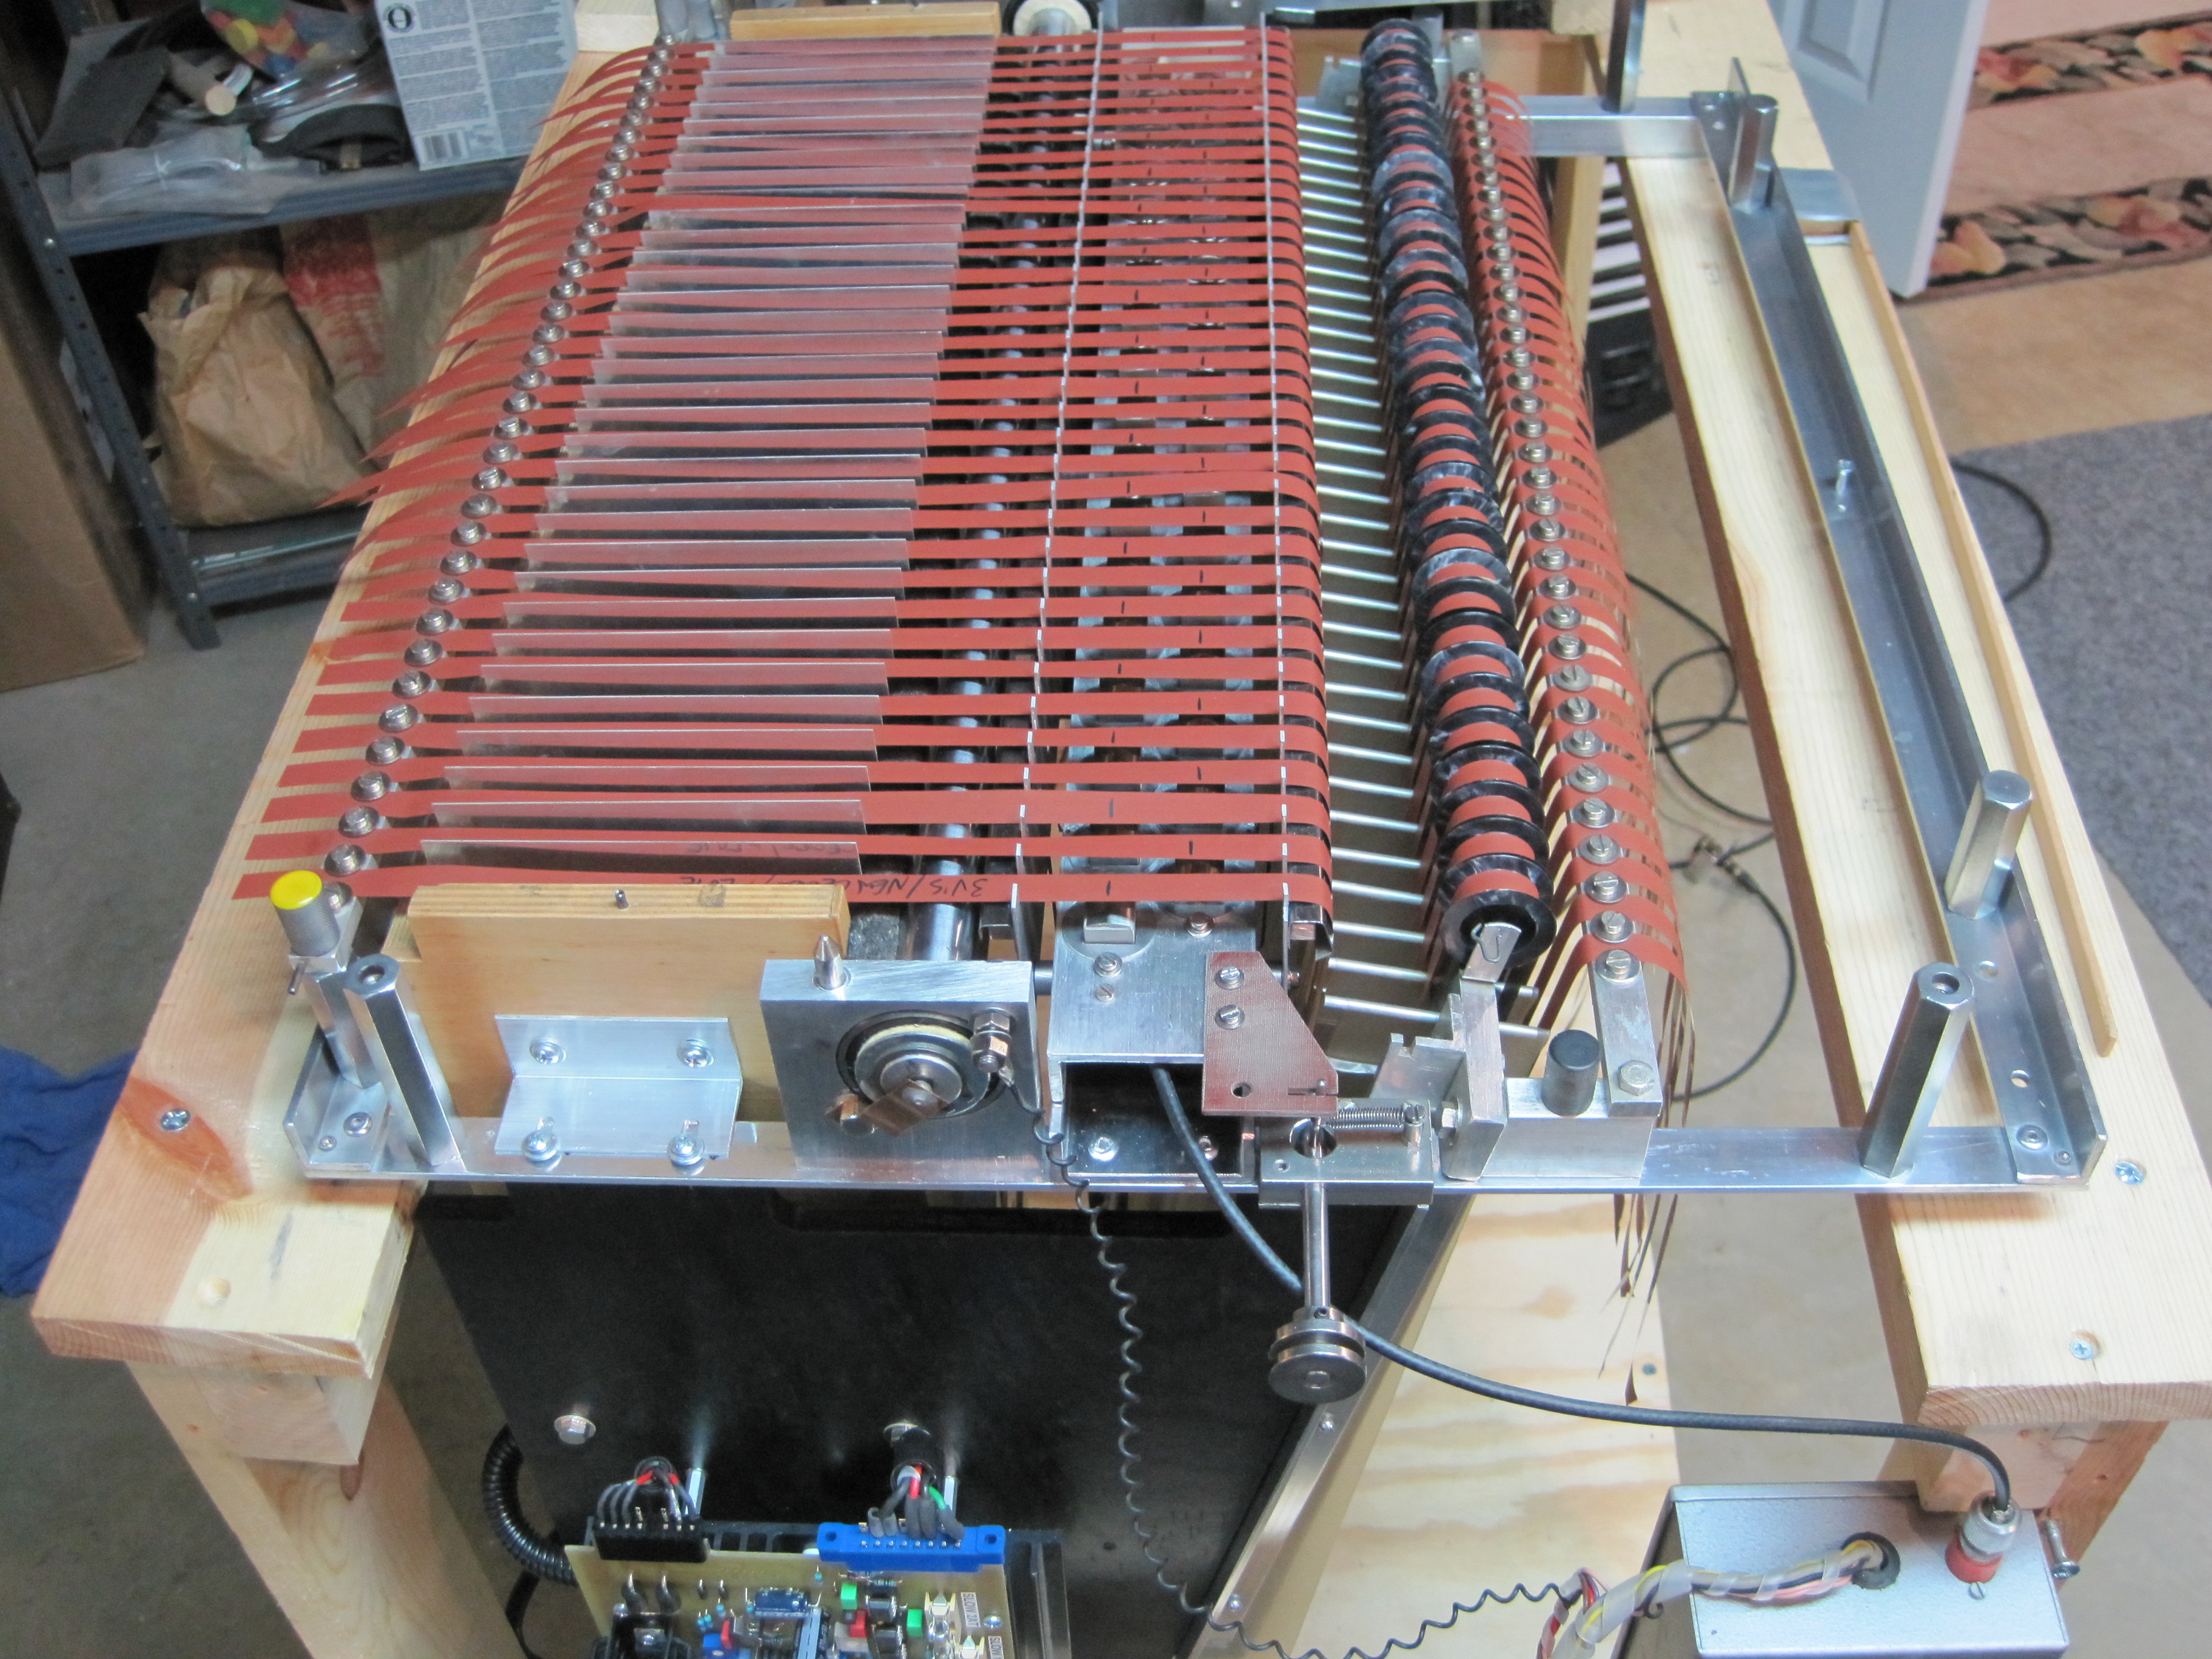 | |
| Mellotron #525 - Mr. Neel | Frame and New Tapes 007 | 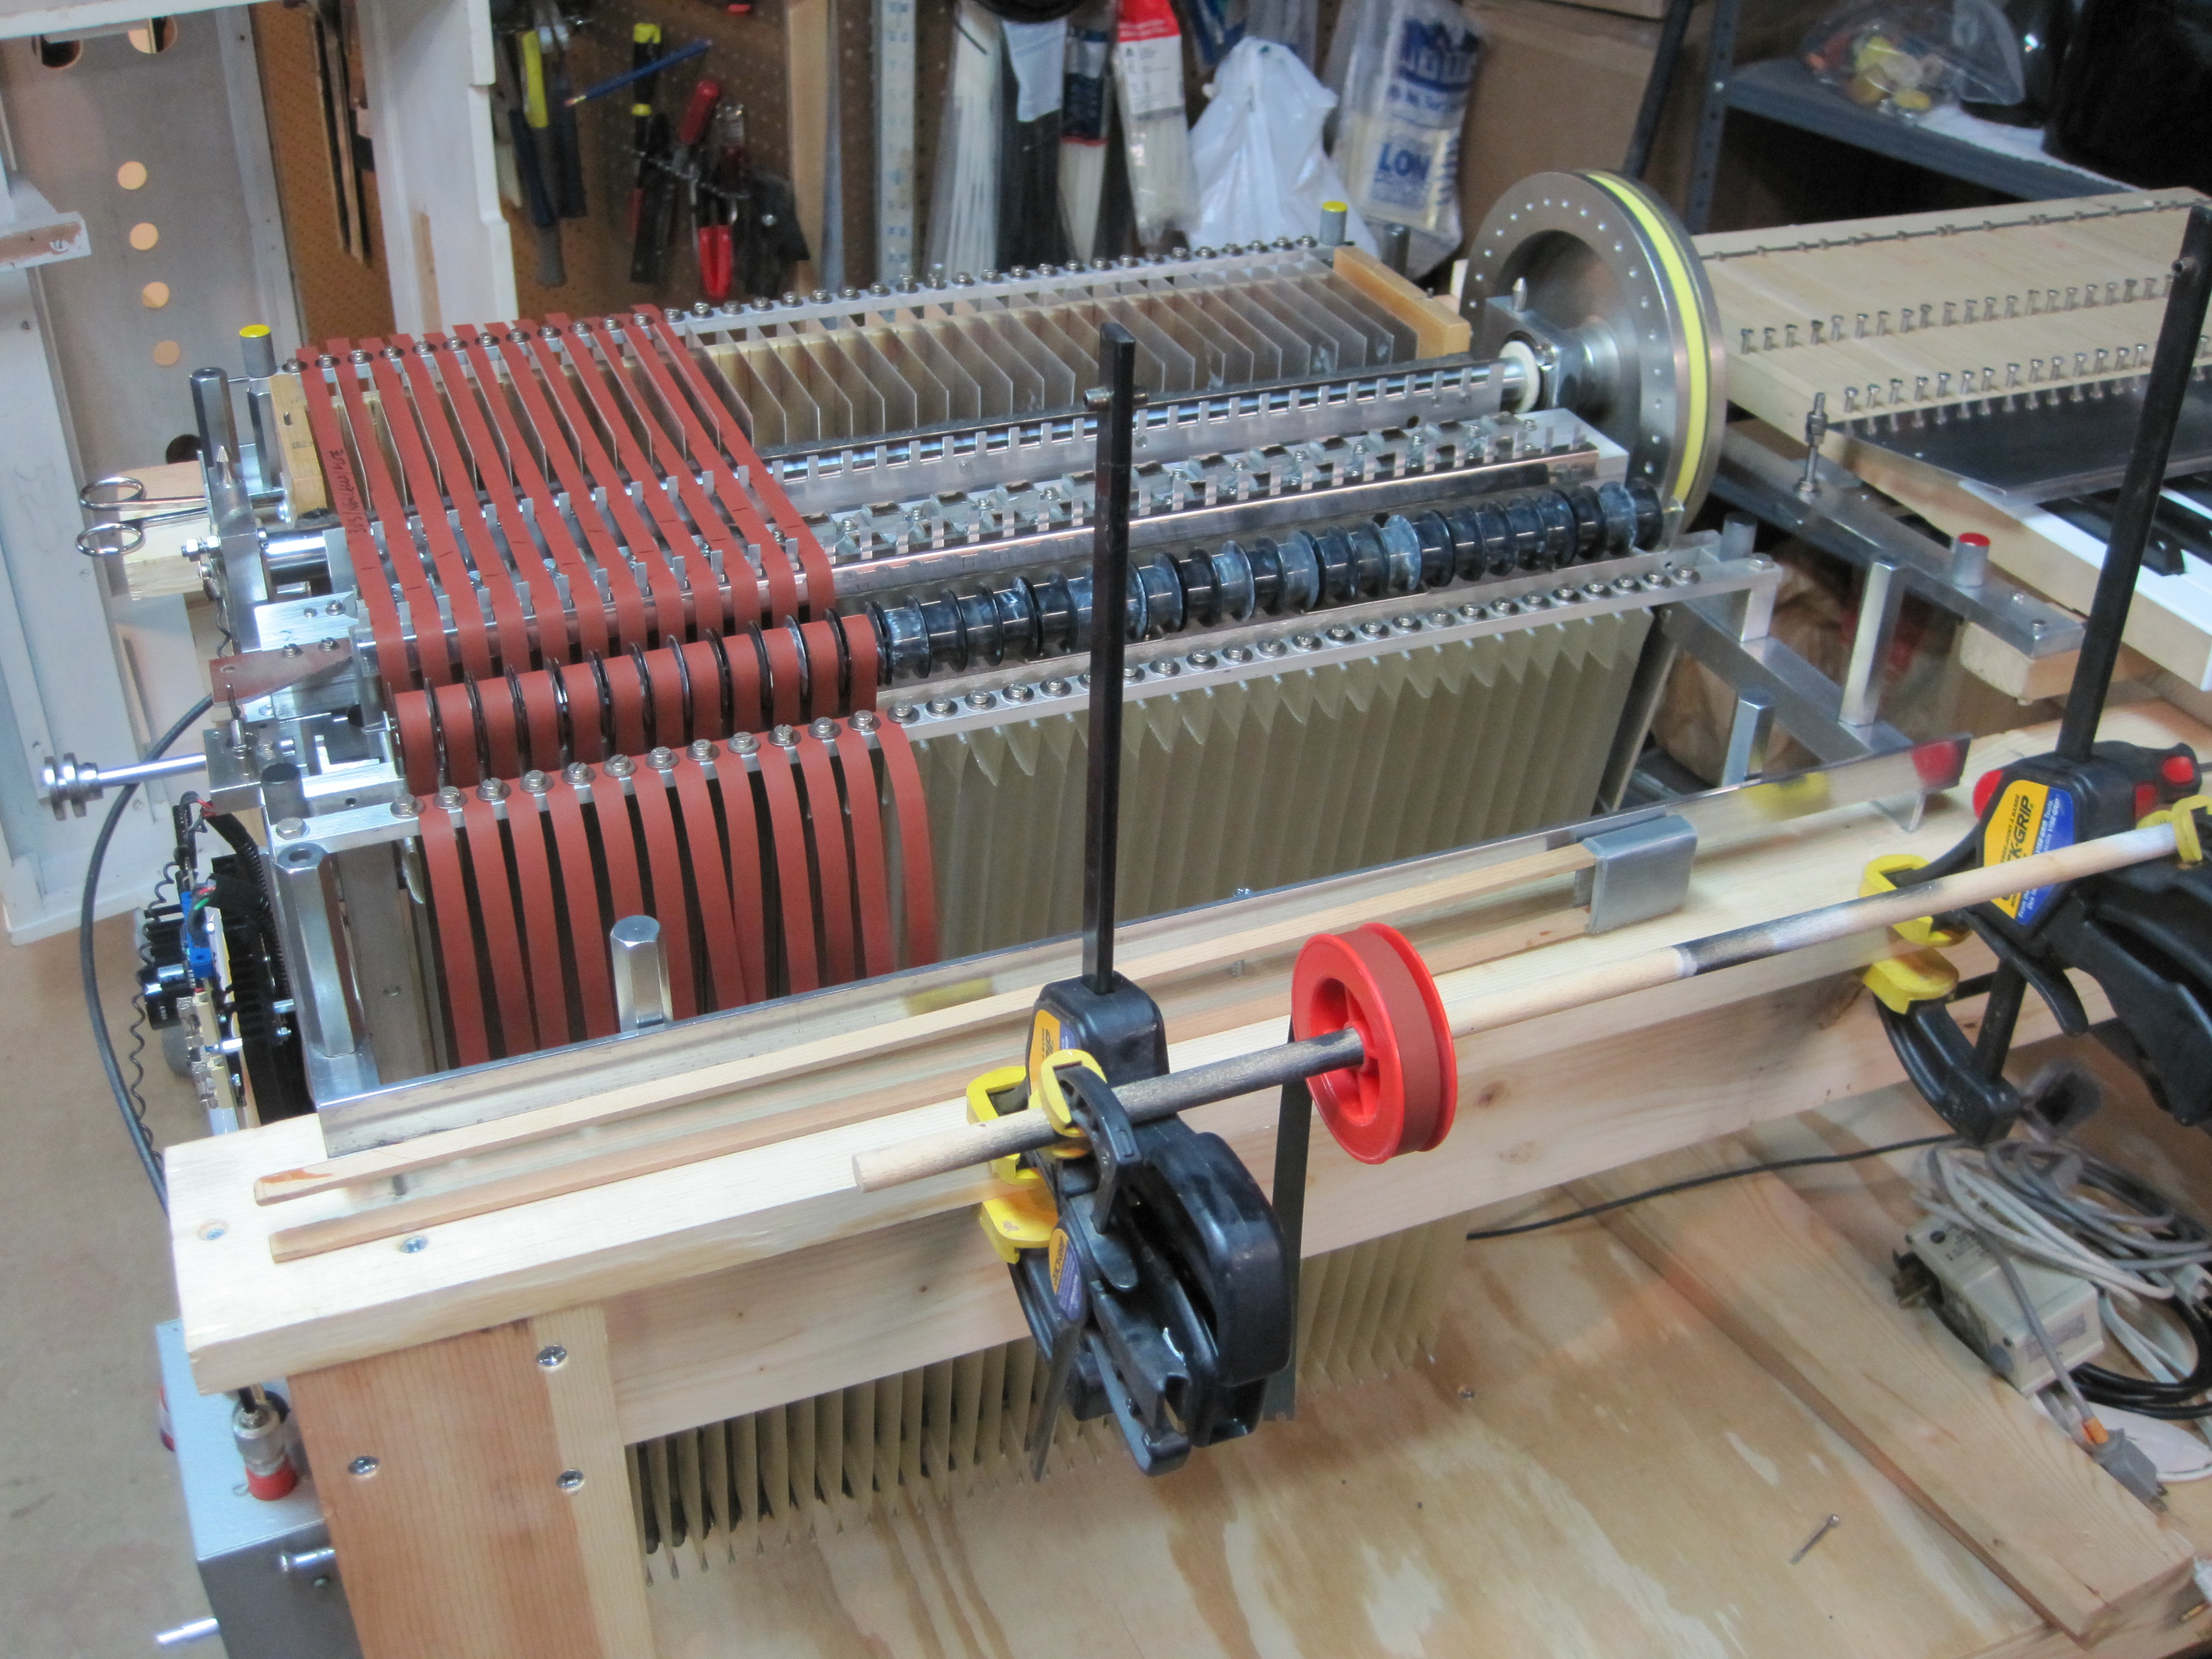 | |
| Mellotron #525 - Mr. Neel | Frame and New Tapes 012 | 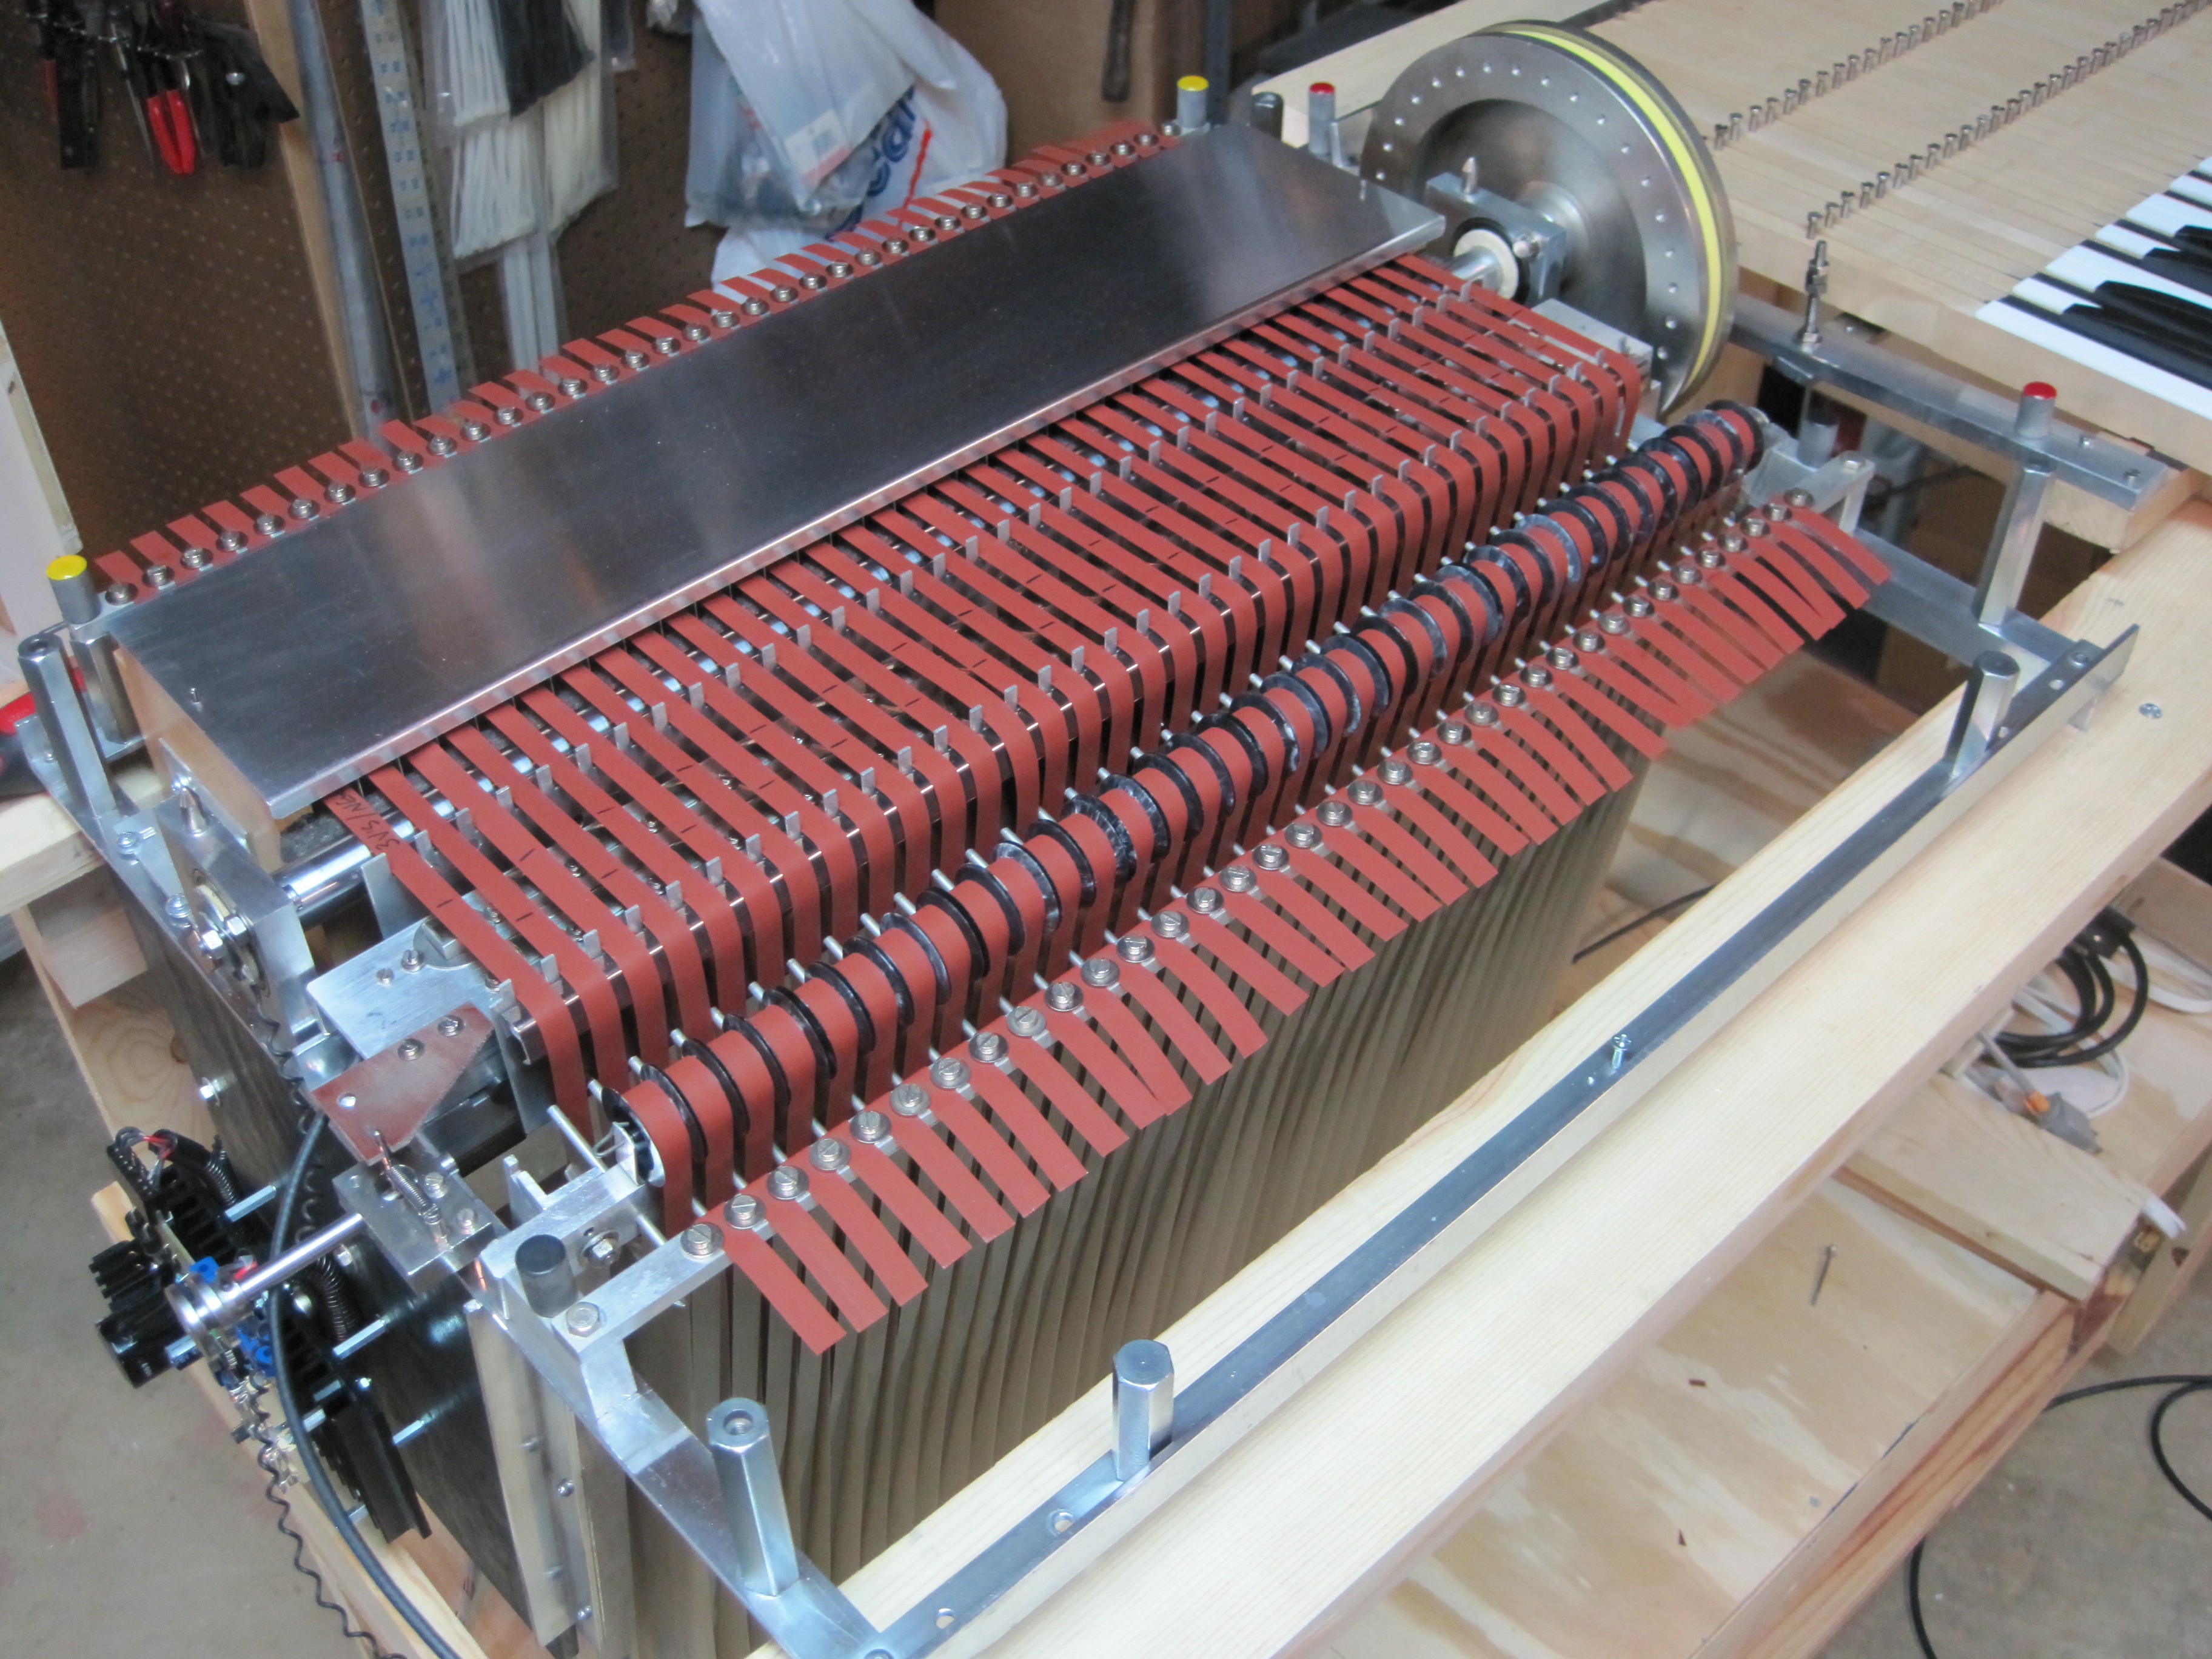 | |
| Mellotron 4-Track | Mellotron 4-Track | 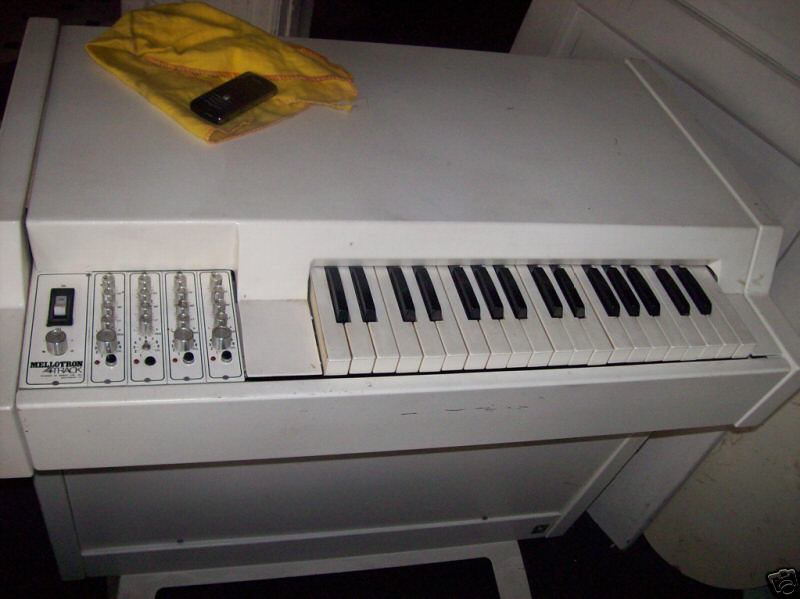 | This is how it looked upon arrival. |
| Mellotron 4-Track | Name Plate | 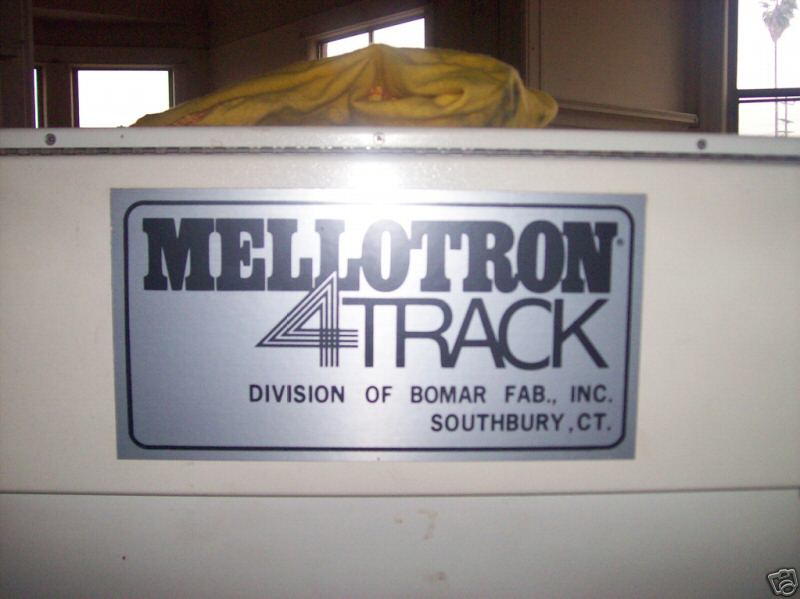 | Prototype fabricated by Bomar |
| Mellotron 4-Track | 4-Track lid open | 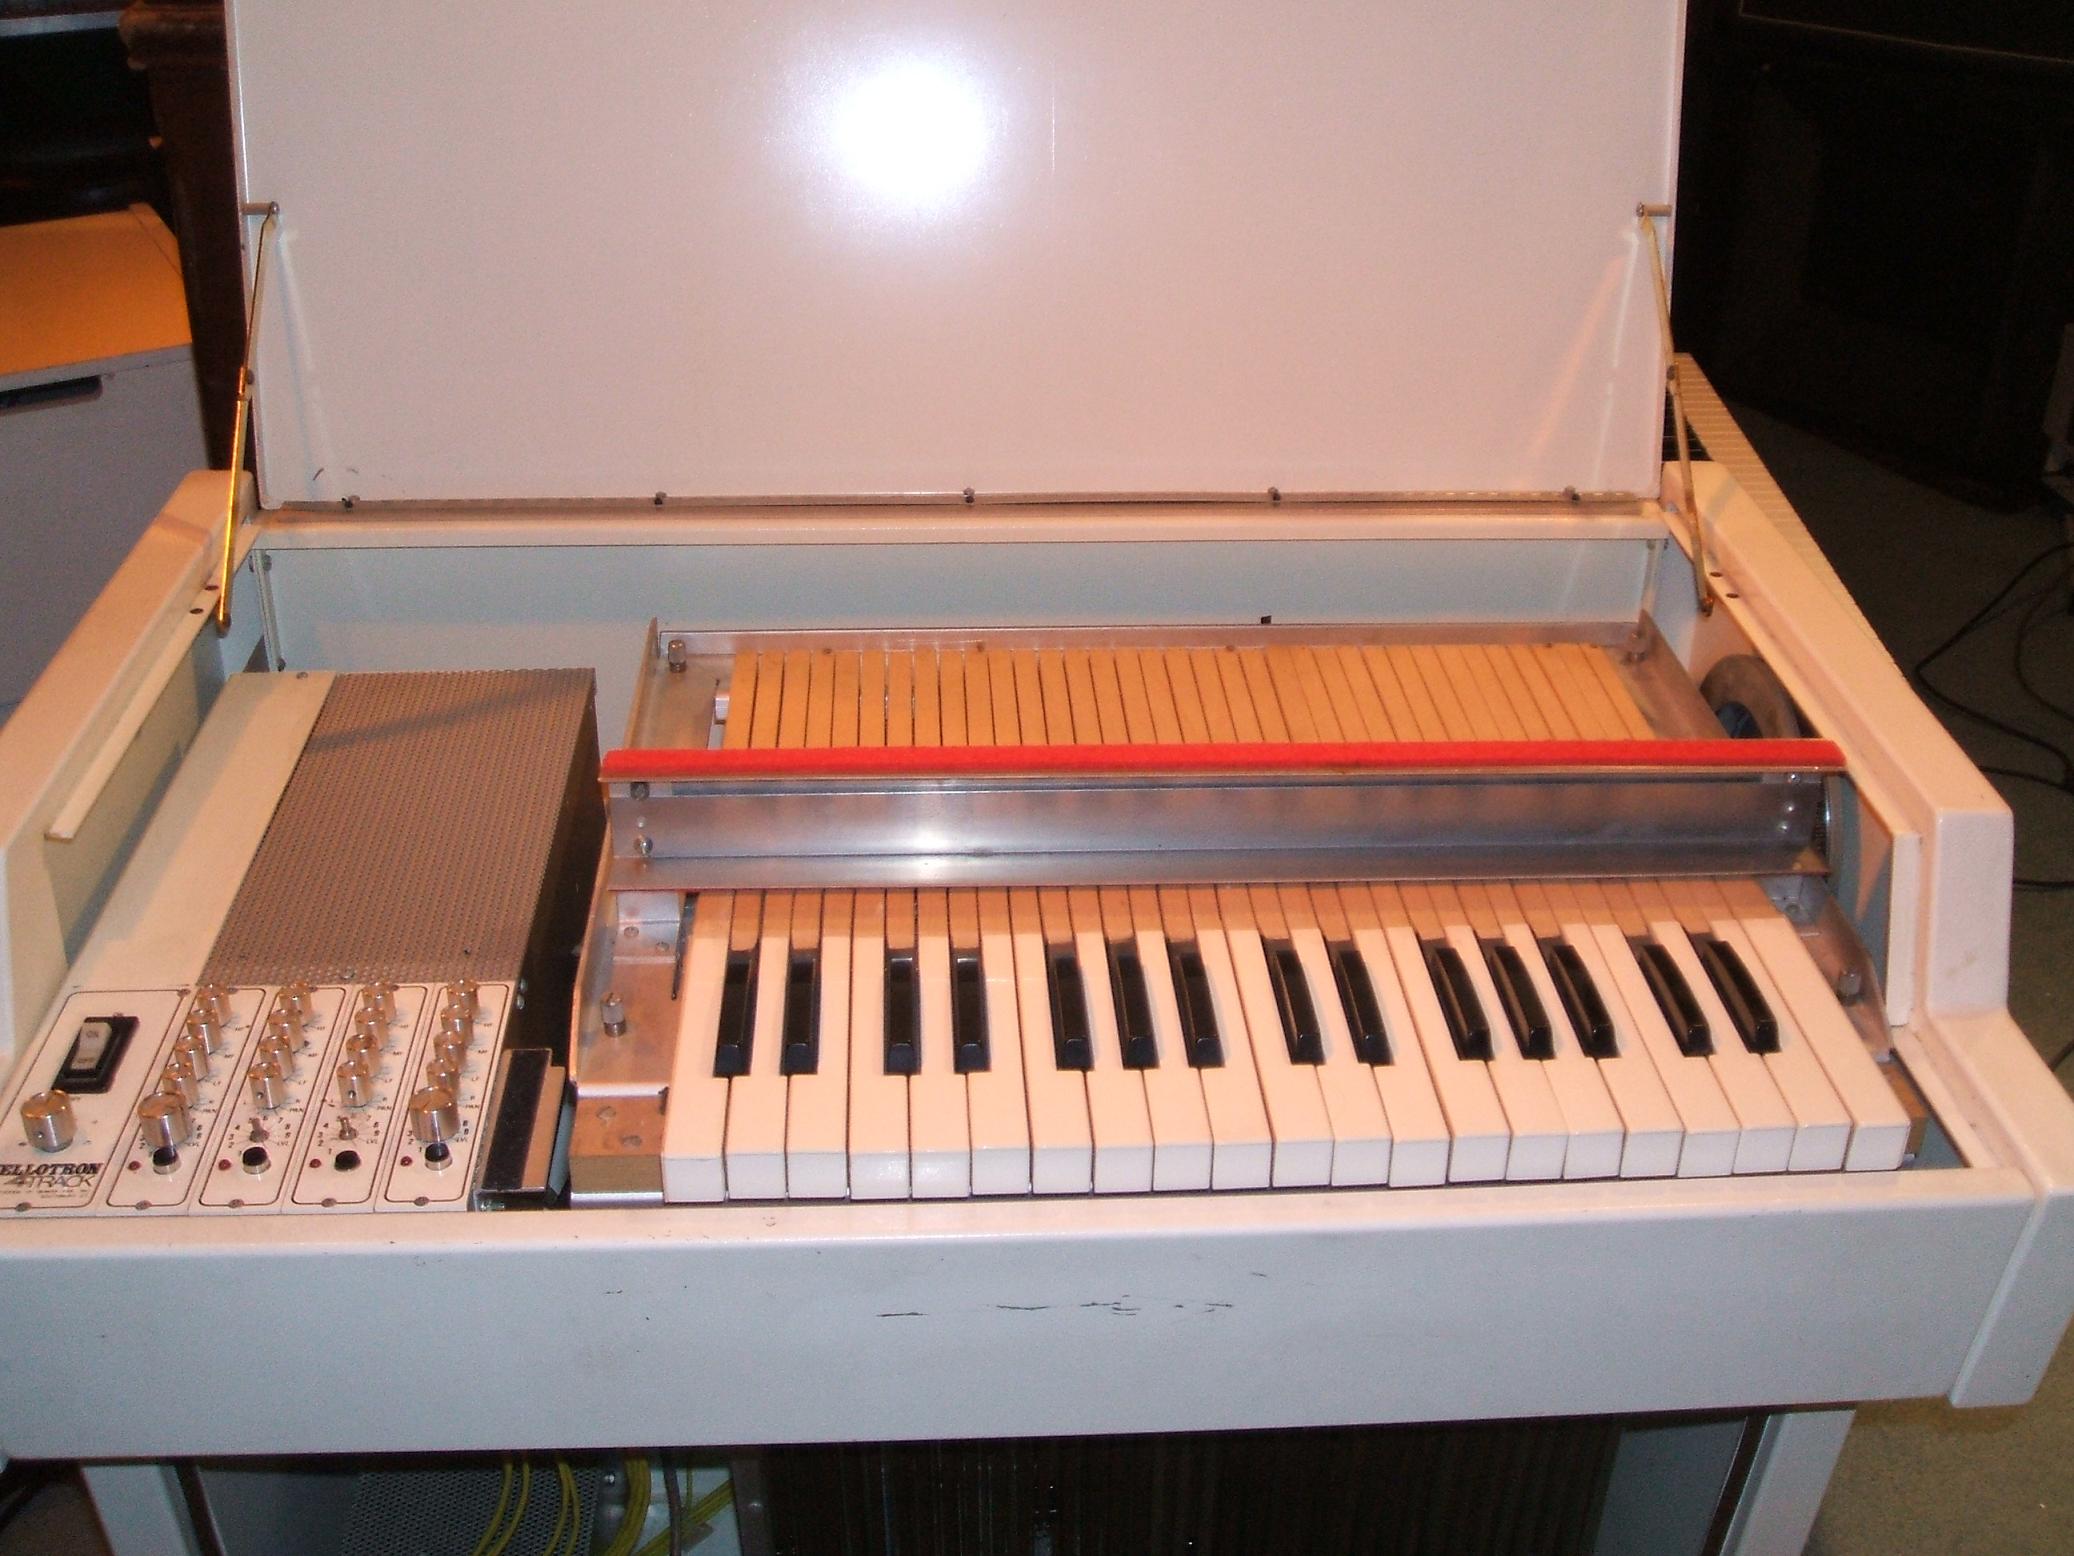 | You can see the basic layout. |
| Mellotron 4-Track | Control Panel. | 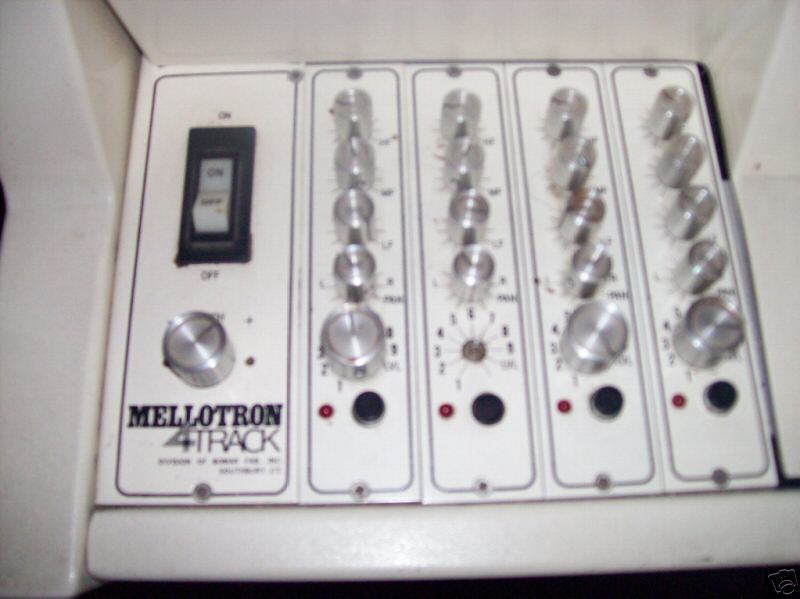 | Each track has volume, EQ and left/right panning. |
| Mellotron 4-Track | Keyboard | 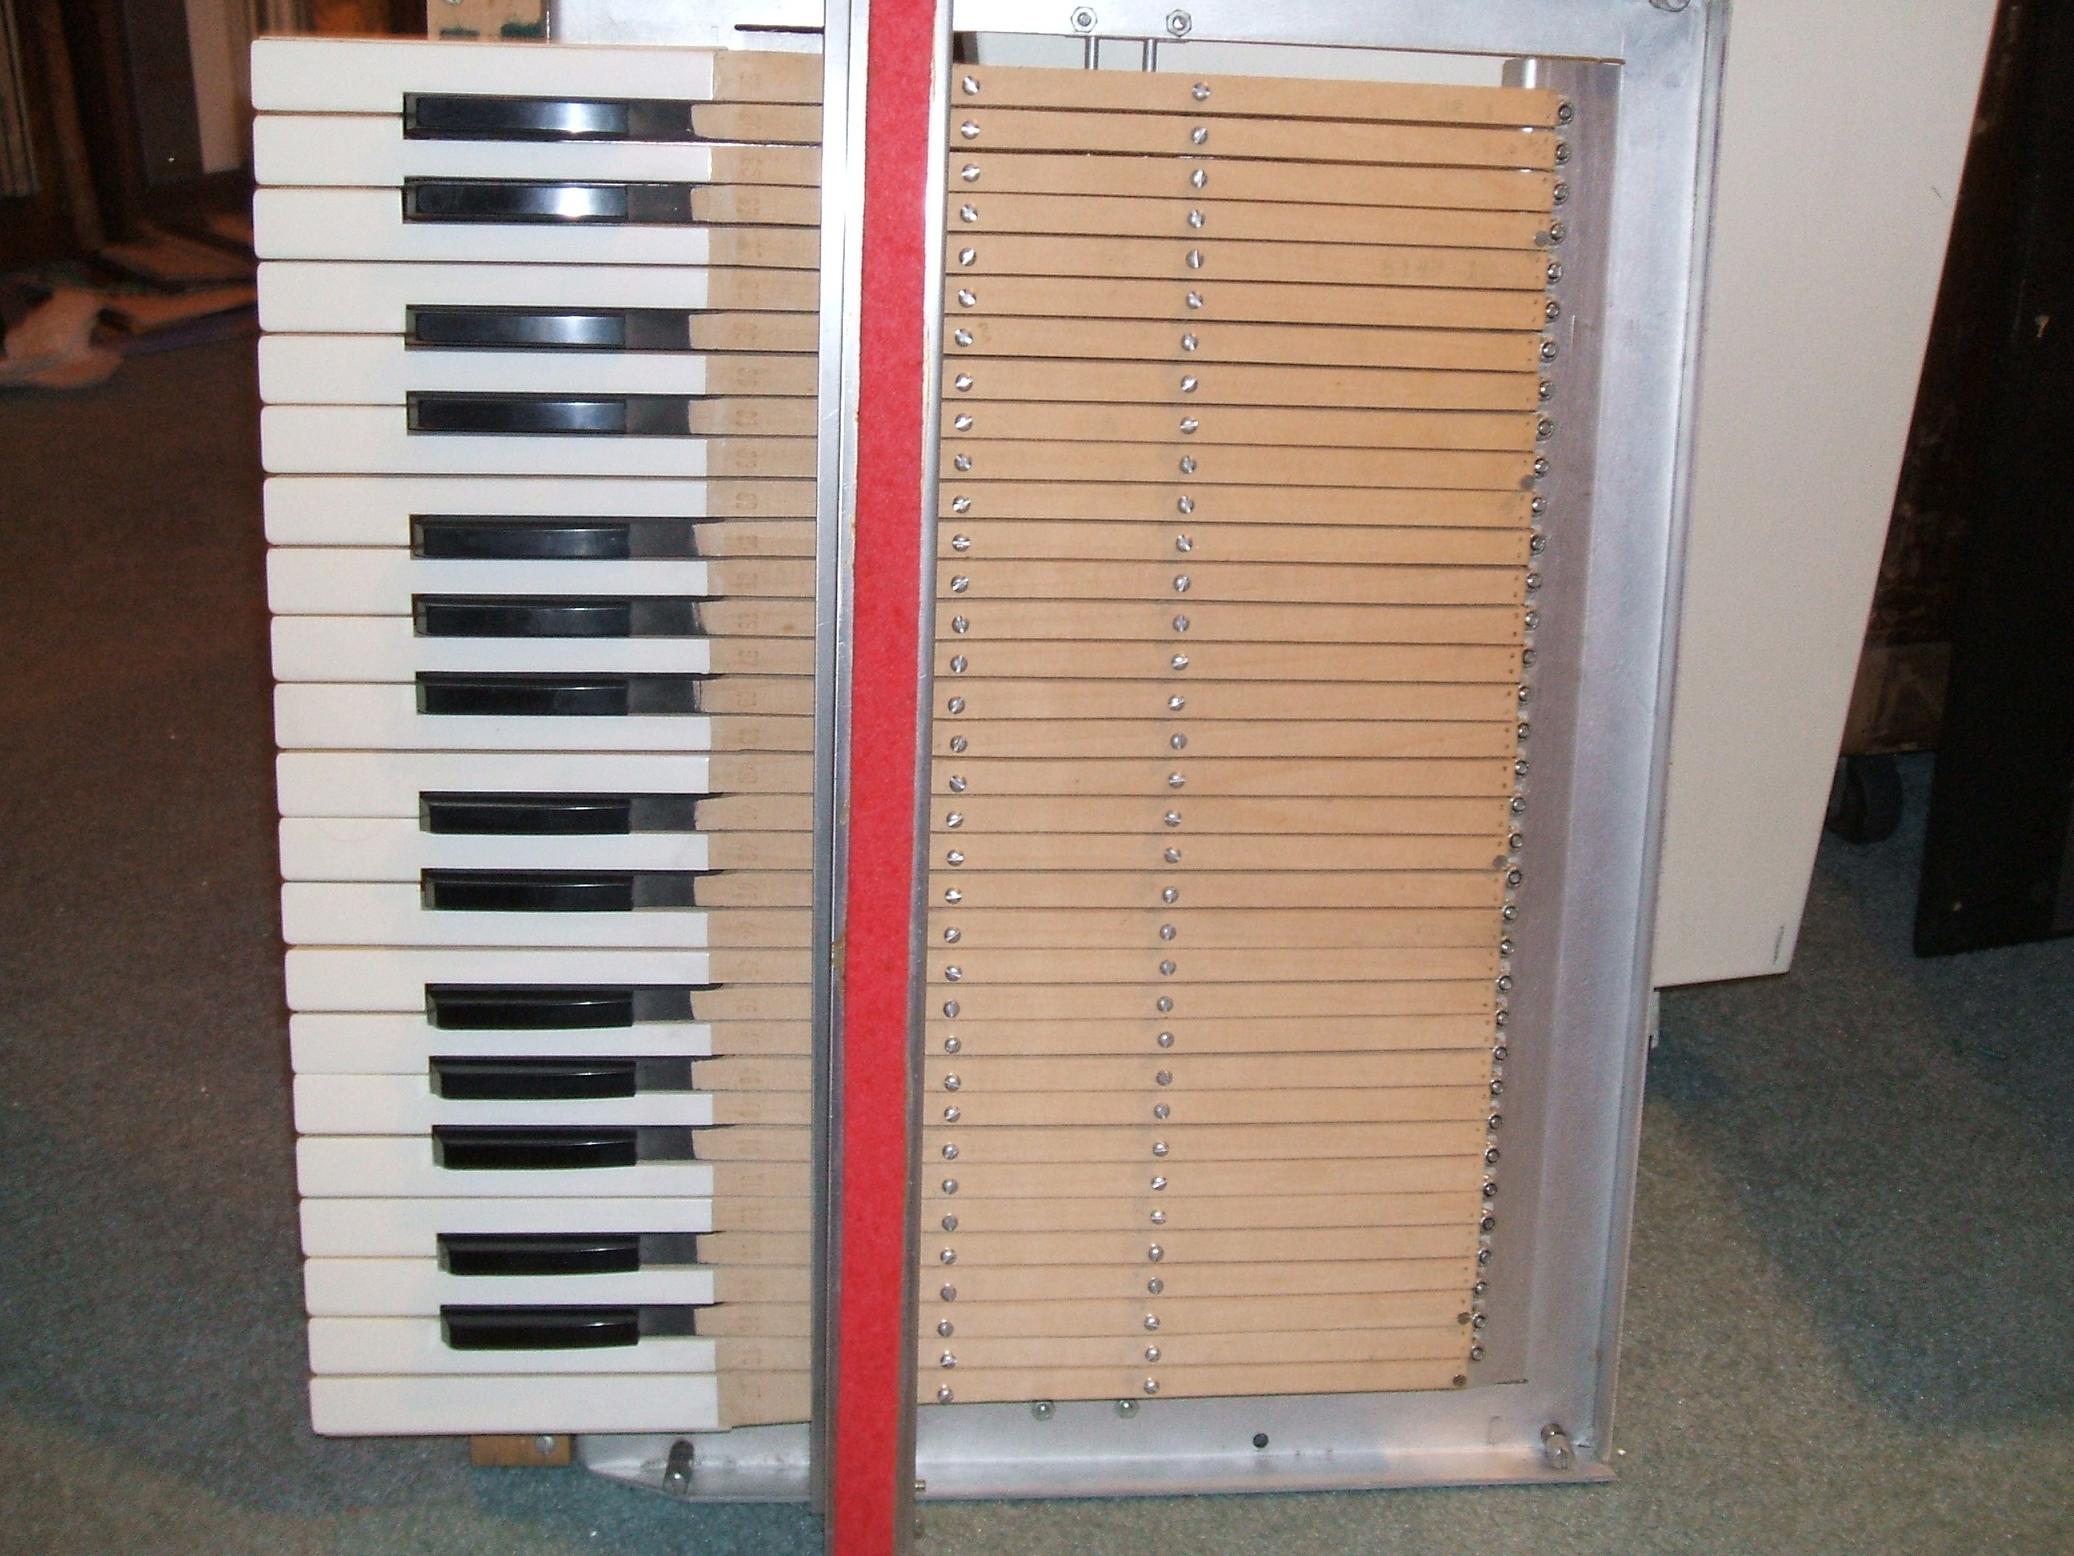 | Here the keyboard has been removed from the 4-Track |
| Mellotron 4-Track | 4-Track with keyboard removed | 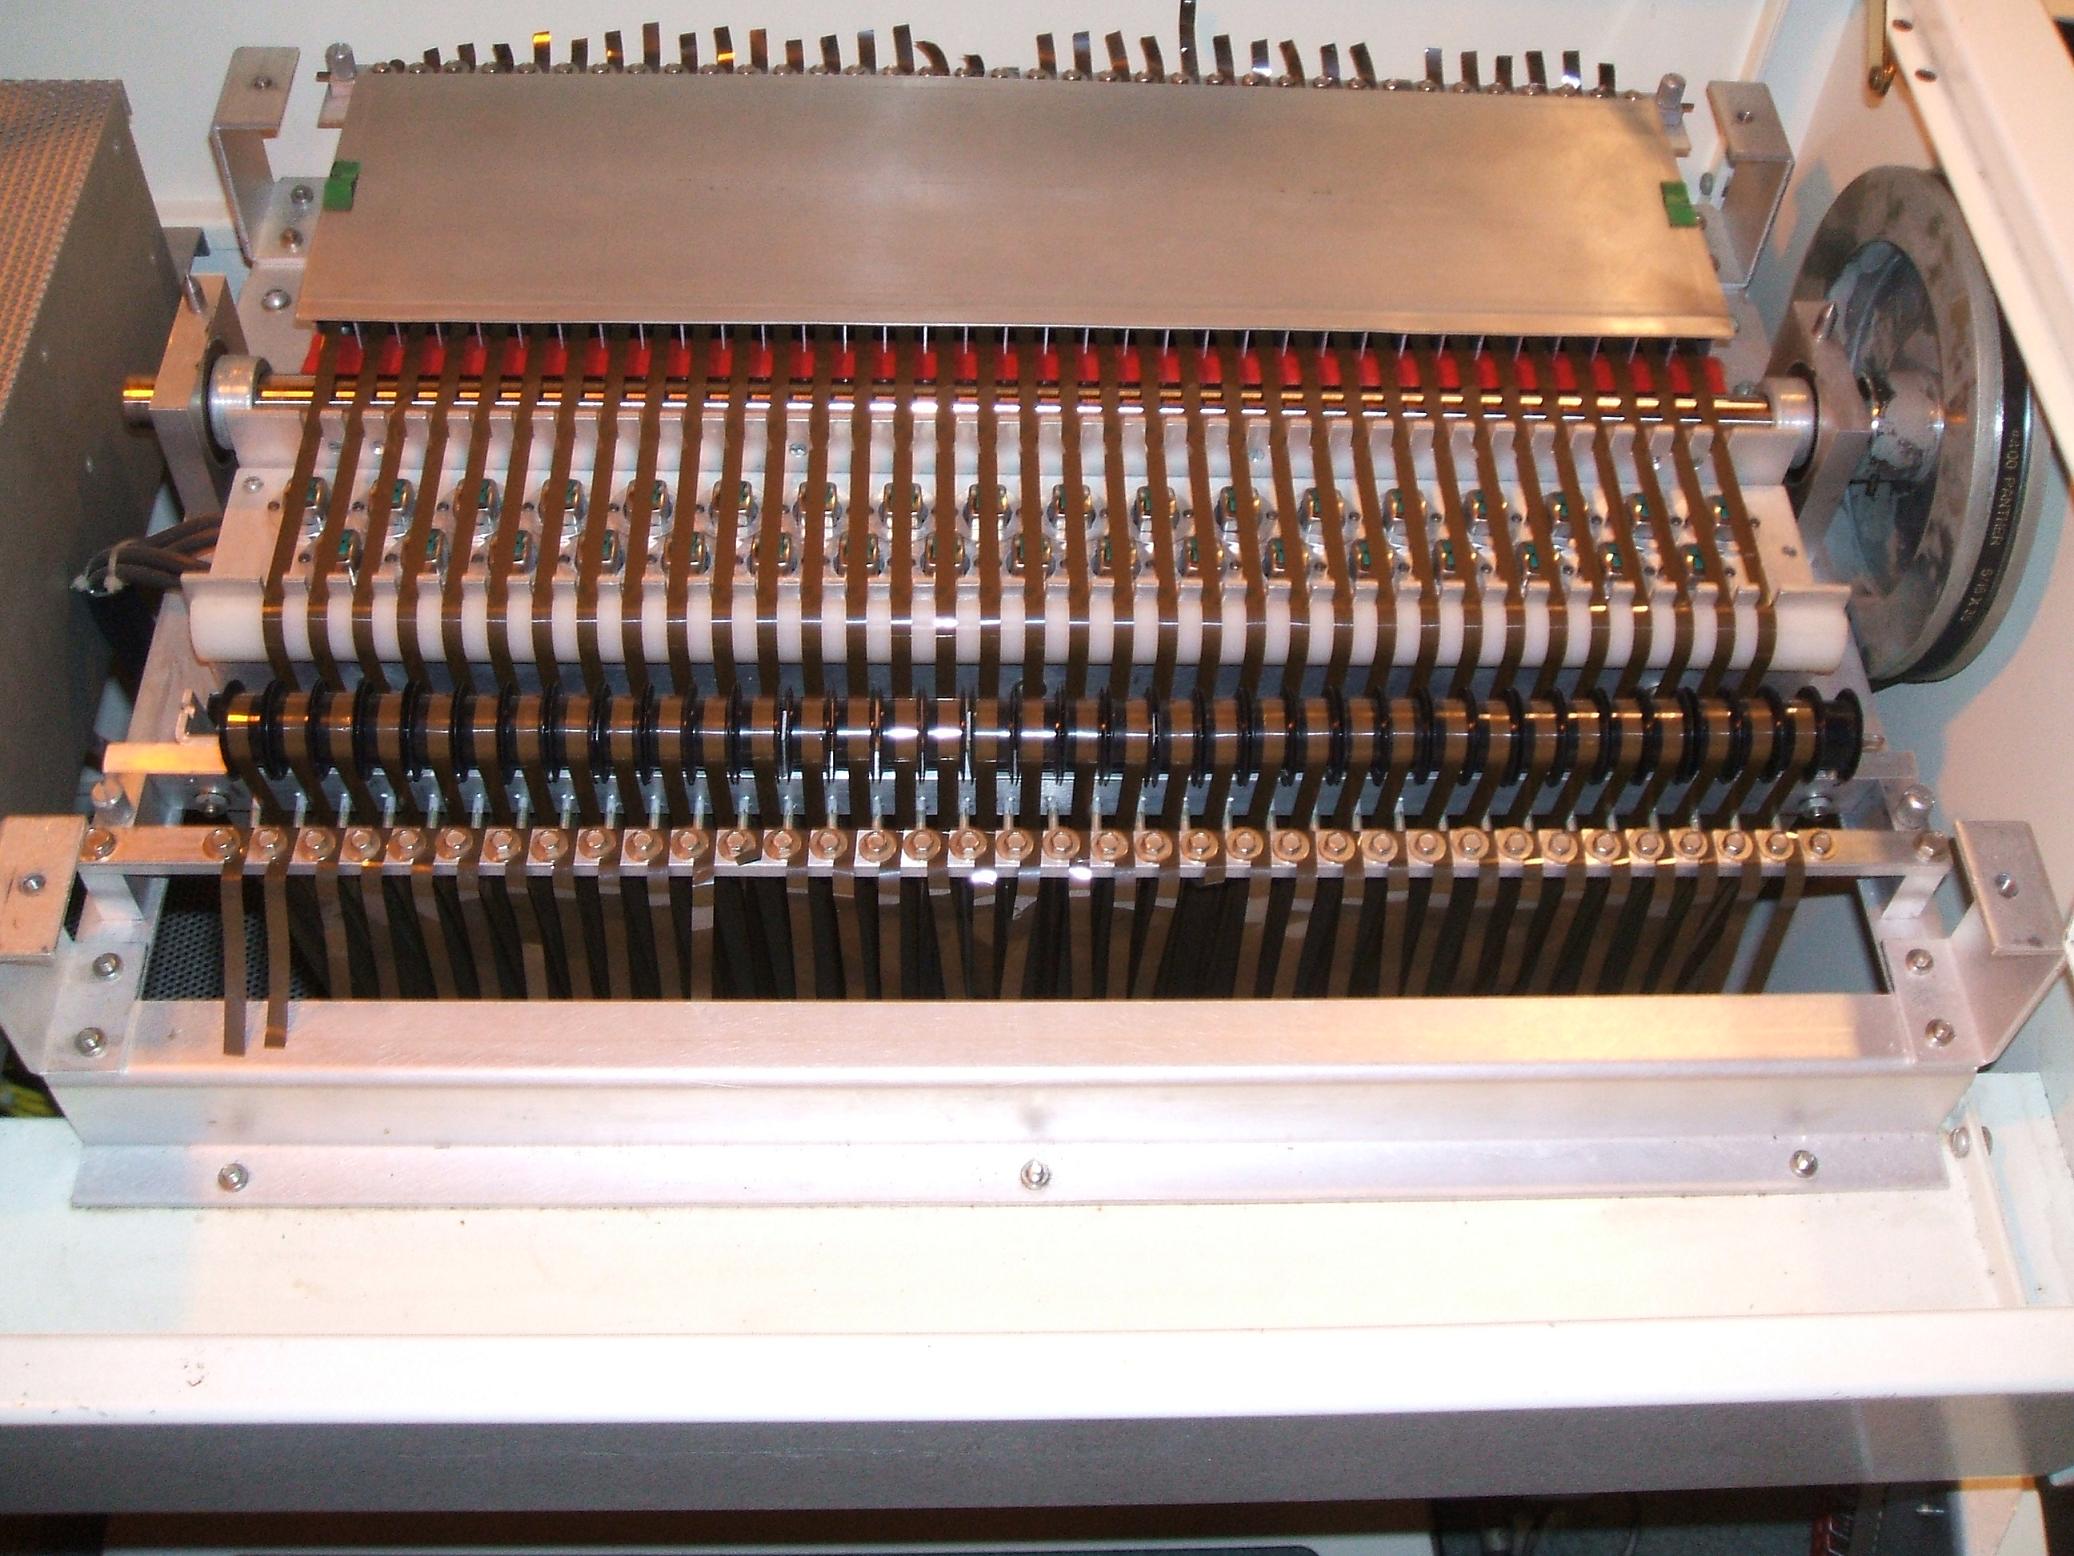 | Here it looks somewhat like a 400 |
| Mellotron 4-Track | 4-Track with tapes removed | 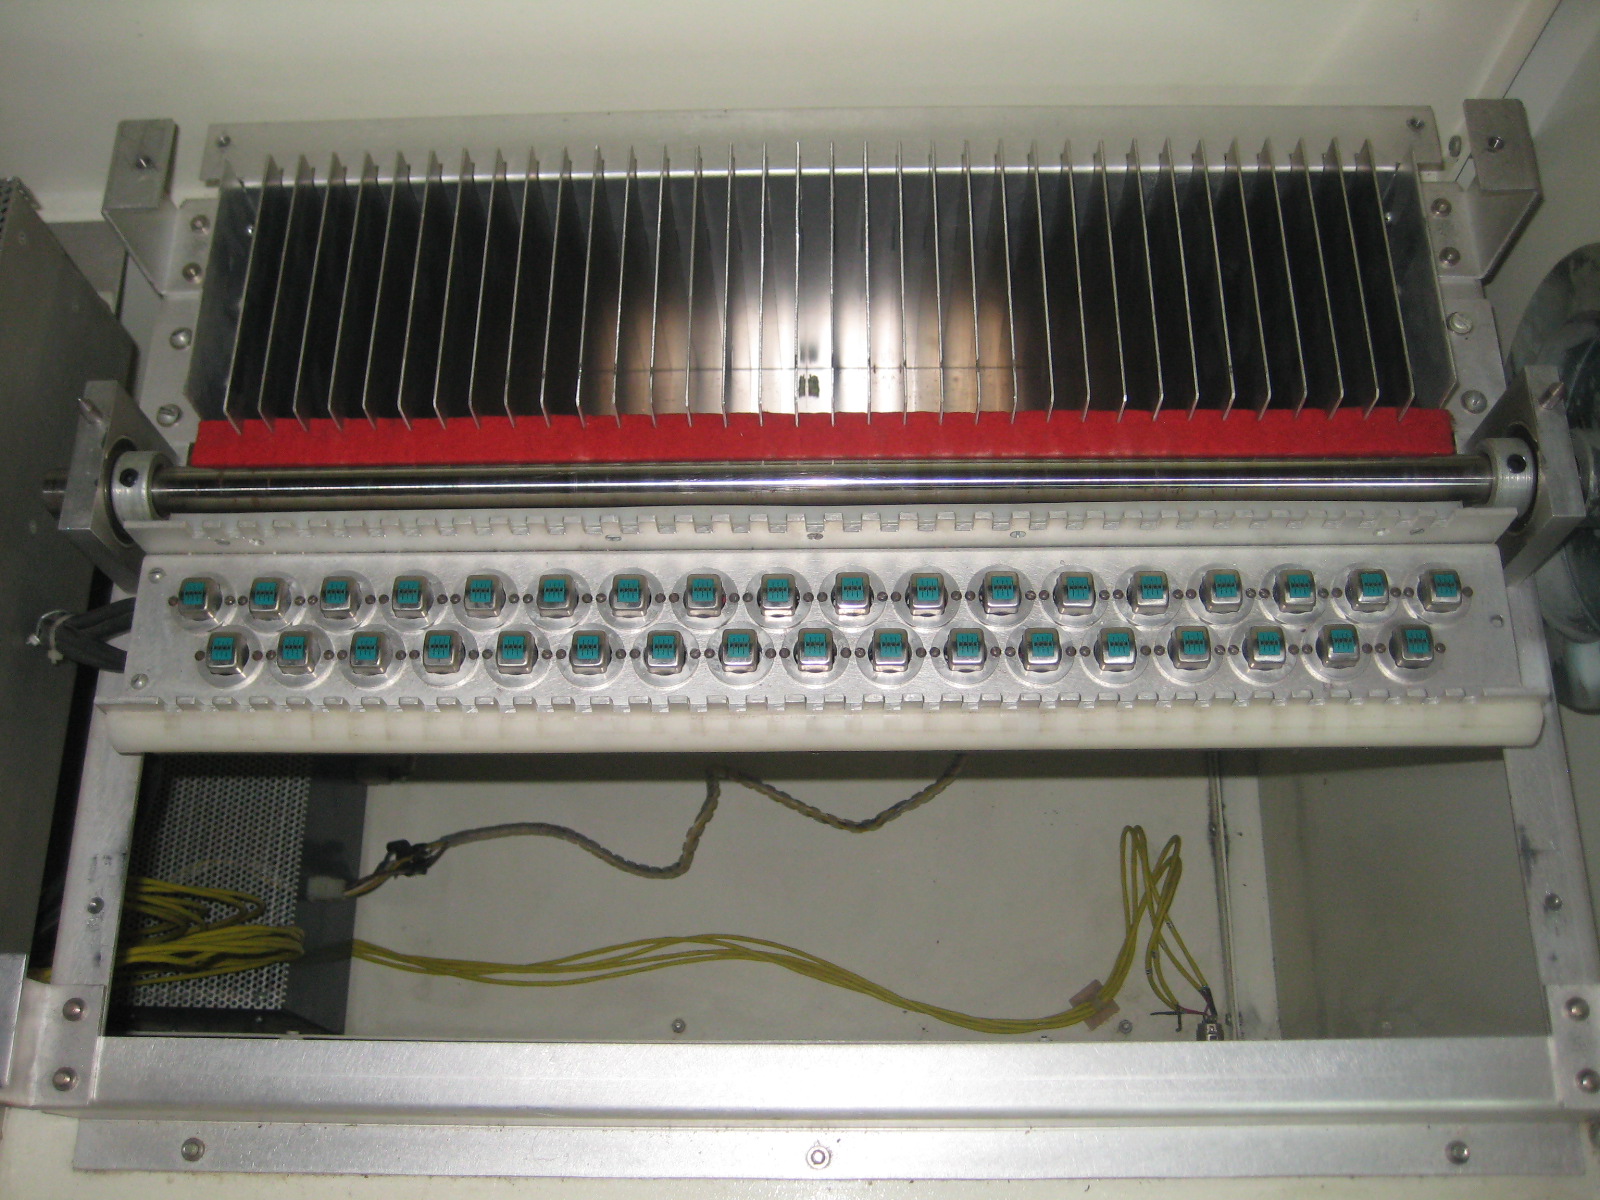 | Everything is metal, even the spill box. |
| Mellotron 4-Track | Power Pack | 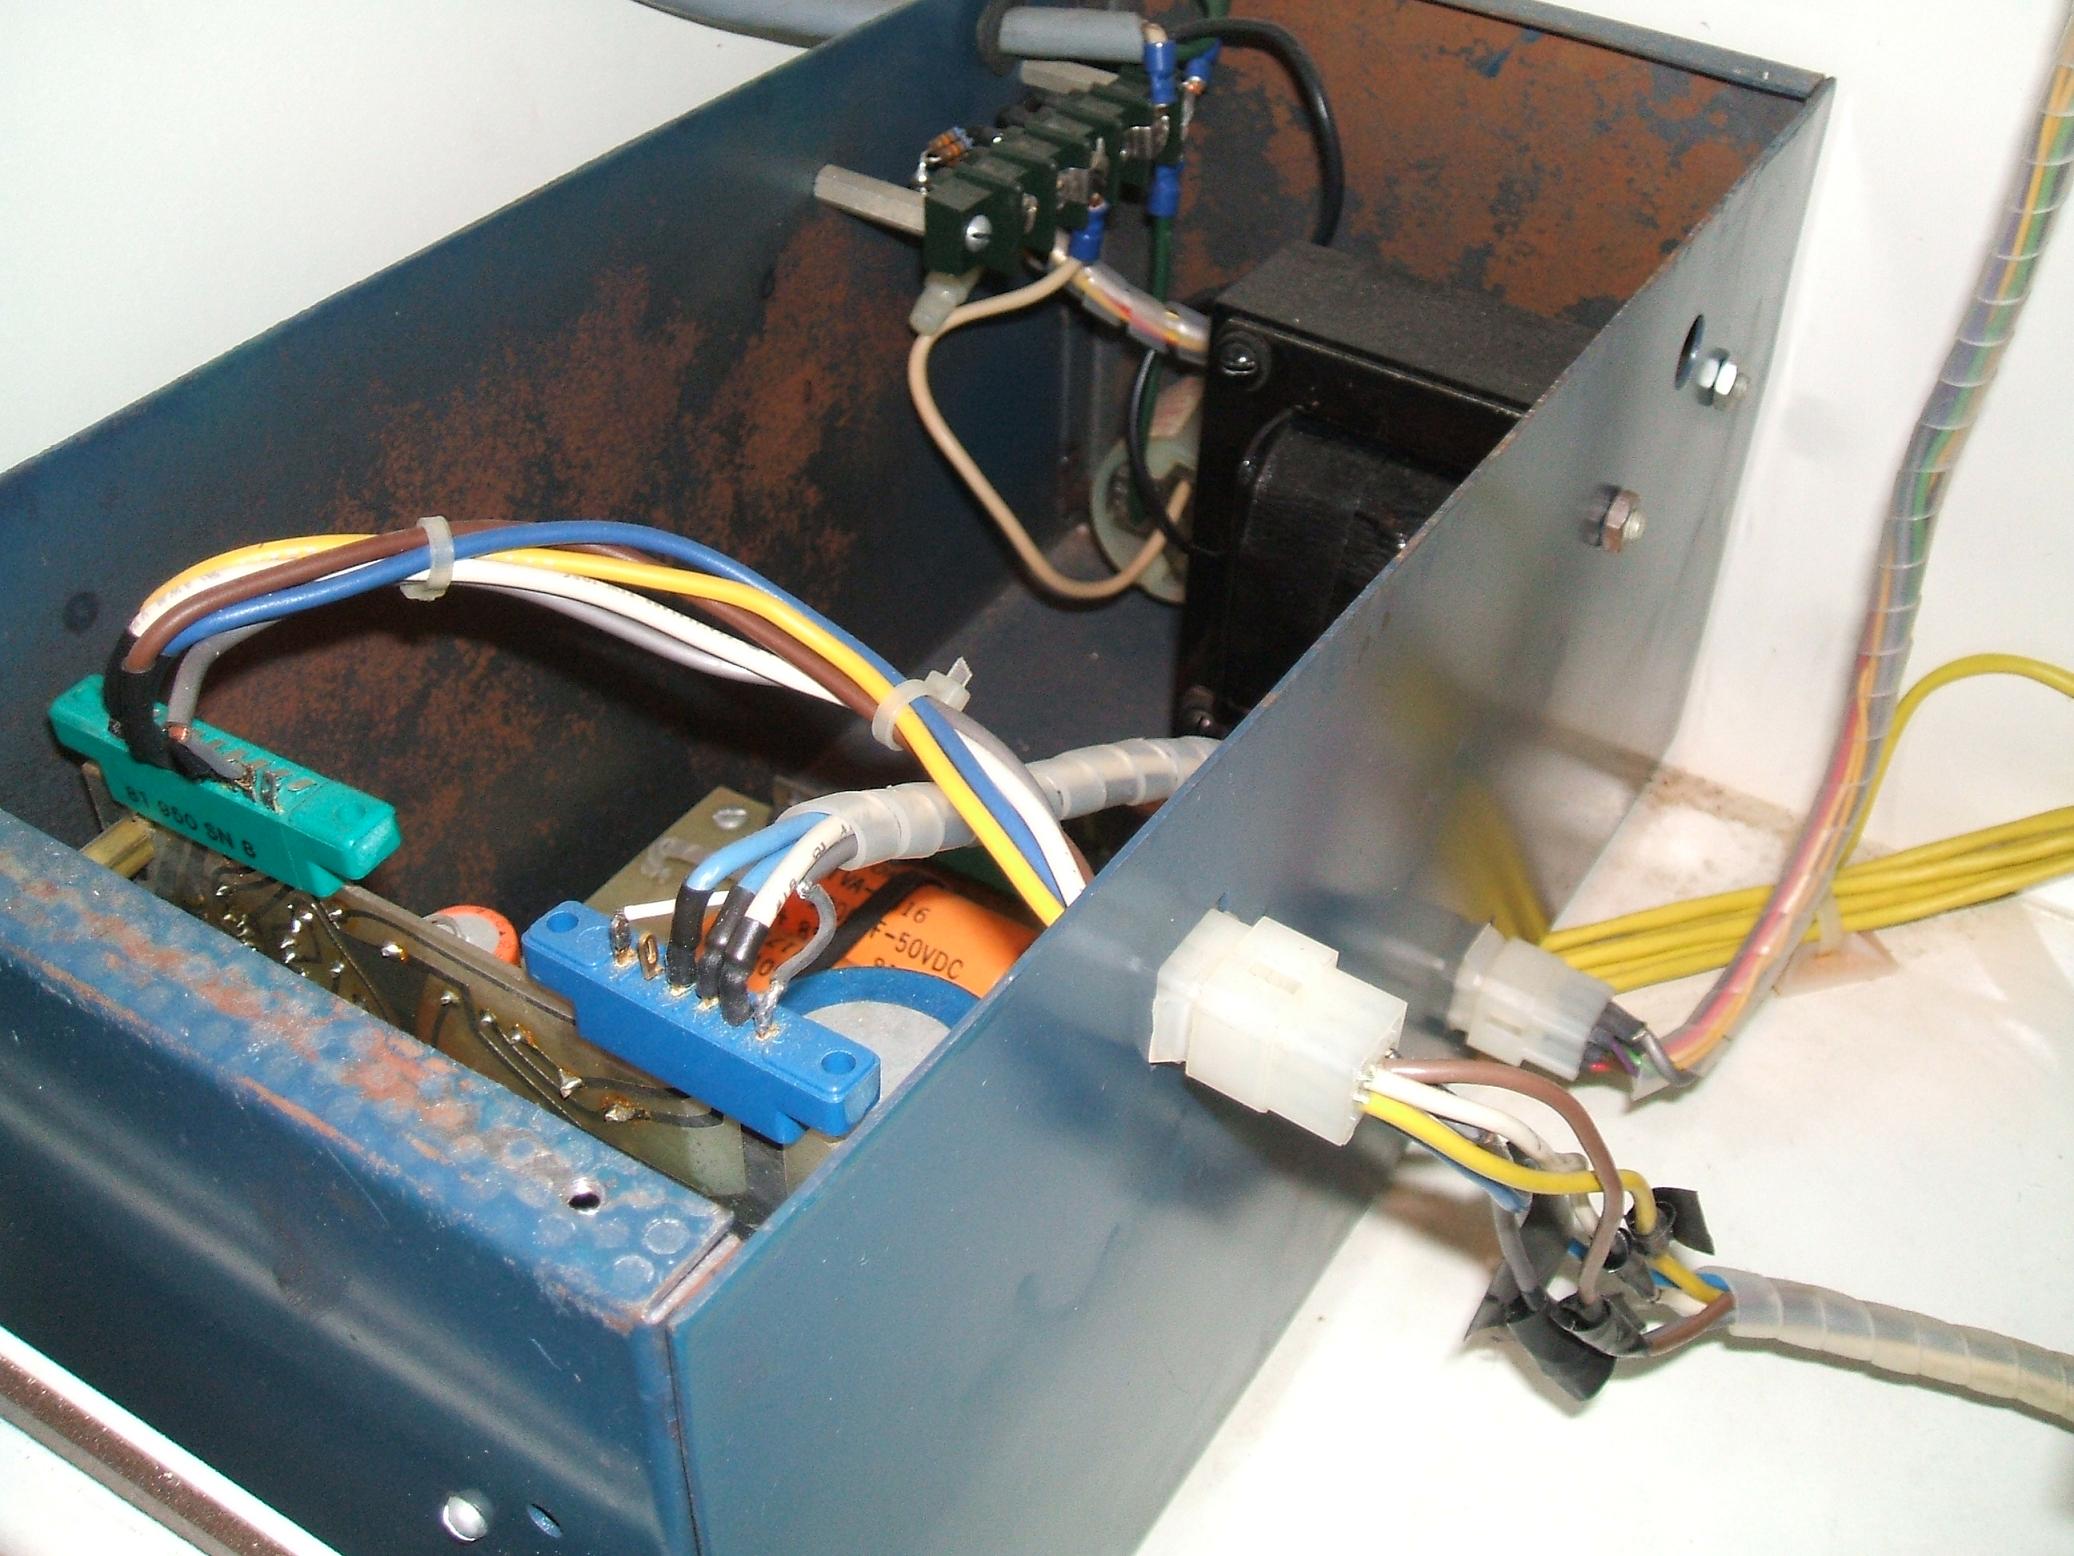 | Here you can see the transformer and the SMS-3 |
| Mellotron 4-Track | Cross brace removed | 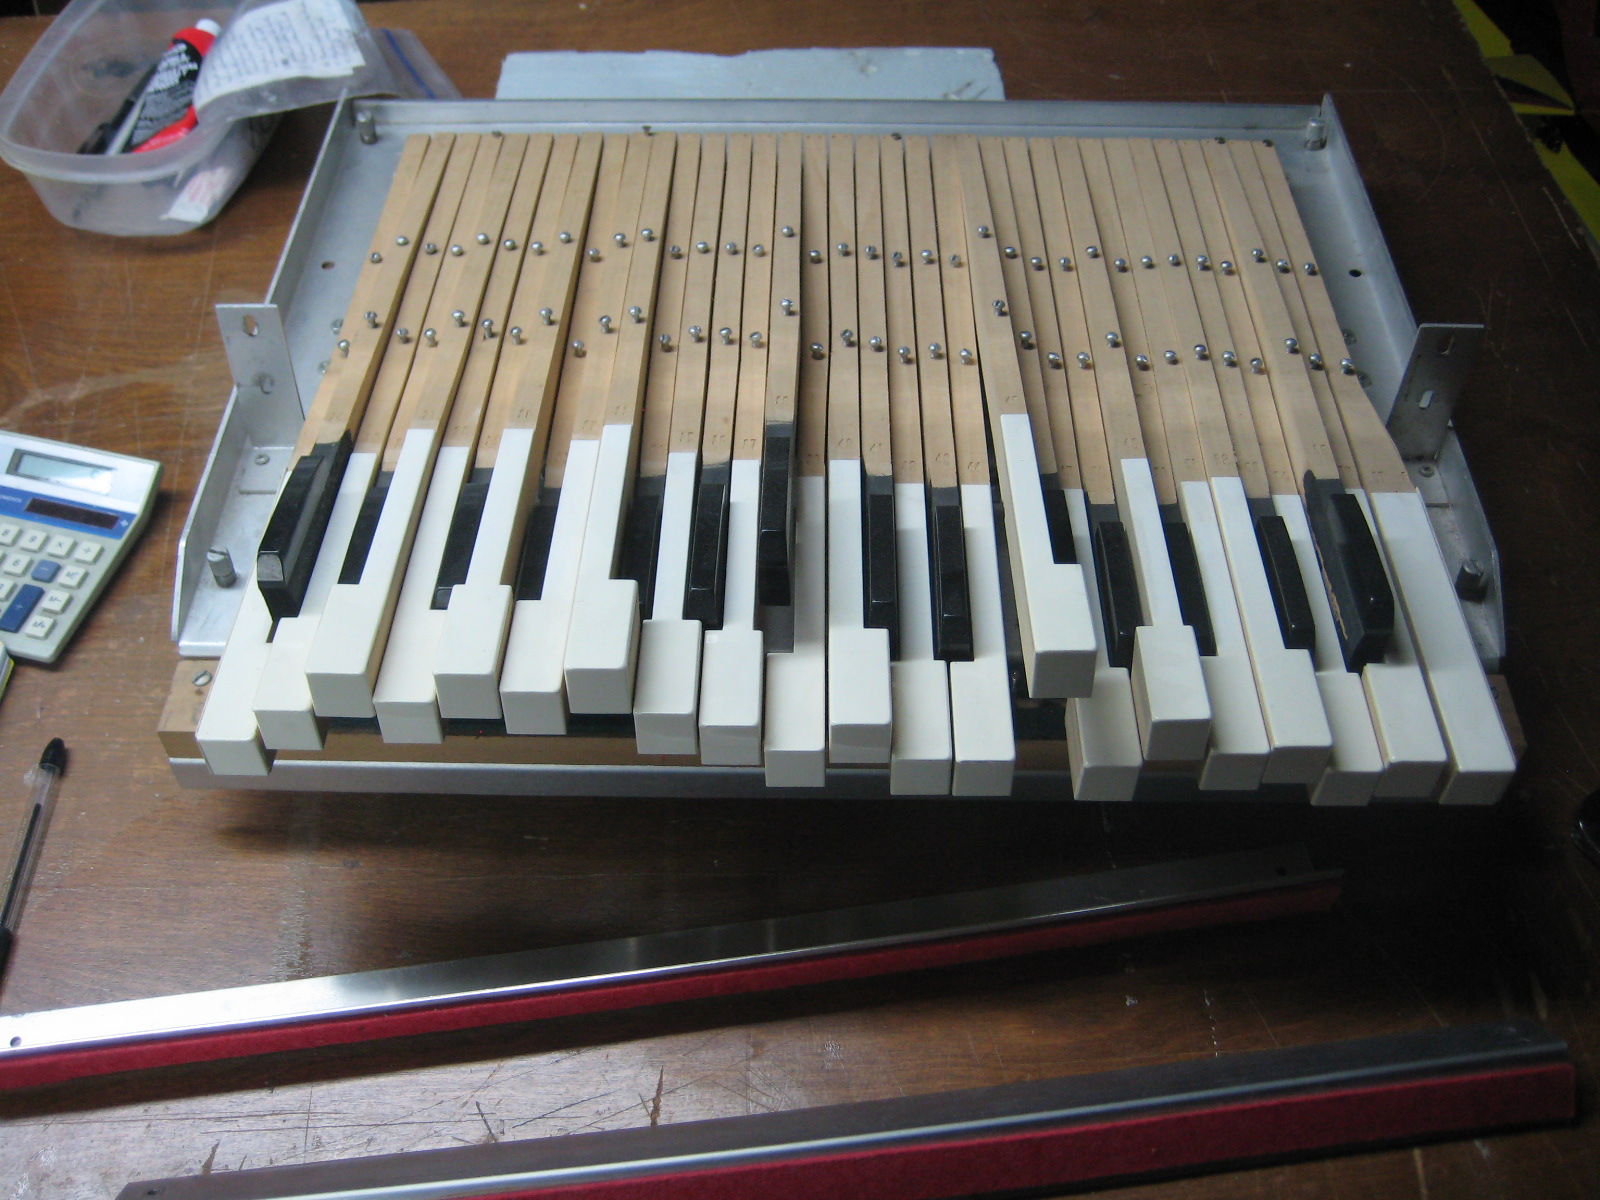 | Obviously, the key springs were of varying tensions. The keys also have numbers stamped on them that have nothing to do with their sequence. |
| Mellotron 4-Track | Basic Key Frame With Pressure Pads | 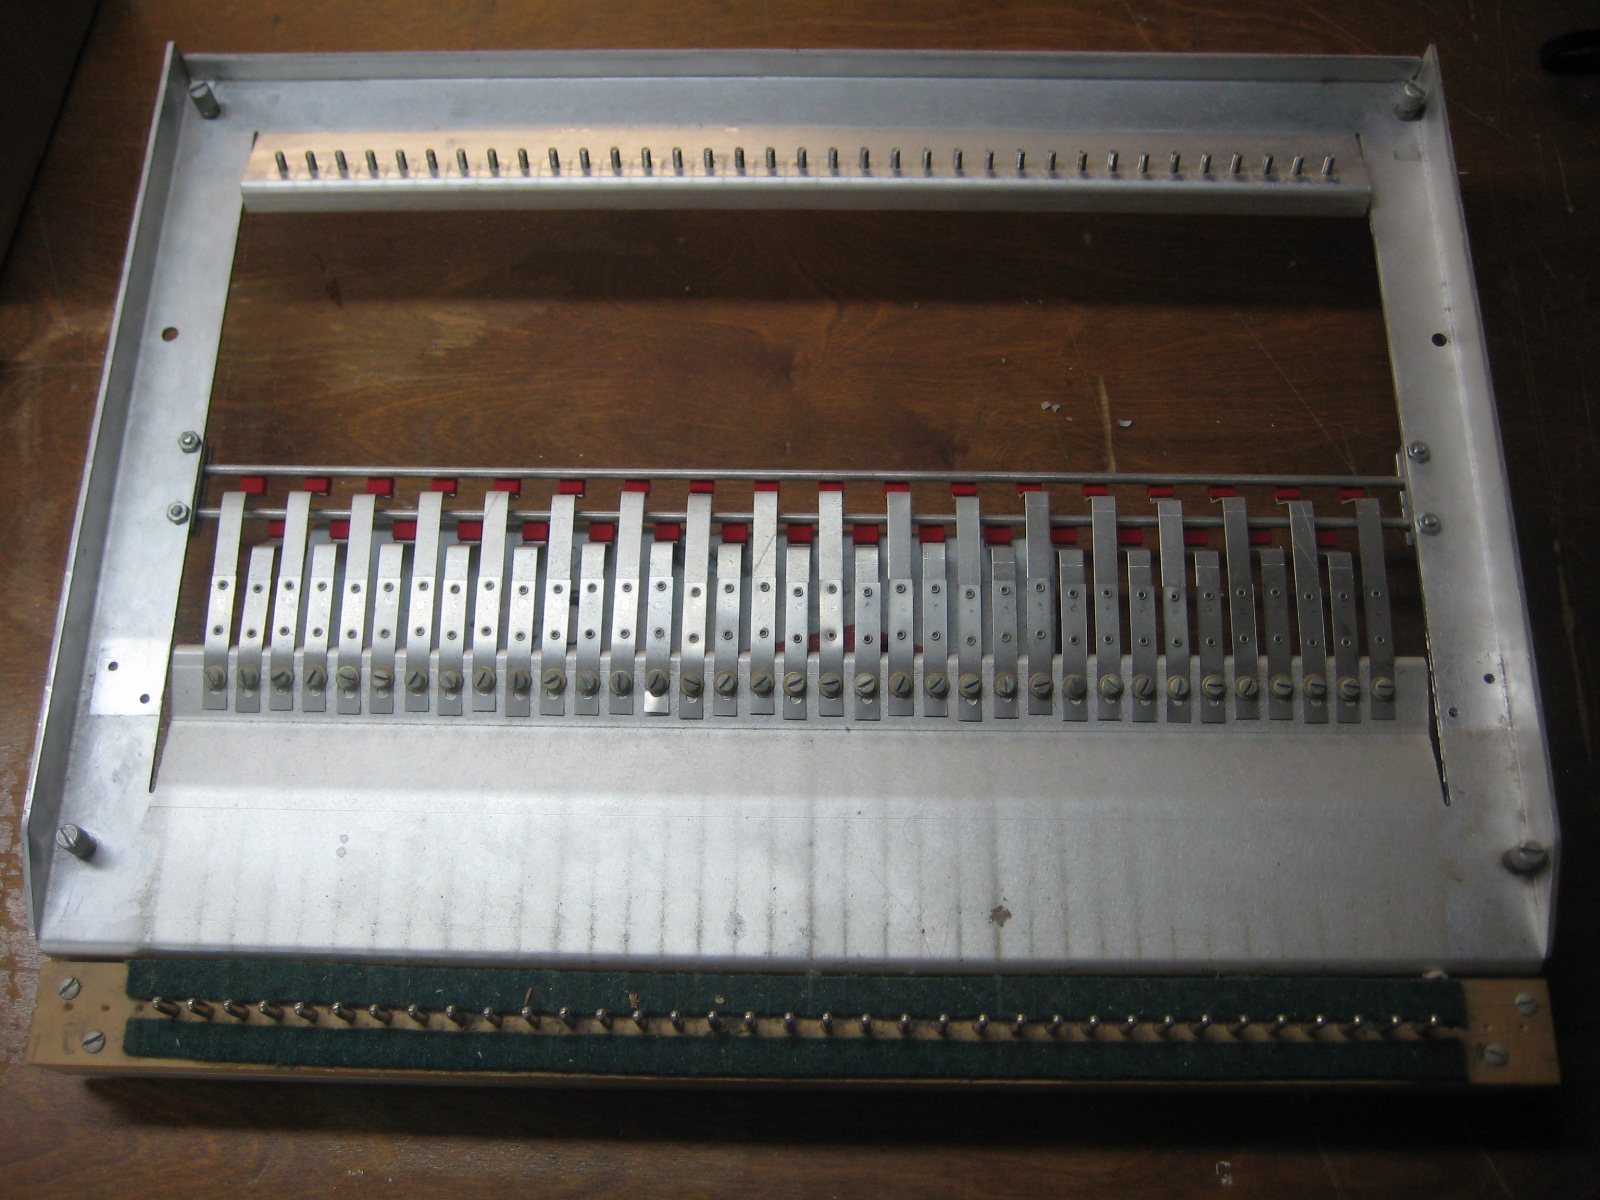 | The keyboard frame was stamped out of one large piece of aluminum |
| Mellotron 4-Track | 4-Track Motor | 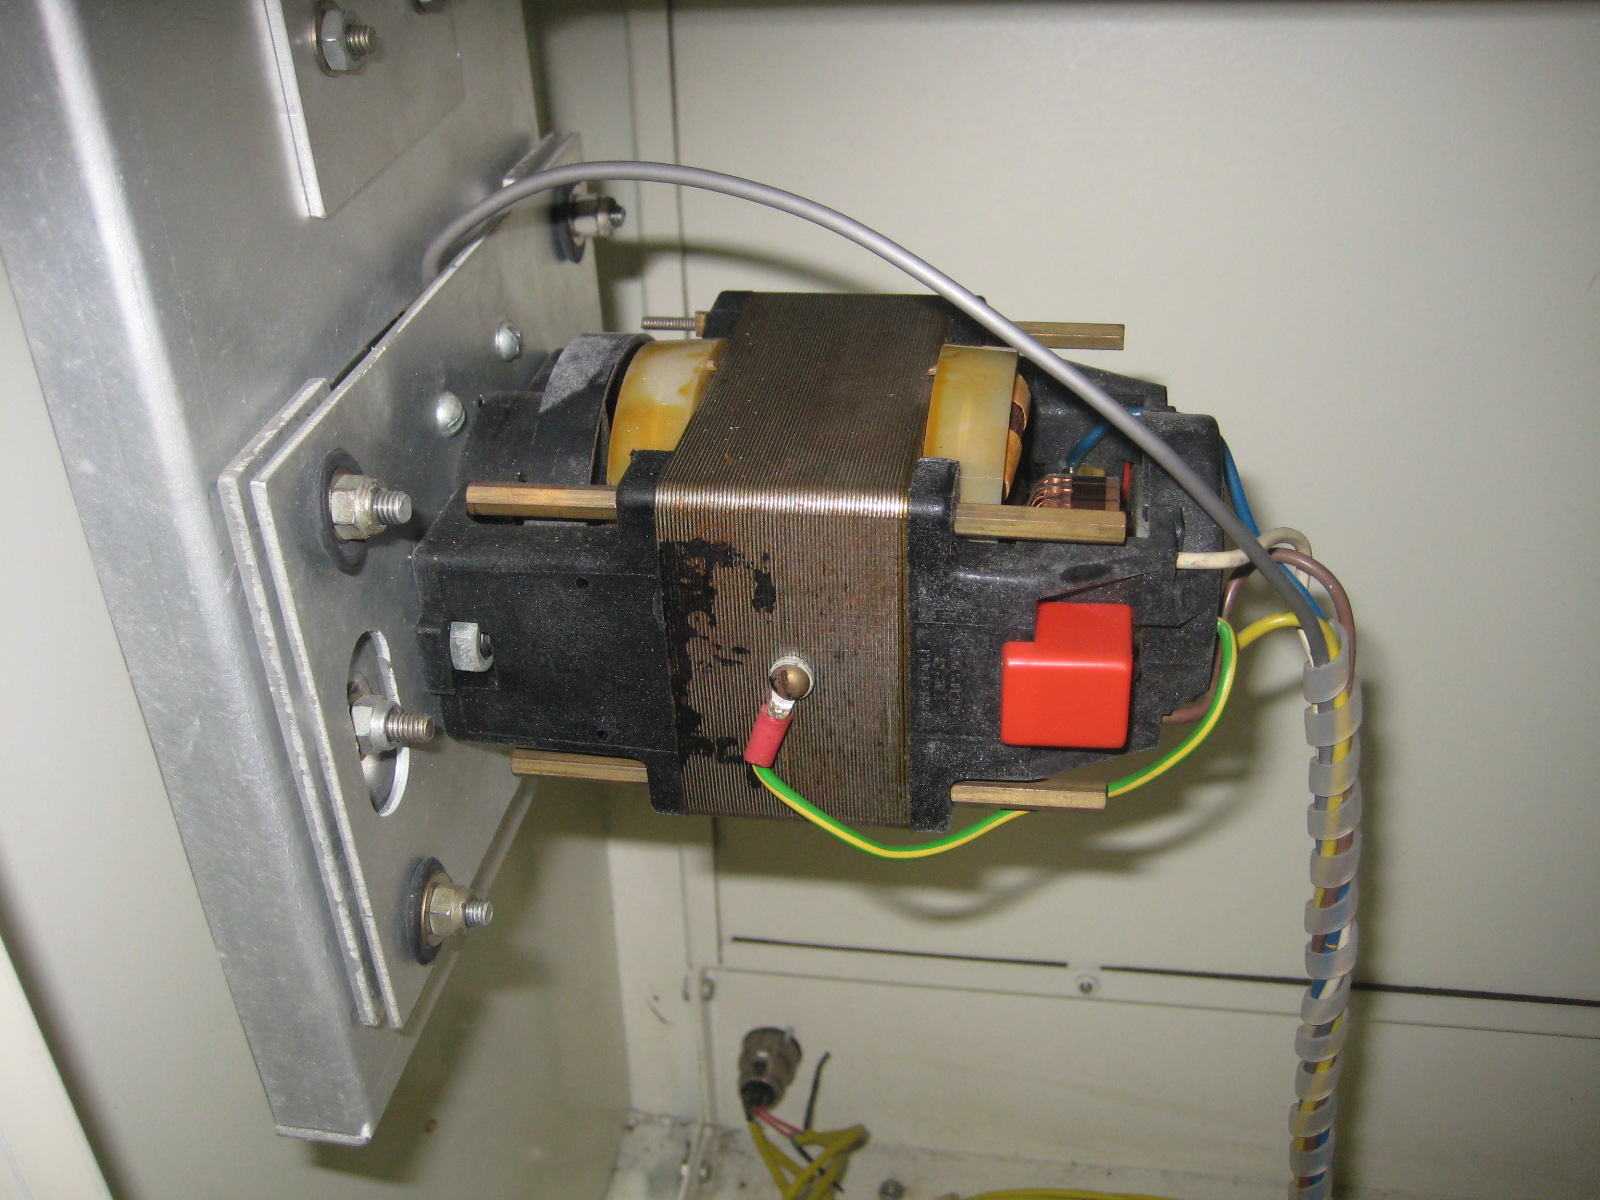 | Standard Mellotron motor, but this one has been apart before. Trust me, tearing apart one of these motors is easy. Getting them bolted back together is very time consuming. Any shaft binding will cause the motor to burn up and could damage other components. |
| Mellotron 4-Track | 4-Track in the ";Rack."; | 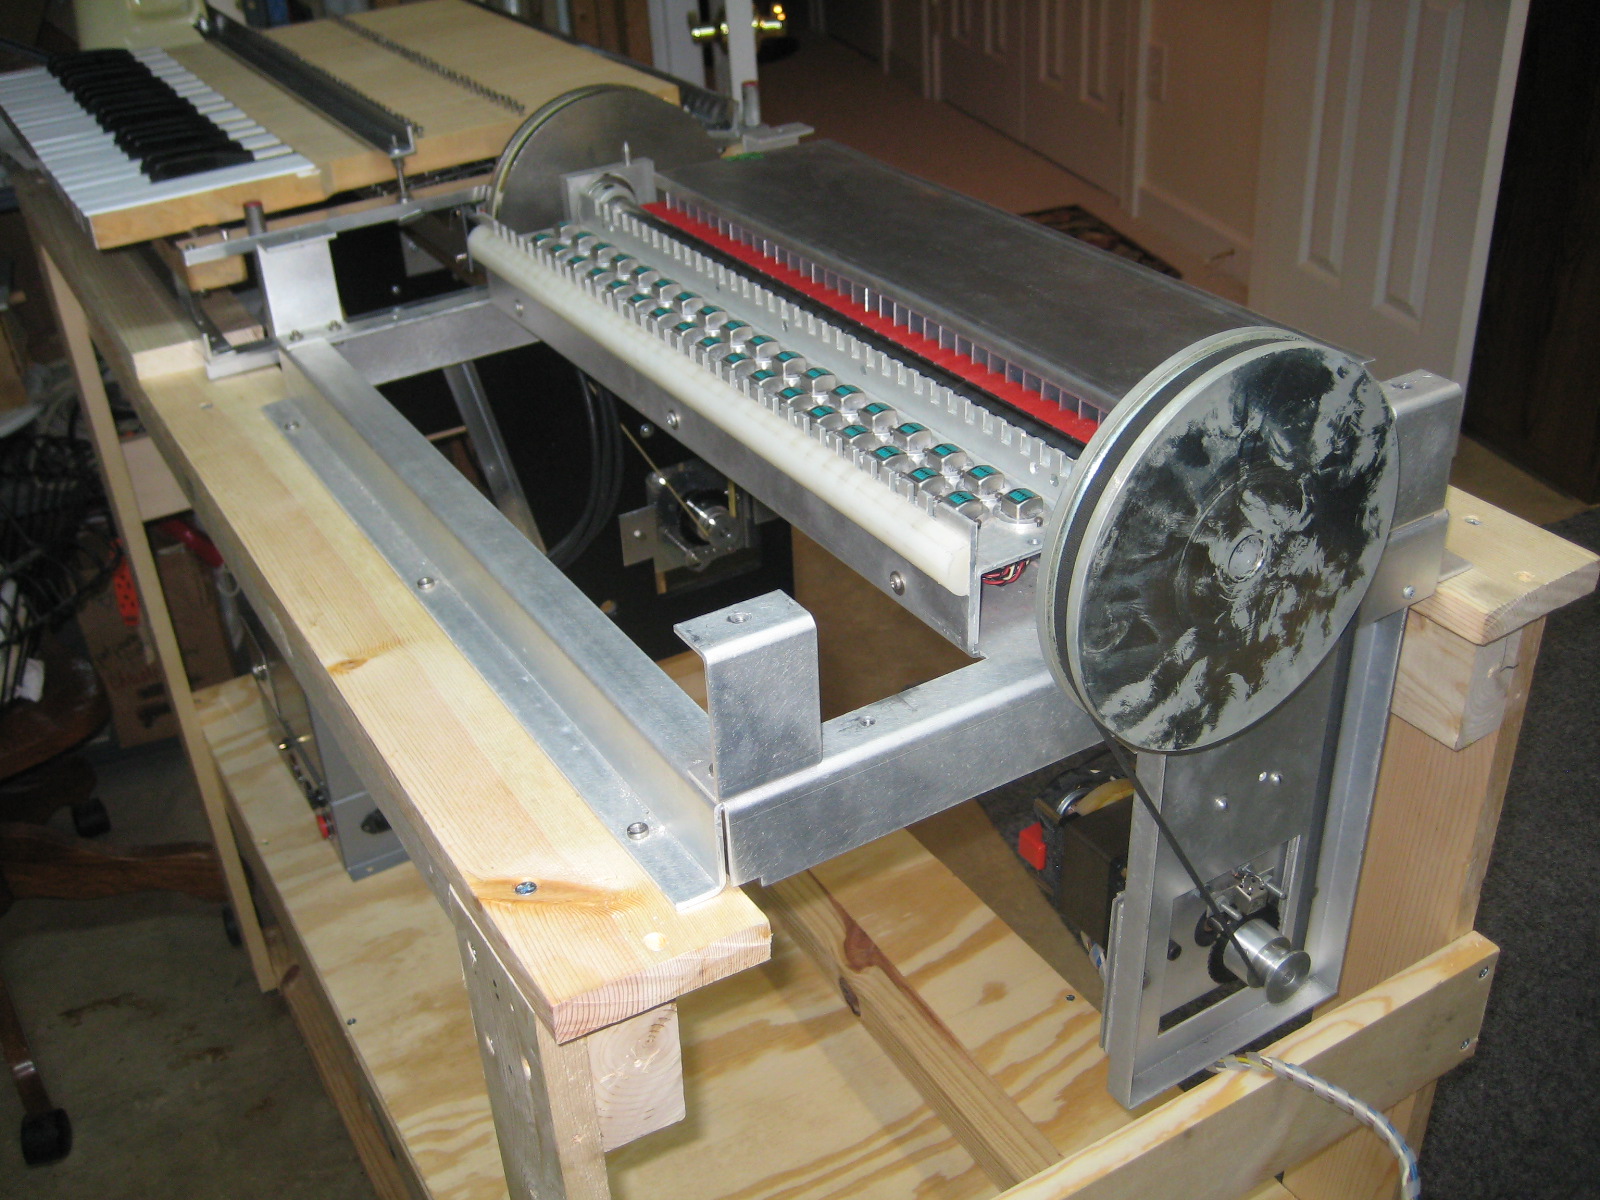 | I don';t know what was on that flywheel, but it was a bitch to get it off. |
| Mellotron 4-Track | 4-Track Main Frame | 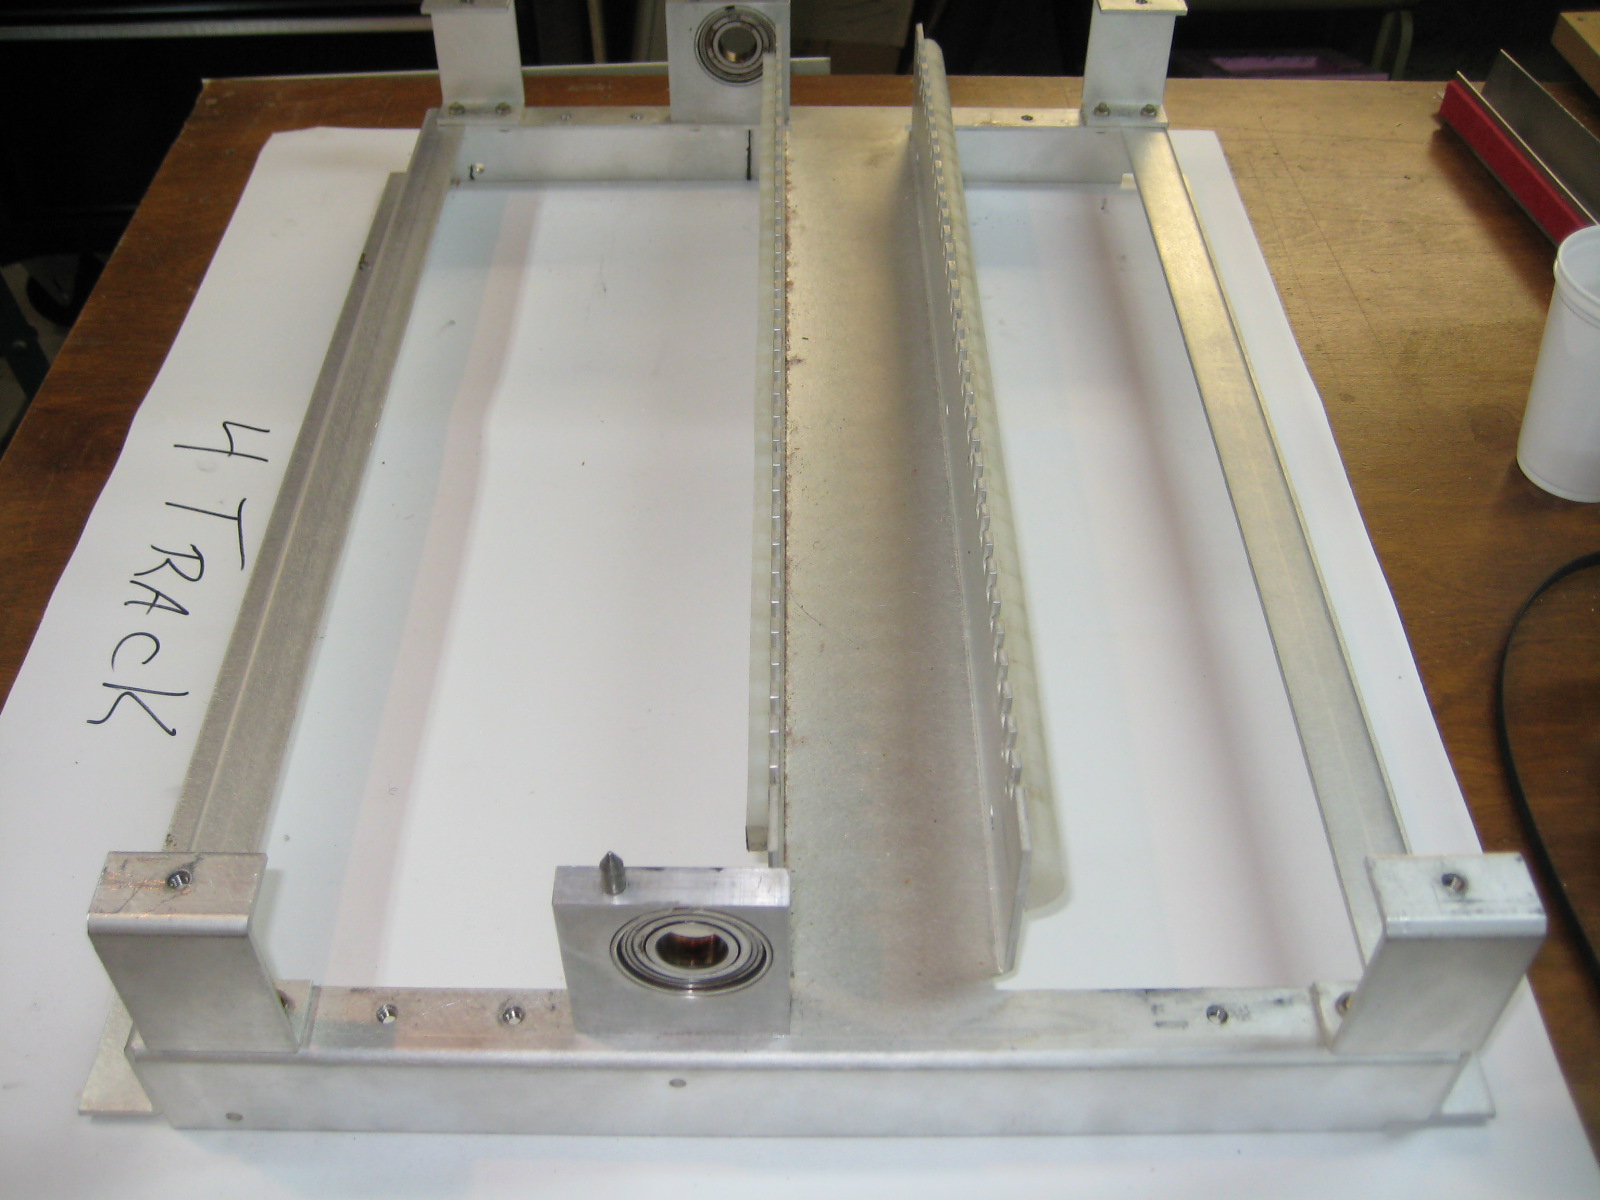 | Here it is nearly stripped. The capstan bearings are R12s, not 6004s as in a standard M-400. The 4-Track capstan has a 3/4"; diameter. The capstan in a M-400 has a 20mm diameter. |
| Mellotron 4-Track | 4-Track Head Block | 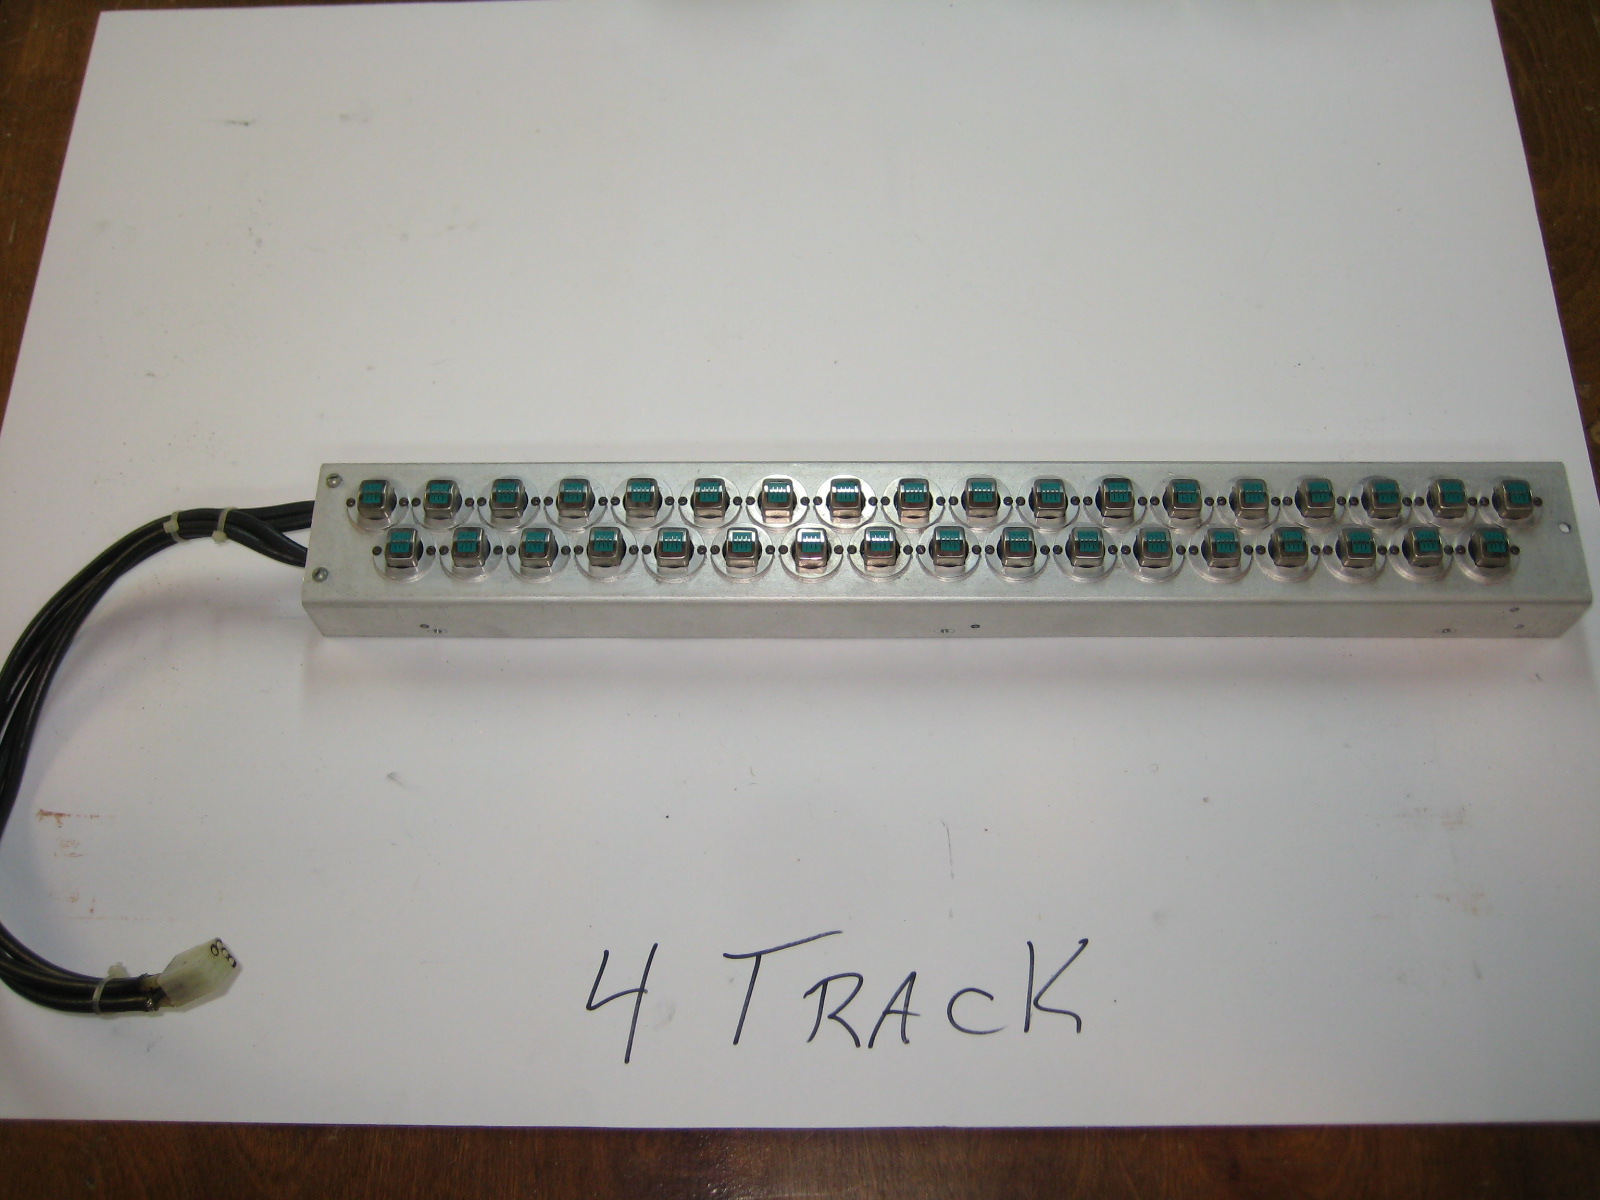 | |
| Mellotron 4-Track | Head Block Close-Up | 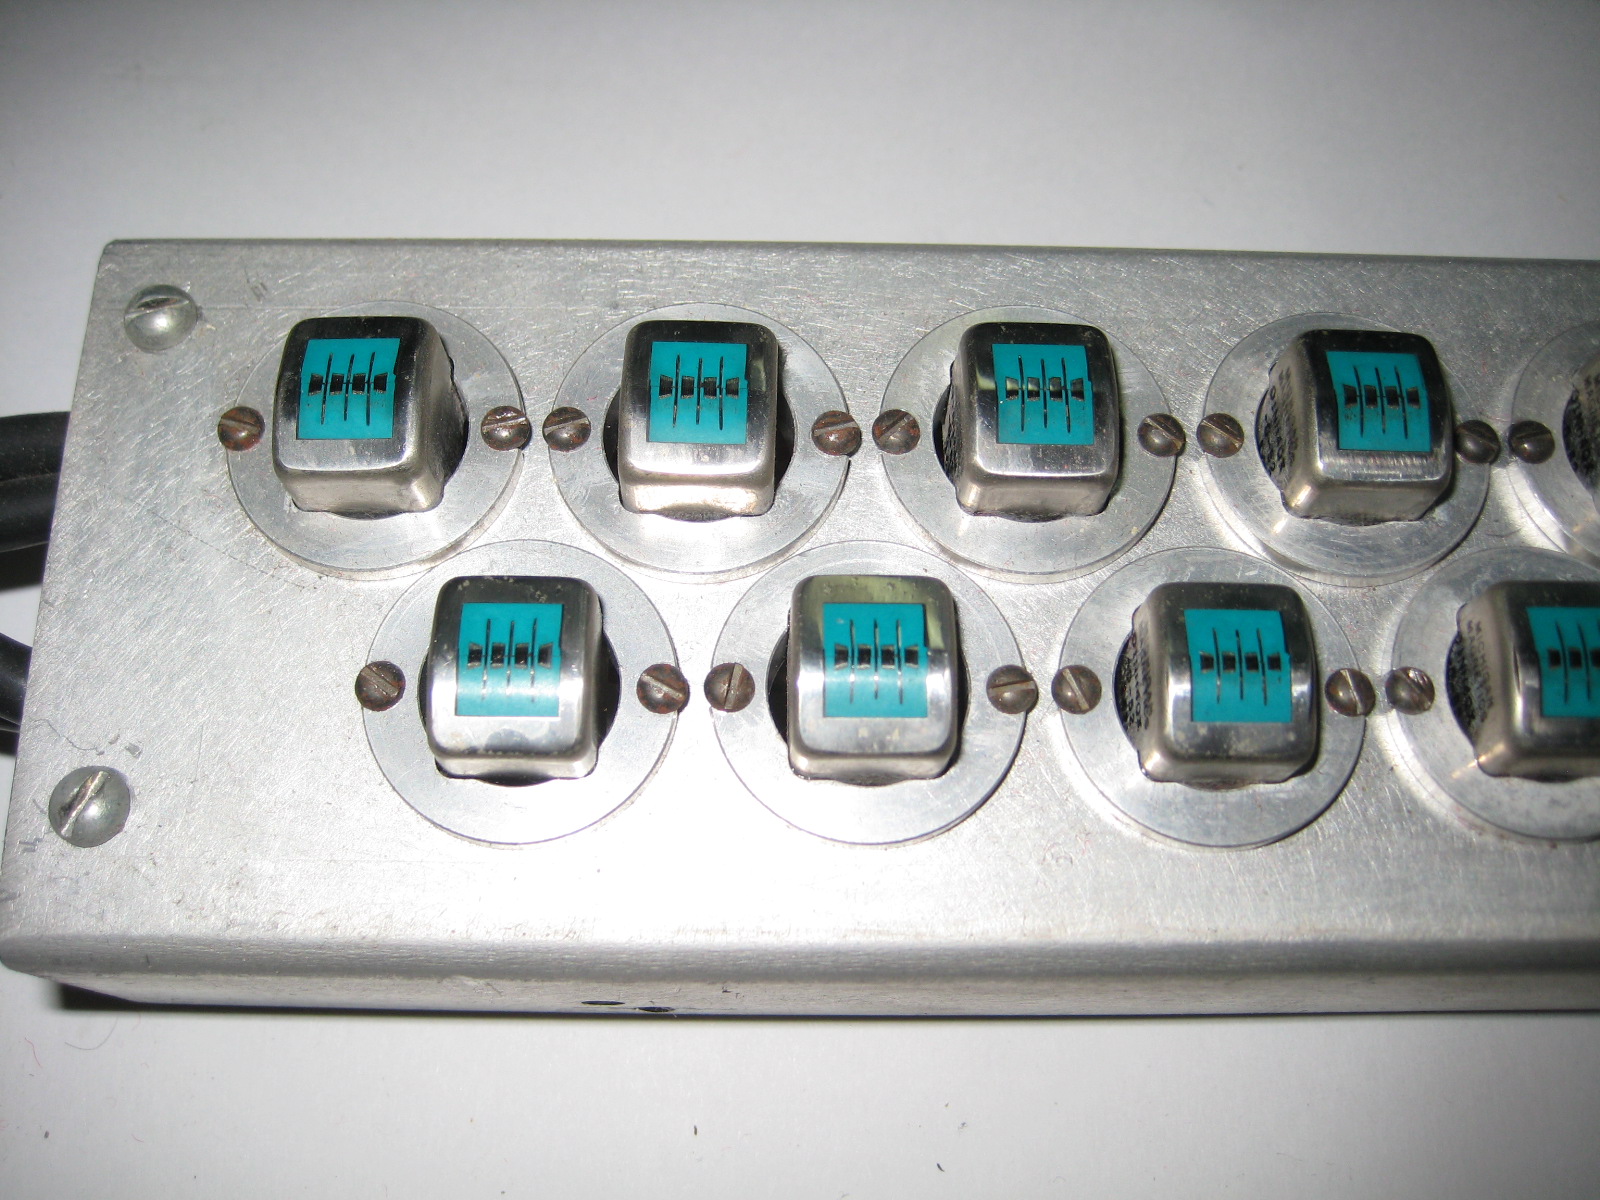 | The head collars are locked. No azimuths to adjust on this one. |
| Mellotron 4-Track | Tach-head Close-Up | 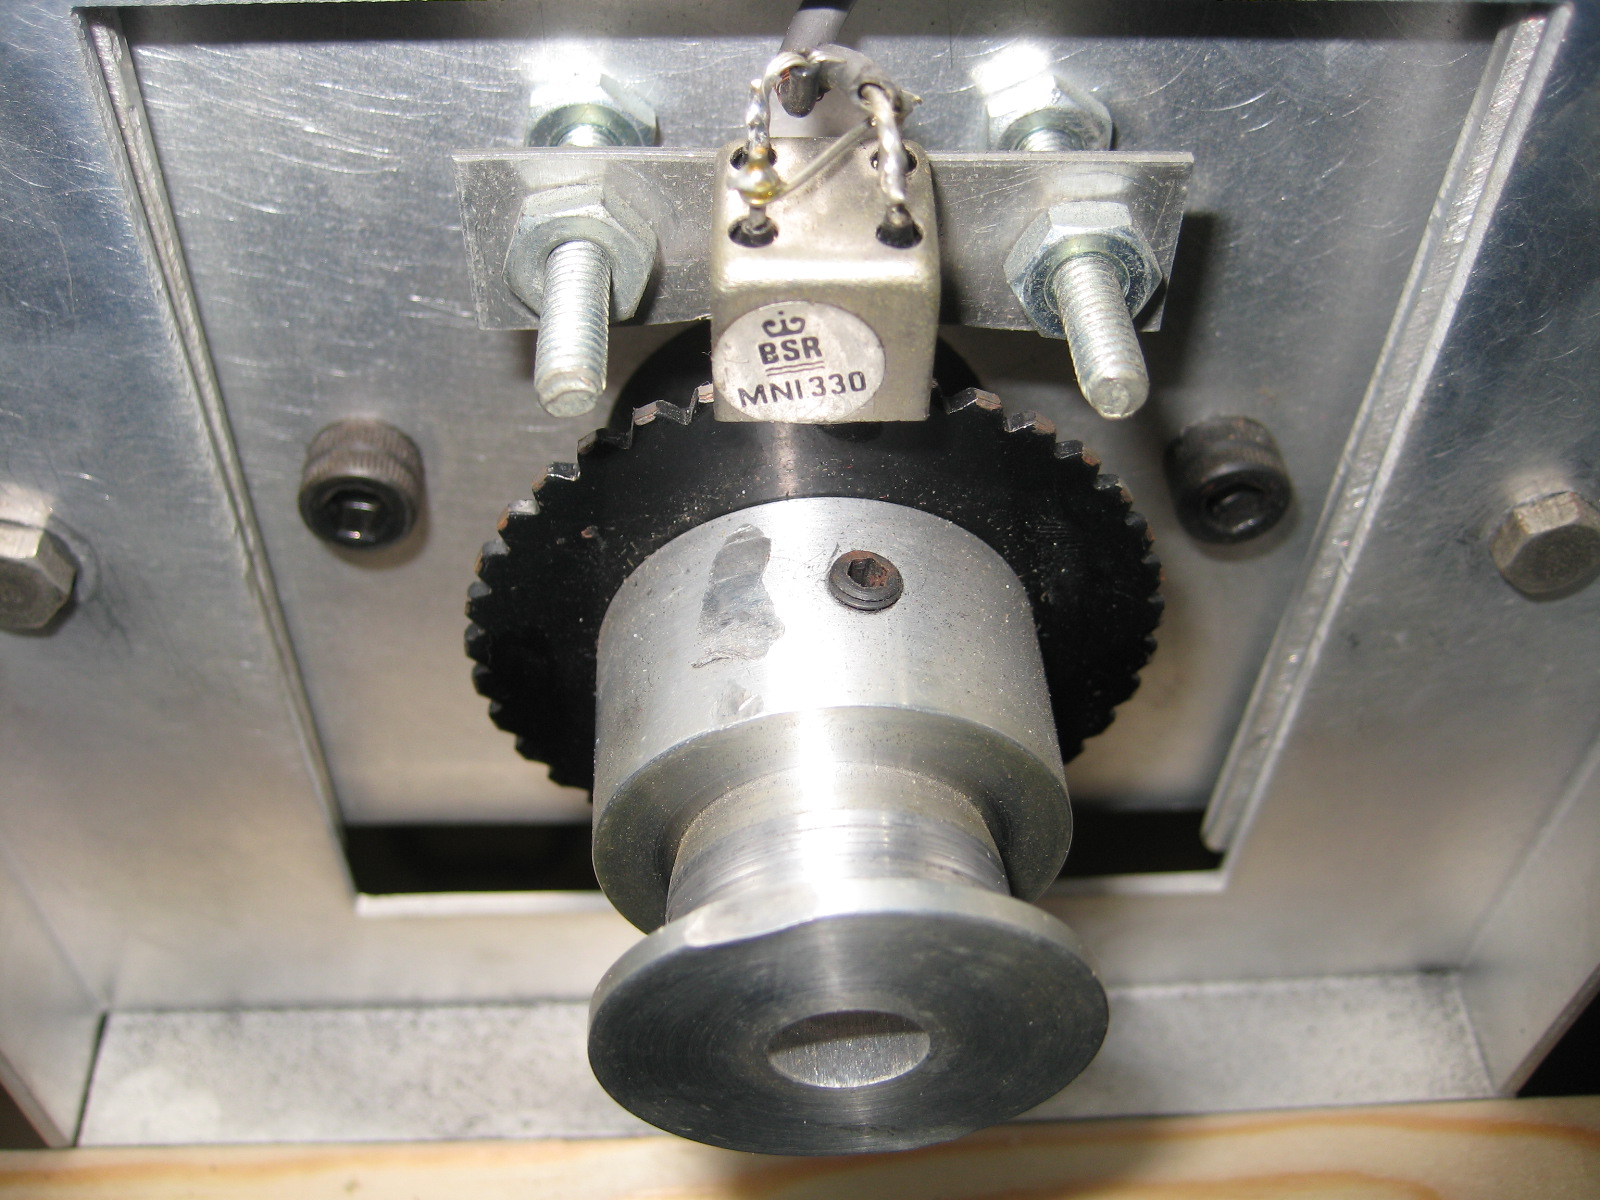 | Looks like all the others, and it should. It feeds to an SMS-3 |
| Mellotron 4-Track | Filthy Cabinet | 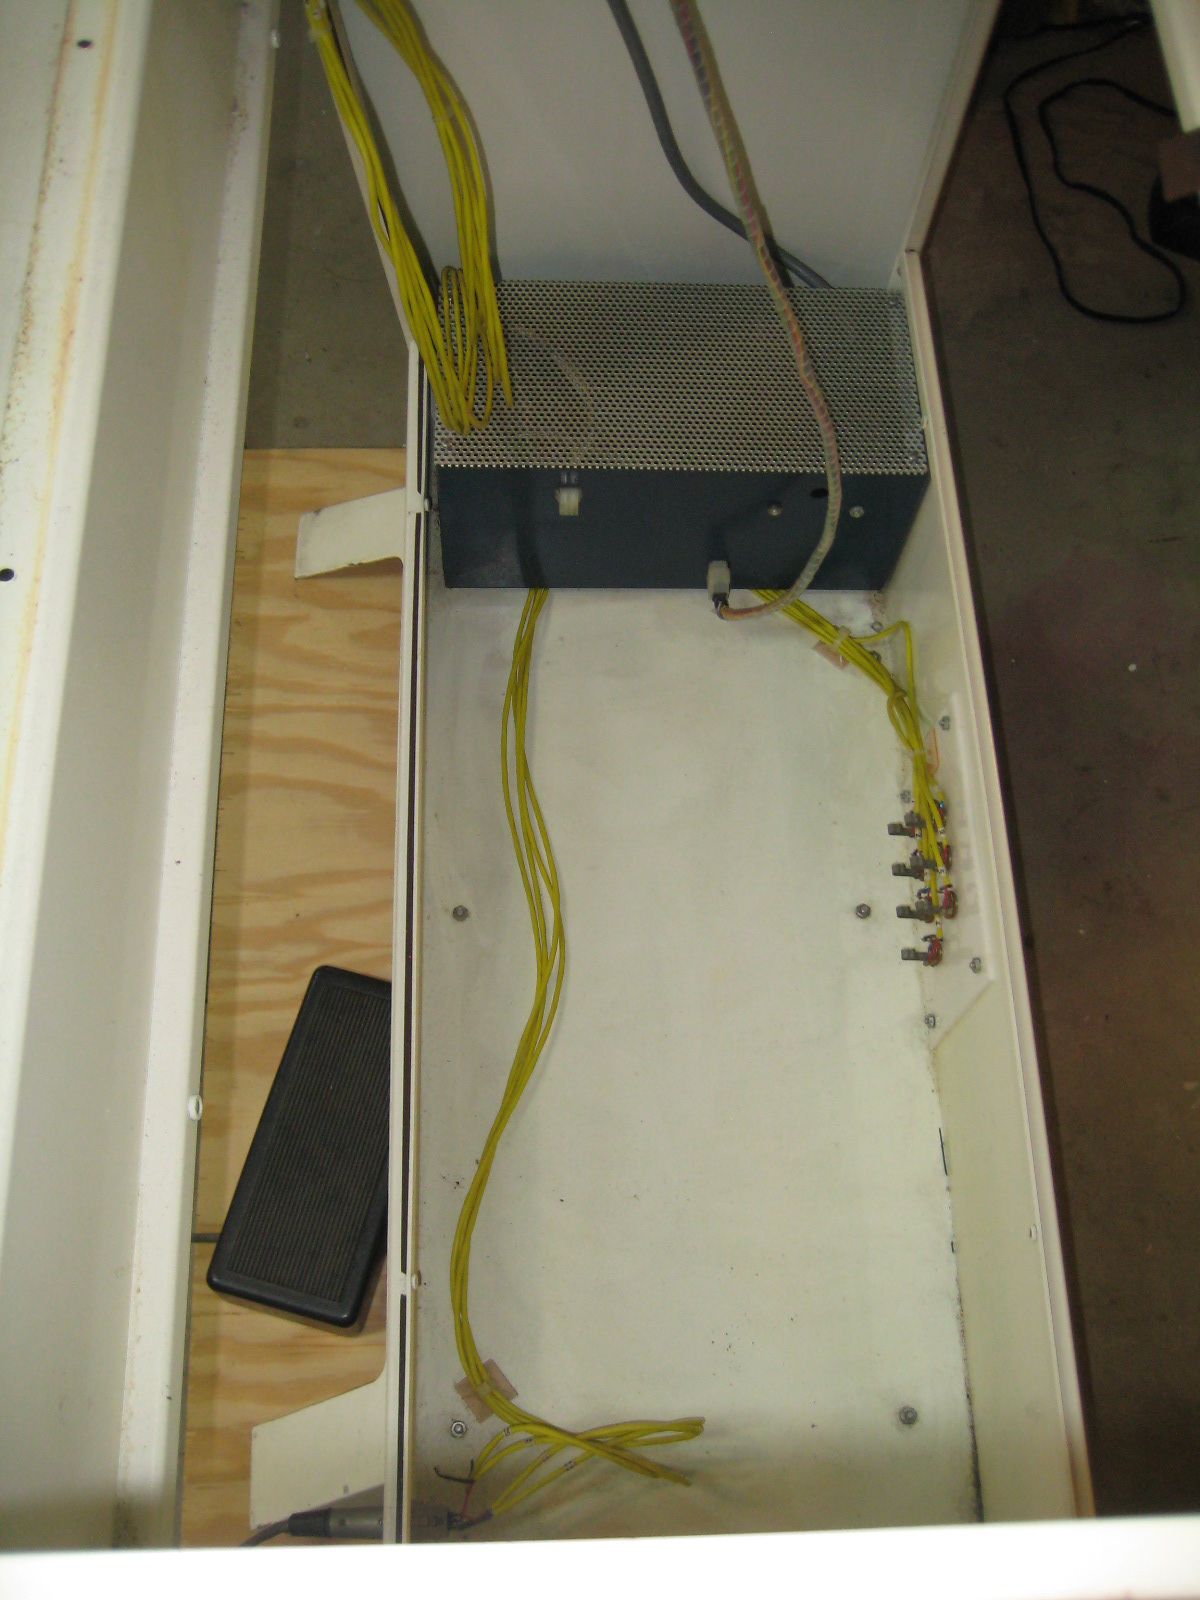 | Just like many others that have come into the shop. Notice the multiple line-out sockets on the right of the photo. |
| Mellotron 4-Track | Installing the pressure pads | 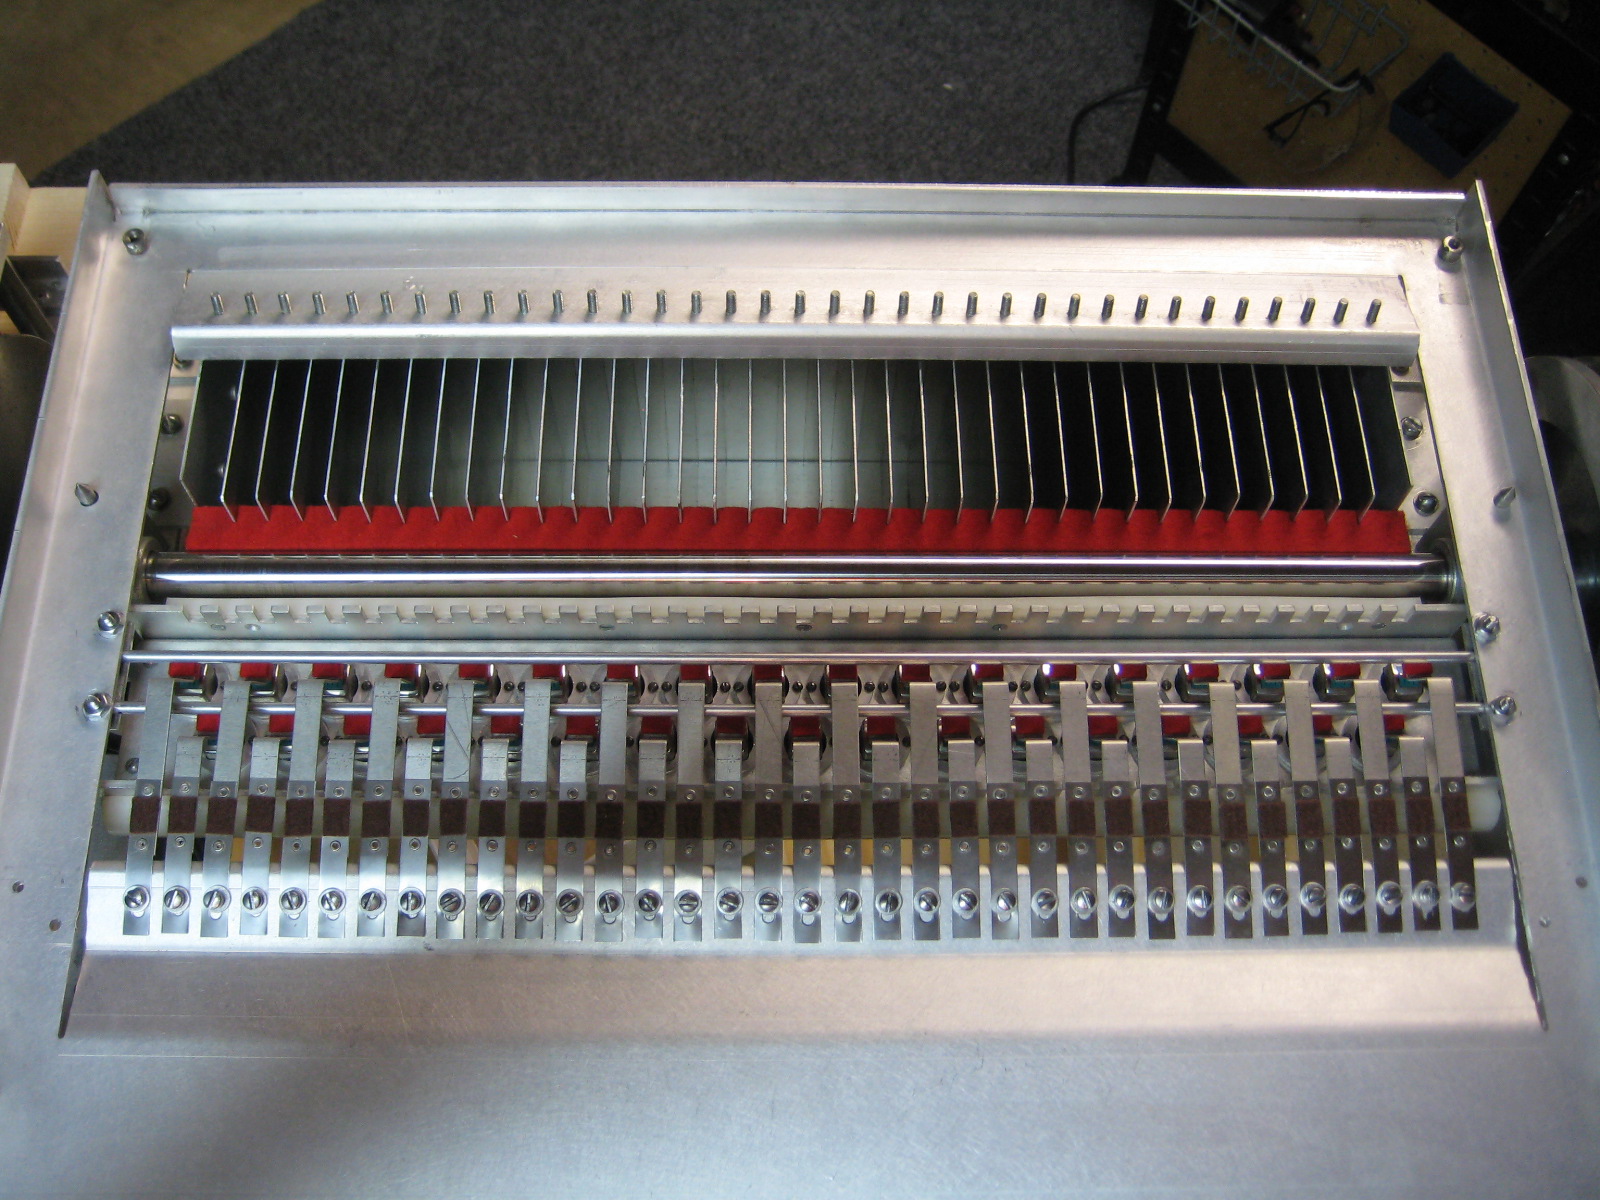 | I really sould have done this, one pad, one key at a time like I do on 400s. It would have saved time. |
| Mellotron 4-Track | The completed keyboard. | 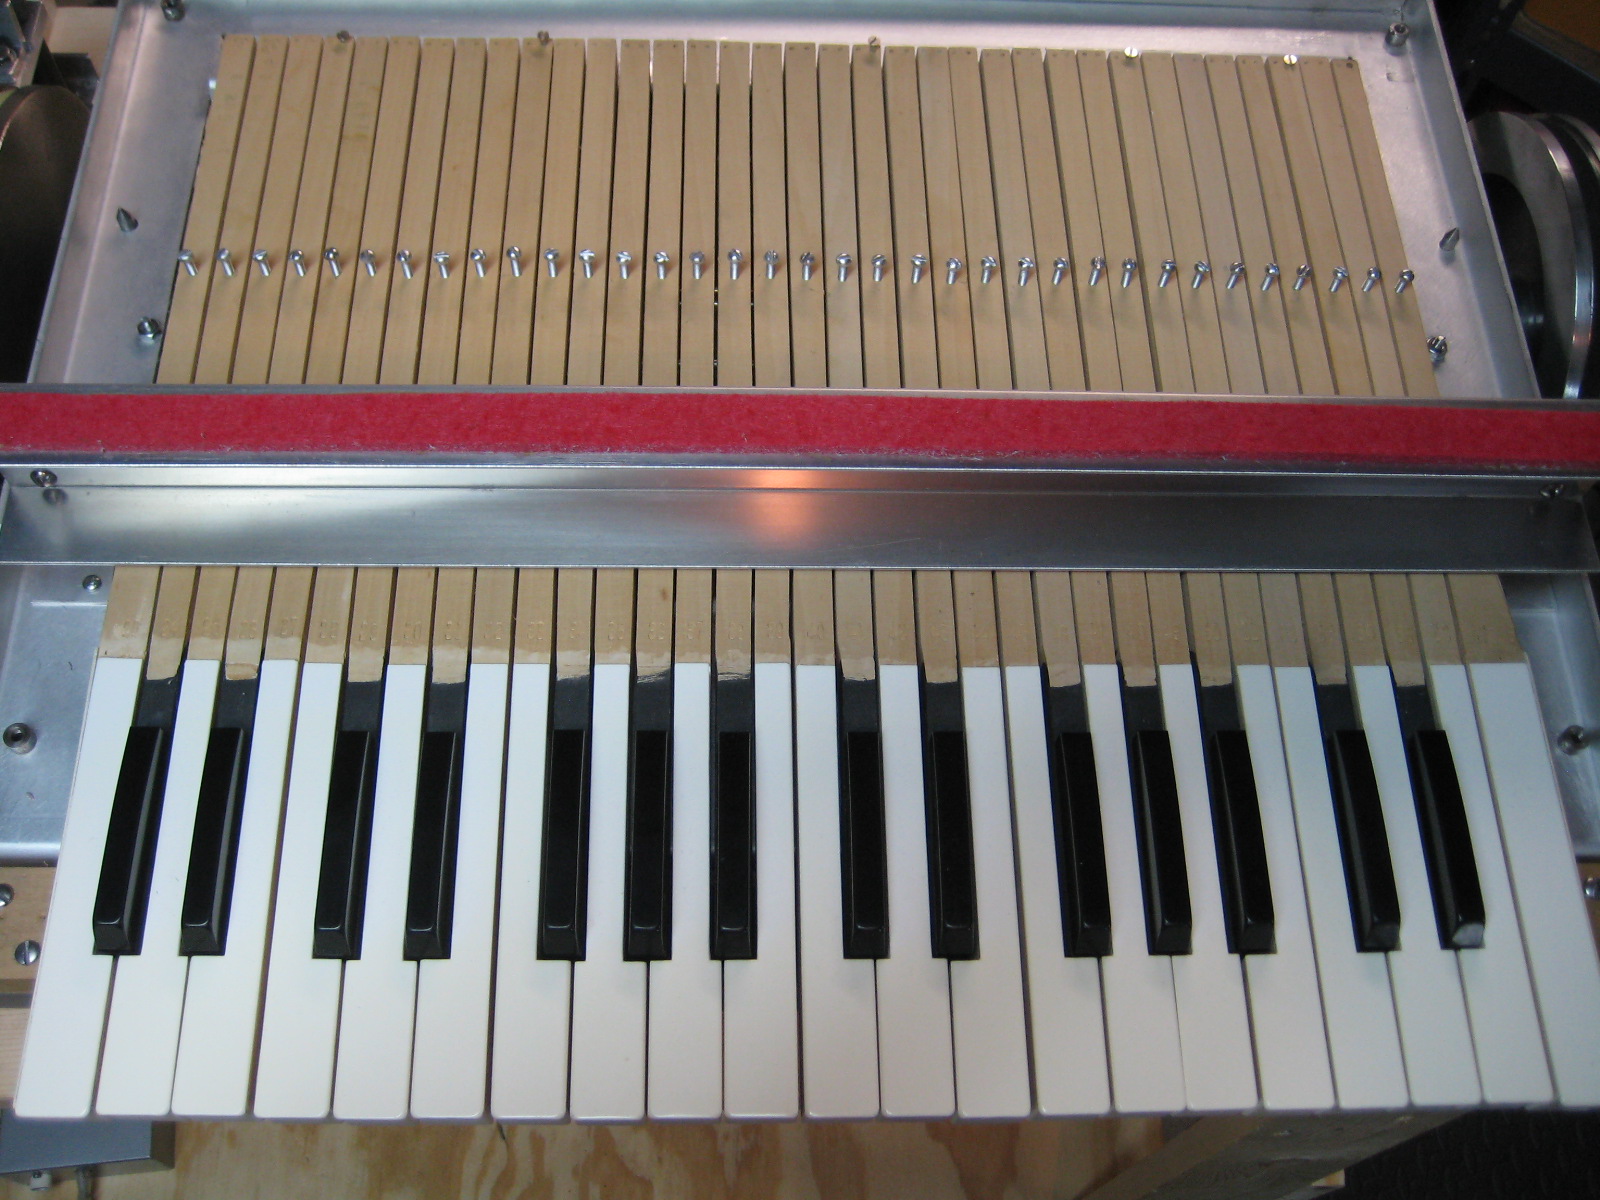 | The keys actually are straight, but my camera is a piece of junk and makes them look funny. |
| Mellotron 4-Track | Comparison of 4-Track & M-400 frames. |  | The 4-track frame is much deeper and the keys are a bit longer. |
| Mellotron 4-Track | The Crappy Old Tapes... | 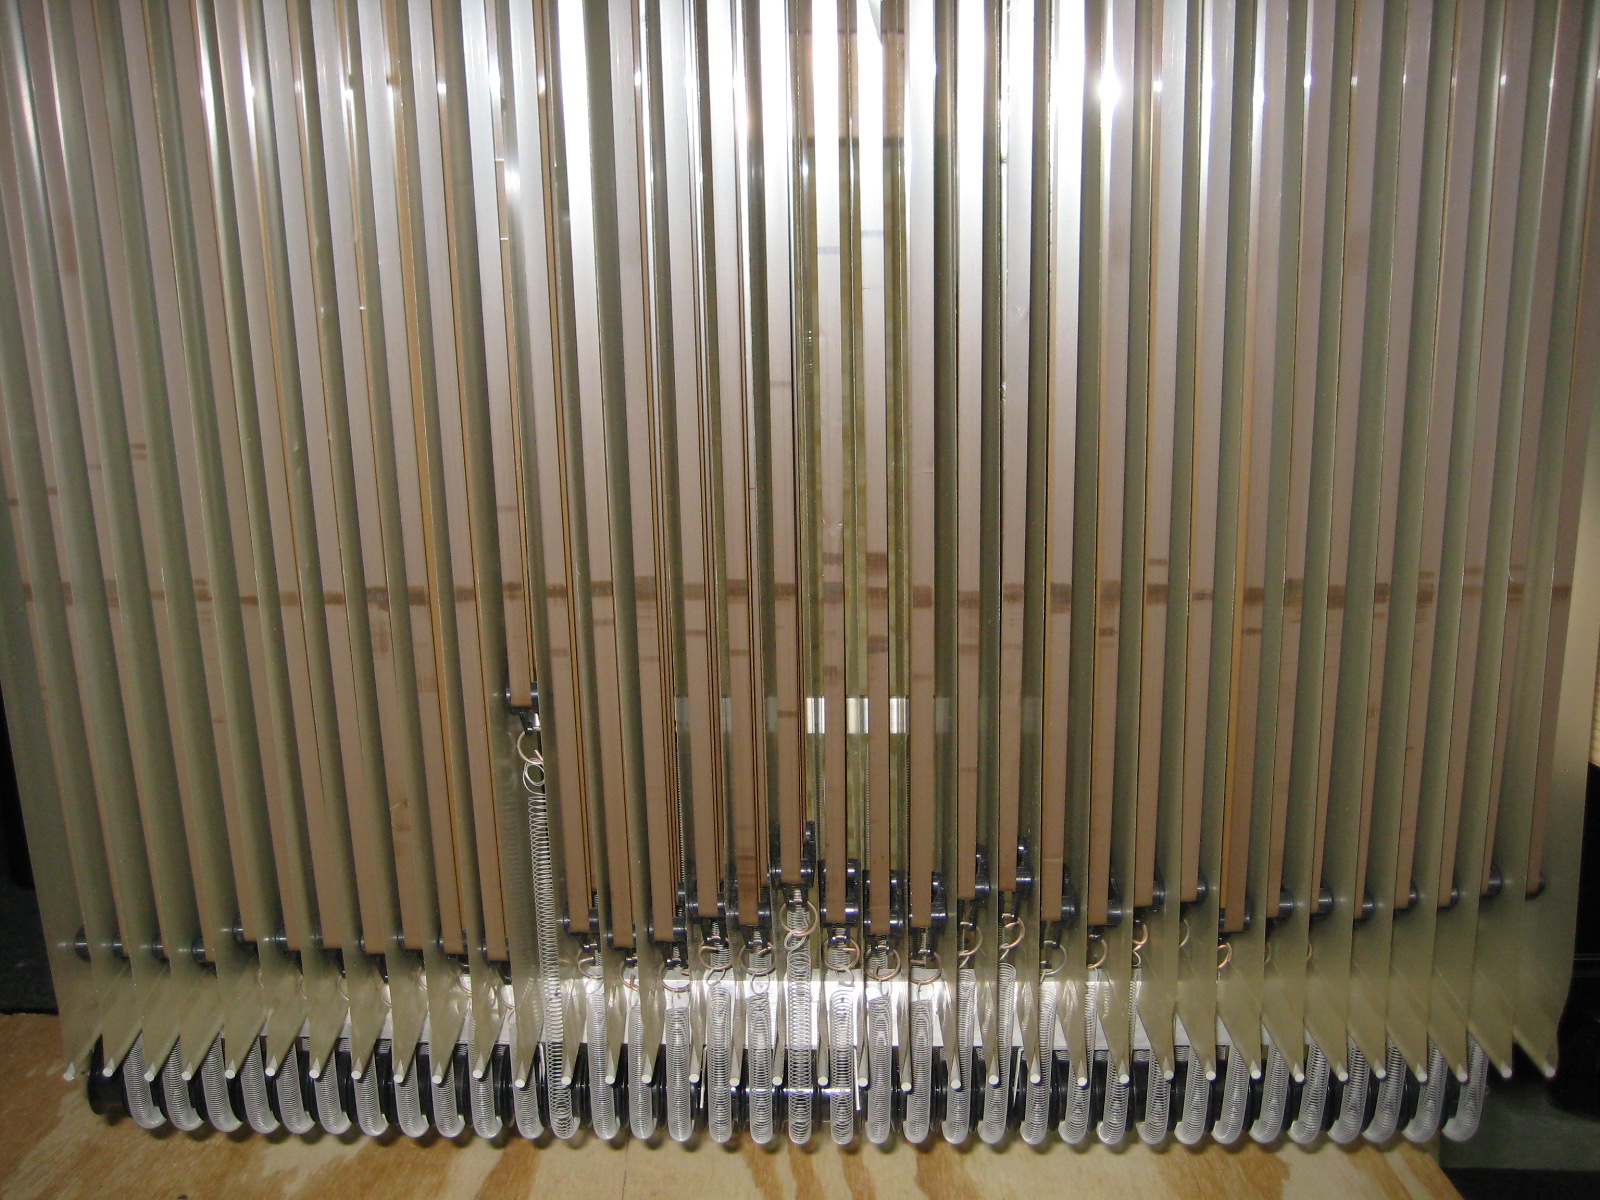 | ...poorly installed |
| Mellotron 4-Track | The 4-Track frame | 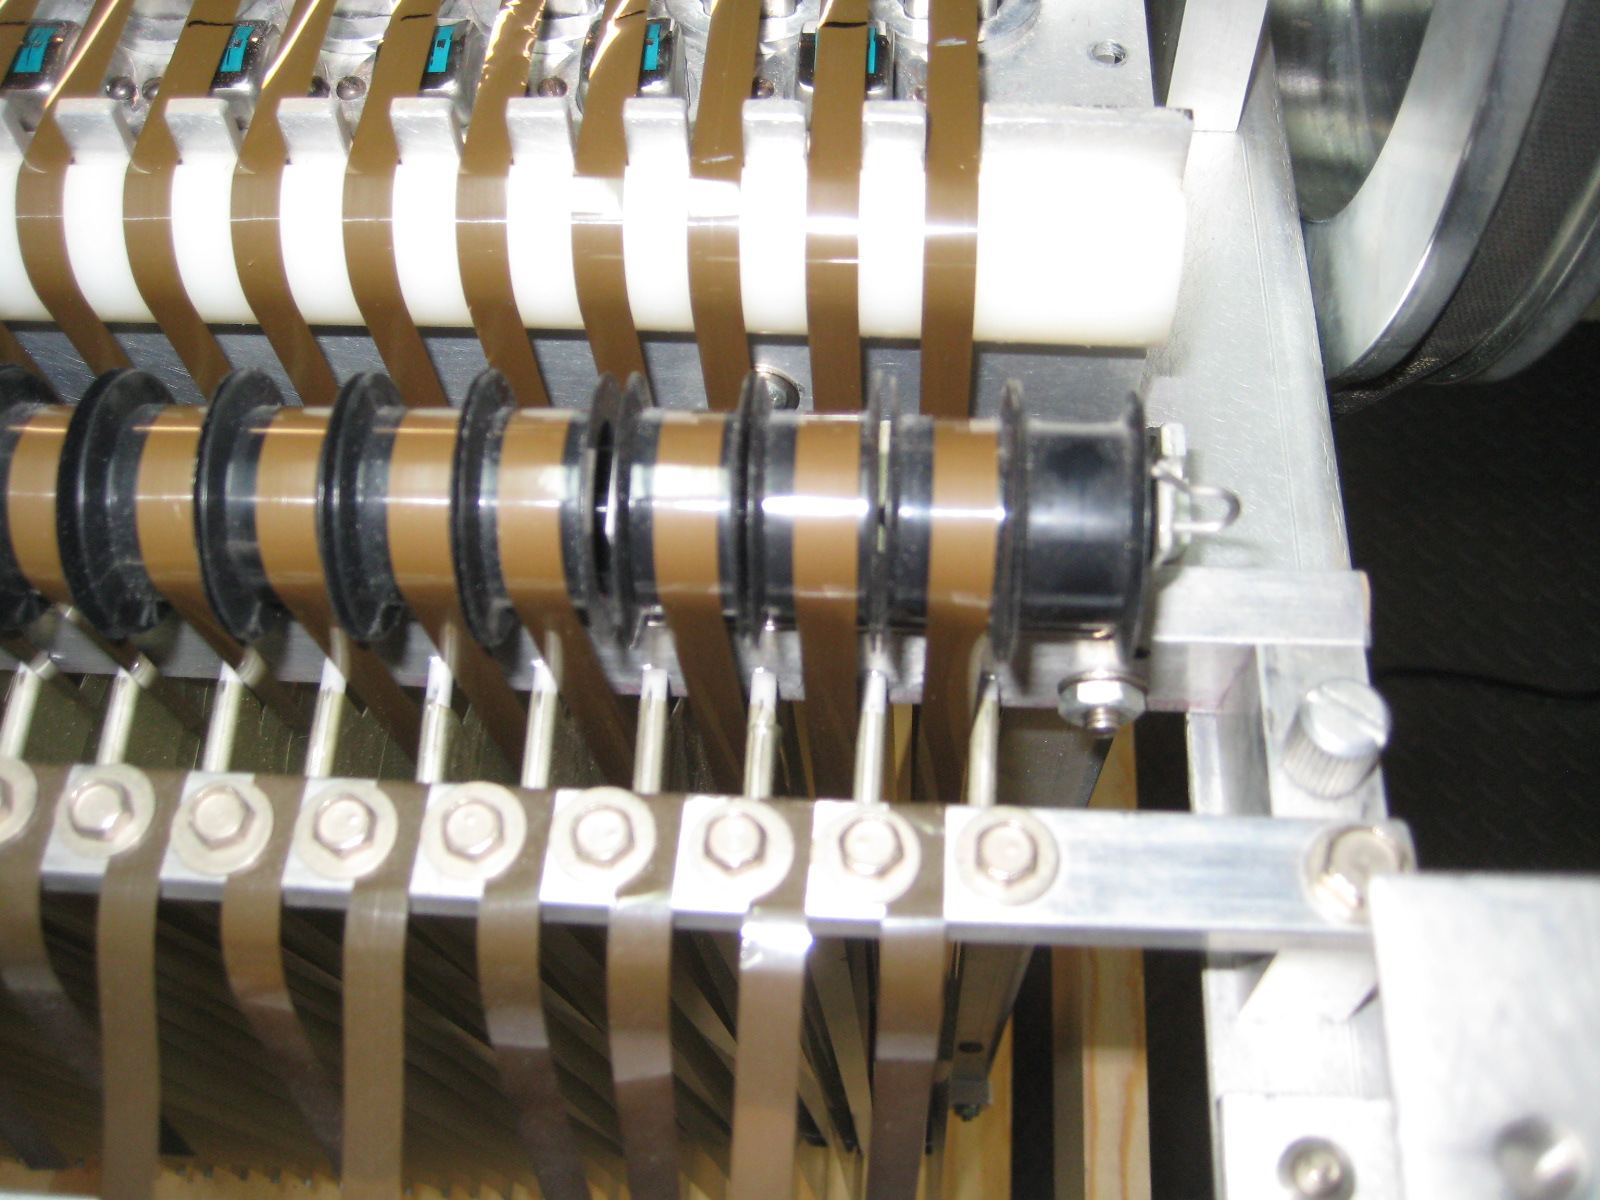 | They installed an extra tape guide that does nothing but cause friction problems. |
| Mellotron 4-Track | Fixing the tape guides. | 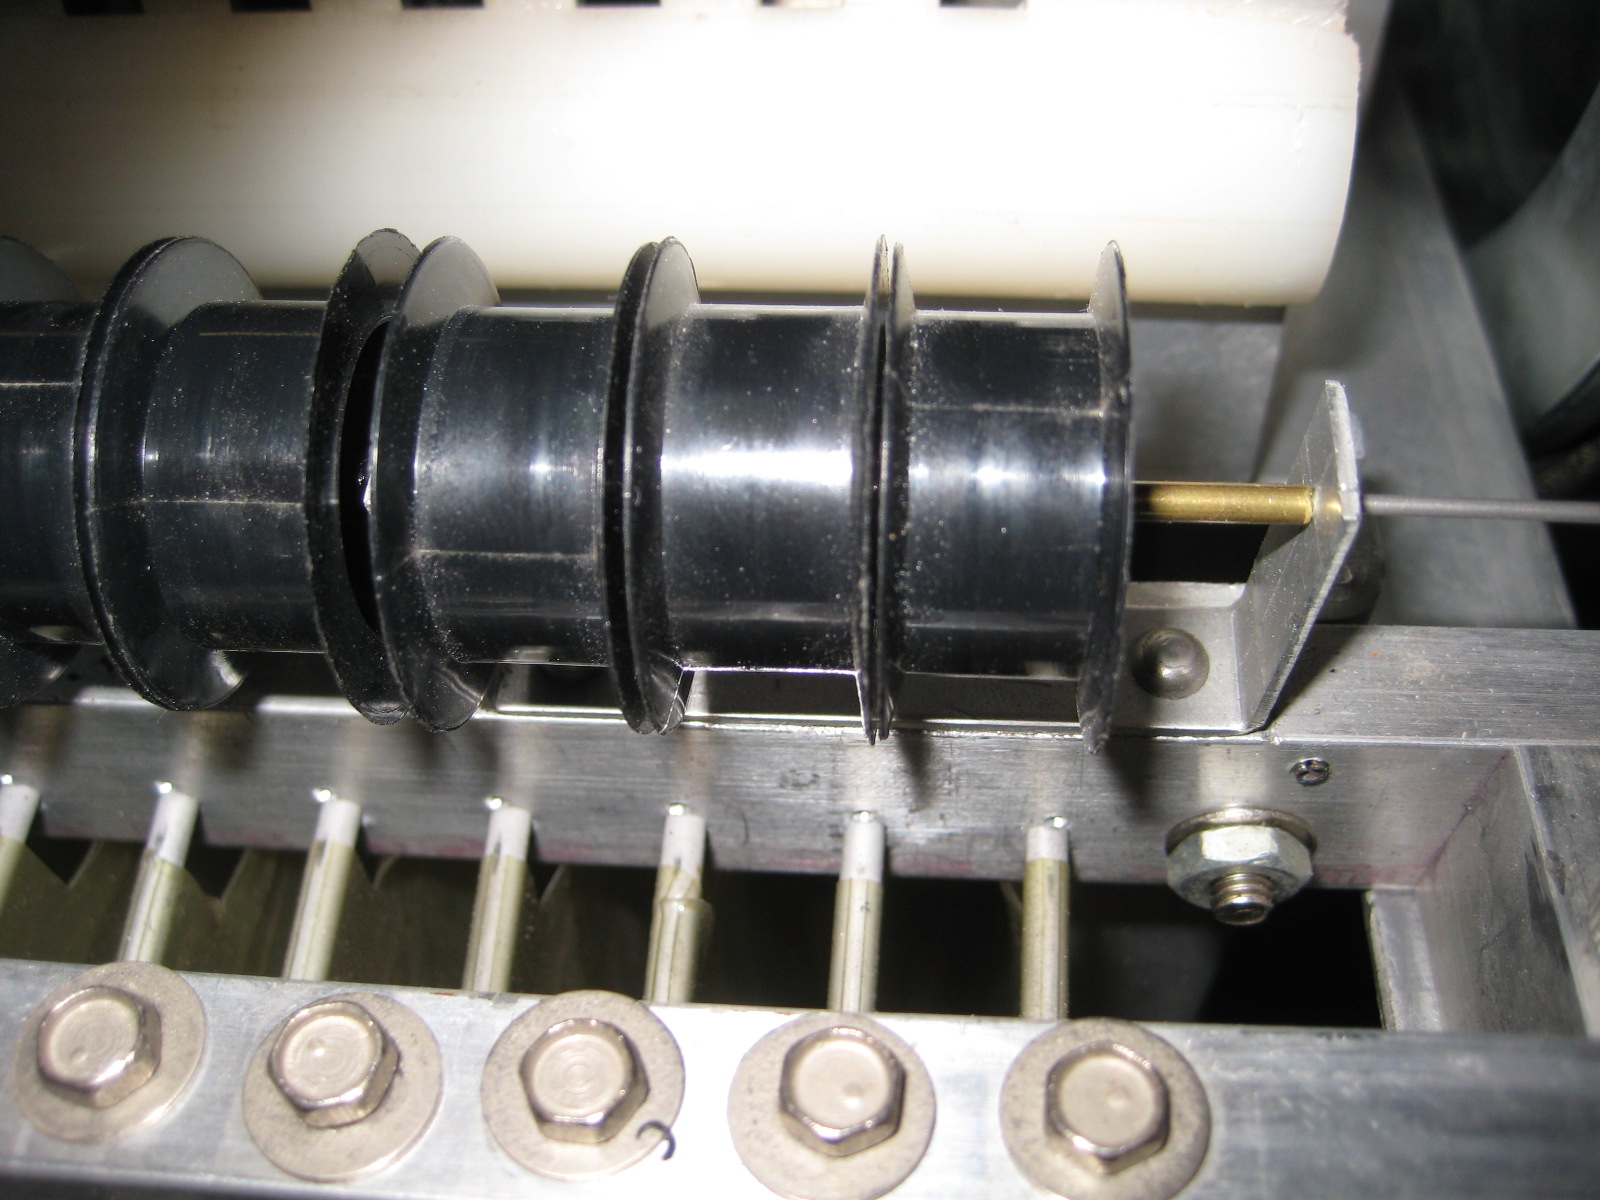 | I took the extra one out and installed a spacer. Then I adjusted every one so they now spin freely. With 1/4 inch tape, friction is a big issue. |
| Mellotron 4-Track | The Old Tapes | 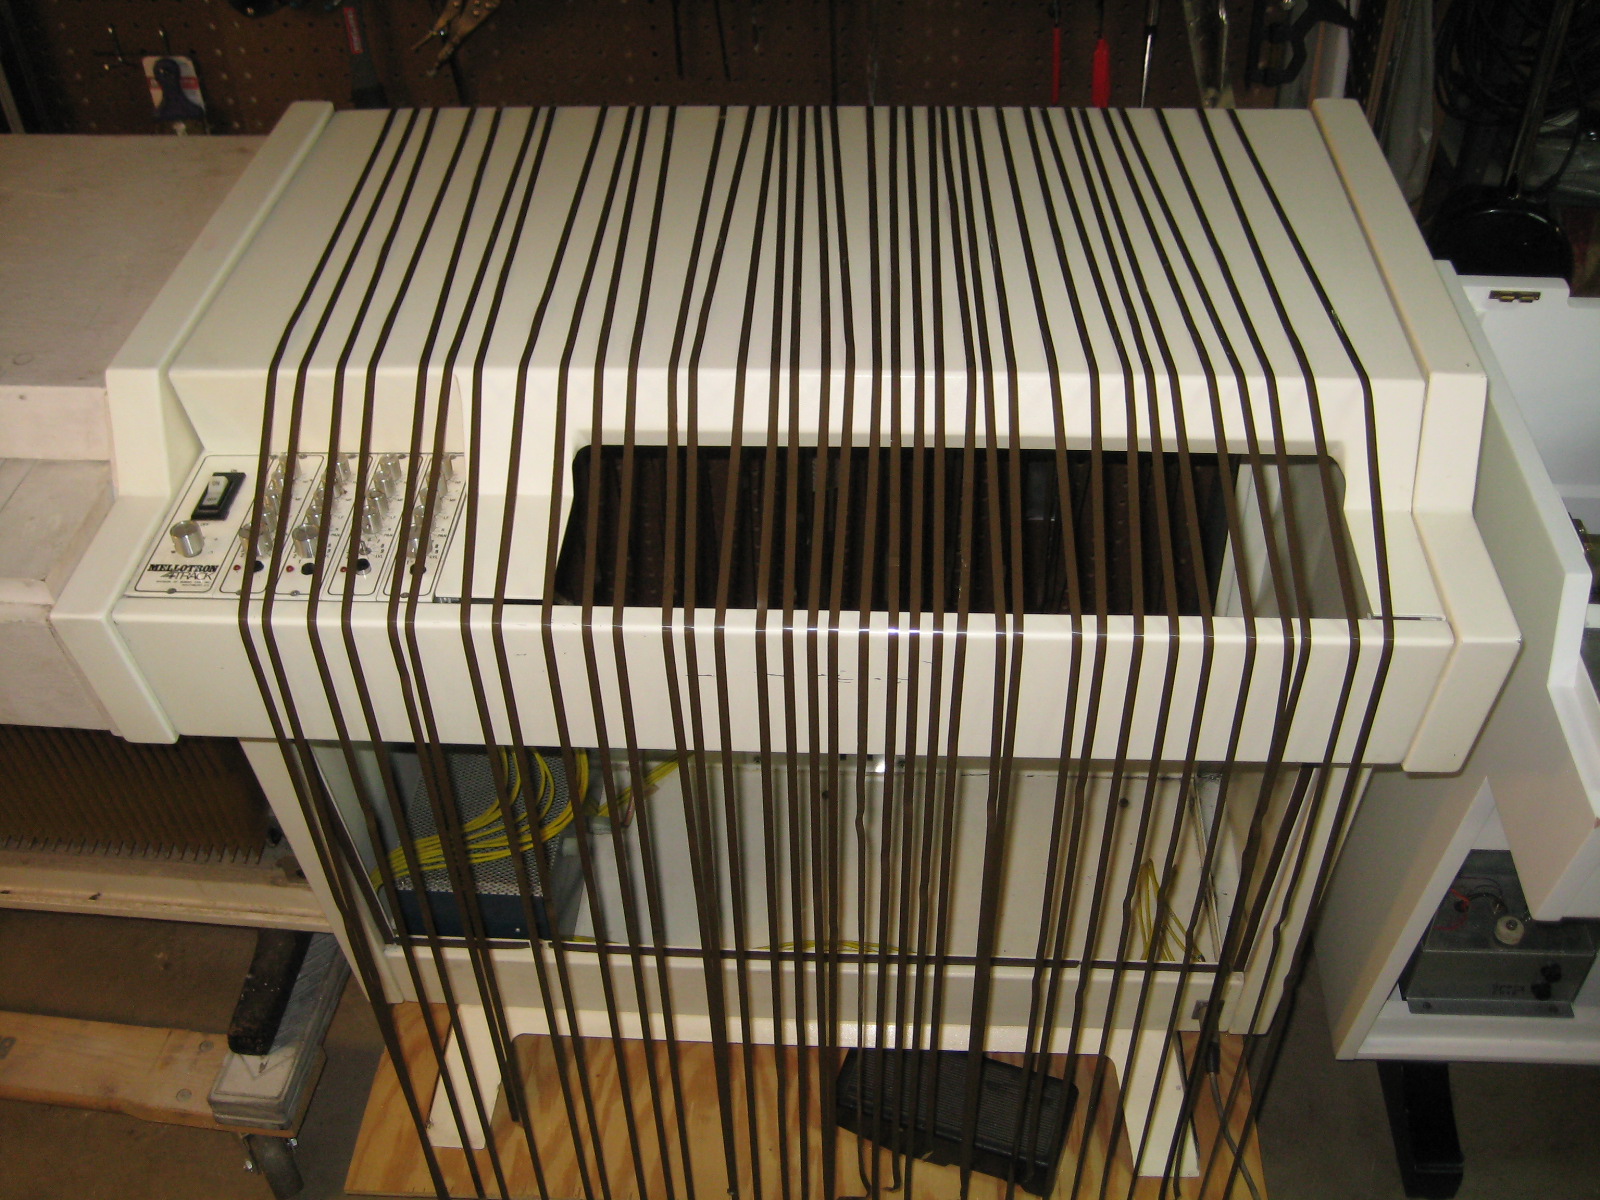 | I saved them on a spool so that the owner can see what shitty tapes look like. |
| Mellotron 4-Track | The New Tapes | 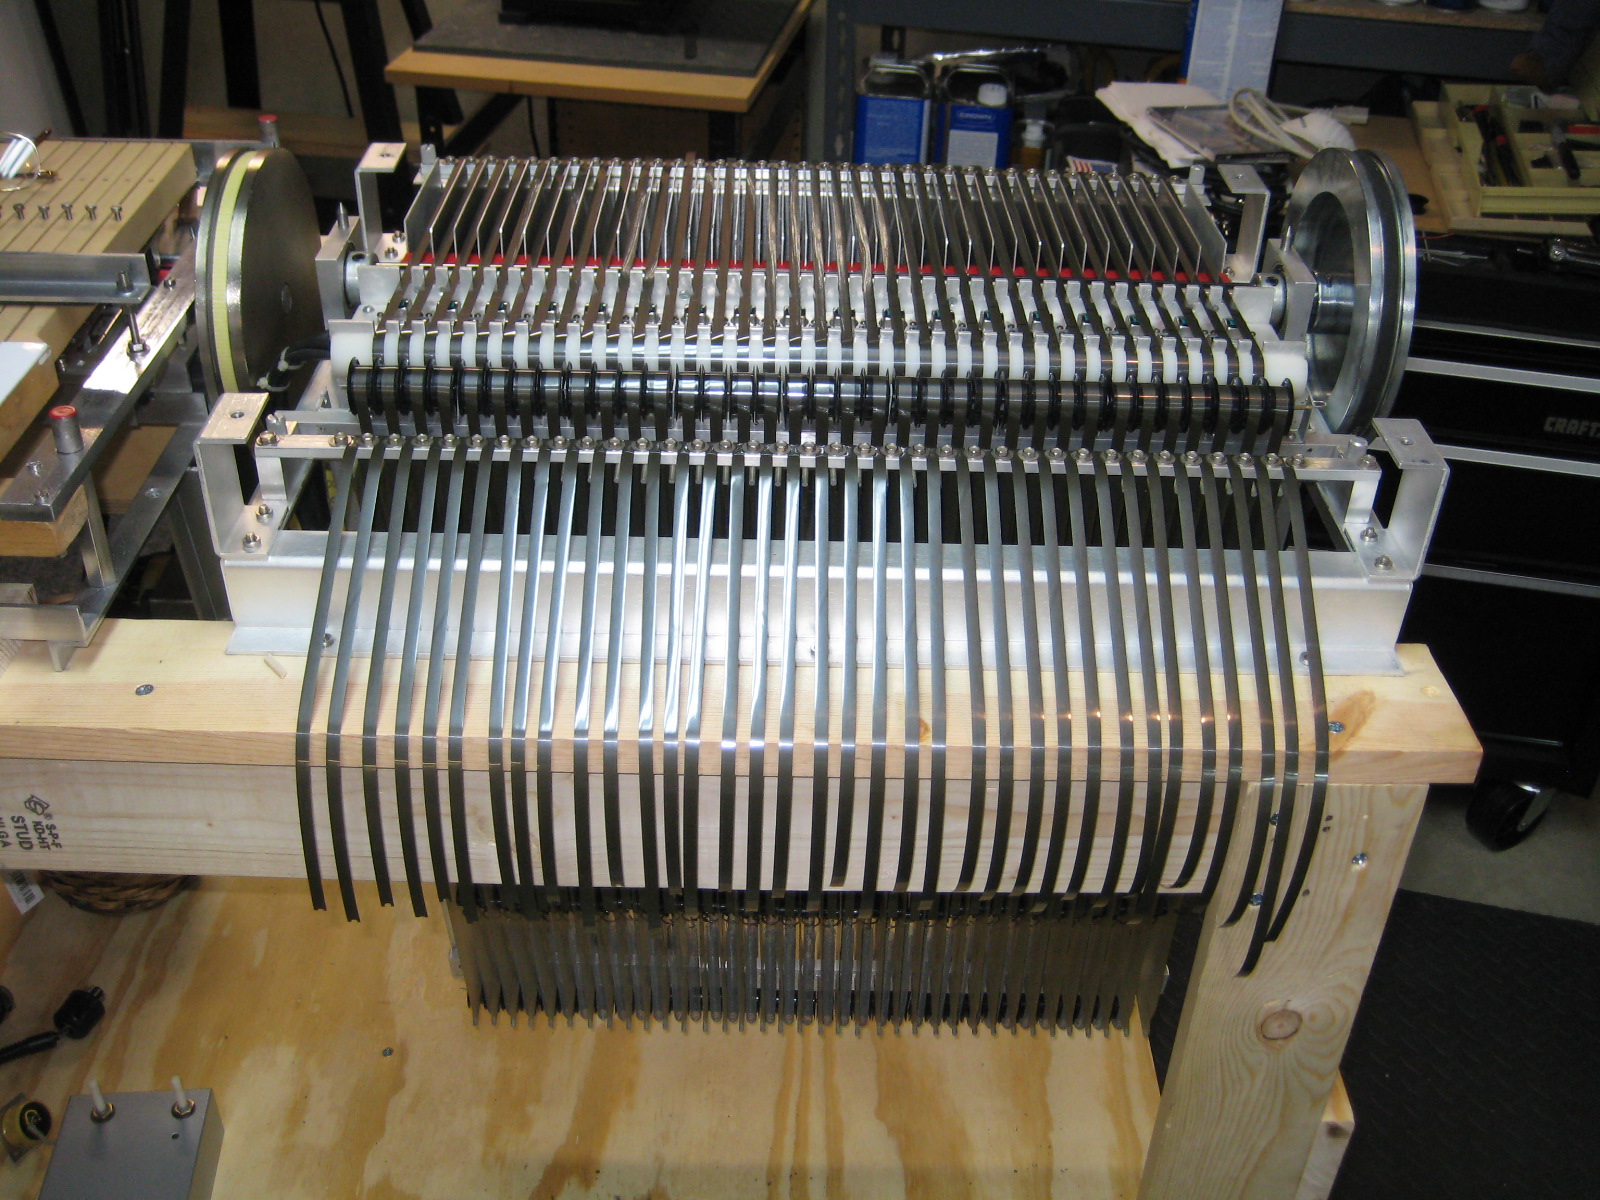 | I left a bit of extra lenght so that I can adjust for maximum time. This proved to be a good idea. |
| Mellotron 4-Track | Tapes Installed | 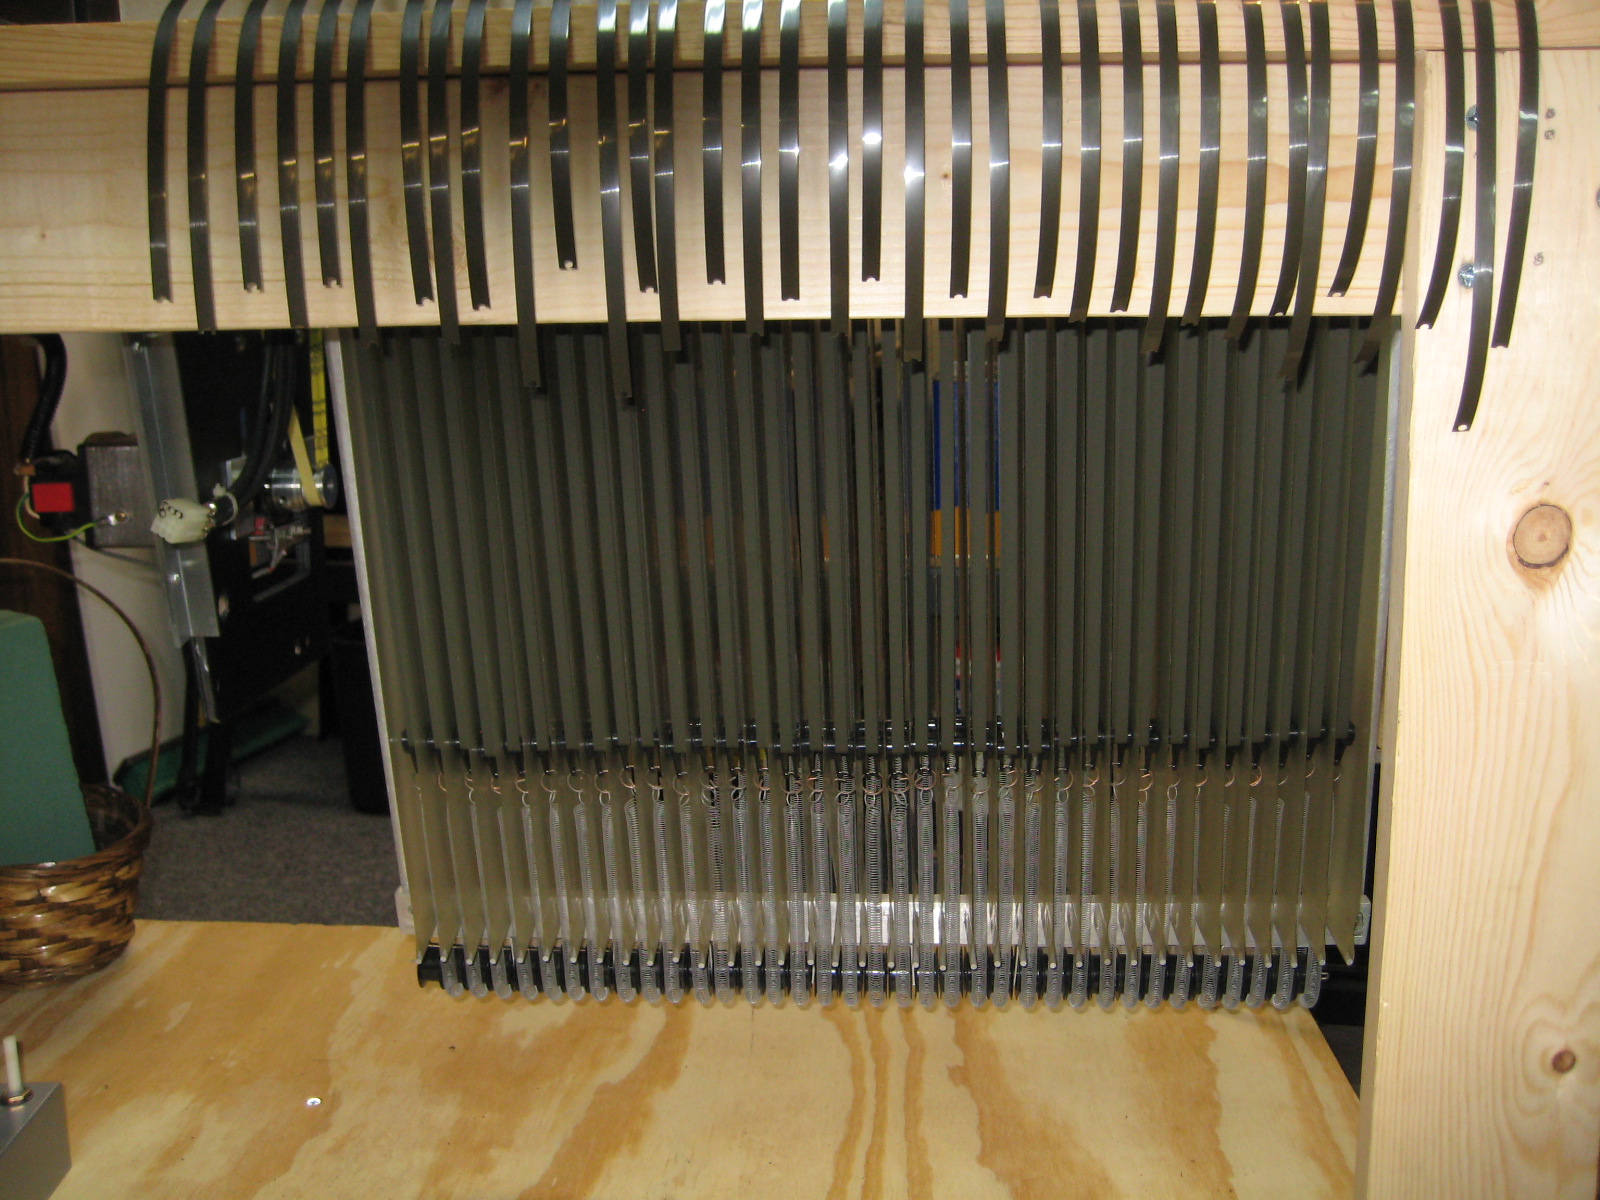 | Doing this outside the cabinet made it a quick job. It took an hour or a bit less. |
| Mellotron 4-Track | 4-Track Pre-amp | 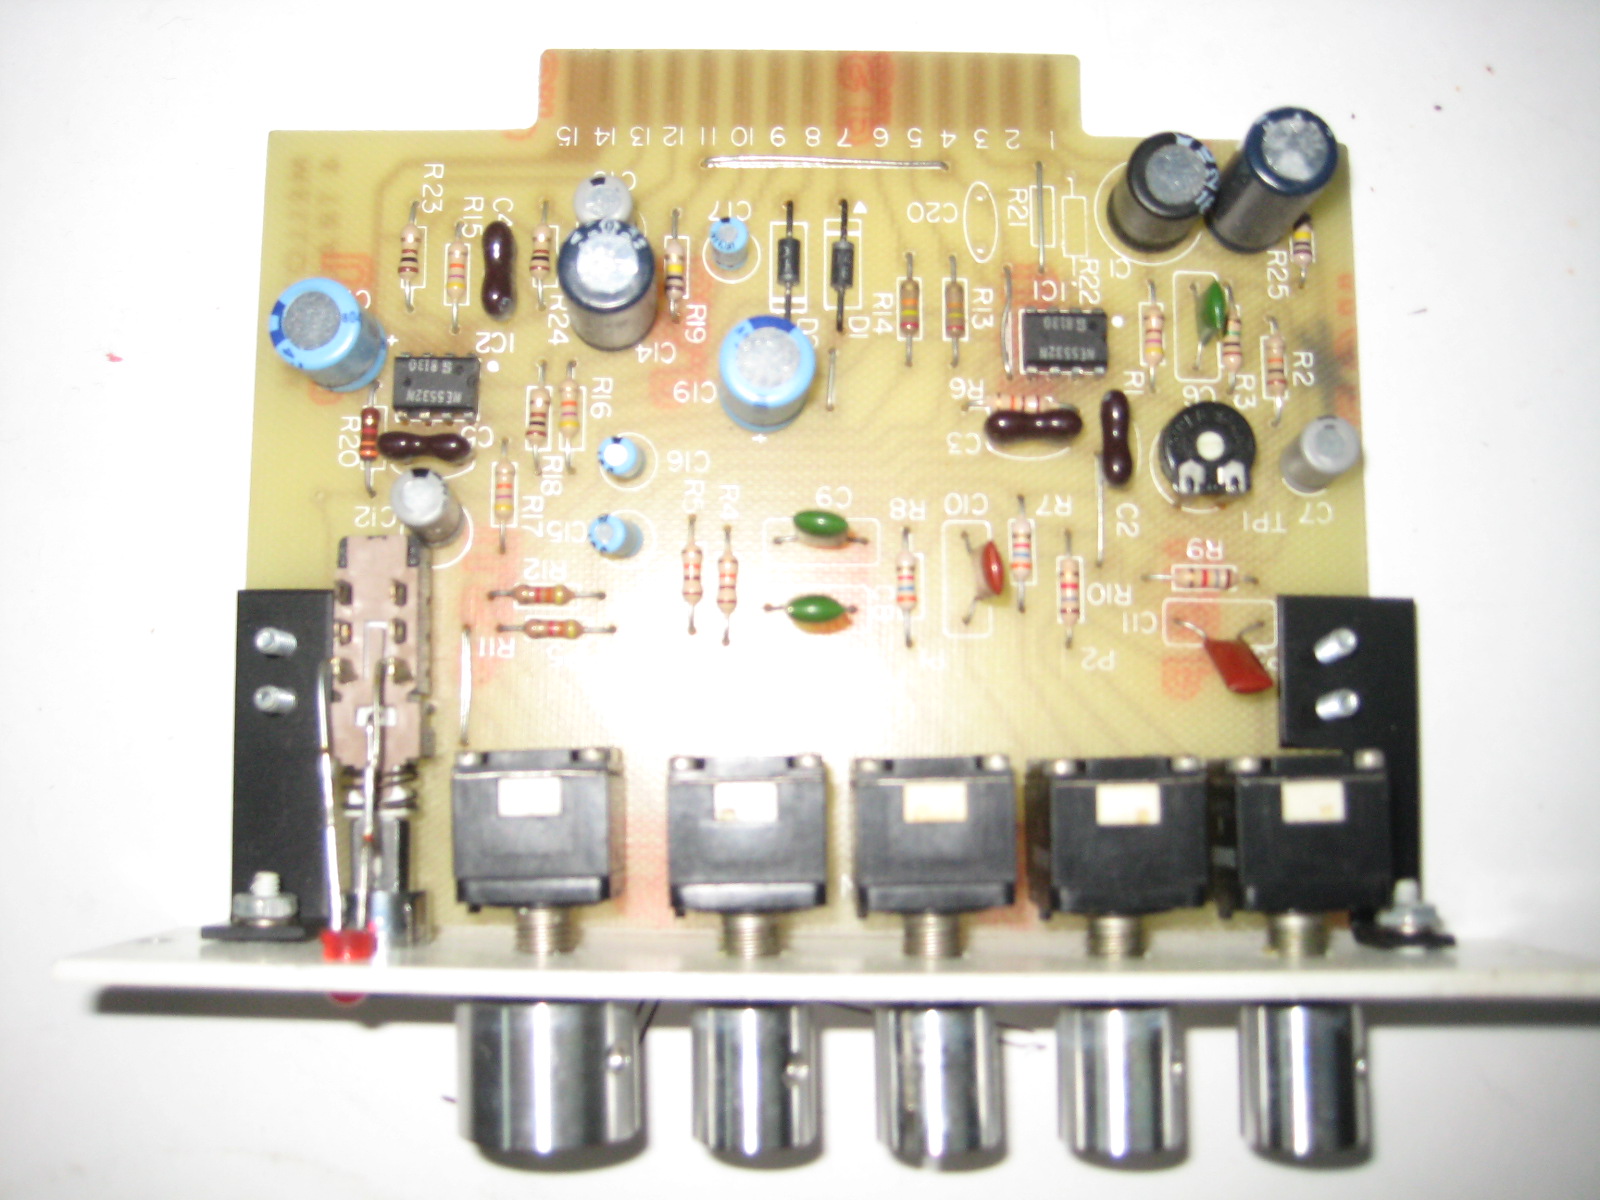 | There are obviously 4 of these. |
| Mellotron 4-Track | Serial # Found | 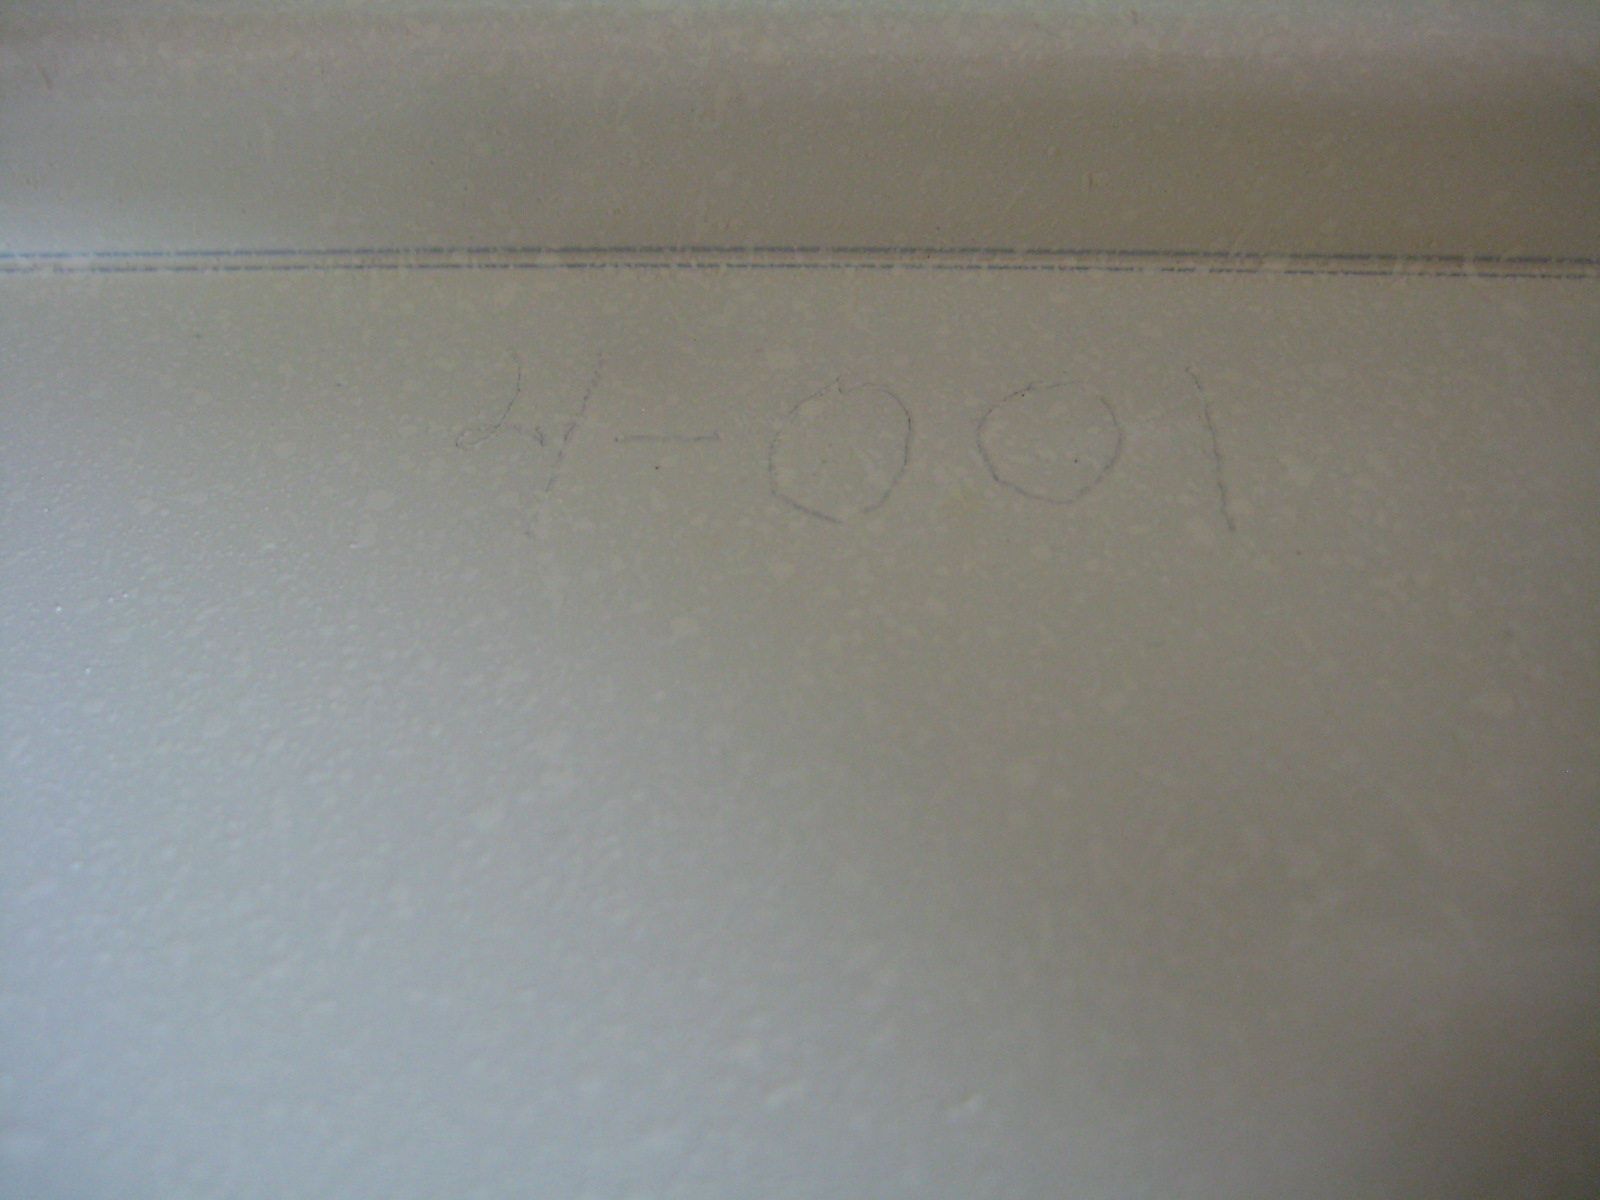 | It took me forever to find this... It is 4-Track #1 |
| Mellotron 4-Track | Installing the frame to the cabinet | 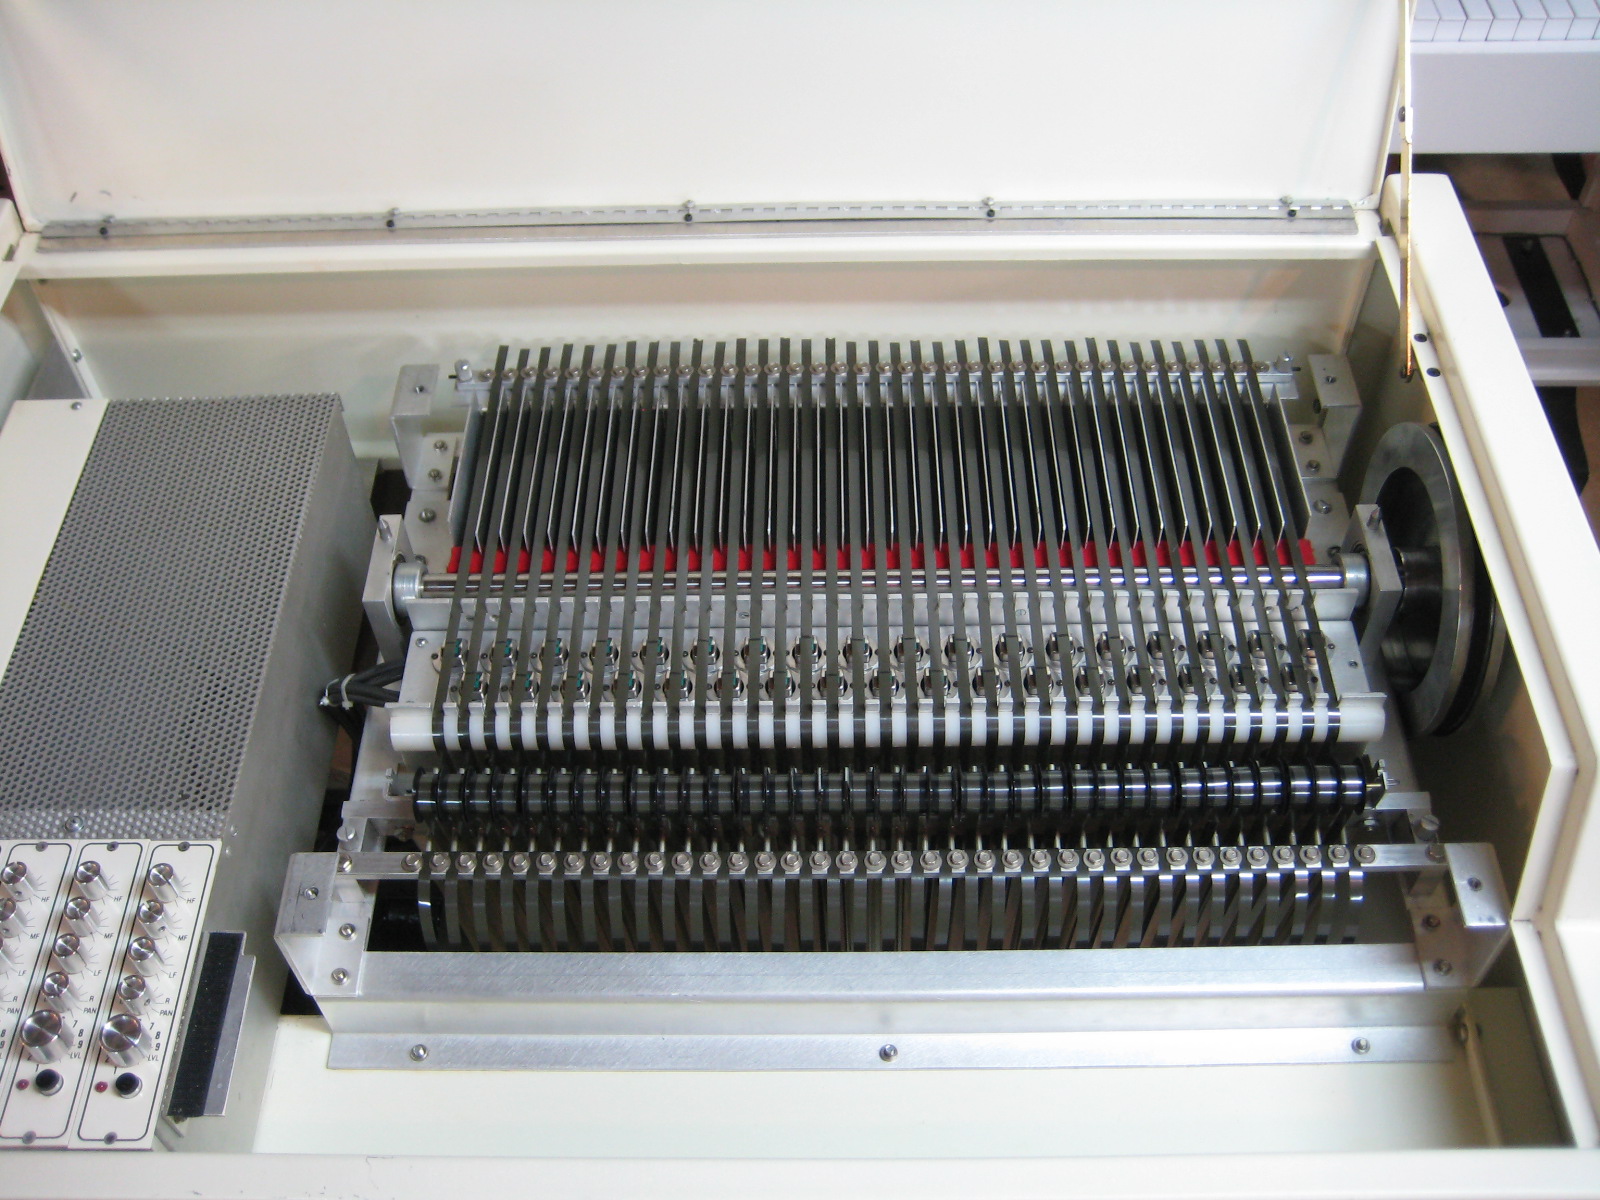 | Here is a look at the frame now reinstalled into a very clean cabinet. |
| Mellotron 4-Track | The completed 4-Track |  | Here it is ready for a test. |
| Mellotron 4-Track | Taking the 4-Track for a test drive | 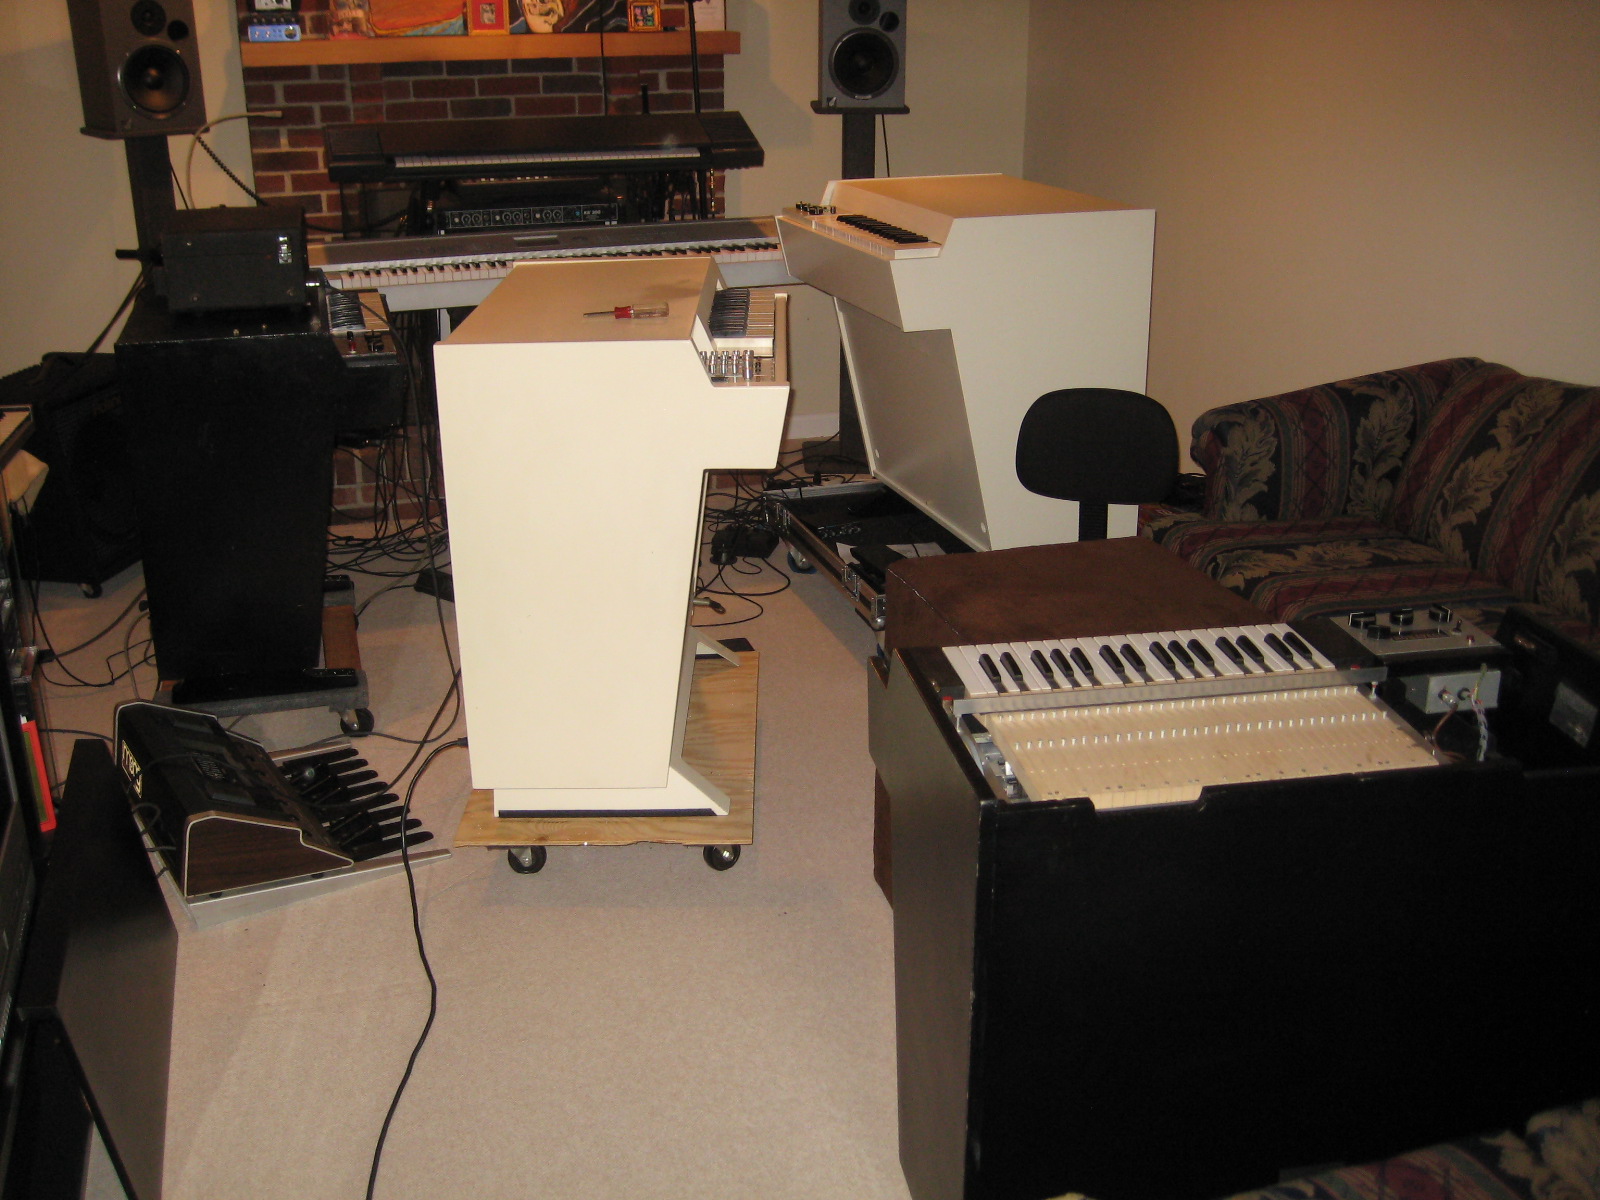 | It sounds great but there are a few adjustments left to do. |
| Mellotron 4-Track | Test Drive II | 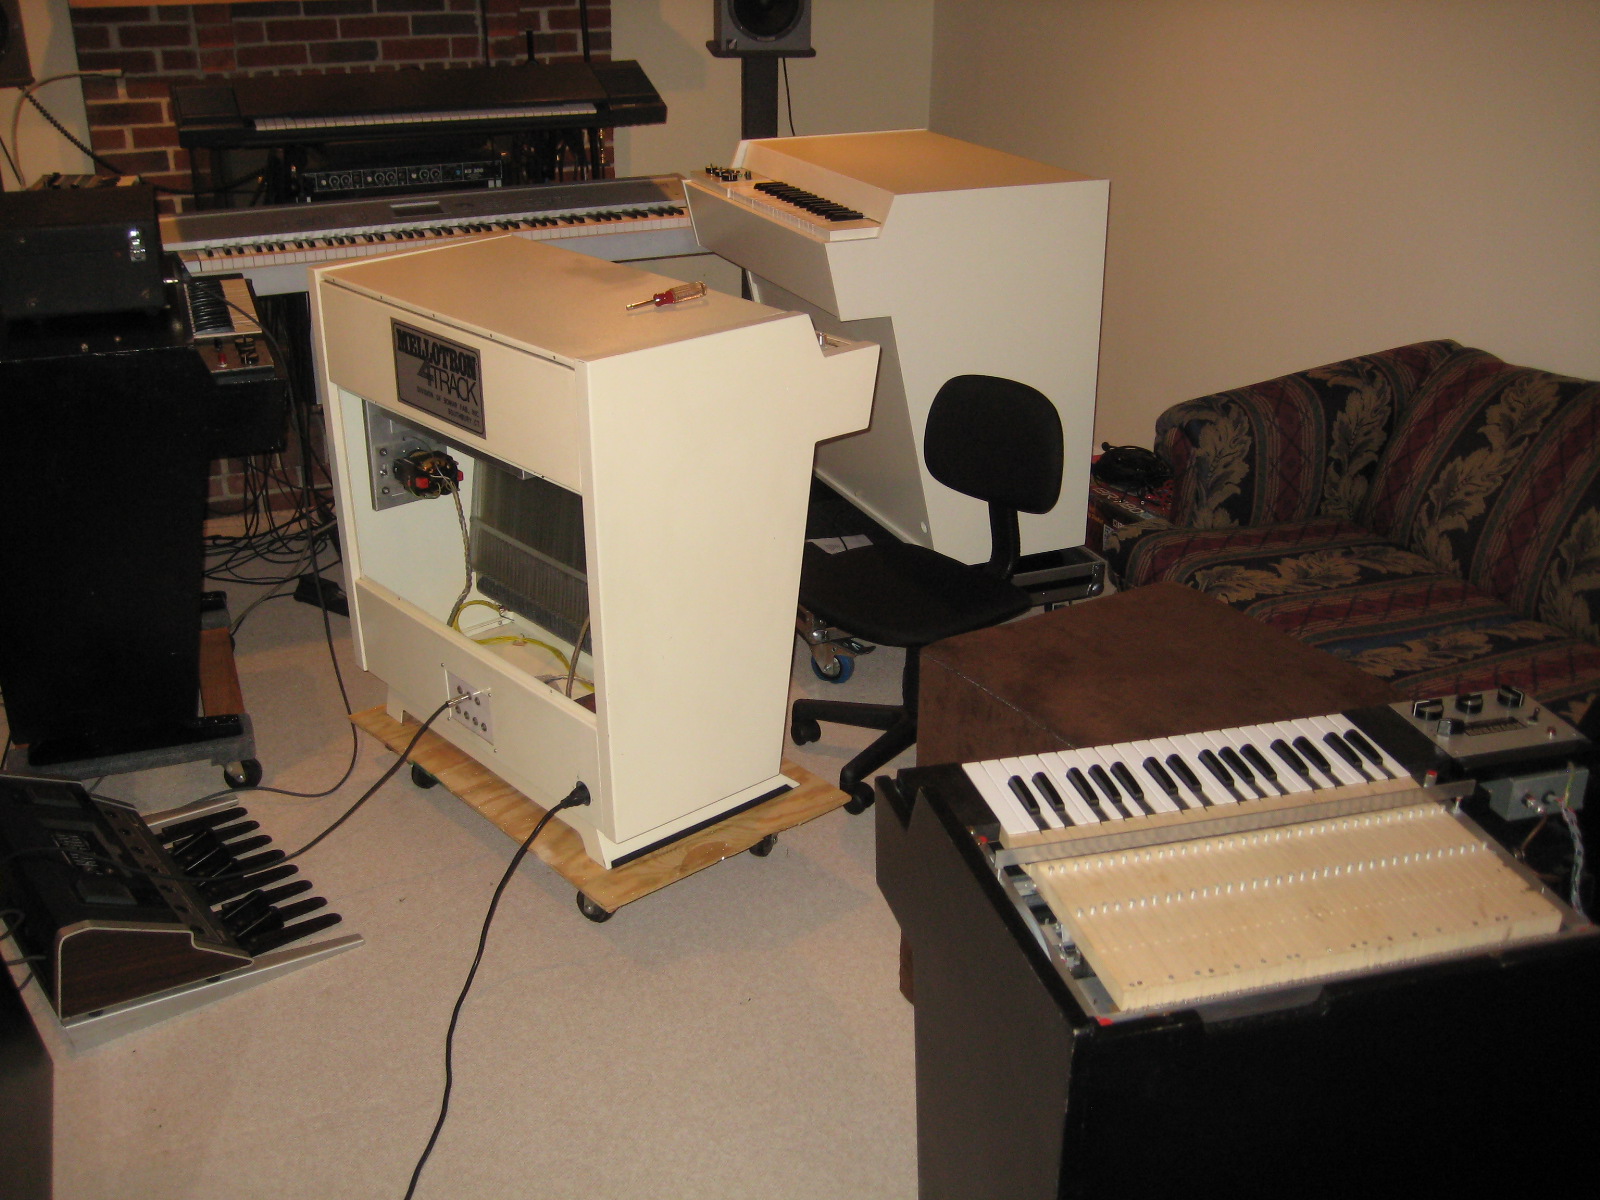 | I imagine I';ll be done by mid-week at the latest. |
| My EMI m400 morphs into a Streetly Gem! | P1000863 | 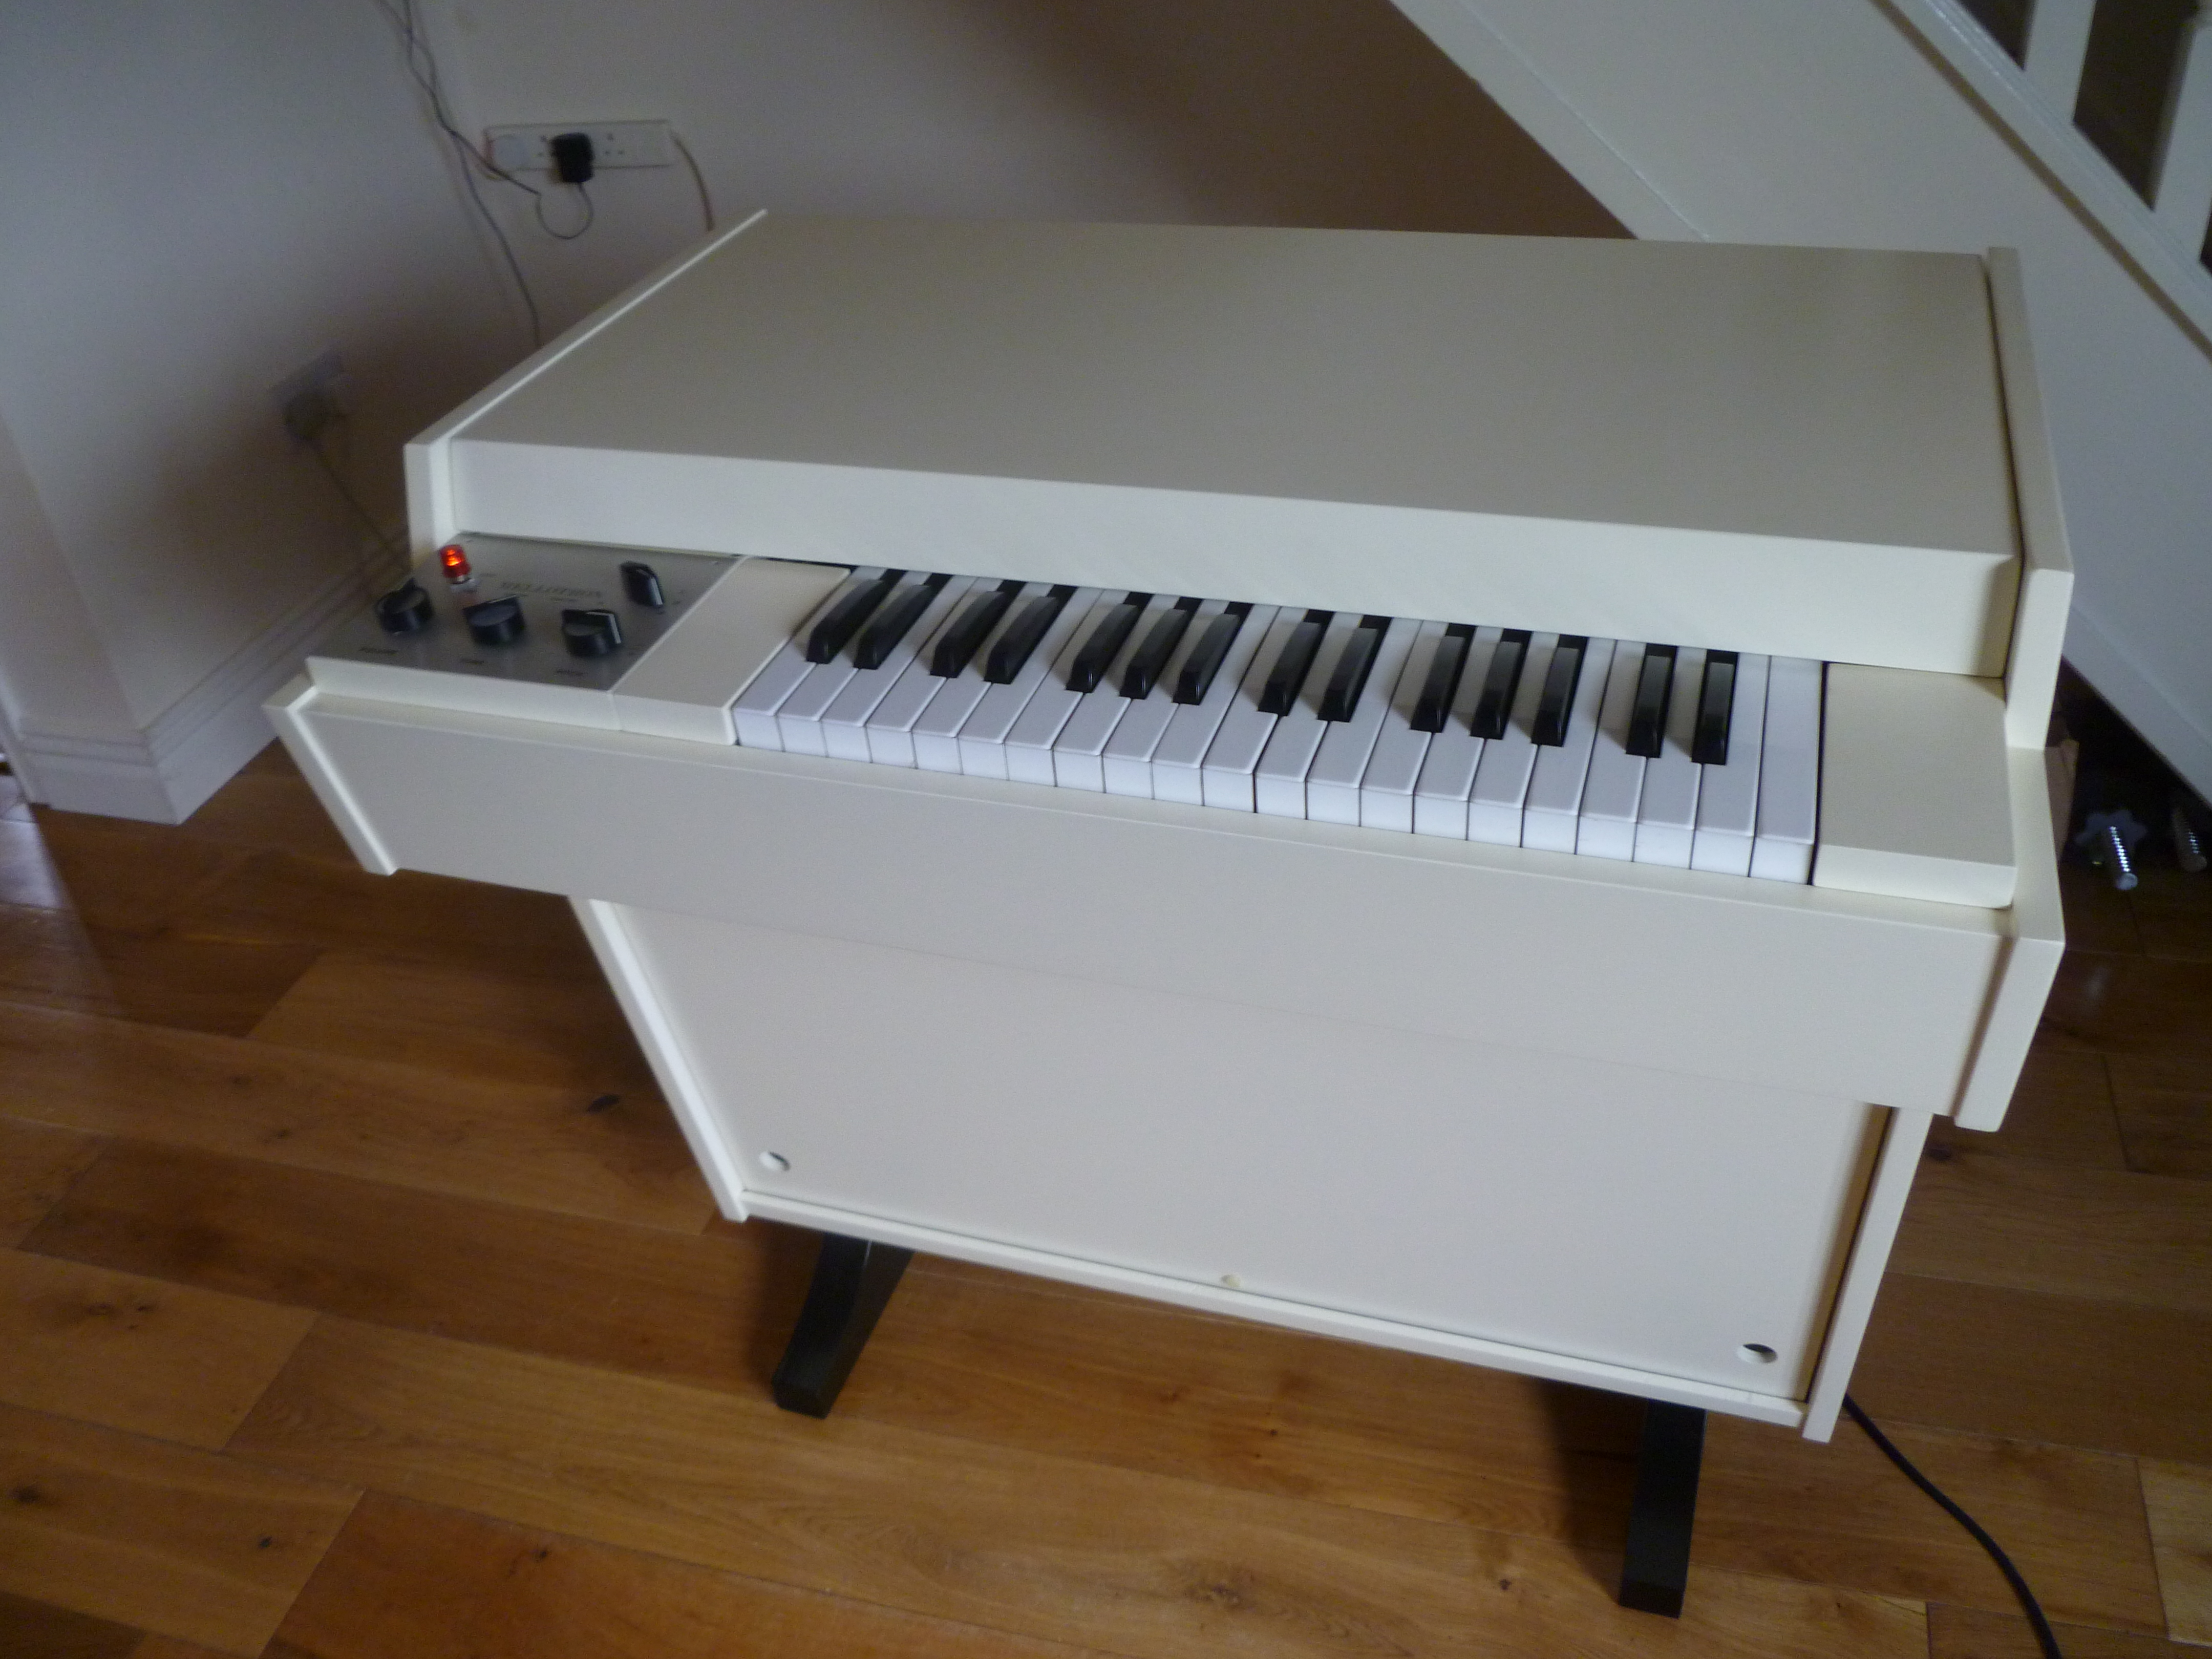 | |
| My EMI m400 morphs into a Streetly Gem! | P1000865 | 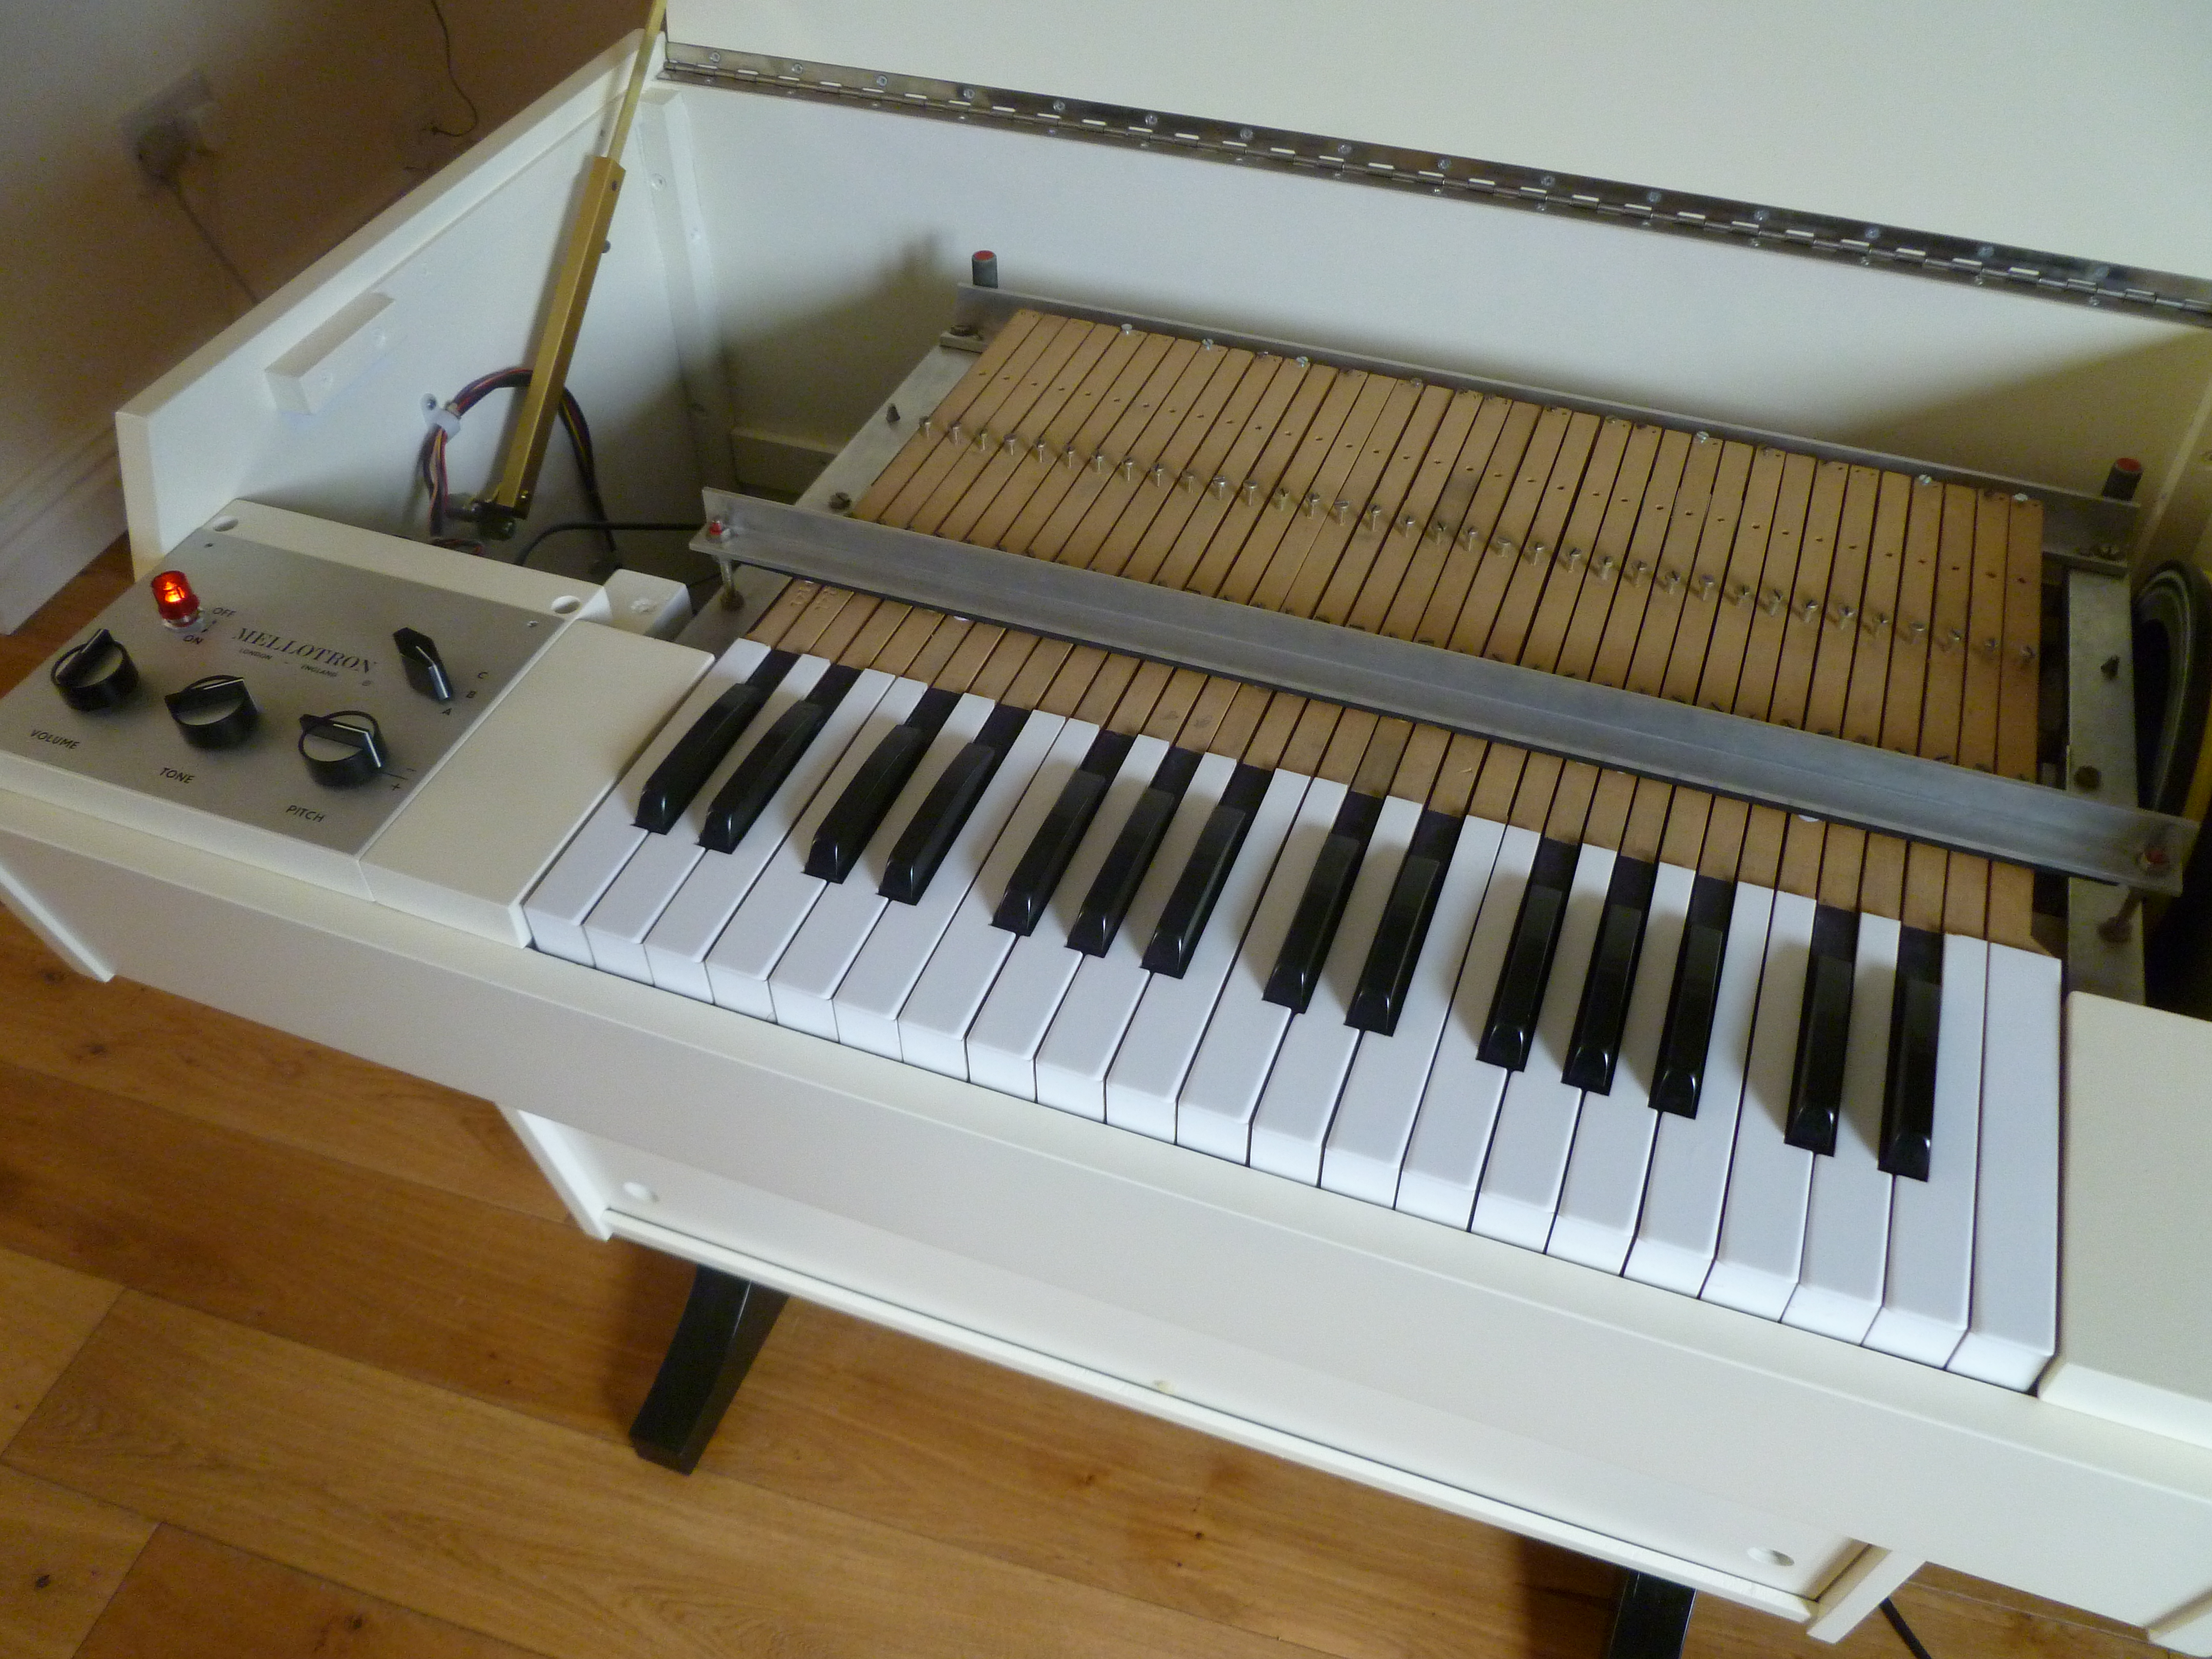 | |
| My EMI m400 morphs into a Streetly Gem! | P1000864 | 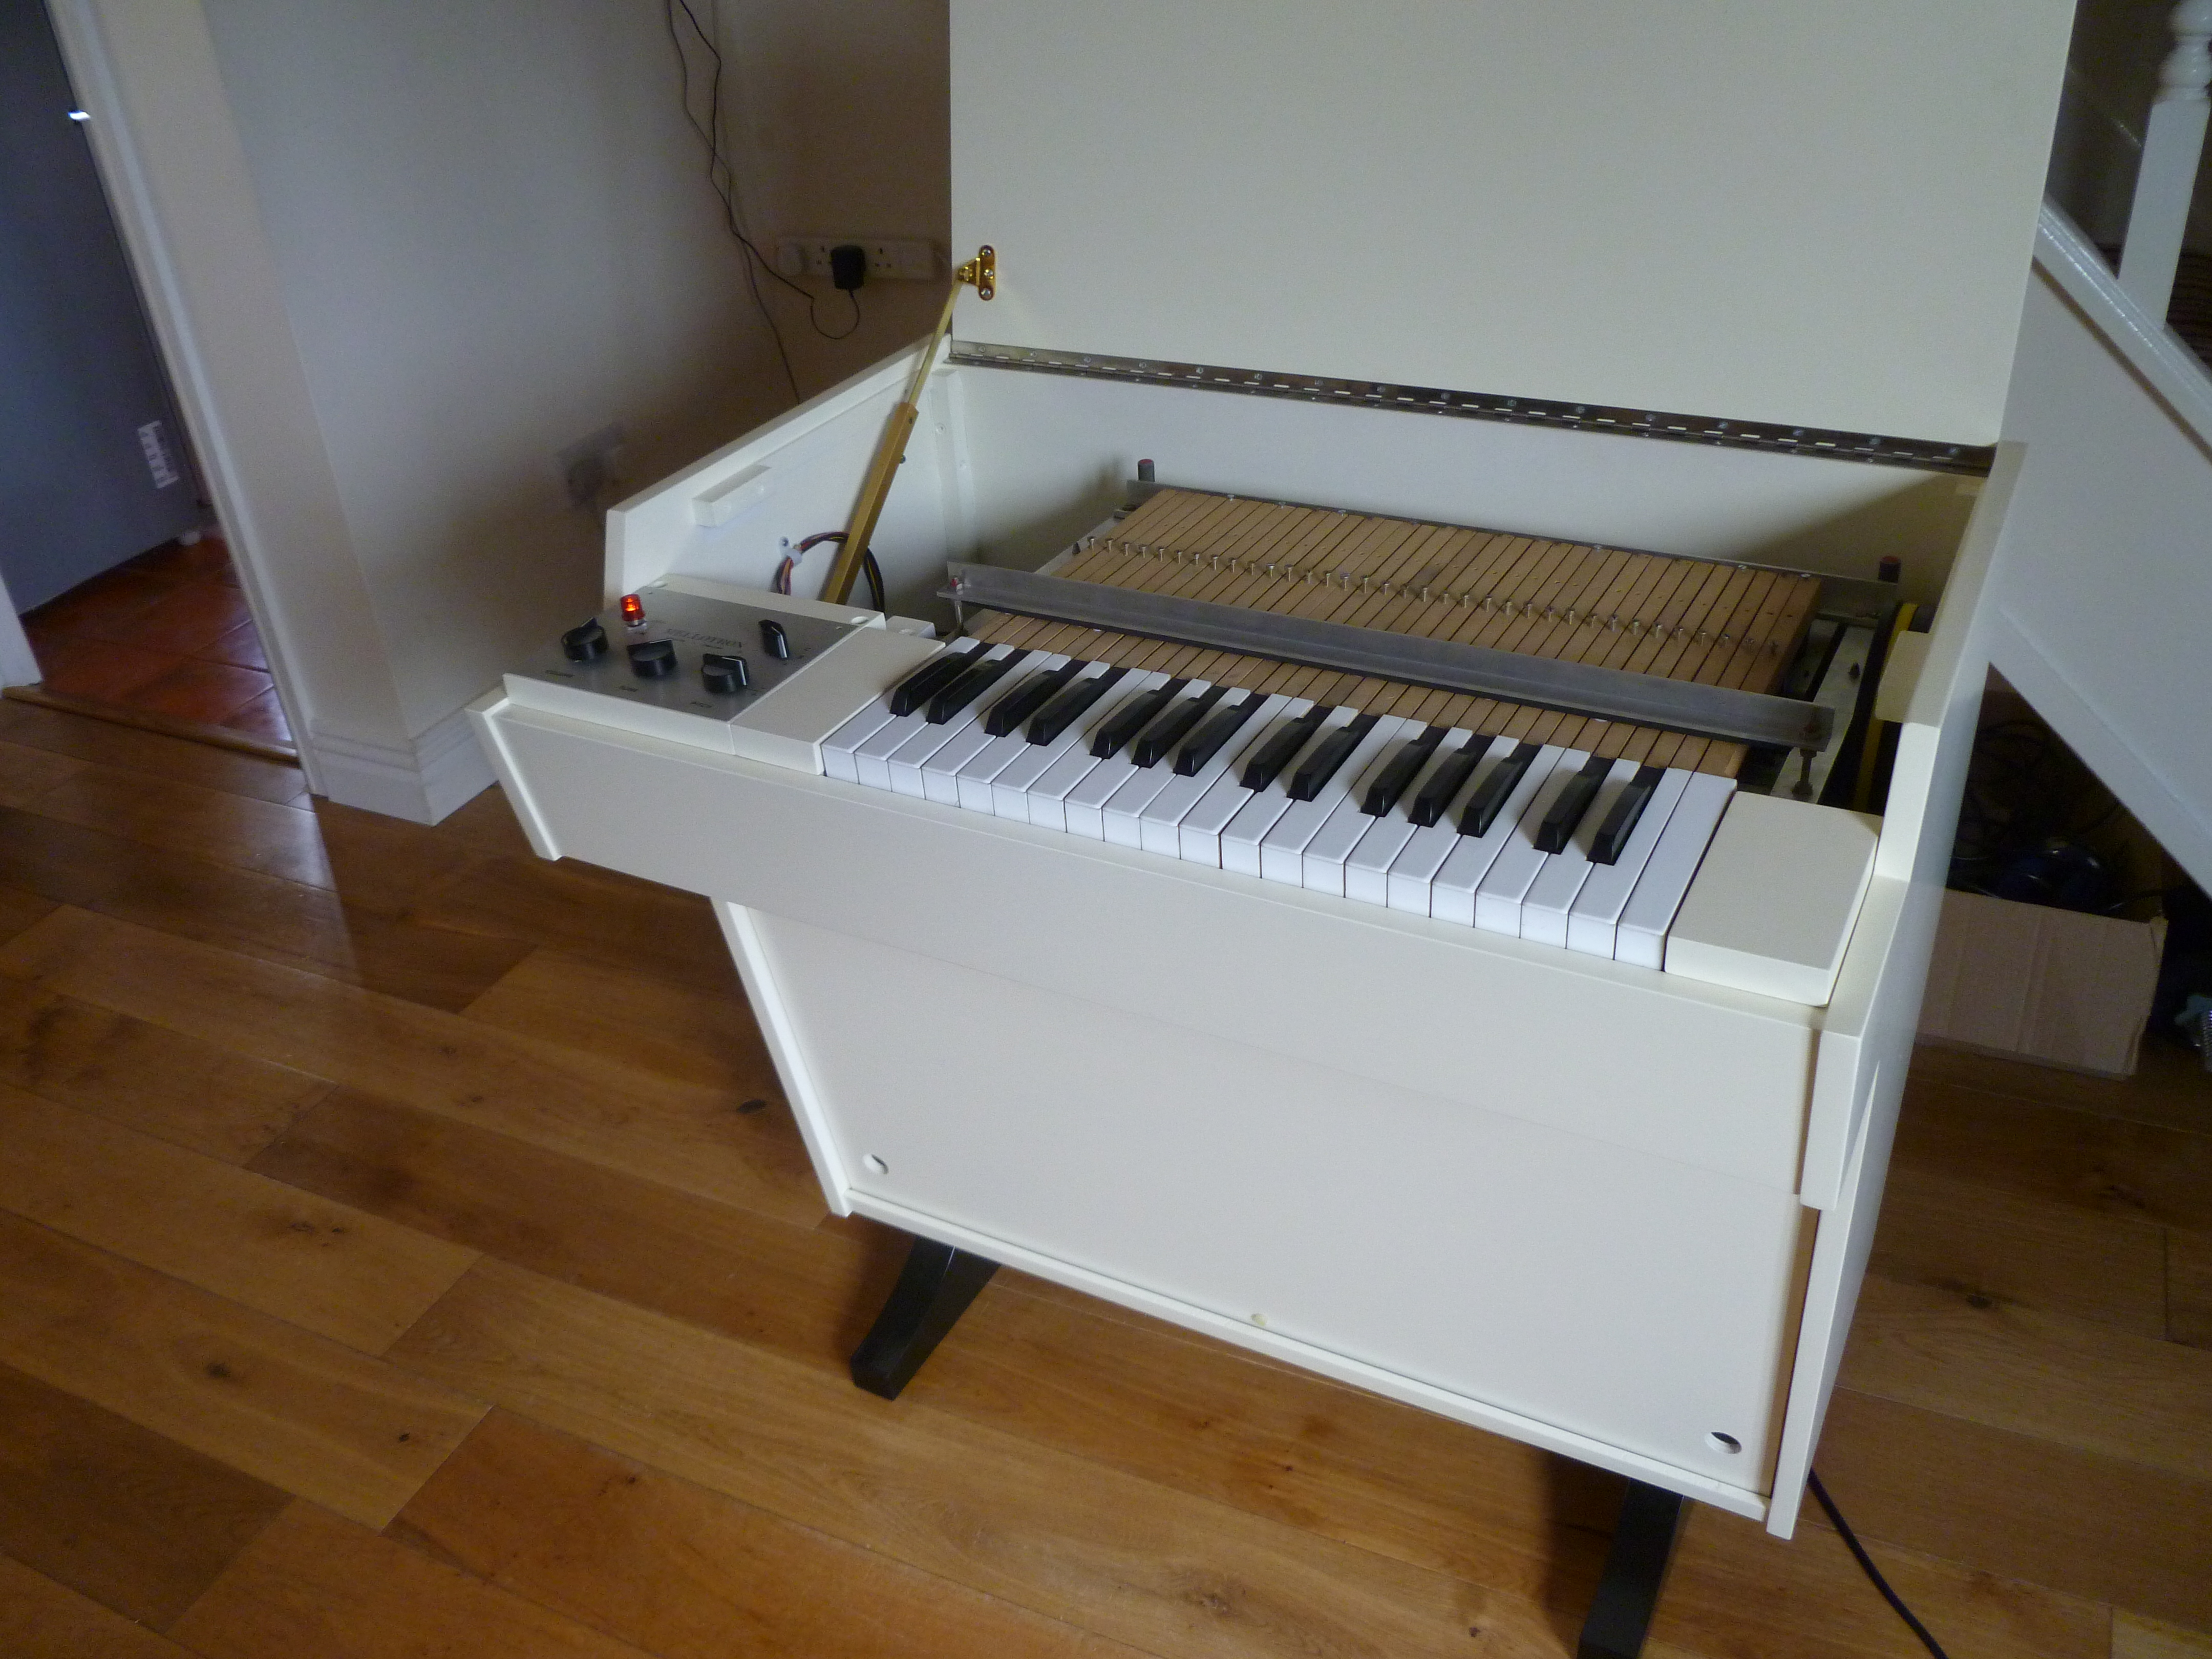 | |
| My EMI m400 morphs into a Streetly Gem! | P1000861 | 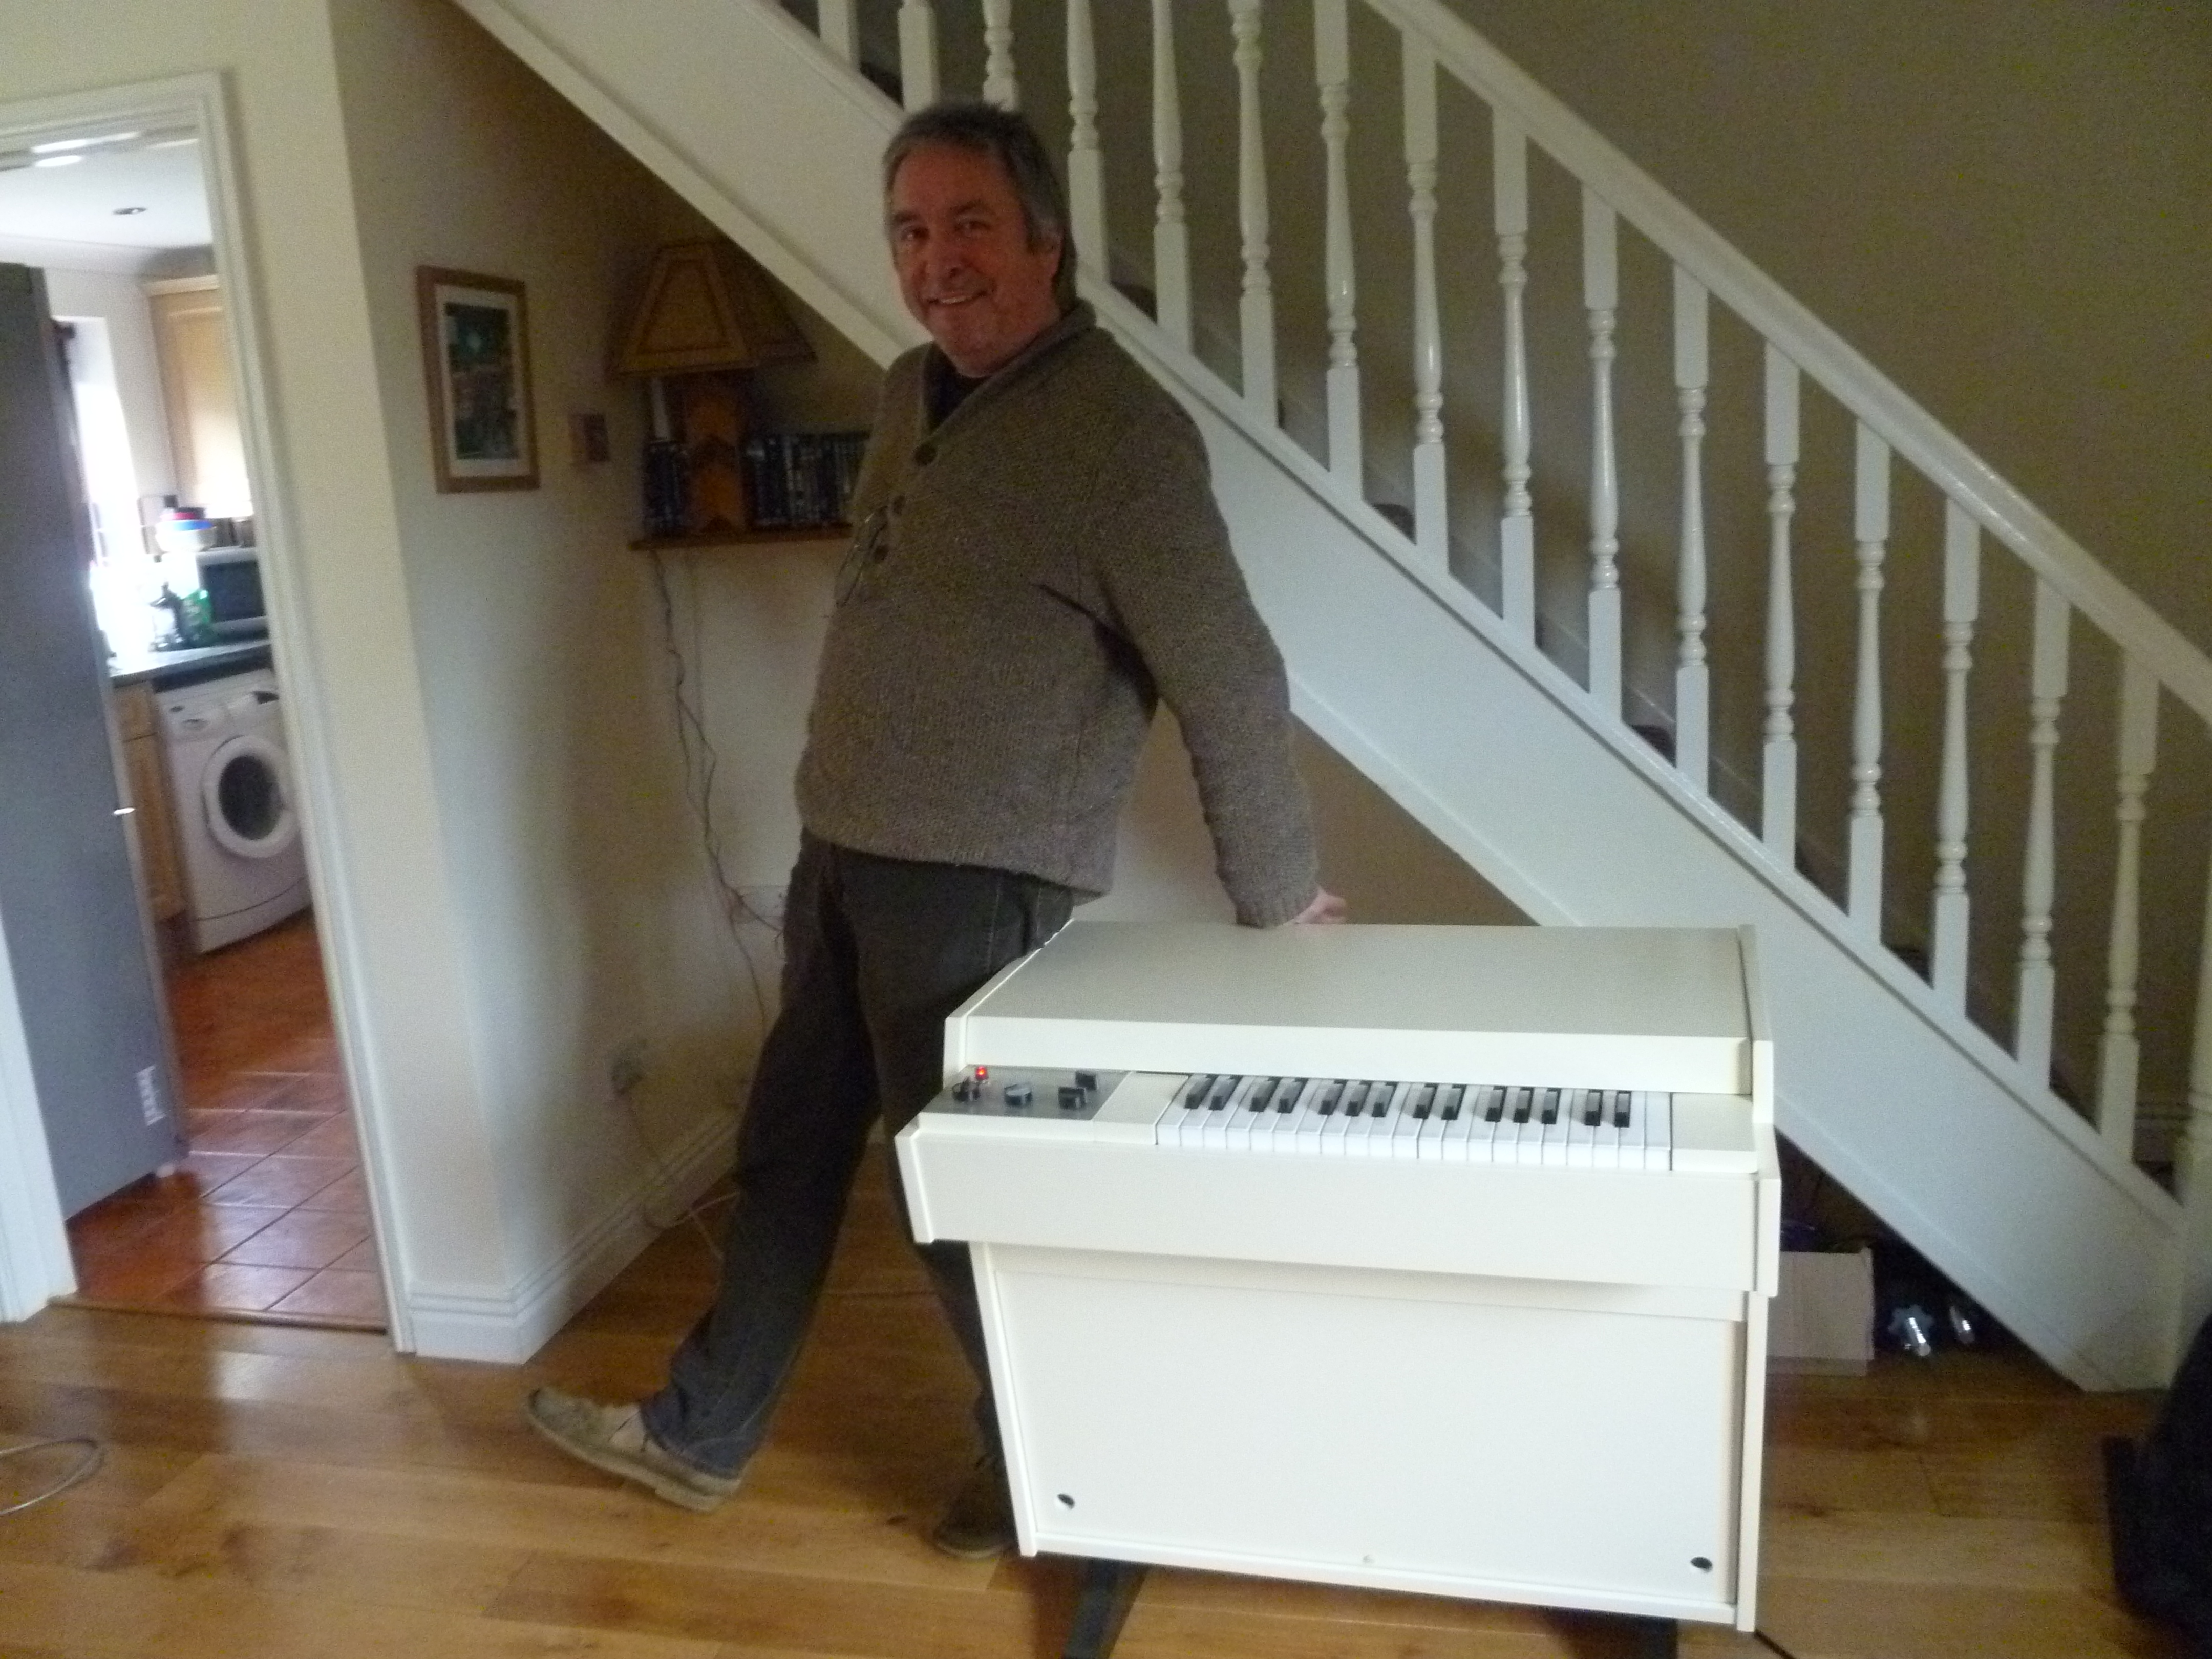 | |
| My EMI m400 morphs into a Streetly Gem! | P1000866 | 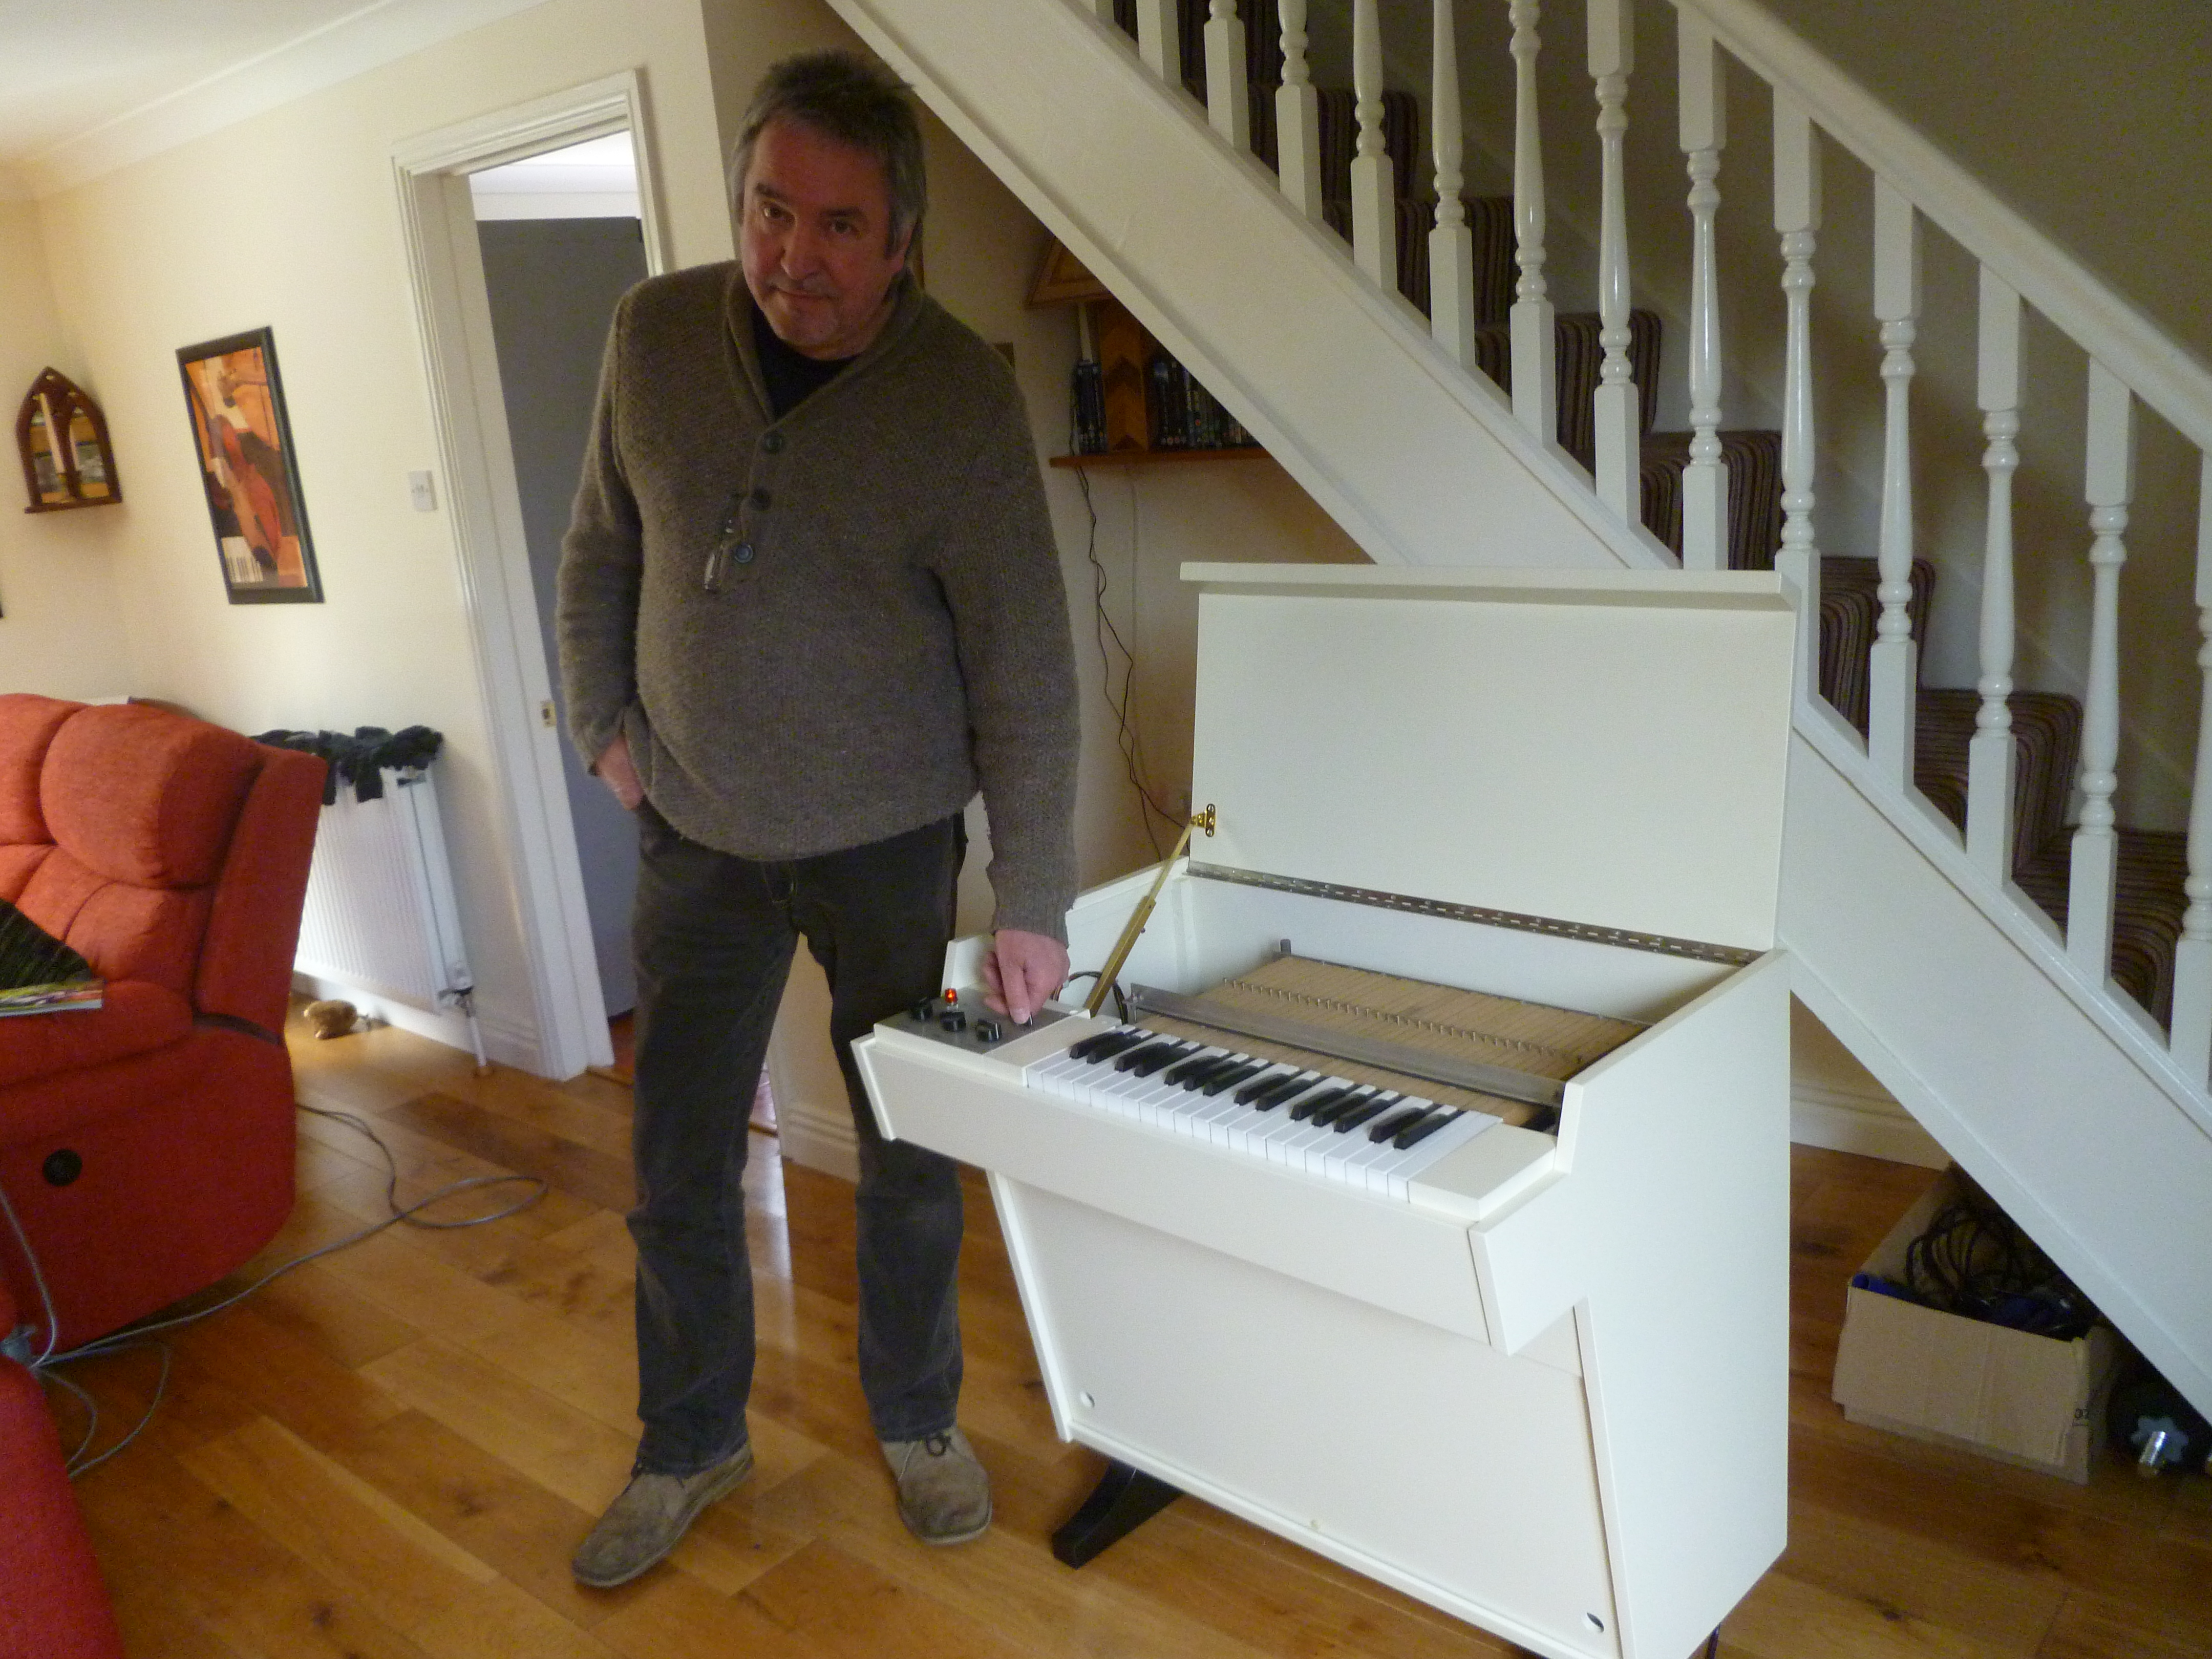 | |
| My EMI m400 morphs into a Streetly Gem! | P1000862 | 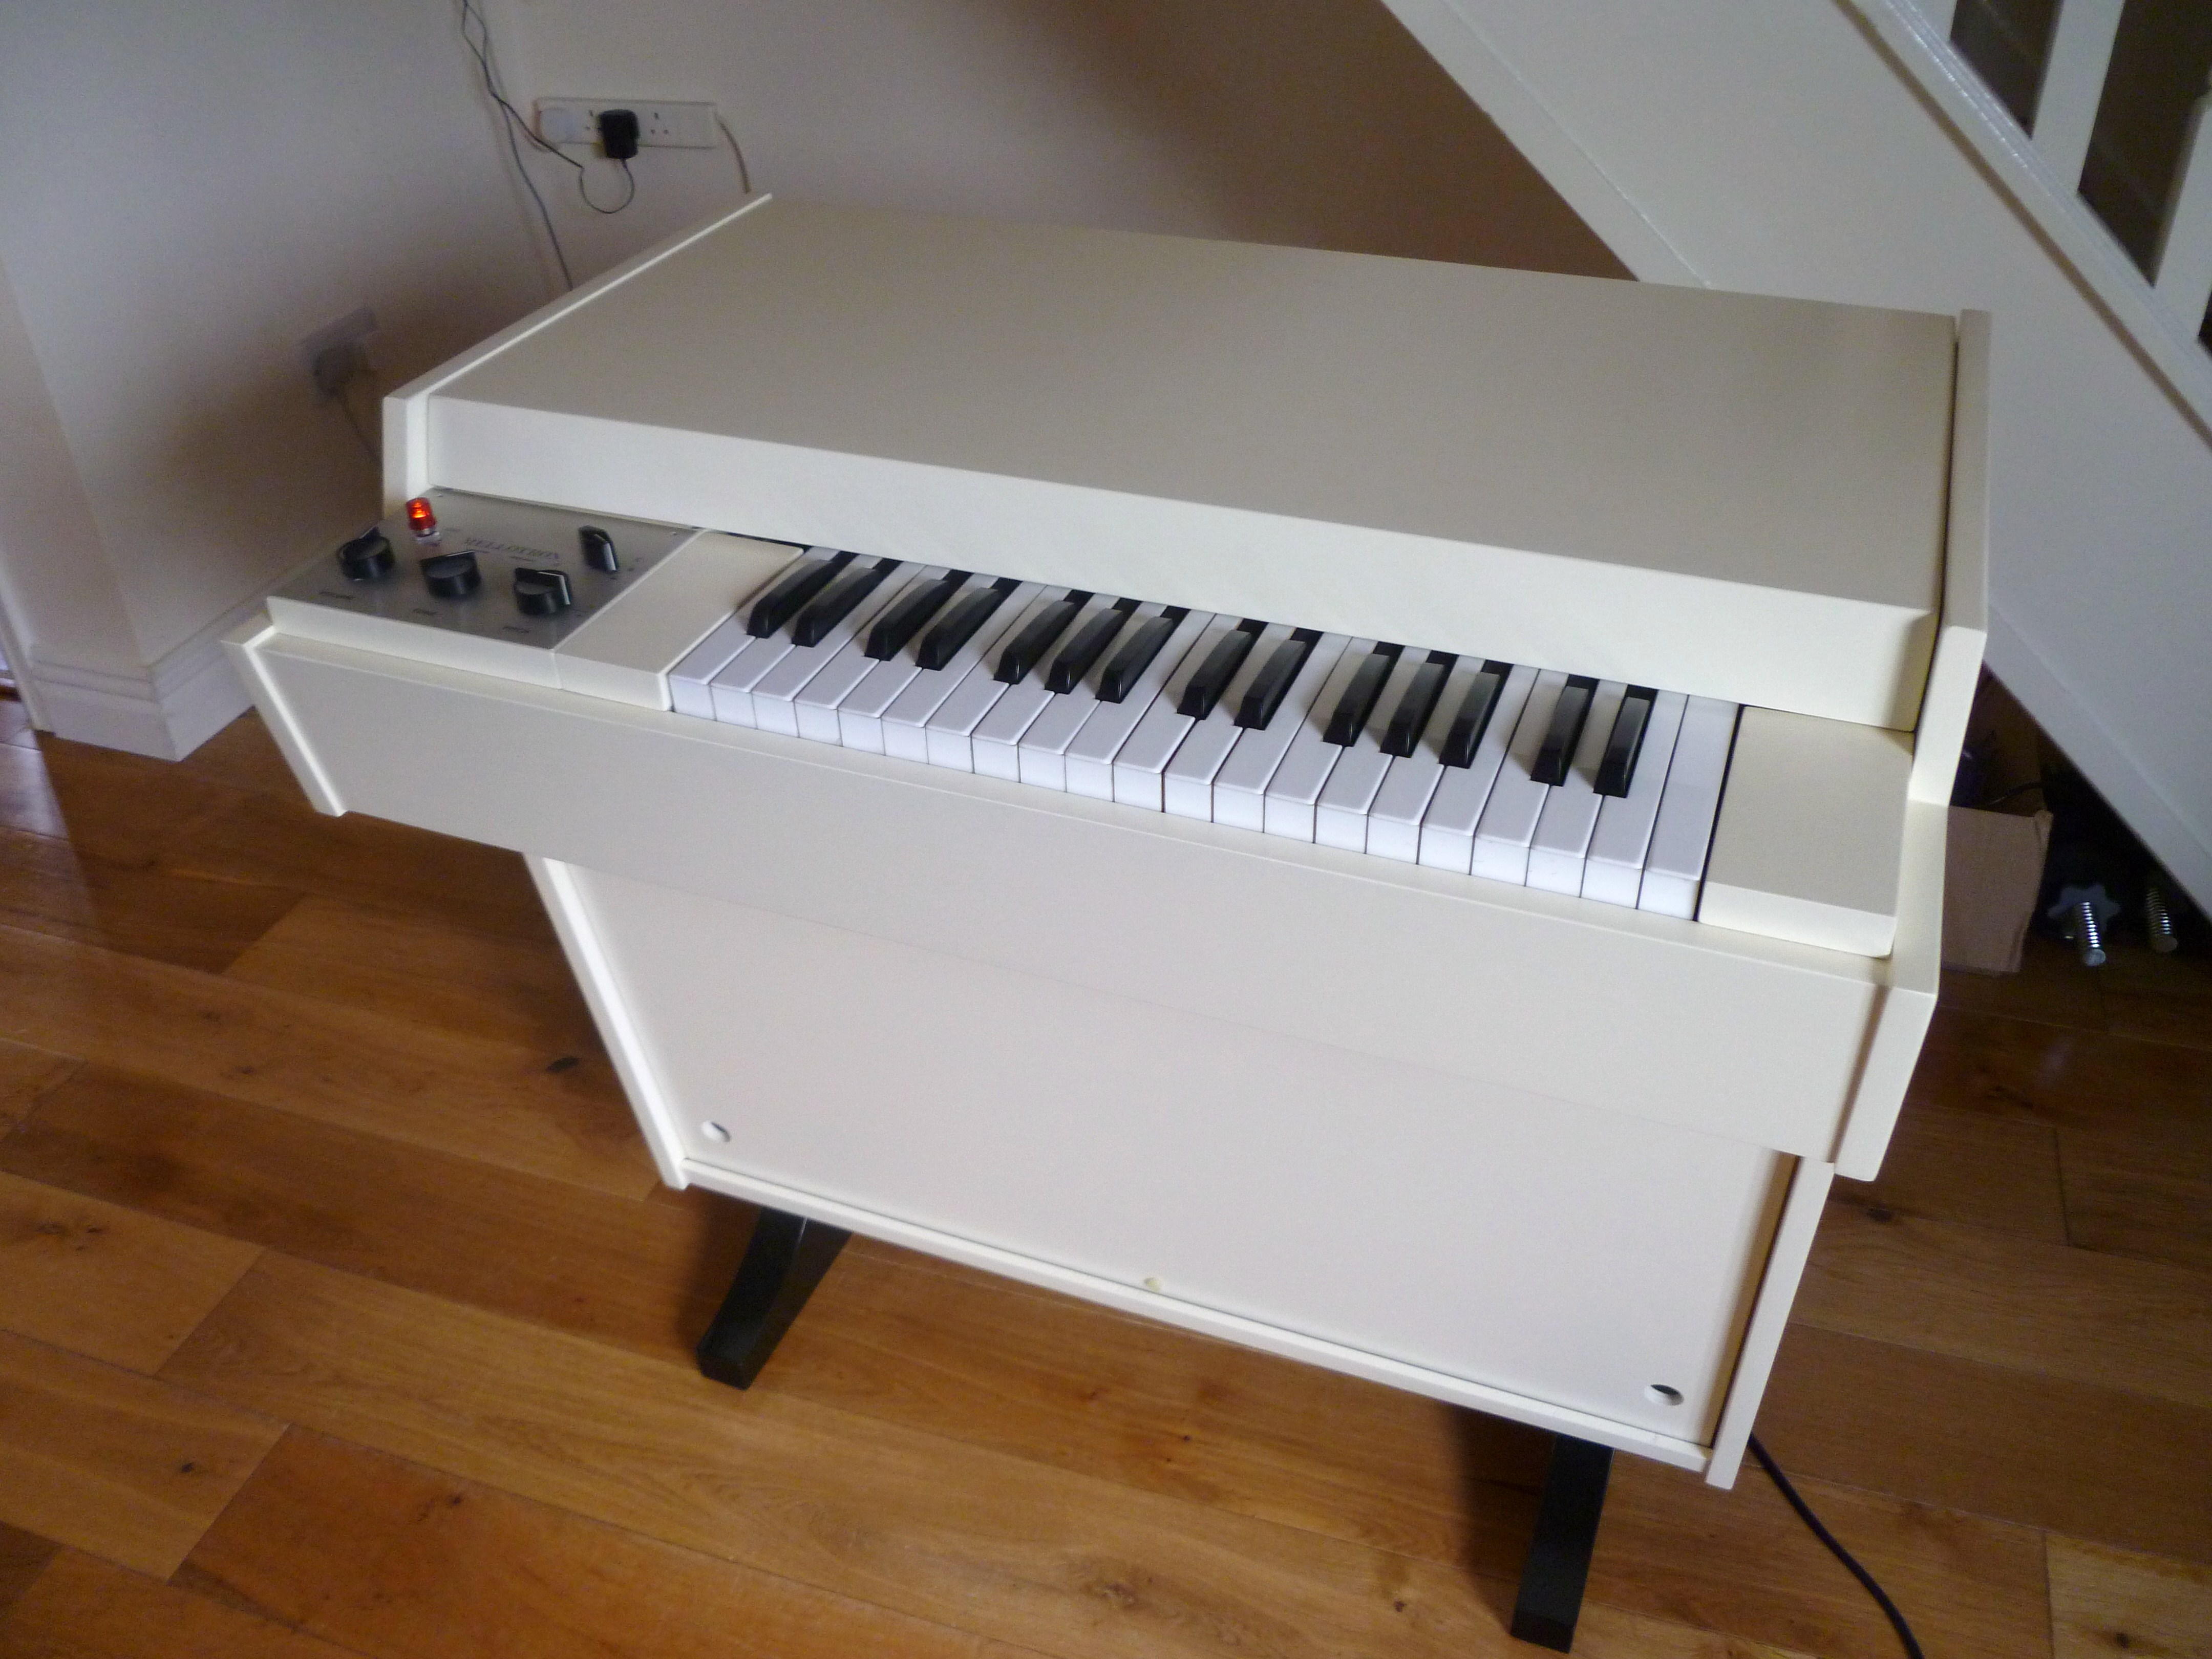 | |
| My EMI m400 morphs into a Streetly Gem! | P1000934 | 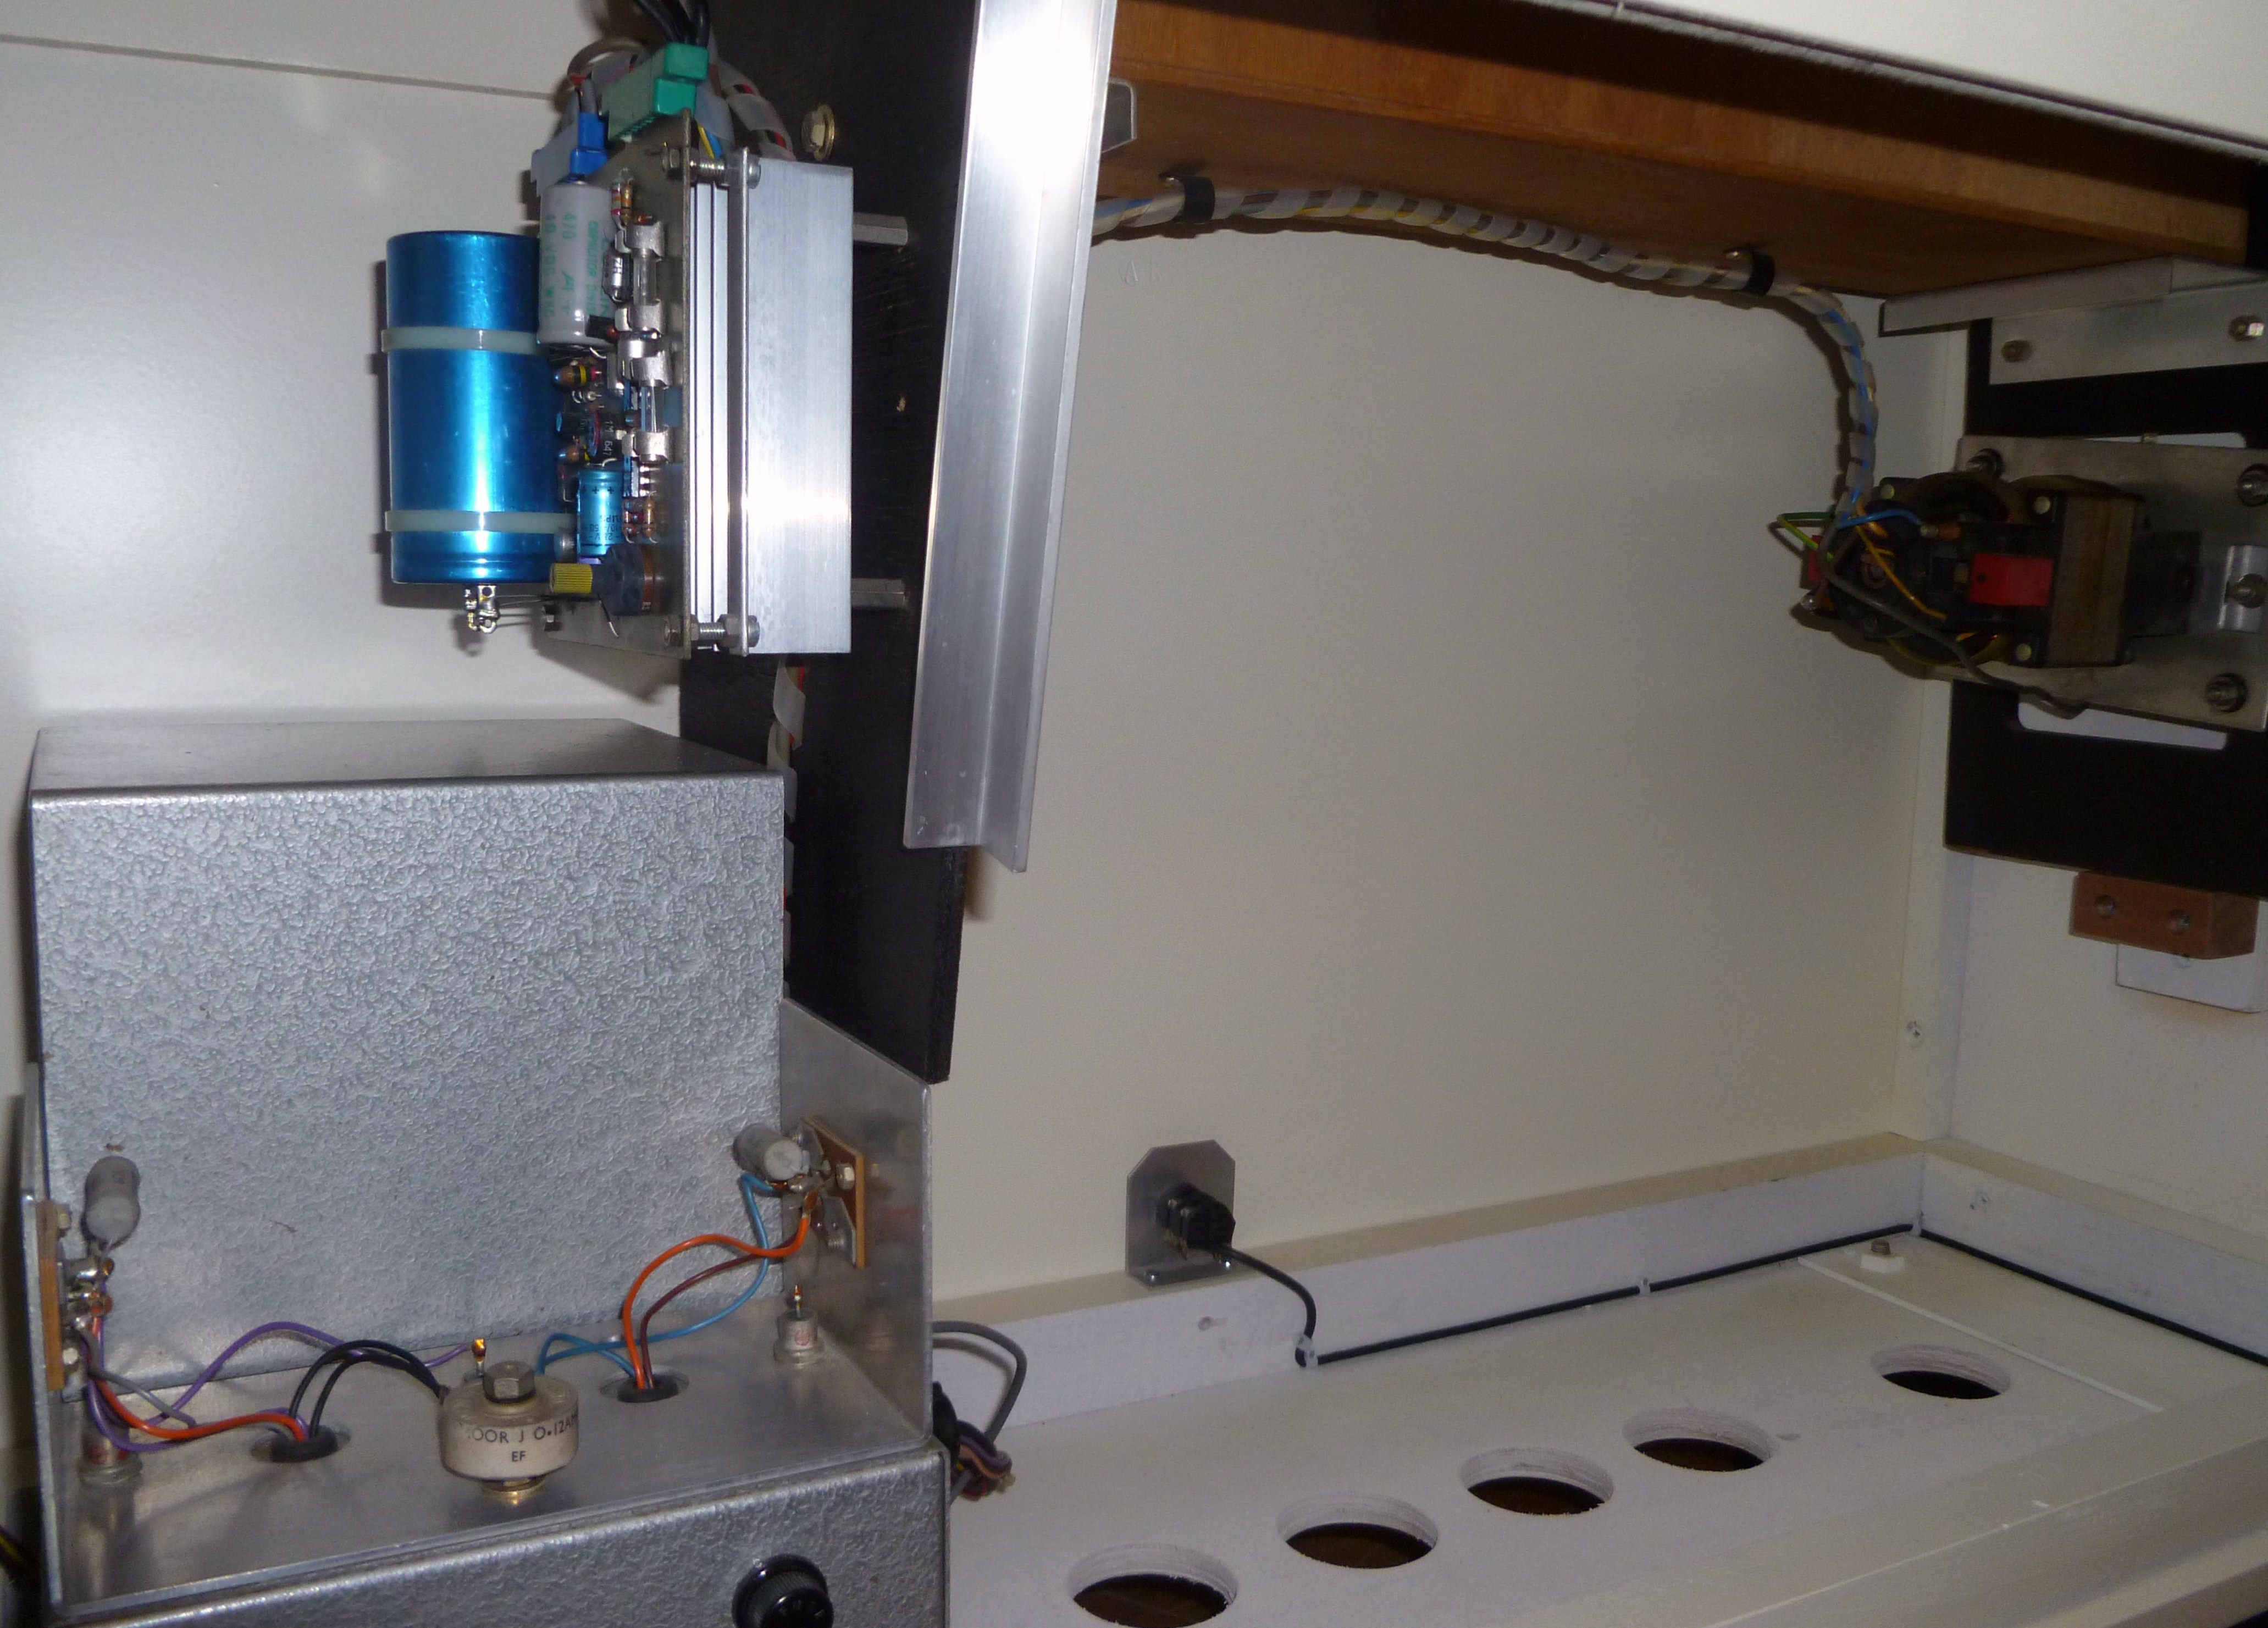 | |
| My EMI m400 morphs into a Streetly Gem! | P1000925 |  | |
| My EMI m400 morphs into a Streetly Gem! | P1000938 |  | |
| My EMI m400 morphs into a Streetly Gem! | P1000929 |  | |
| My EMI m400 morphs into a Streetly Gem! | P1000928 |  | |
| My EMI m400 morphs into a Streetly Gem! | P1000937 |  | |
| My EMI m400 morphs into a Streetly Gem! | P1000939 |  | |
| My EMI m400 morphs into a Streetly Gem! | P1000927 | 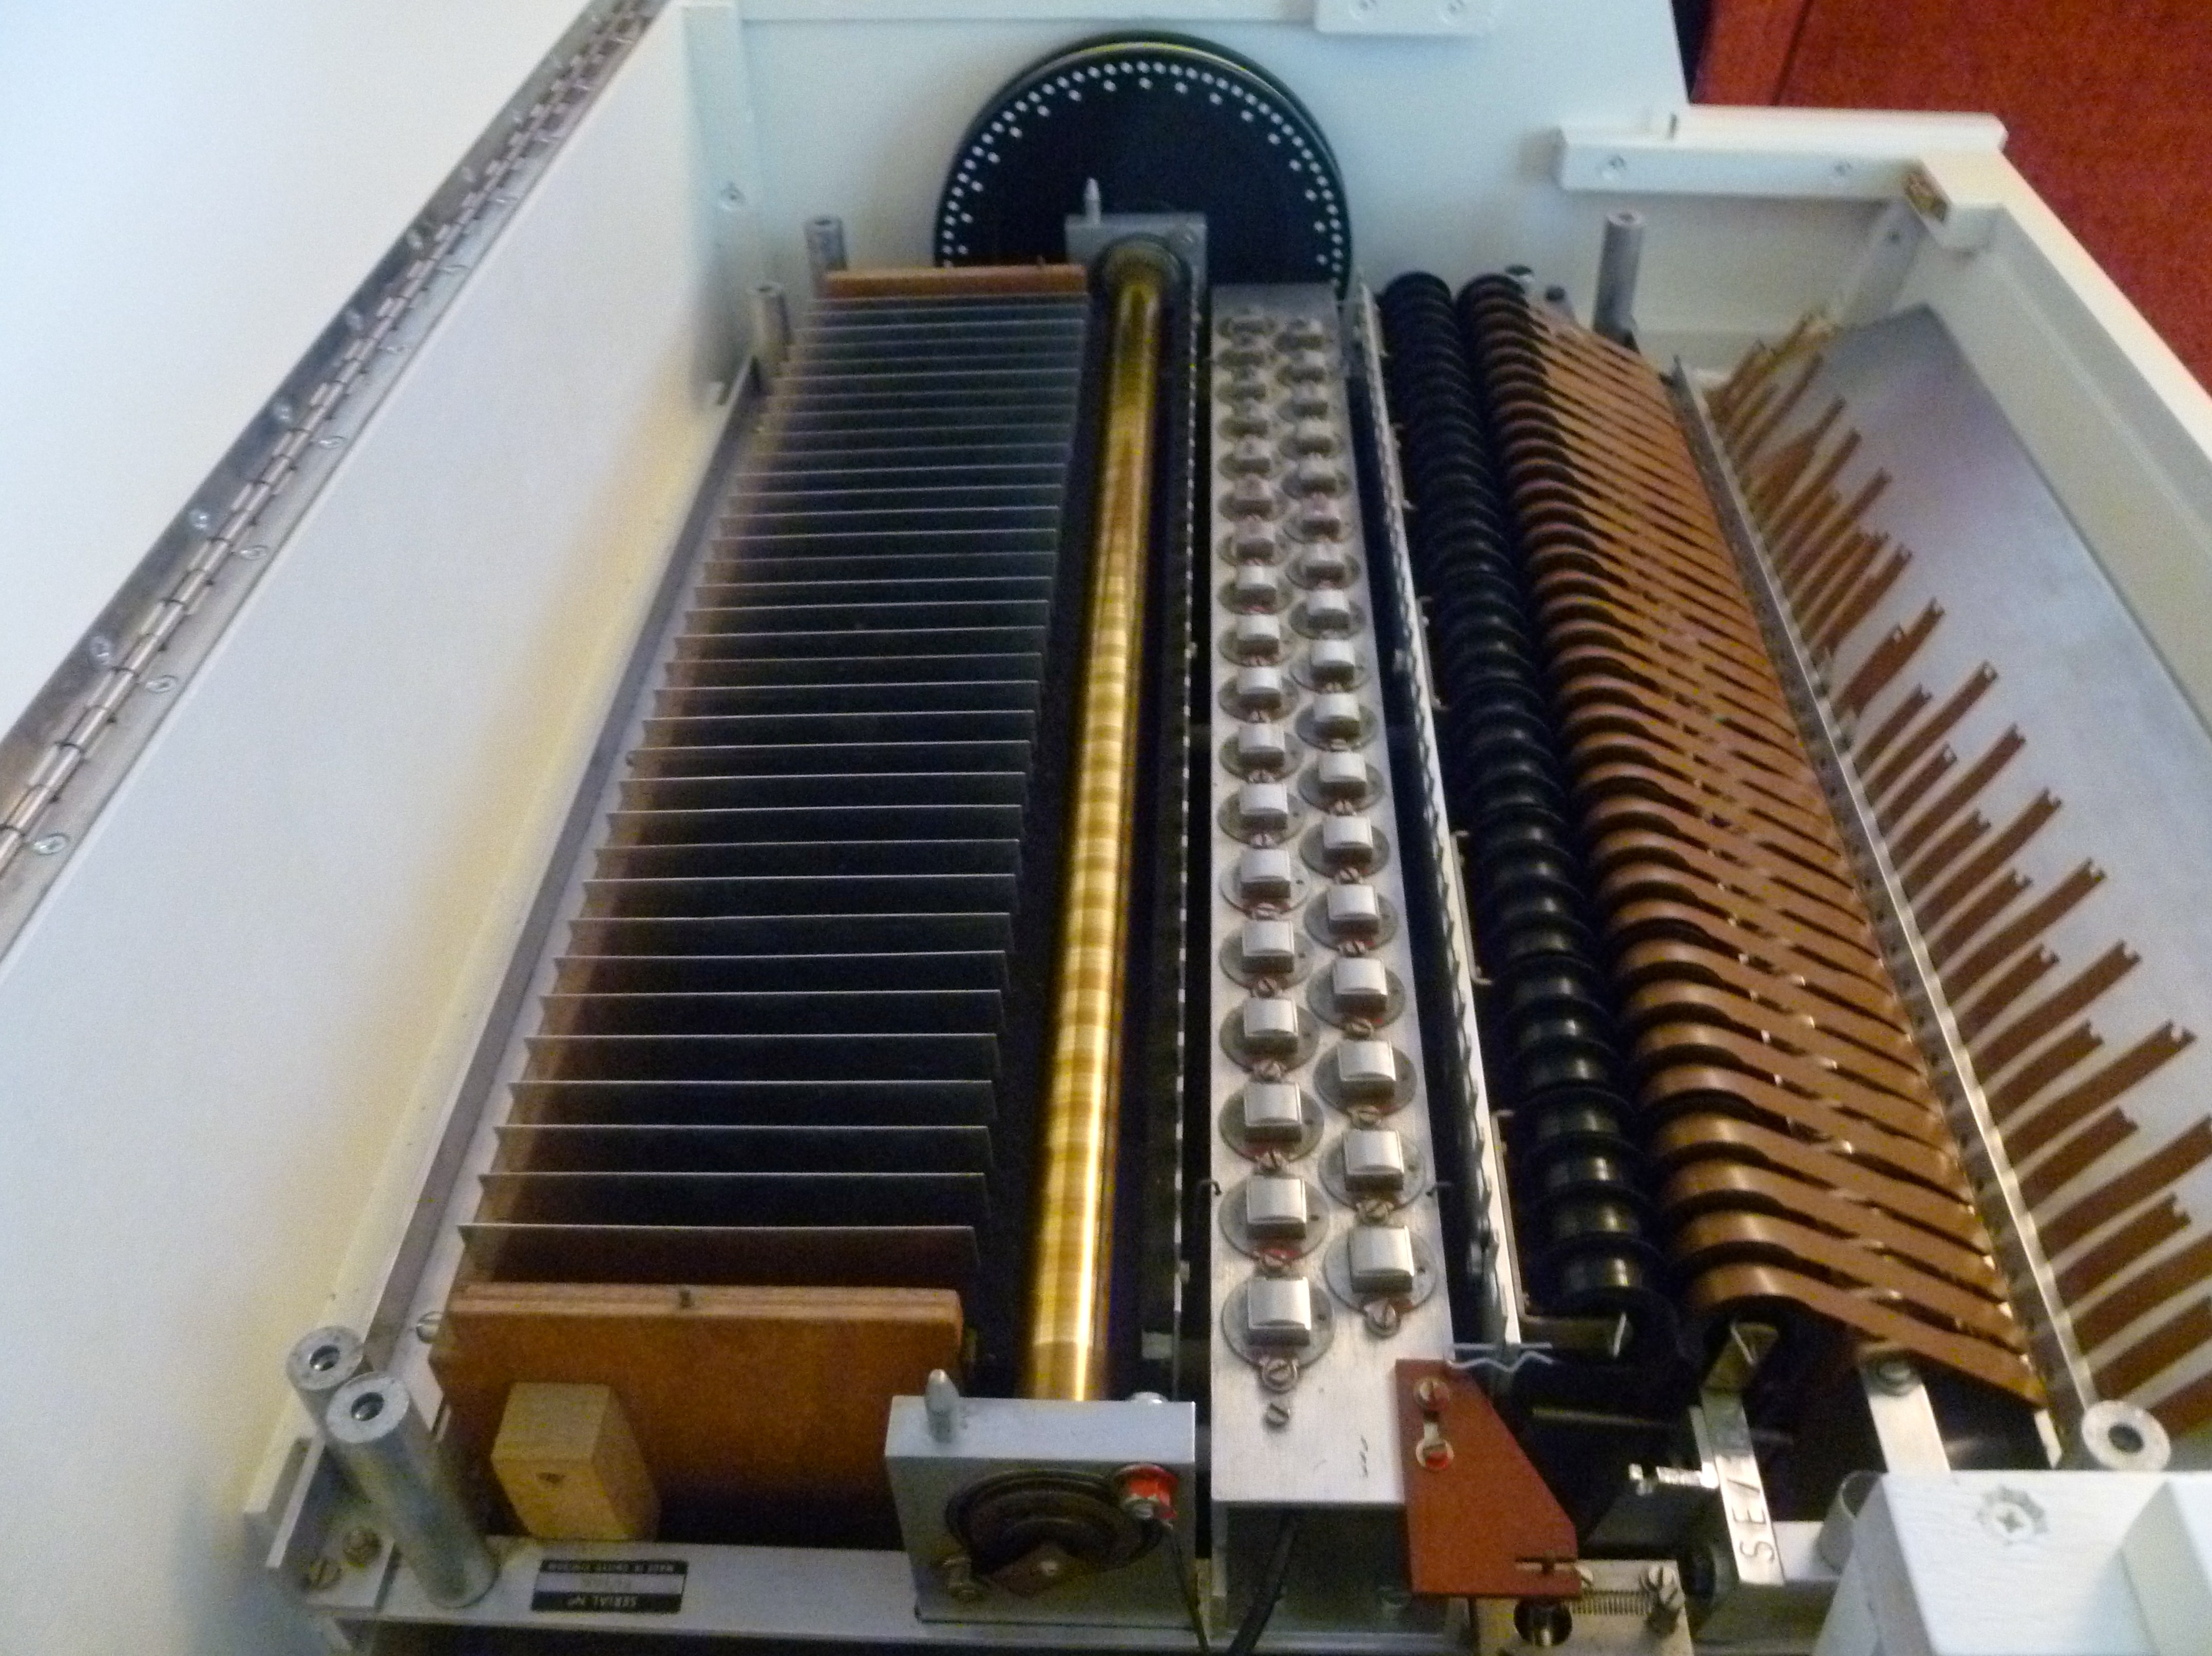 | |
| My EMI m400 morphs into a Streetly Gem! | P1000921 | 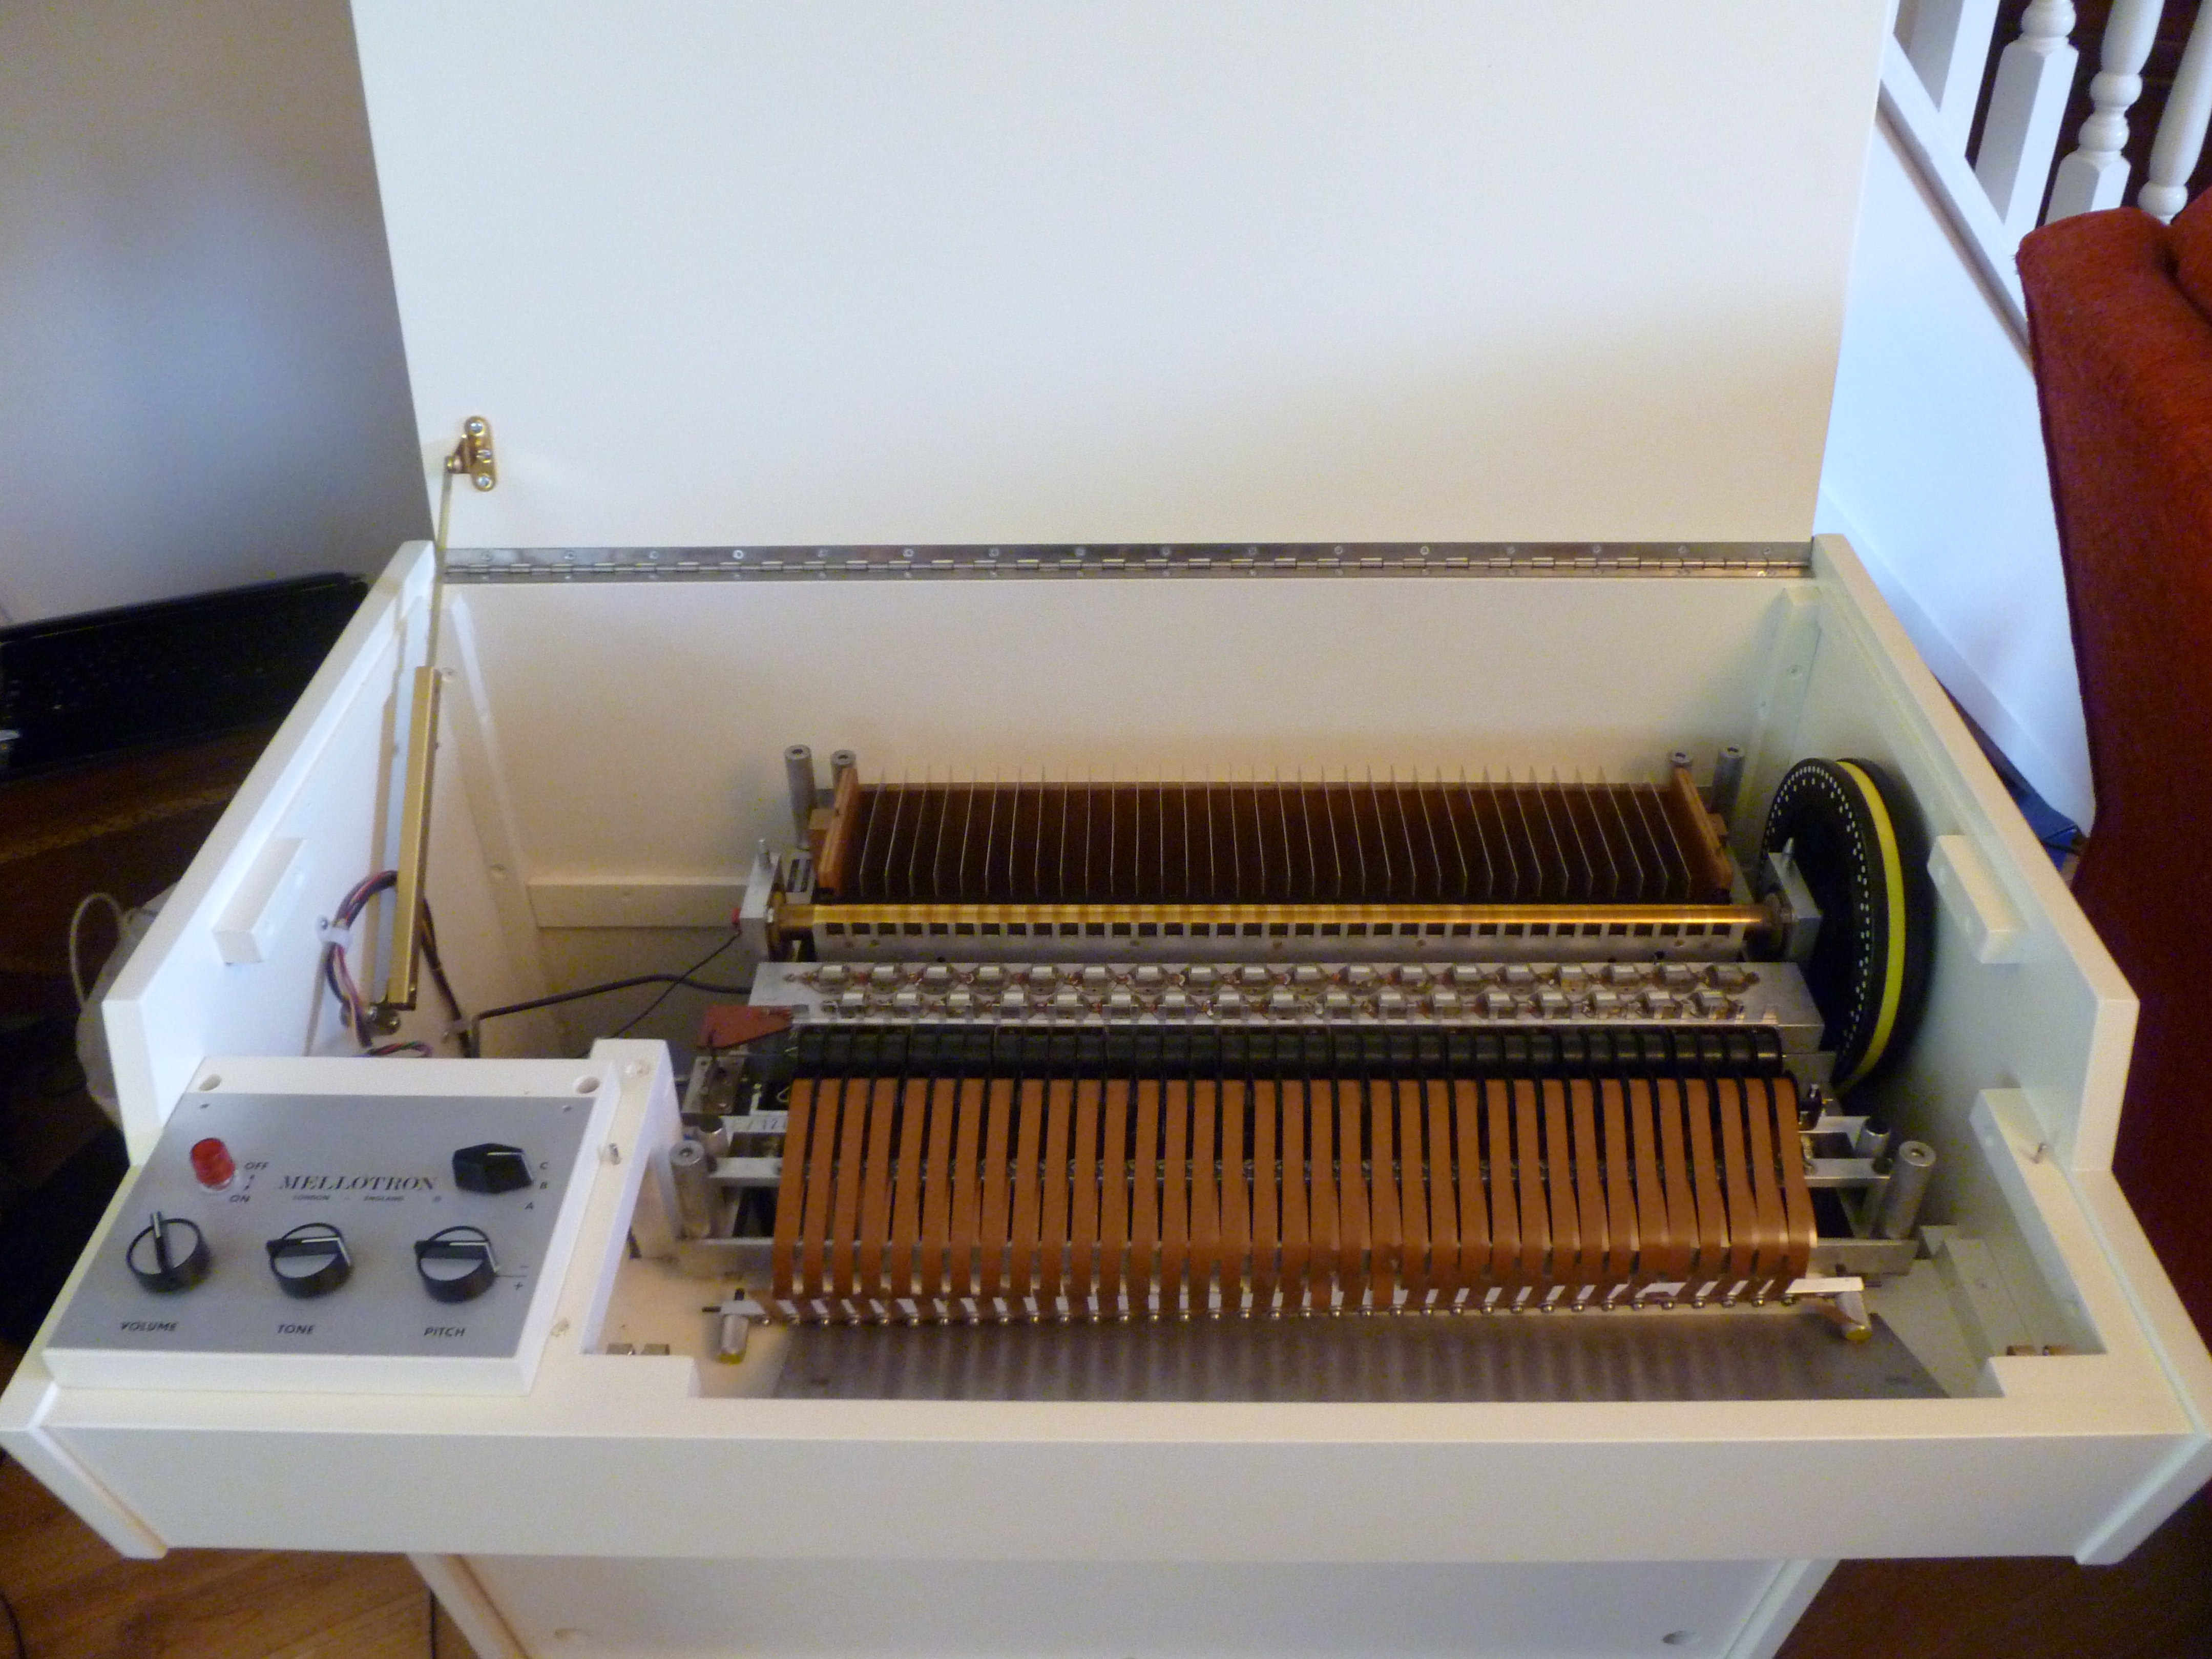 | |
| My EMI m400 morphs into a Streetly Gem! | P1000933 |  | |
| My EMI m400 morphs into a Streetly Gem! | P1000936 | 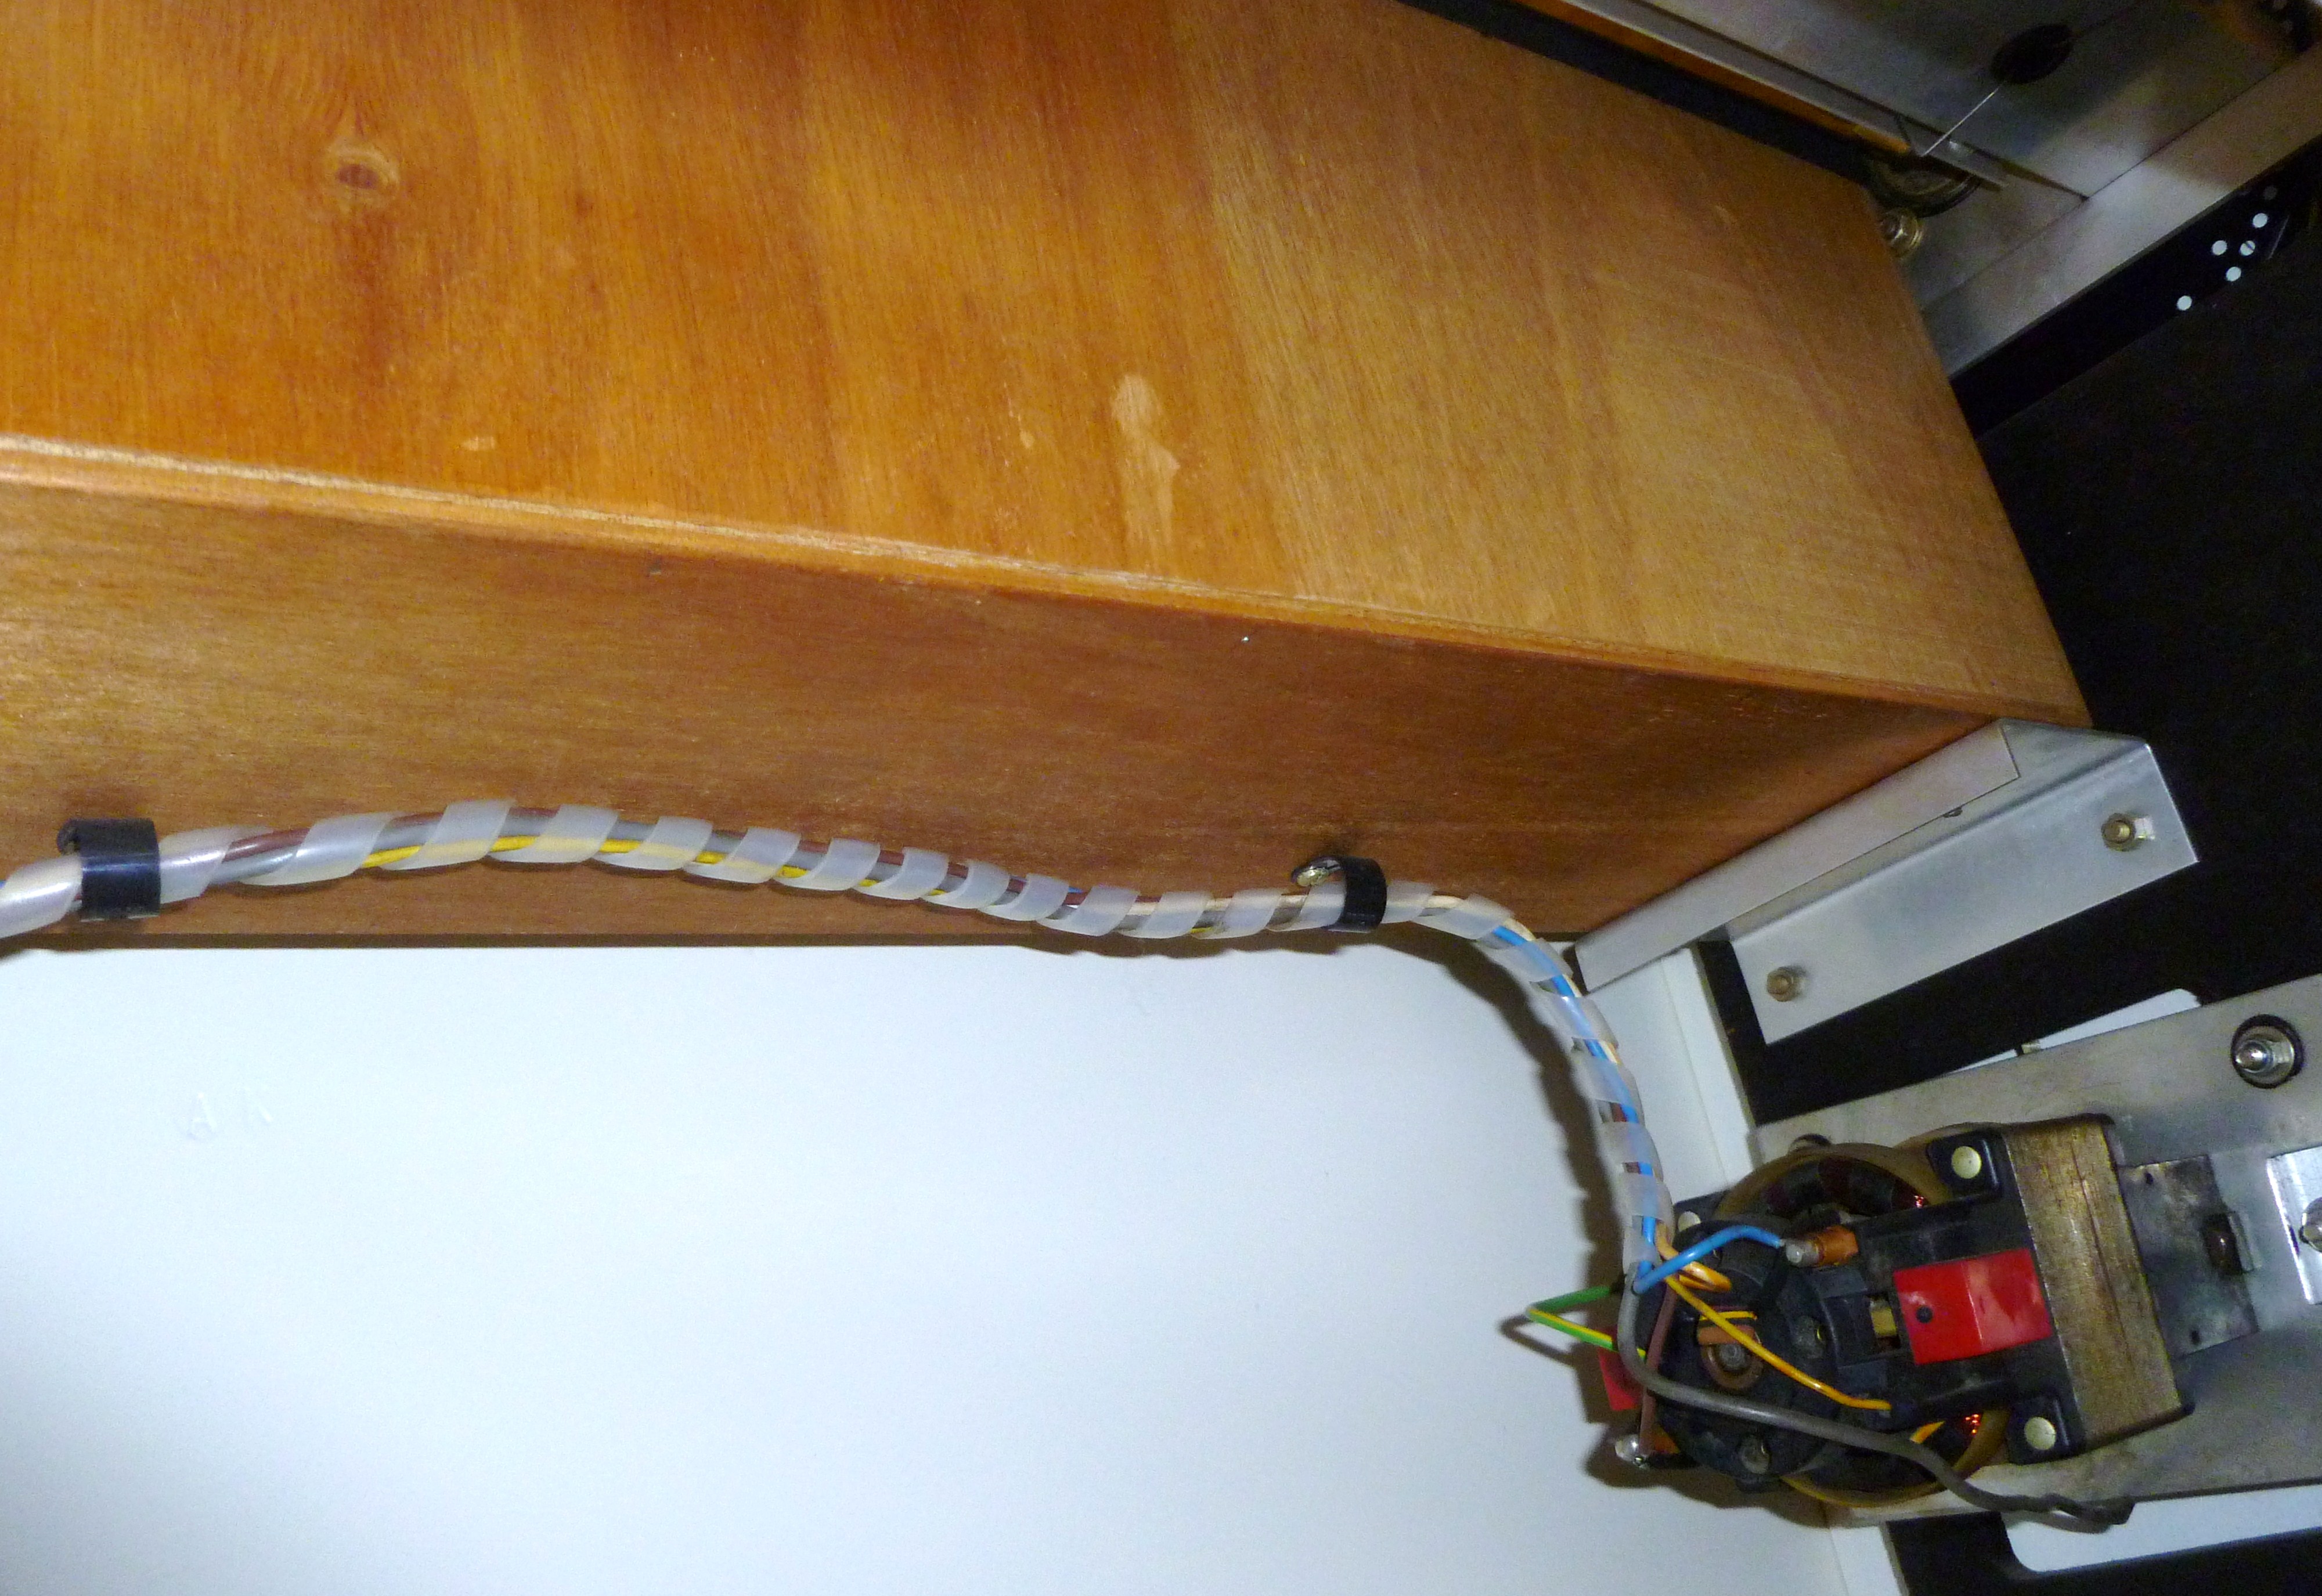 | |
| My EMI m400 morphs into a Streetly Gem! | P1000935 | 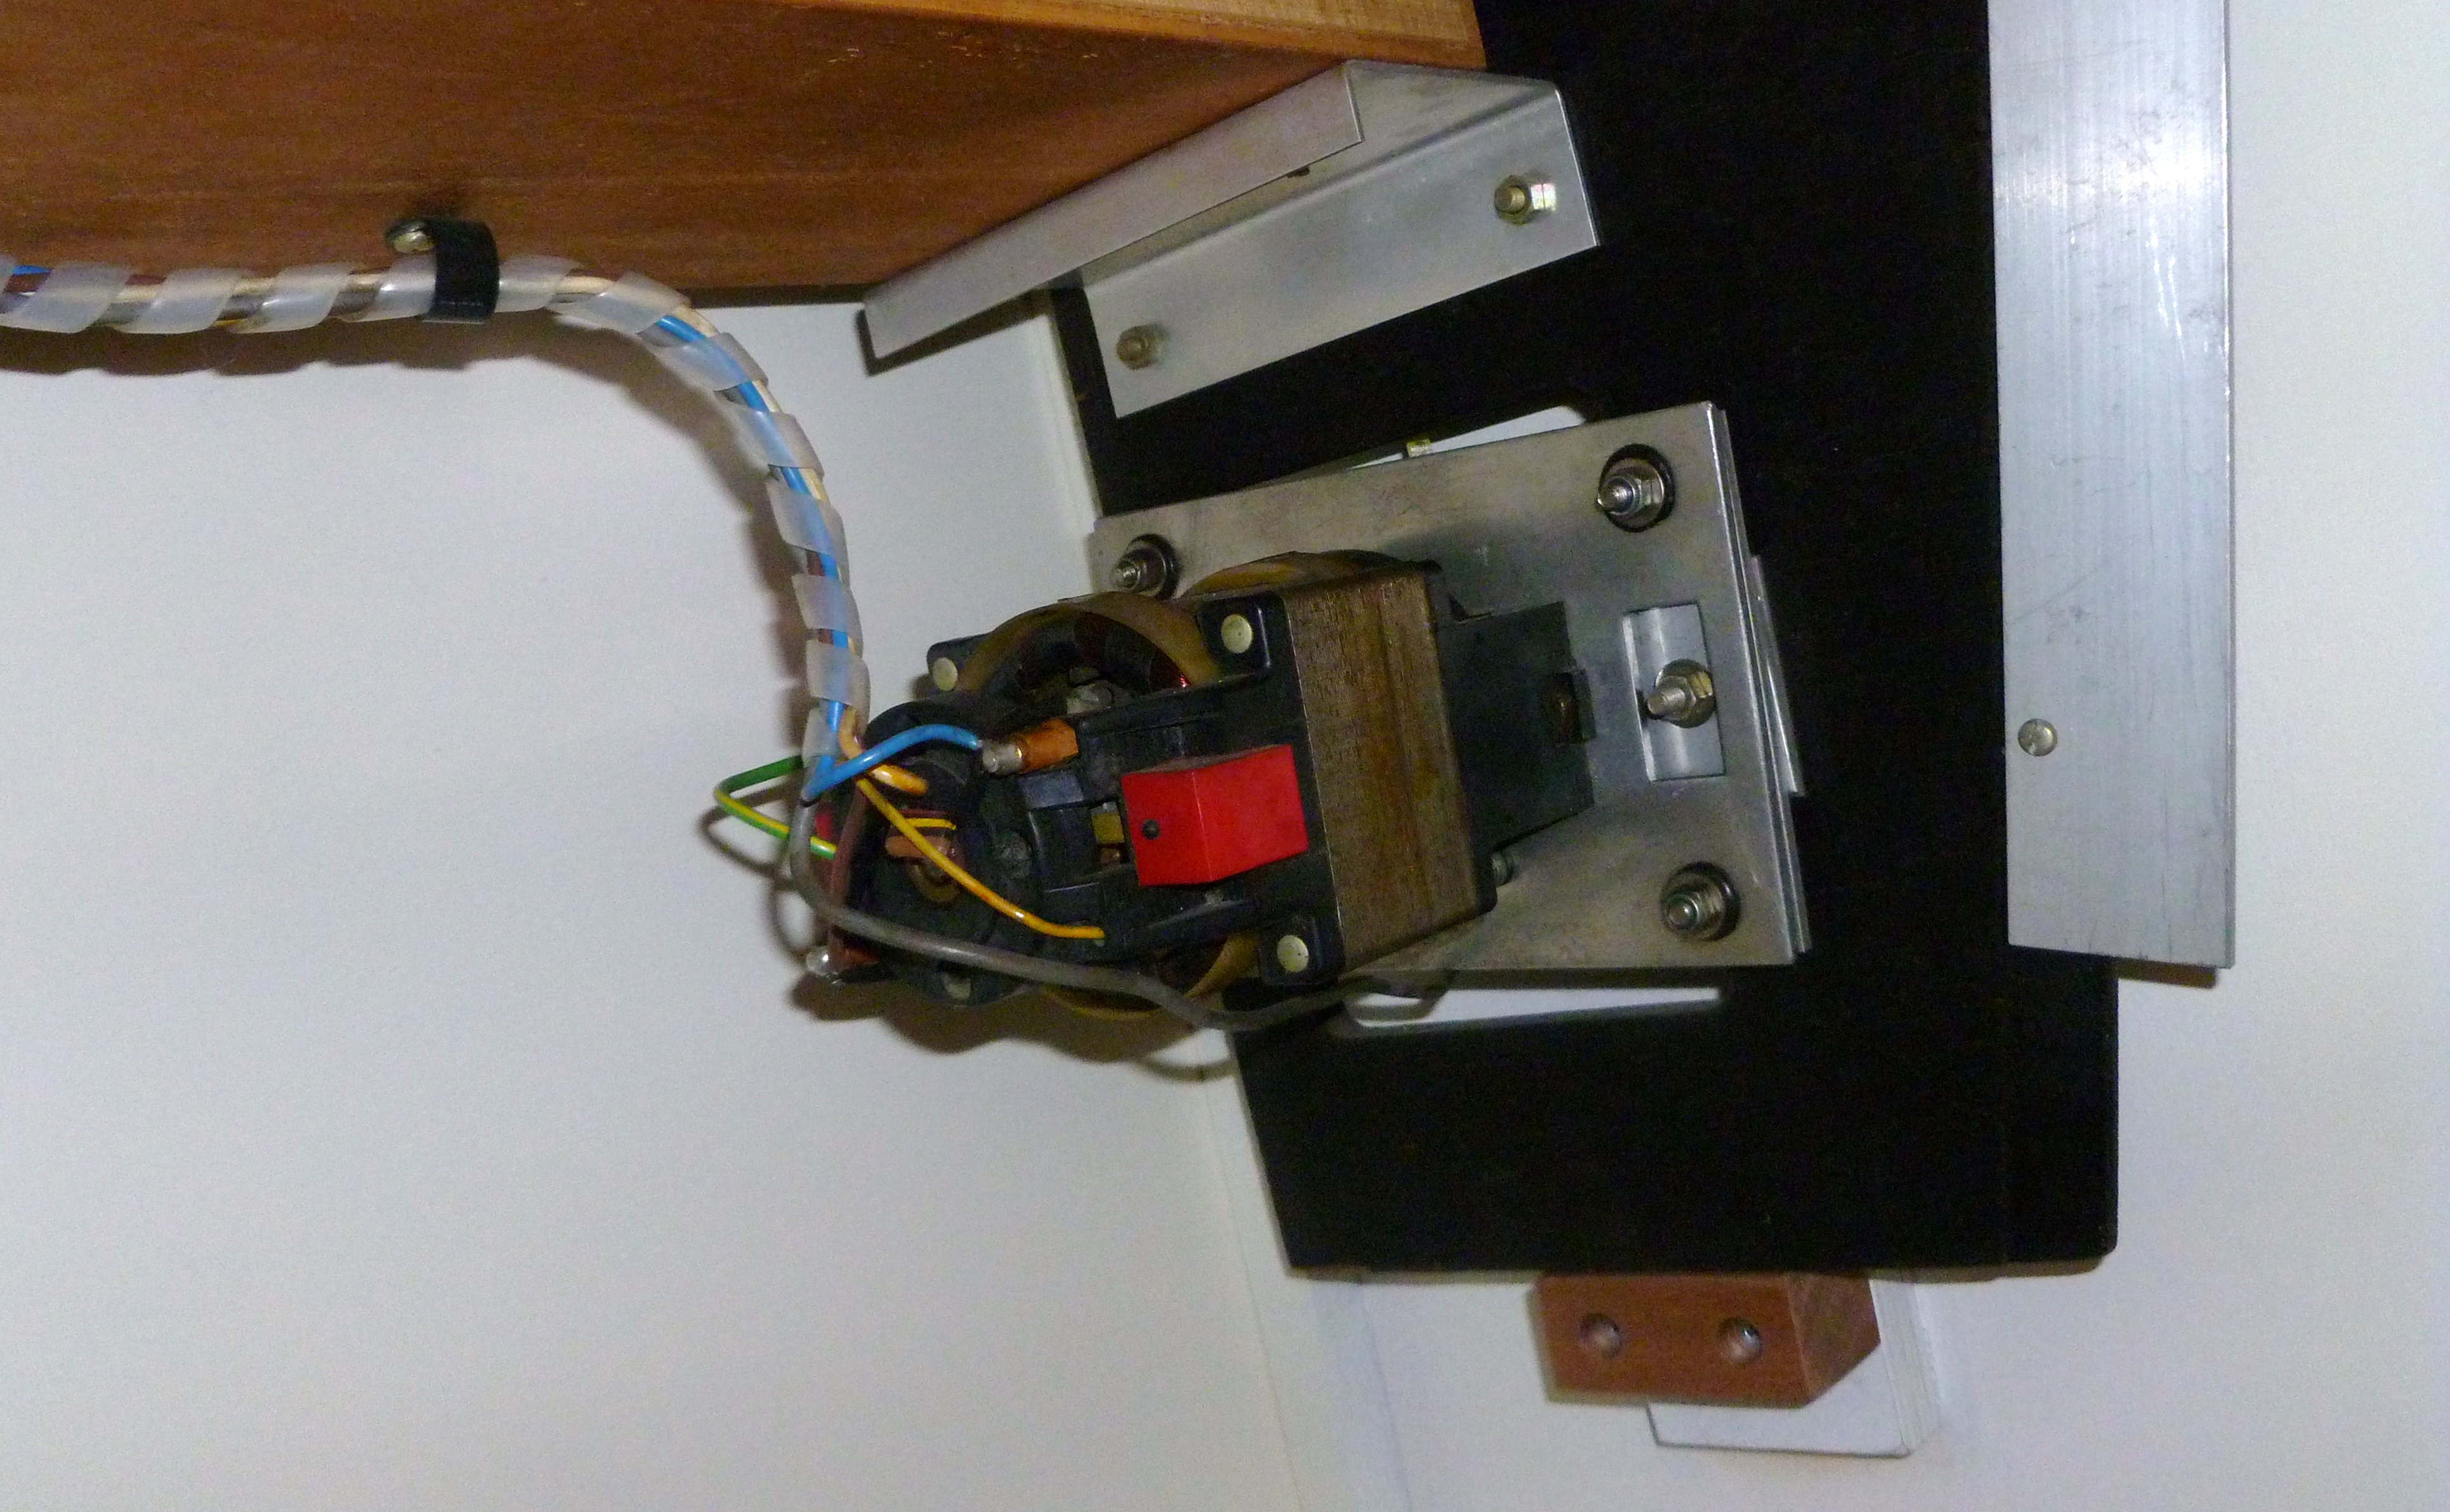 | |
| My EMI m400 morphs into a Streetly Gem! | P1000930 | 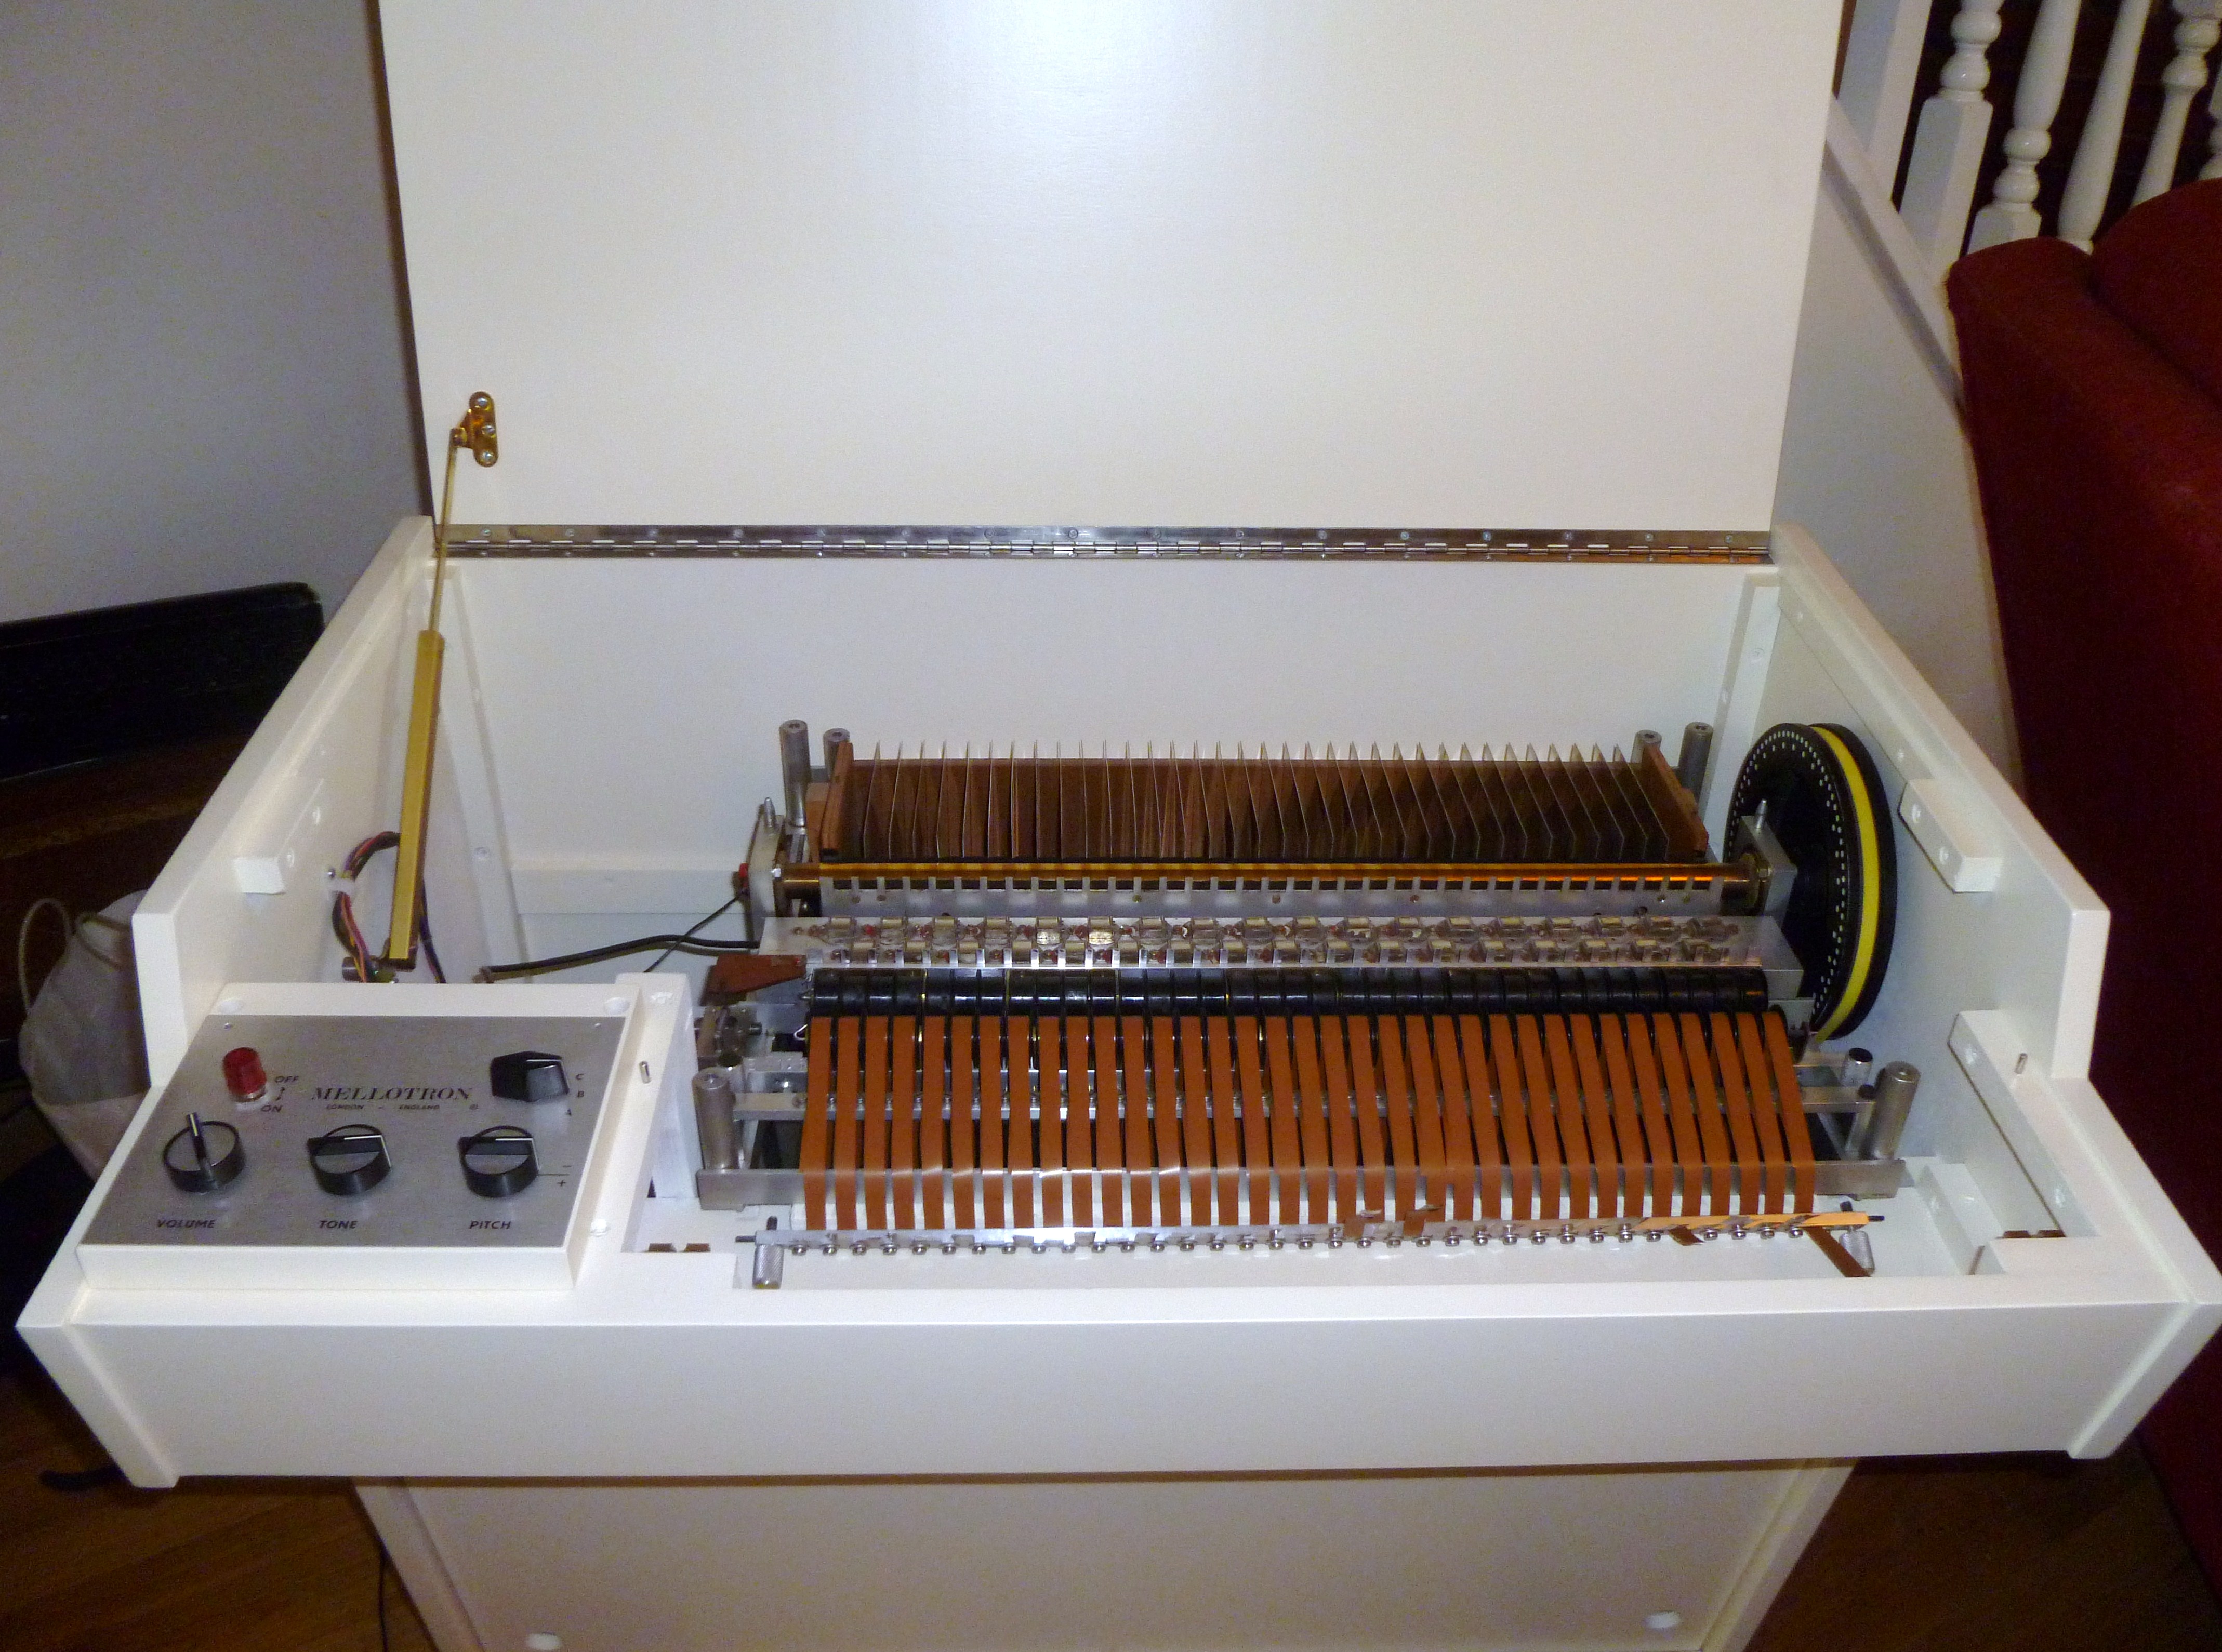 | |
| My EMI m400 morphs into a Streetly Gem! | P1000922 | 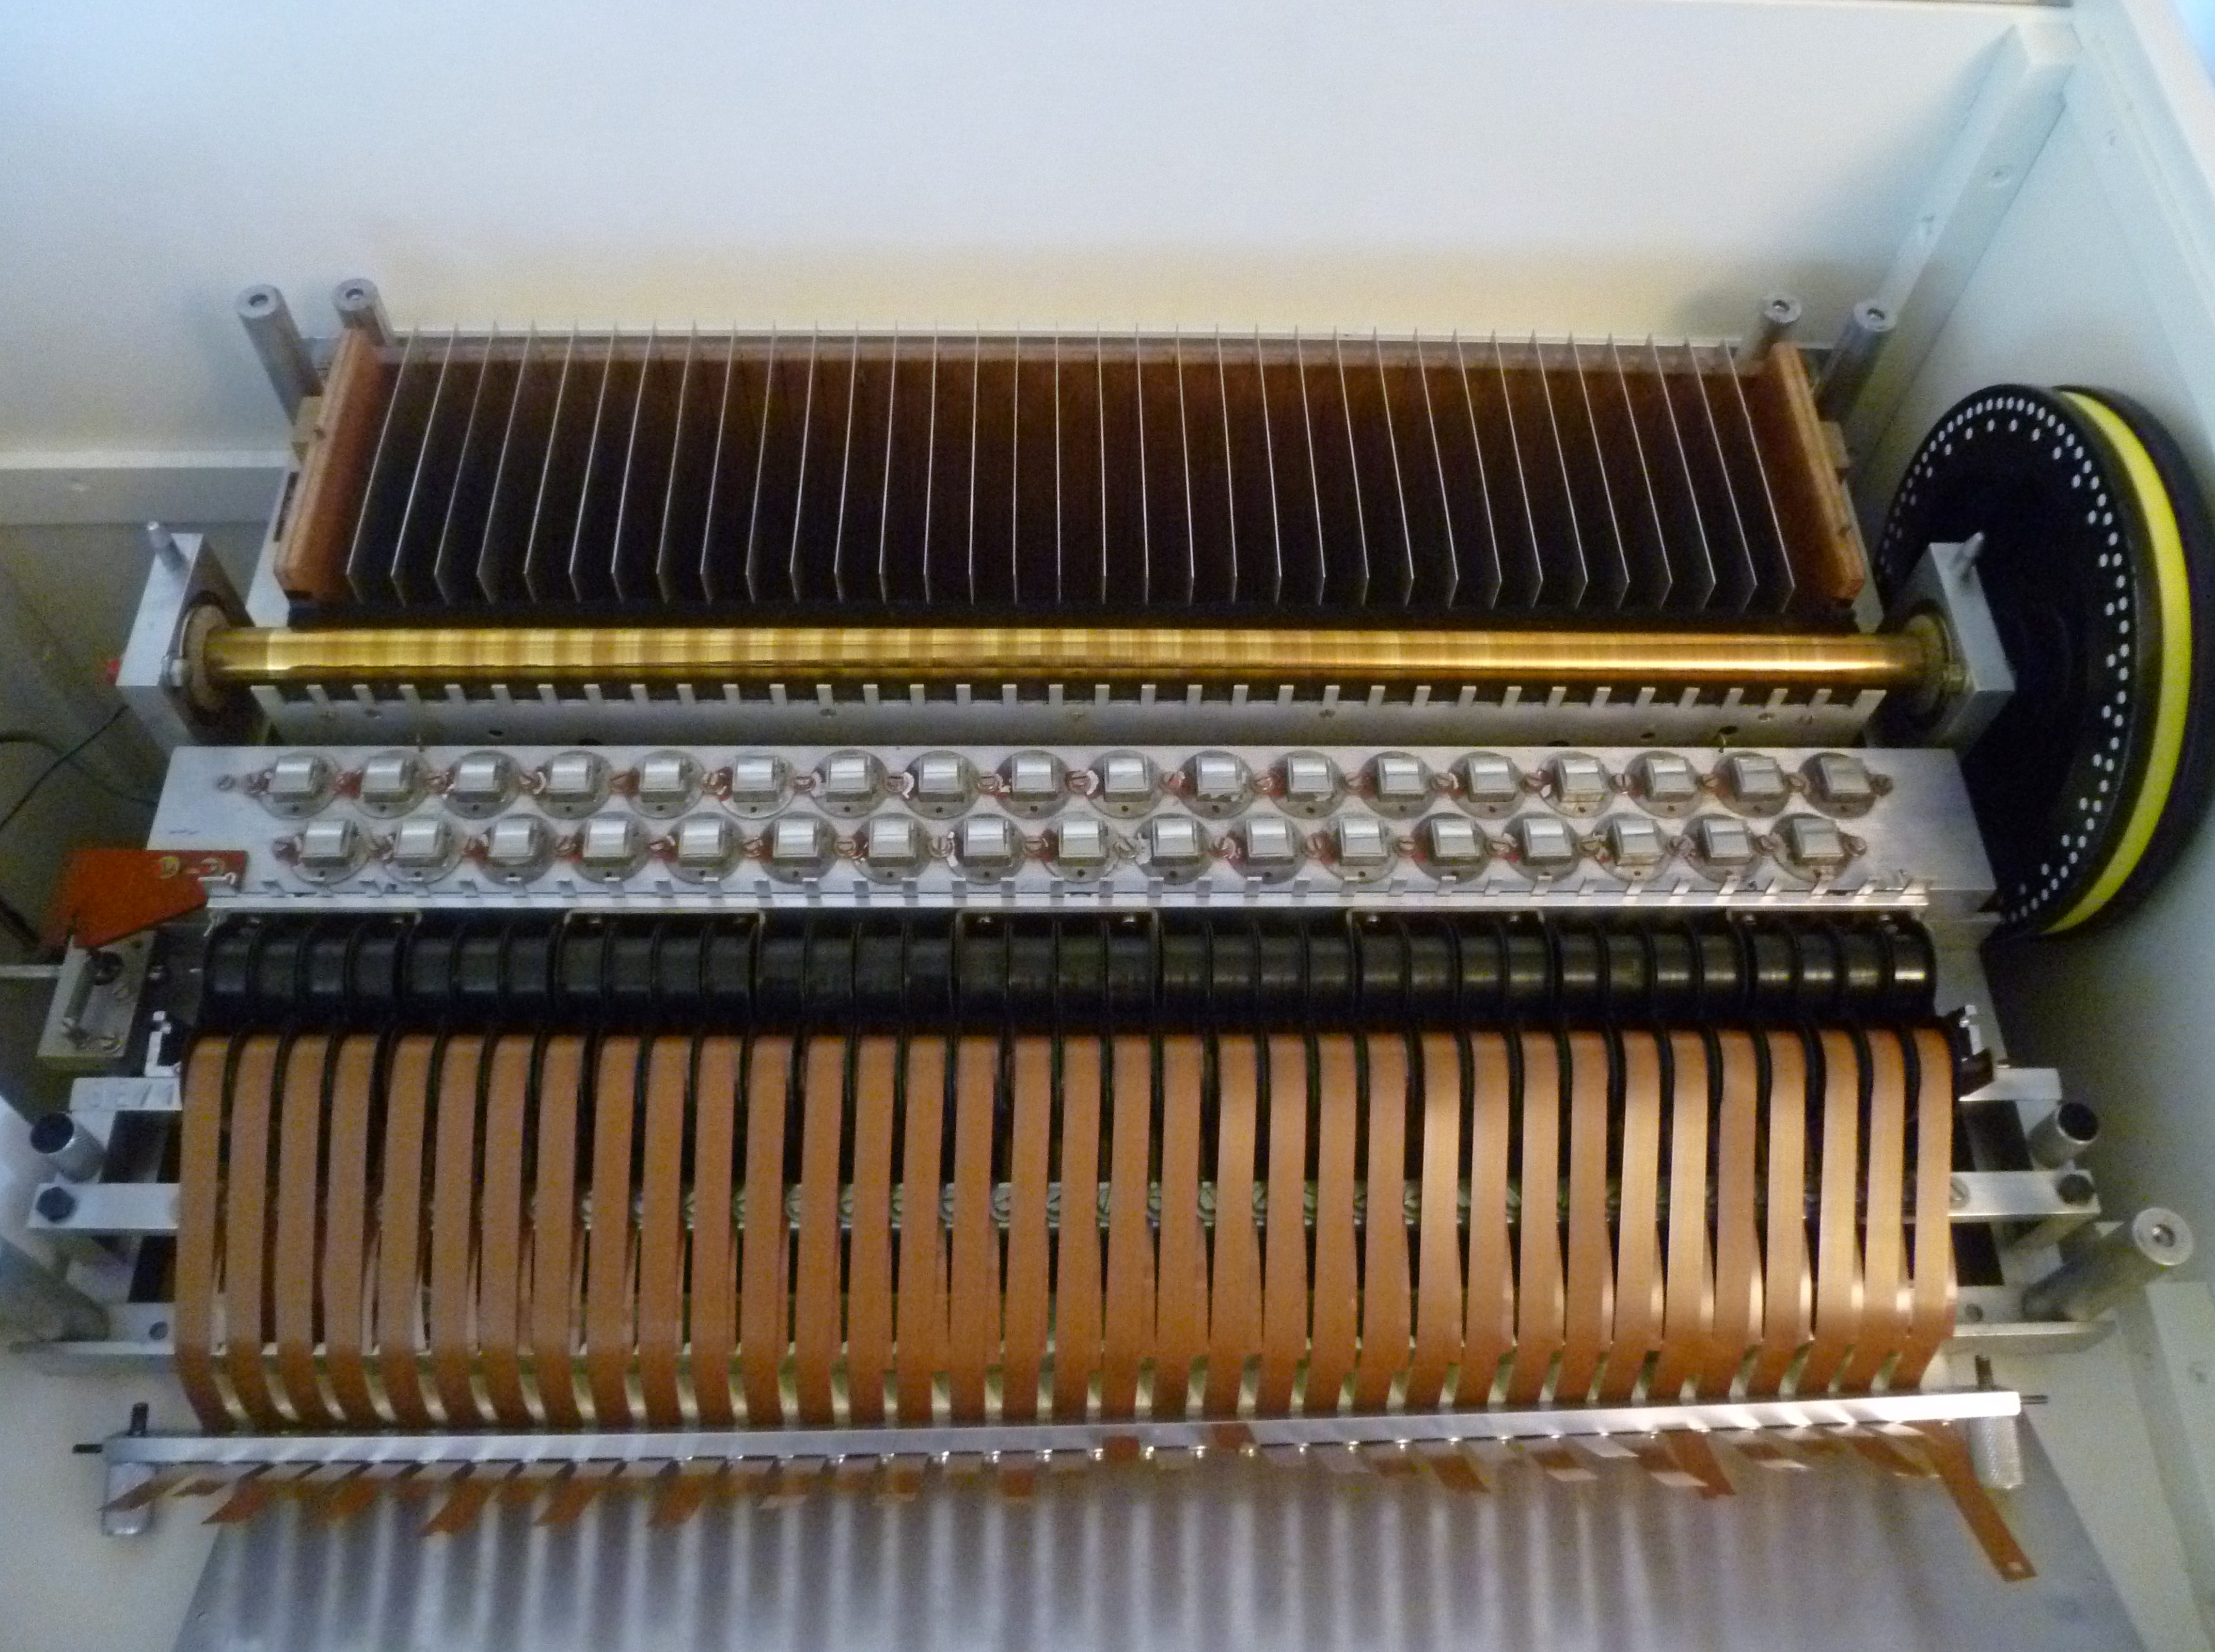 | |
| Pete'sNovatron Model 400SM/ Serial # M18 | DSCF1352 | 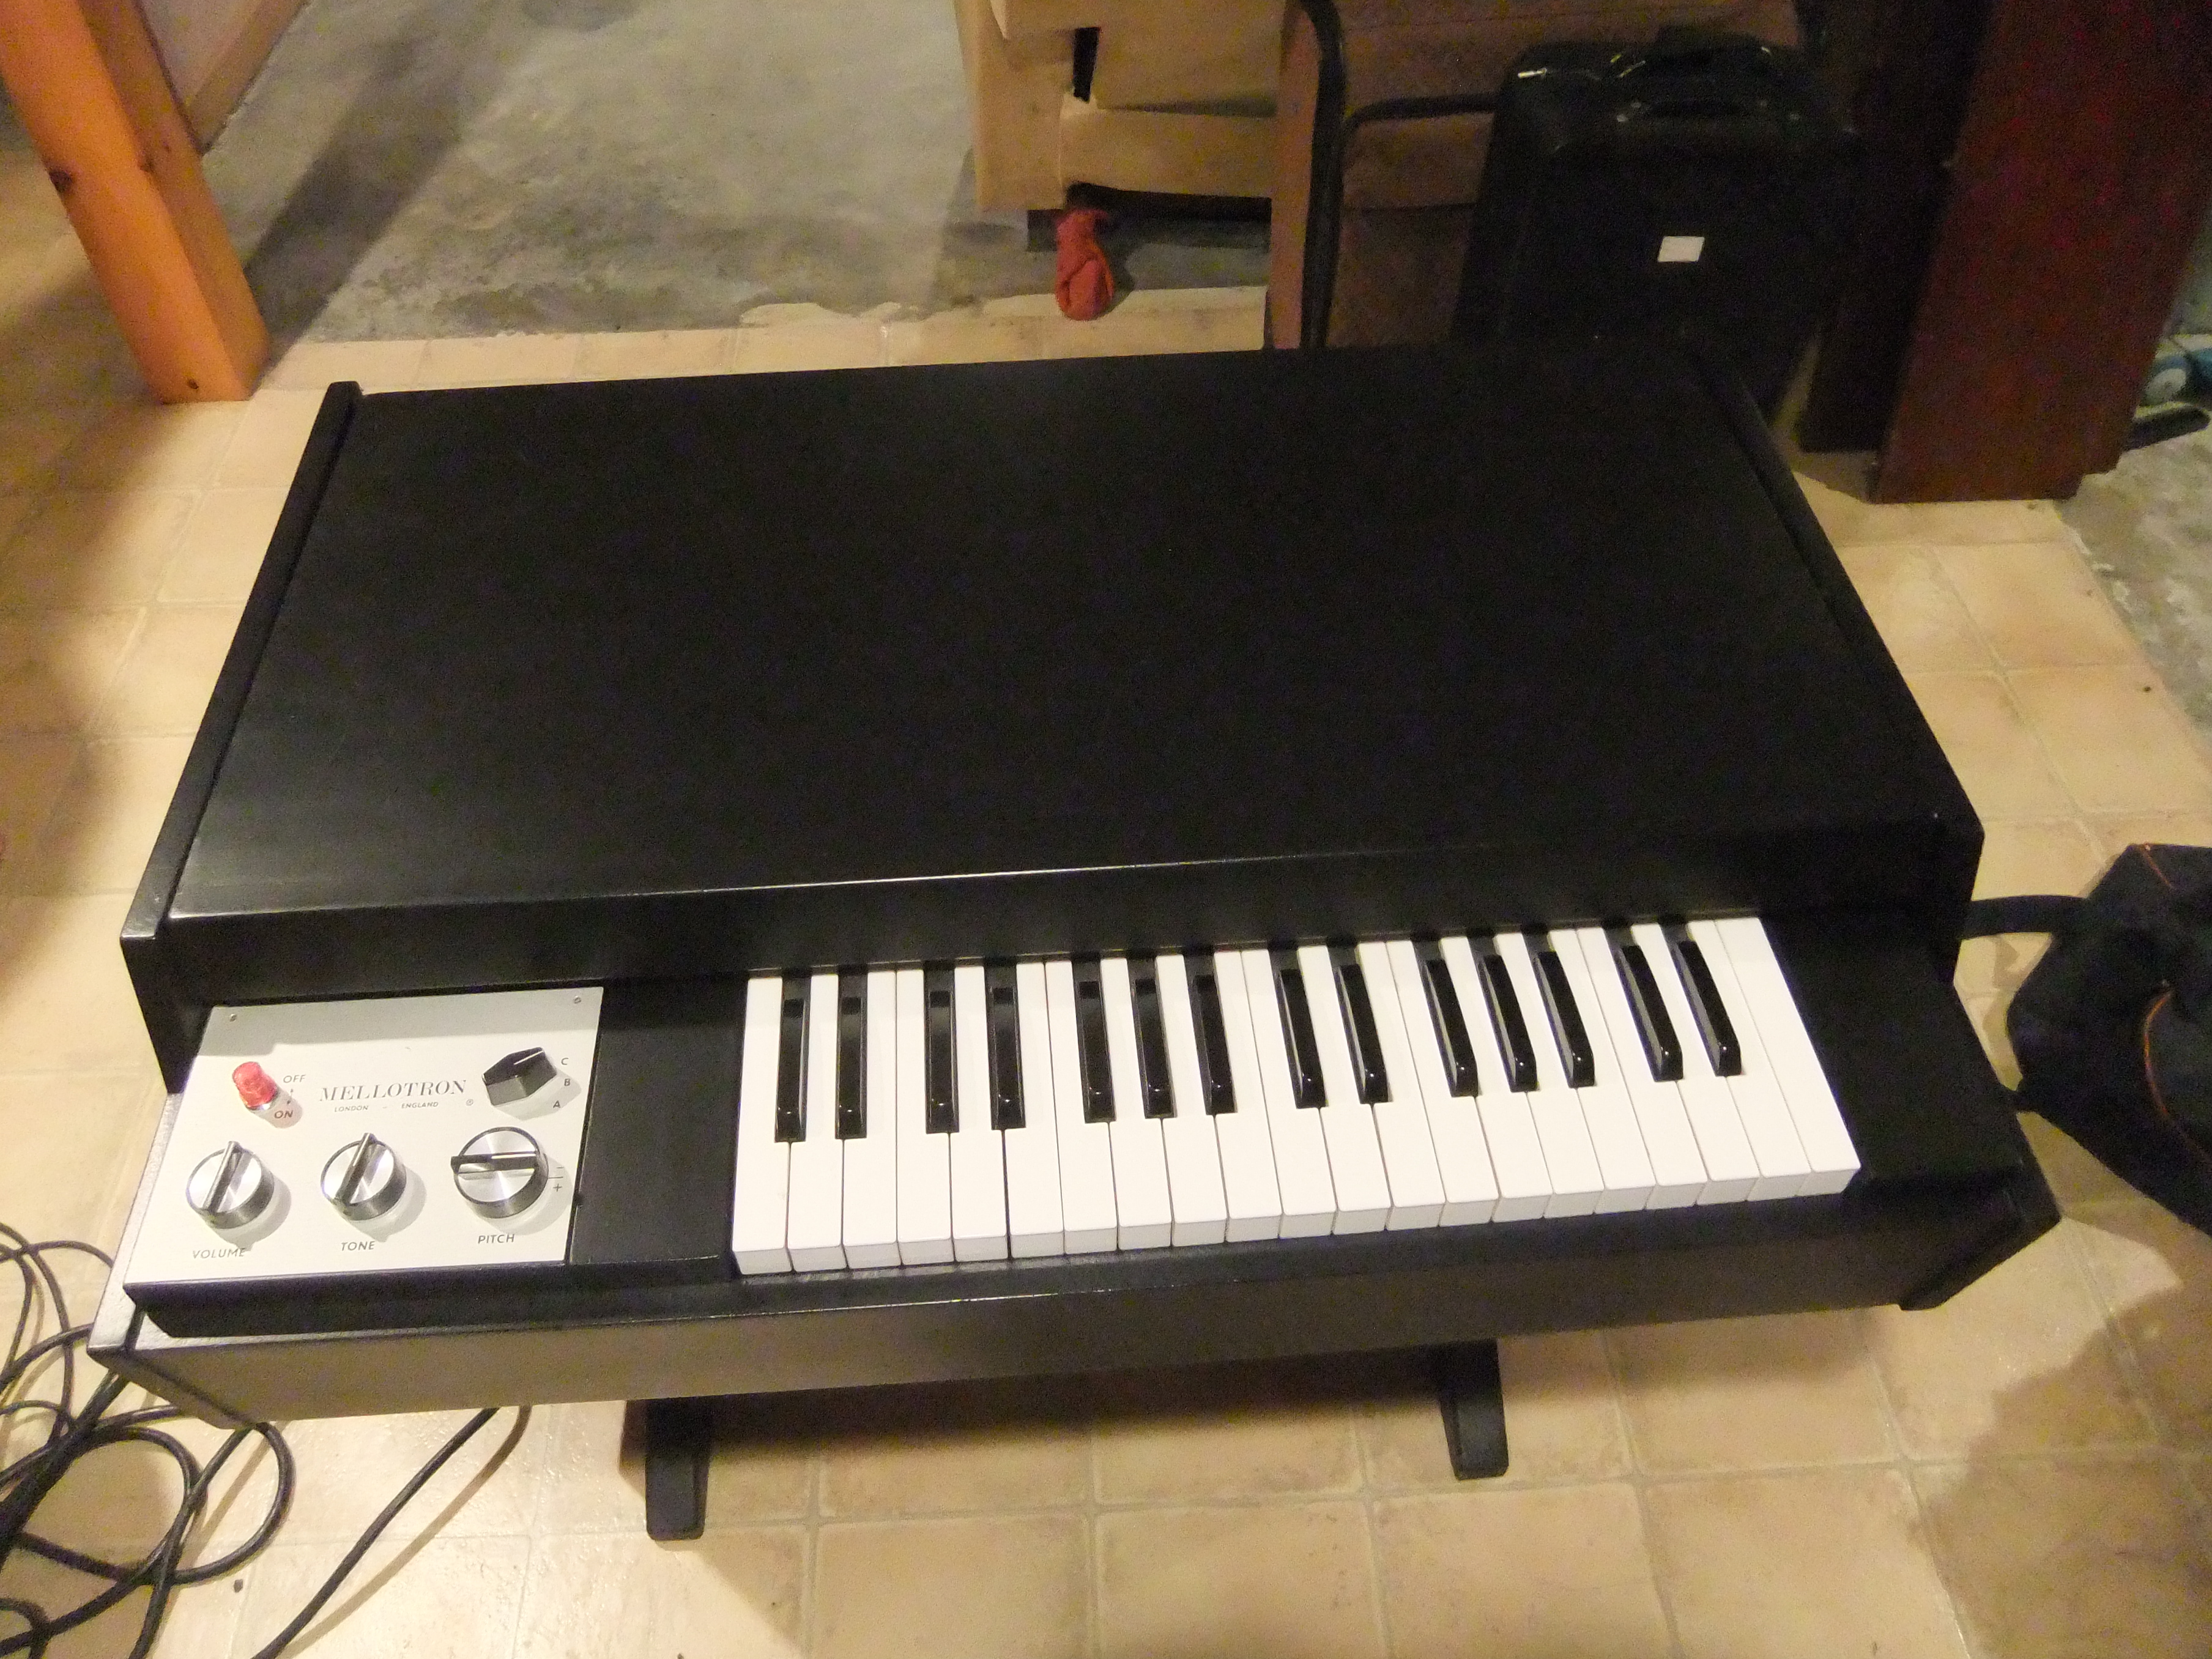 | |
| Rick Nielsen Exhibit "Ricks Picks" | Mellotron Timeline | 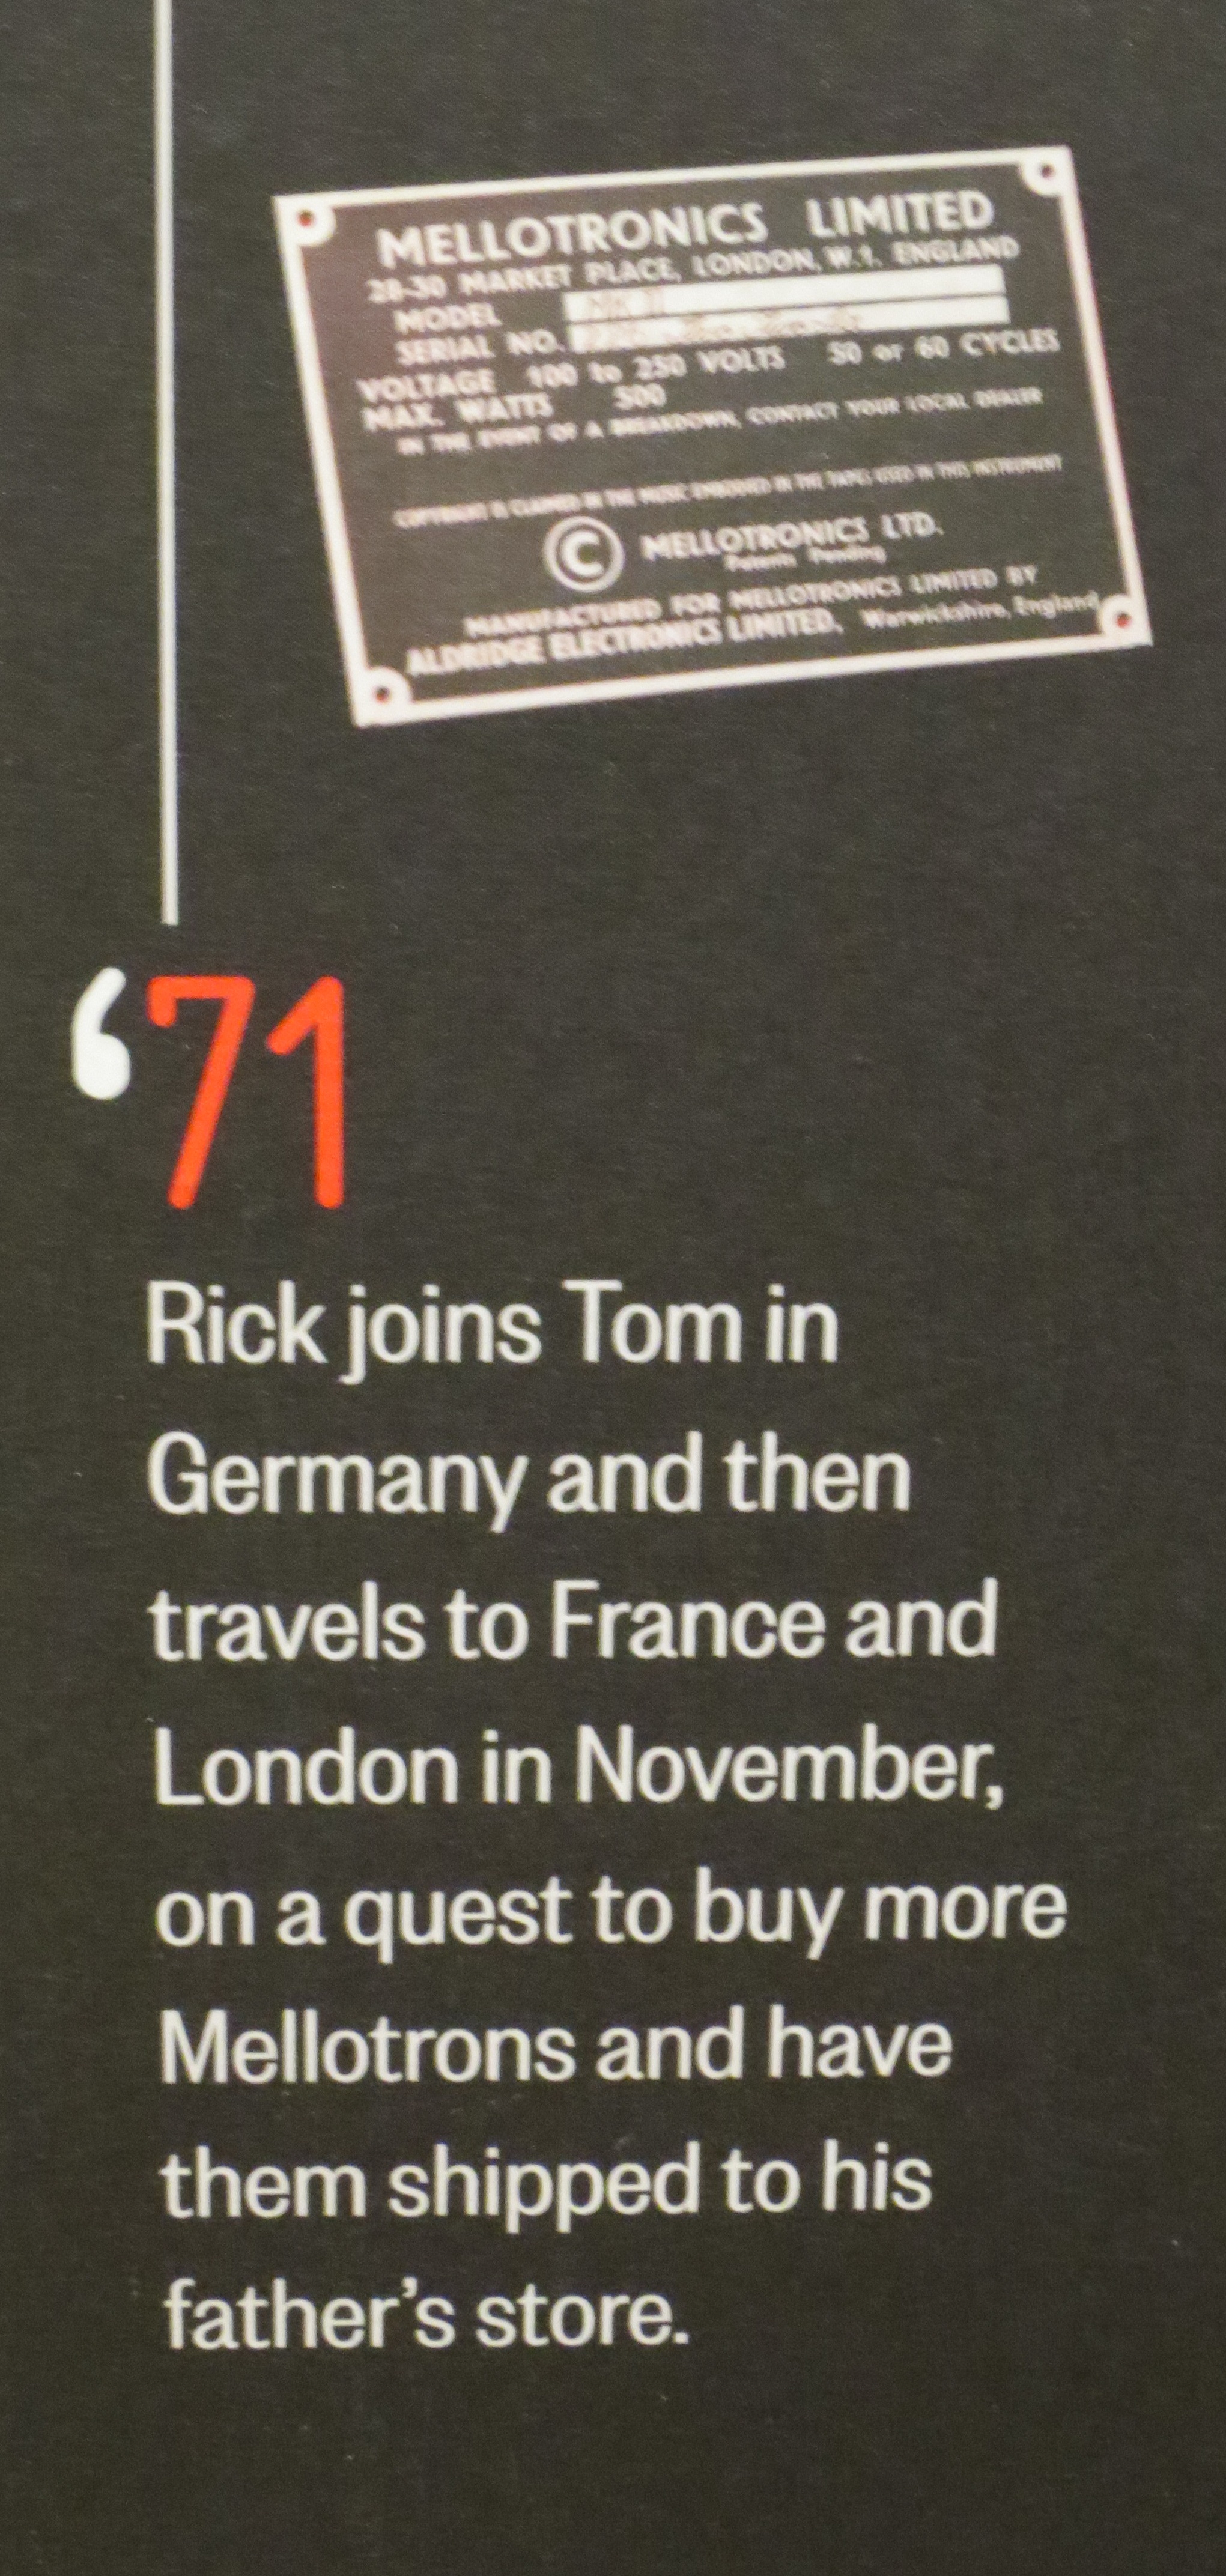 | |
| Rick Nielsen Exhibit "Ricks Picks" | Mellotron Label | 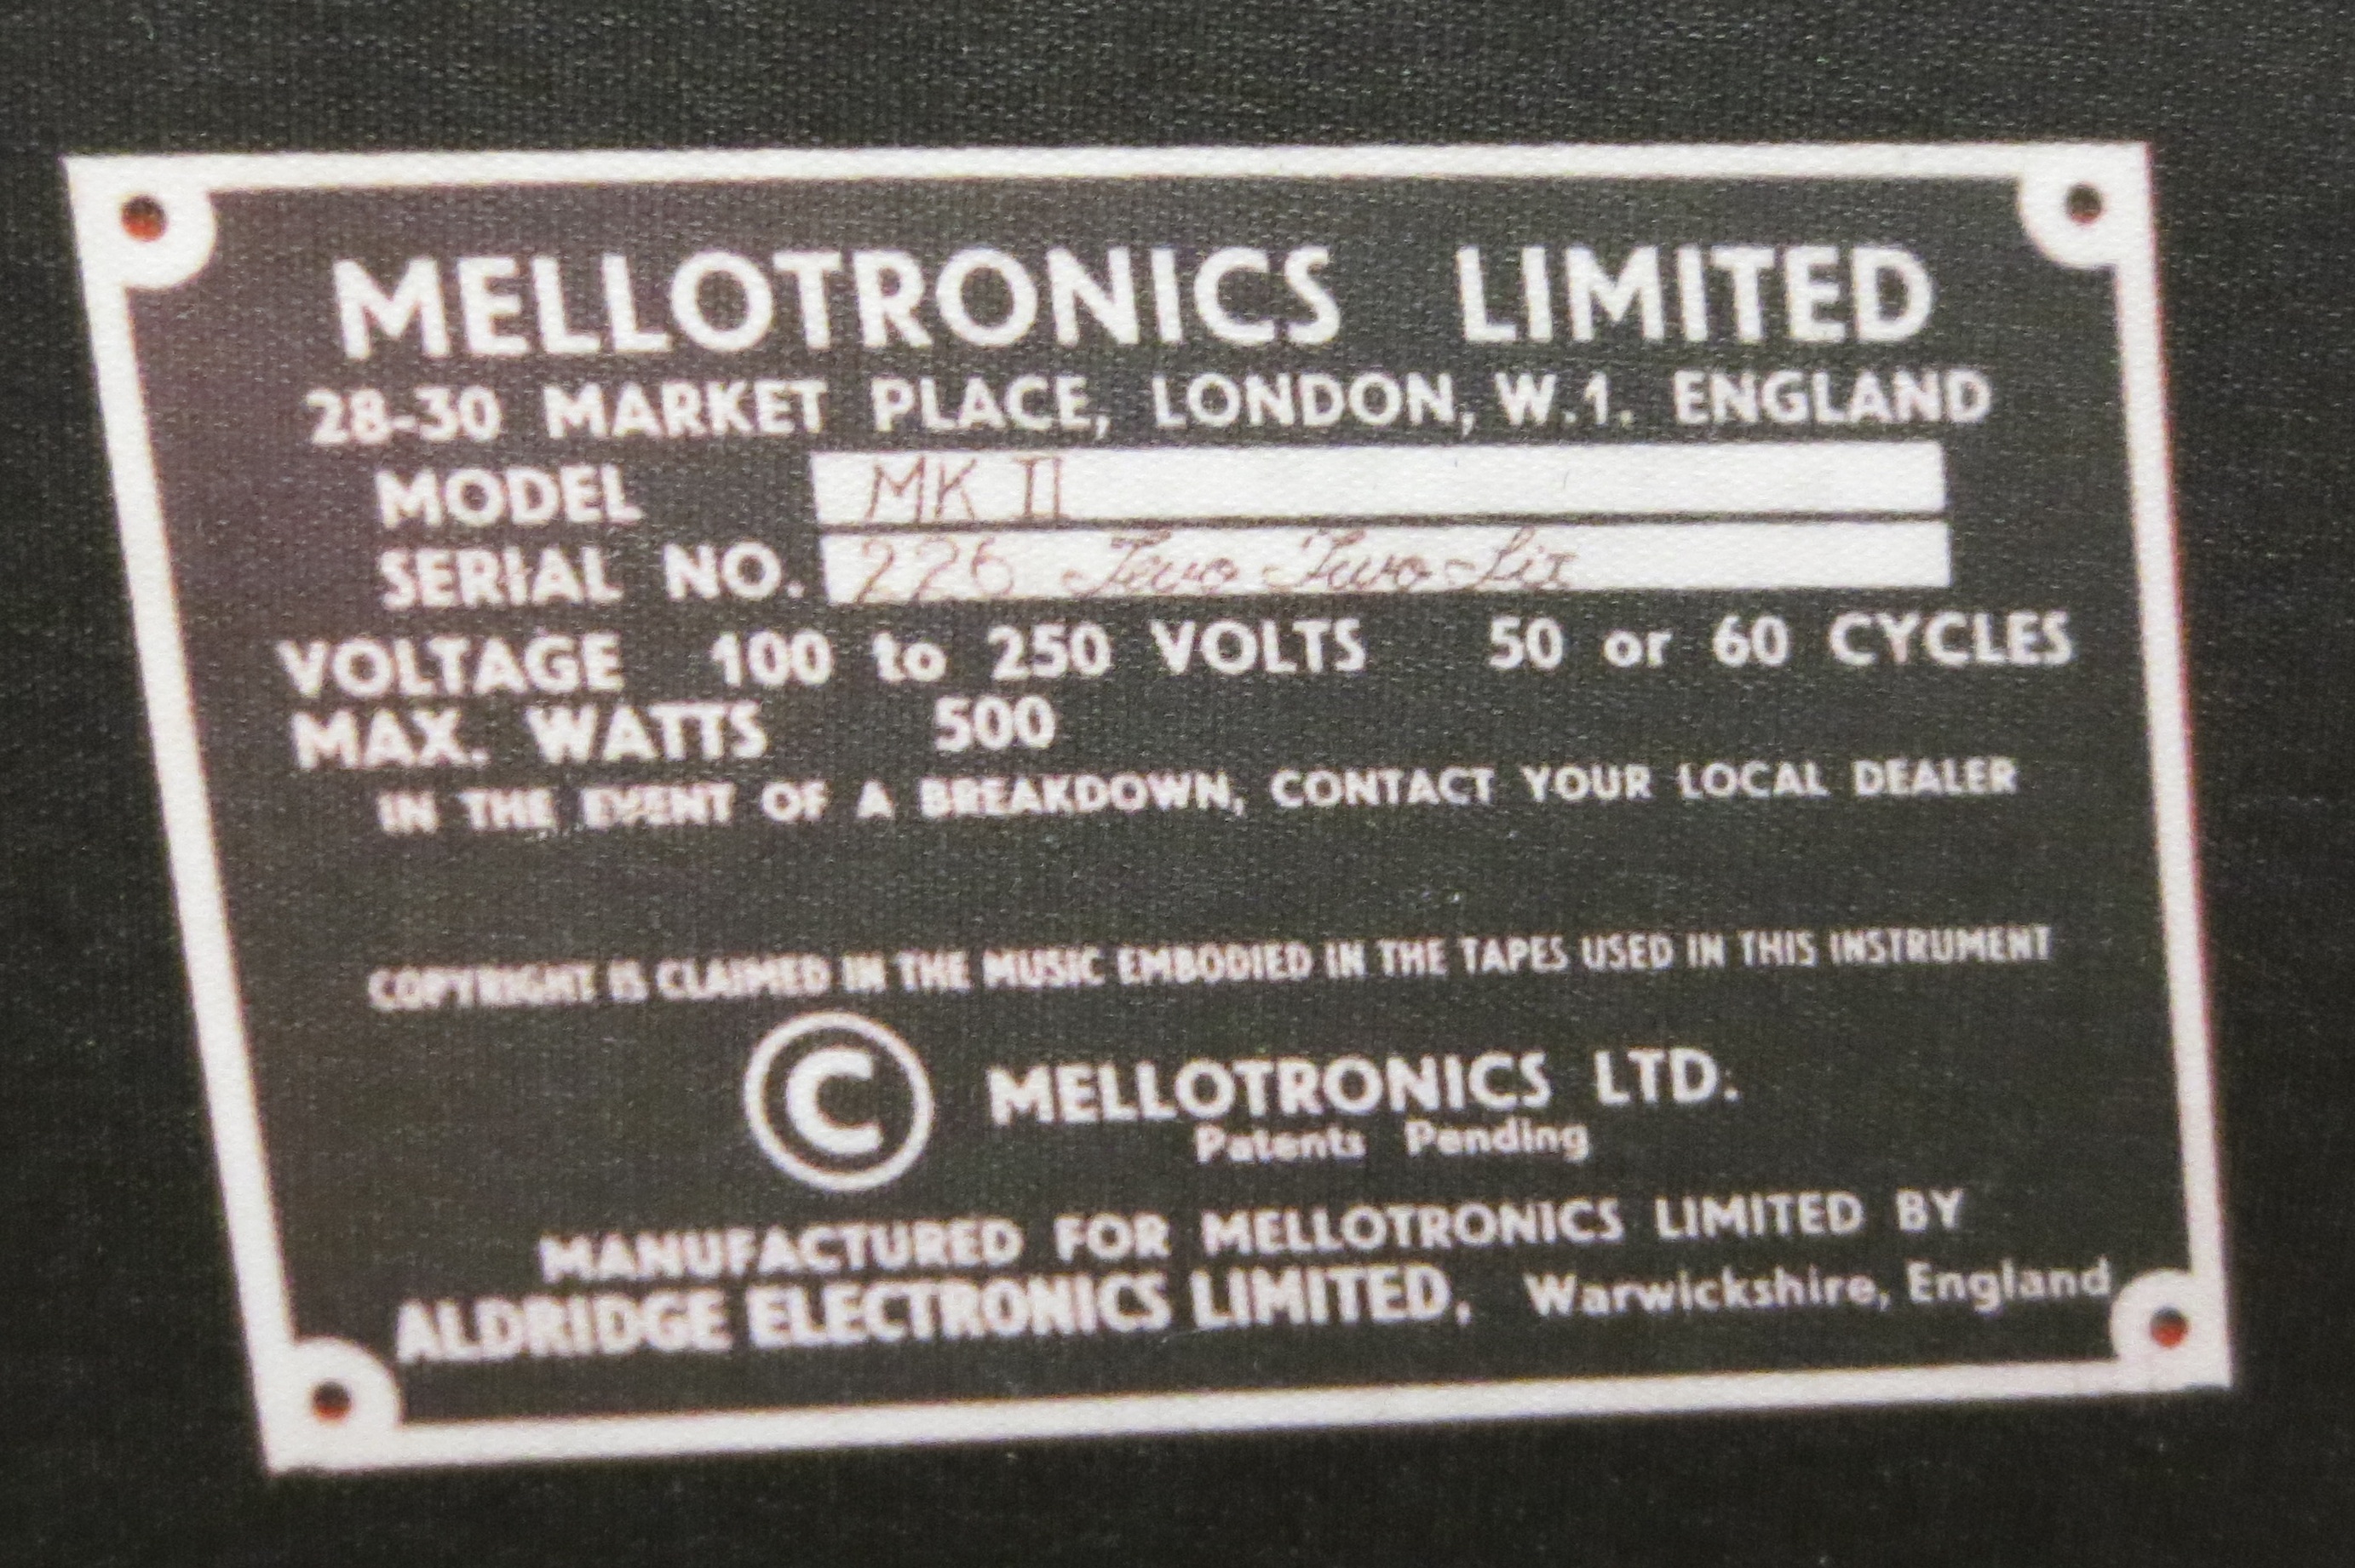 | |
| SKIP_TRON | SKIP_TRON_7 |  | |
| SKIP_TRON | SKIP_TRON_2 |  | |
| SKIP_TRON | SKIP_TRON_13 |  | |
| SKIP_TRON | SKIP_TRON_6 |  | |
| SKIP_TRON | SKIP_TRON_15 |  | |
| SKIP_TRON | SKIP_TRON_5 |  | |
| SKIP_TRON | SKIP_TRON_12 | 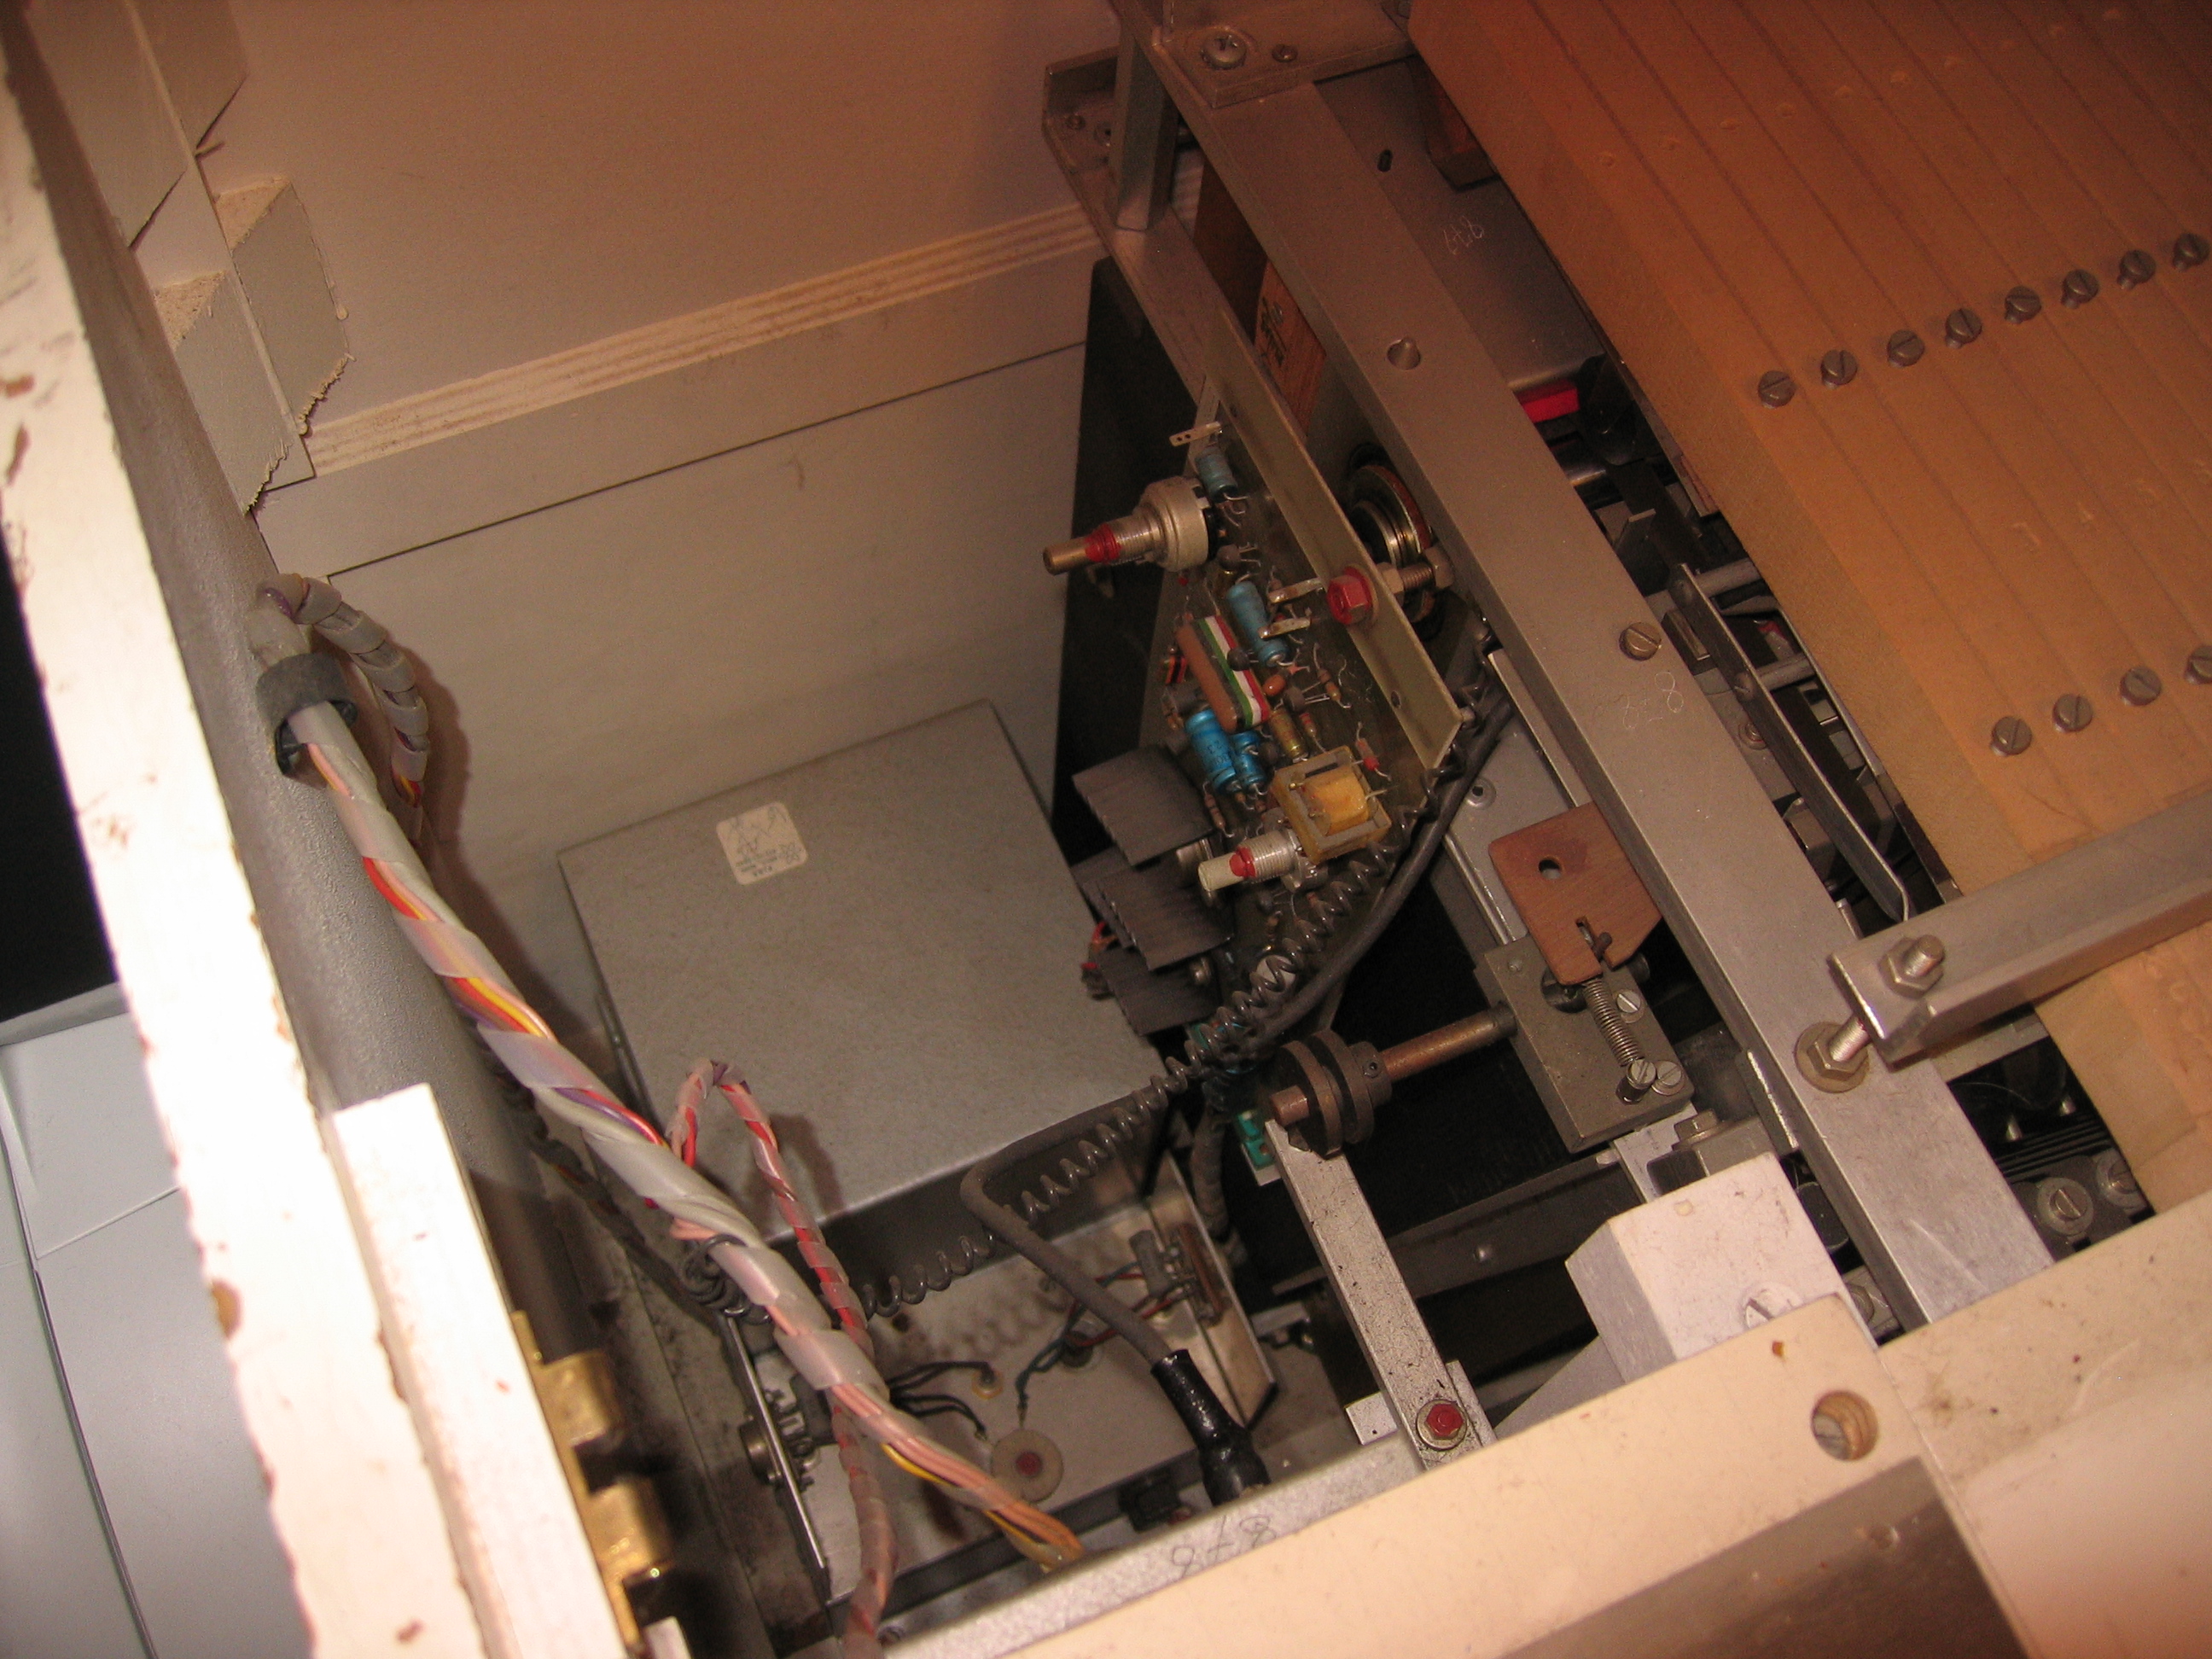 | |
| SKIP_TRON | SKIP_TRON_17 |  | |
| SKIP_TRON | SKIP_TRON_10 |  | |
| SKIP_TRON | SKIP_TRON_4 |  | |
| SKIP_TRON | SKIP_TRON_14 |  | |
| SKIP_TRON | SKIP_TRON_1 | 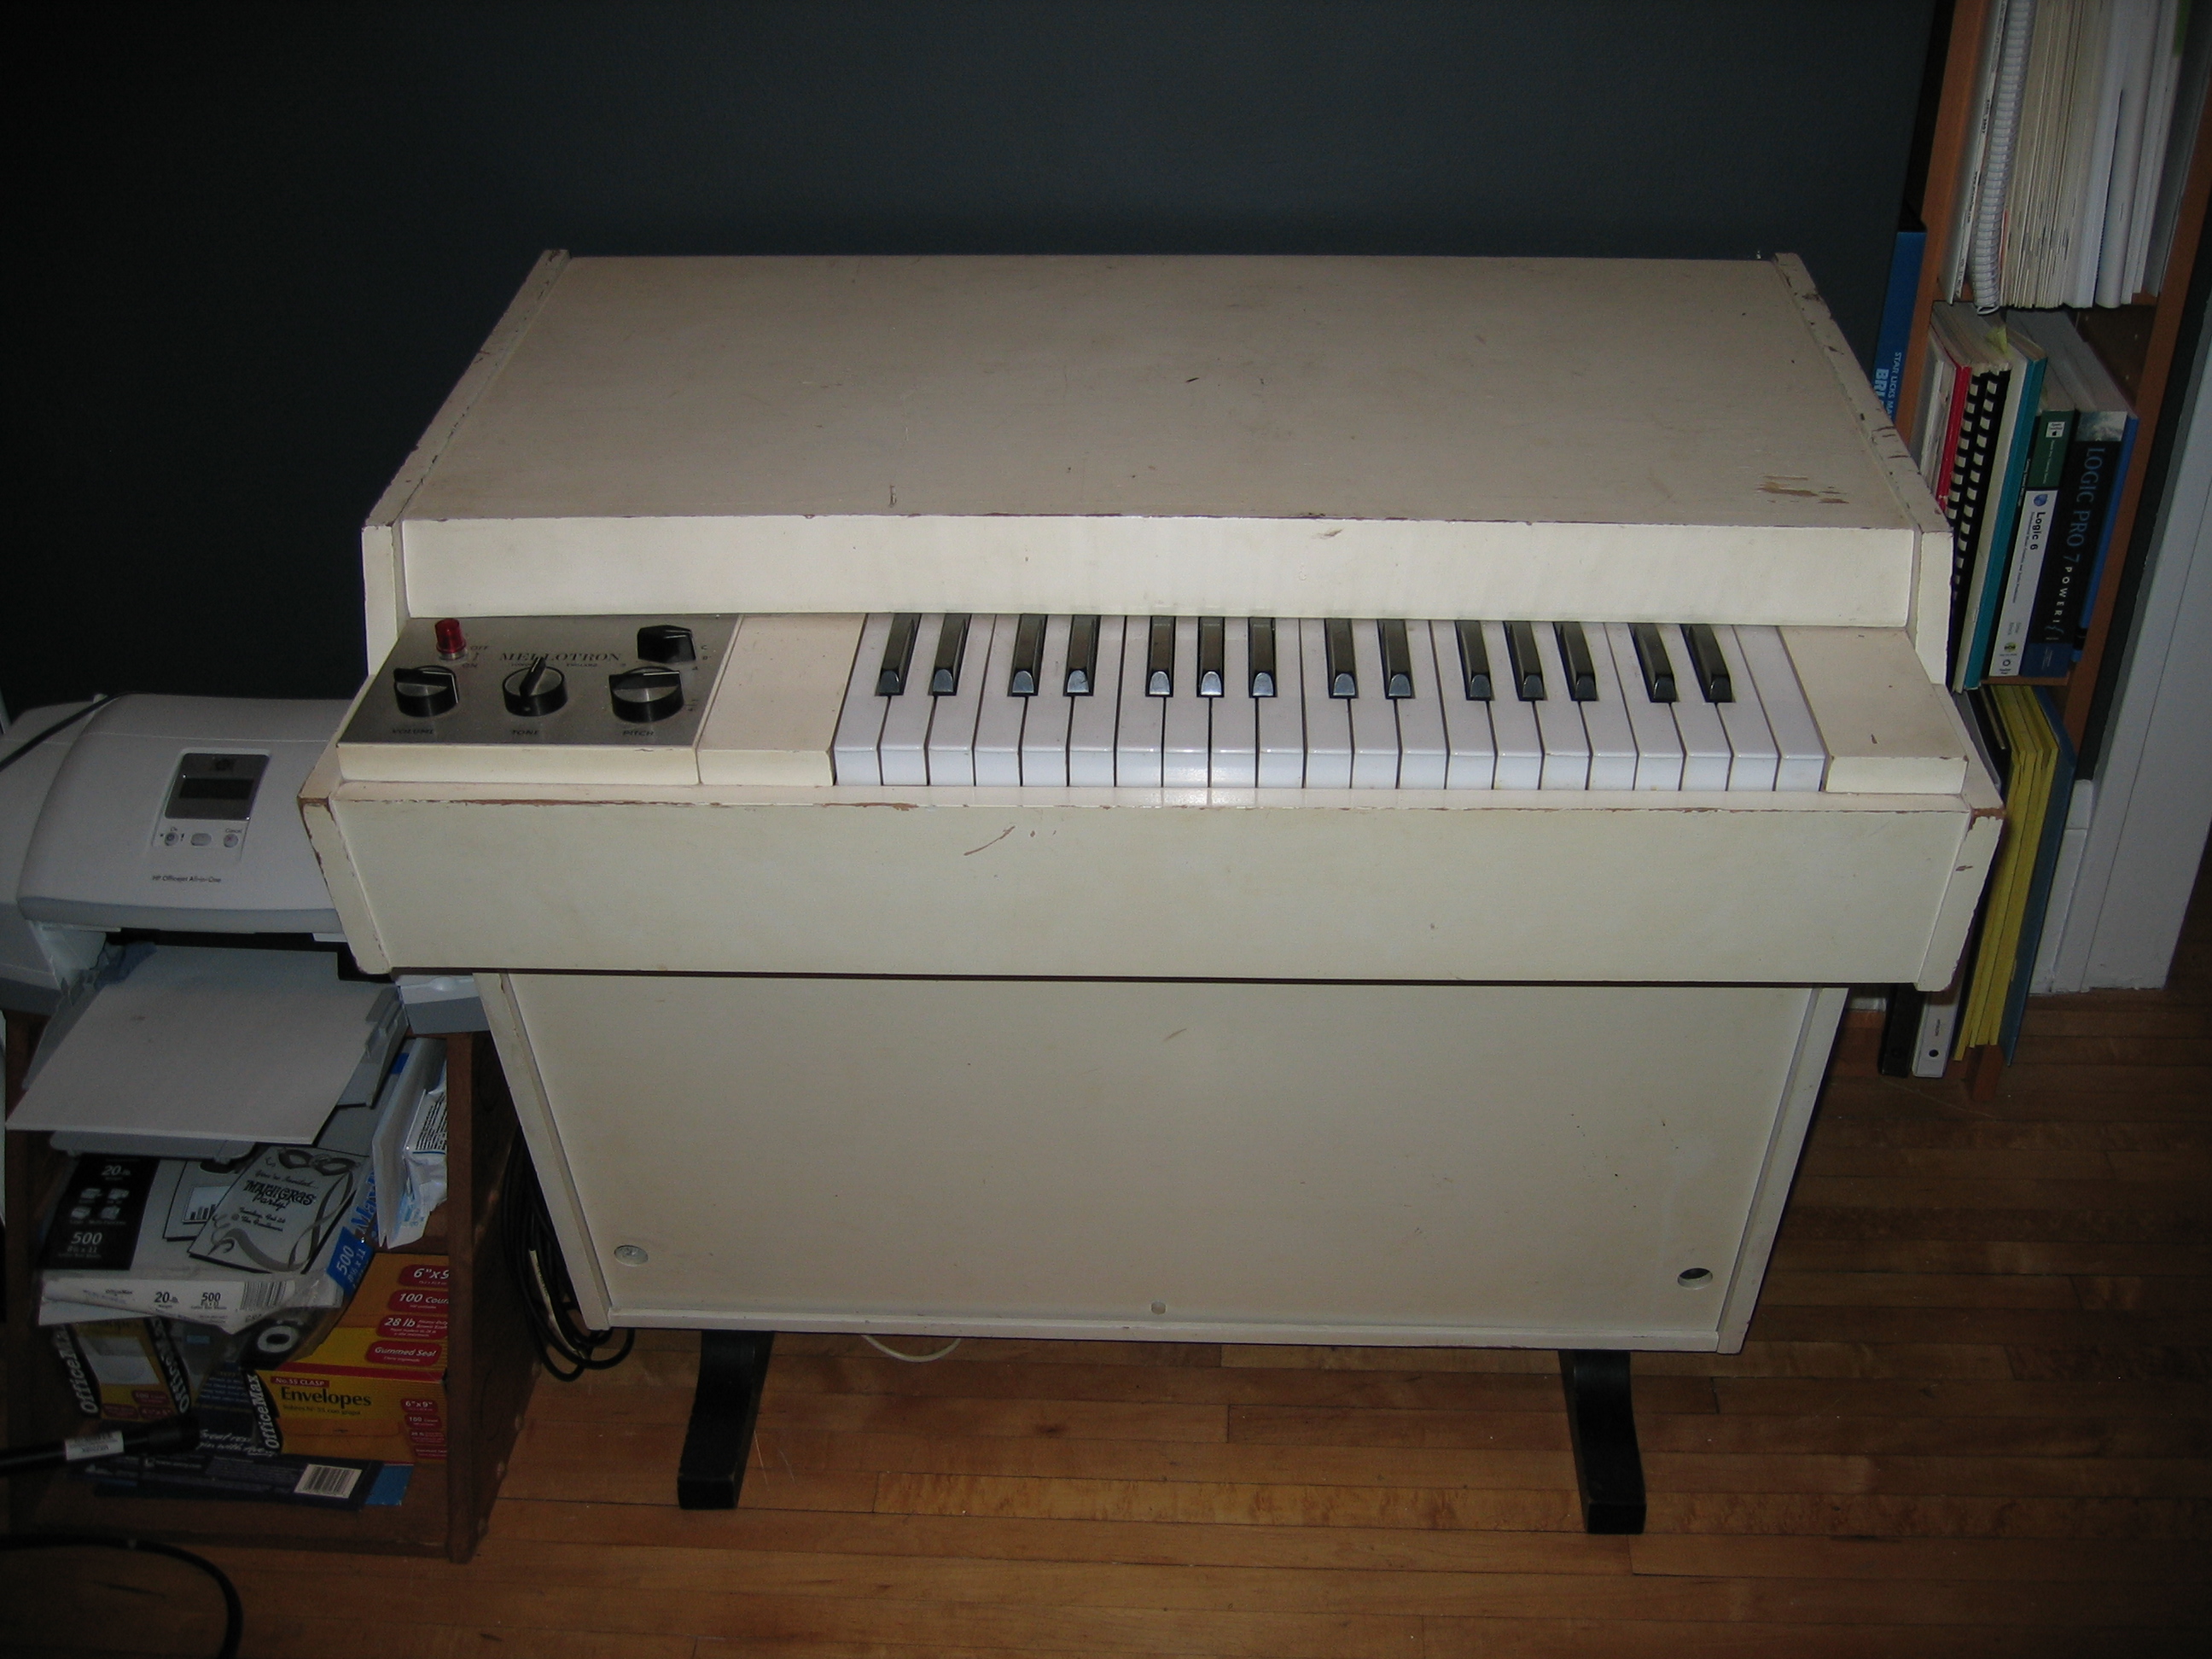 | |
| SKIP_TRON | SKIP_TRON_9 | 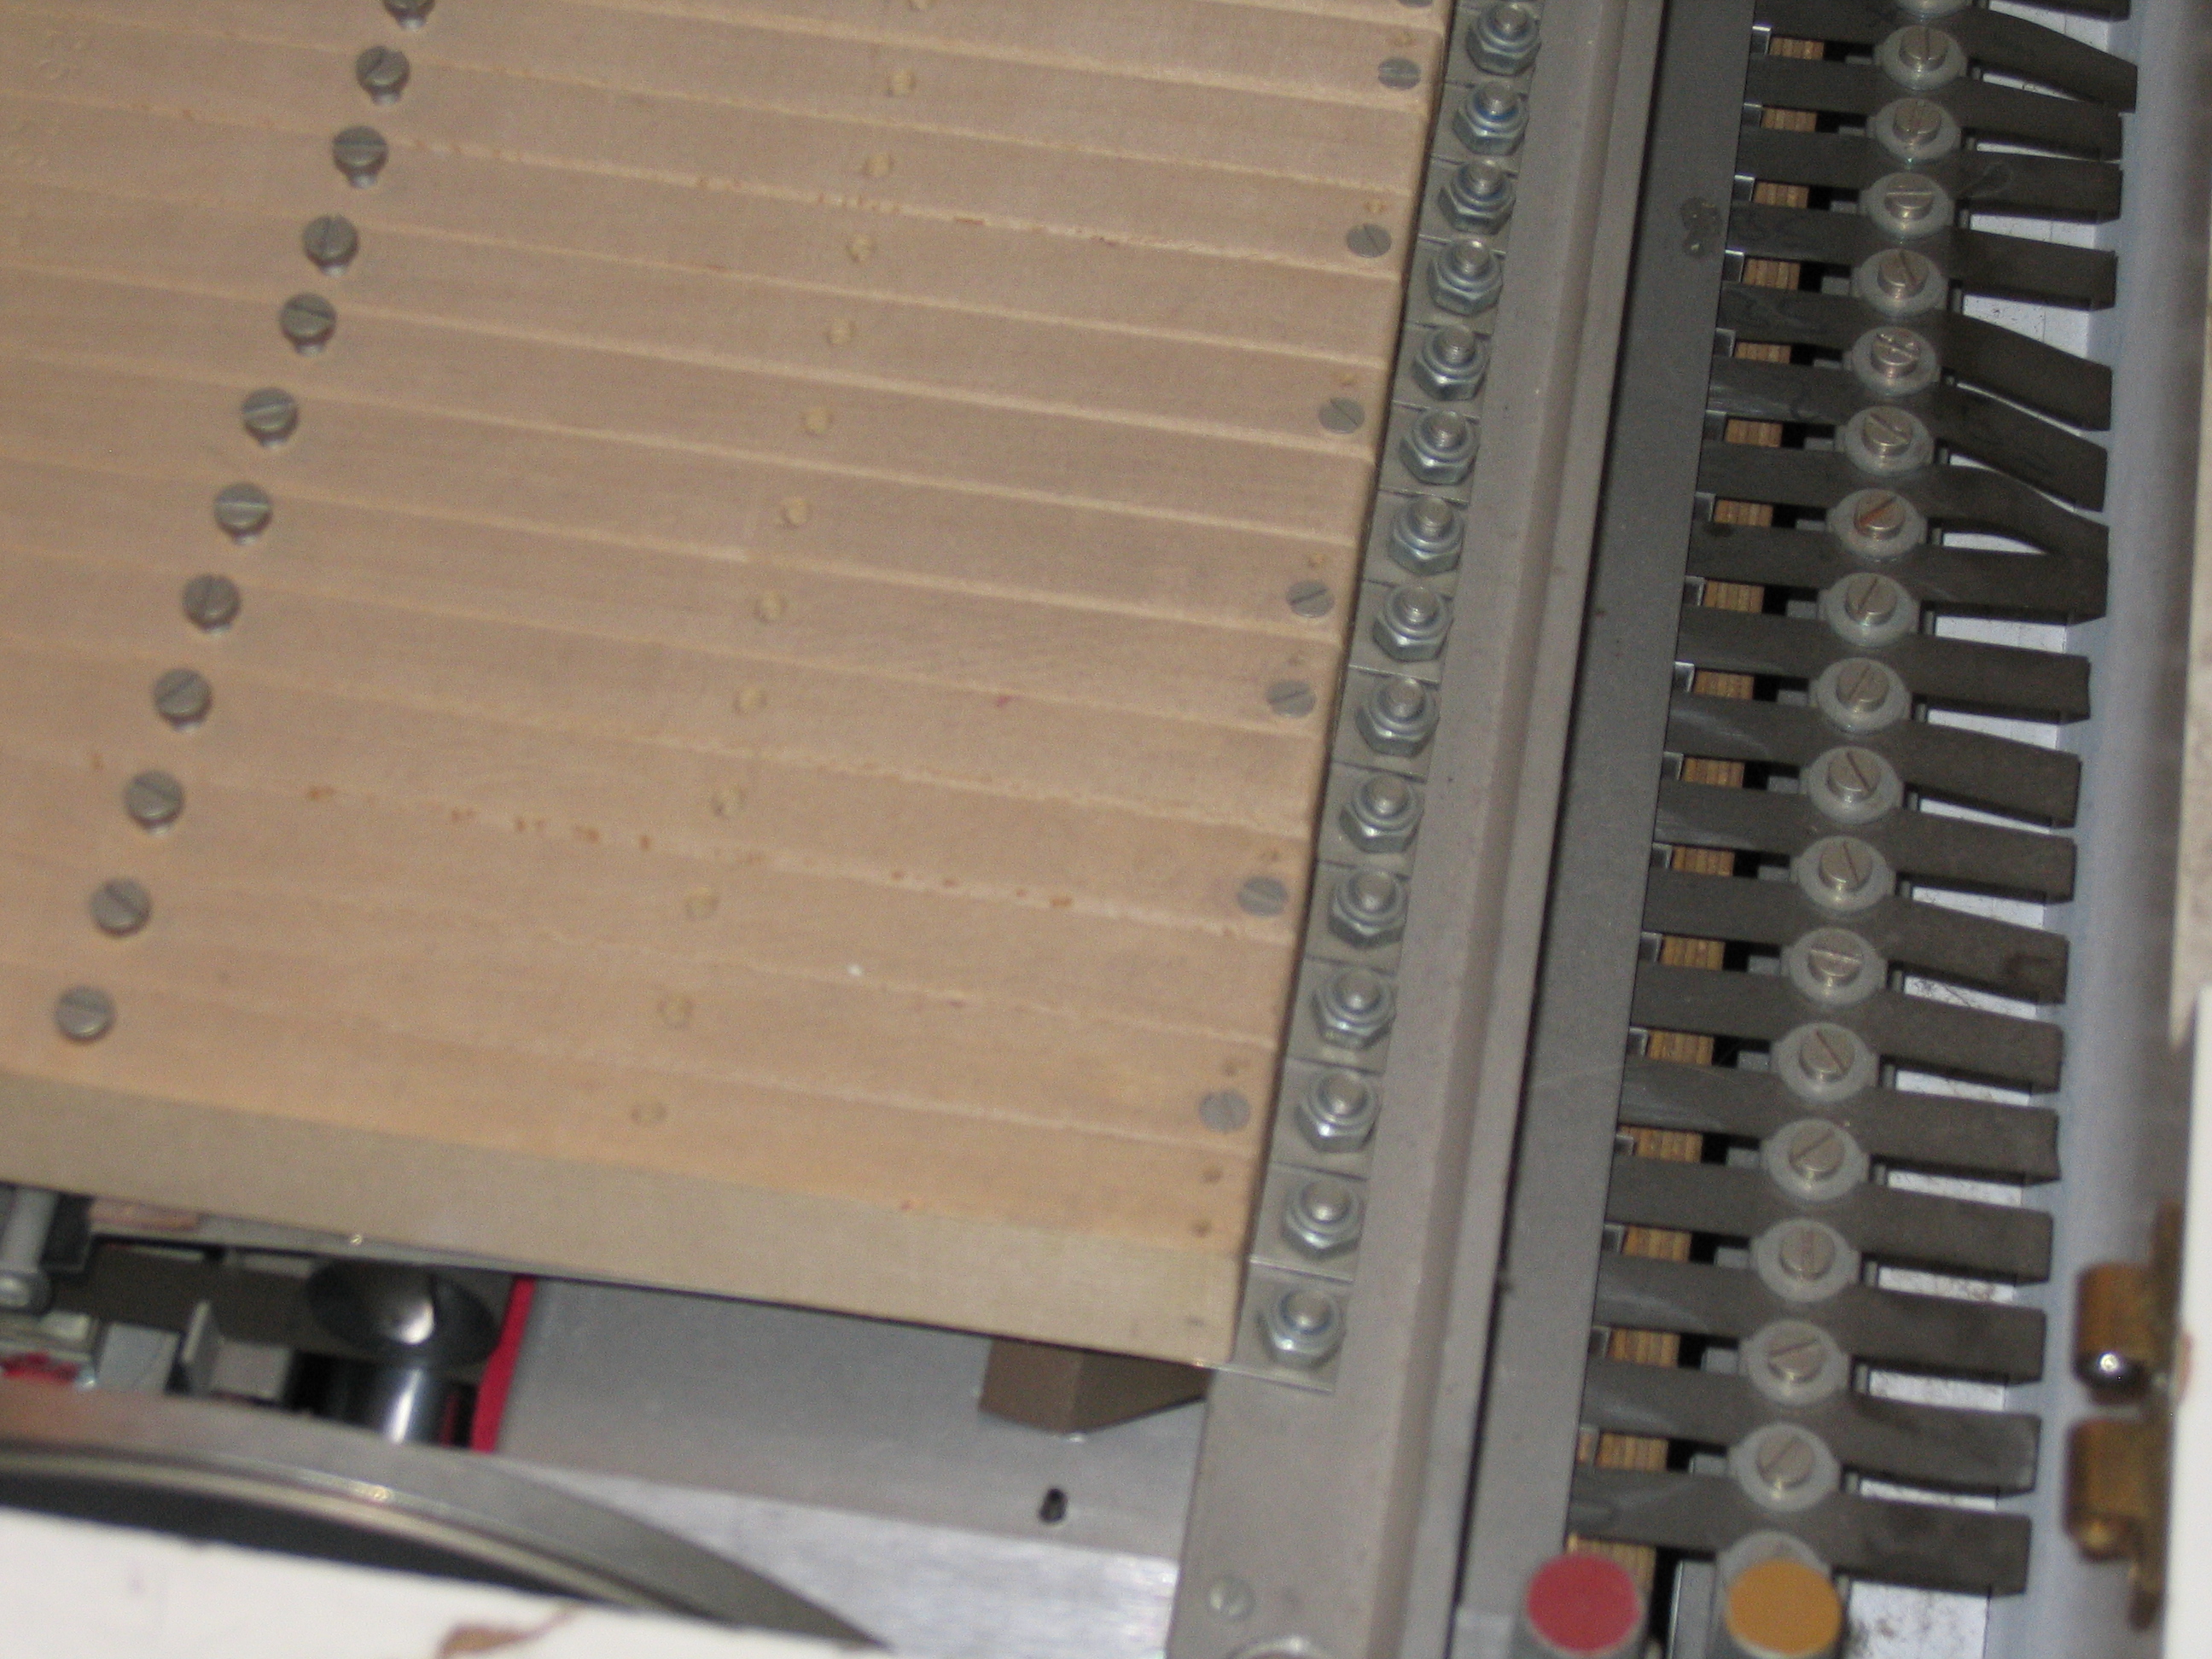 | |
| SKIP_TRON | SKIP_TRON_3 | 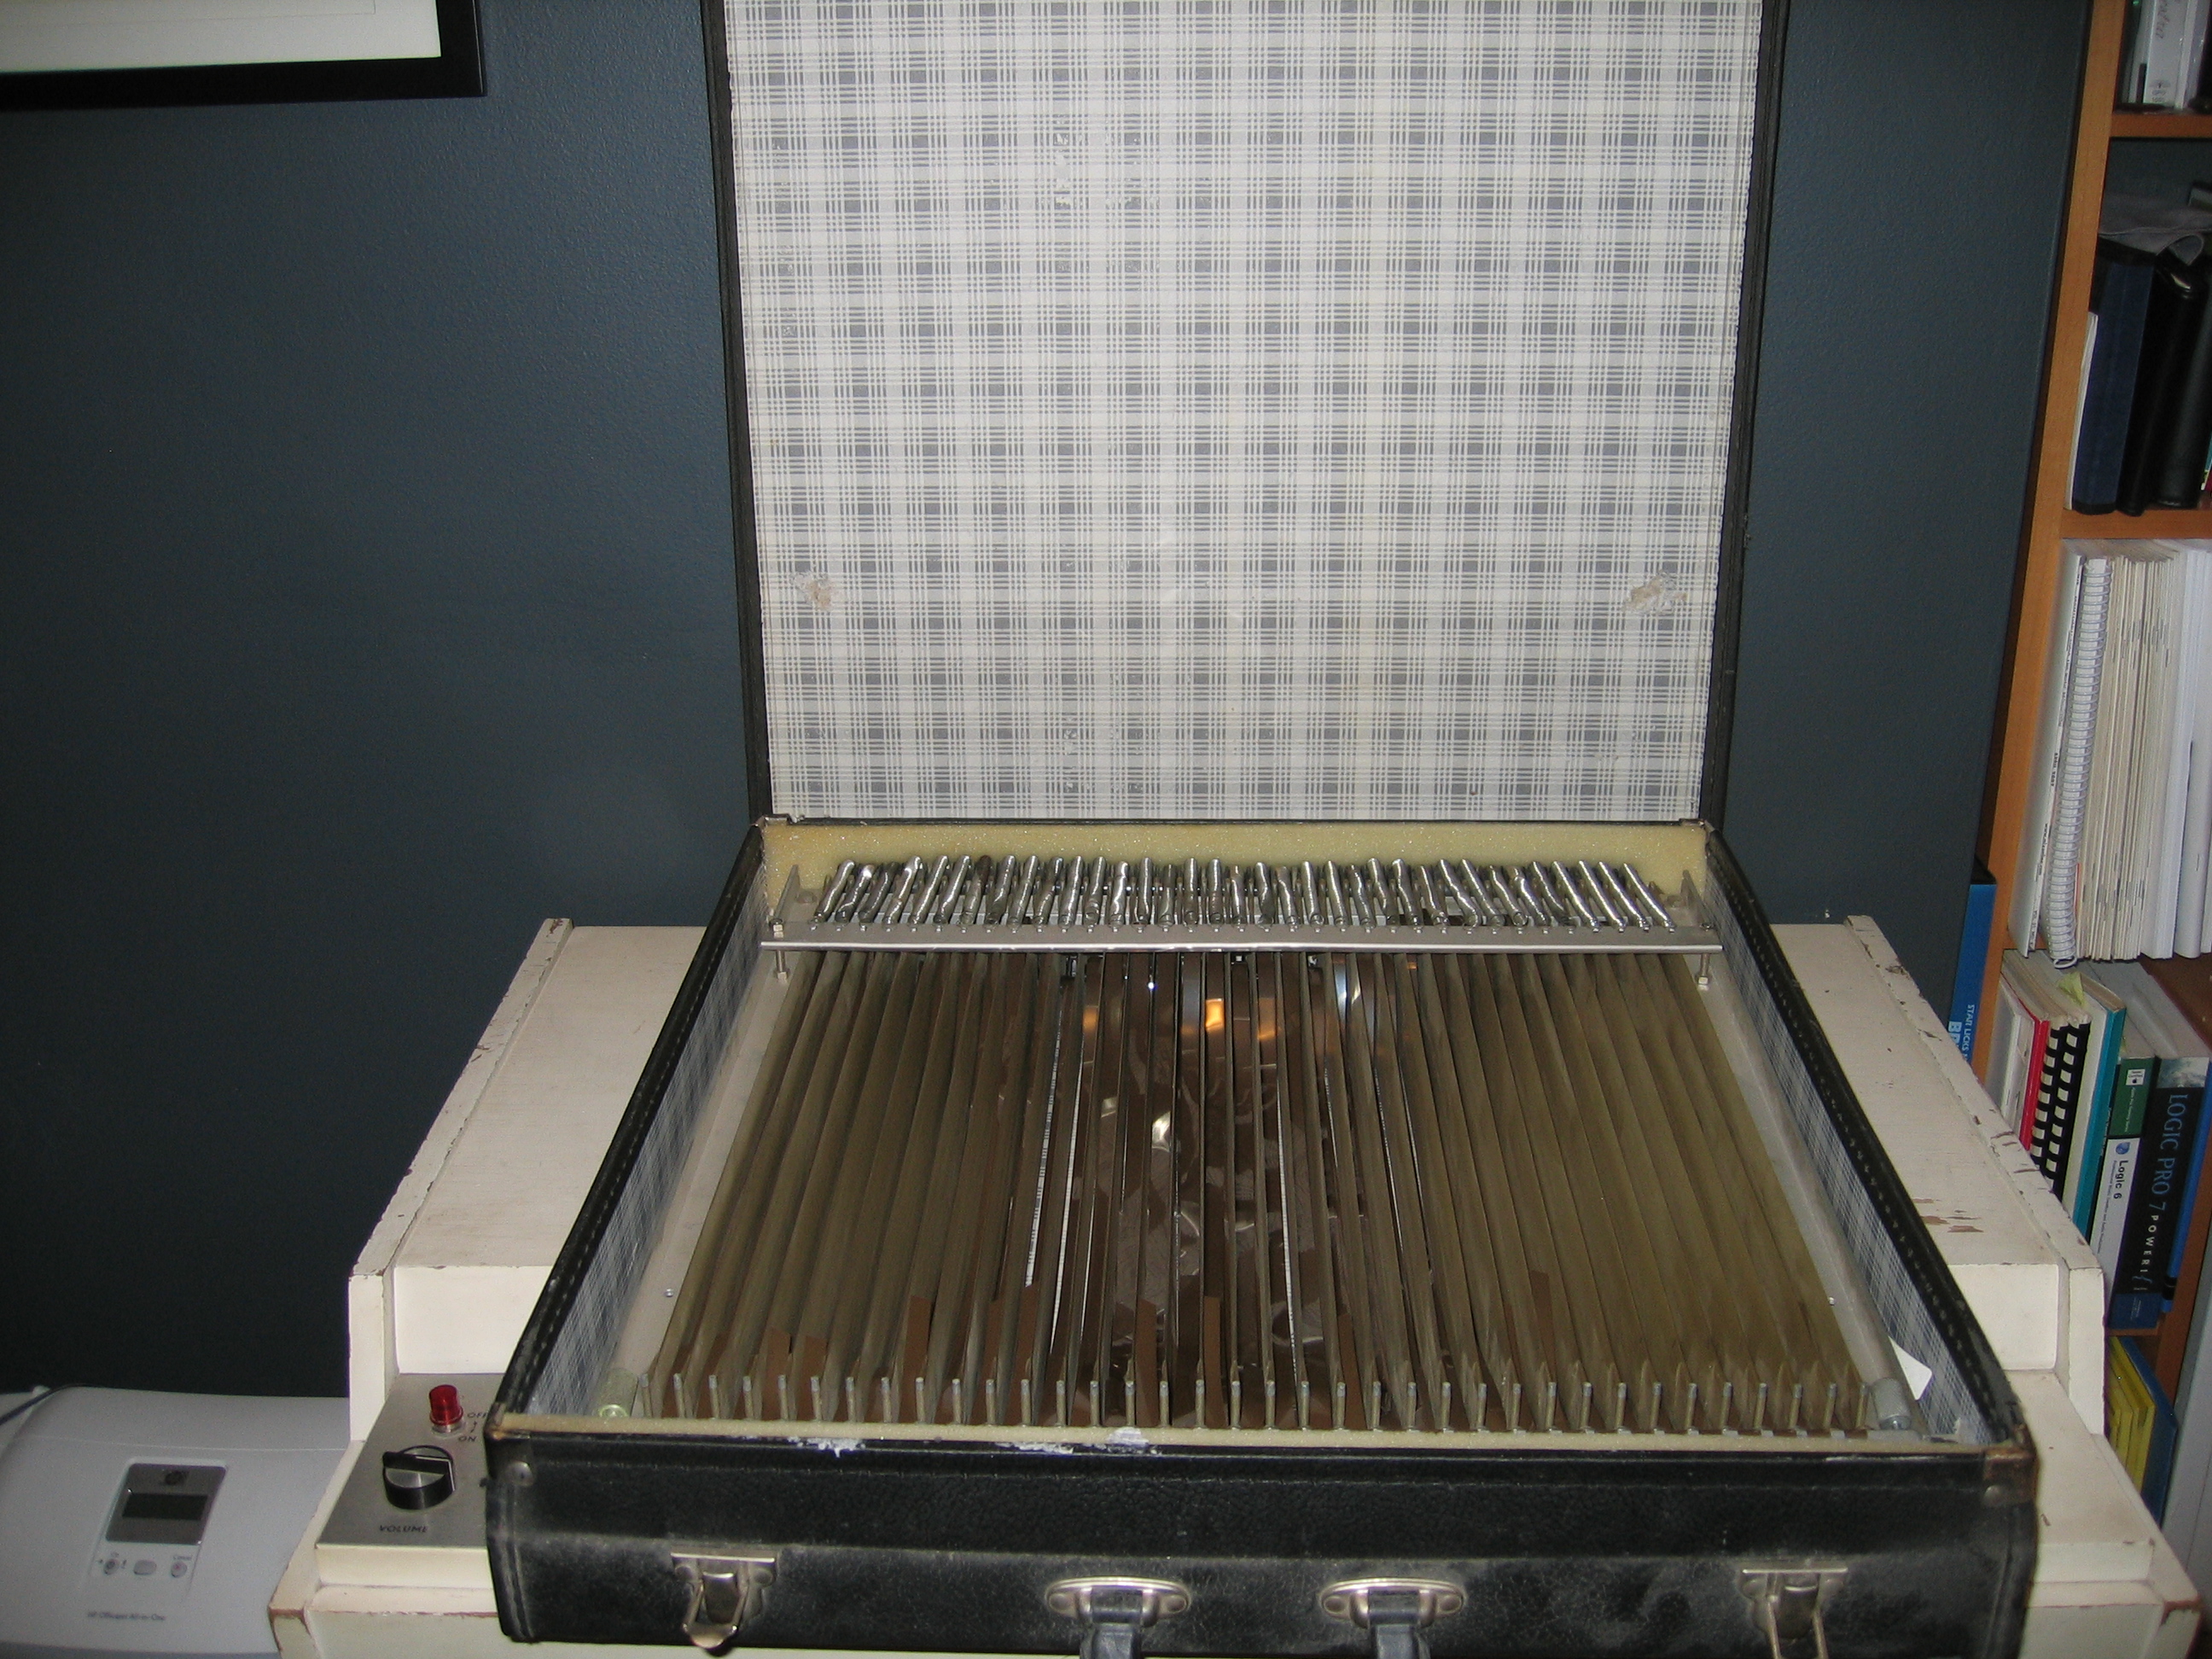 | |
| SKIP_TRON | SKIP_TRON_18 | 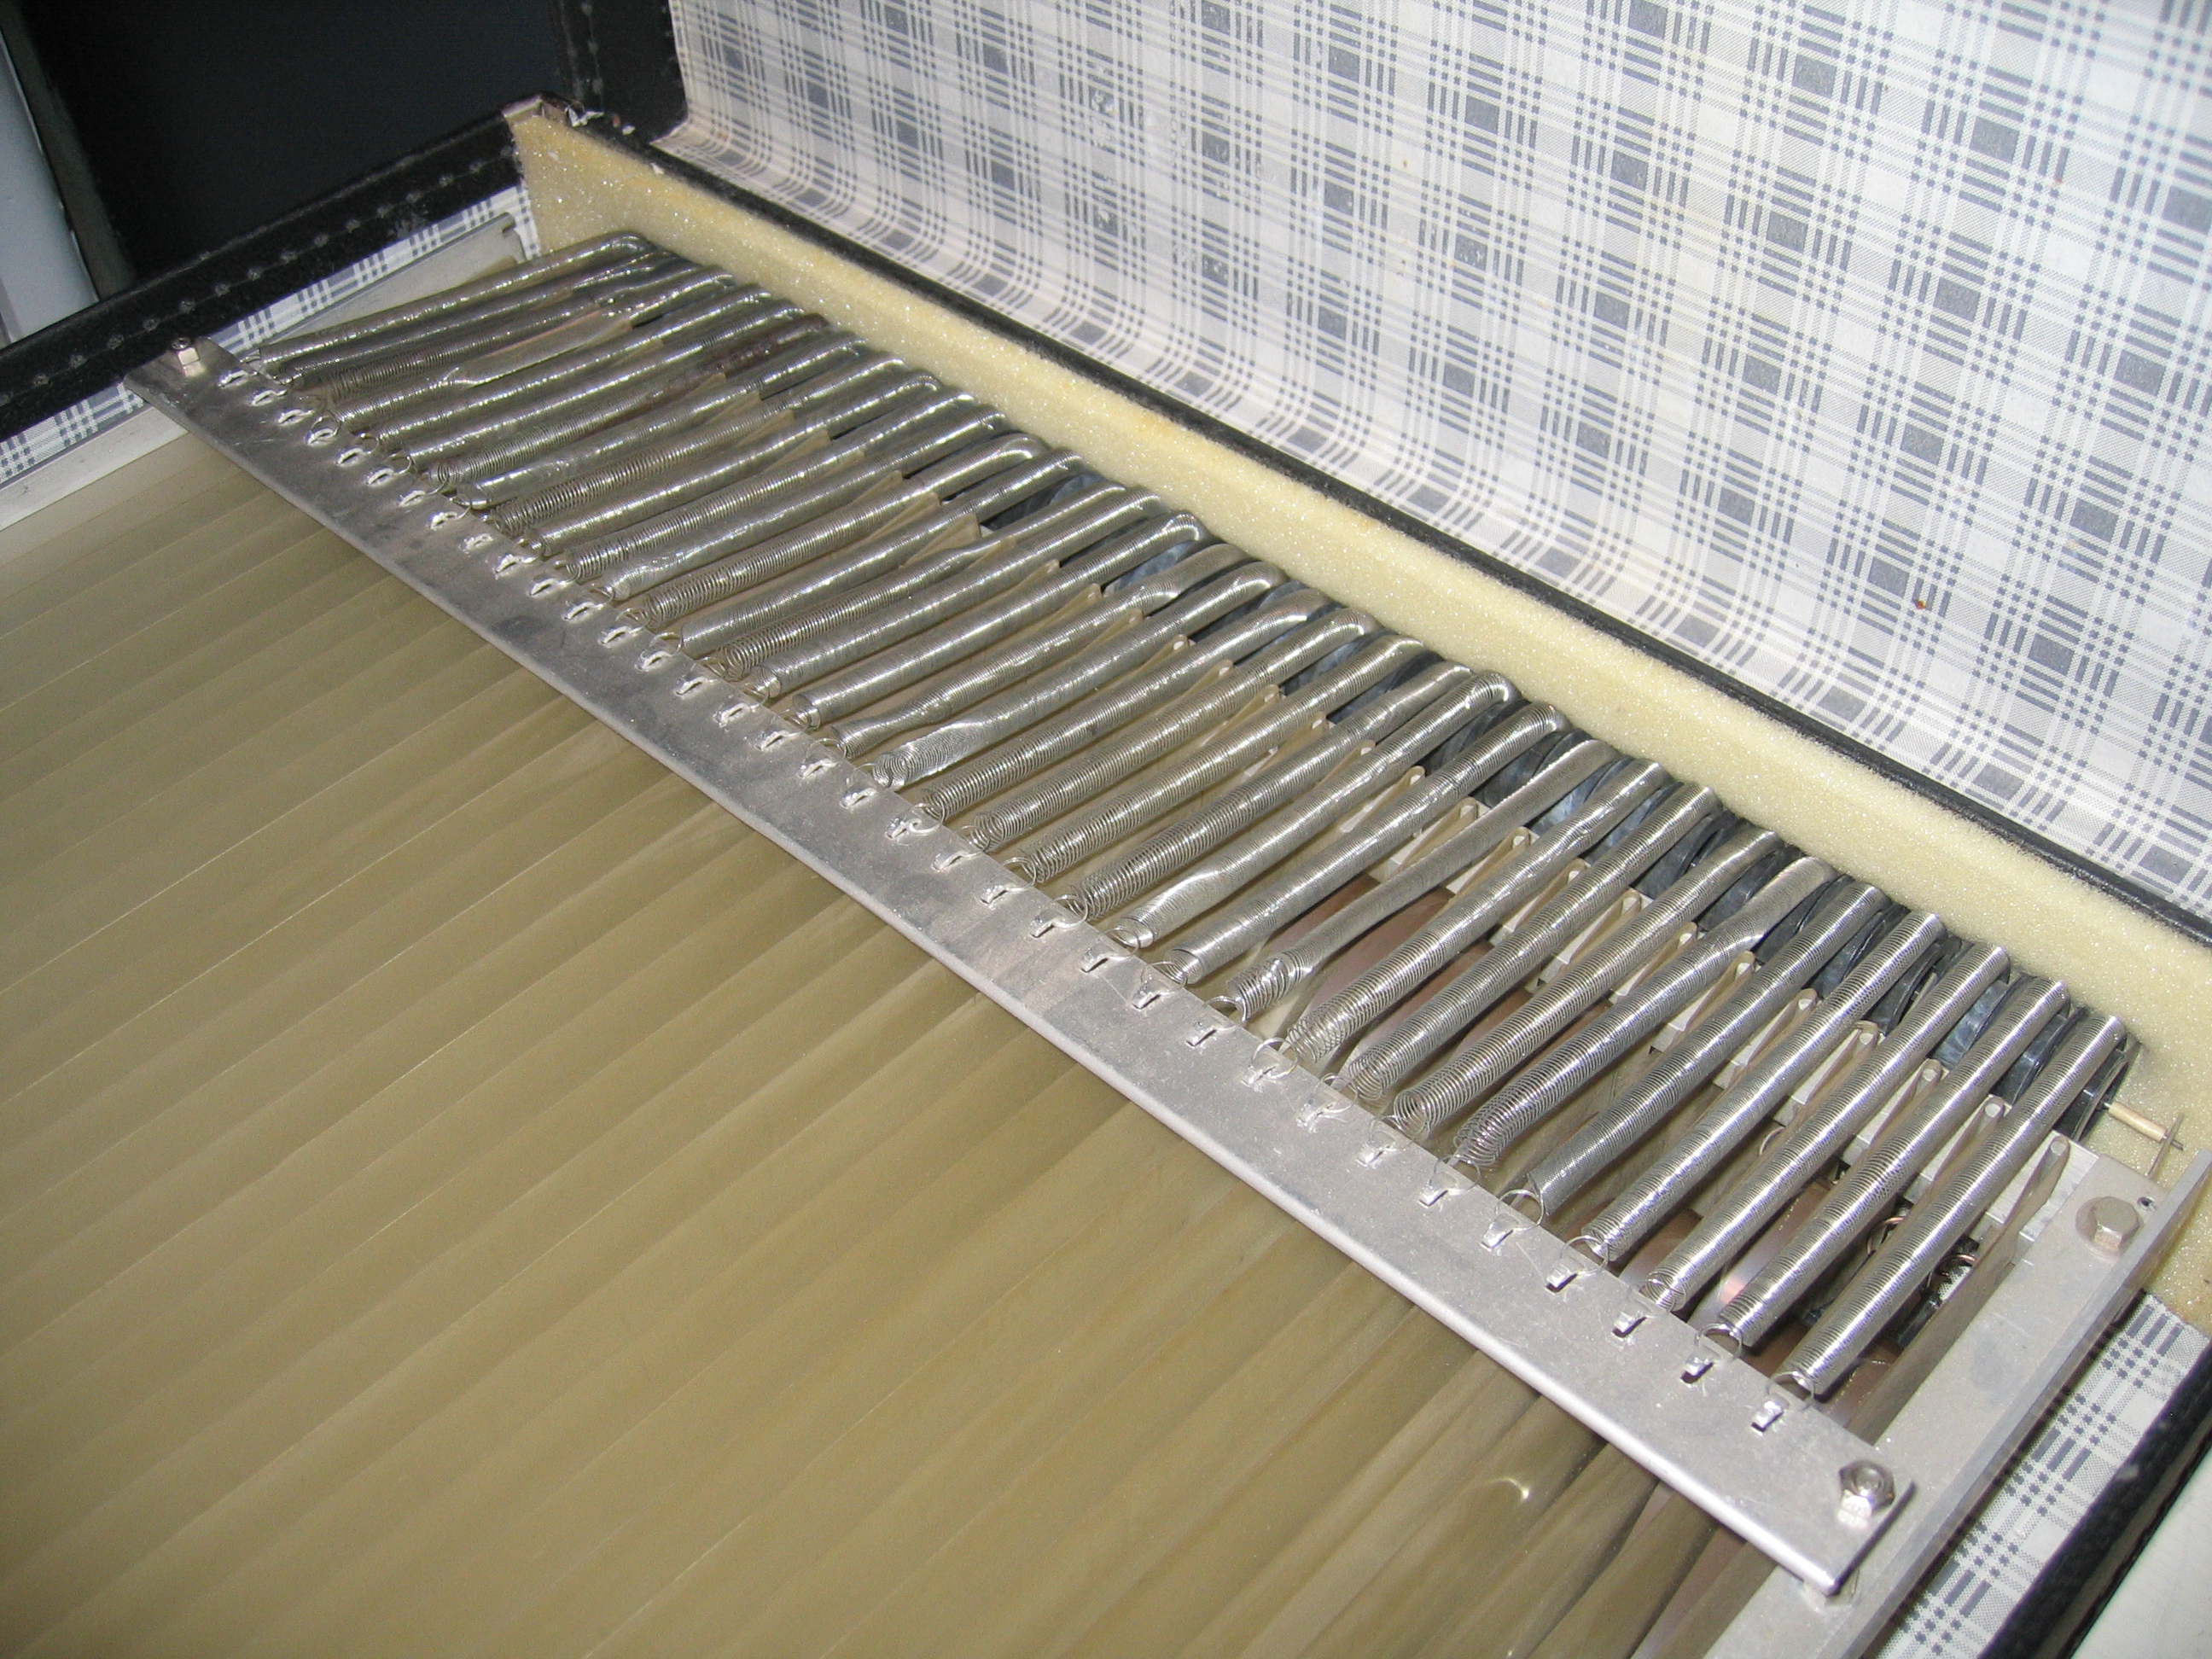 | |
| SKIP_TRON | SKIP_TRON_19 | 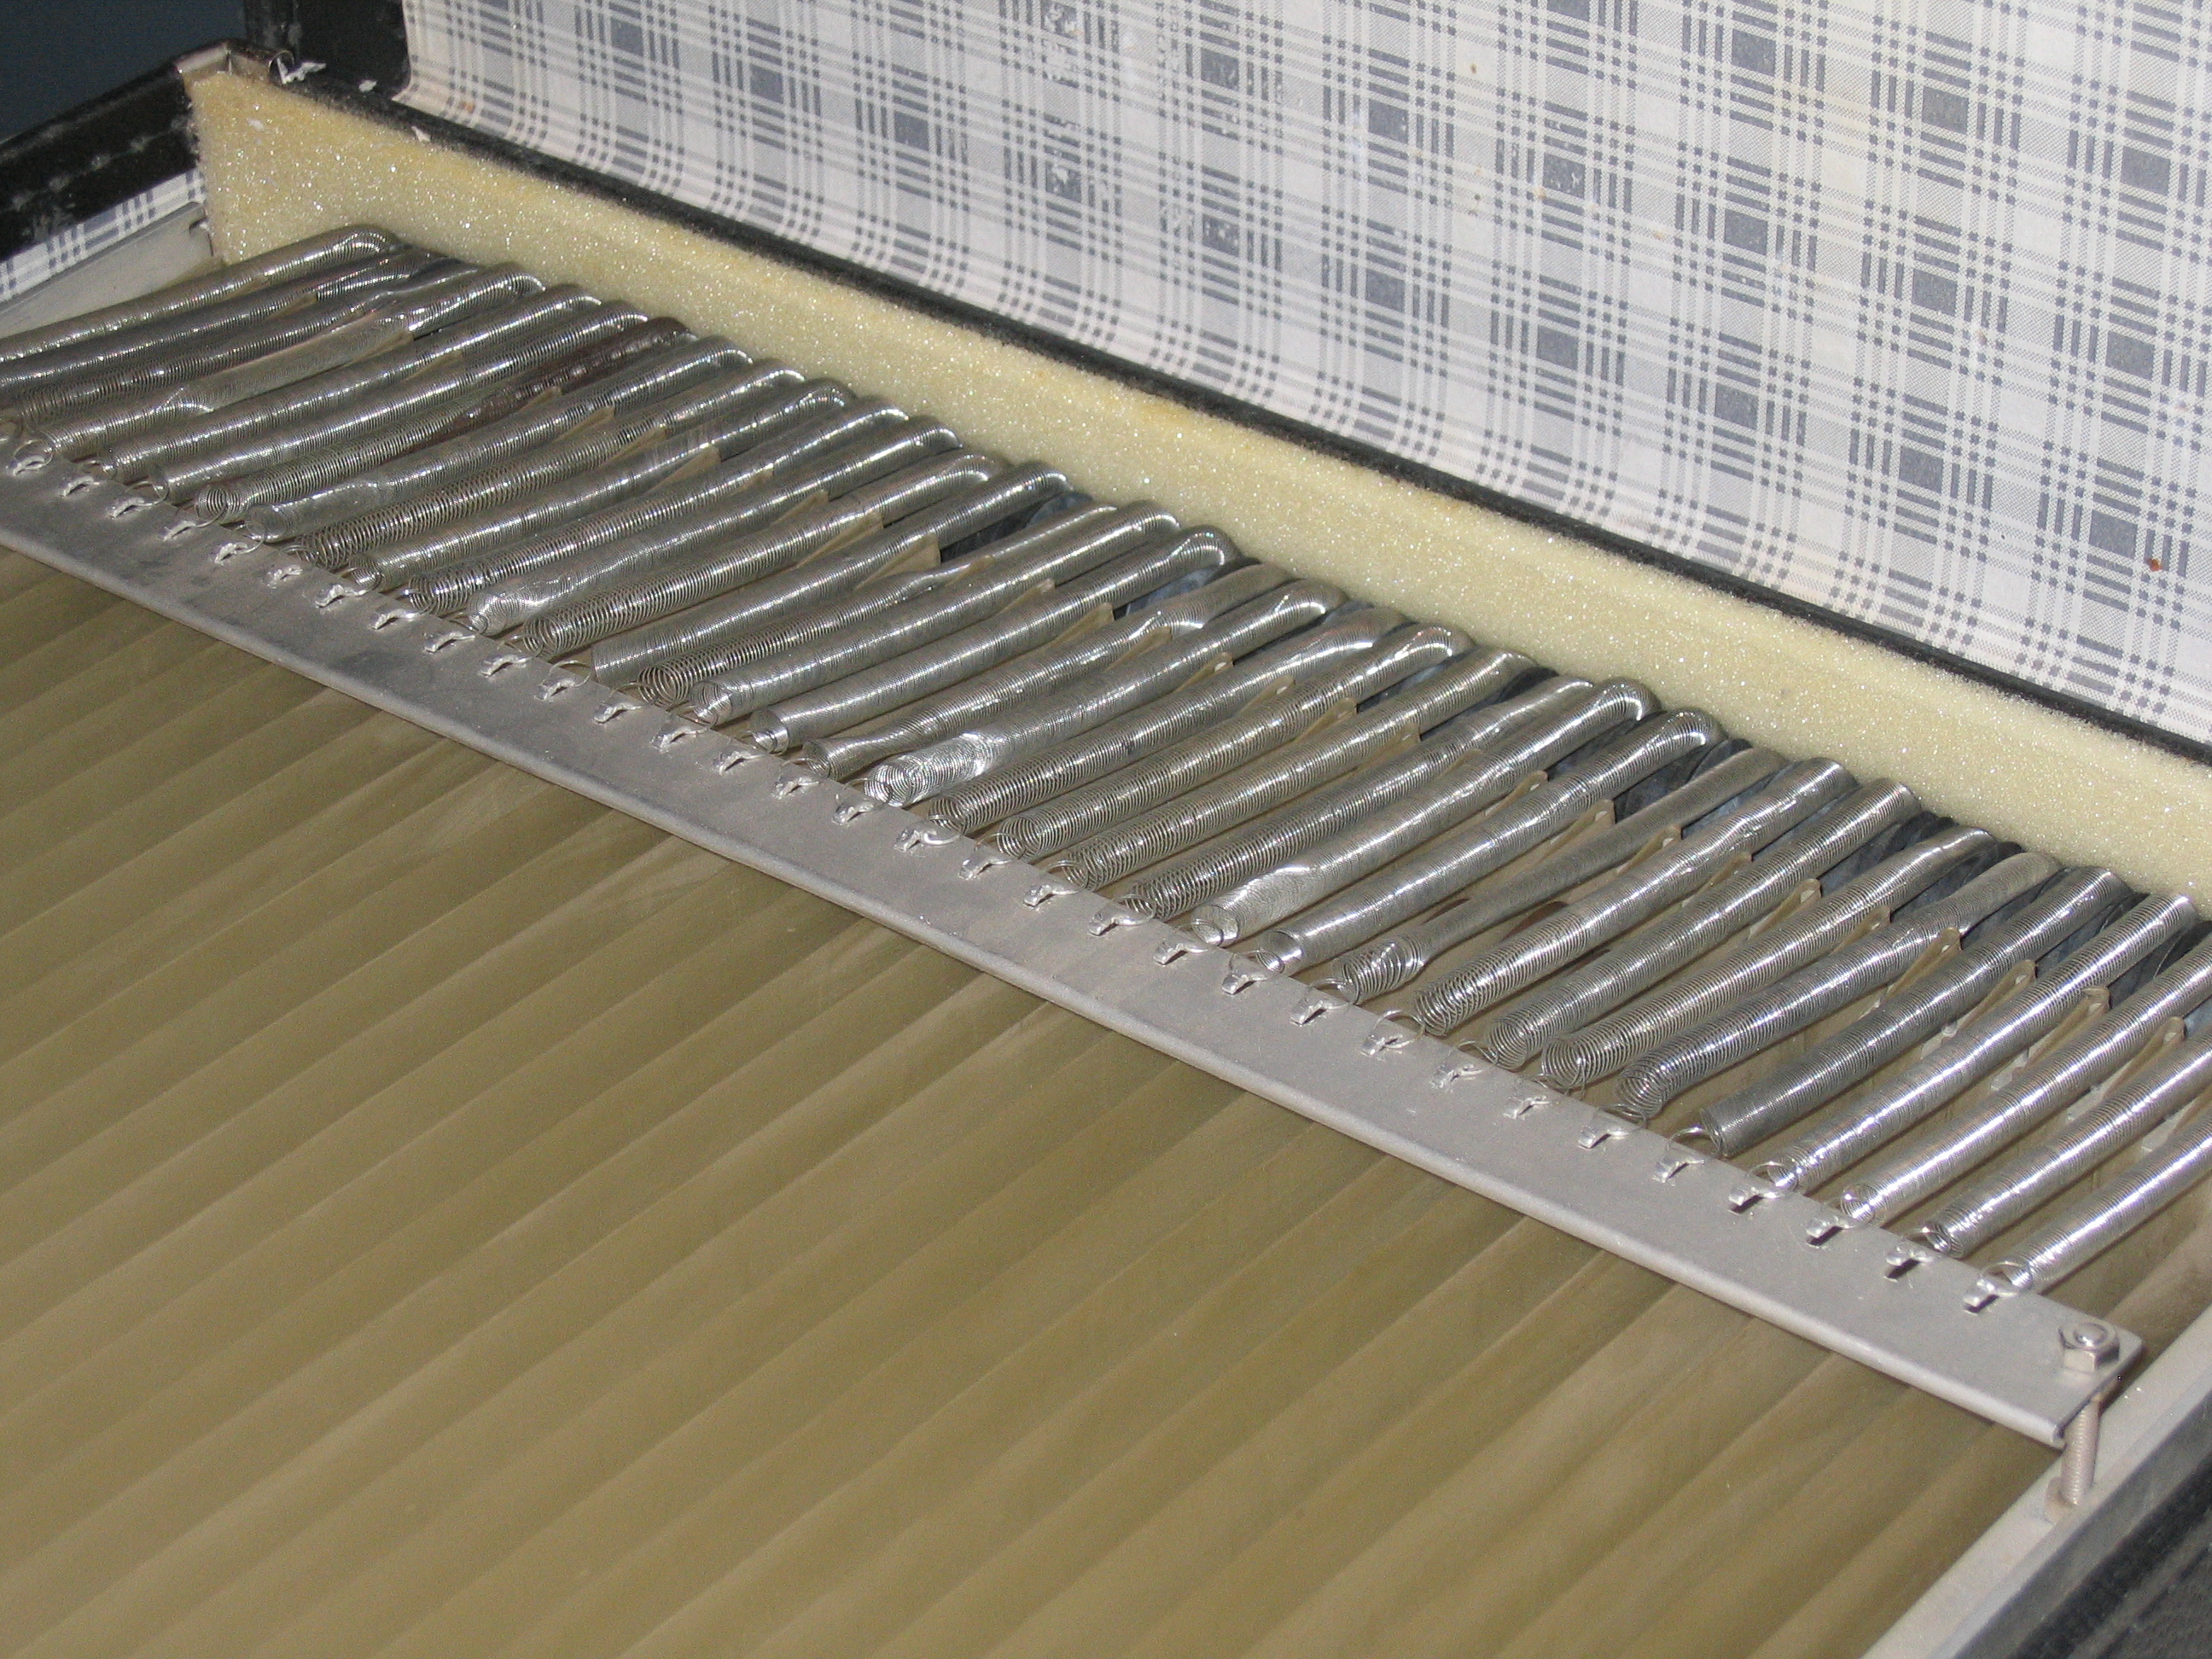 | |
| SKIP_TRON | SKIP_TRON_16 |  | |
| SKIP_TRON | SKIP_TRON_8 | 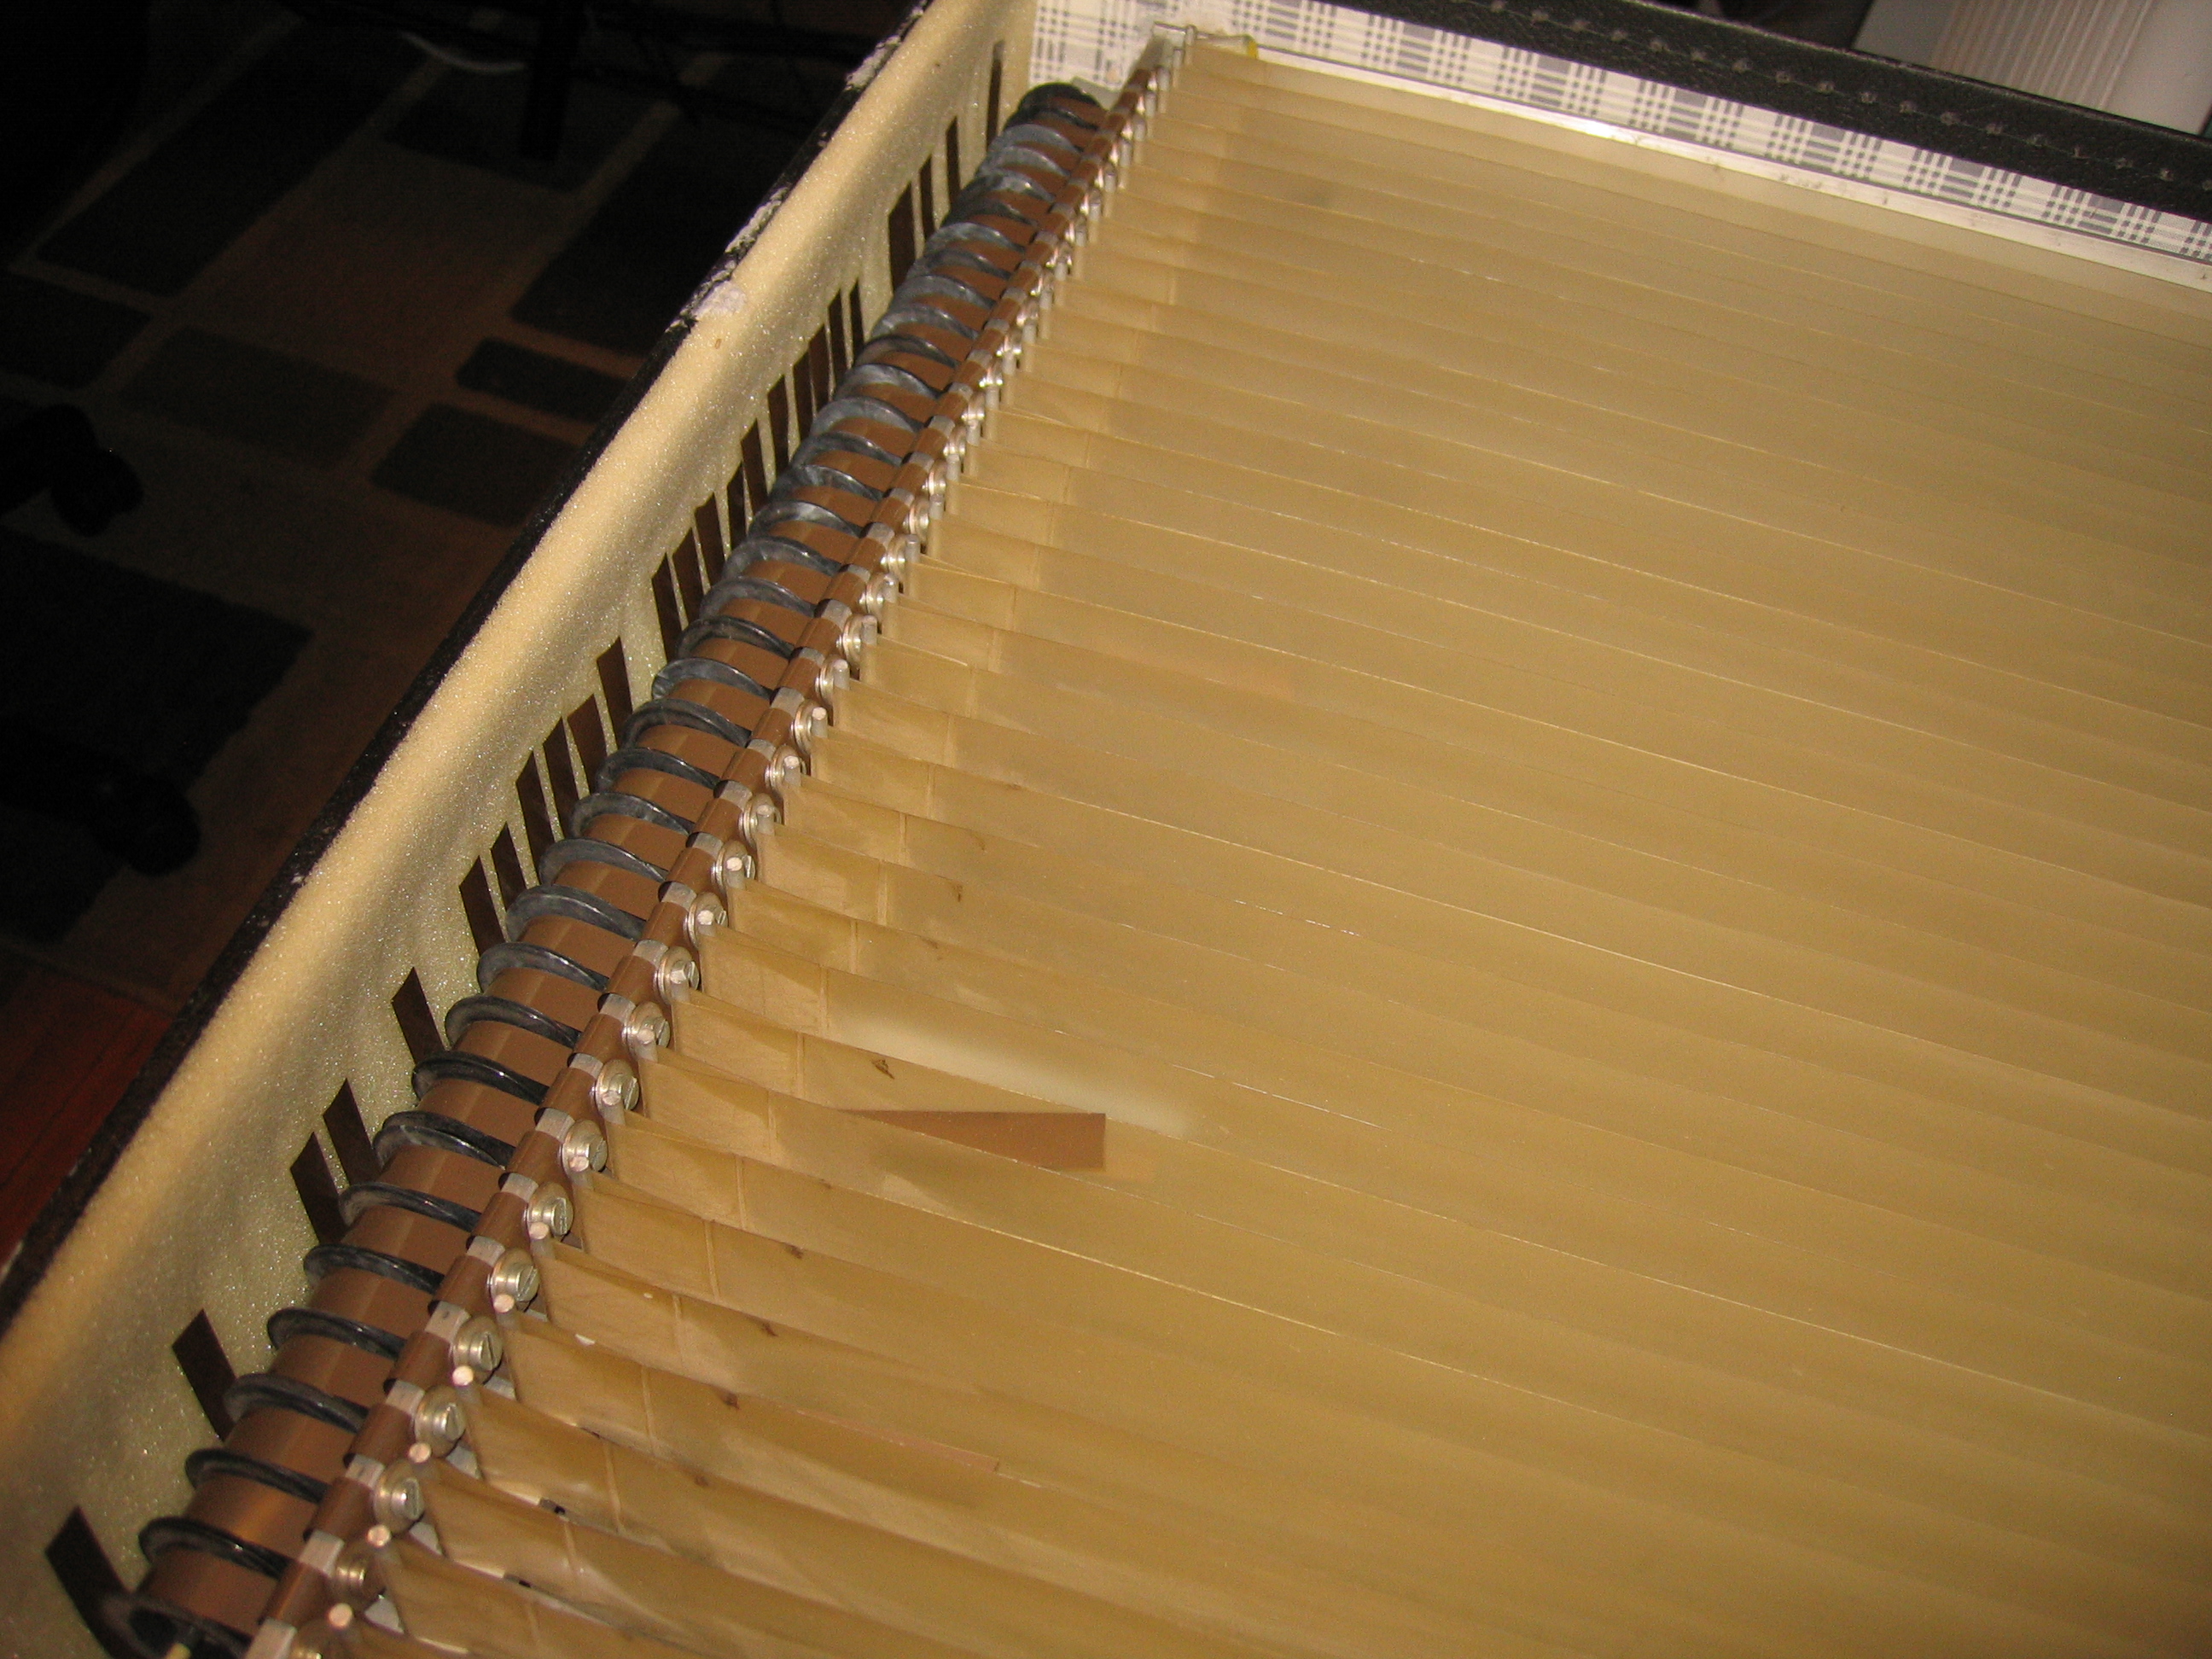 | |
| SKIP_TRON | SKIP_TRON_11 |  | |
| SKIP_TRON | SKIP_TRON_14 | 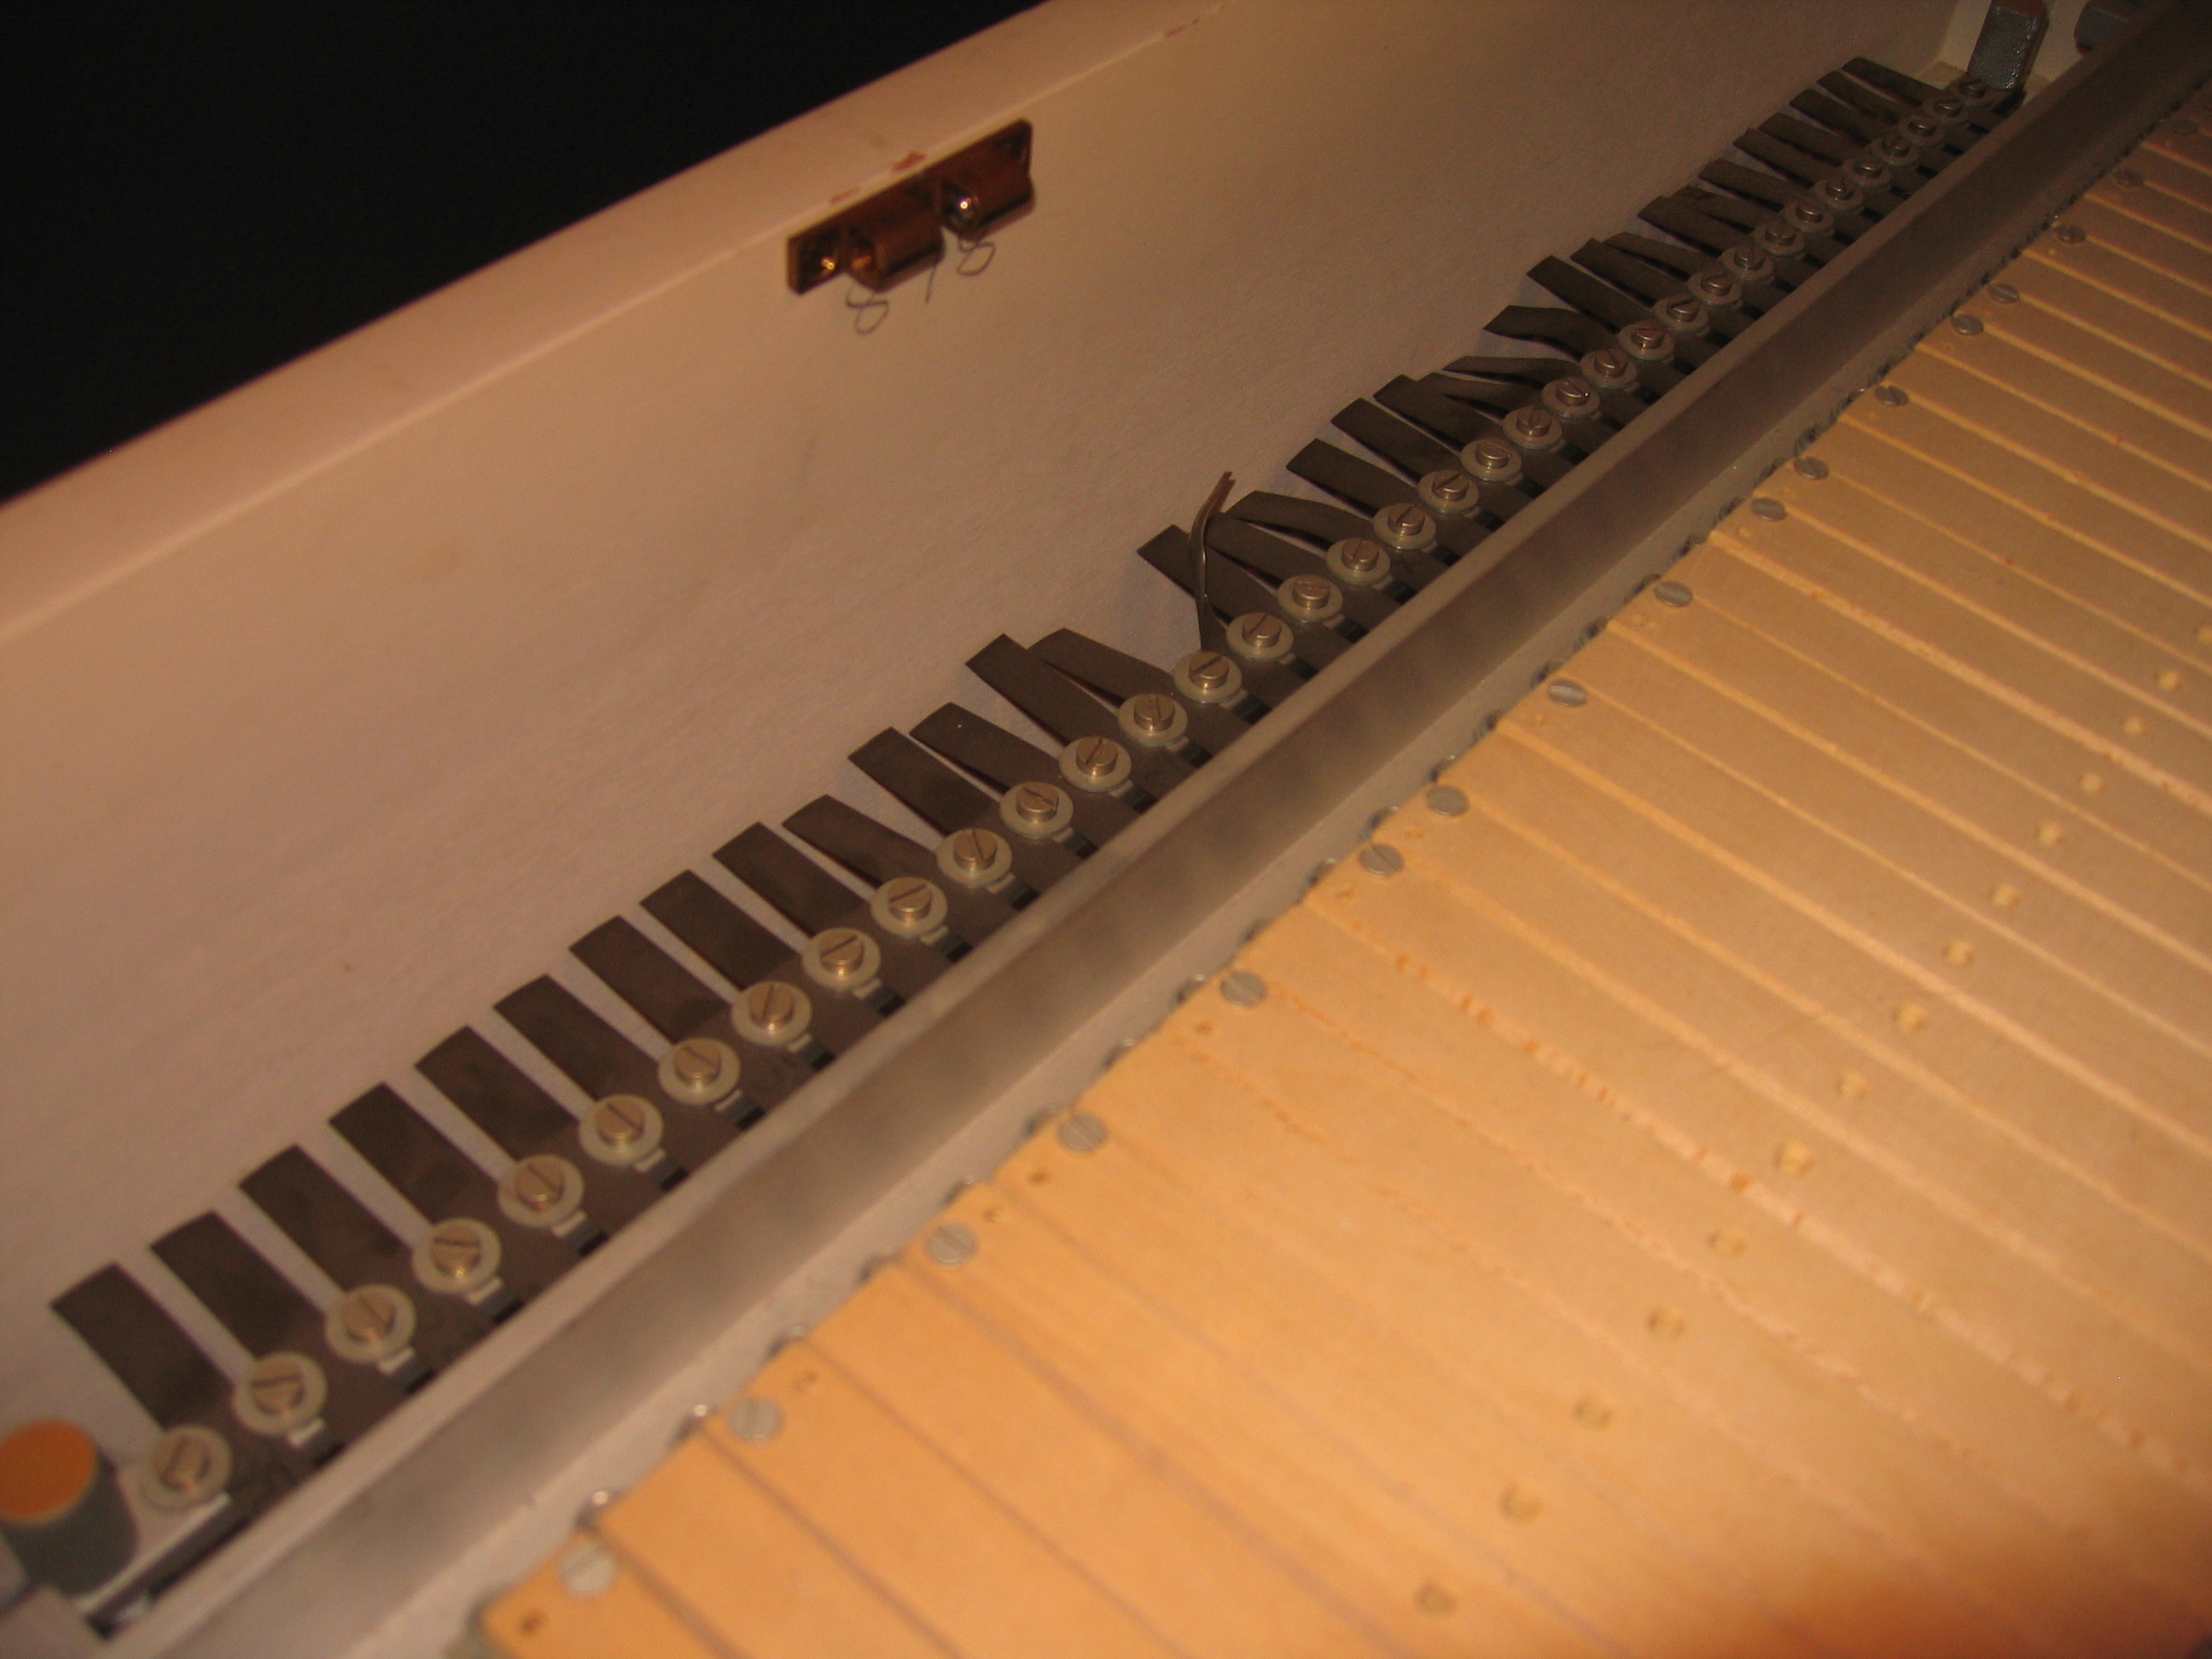 | |
| SKIP_TRON | SKIP_TRON_16 | 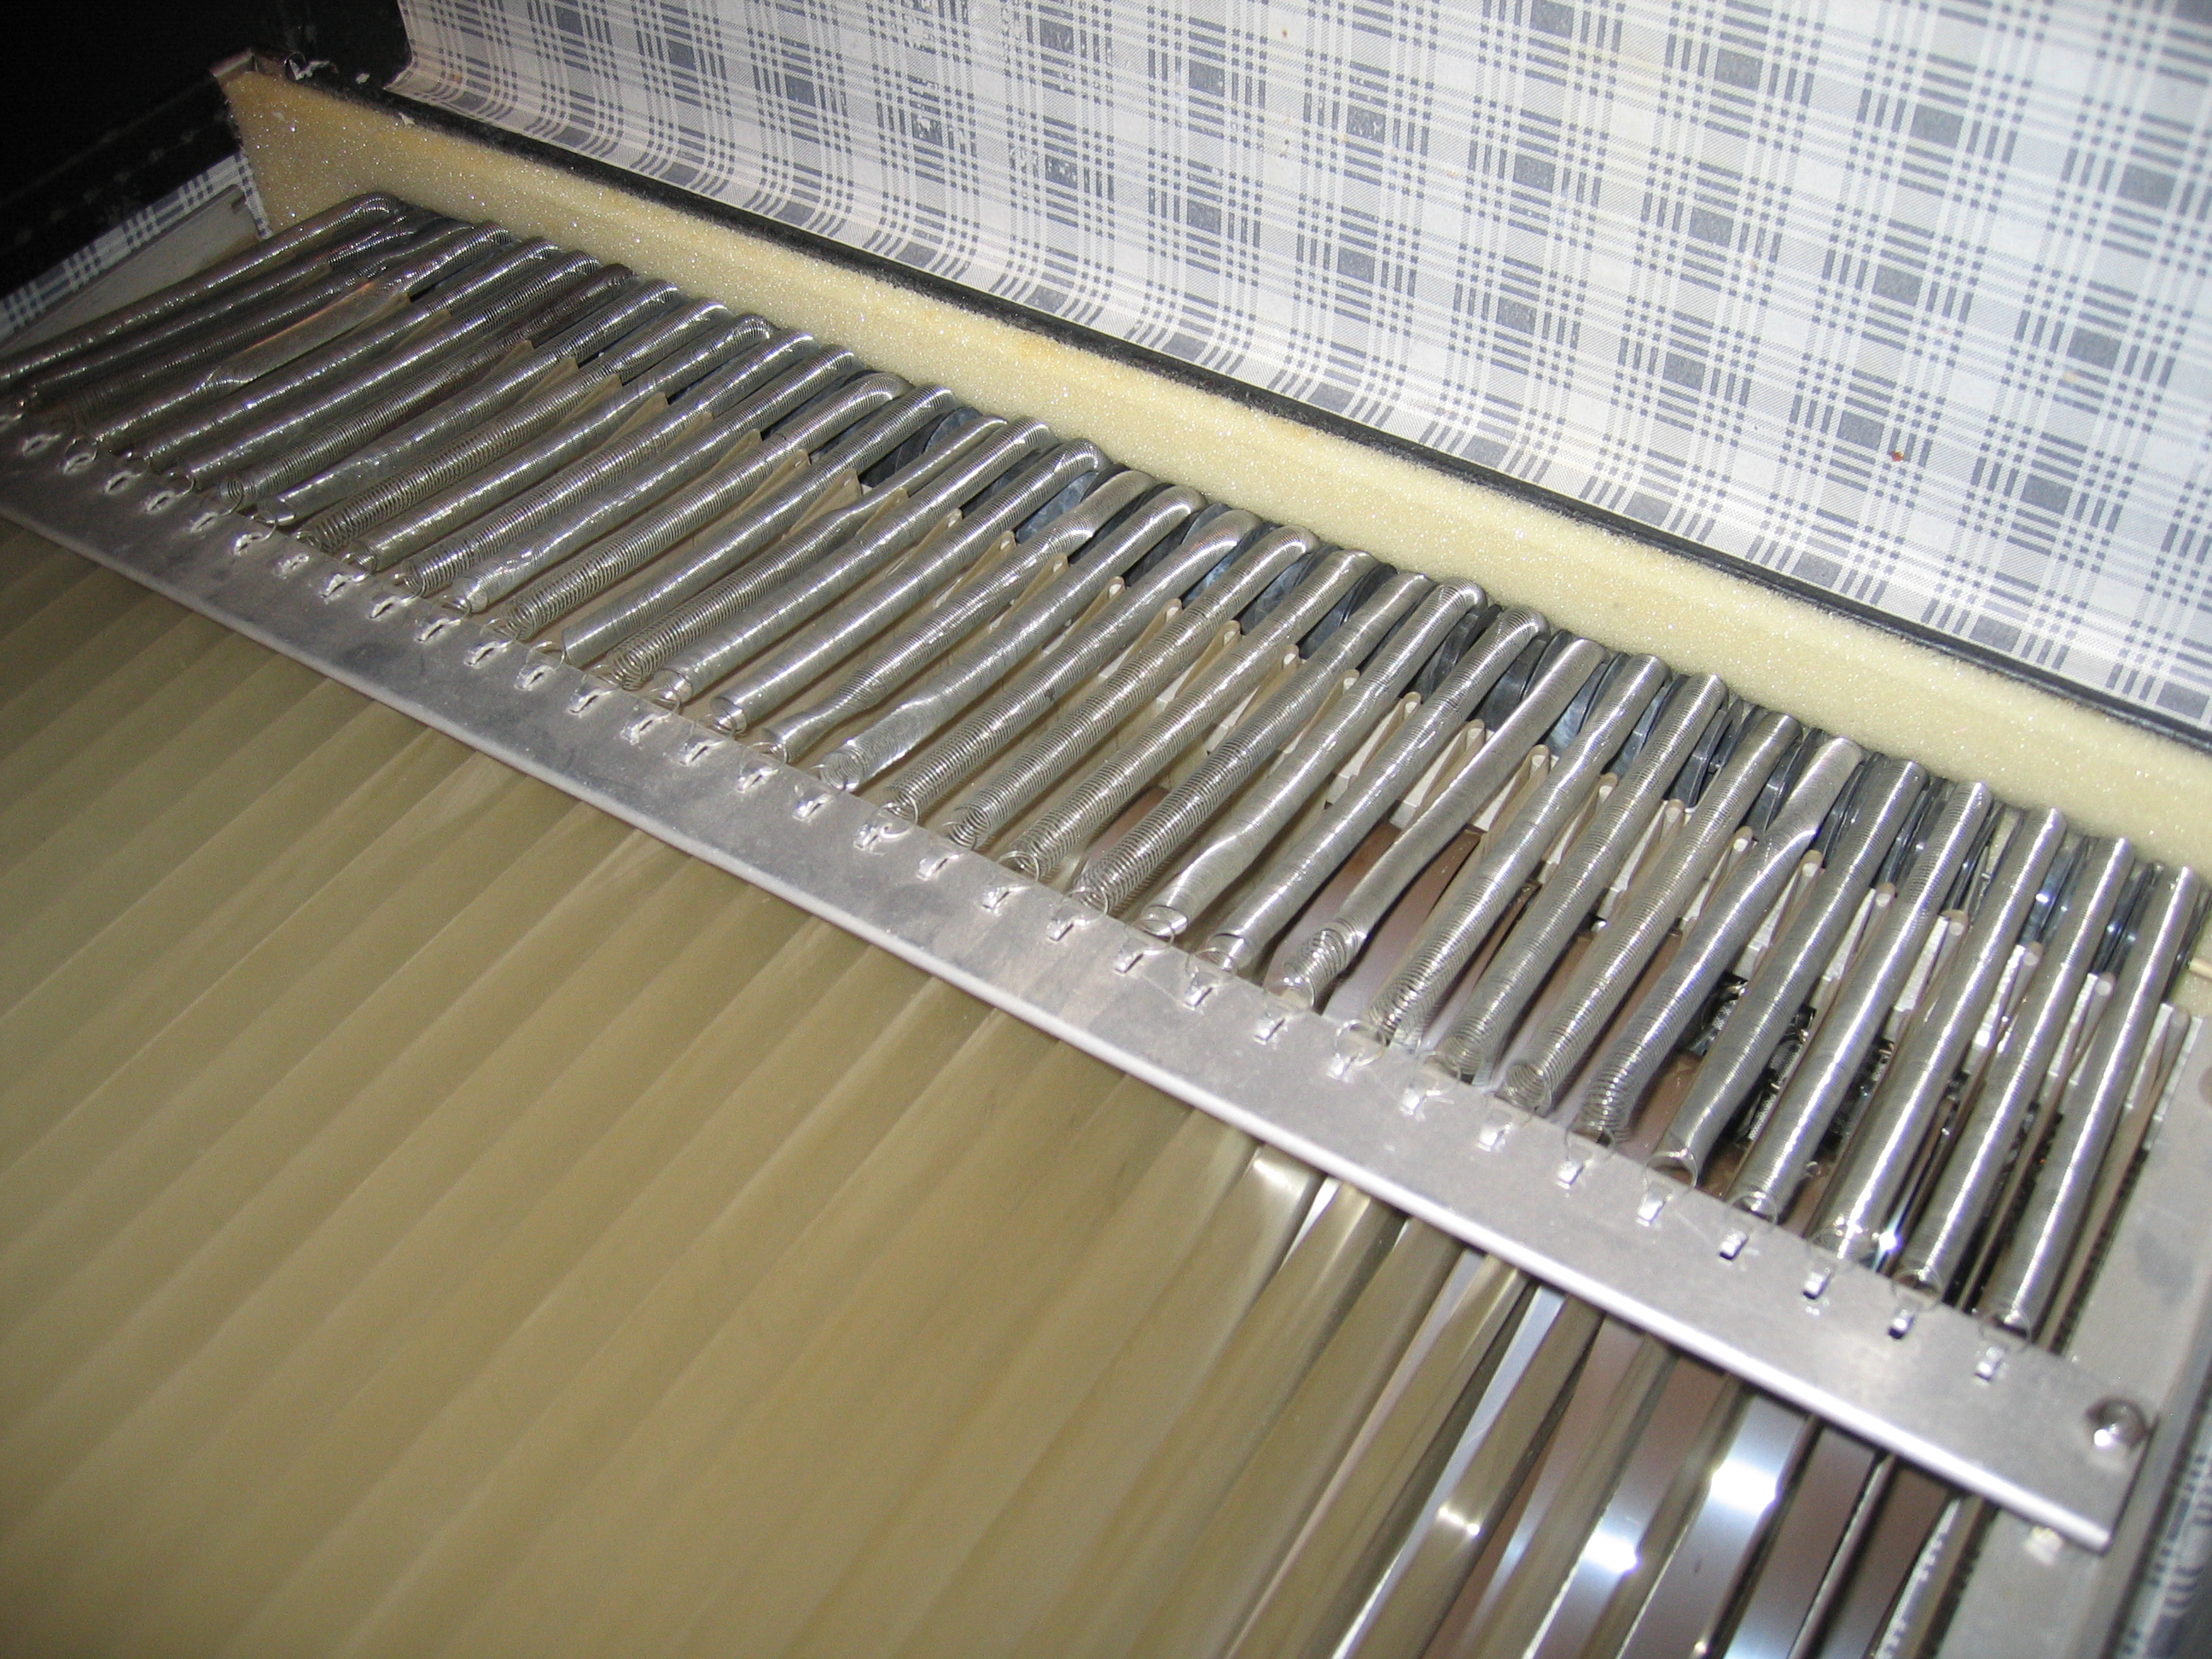 | |
| SKIP_TRON | SKIP_TRON_8 |  | |
| SKIP_TRON | SKIP_TRON_11 |  | |
| Sean and his lack of a real Mellotron | A poster of sorts! |  | |
| Sean and his lack of a real Mellotron | Hammond plus Rob |  | |
| Sean and his lack of a real Mellotron | Hammond in the dark | 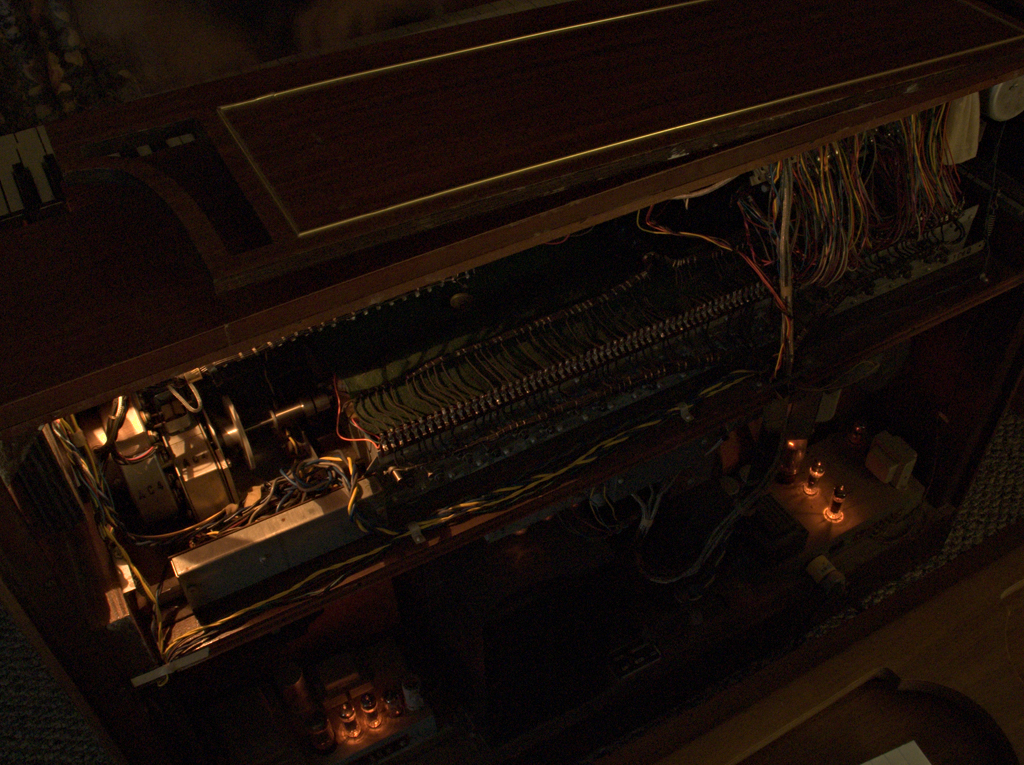 | |
| Sean and his lack of a real Mellotron | Me, the Hammond, the Conn |  | |
| Sean and his lack of a real Mellotron | Hammond manuals | 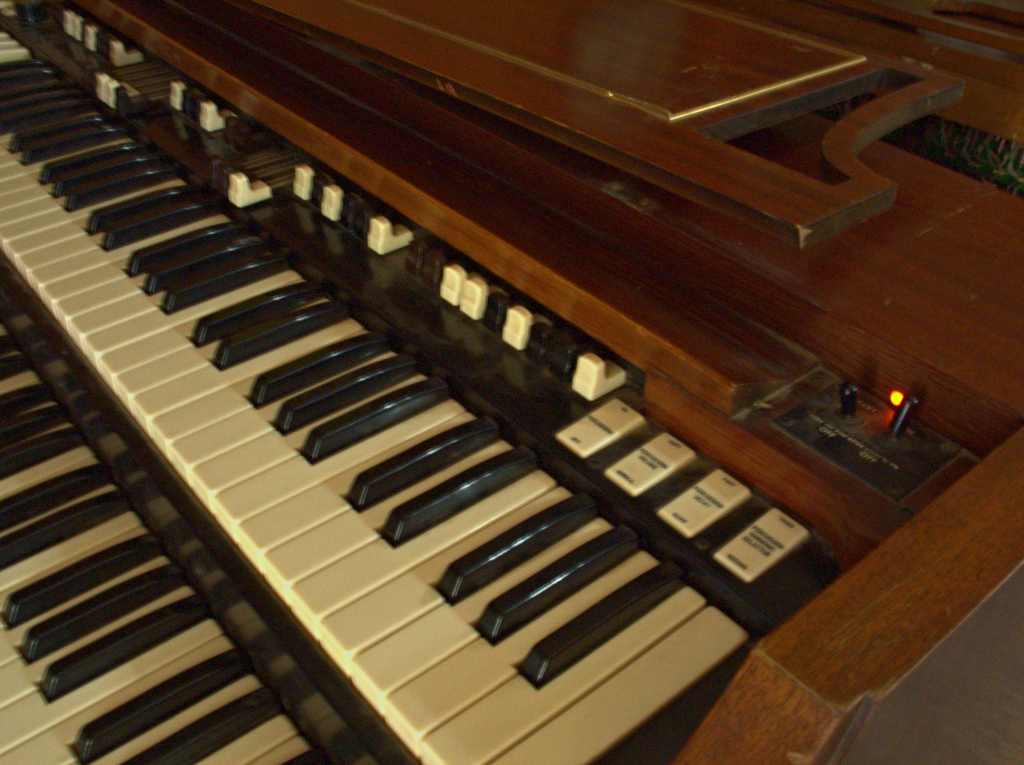 | |
| Sean and his lack of a real Mellotron | Hammond view 2 | 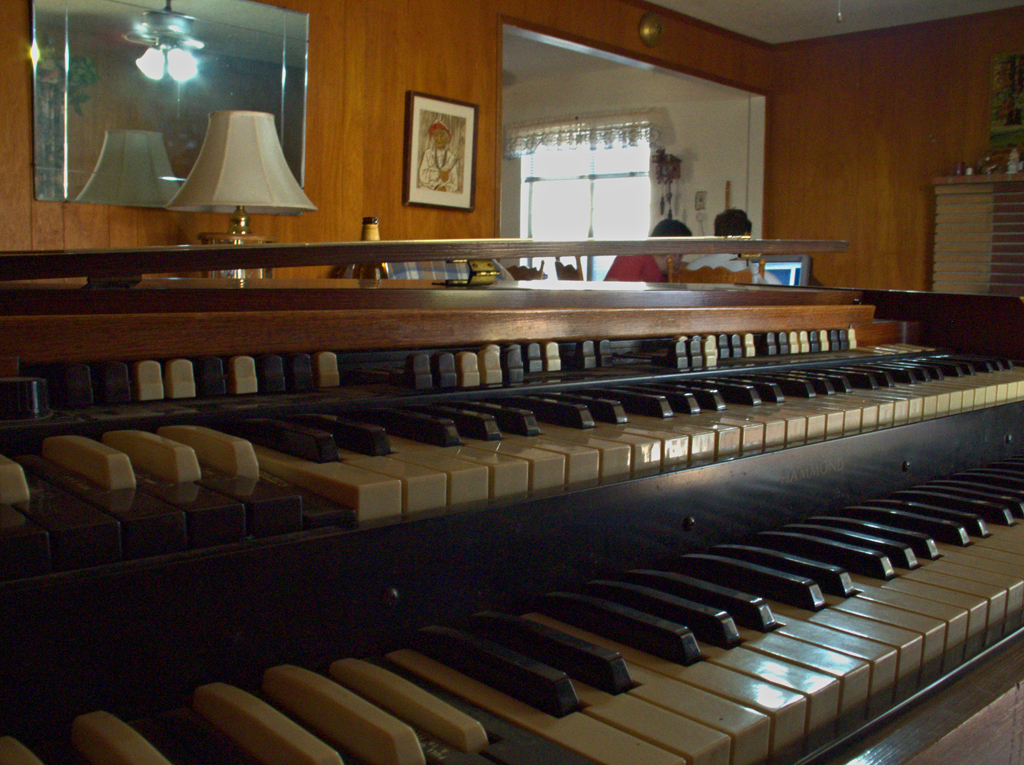 | |
| Skip';s Tron | SKIP_TRON_6 |  | |
| Skip';s Tron | SKIP_TRON_2 | 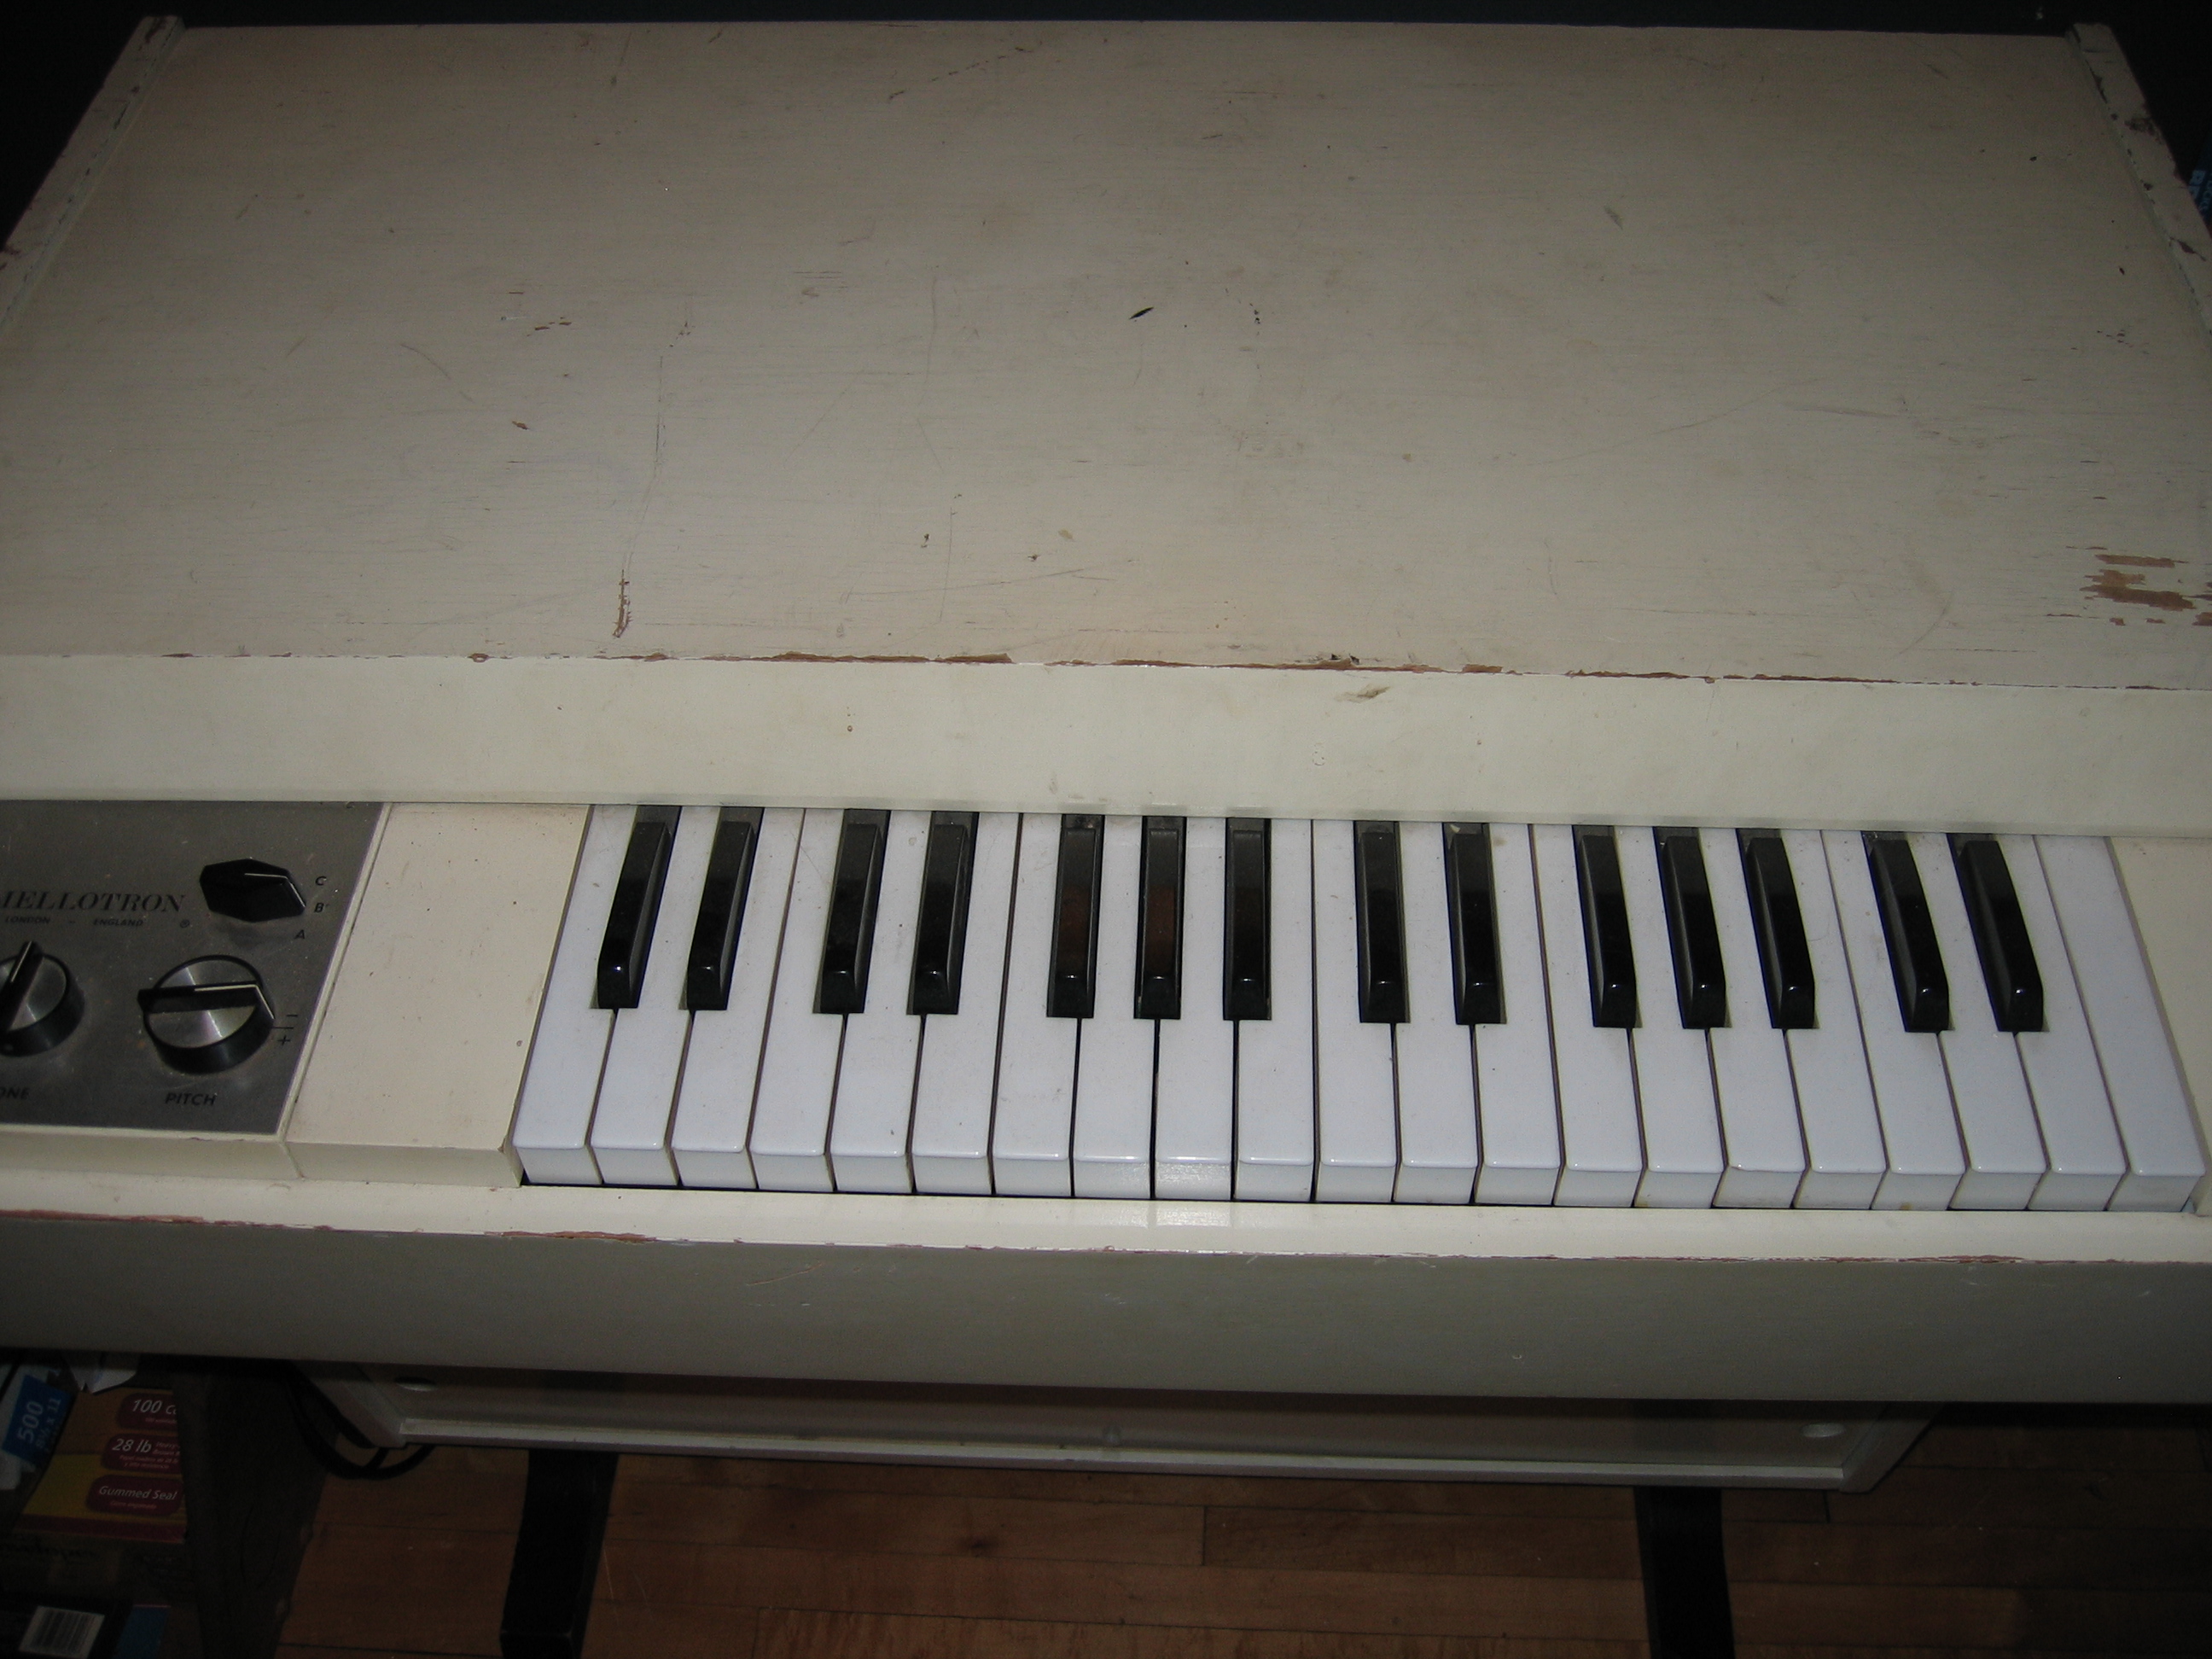 | |
| Skip';s Tron | SKIP_TRON_4 | 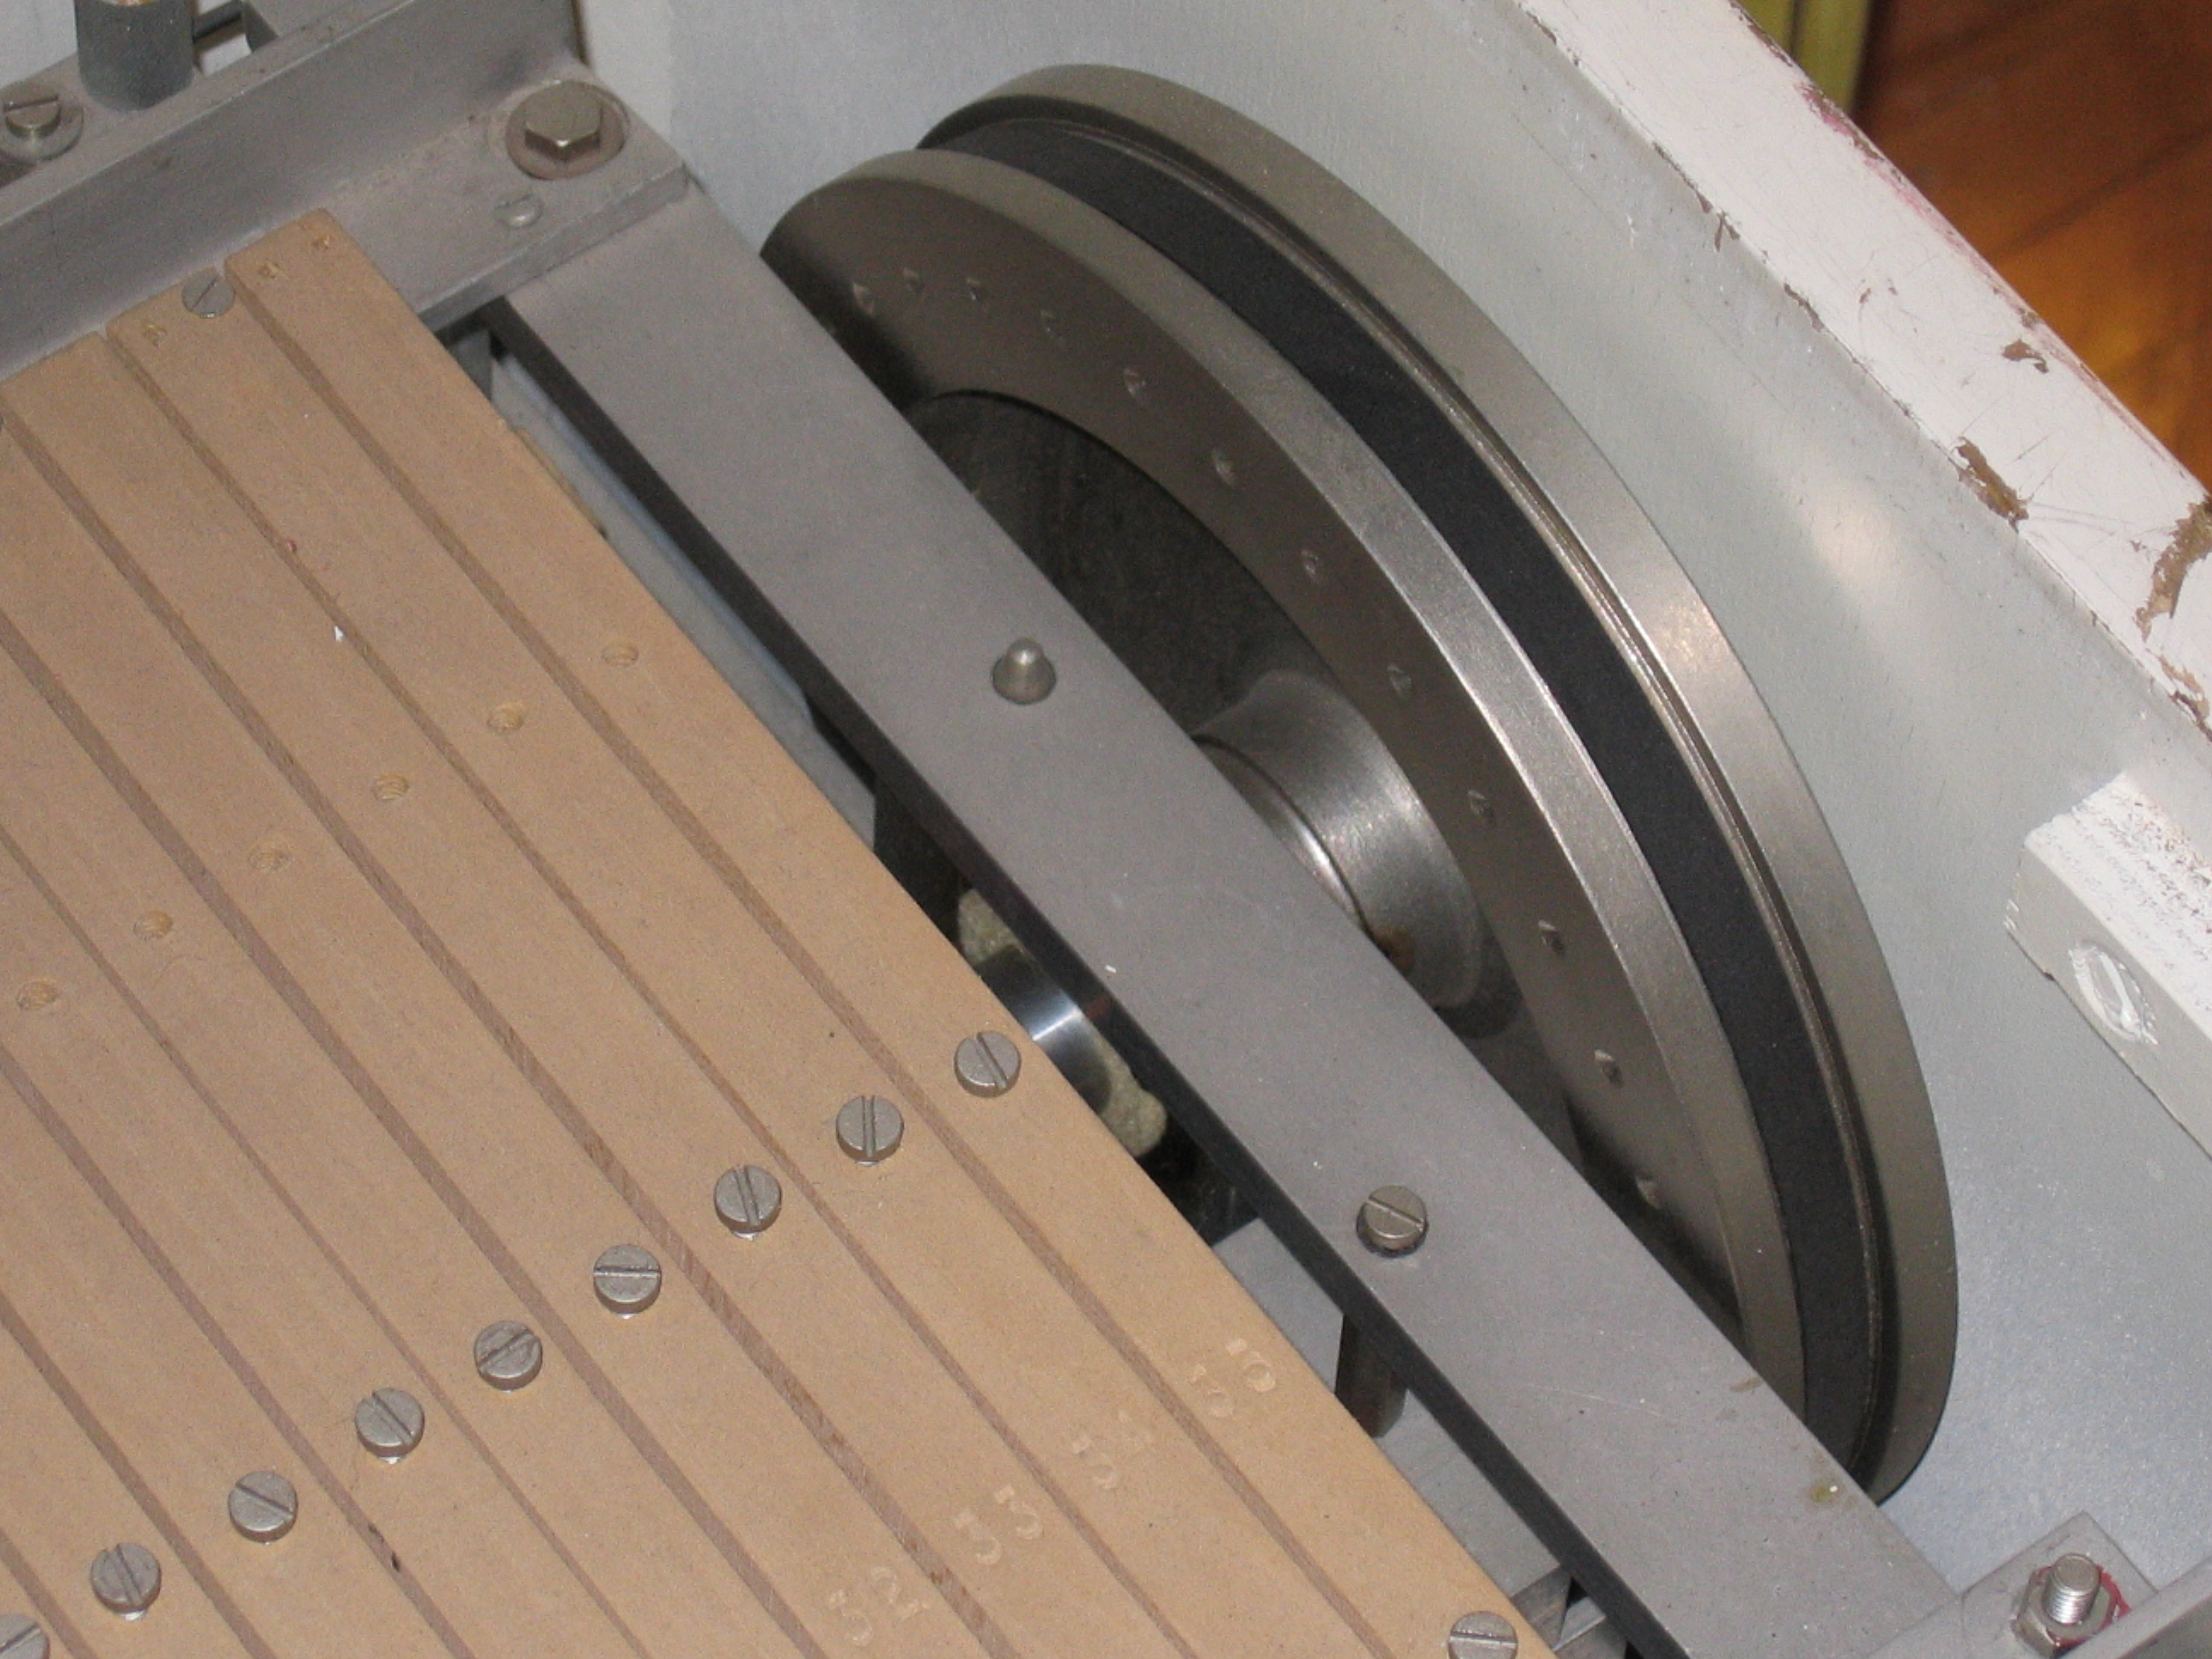 | |
| Skip';s Tron | SKIP_TRON_10 | 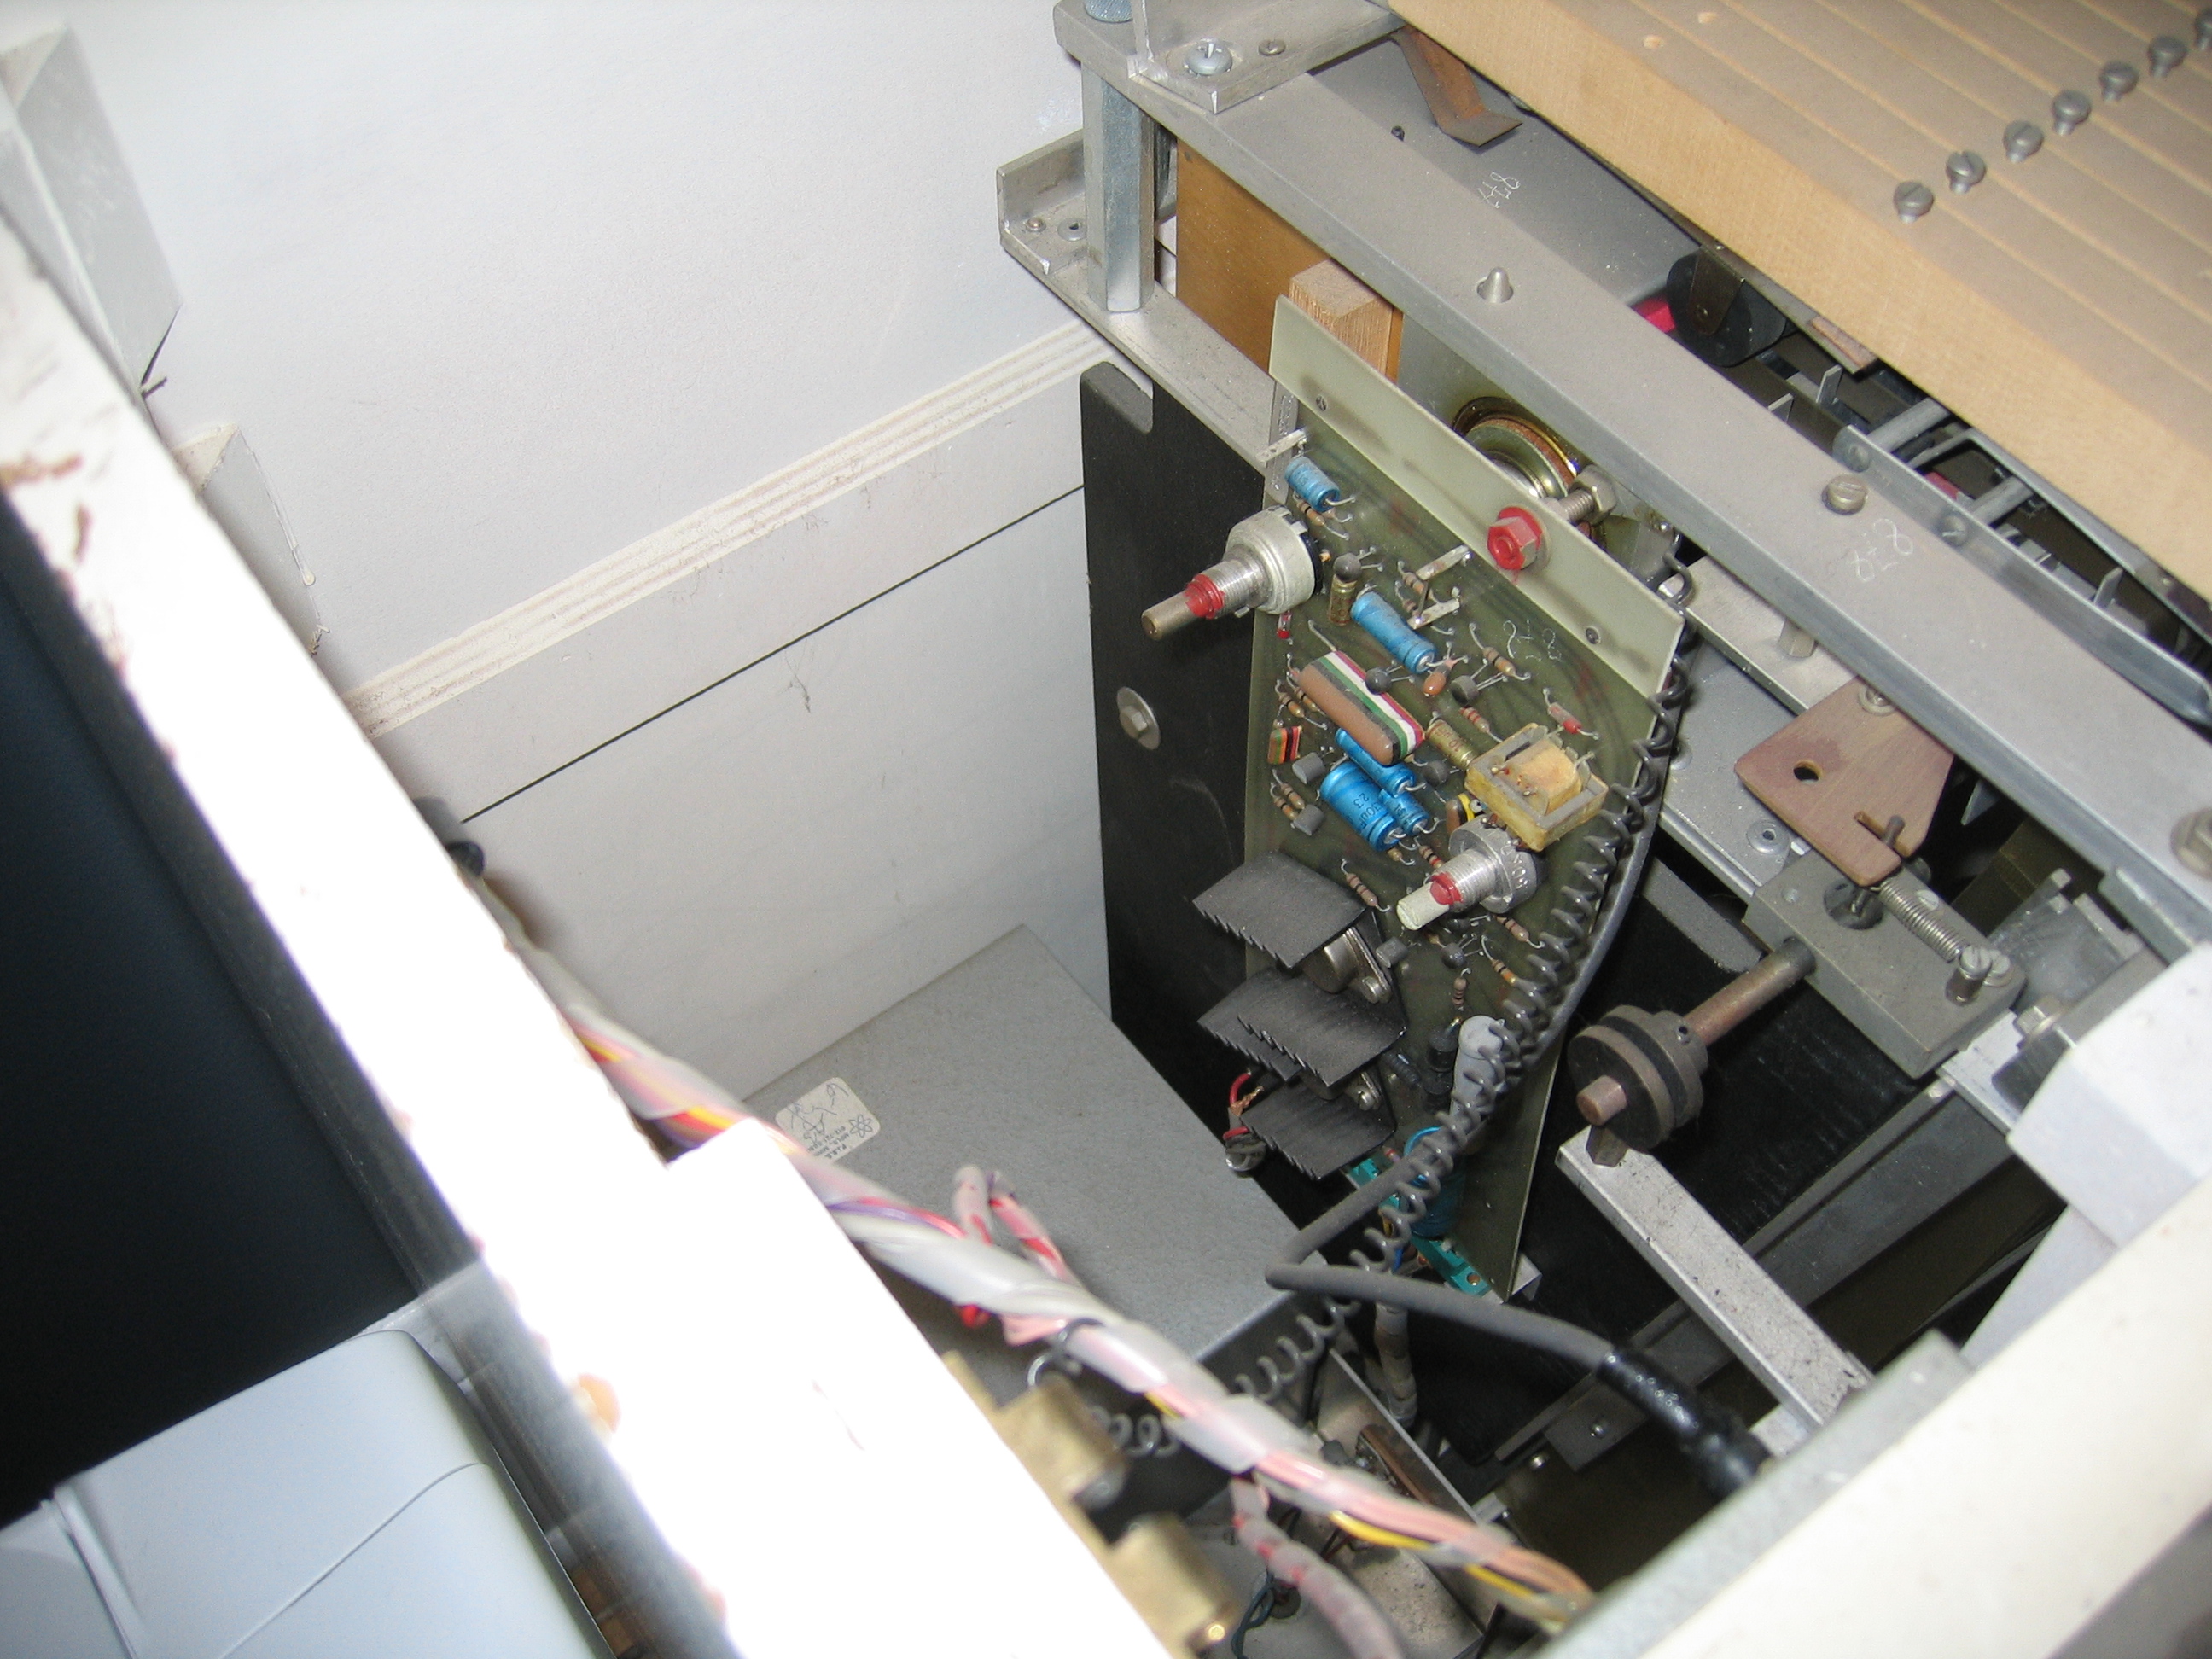 | |
| Skip';s Tron | SKIP_TRON_16 |  | |
| Skip';s Tron | SKIP_TRON_14 |  | |
| Skip';s Tron | SKIP_TRON_15 | 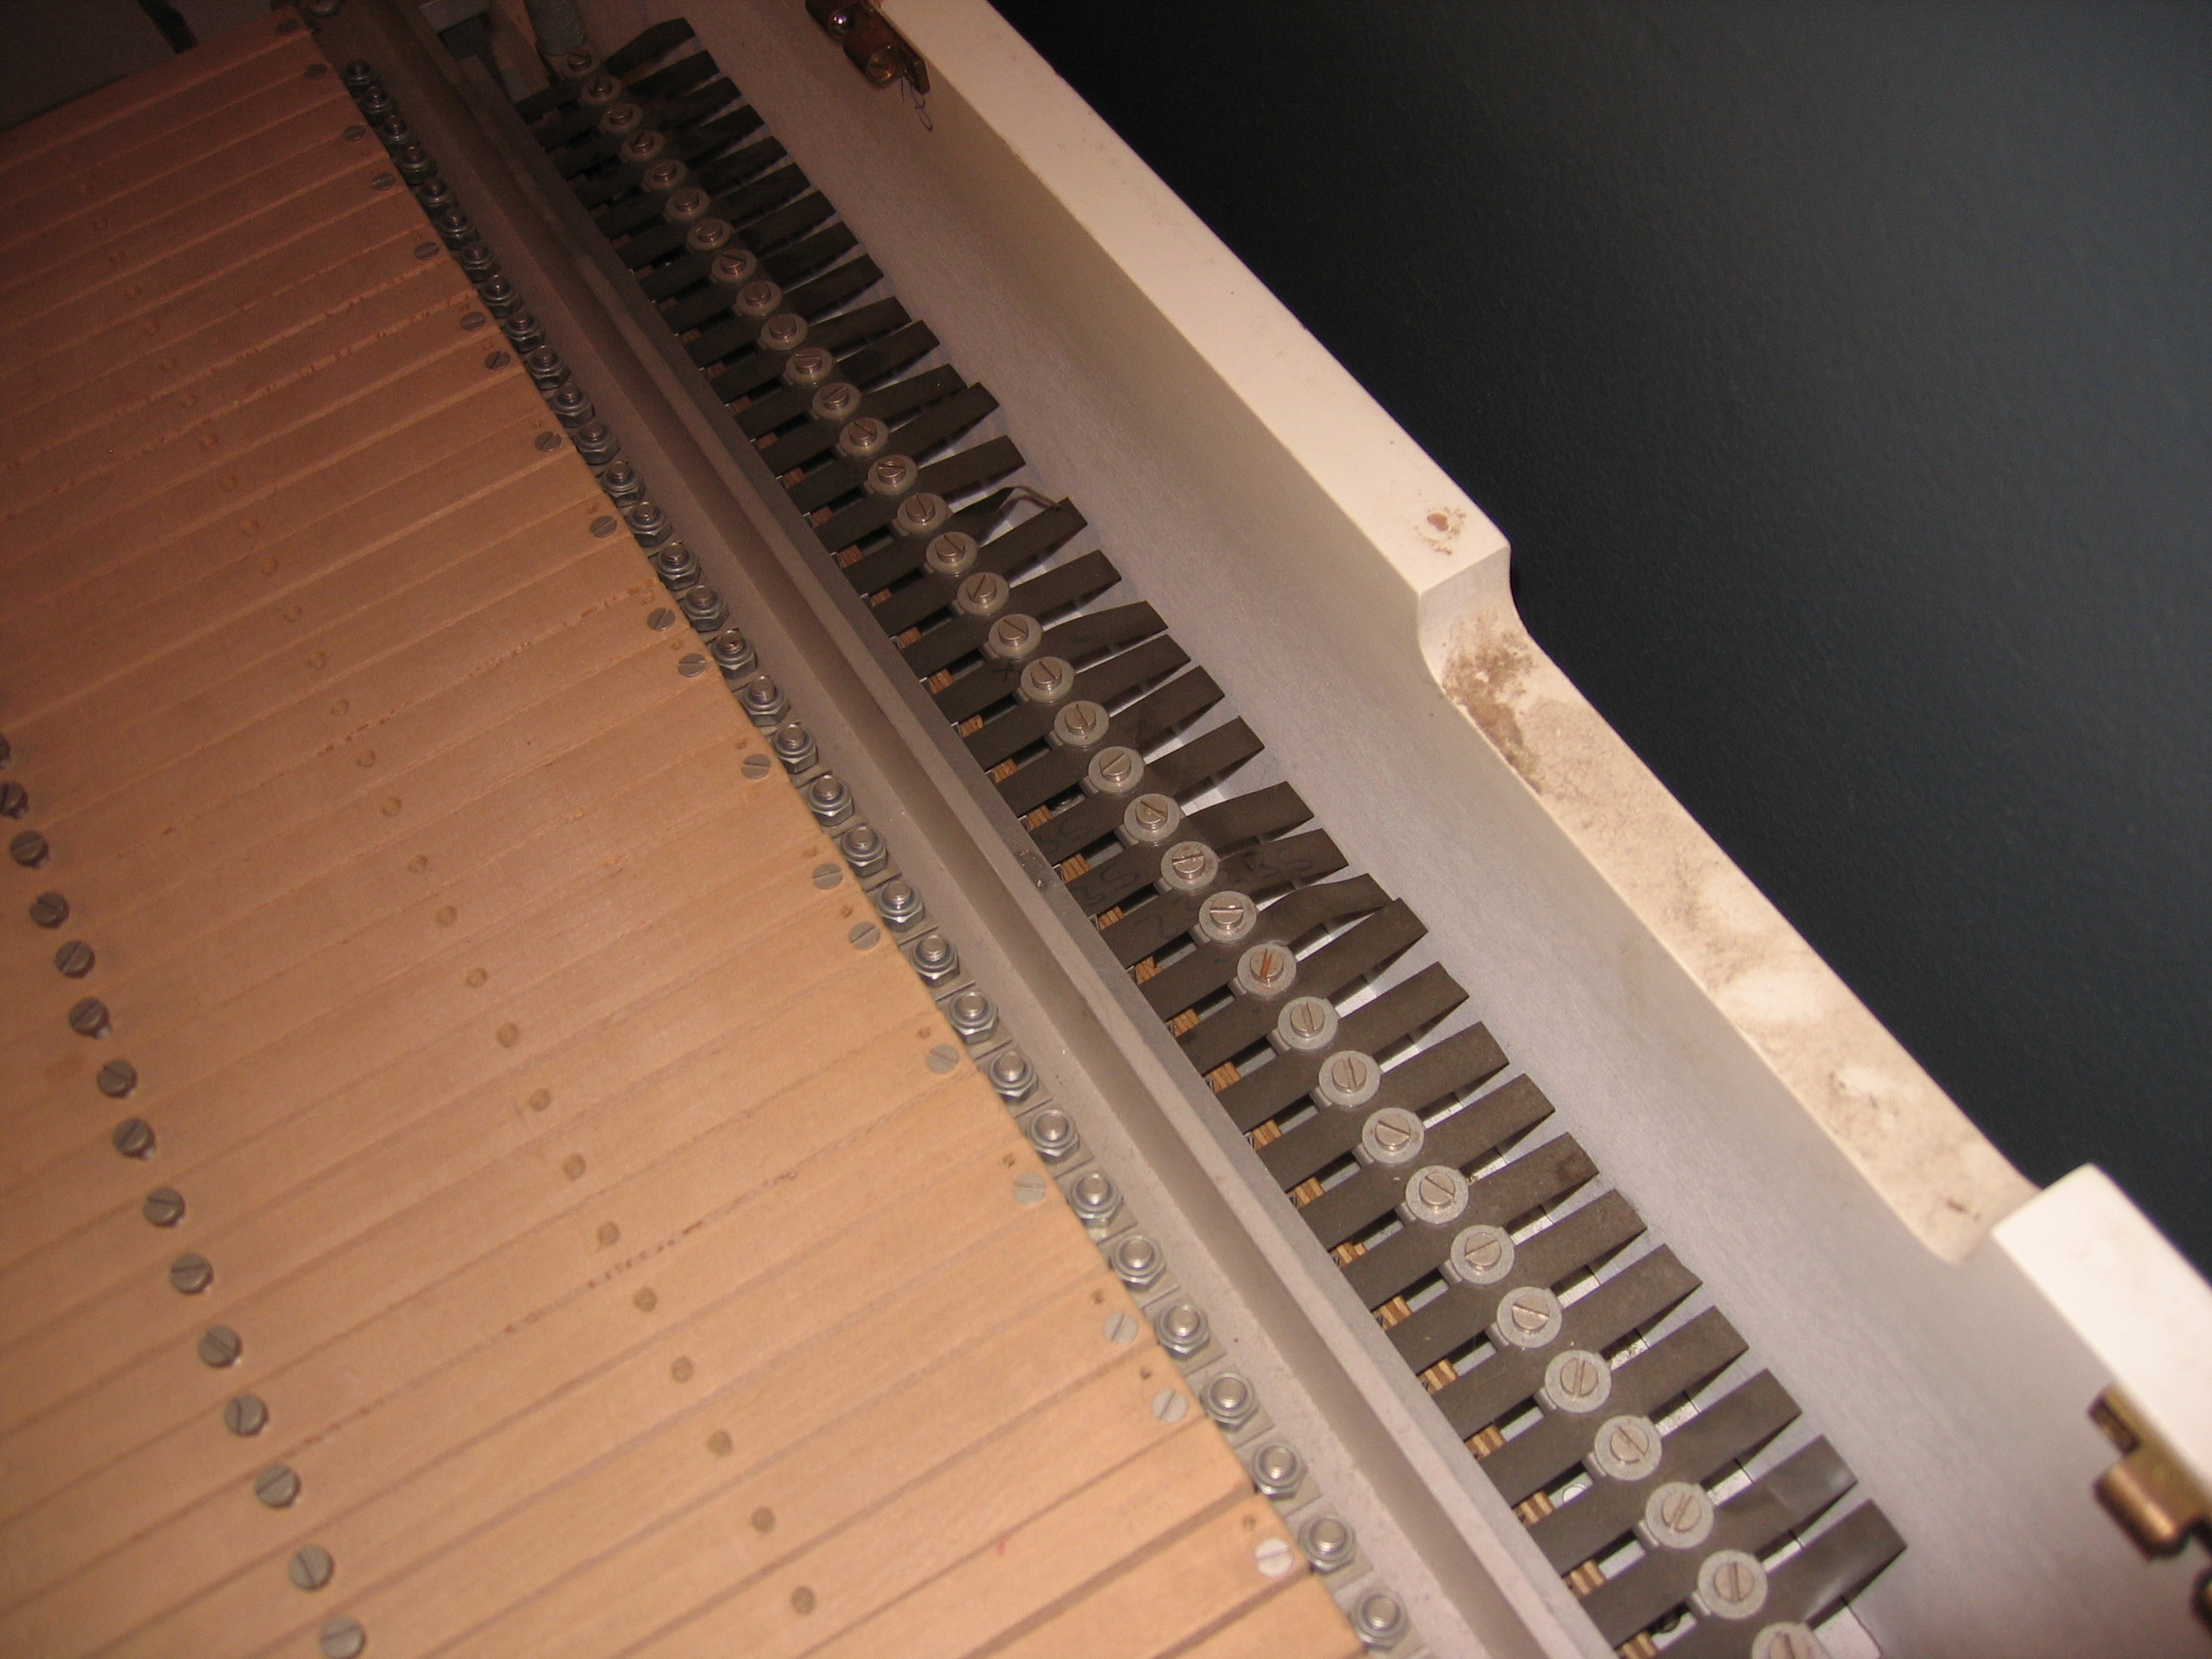 | |
| Skip';s Tron | SKIP_TRON_11 | 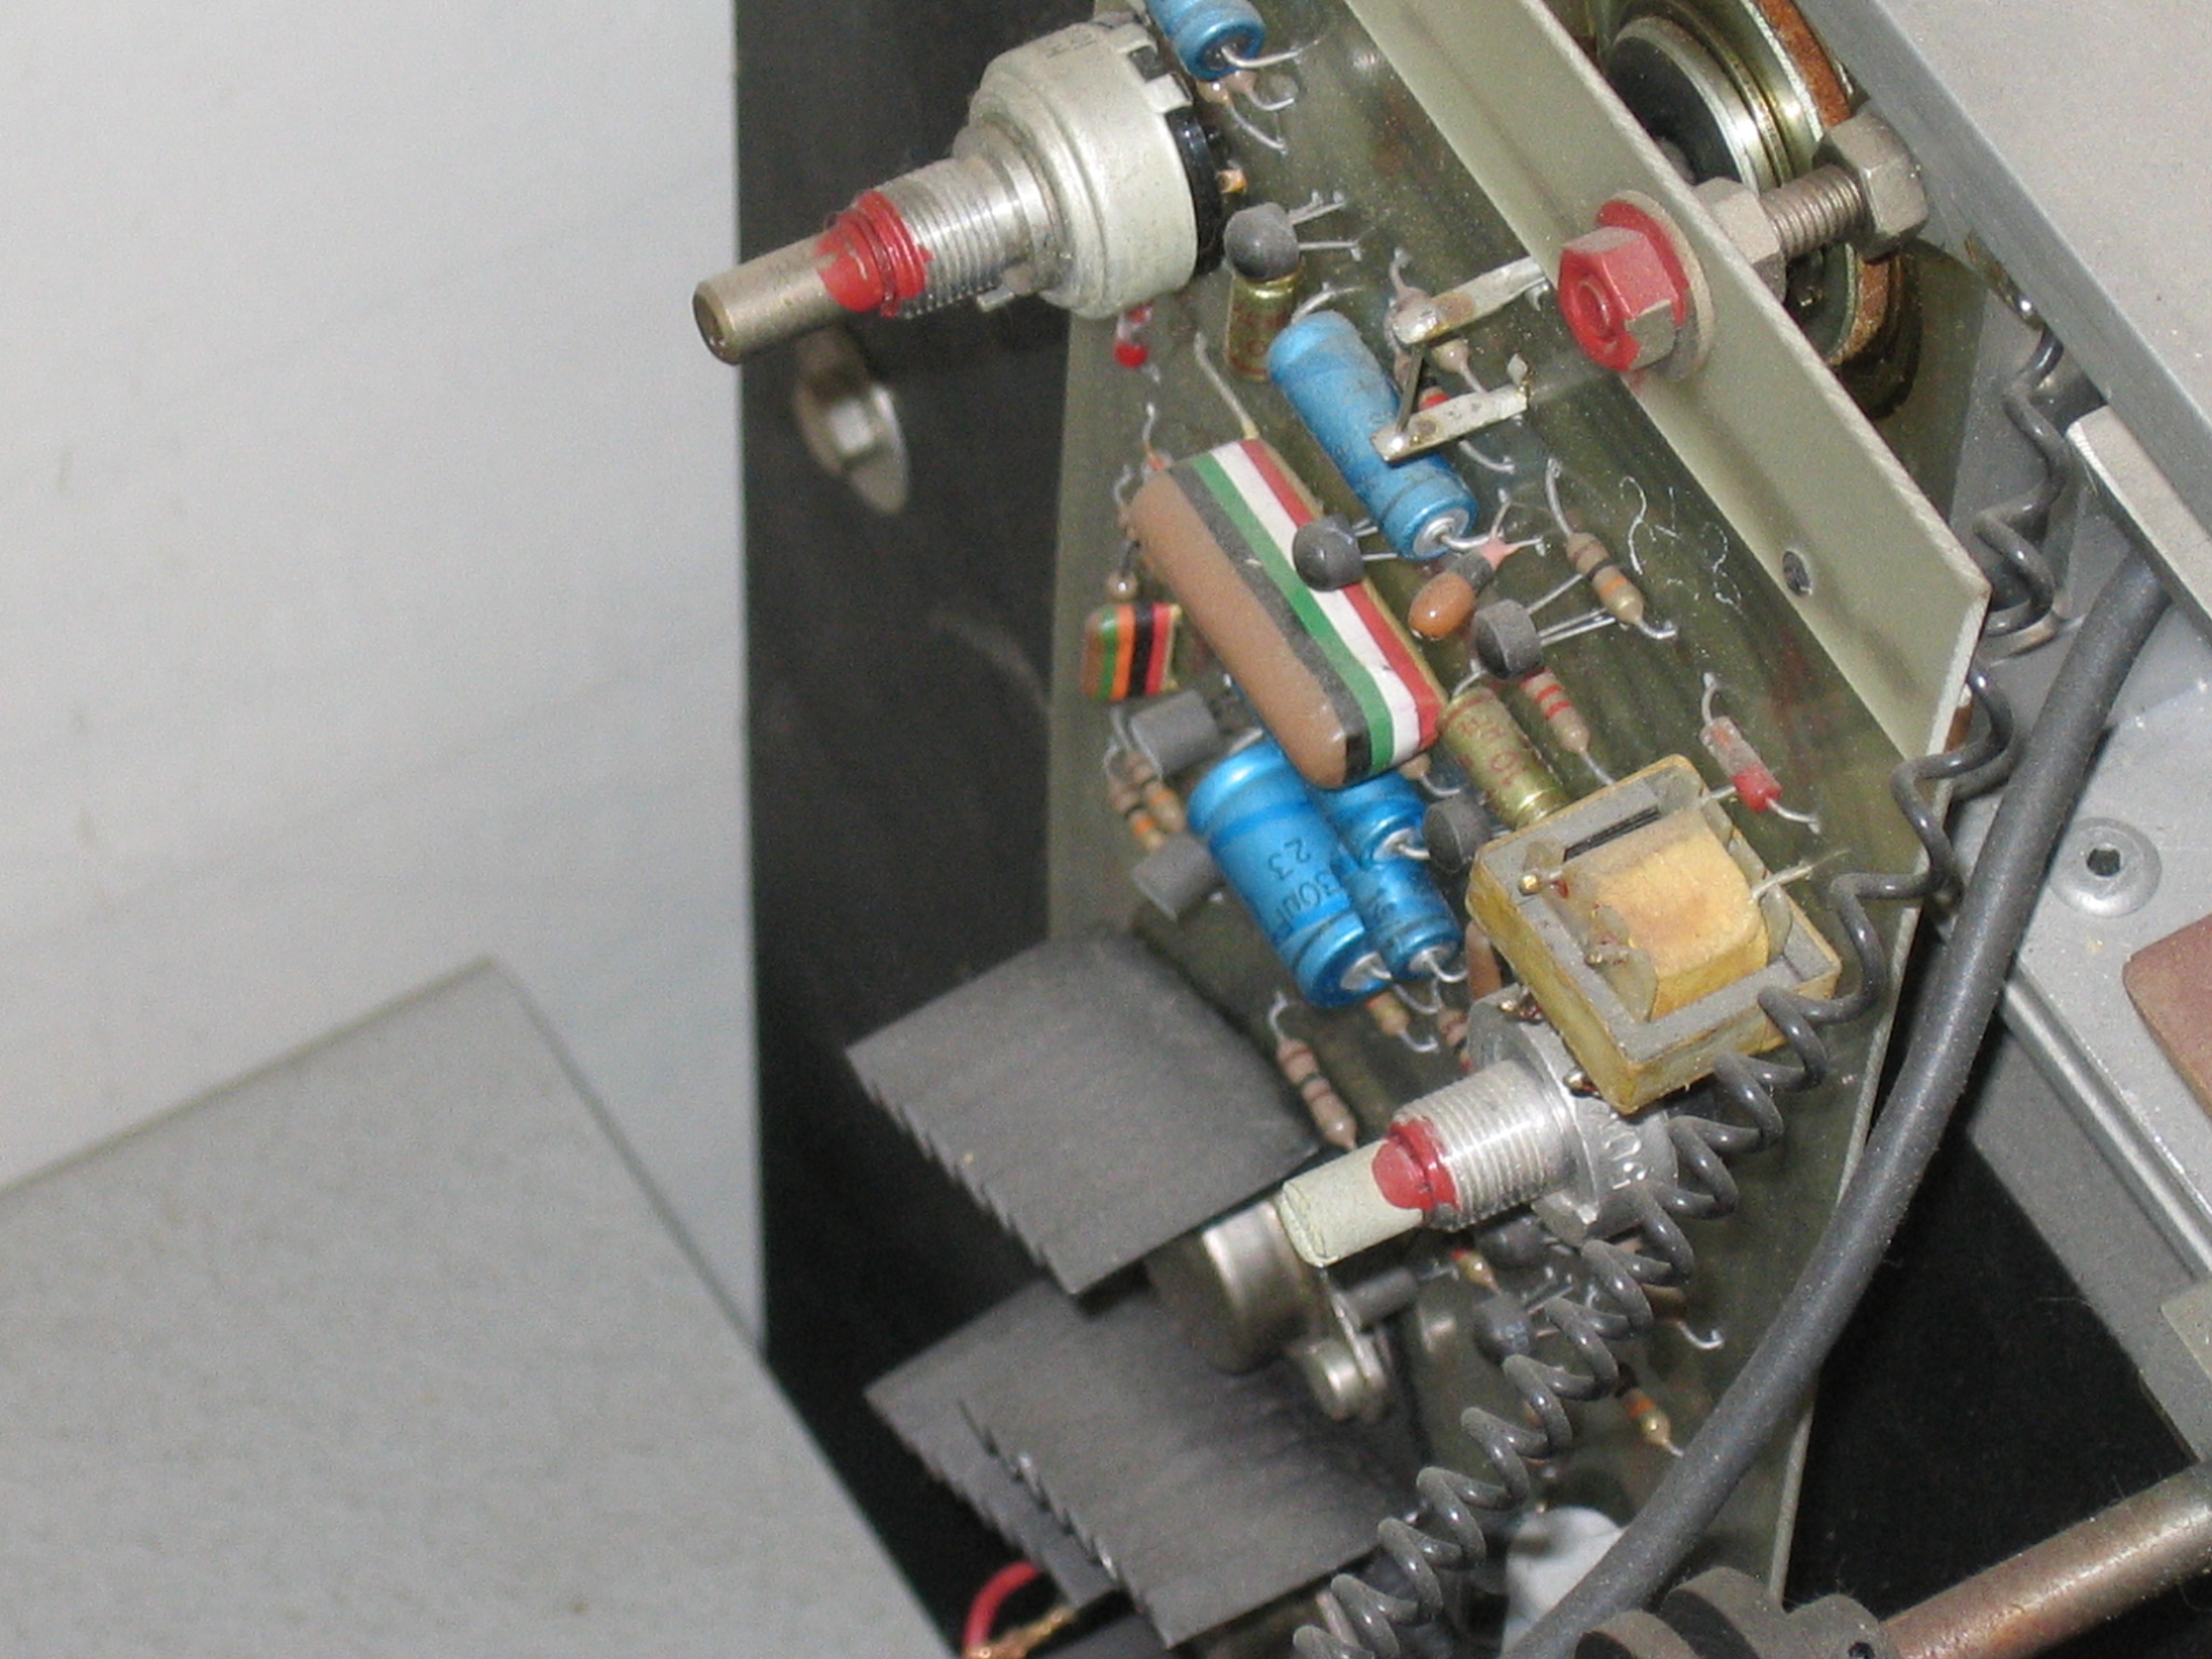 | |
| Skip';s Tron | SKIP_TRON_3 |  | |
| Skip';s Tron | SKIP_TRON_5 |  | |
| Skip';s Tron | SKIP_TRON_8 |  | |
| Skip';s Tron | SKIP_TRON_13 | 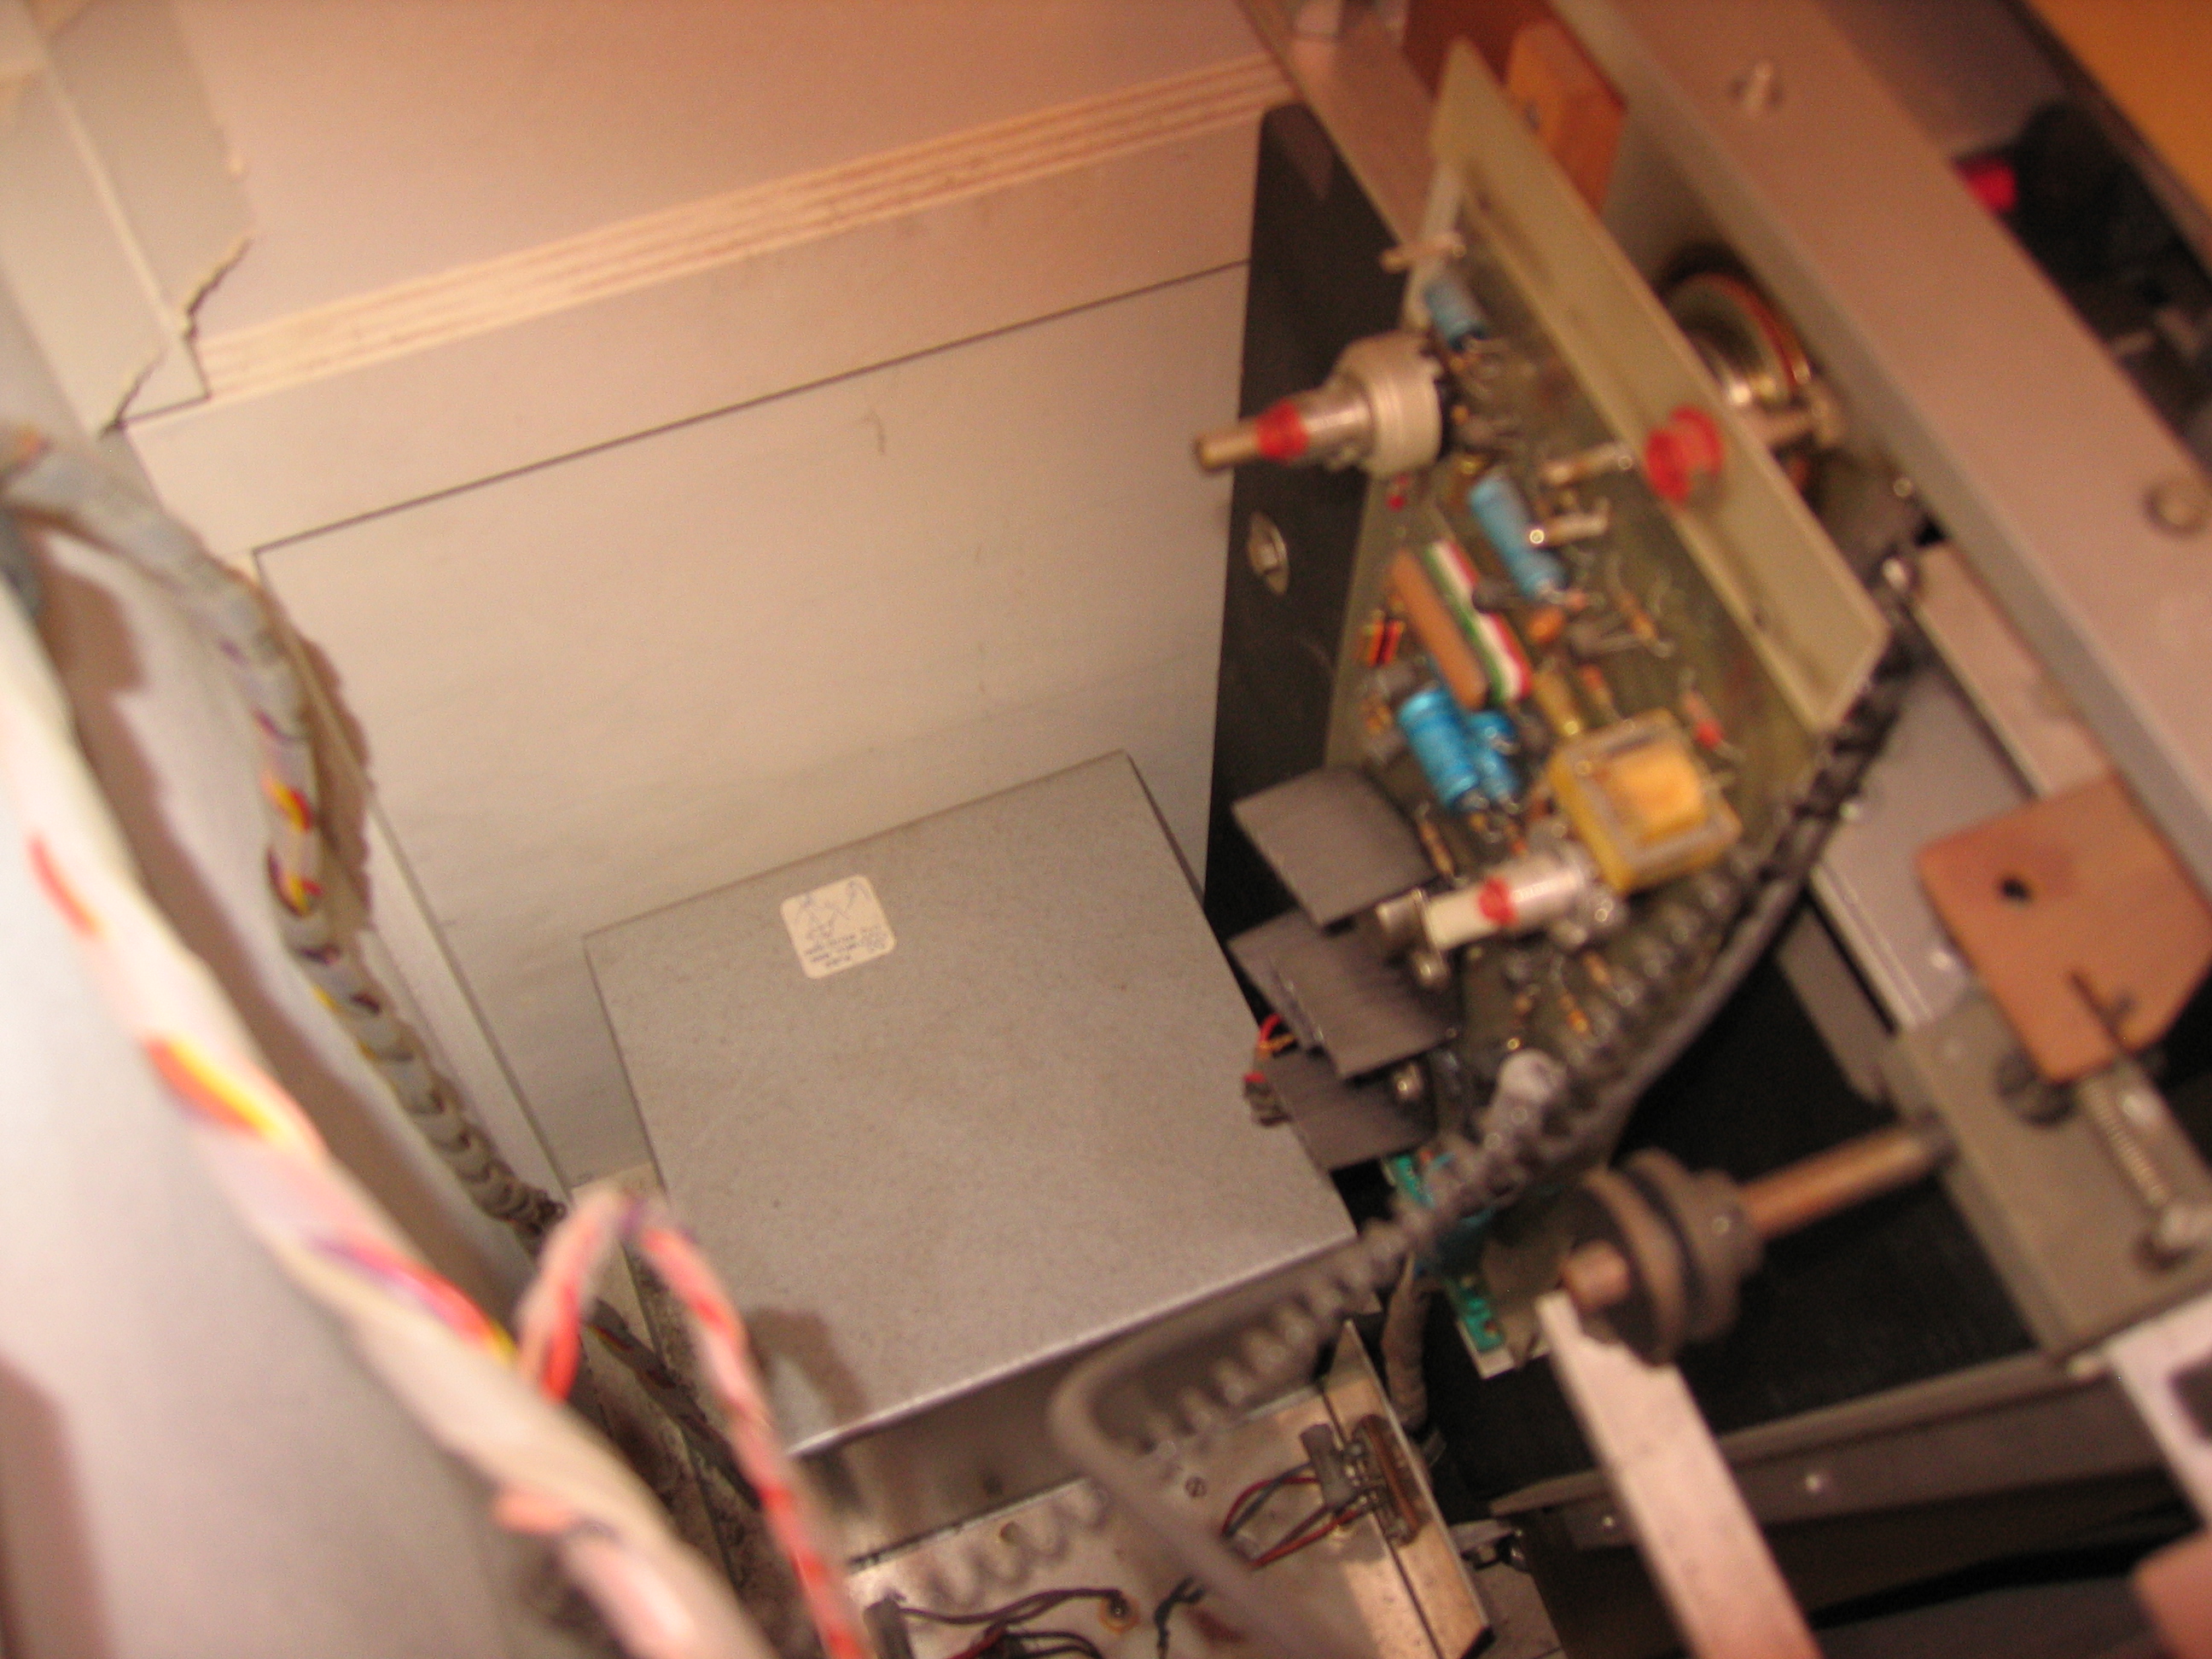 | |
| Skip';s Tron | SKIP_TRON_12 |  | |
| Skip';s Tron | SKIP_TRON_7 | 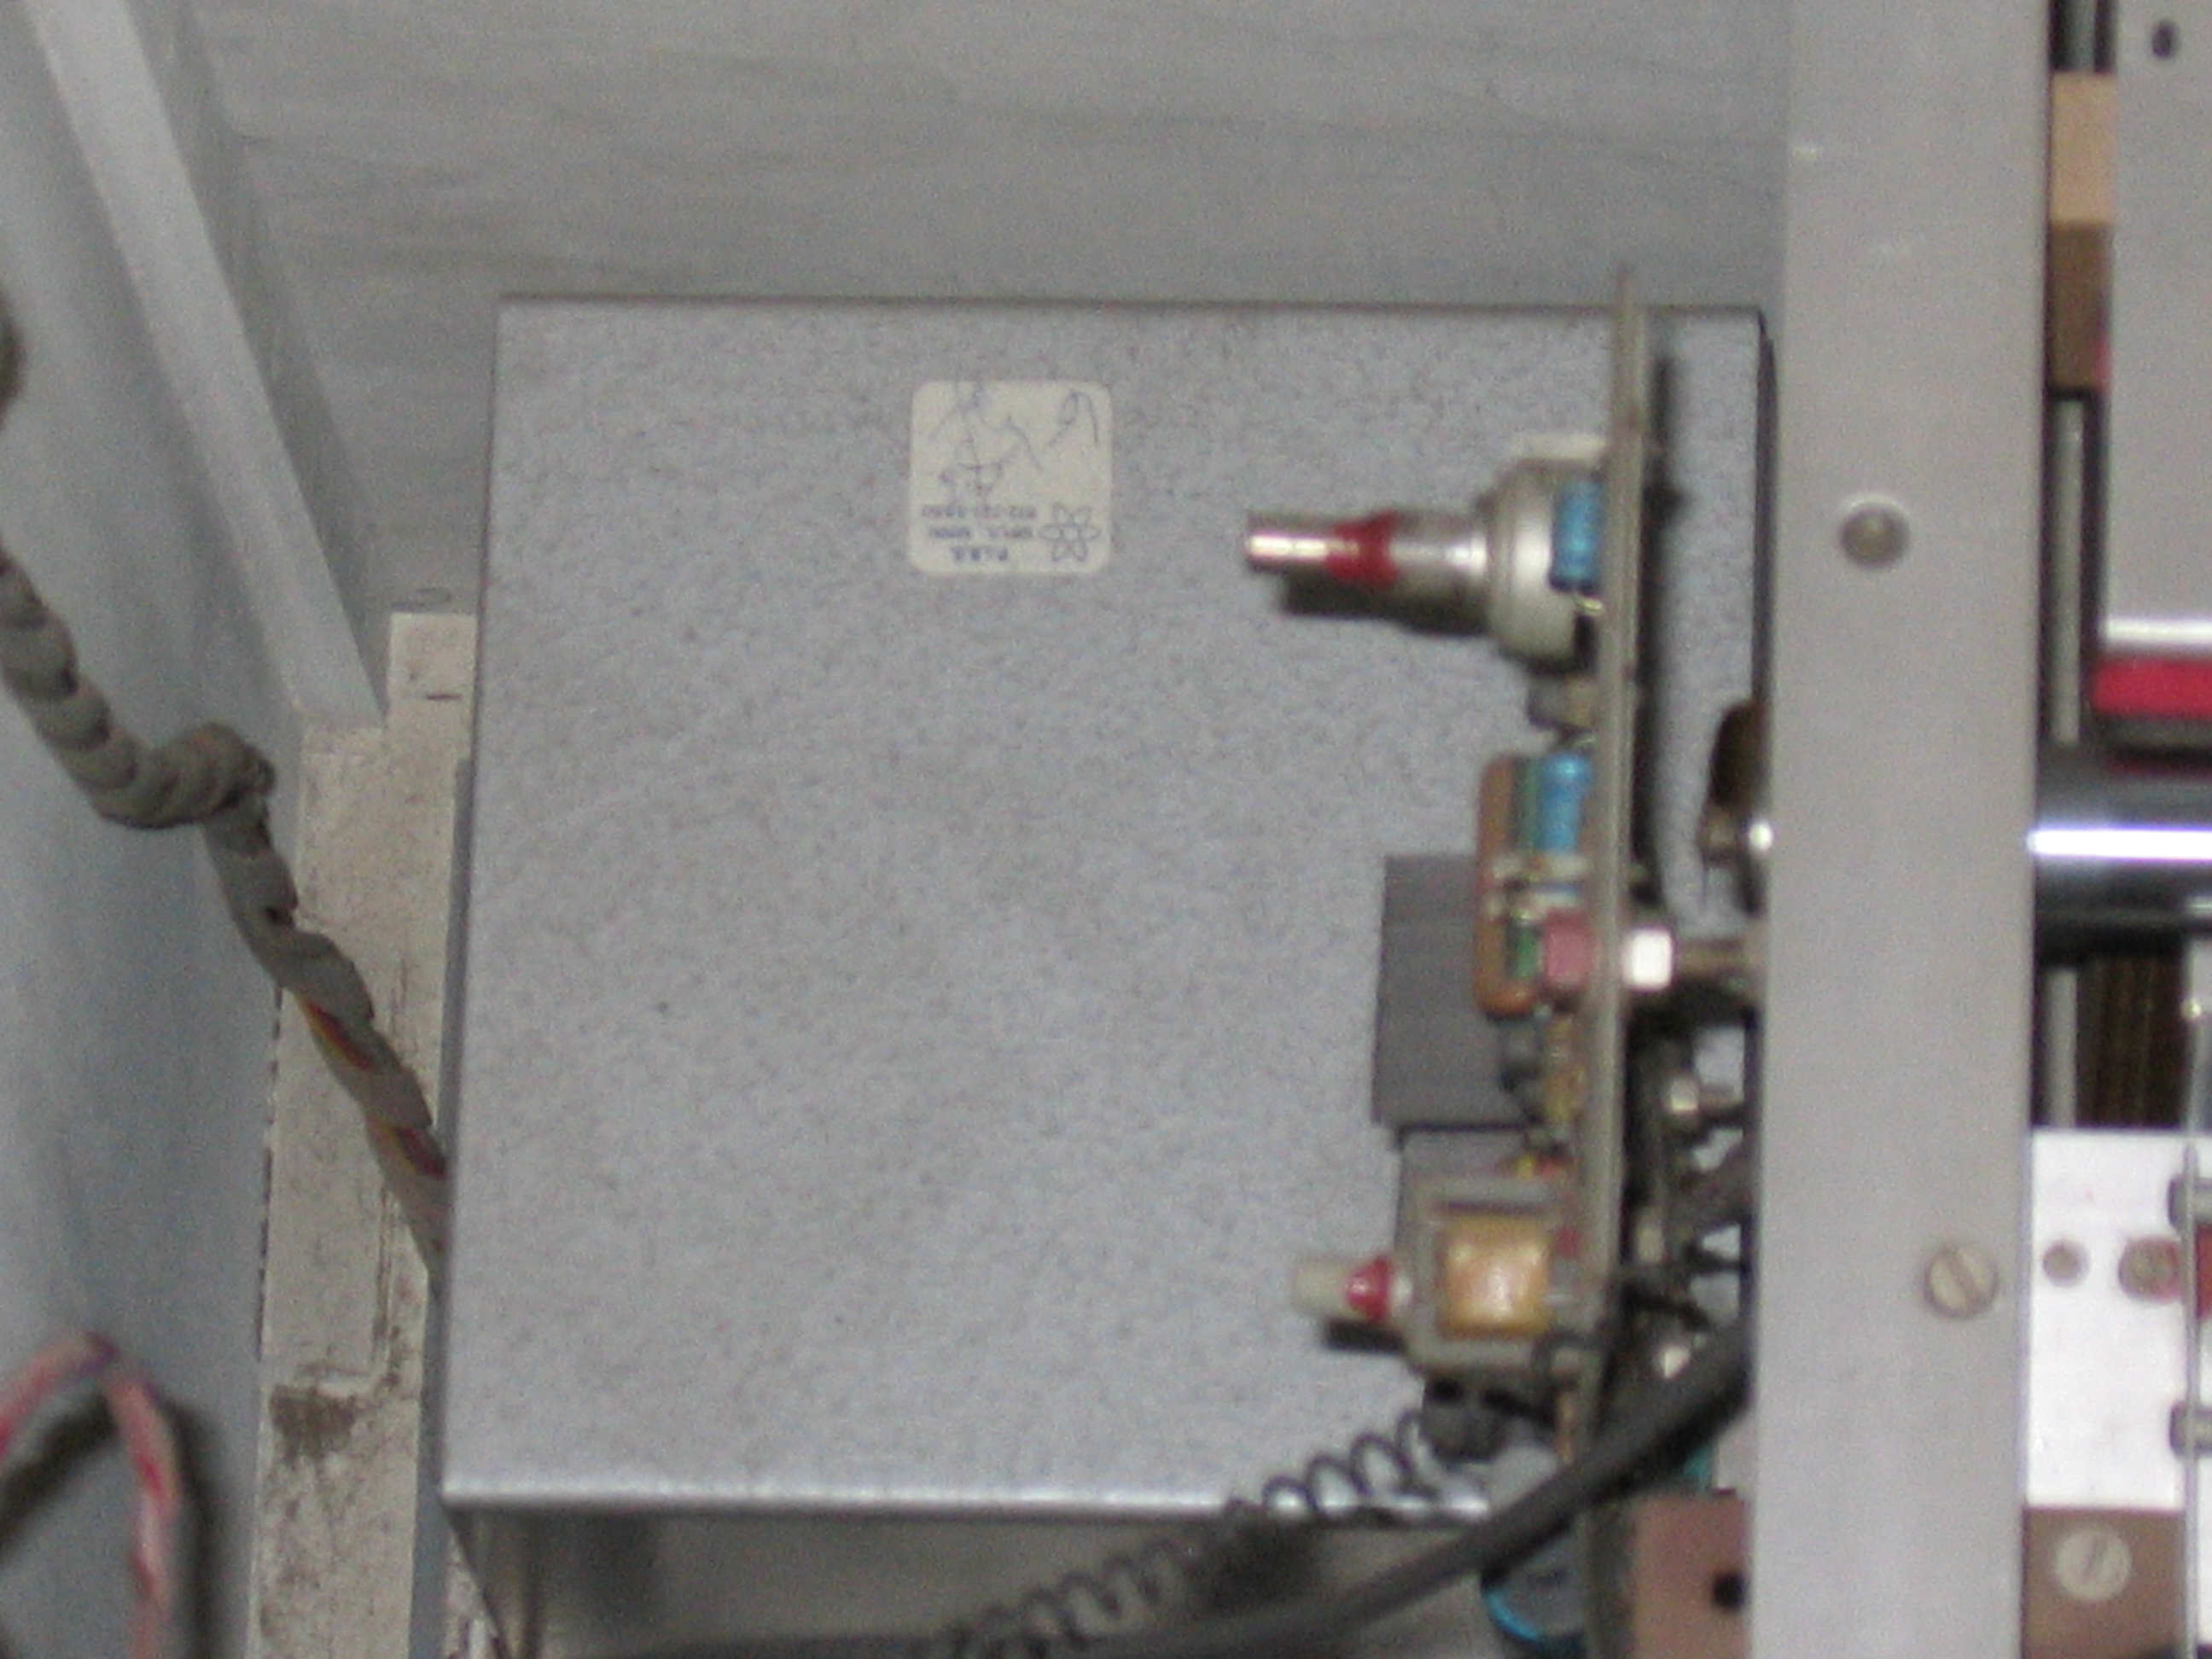 | |
| Skip';s Tron | SKIP_TRON_9 |  | |
| Skip';s Tron | SKIP_TRON_1 |  | |
| TRON LEGACY | Tron-legacy-poster |  | |
| The Black Mellotron | As it arrived |  | The Black Mellotron when I first obtained it |
| The Black Mellotron | As it arrived |  | Not much care taken in painting it. |
| The Black Mellotron | As it arrived |  | Sound Sales had it for an ";update."; |
| The Black Mellotron | As it arrived | 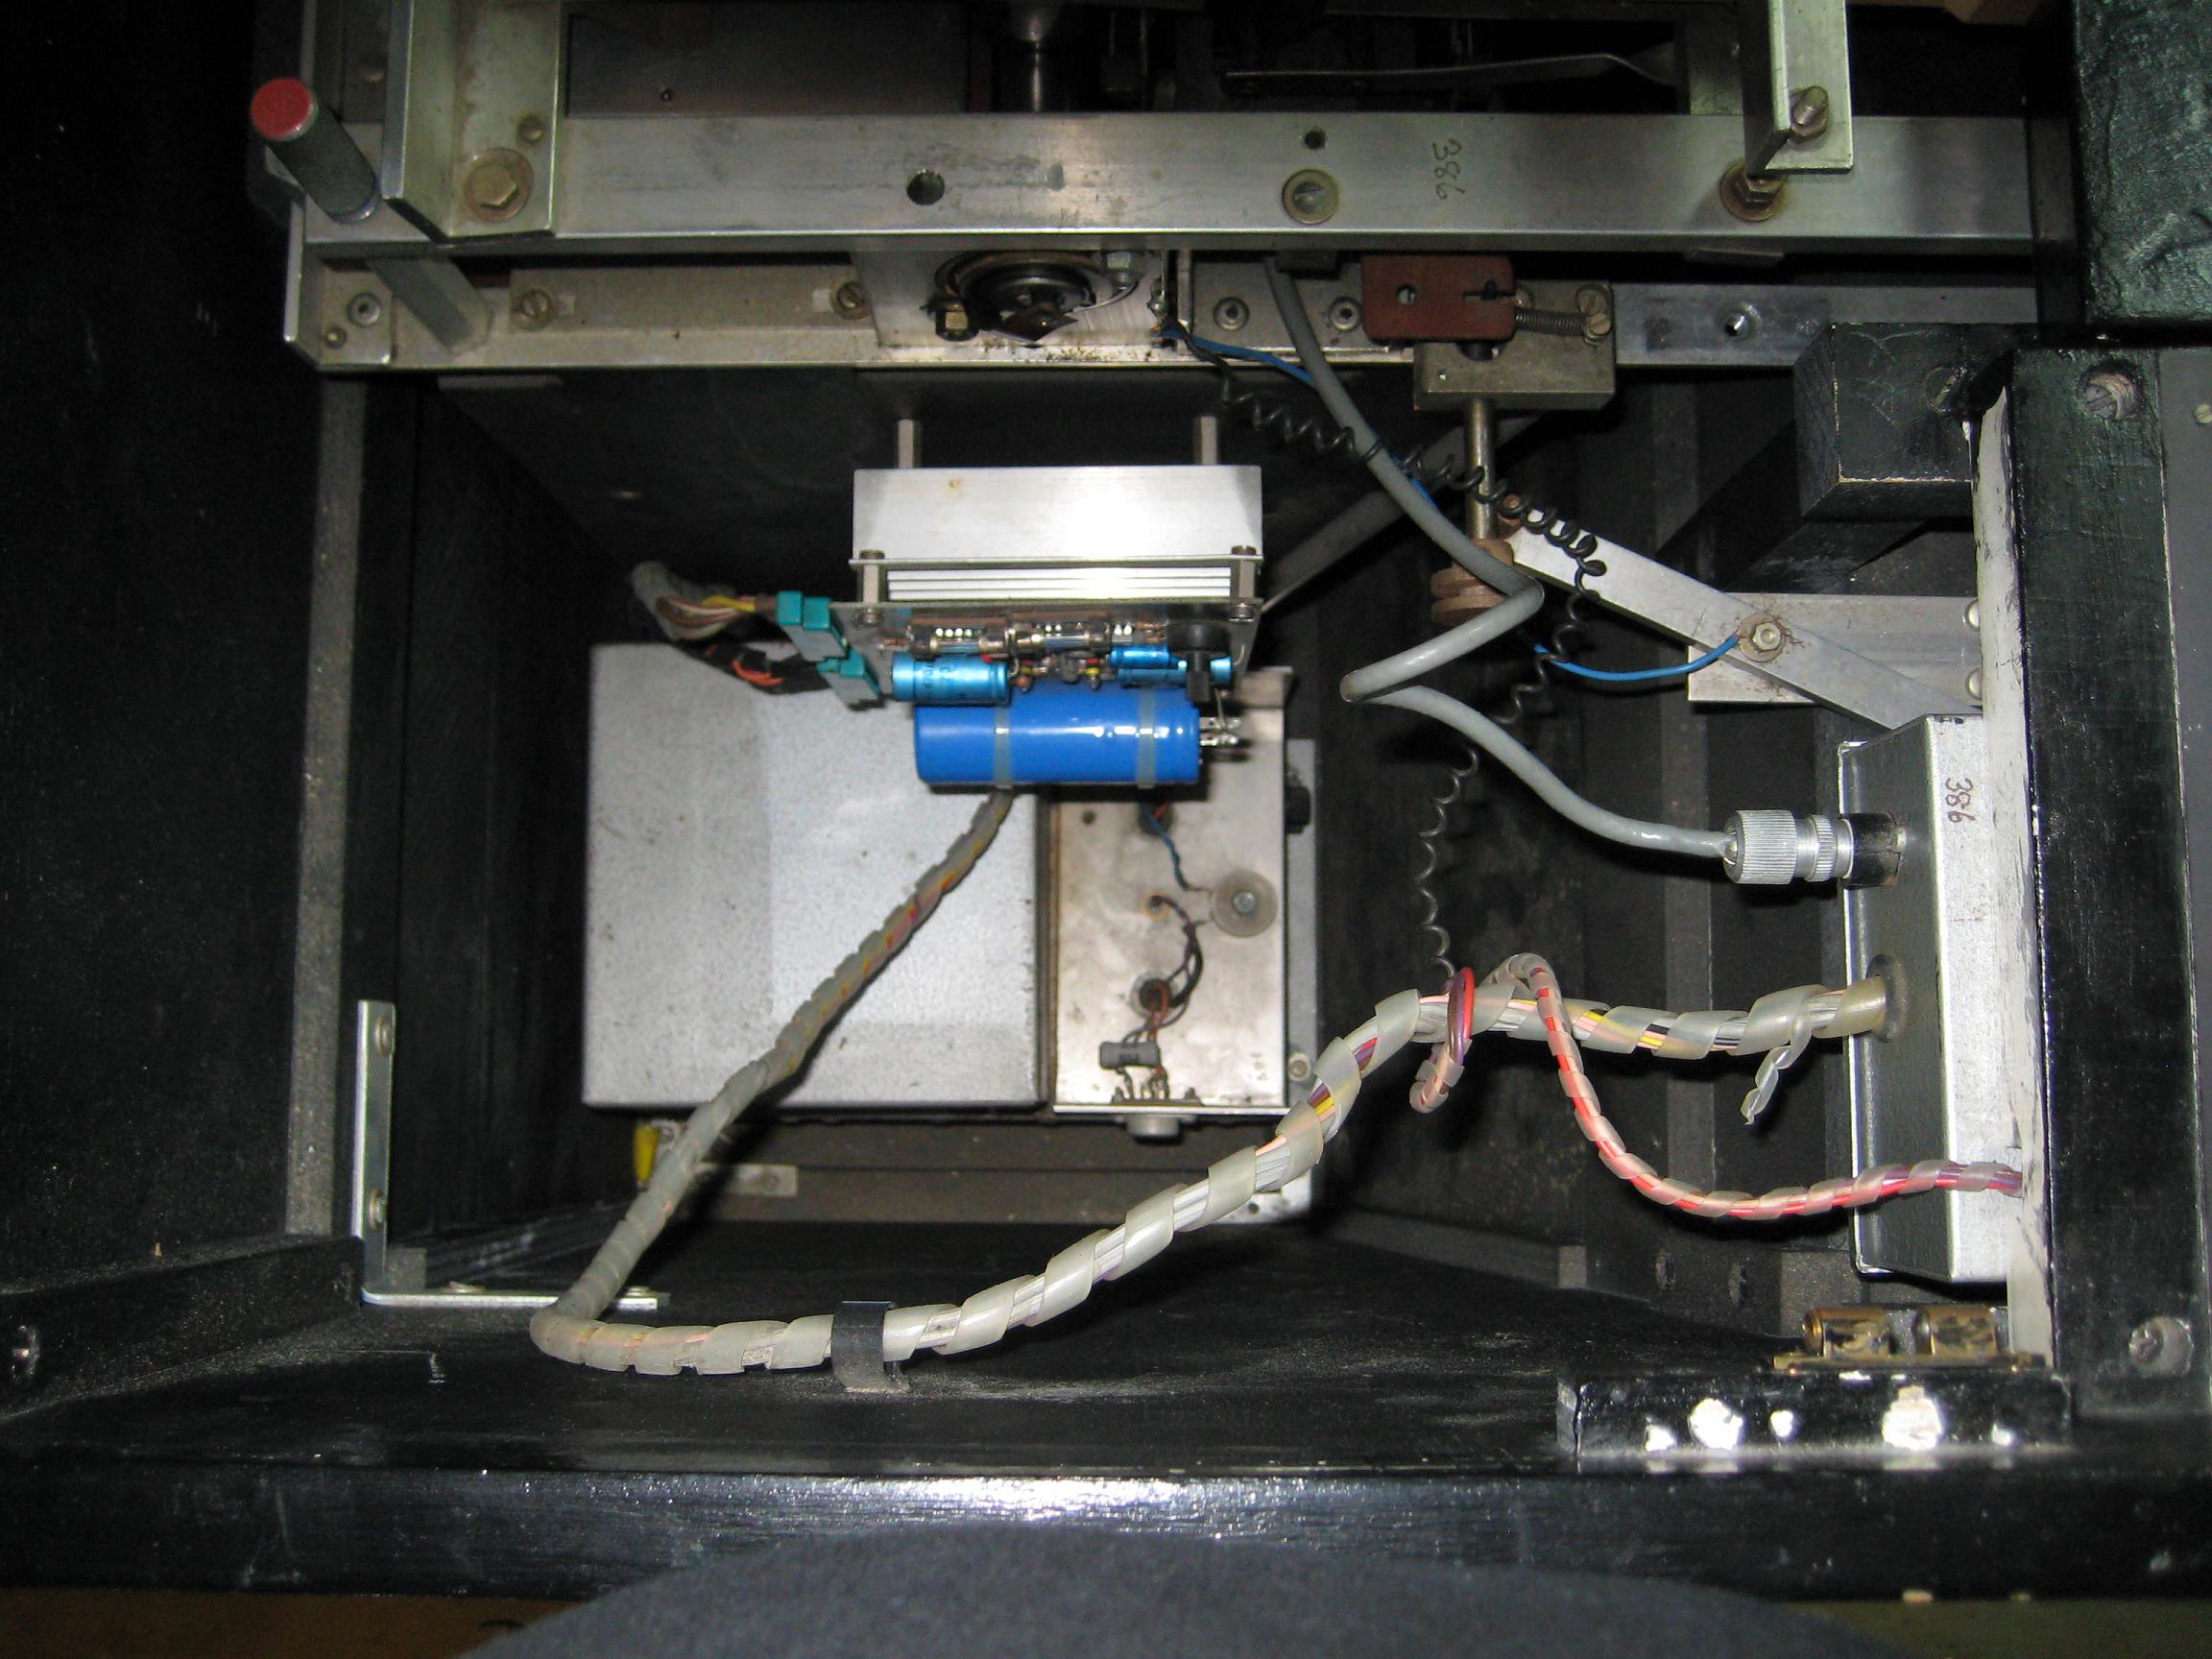 | Pretty messy inside. |
| The Black Mellotron | Cleaning up the cabinet | 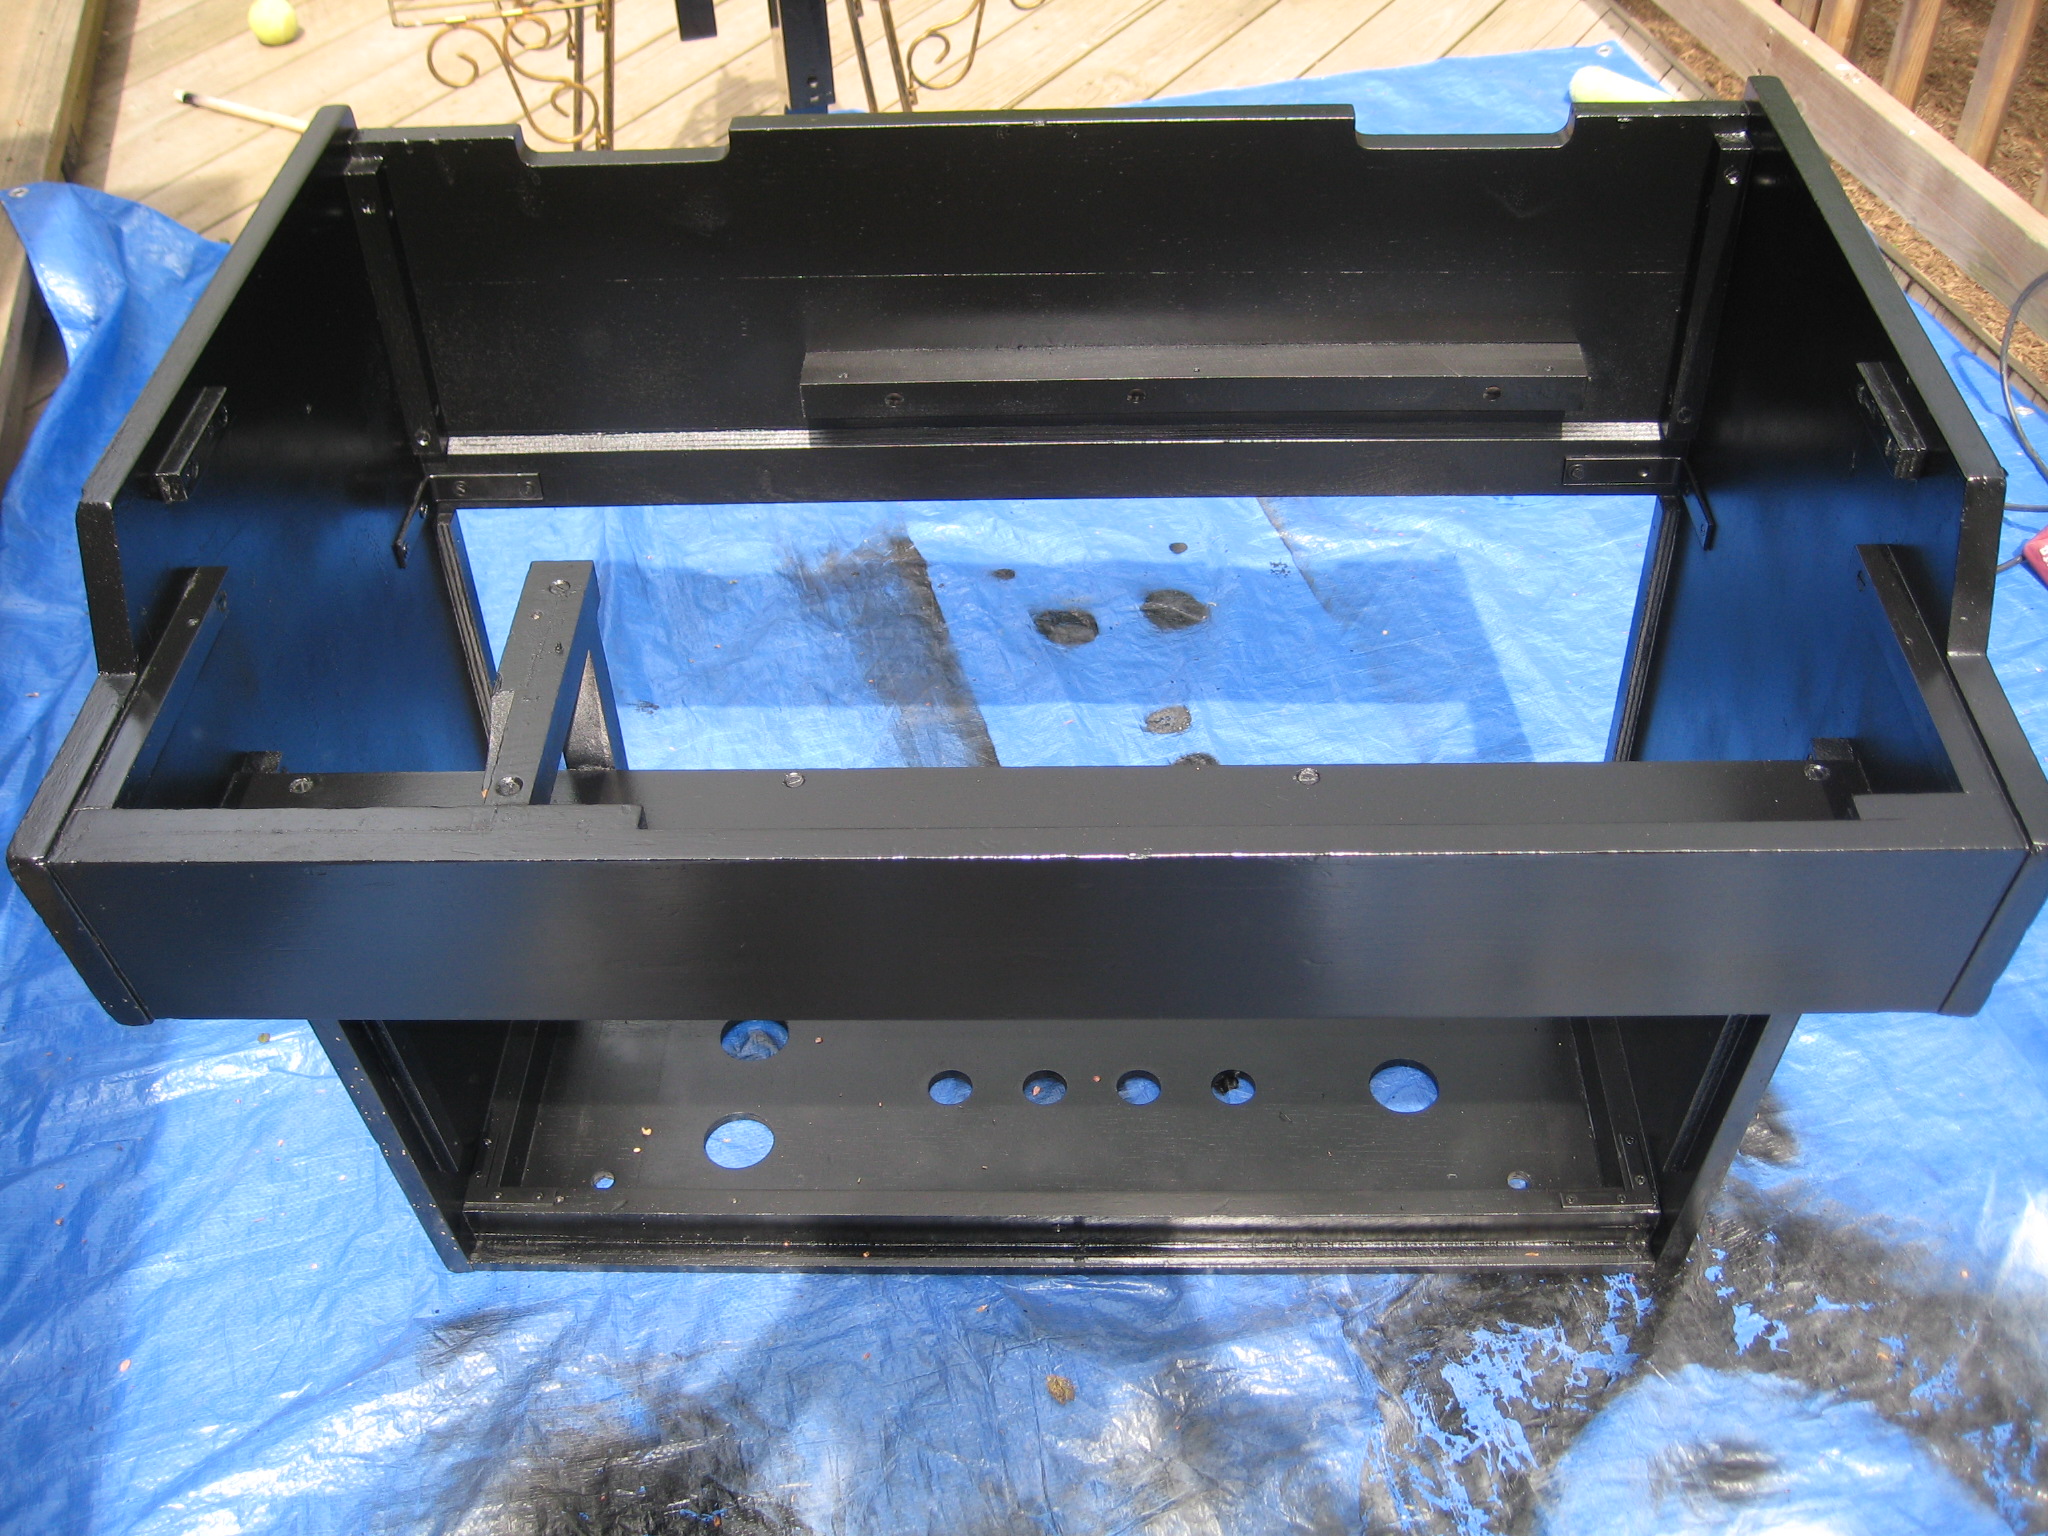 | I always paint the inside. |
| The Black Mellotron | Preparing the cabinet | 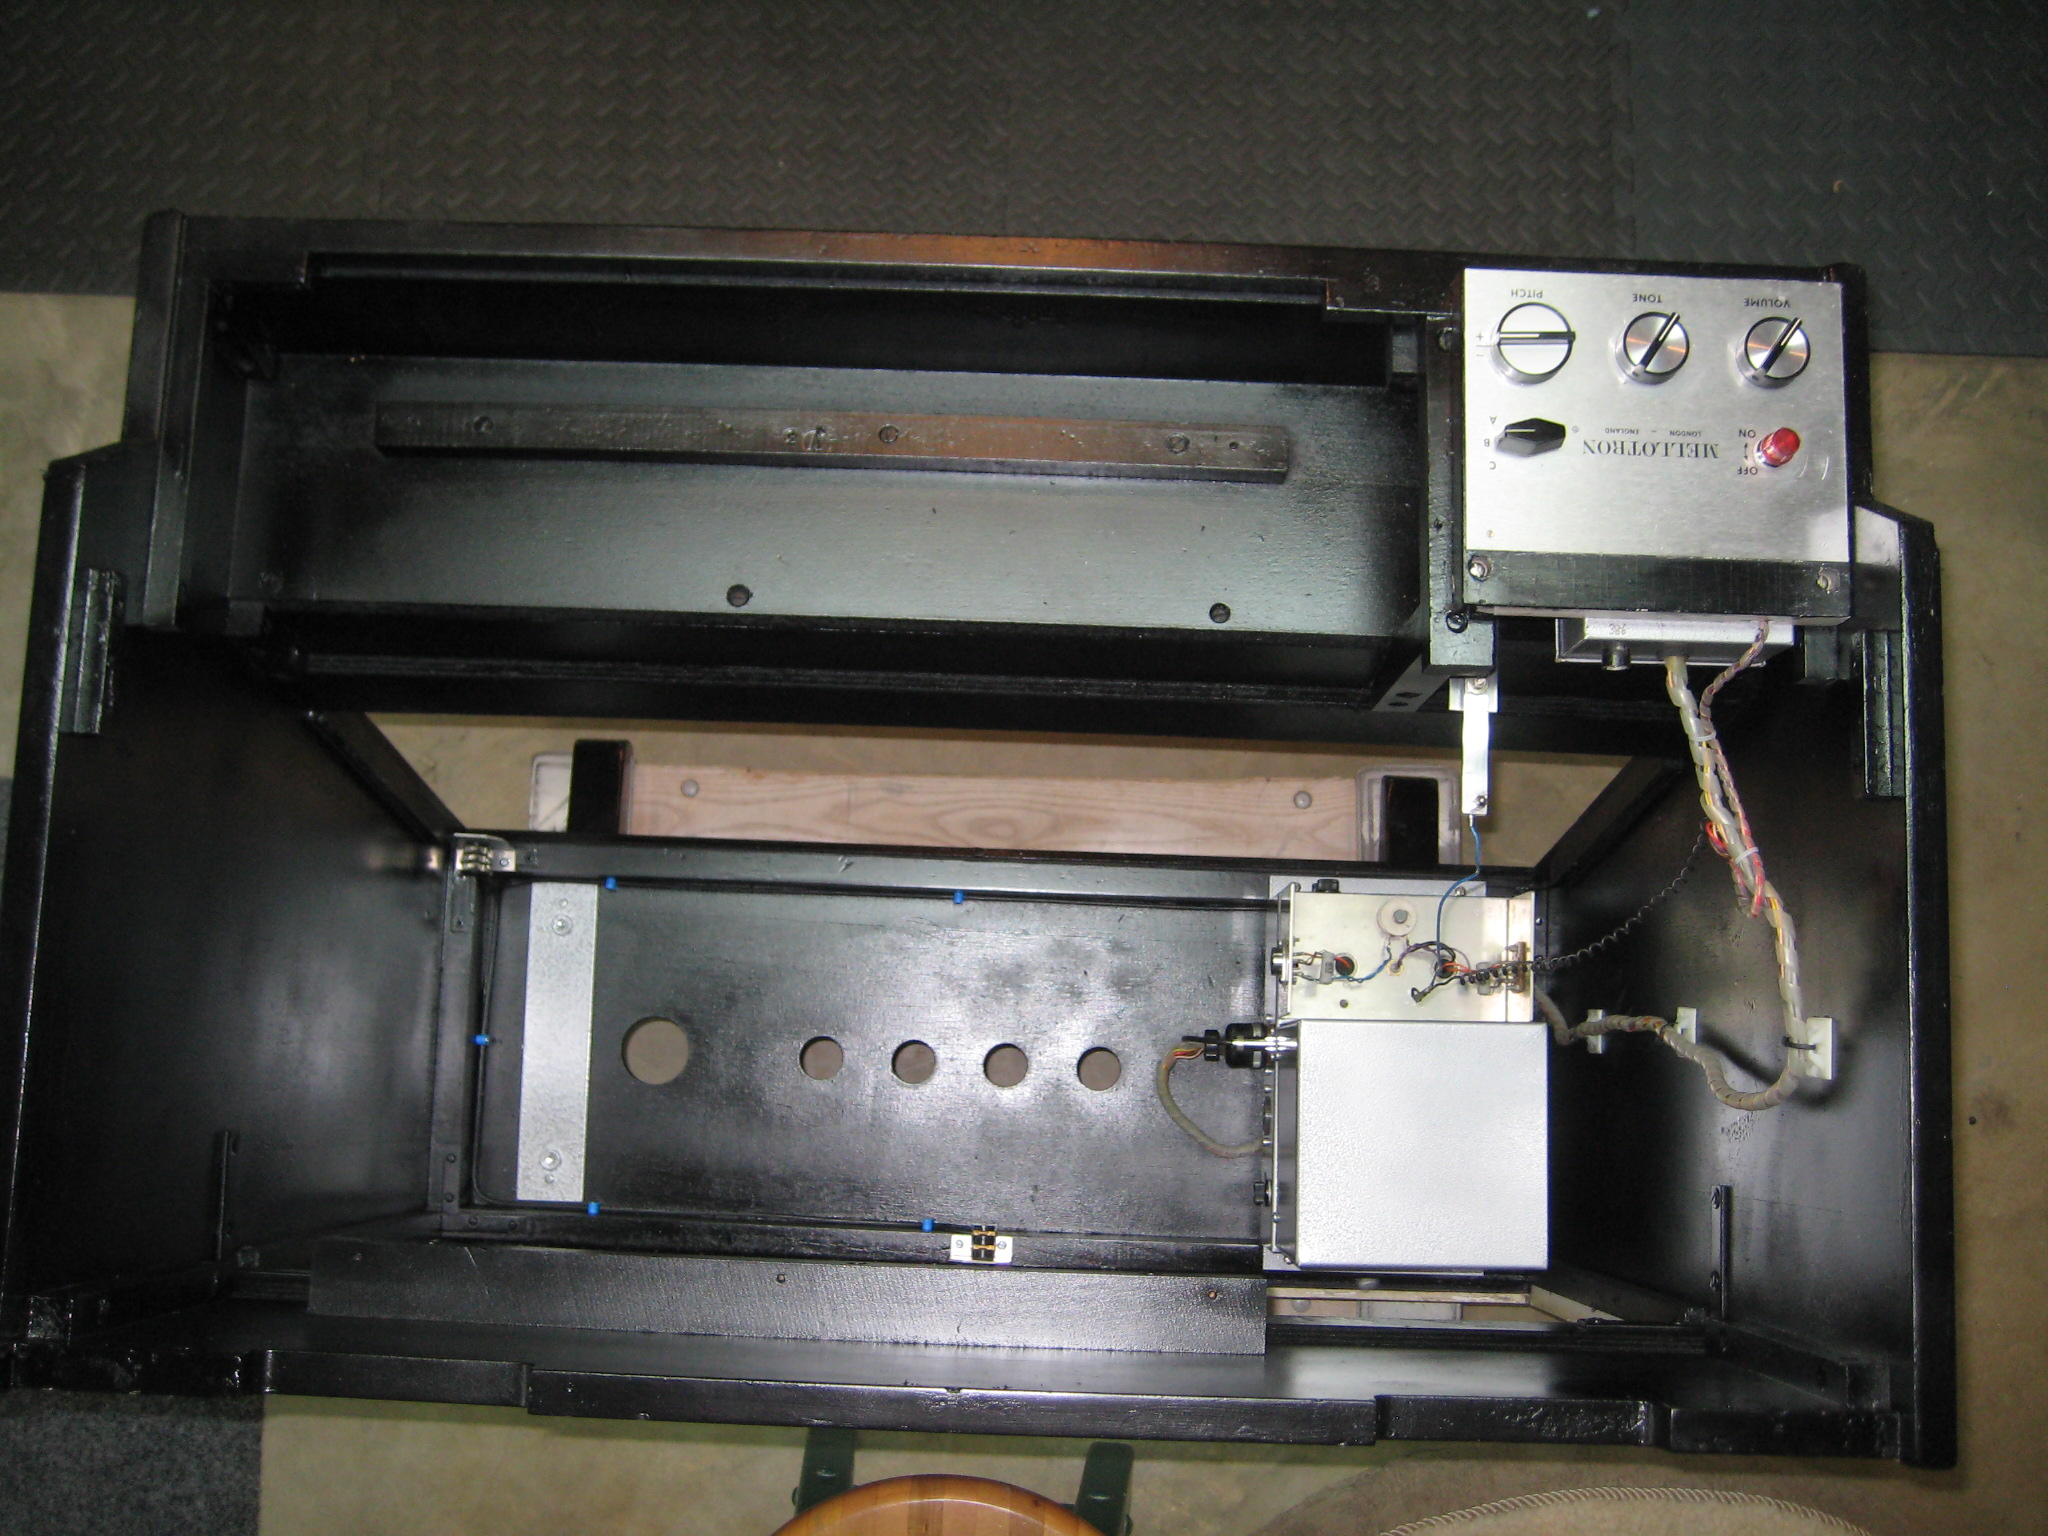 | Reinstalling the gear |
| The Black Mellotron | Preparing the cabinet | 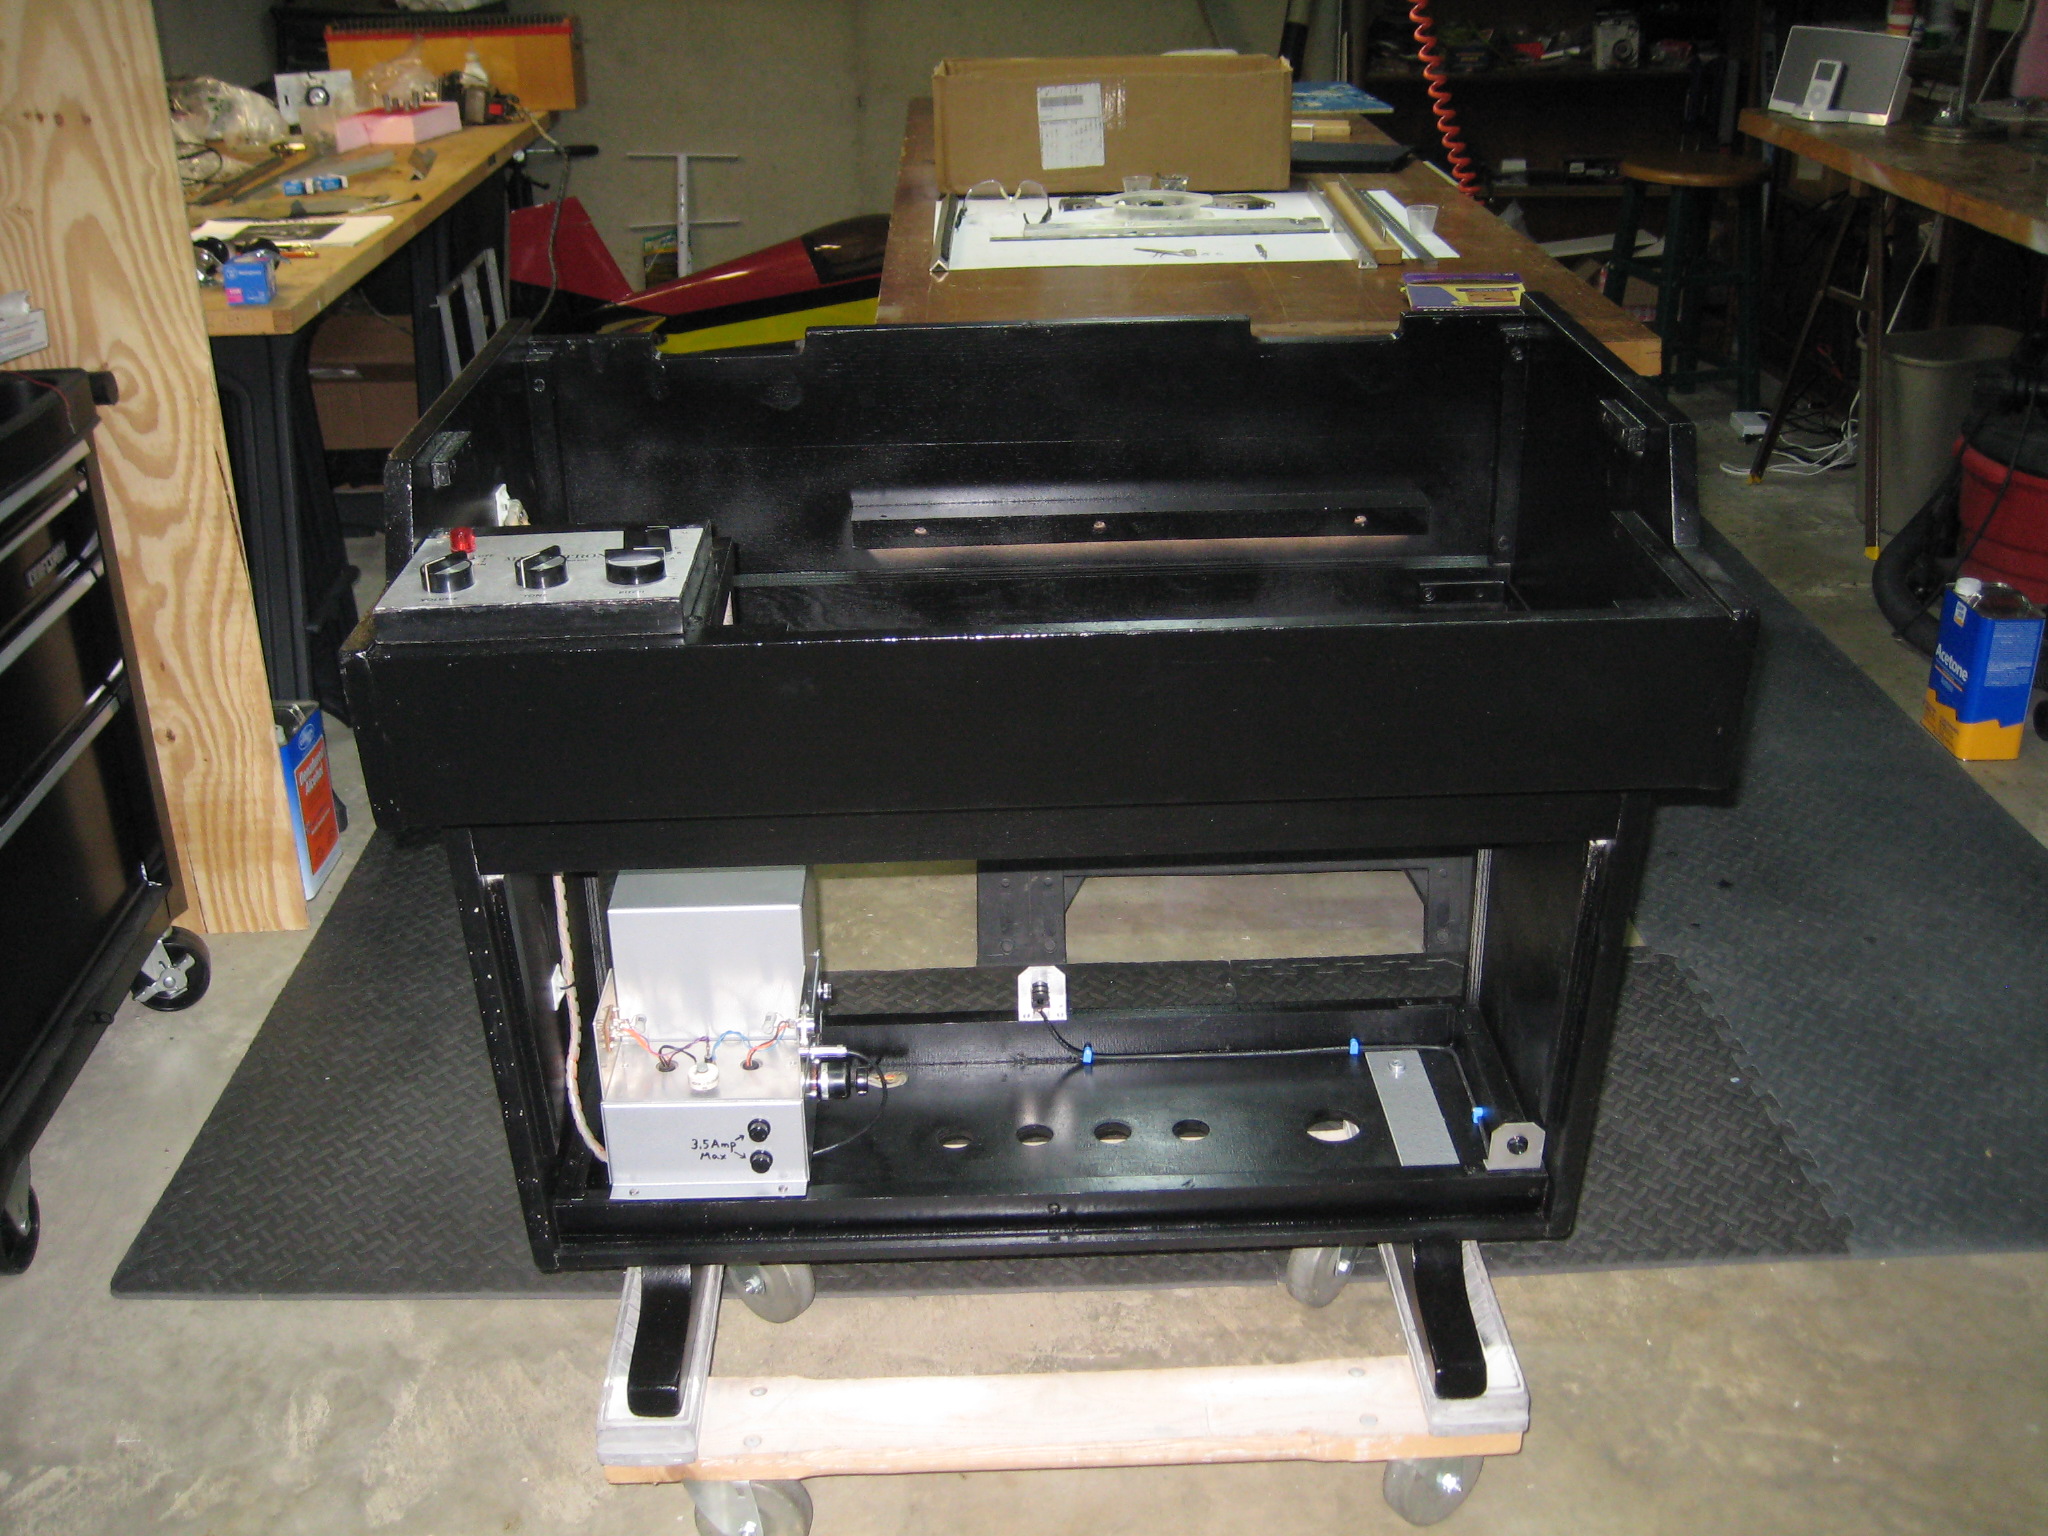 | Ready for the main frame & keyboard |
| The Black Mellotron | I was only painting the inside | 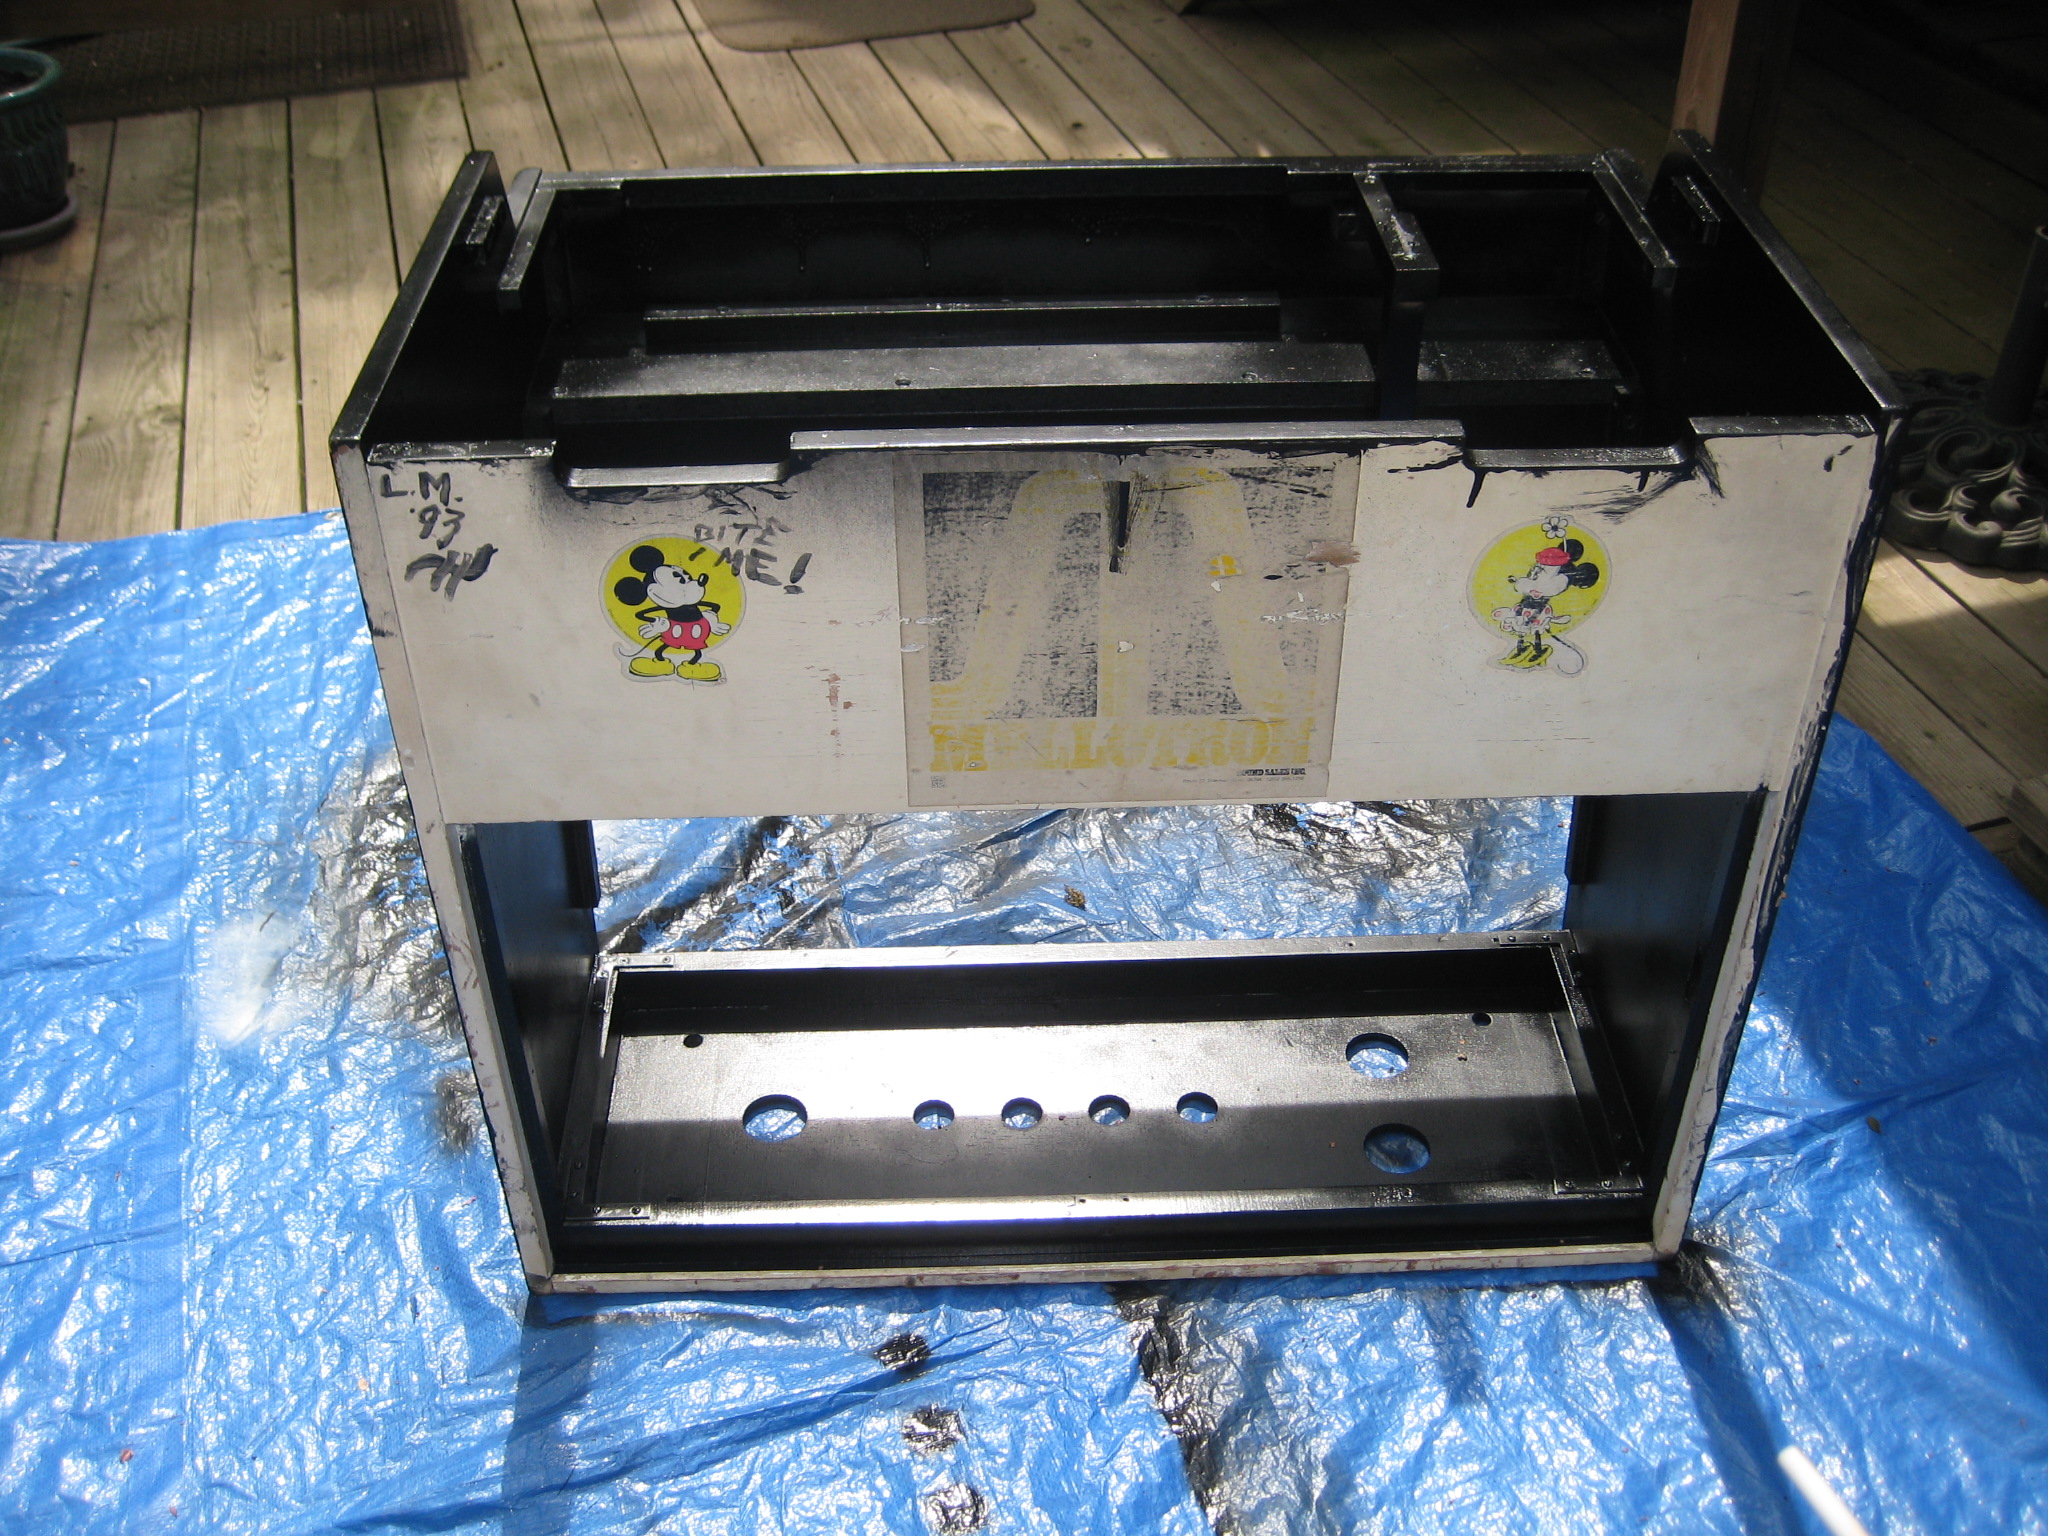 | Originally I left the back as I found it. Truly awful! |
| The Black Mellotron | Ready to reinstall the components | 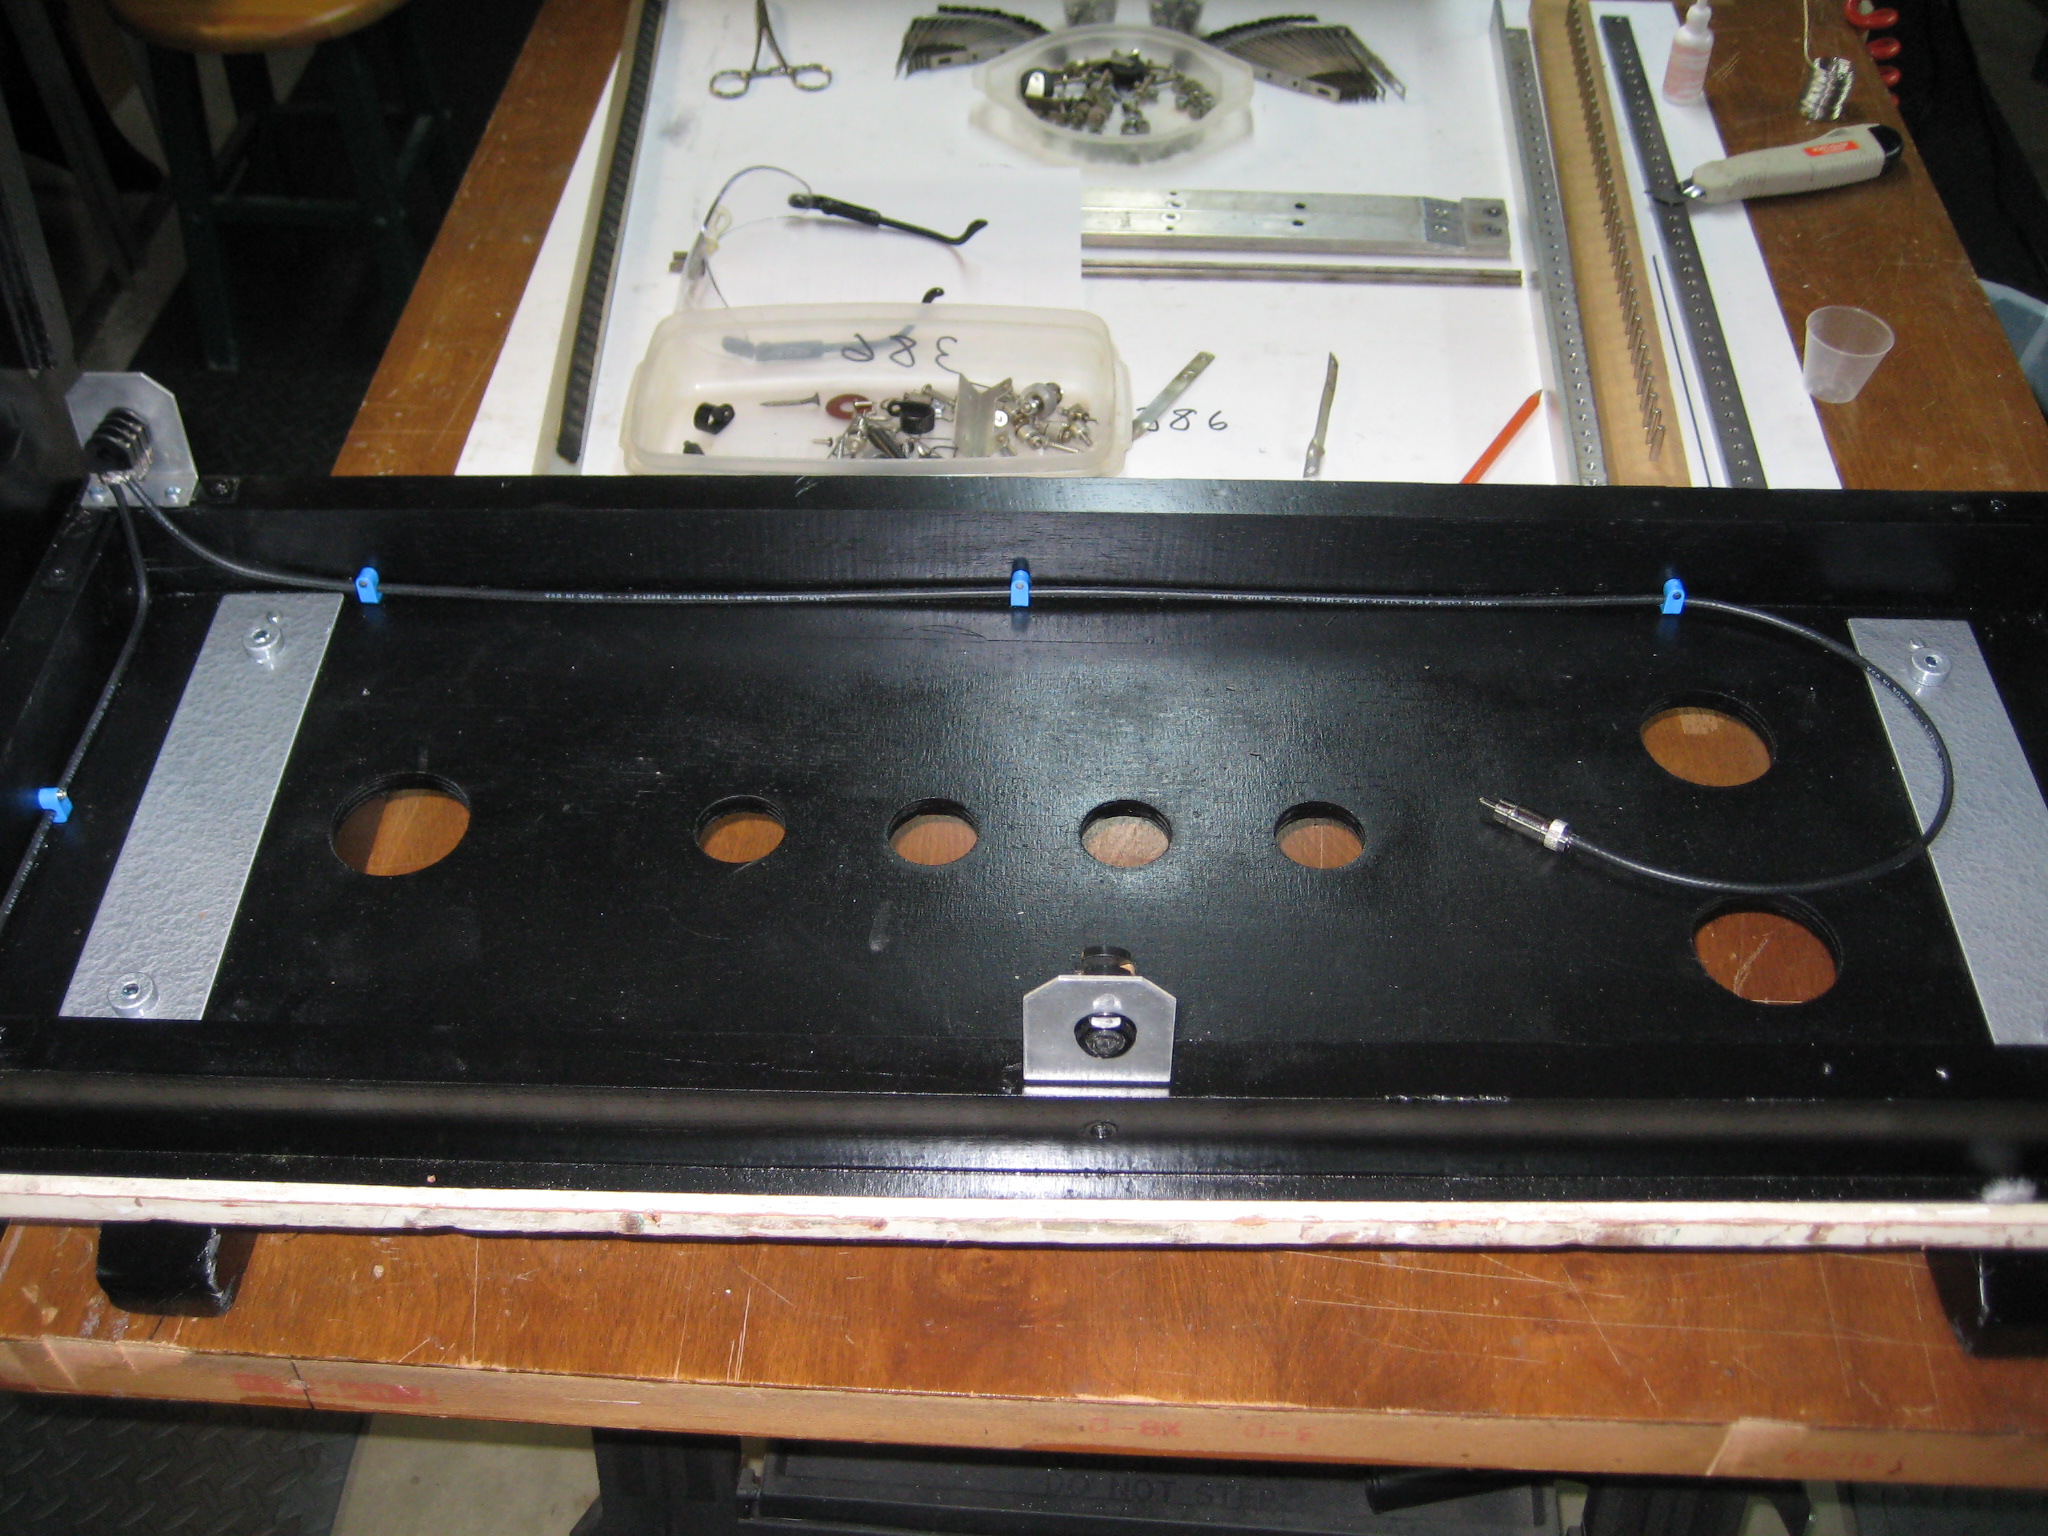 | I had to rebuild the floor. |
| The Black Mellotron | Rebuilding the main frame | 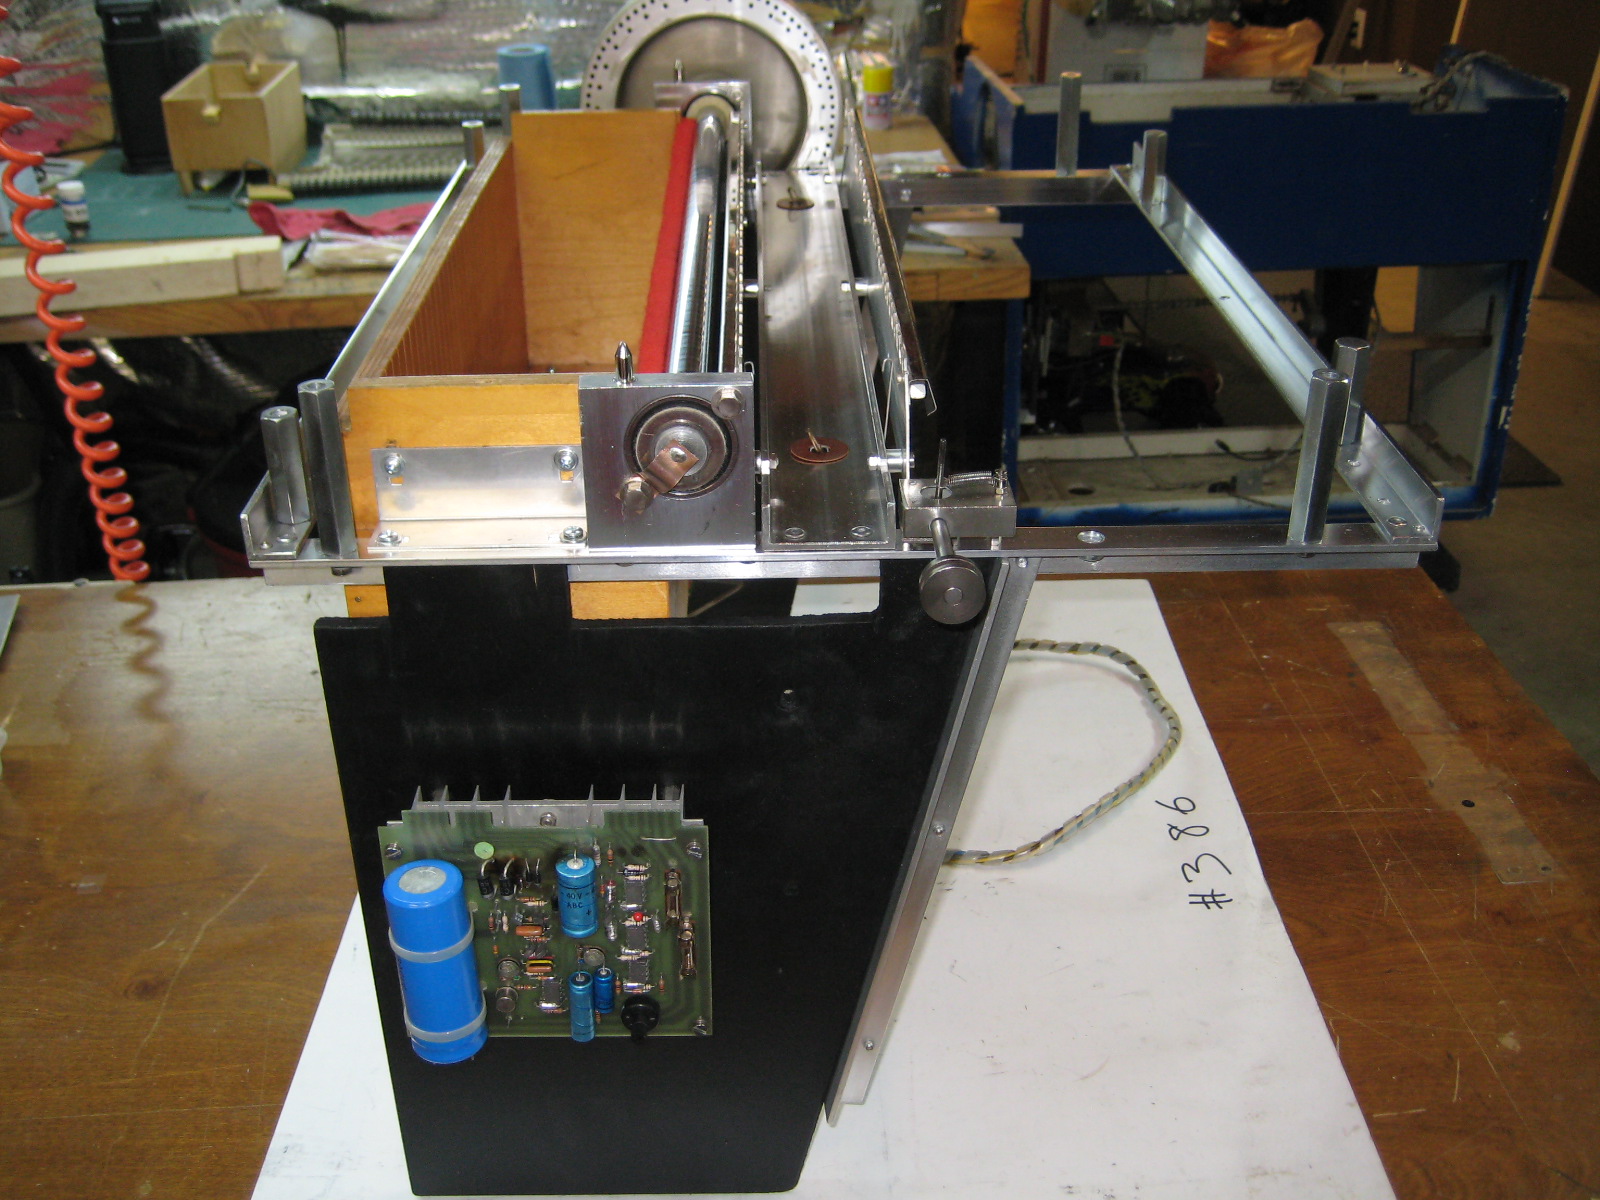 | Obviously I rebuilt the entire machine. |
| The Black Mellotron | Finished main frame. | 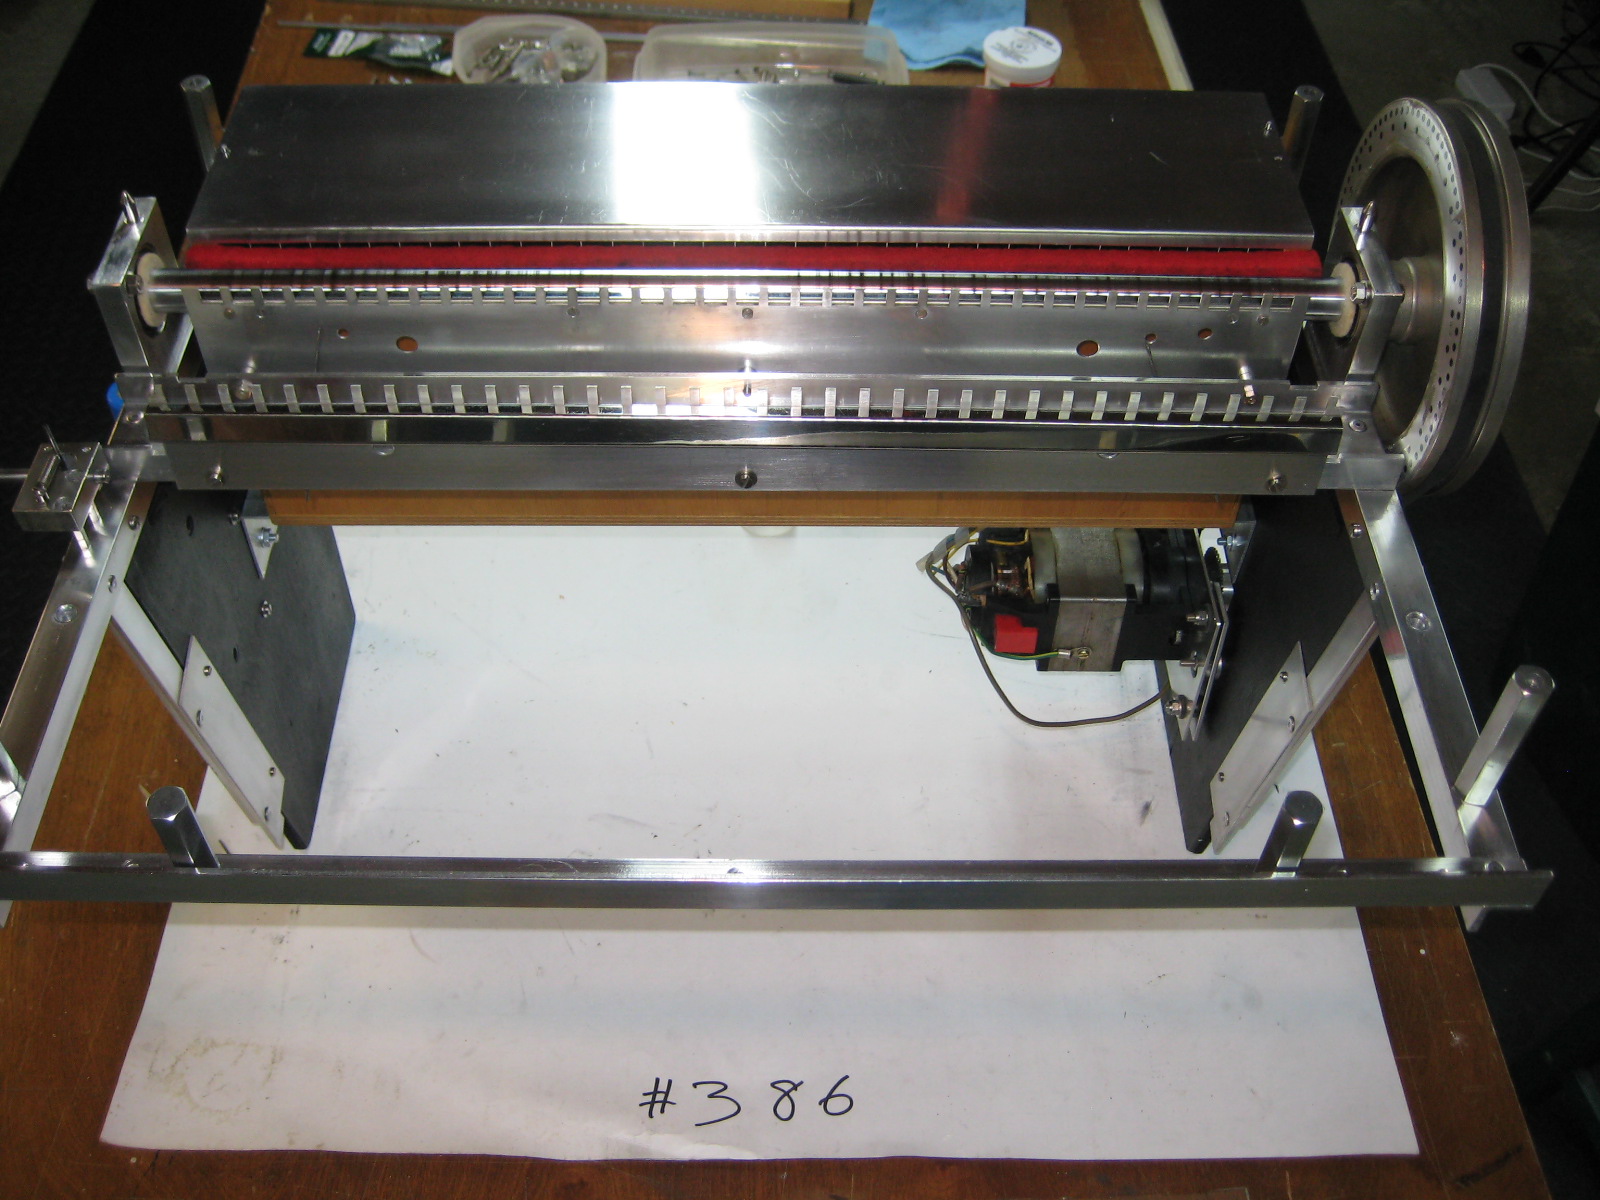 | Everything done but the keyboard |
| The Black Mellotron | Main frame in the cabinet | 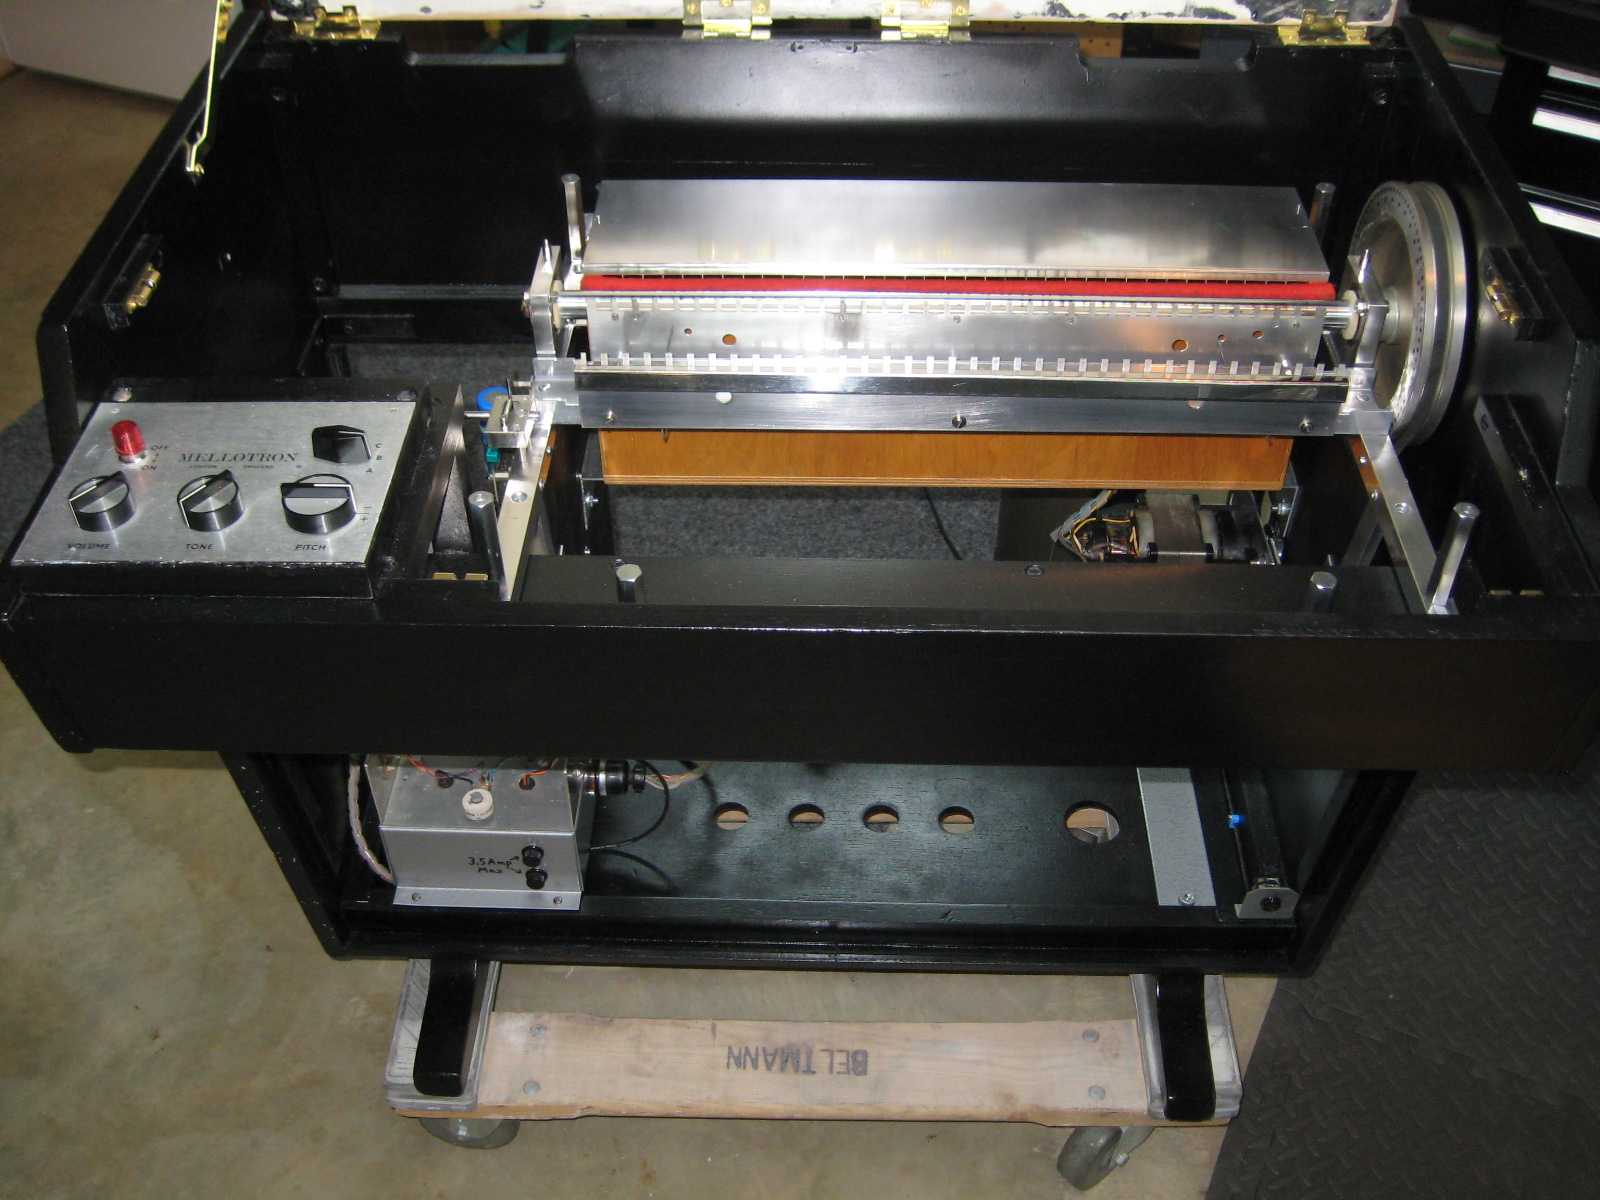 | Temorarily installing the main frame. |
| The Black Mellotron | Keyboard | 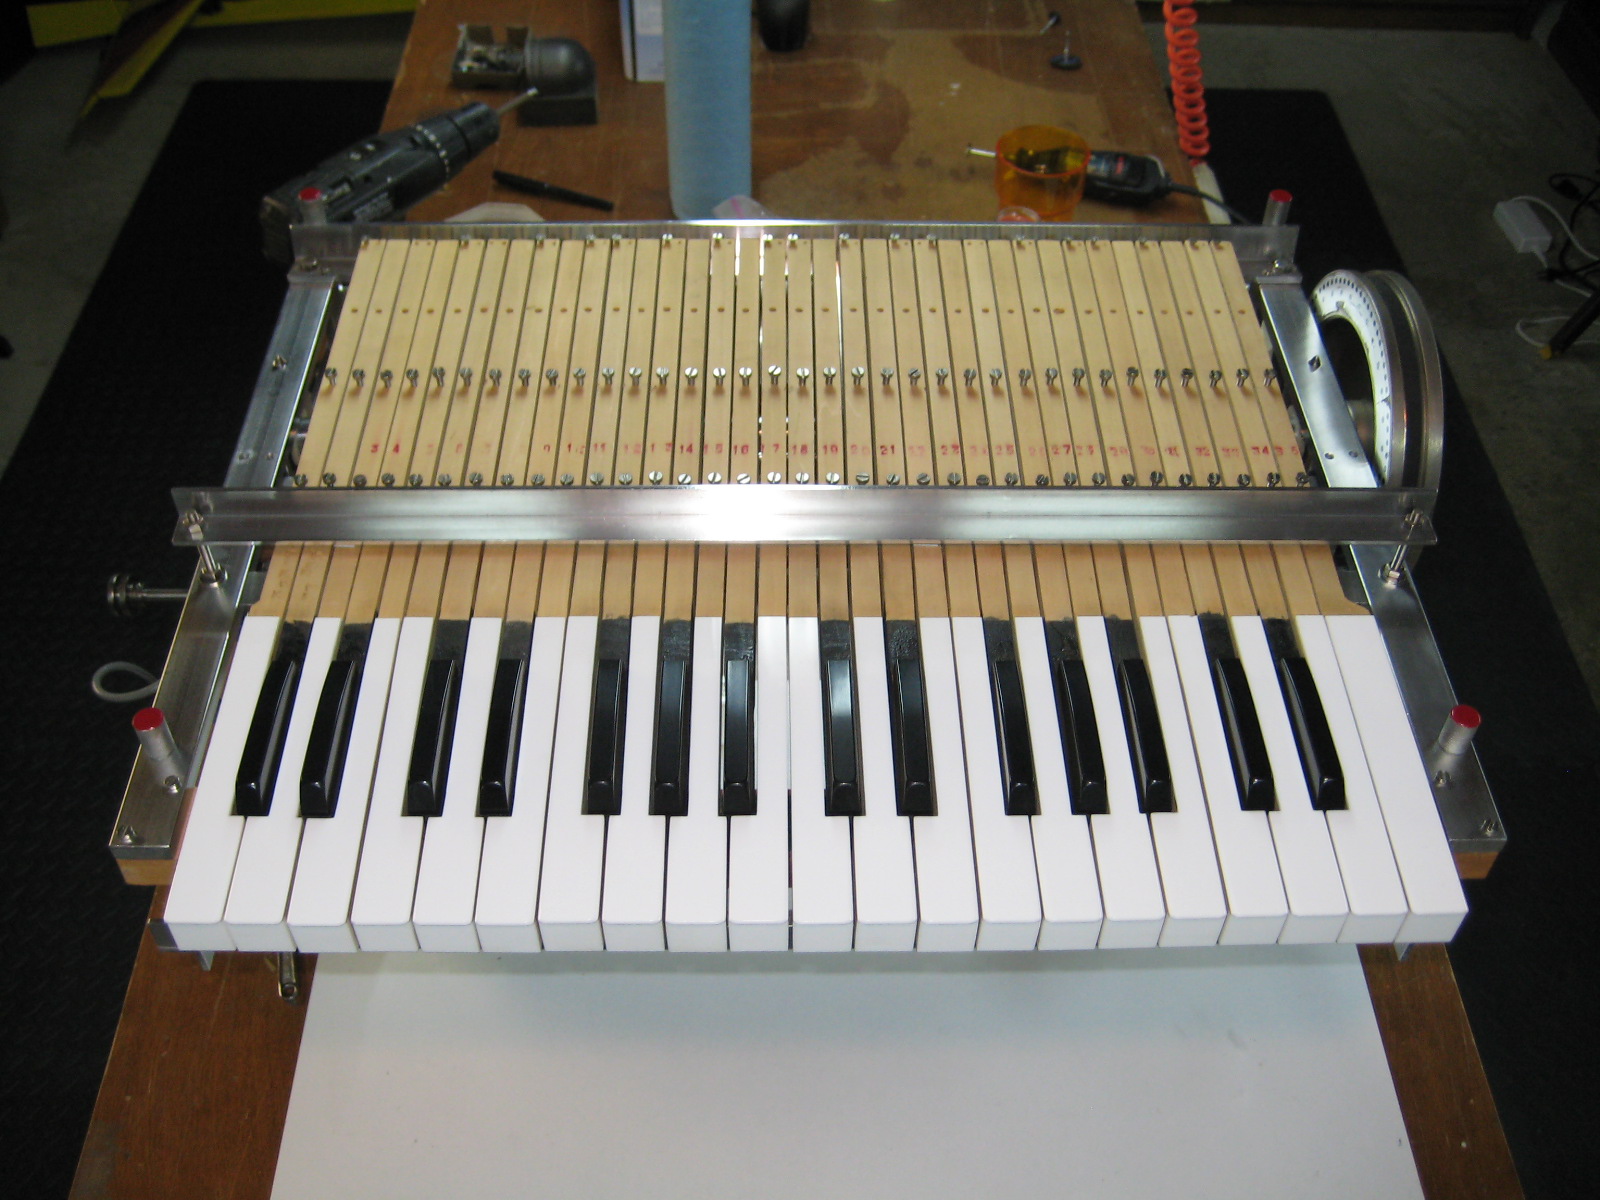 | Restored keyboard |
| The Black Mellotron | FInished... round one | 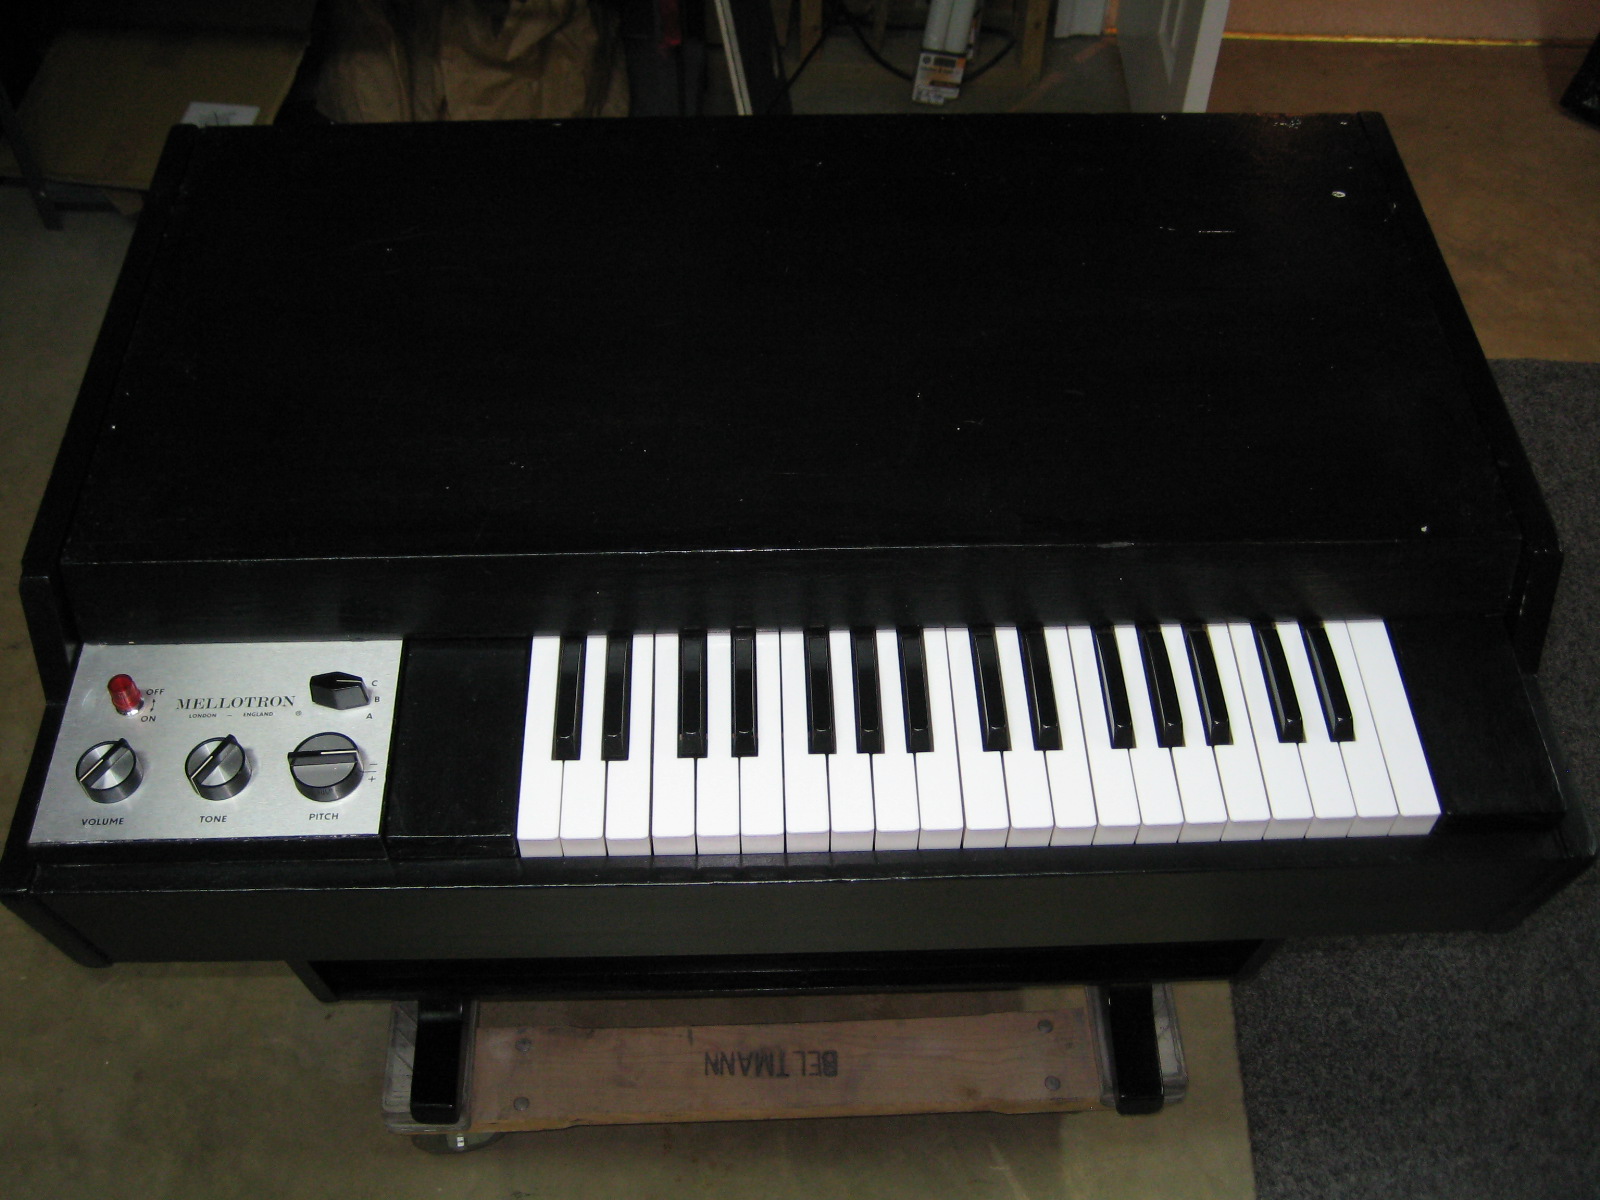 | Completed 386 before further improvements. |
| The Black Mellotron | View of the inside with the SMS-3 | 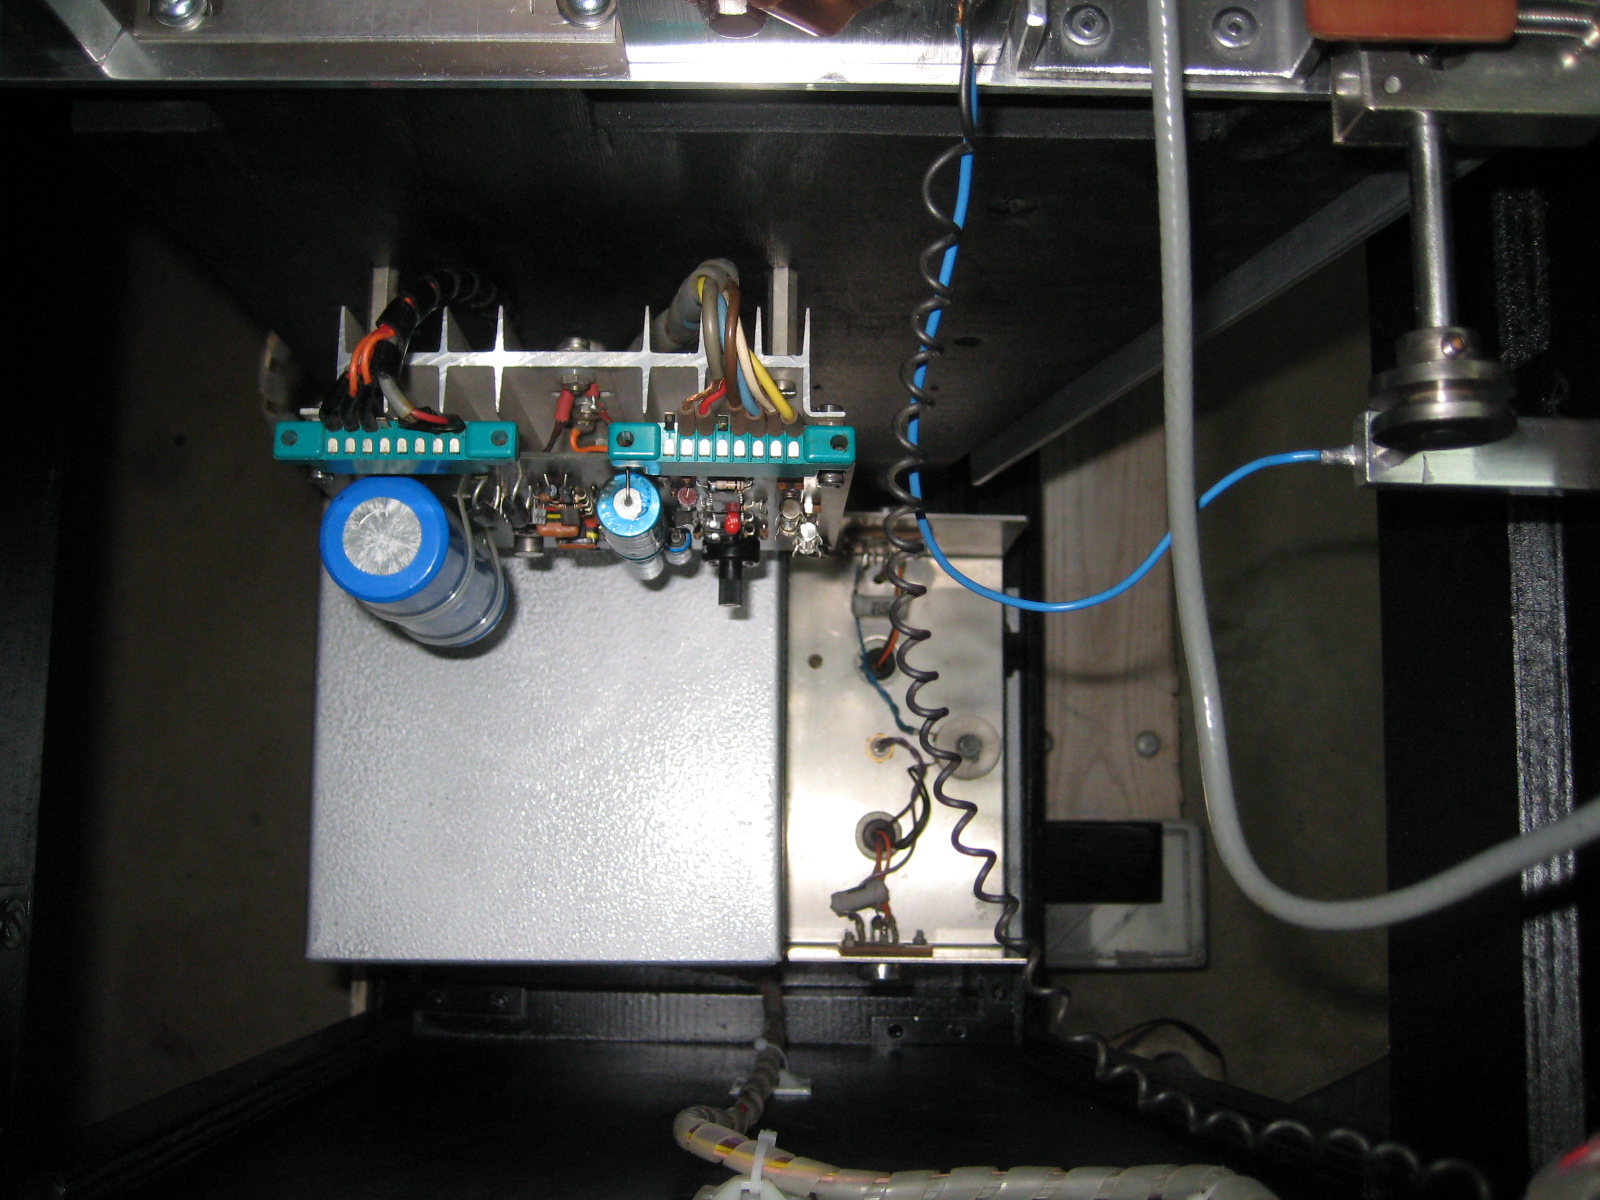 | SMS-3 |
| The Black Mellotron | The Black Tron gets updated | 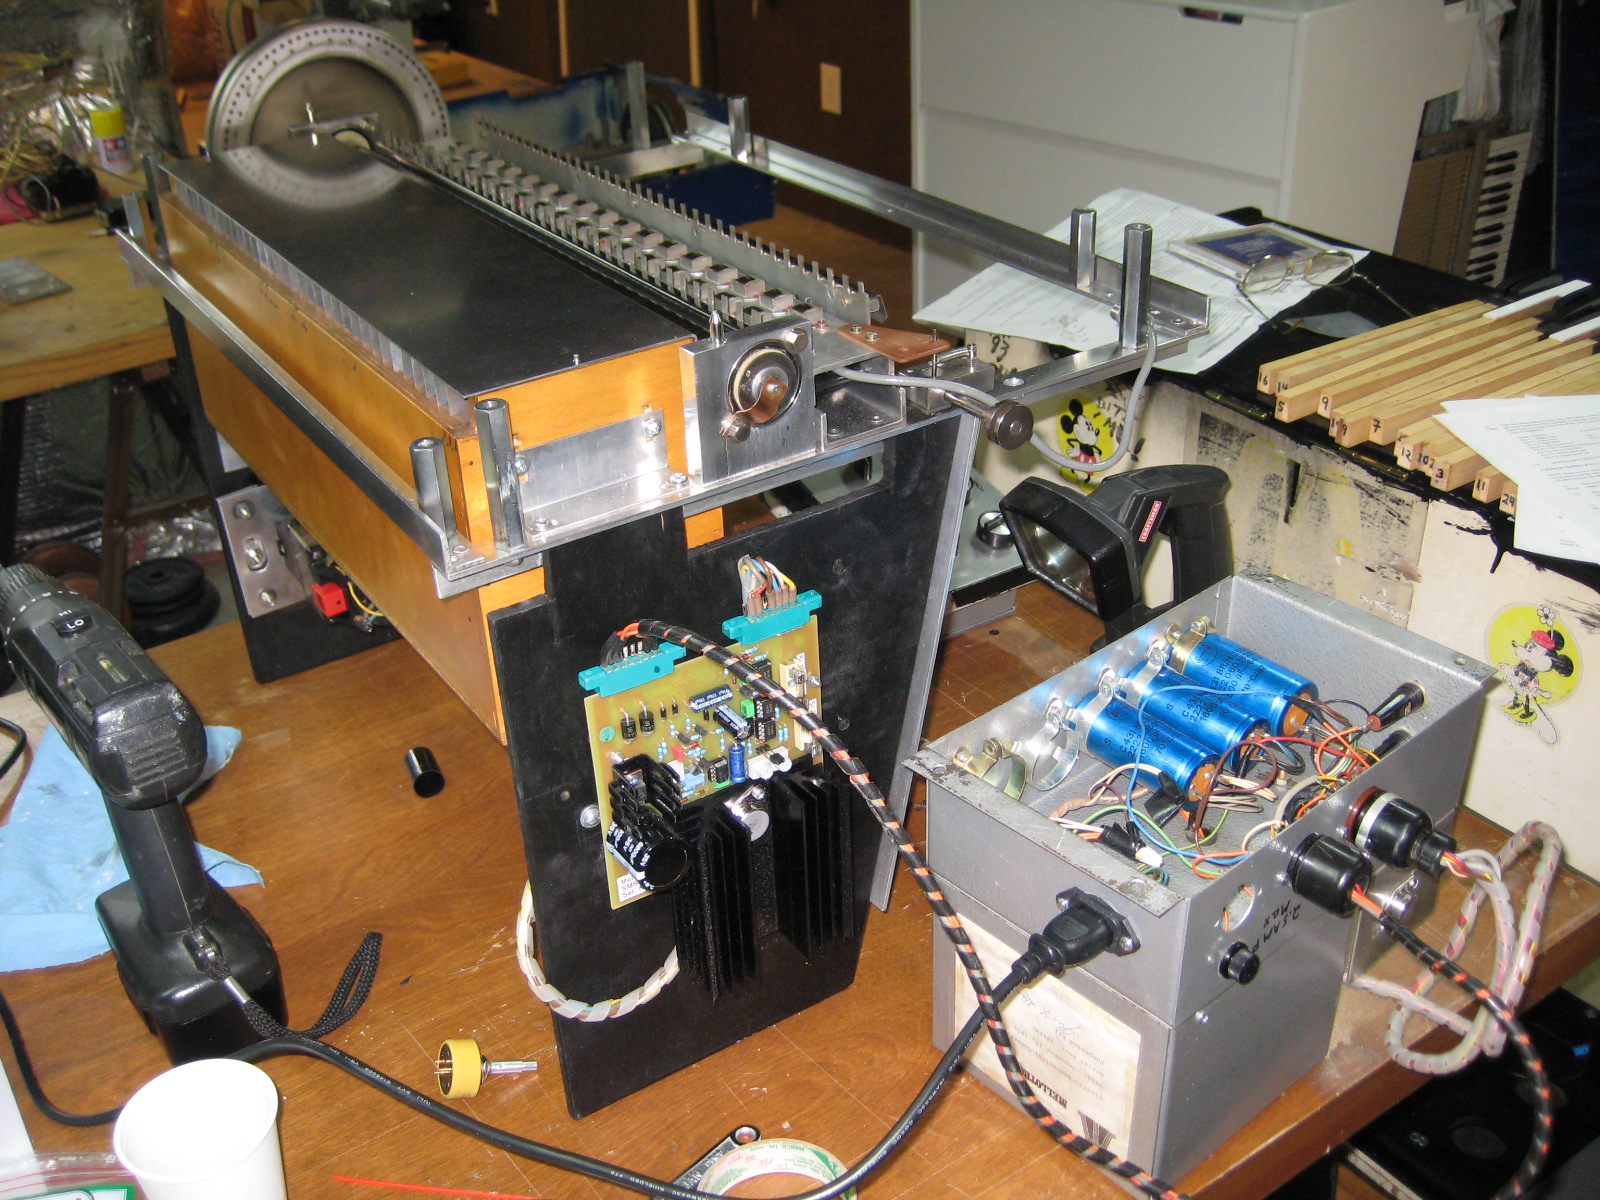 | I decided to give it an SMS-5 |
| The Black Mellotron | Black Tron Power supply. | 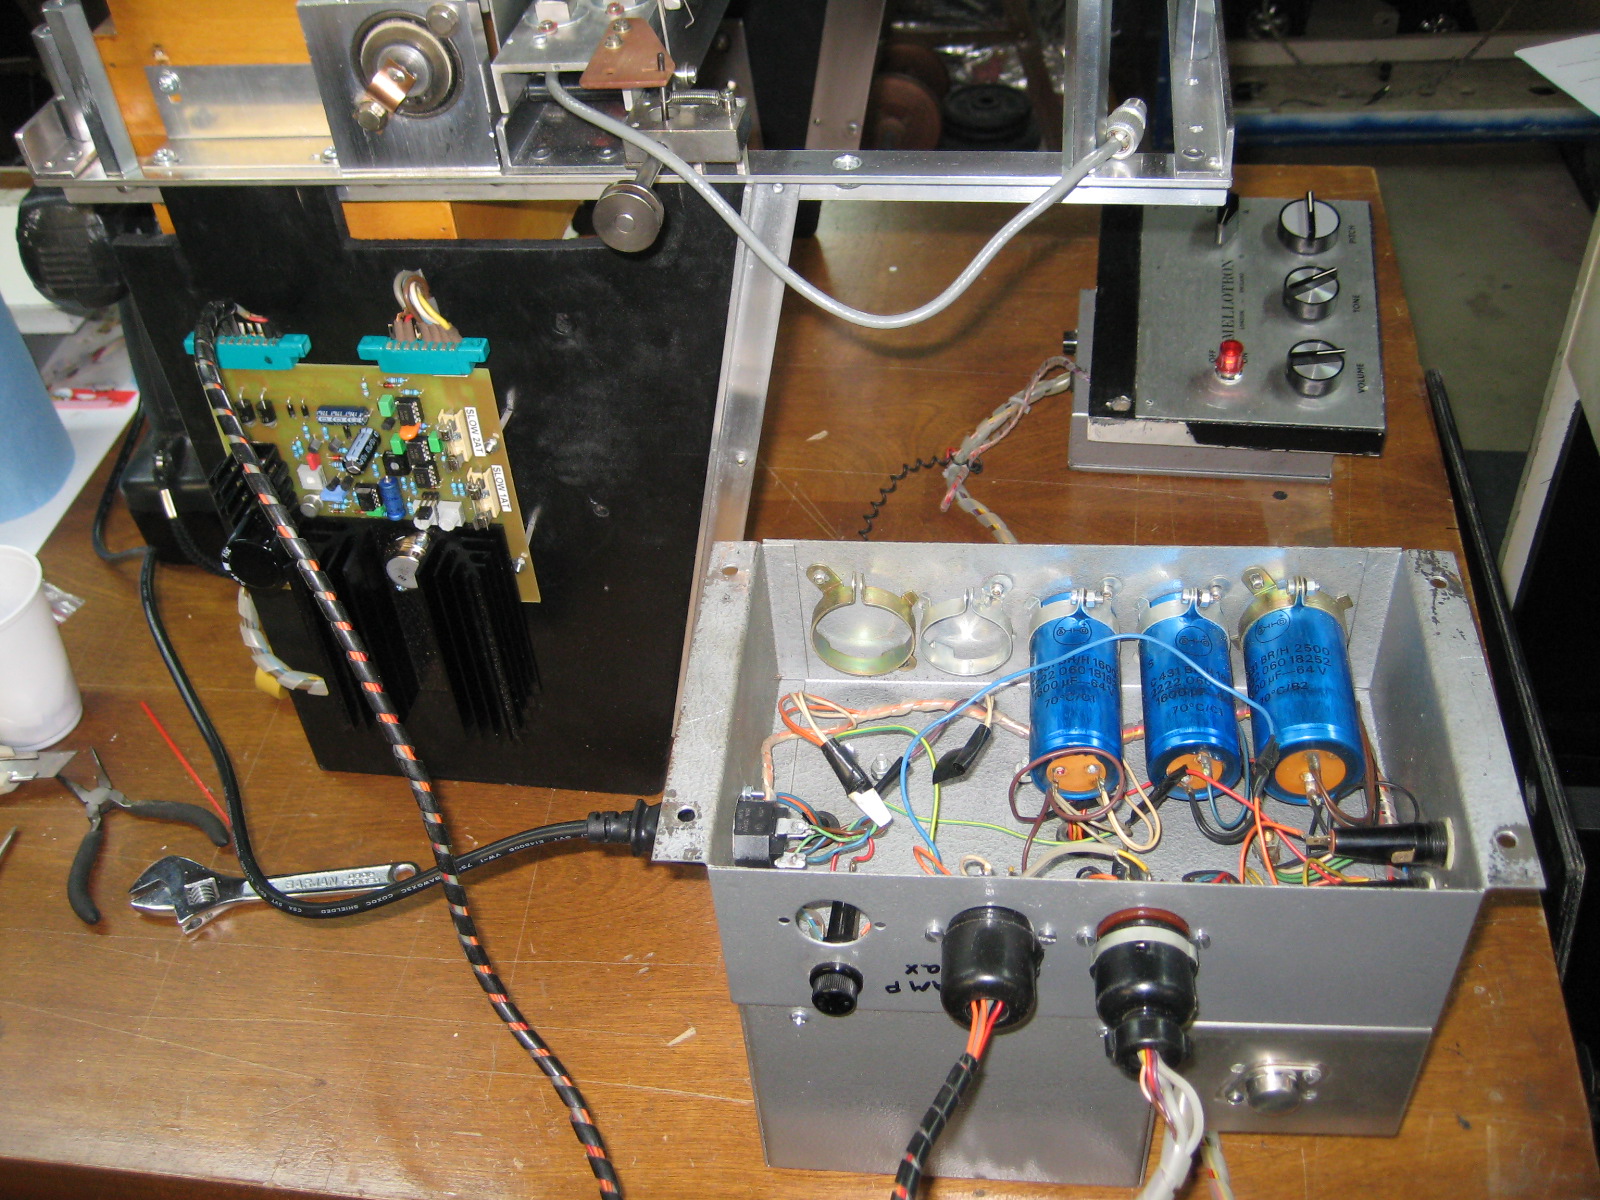 | Sound Sales had really made a mess of this. |
| The Black Mellotron | Black Tron Power Supply before overhaul |  | Highly modified power supply with non-standard transformer. |
| The Black Mellotron | New Control Panel | 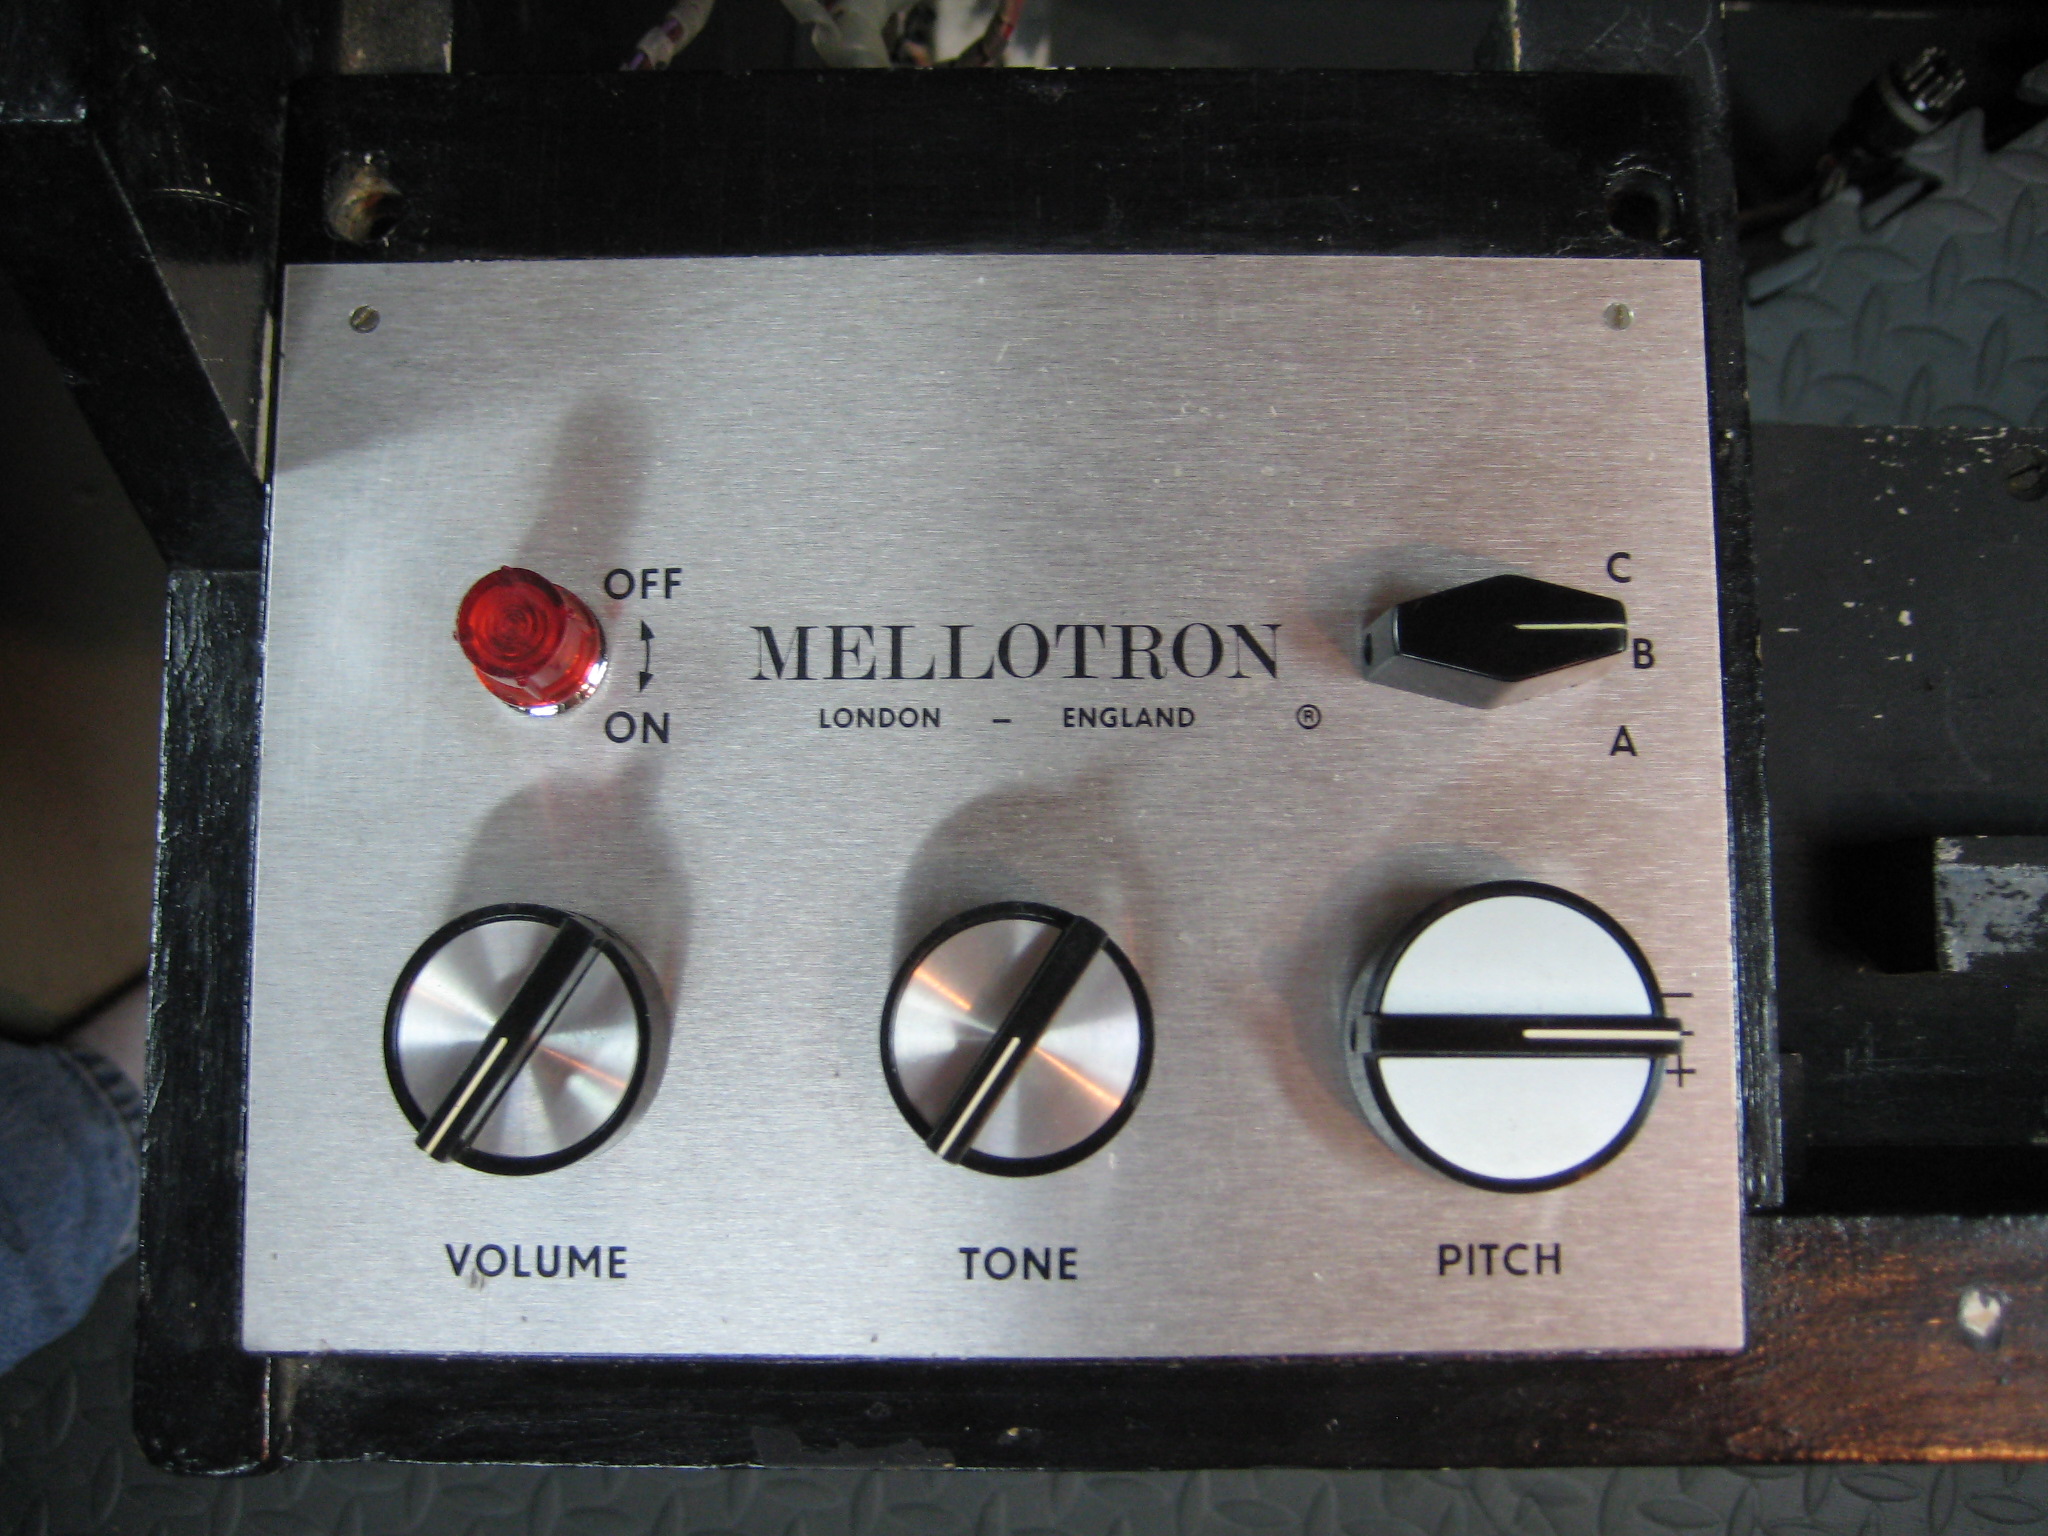 | I replaced the crappy black SS face plate and knobs. |
| The Black Mellotron | The Black Tron...update 2 | 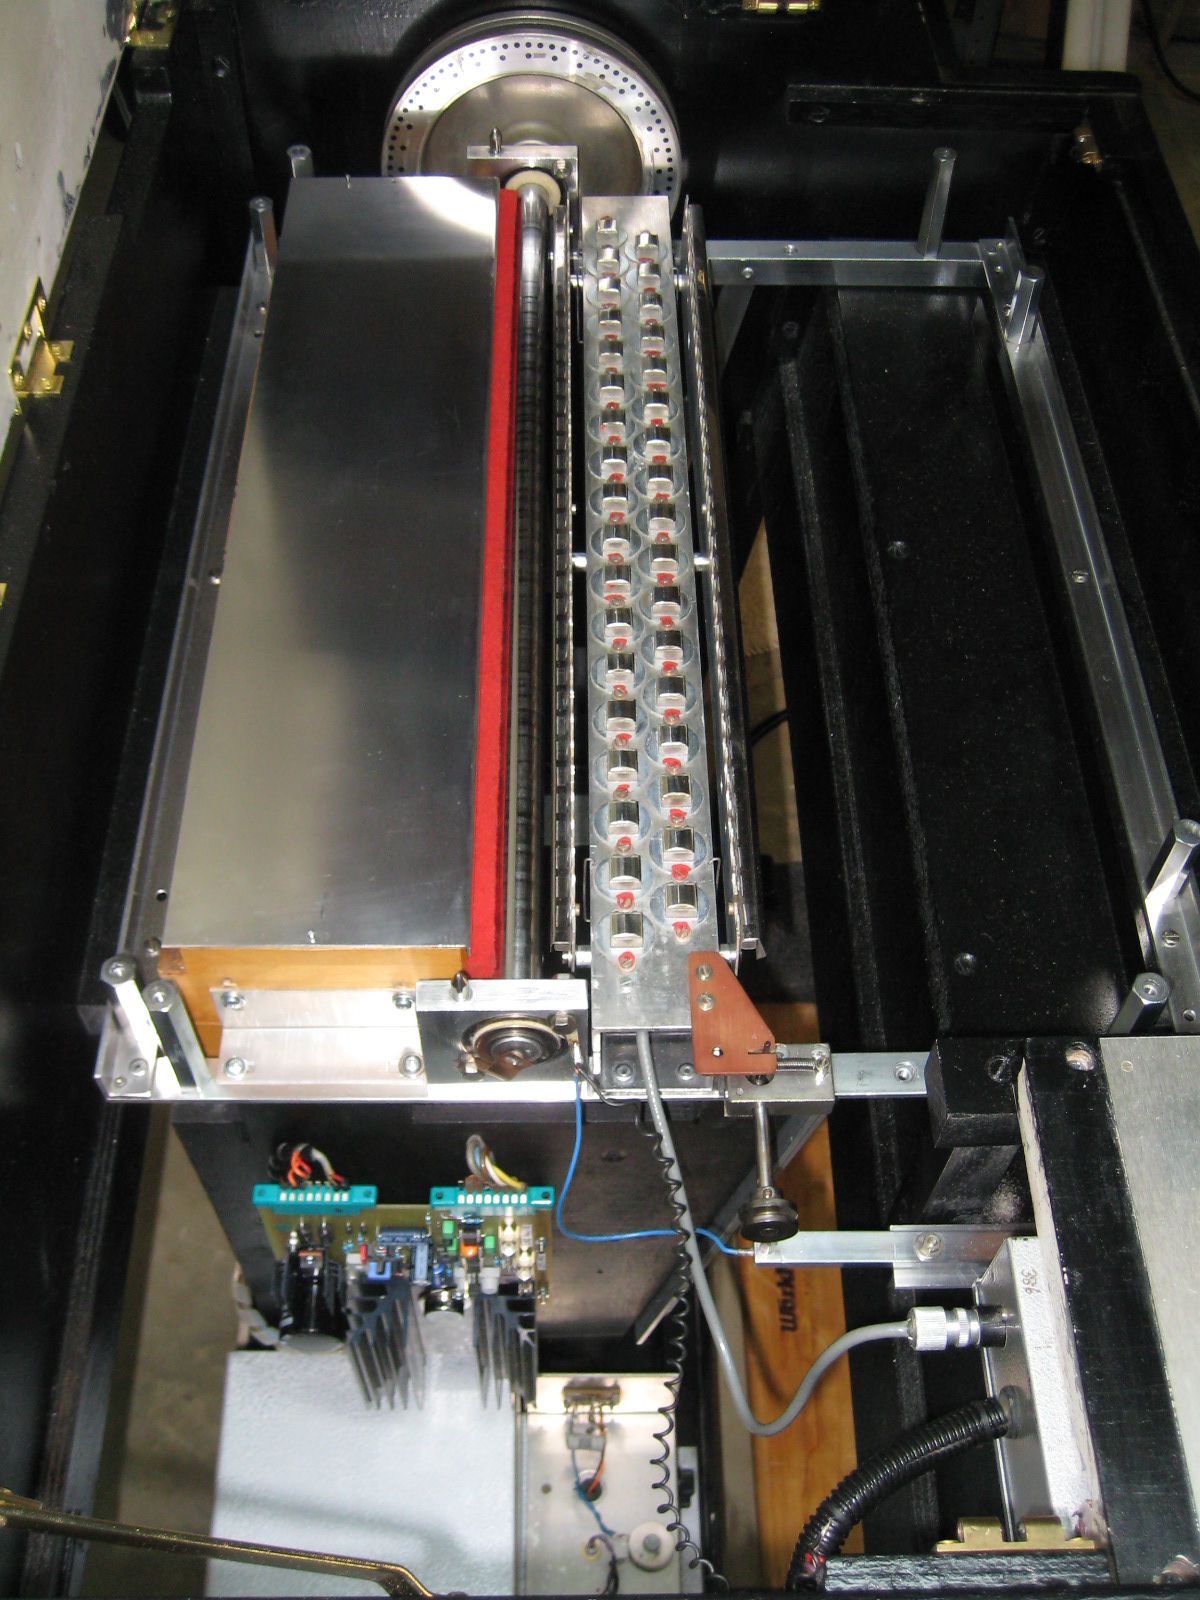 | Back in the cabinet with the SMS-5 installed |
| The Black Mellotron | The Black Tron... update 2 | 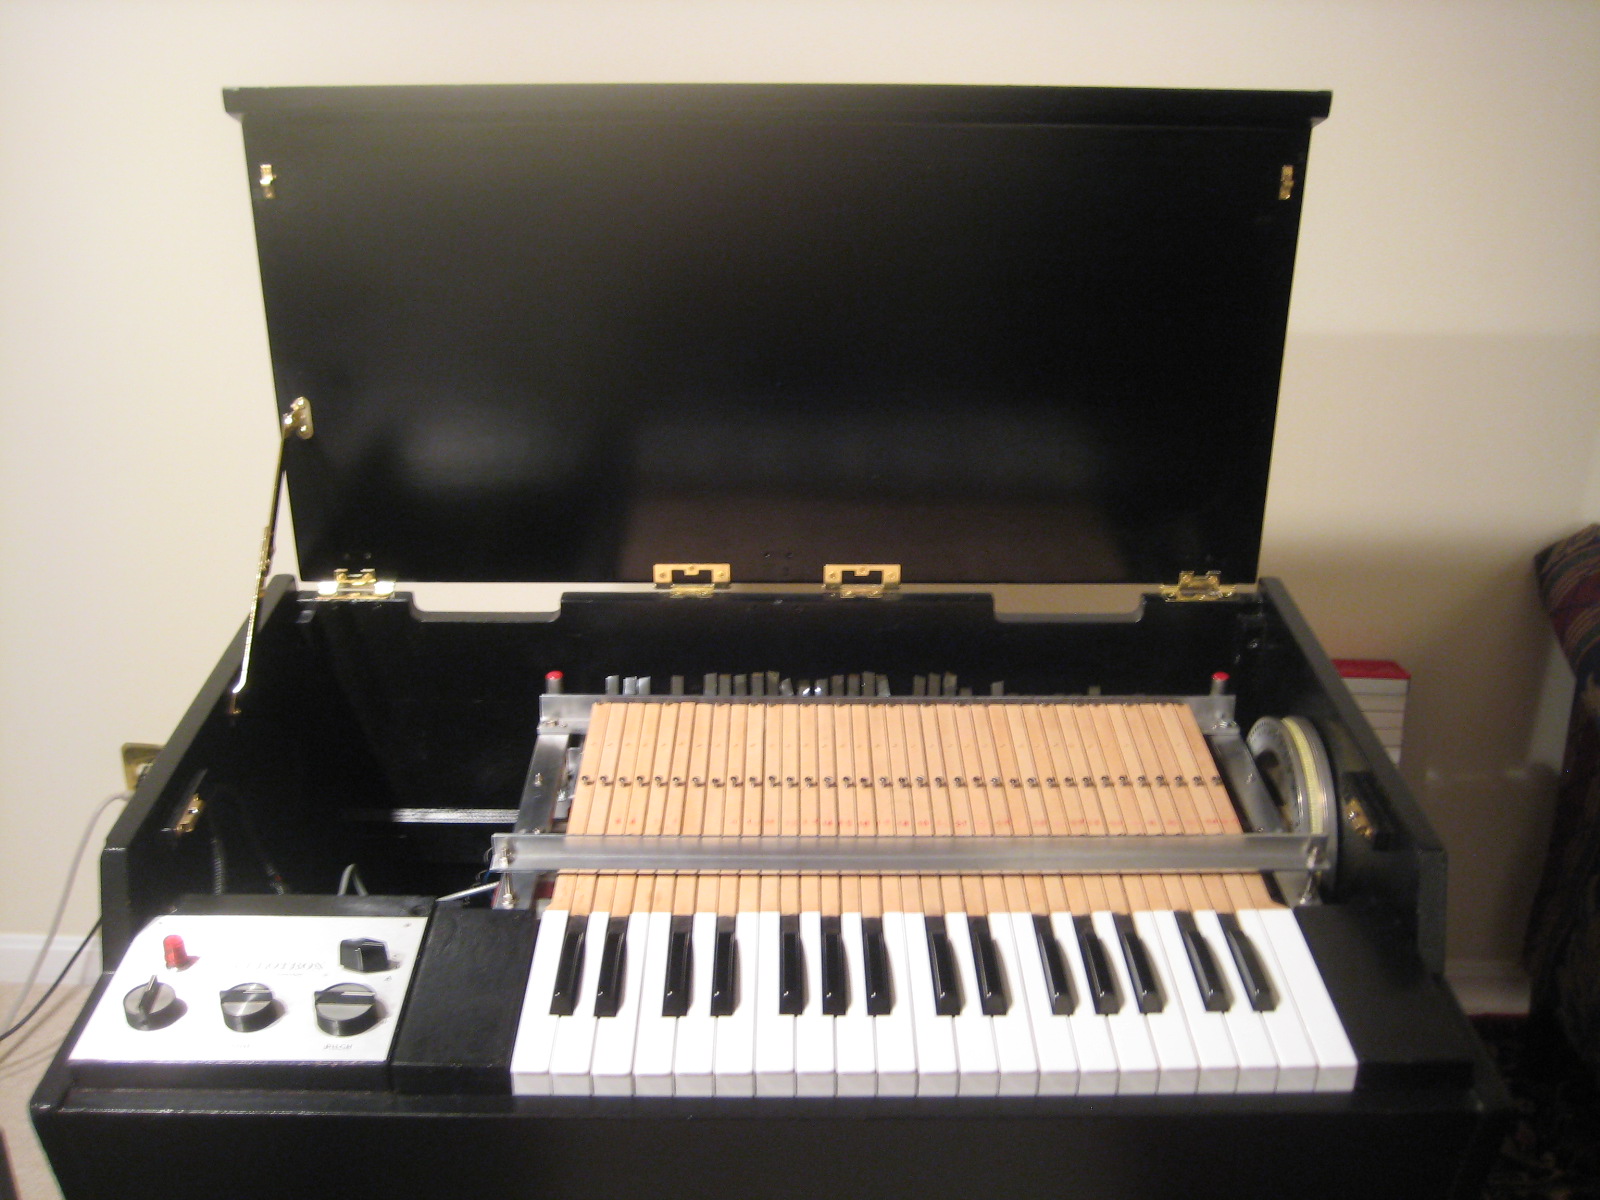 | Ready for NEARfest |
| The Black Mellotron | The Black Tron... update 2 |  | View of the SMS-3 |
| The Black Mellotron | The Black Tron... update 2 |  | Mike Visaggio recording Powered By Light with 386 |
| The Black Mellotron | The Black Tron... update 2 | 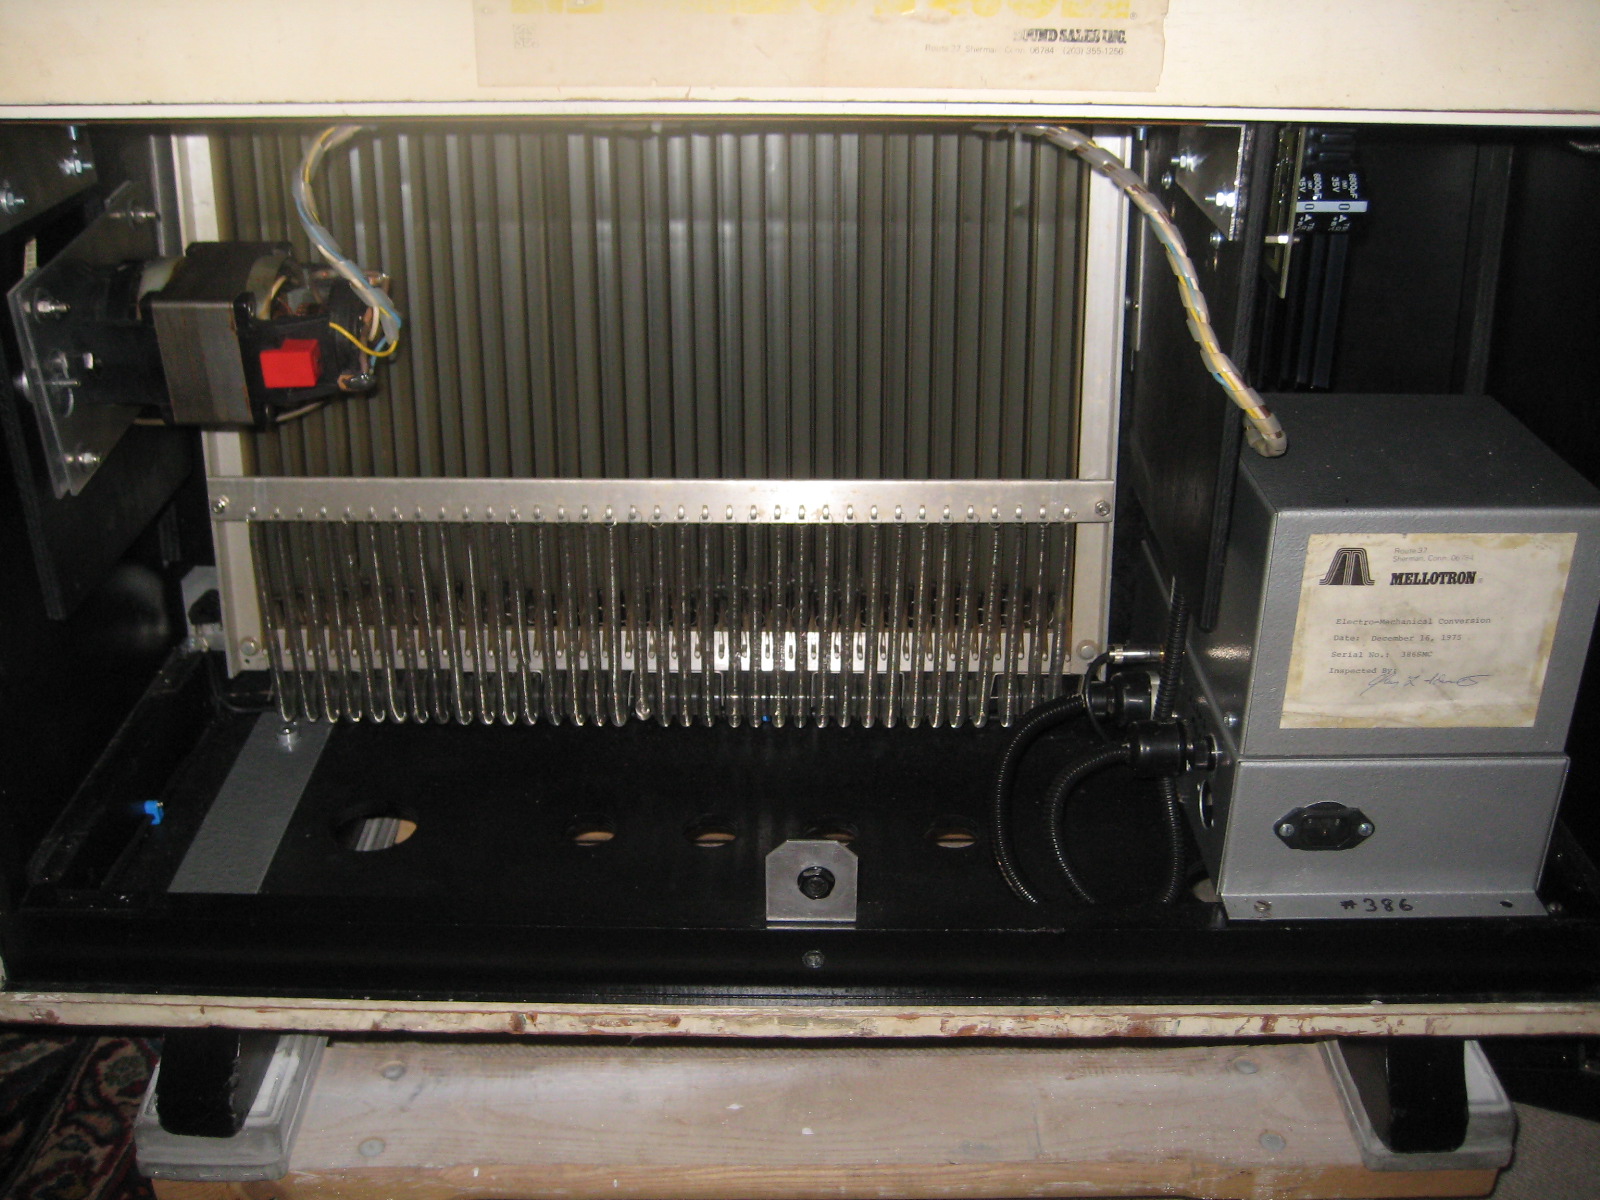 | The inside |
| The Black Mellotron | The Black Tron... update 3 | 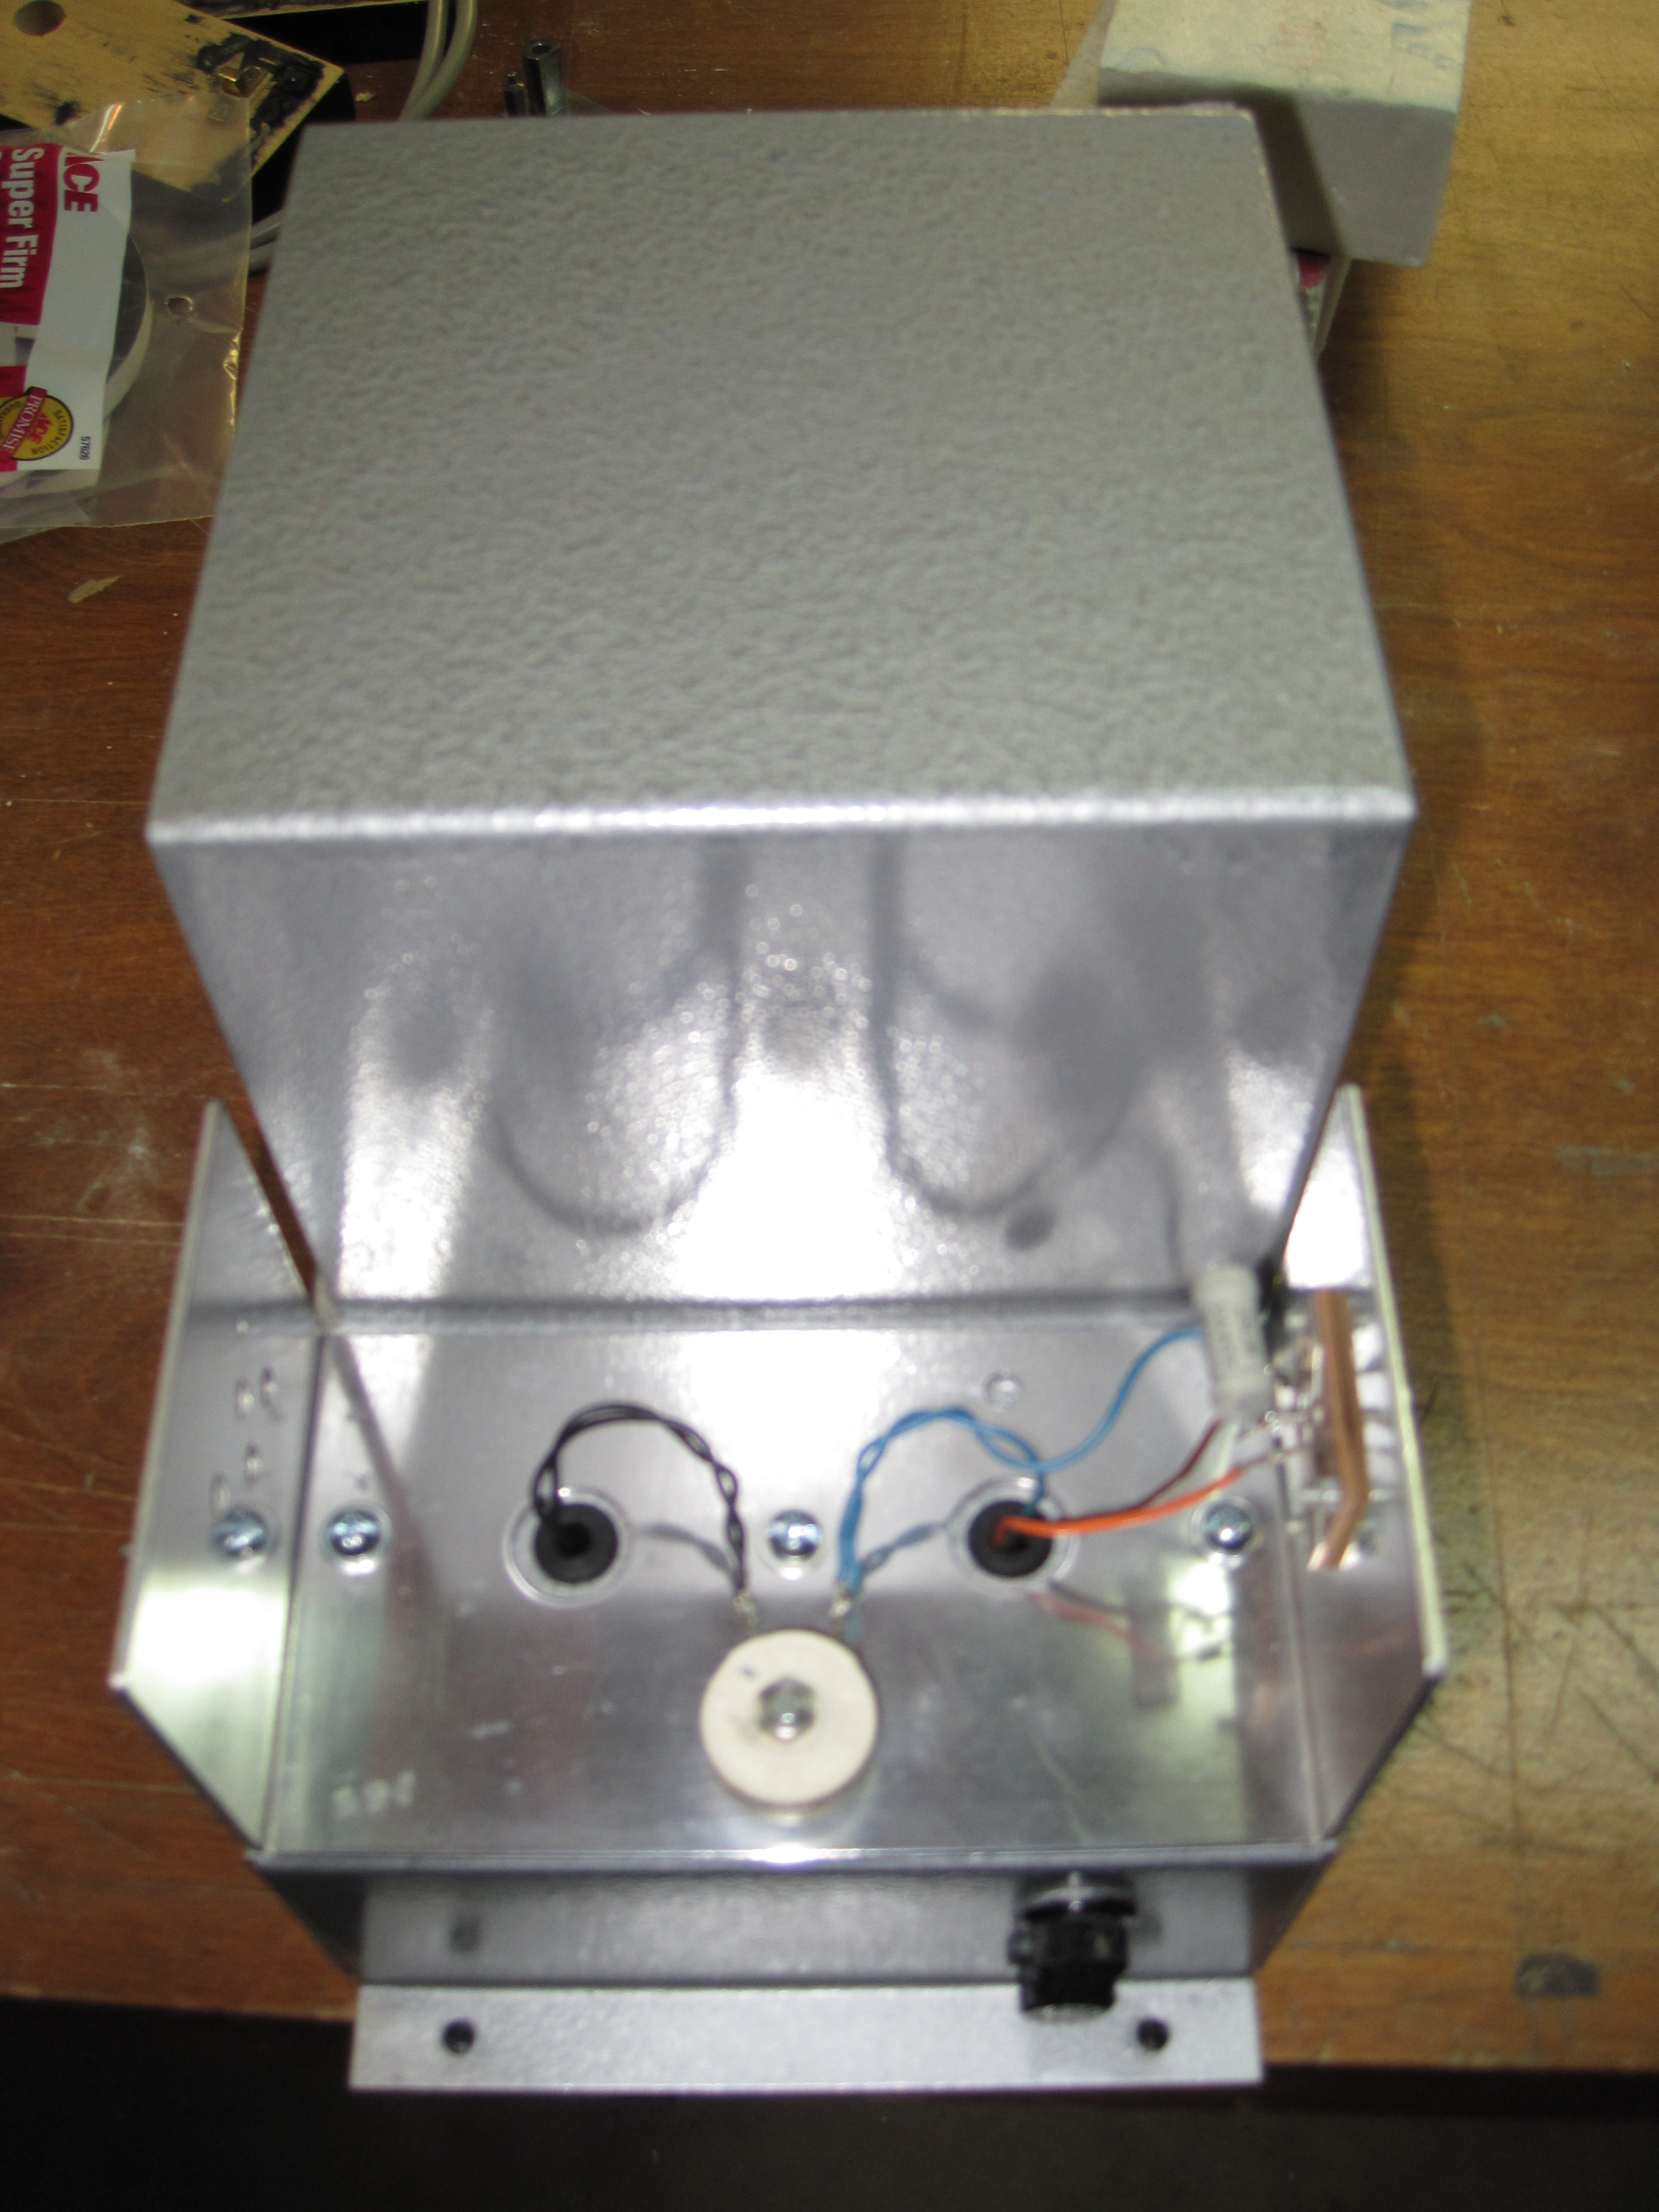 | Completed power supply |
| The Black Mellotron | The Black Tron... update 3 | 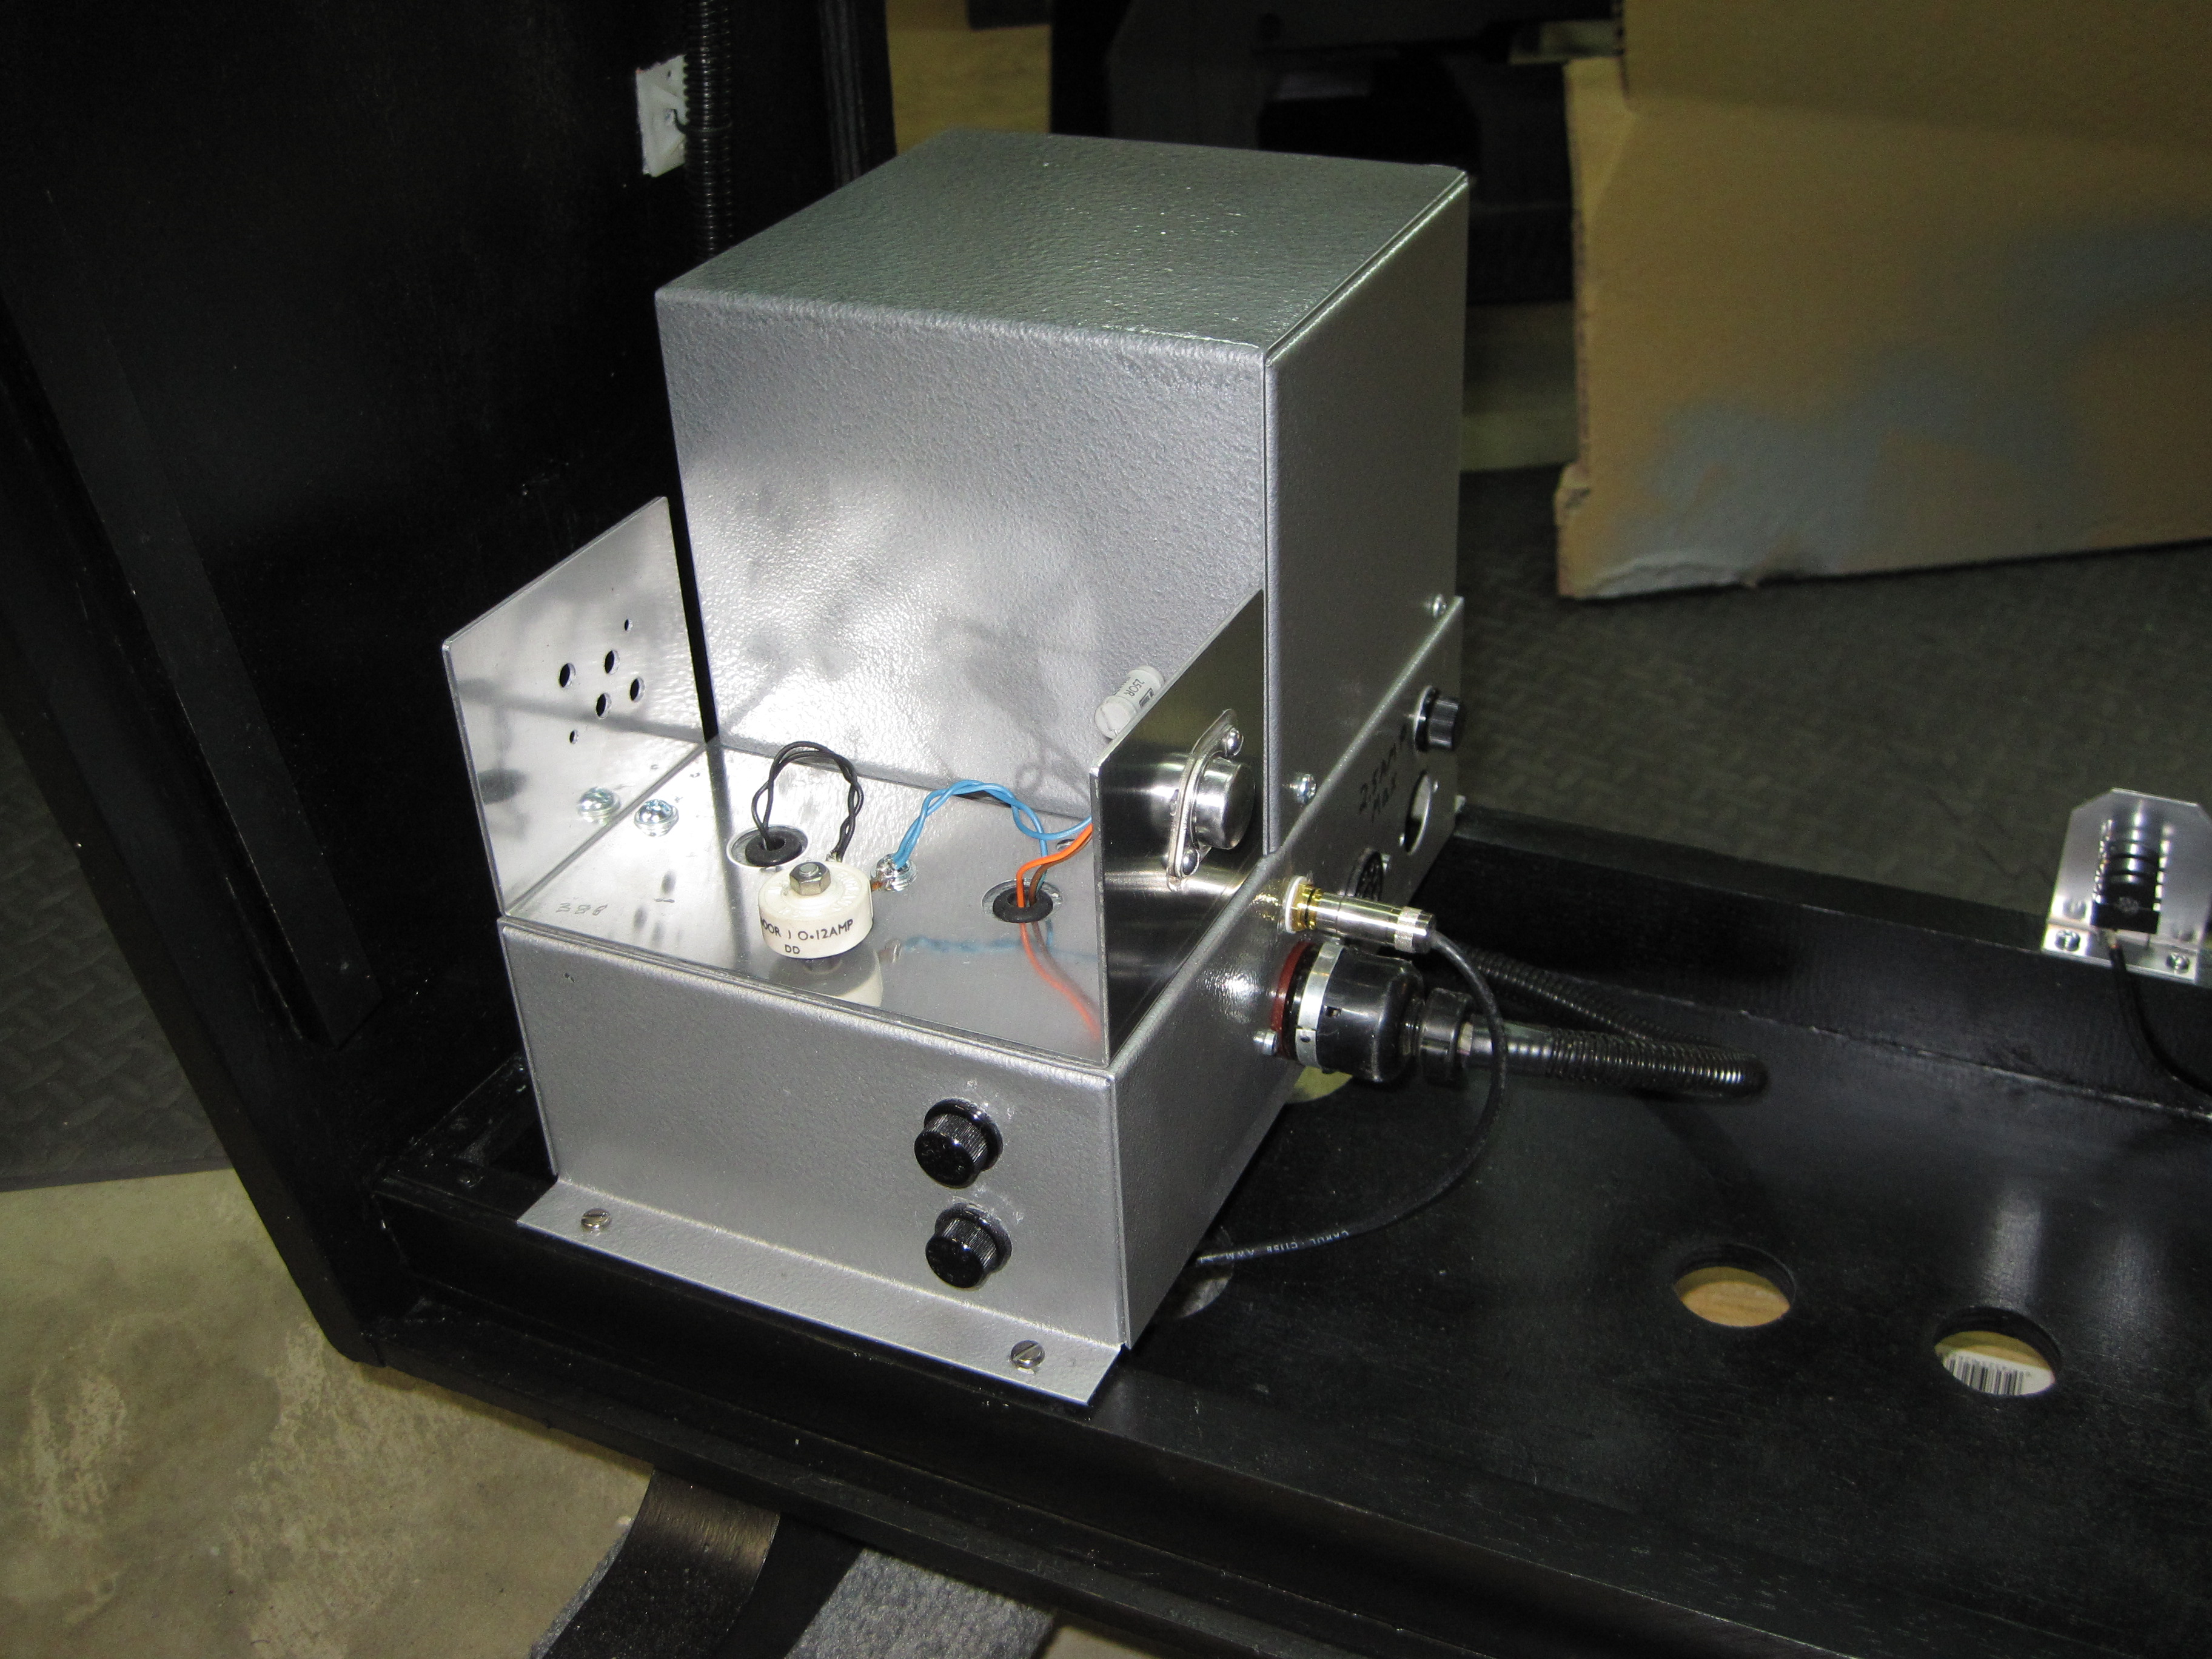 | Power supply reinstalled |
| The Black Mellotron | The Black Tron... update 3 | 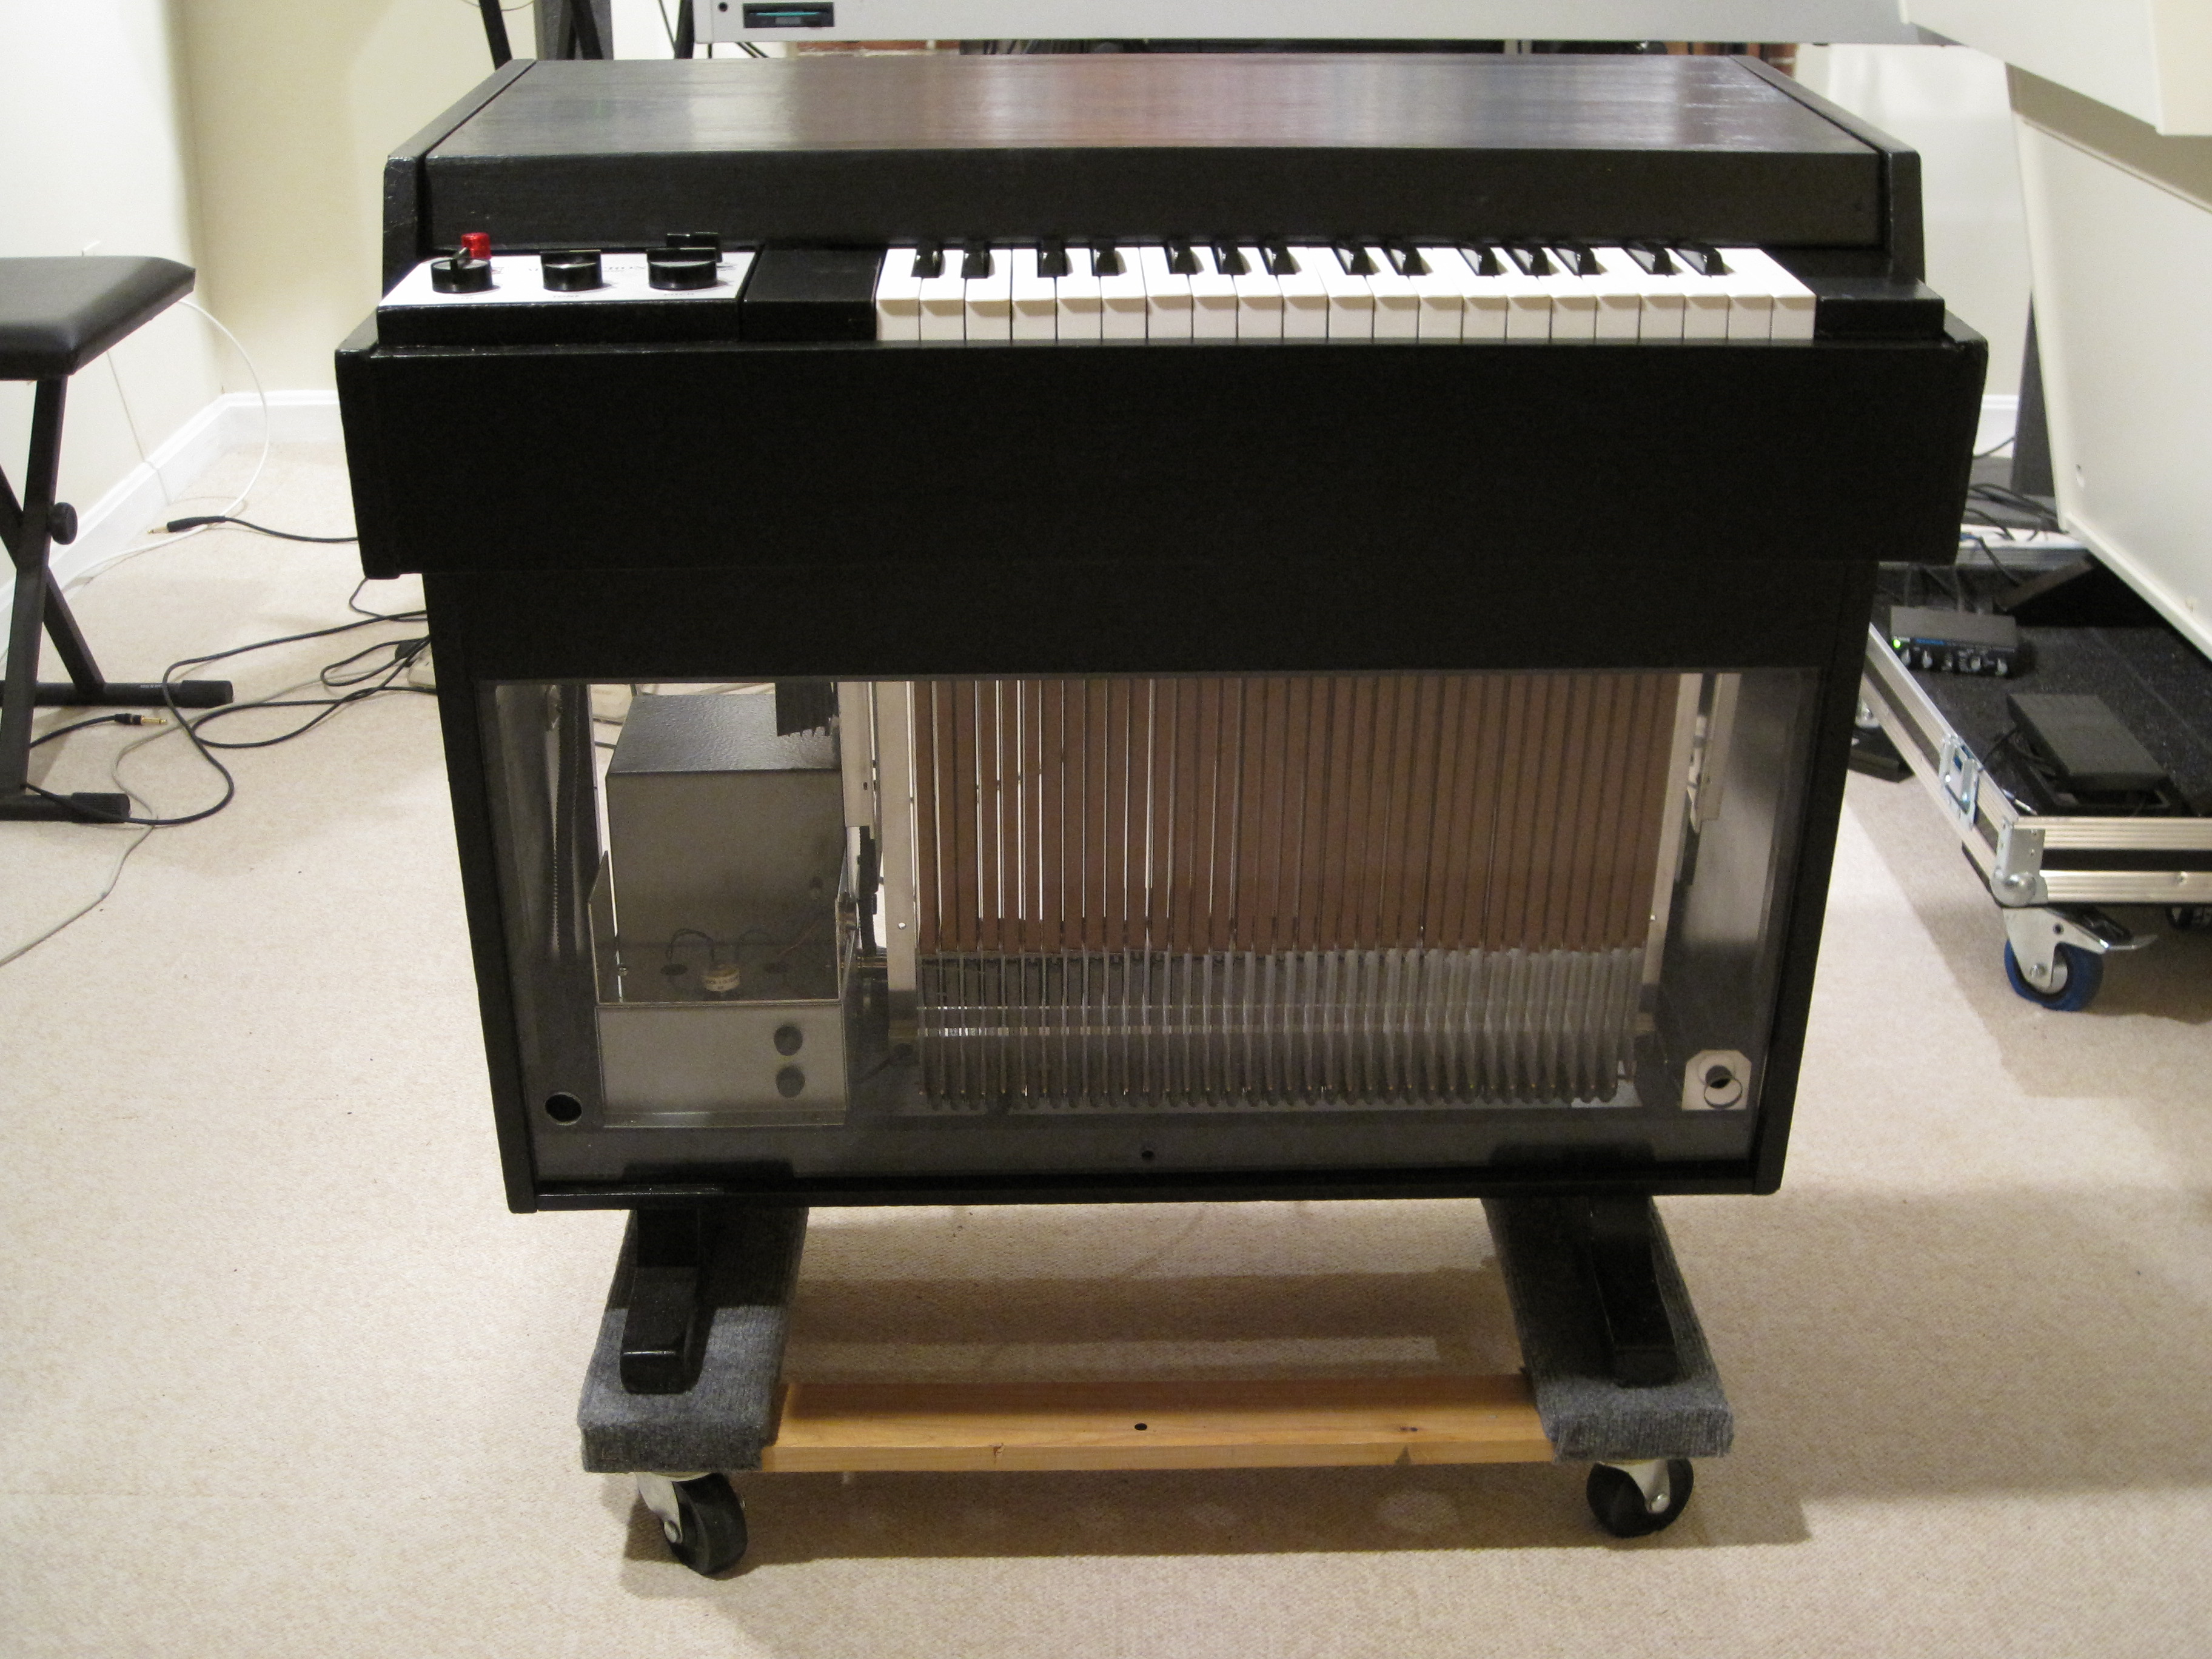 | Complete 386 with Lexan front and rear panels. |
| The Black Mellotron | The Black Tron... update 3 | 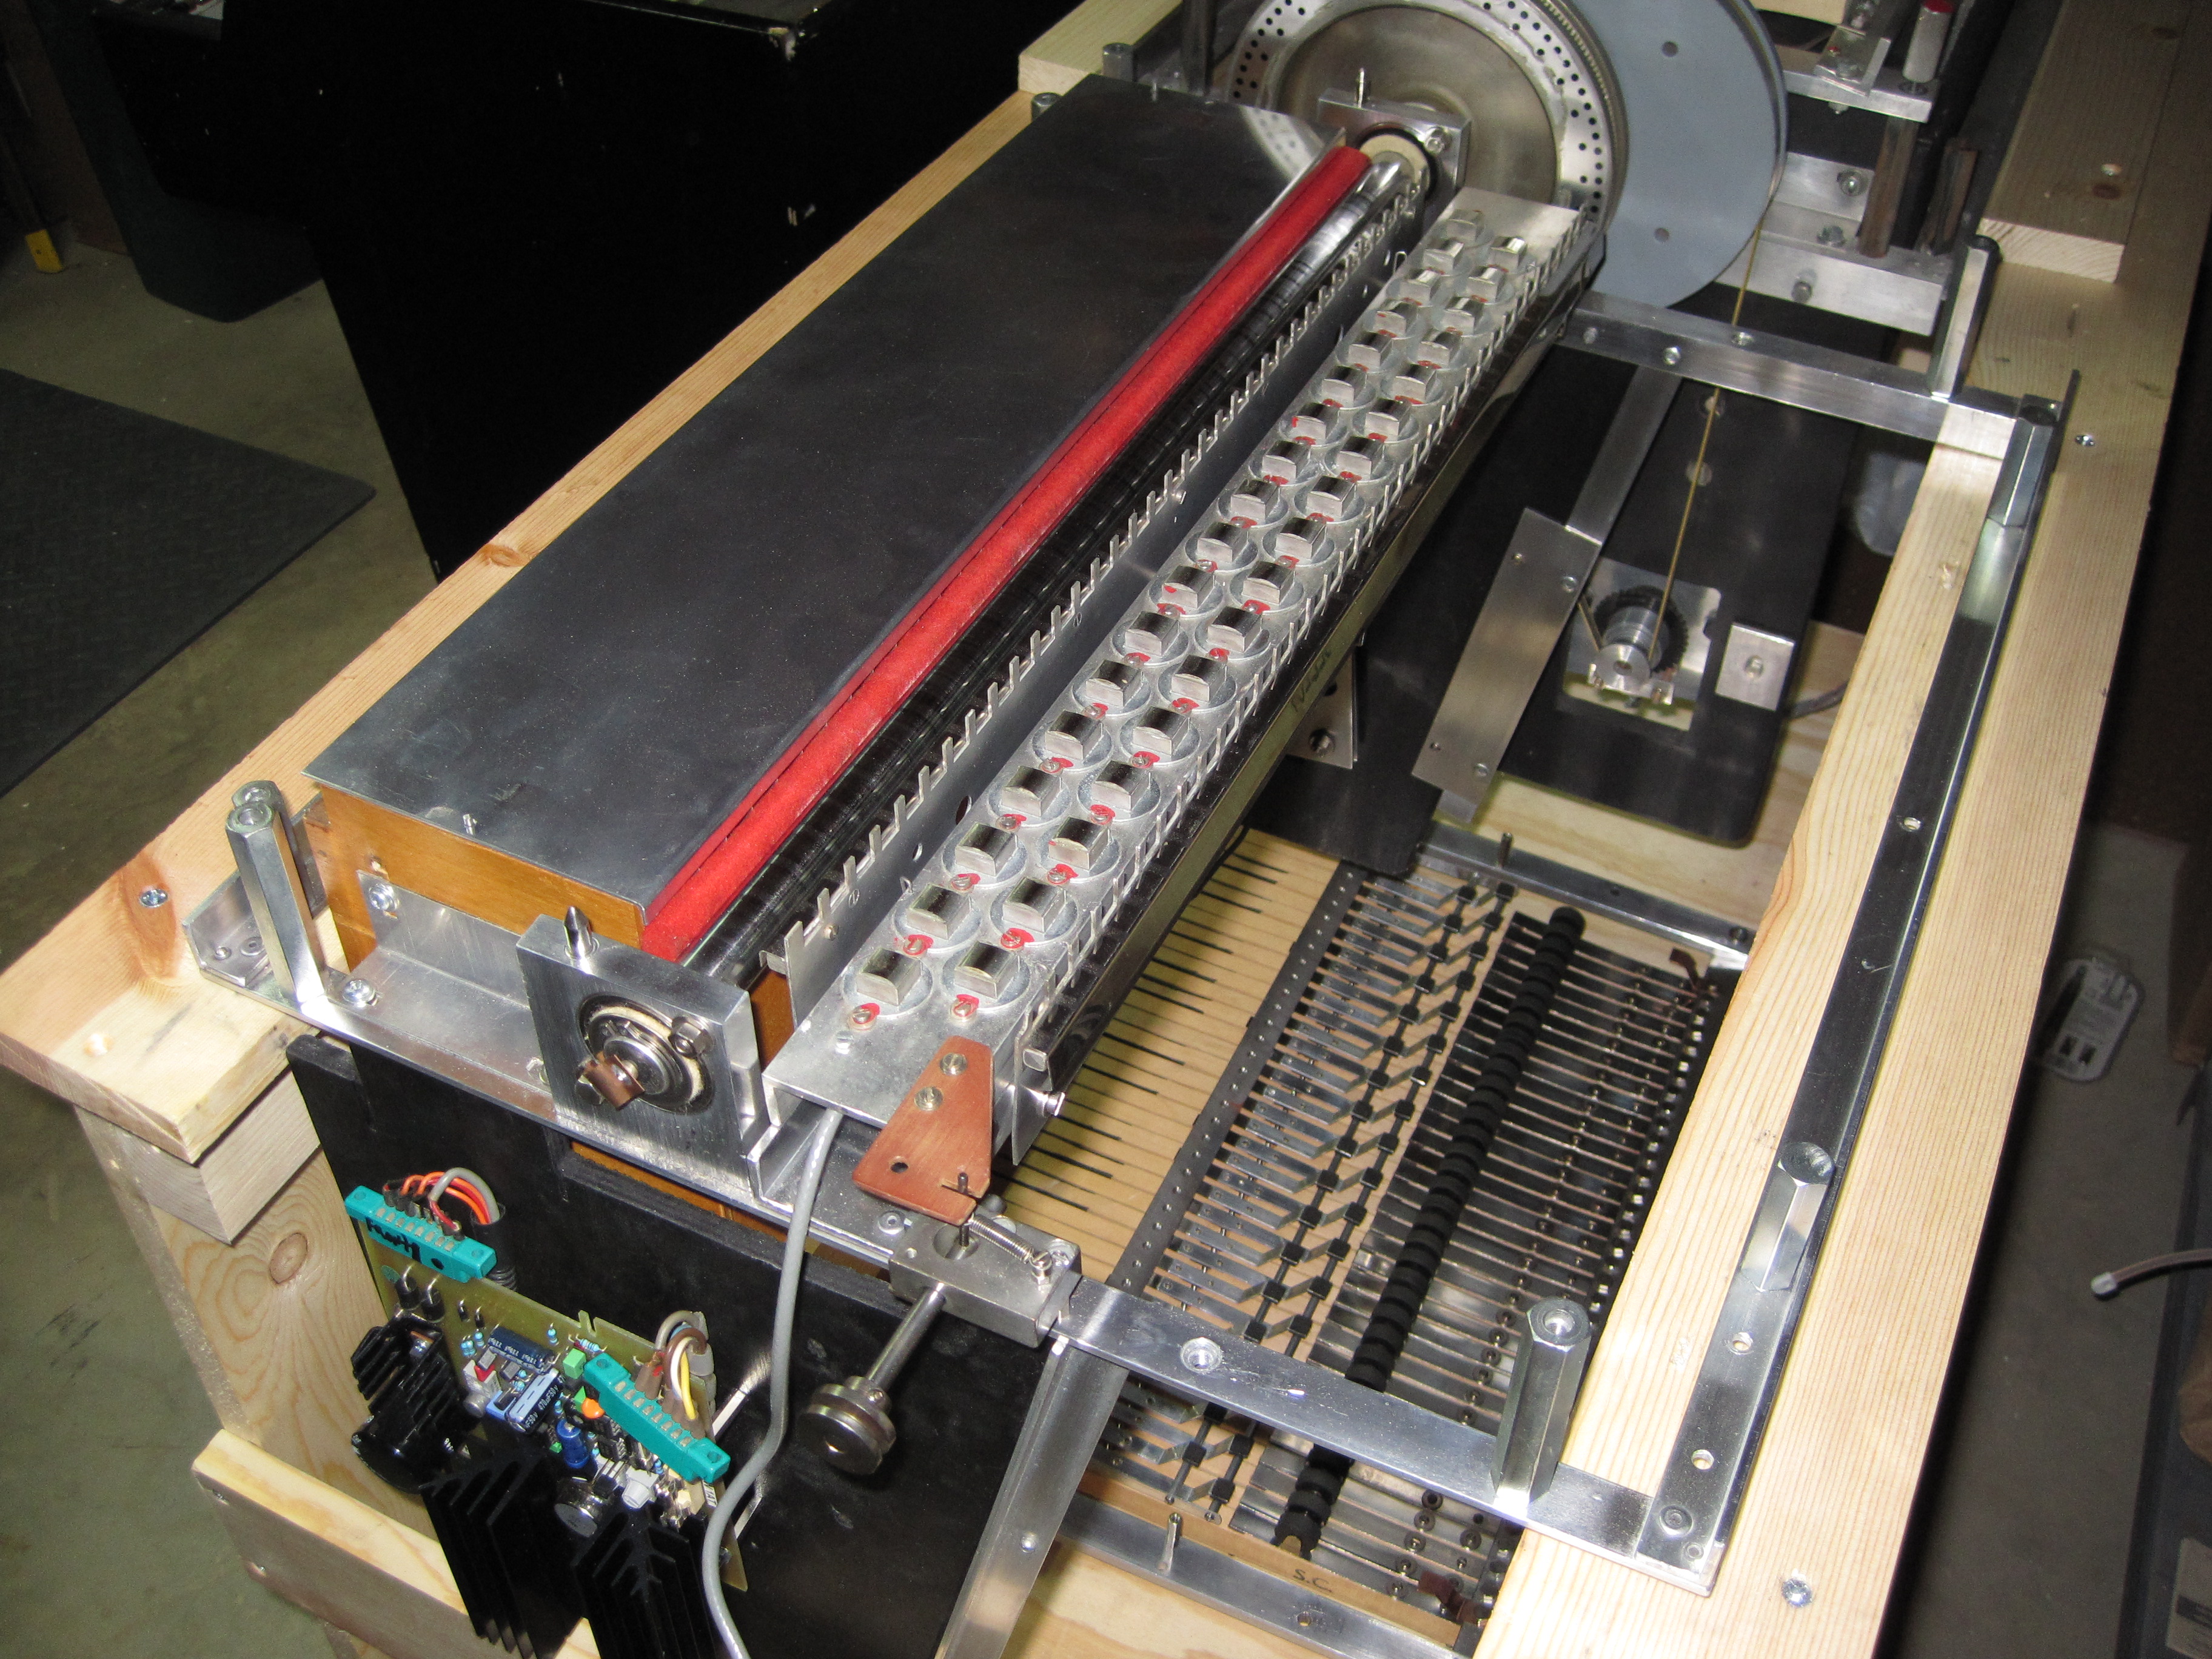 | Out of the cabinet for the third update |
| The Black Mellotron | The Black Tron... update 3 | 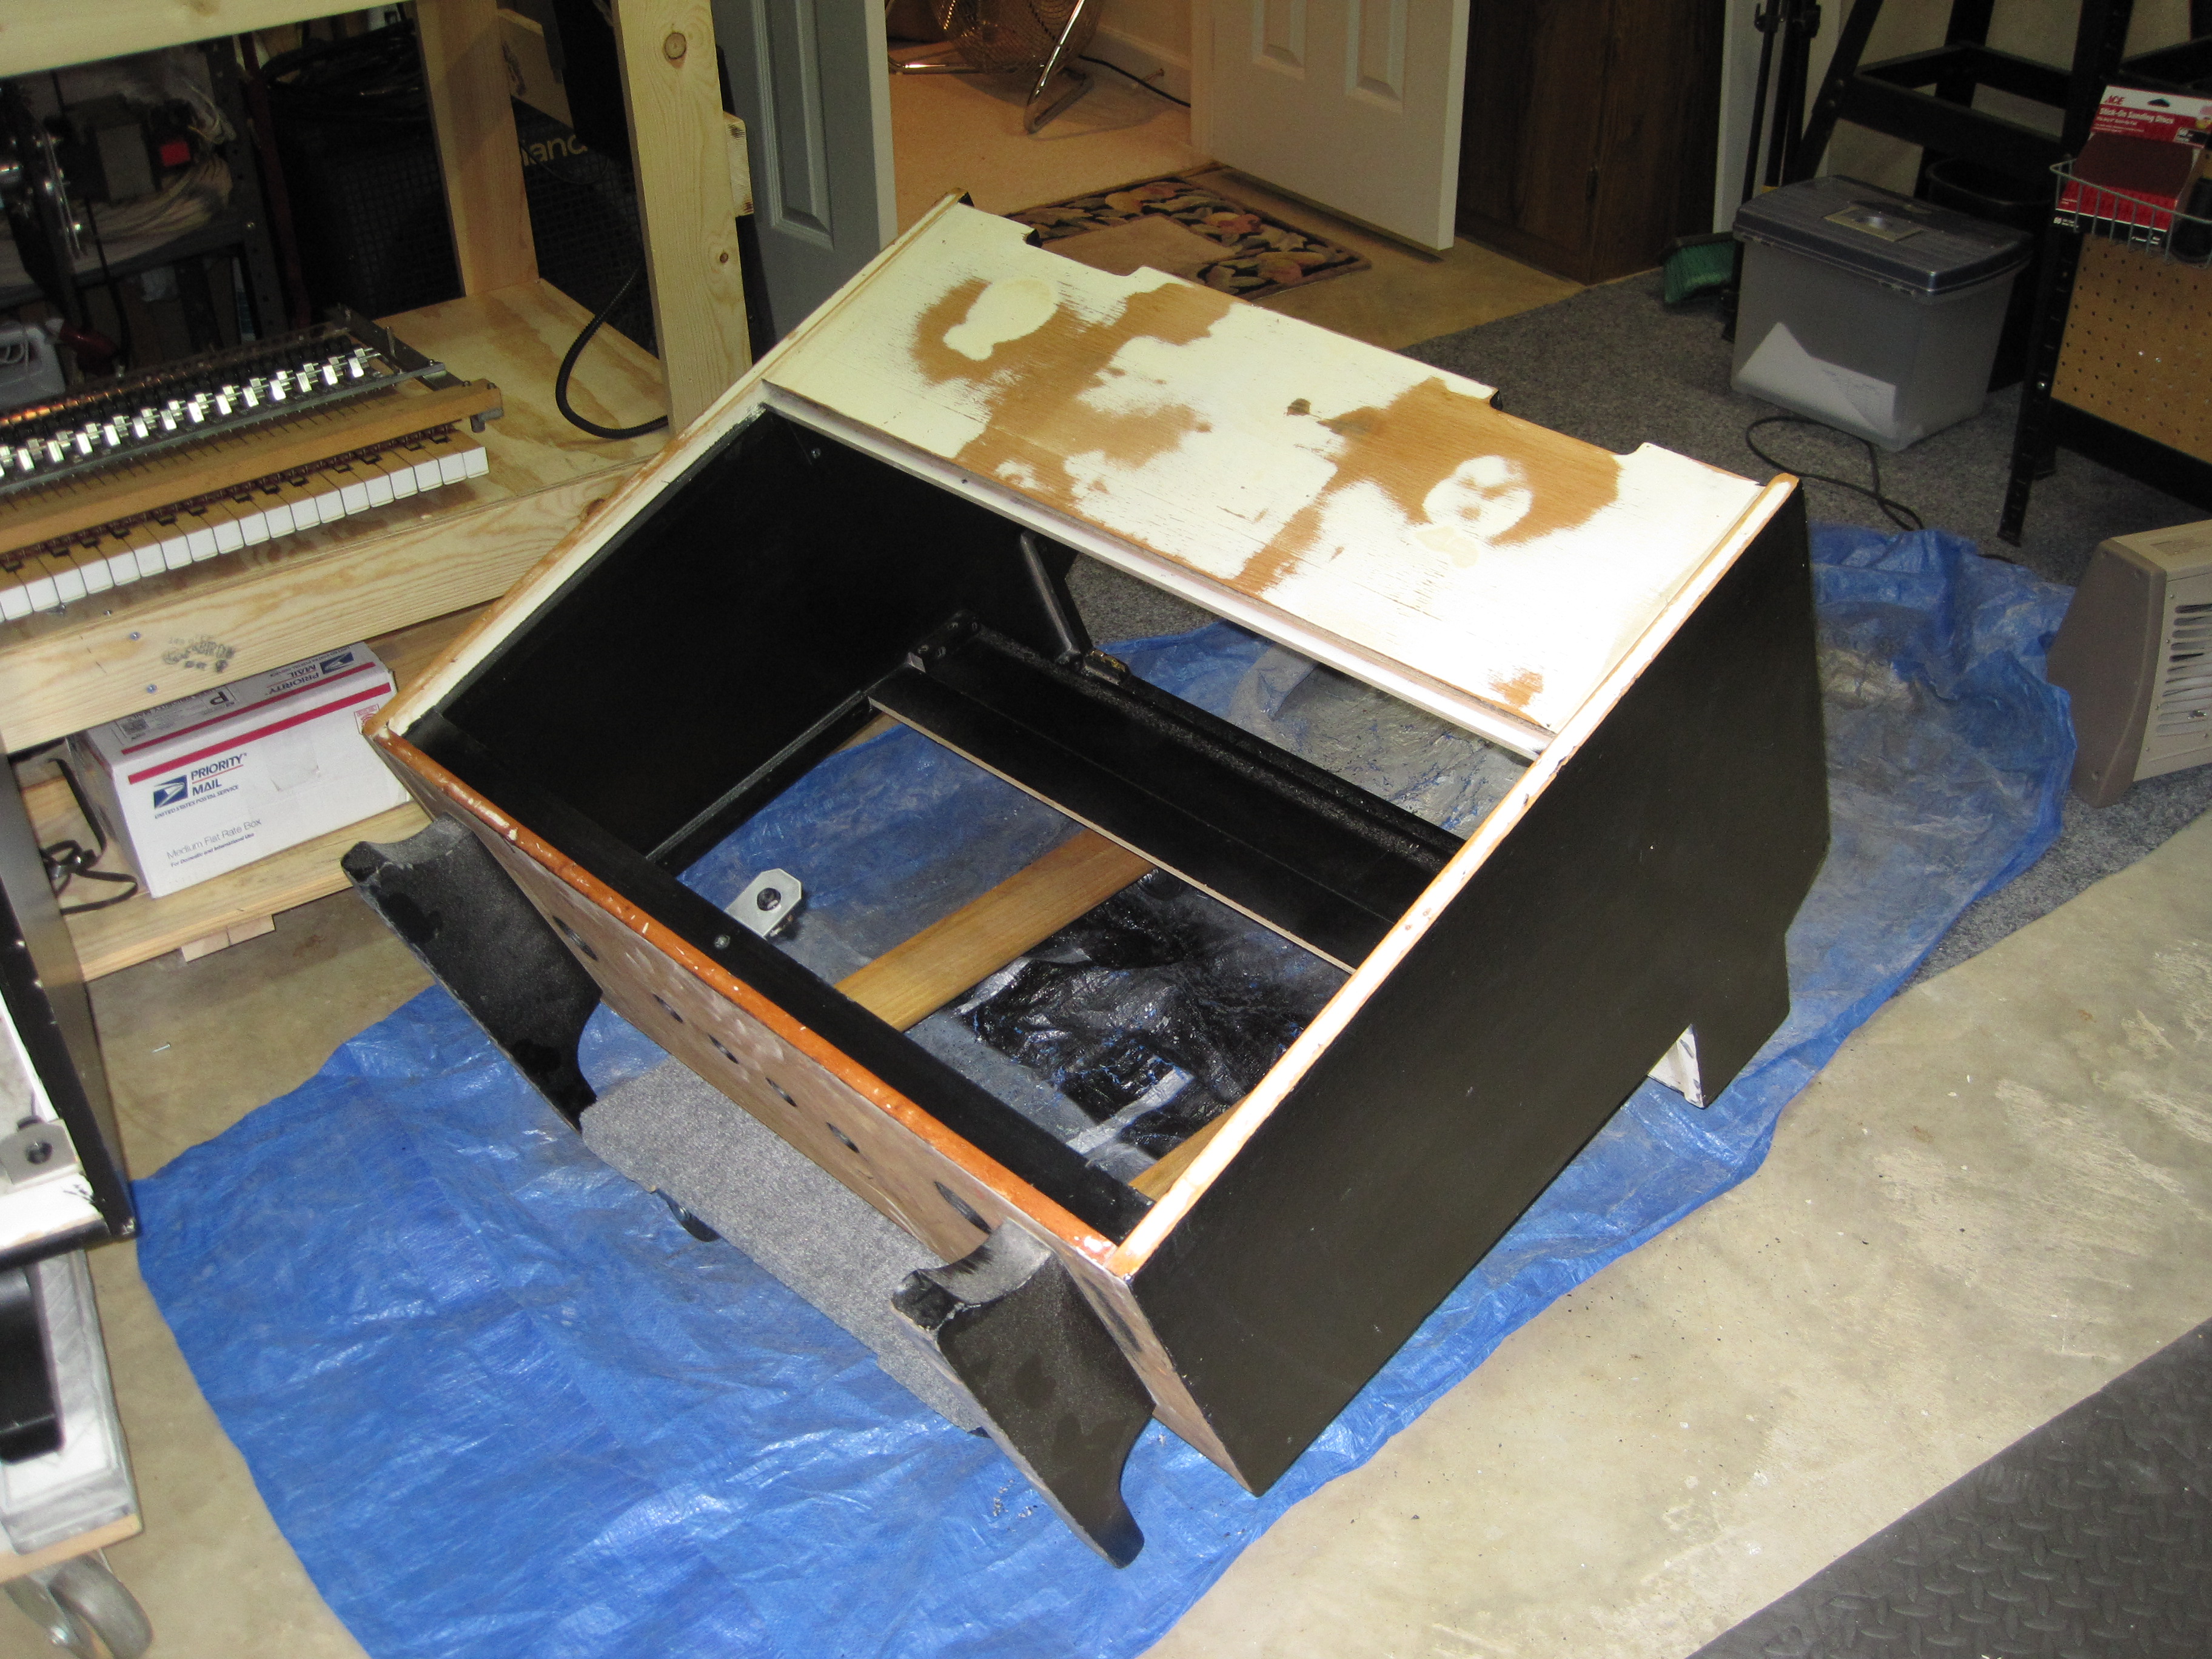 | I decided to paint the back of the cabinet |
| The Black Mellotron | 386 gets a make-over 029 | 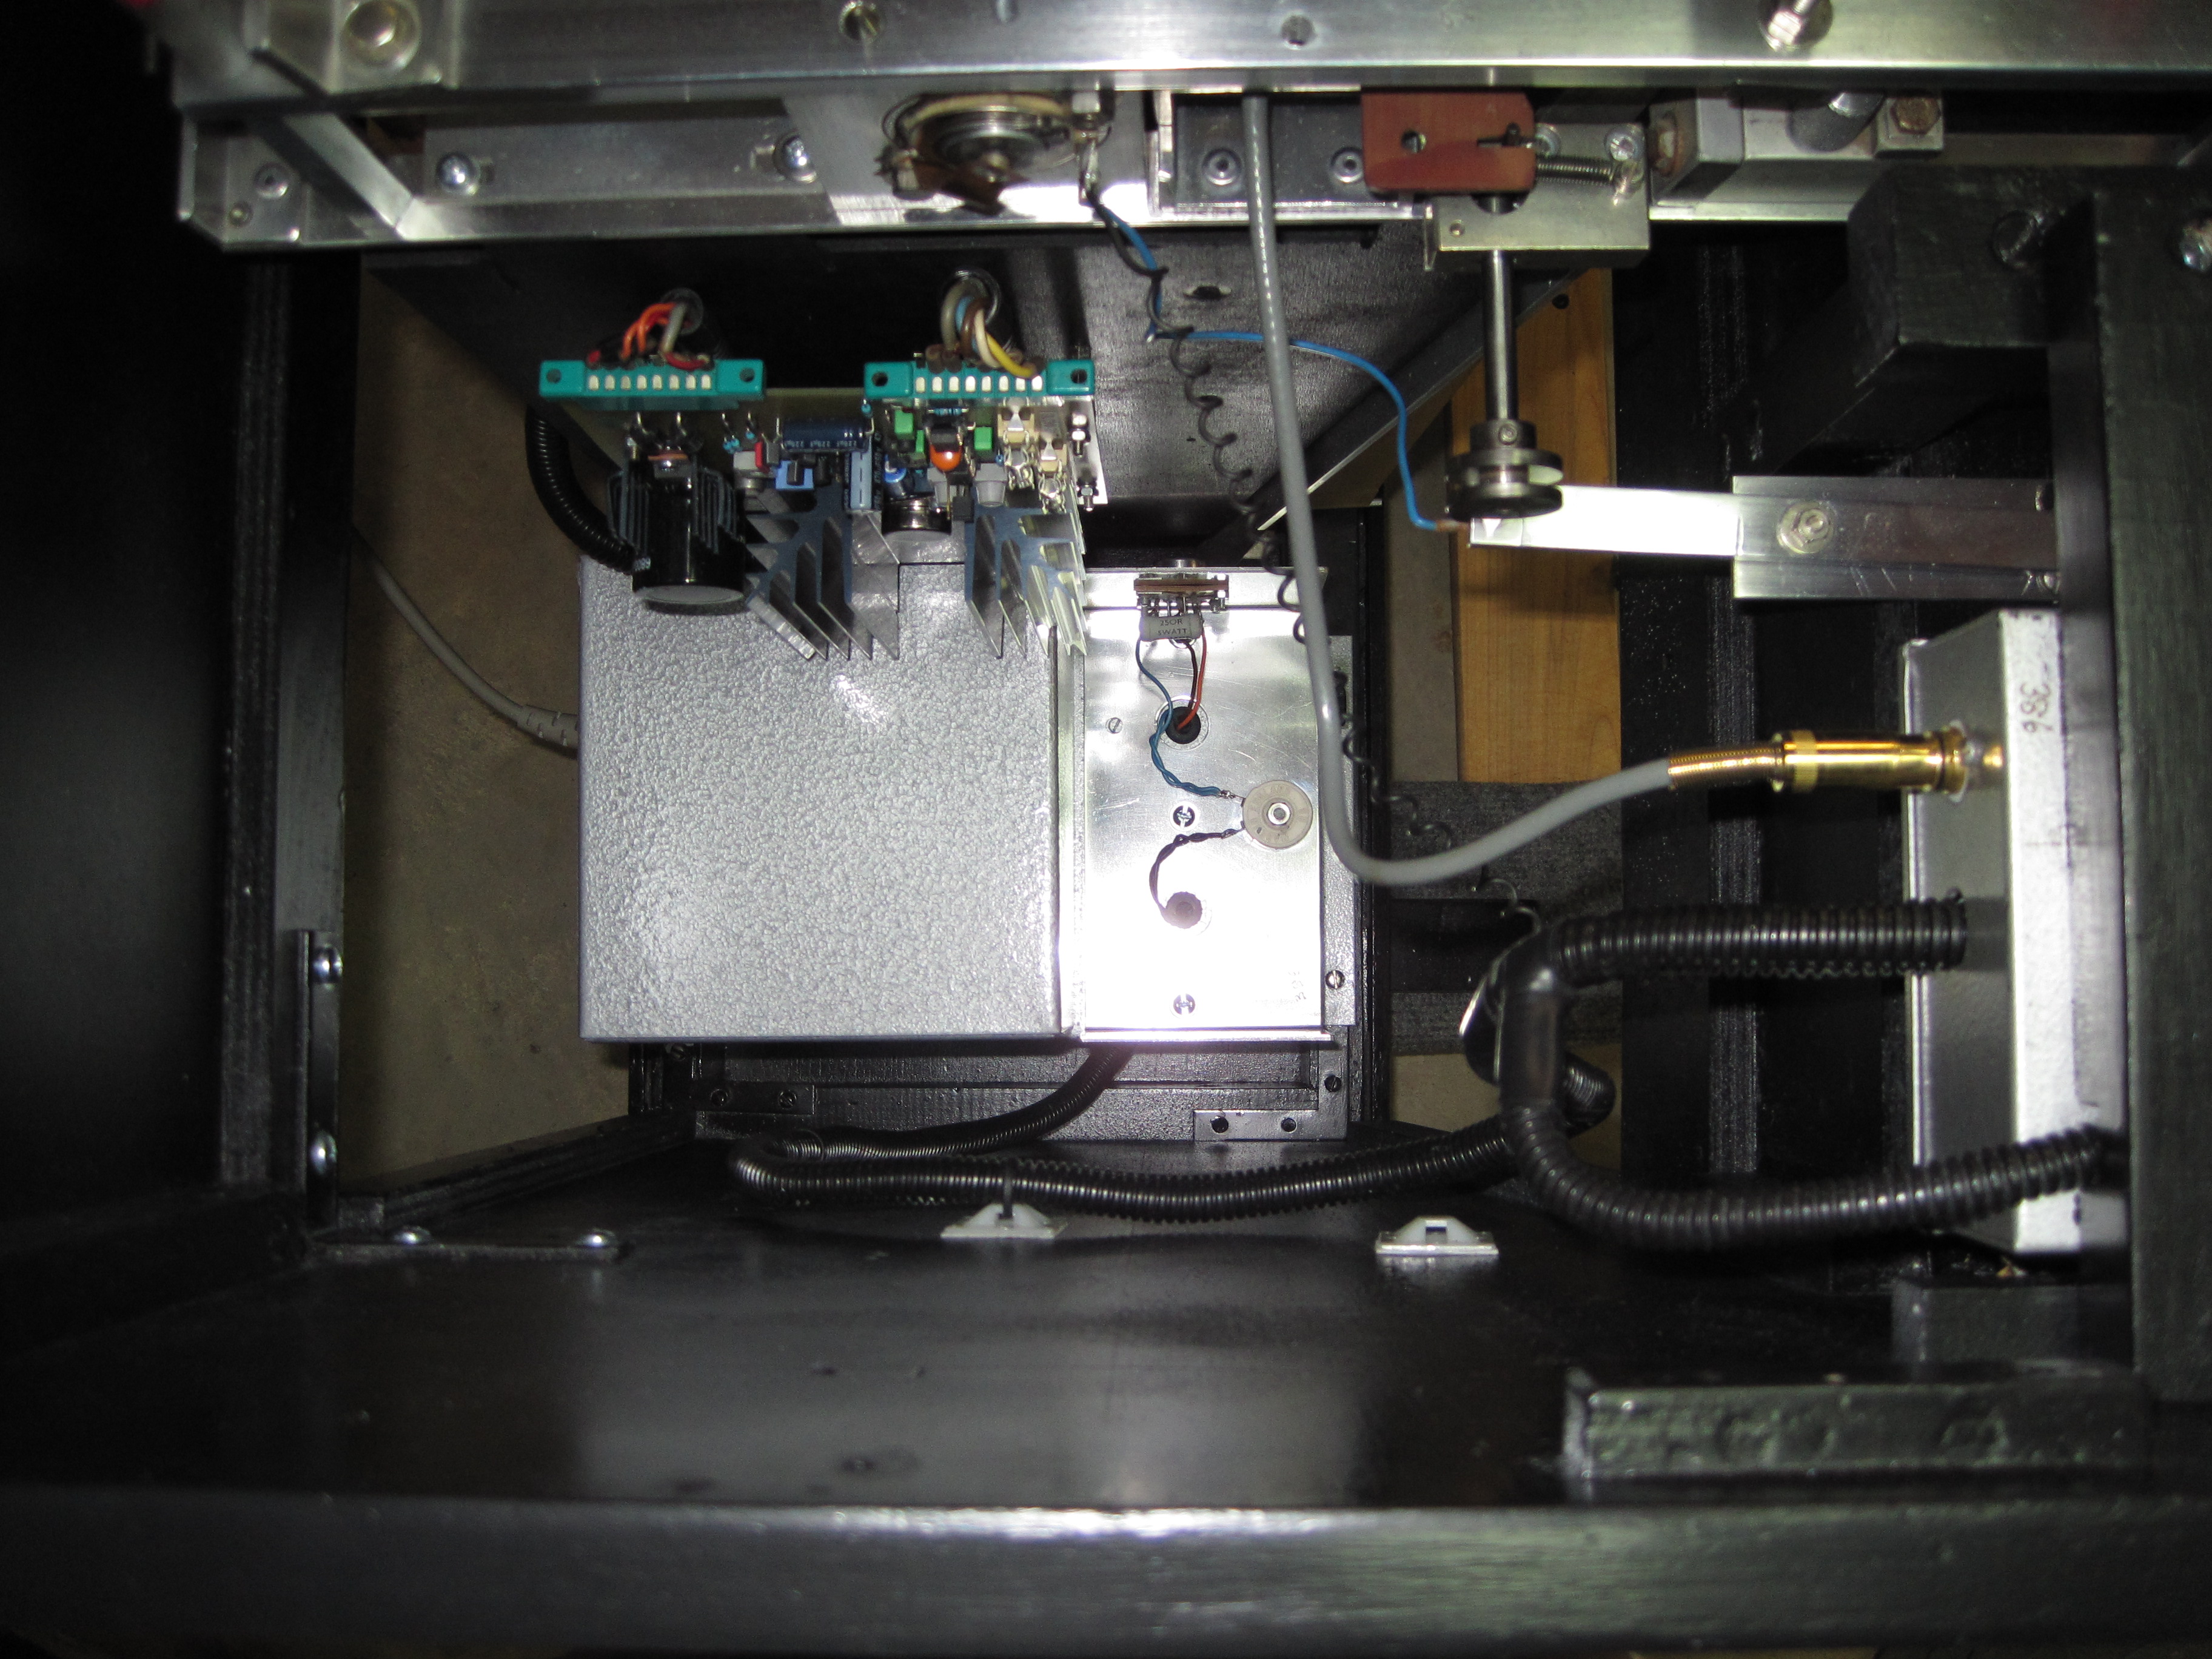 | |
| The Black Mellotron | The Black Tron... update 3 | 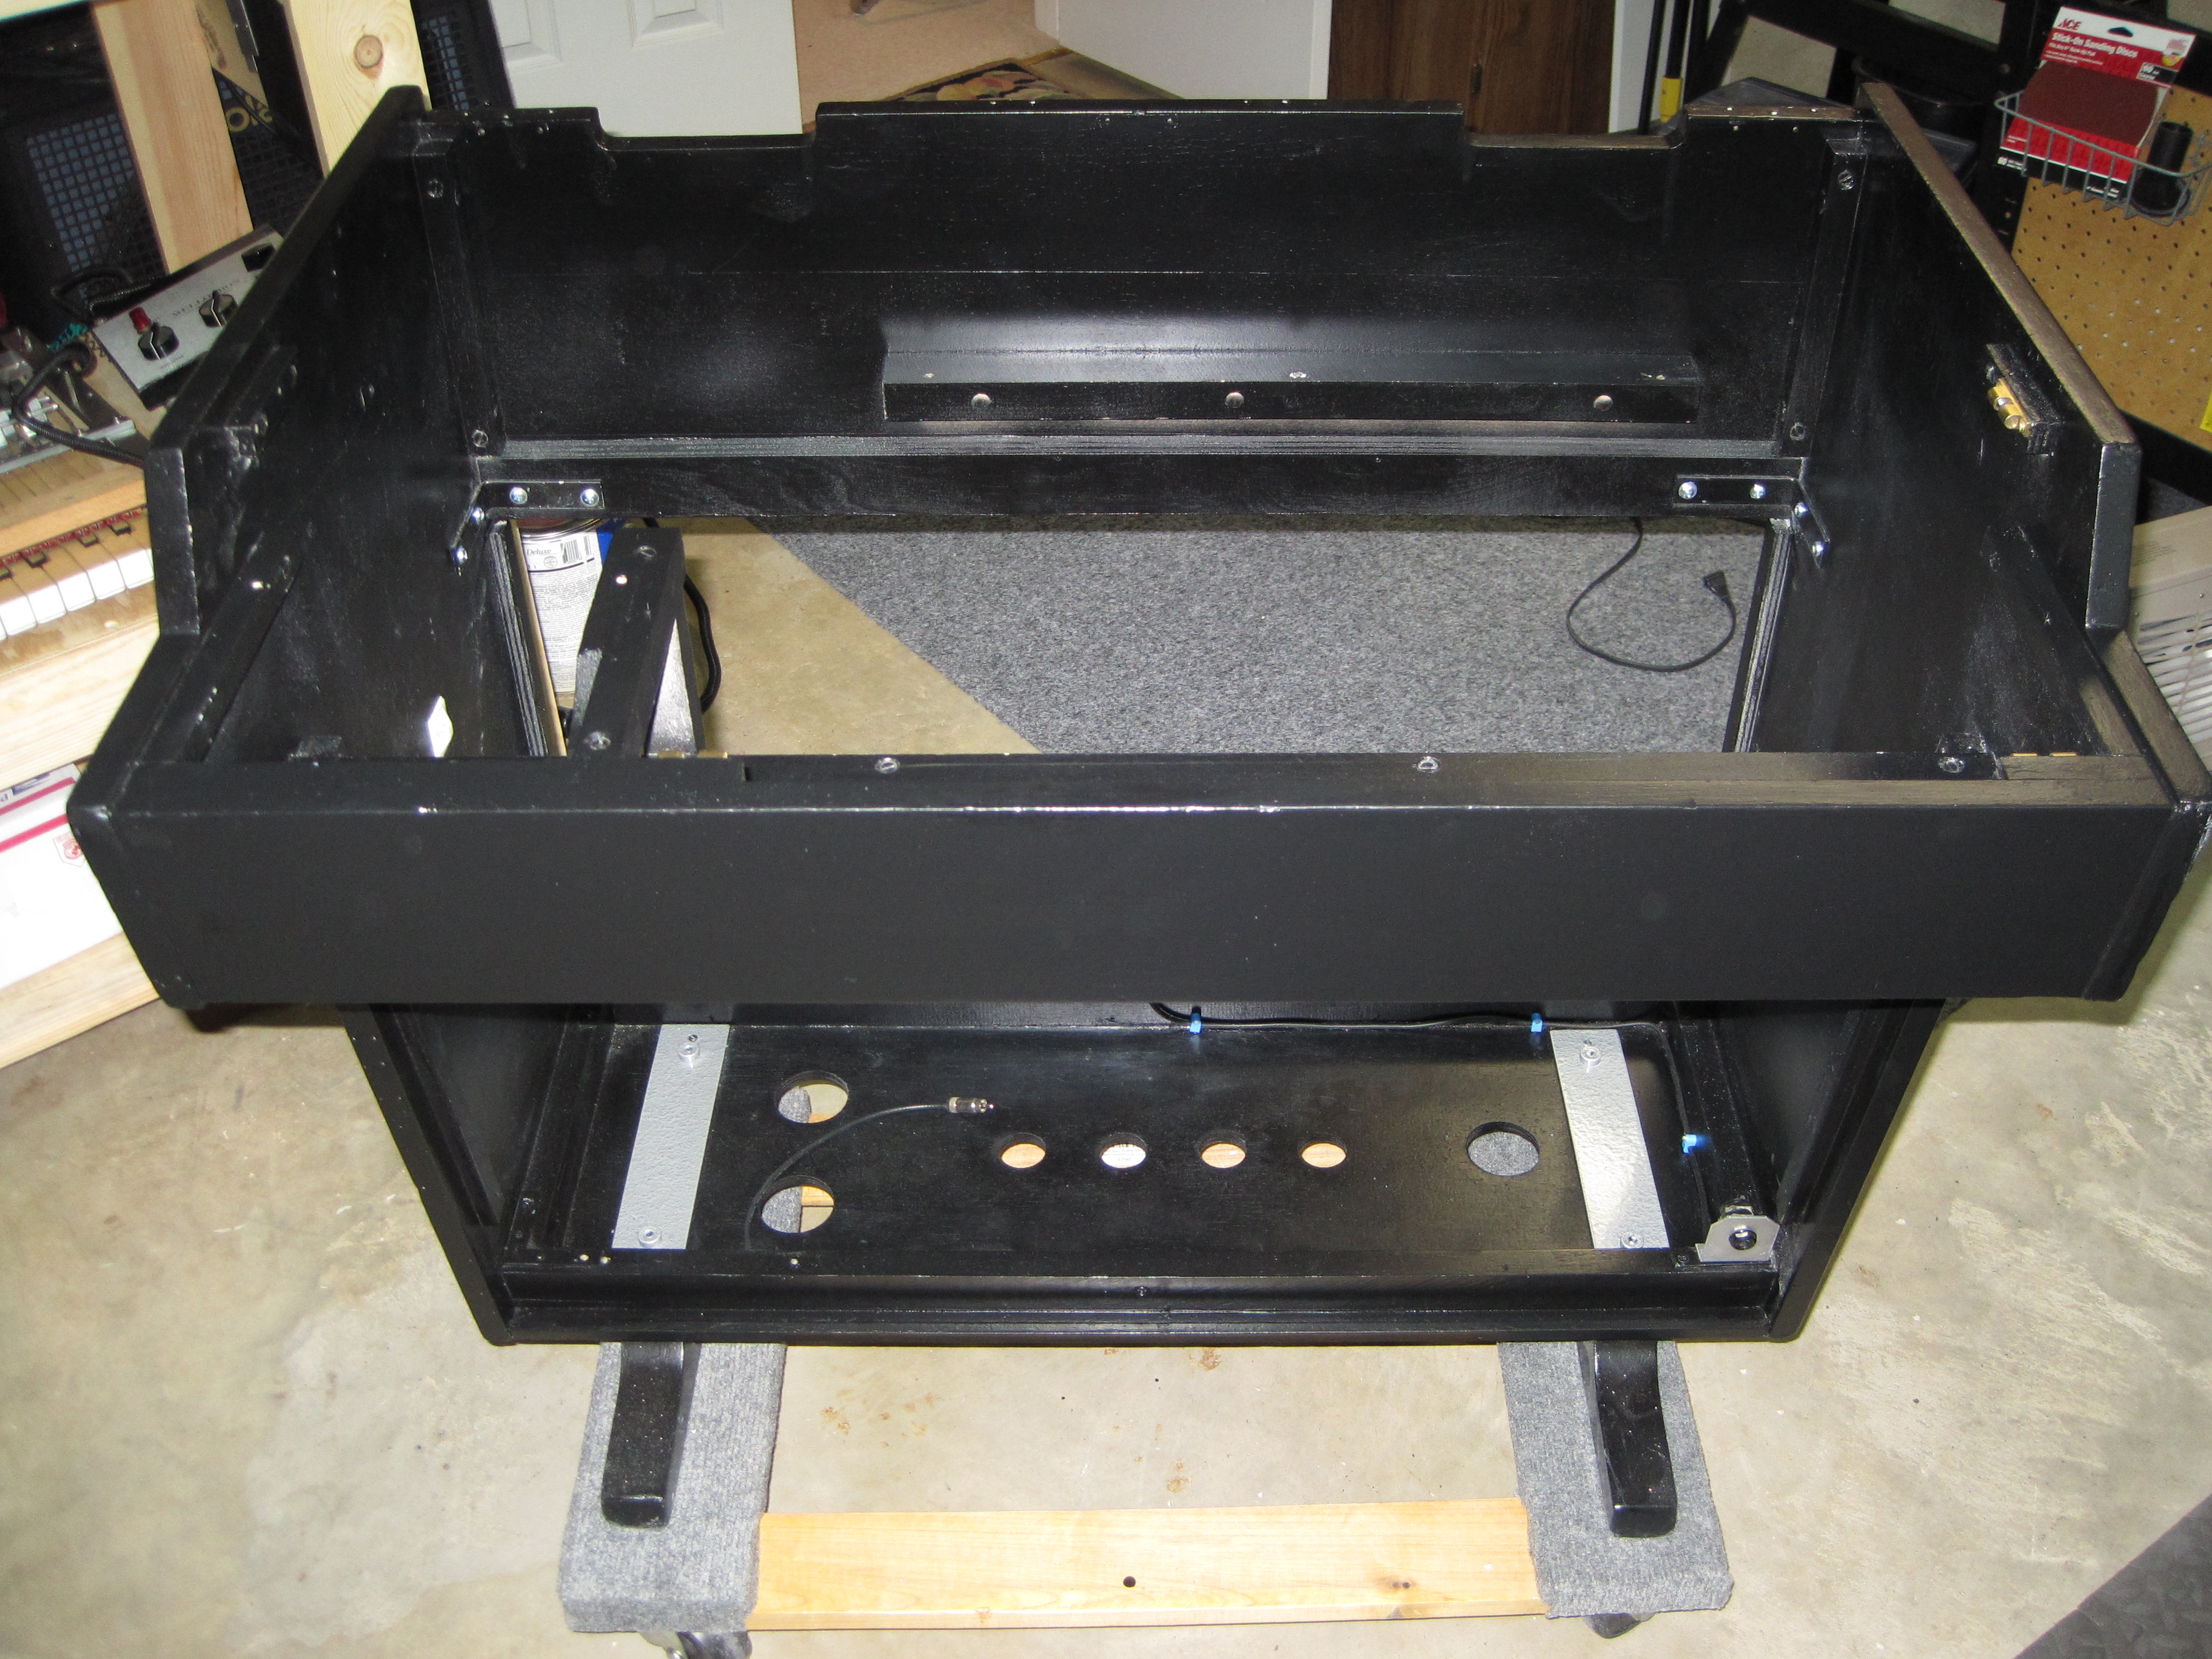 | So then I just repainted the whole cabinet. |
| The Black Mellotron | The Black Tron... update 3 | 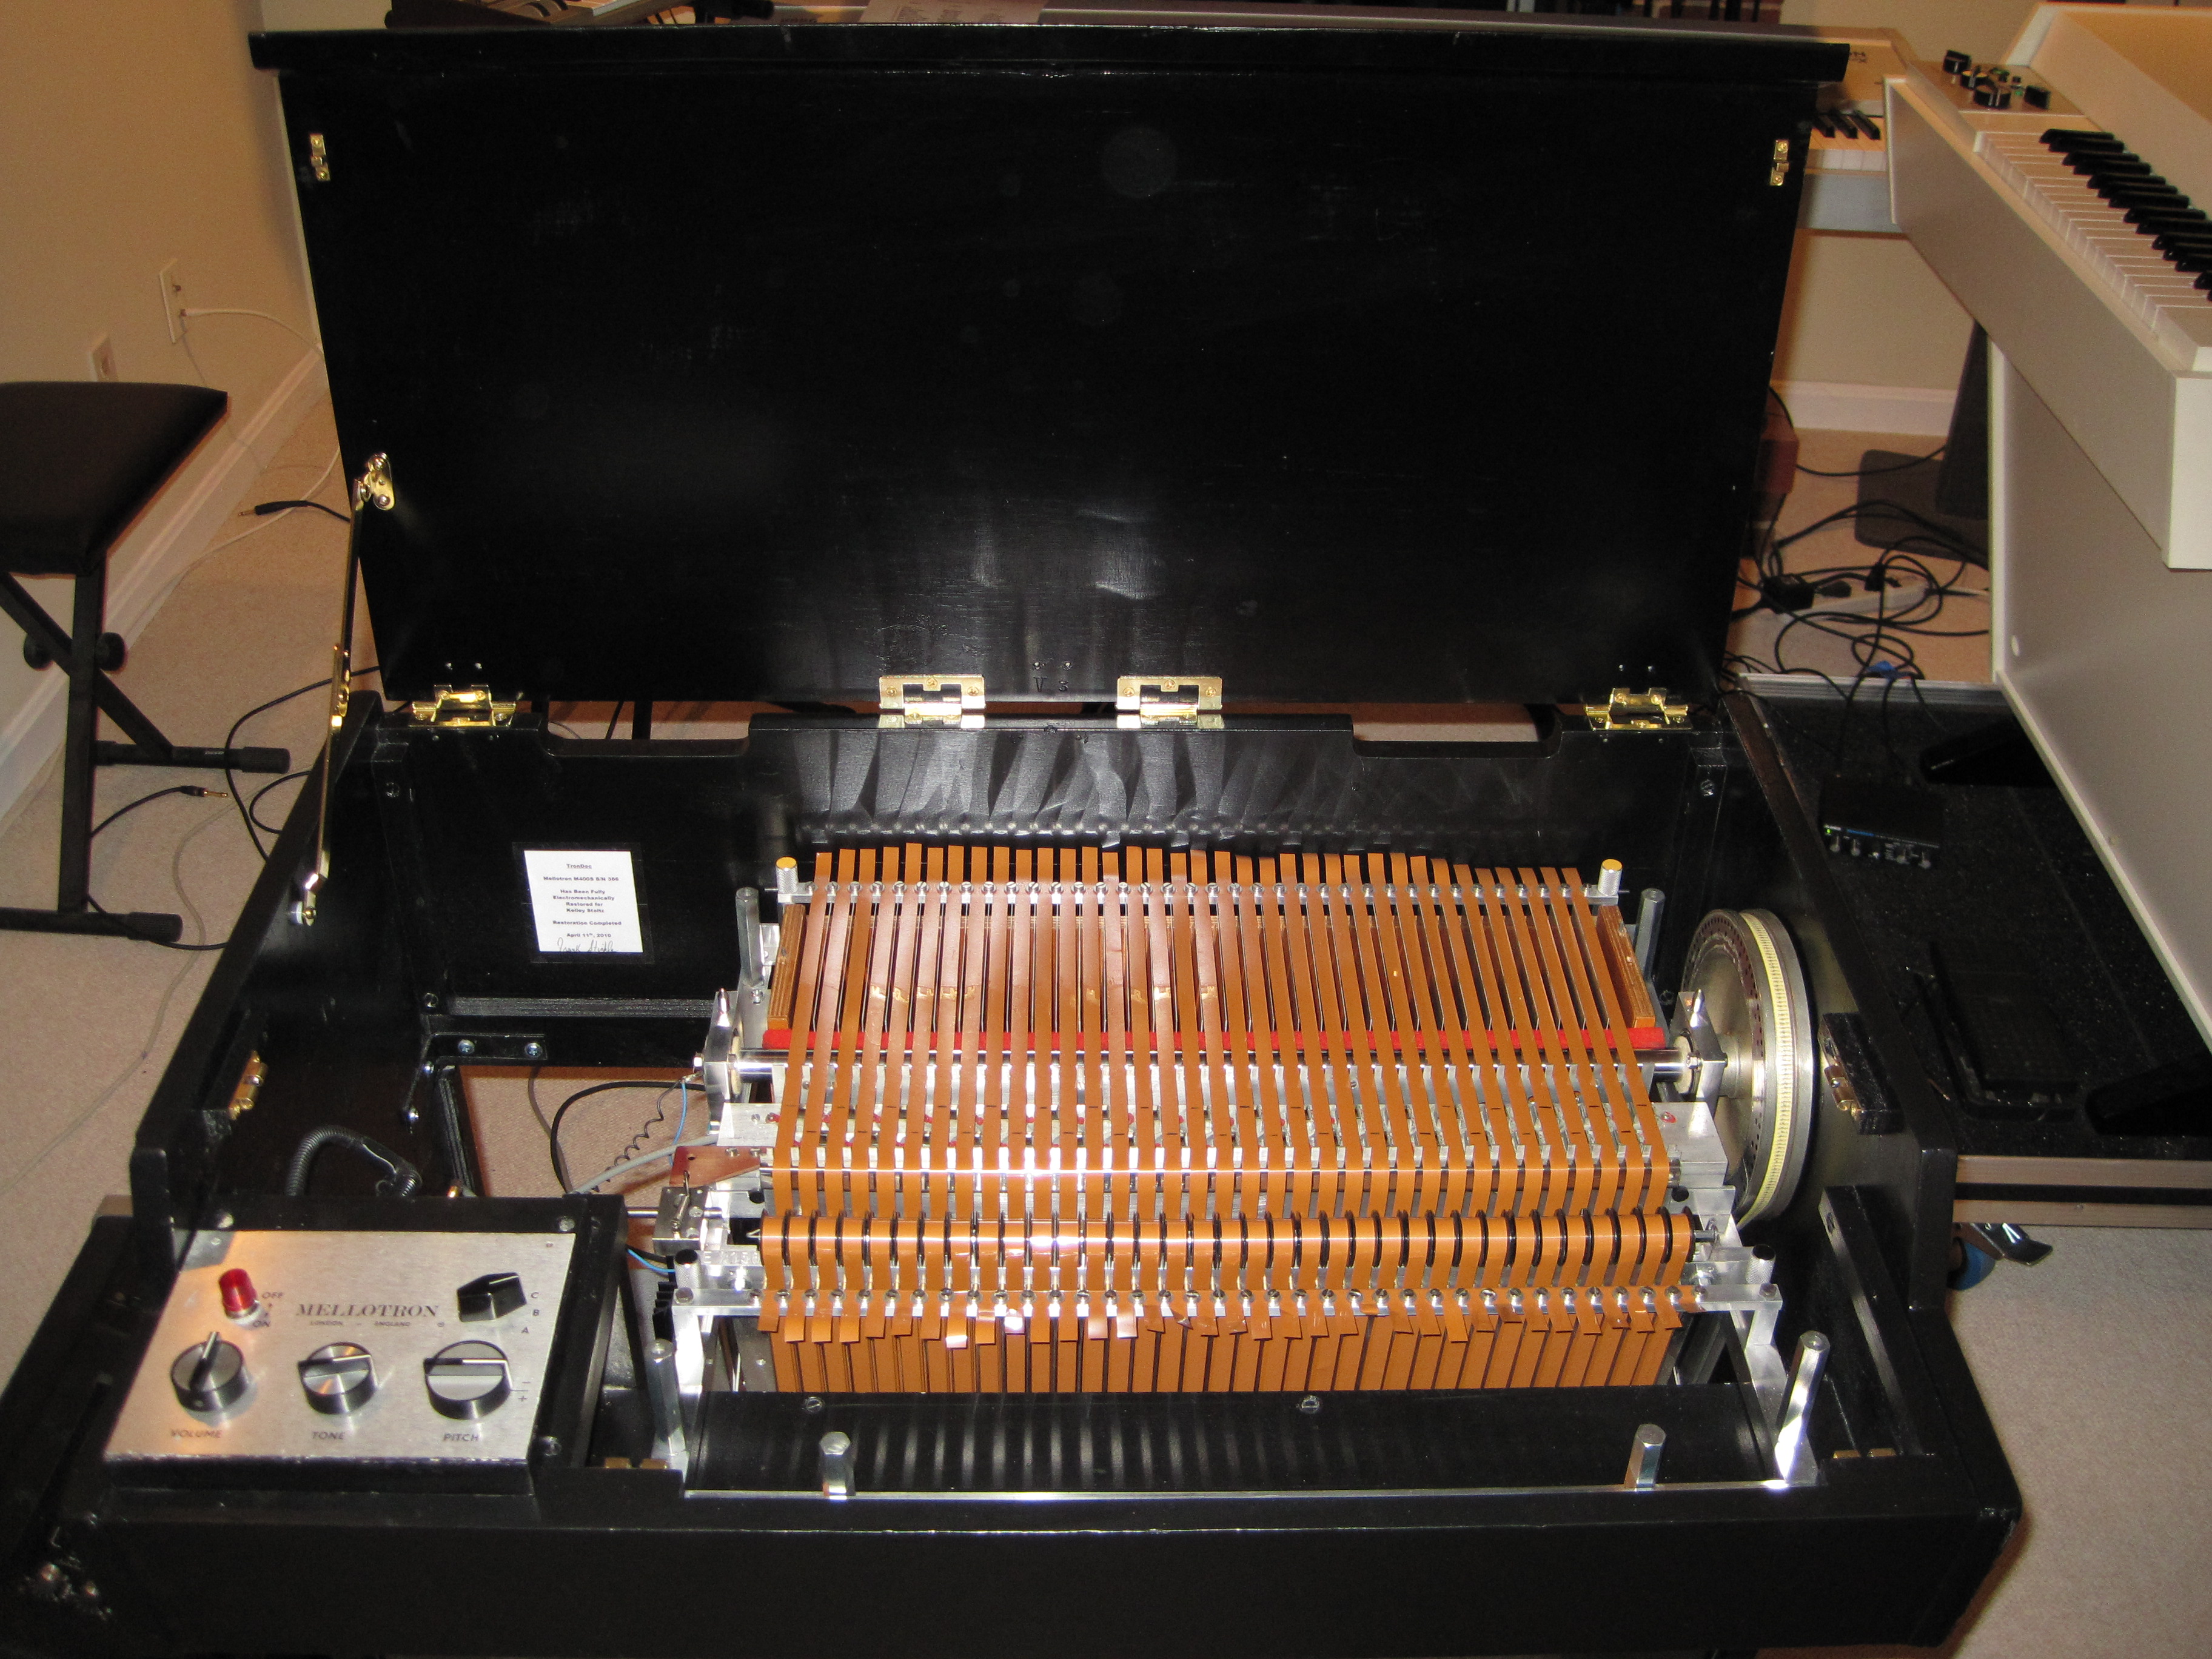 | Now I think she really looks sharp |
| The Black Mellotron | The Black Tron... update 3 |  | I';m finally done |
| The Black Mellotron | The Black Tron... update 3 | 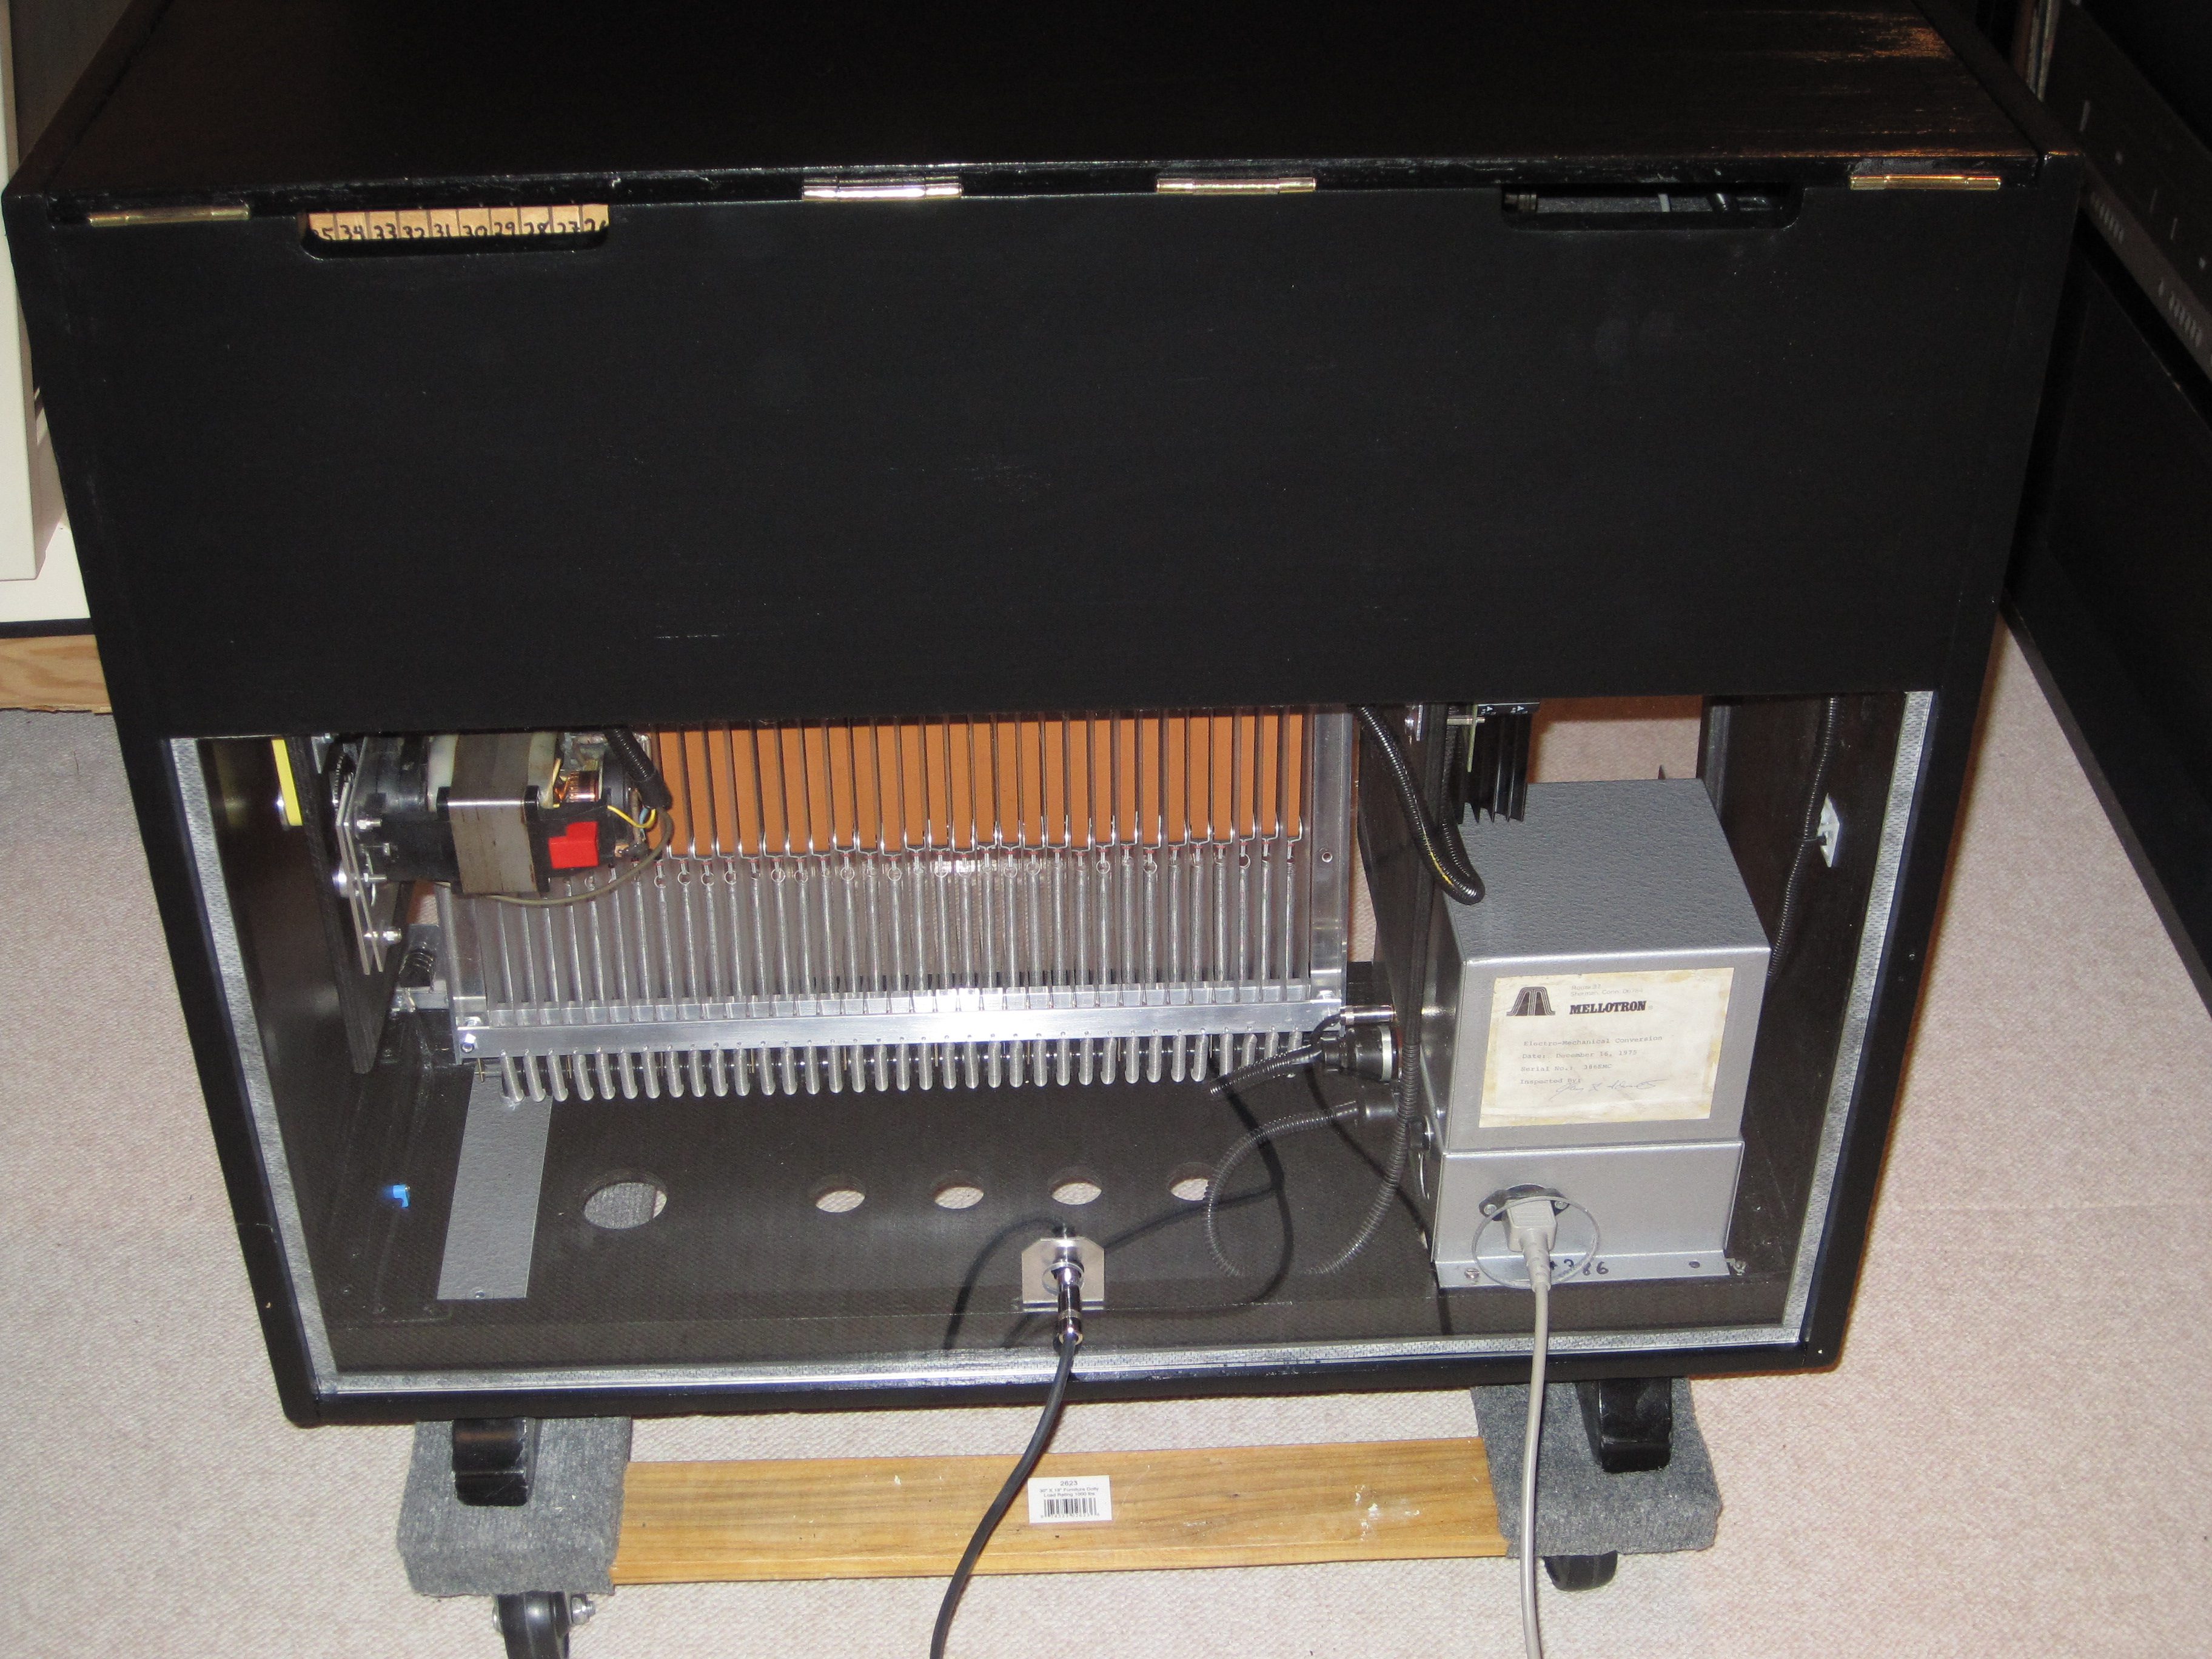 | View of clear Lexan panel |
| The Black Mellotron | The Black Tron... update 3 | 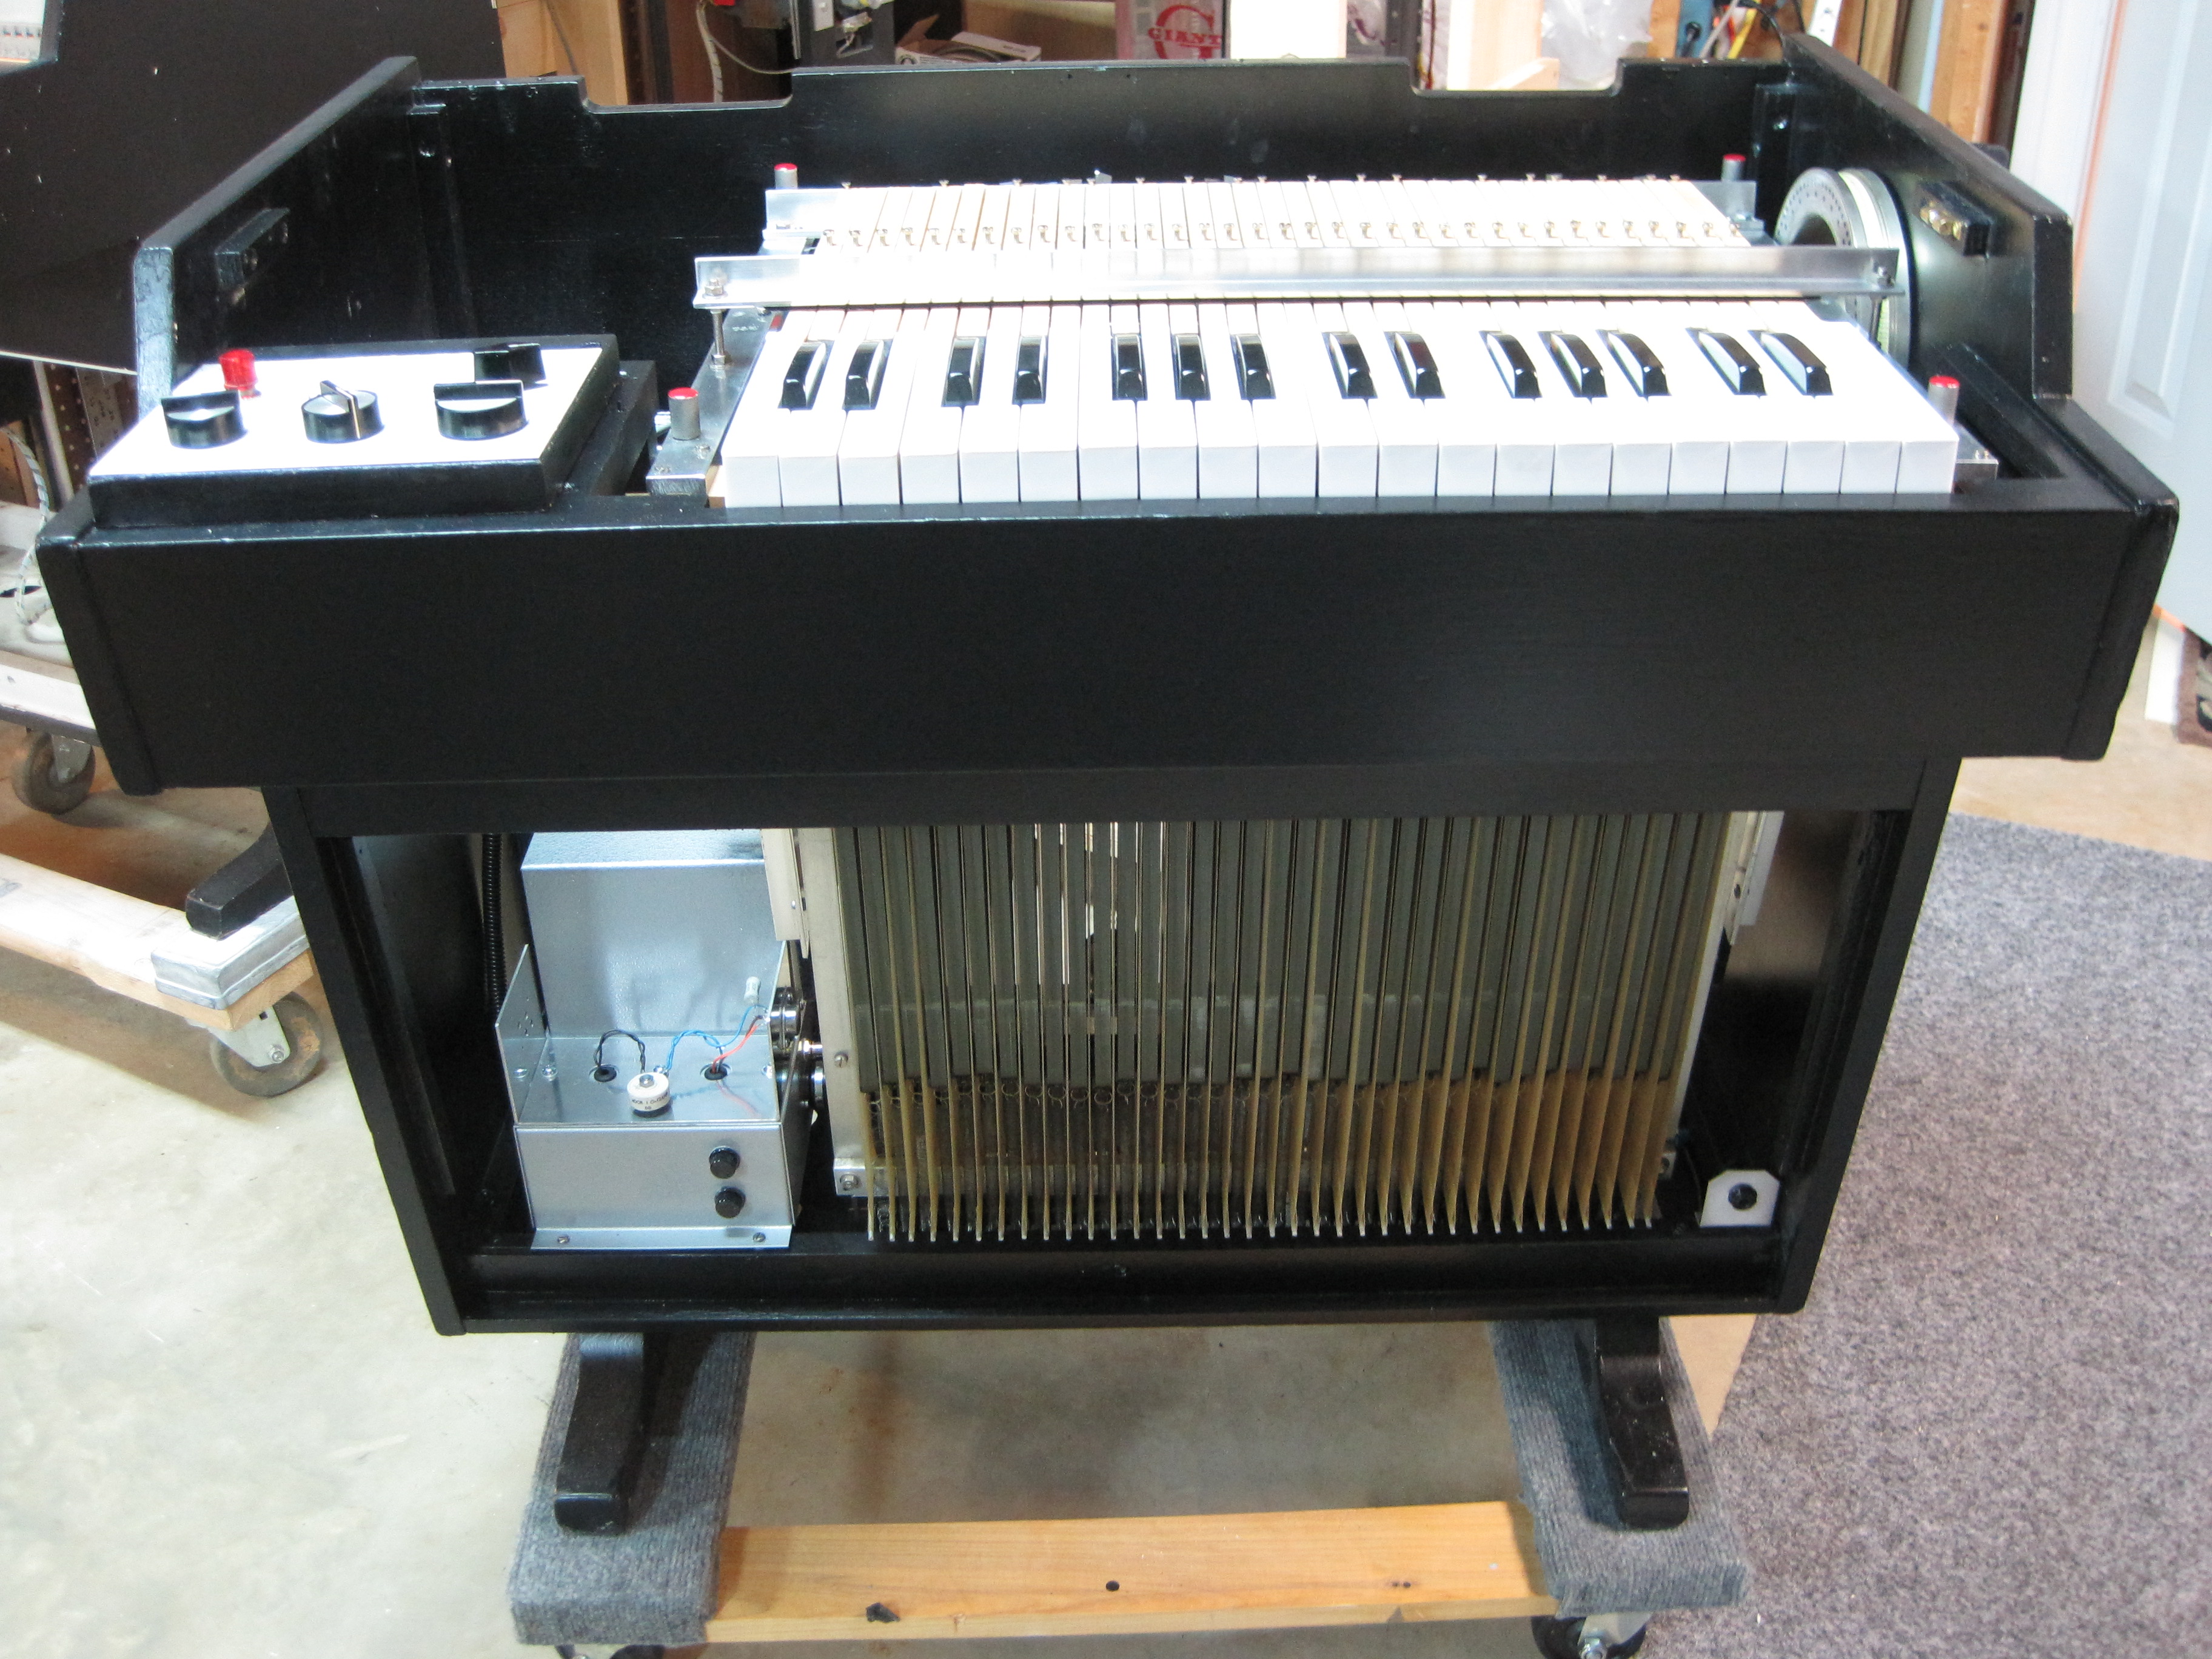 | Mellotron back in the cabinewt |
| The Black Mellotron | The Black Tron... update 3 |  | I rewired the power supply again to make it right(er) |
| The Black Mellotron | M400S #386 Leaves For San Francisco |  | I will really miss this one! |
| The Dennytron photos | left keyboard view | 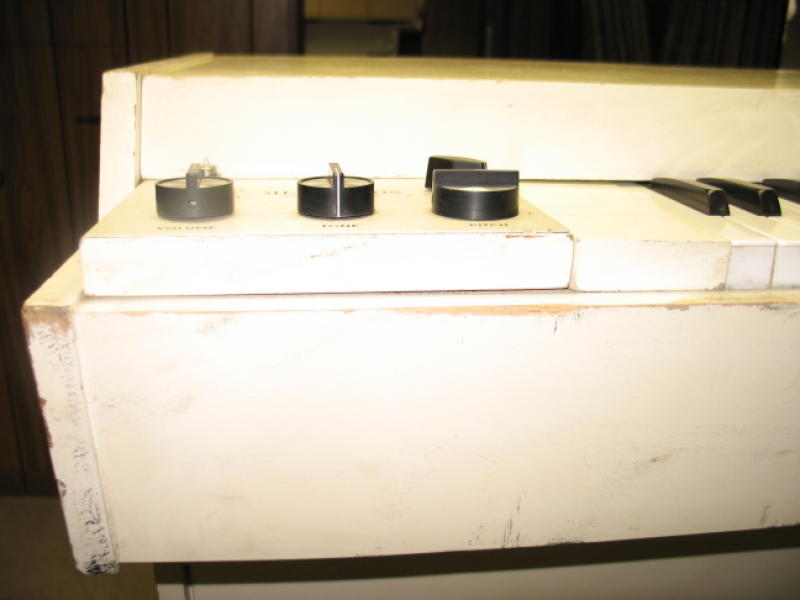 | |
| The Dennytron photos | middle keyboard view |  | |
| The Dennytron photos | right keyboard view |  | |
| The Dennytron photos | left bottom | 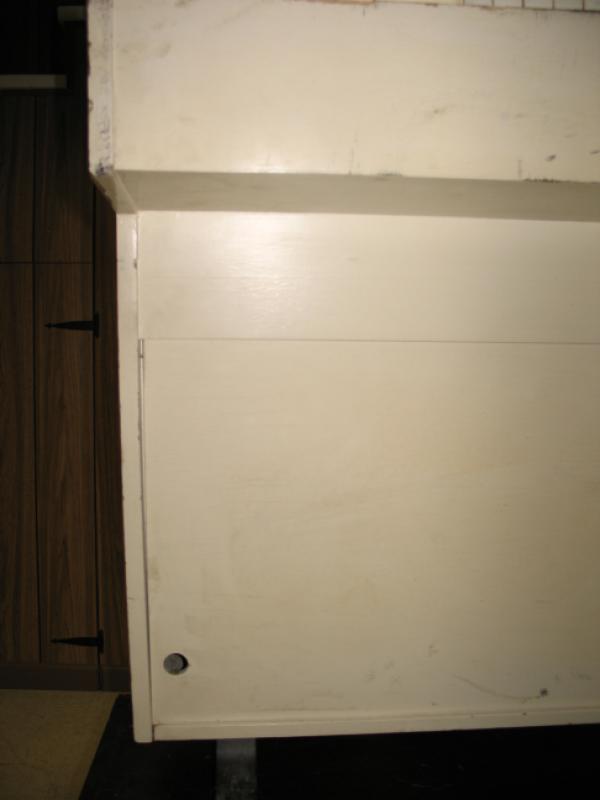 | |
| The Dennytron photos | right bottom | 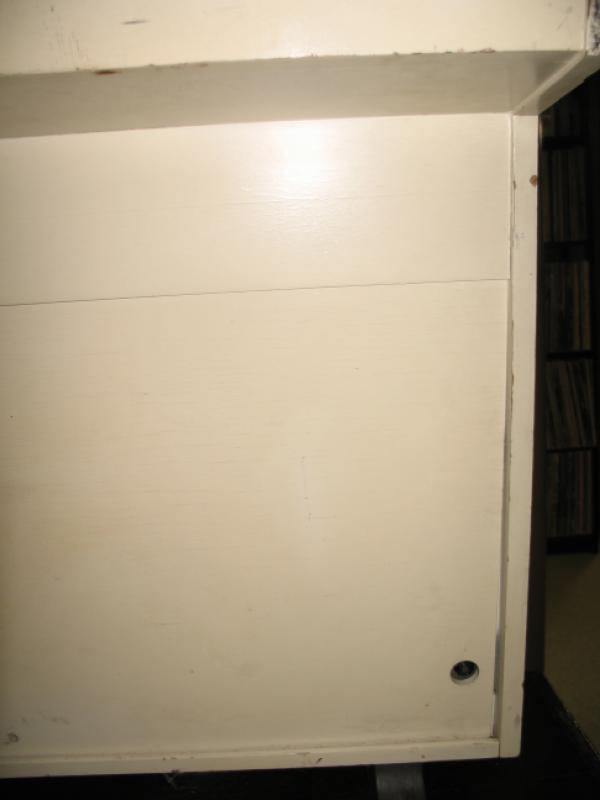 | |
| The Dennytron photos | bttom left corner | 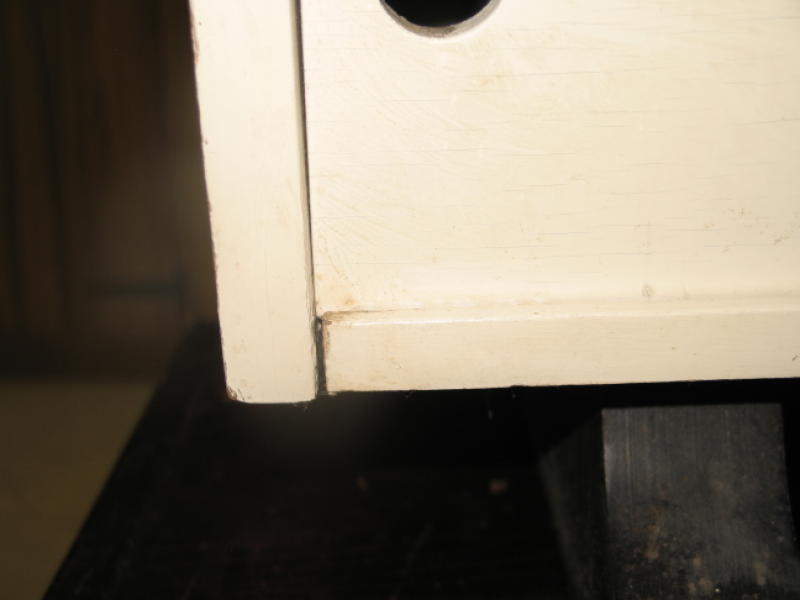 | |
| The Dennytron photos | bottom right corner | 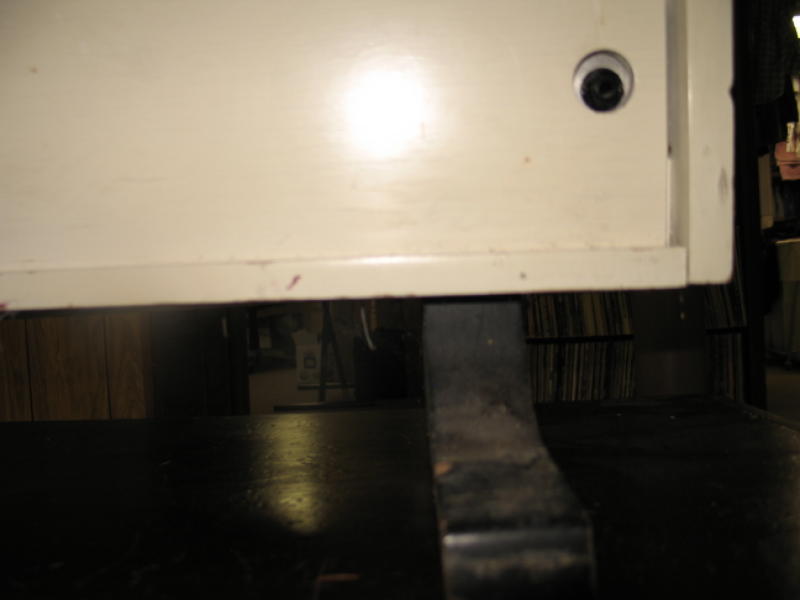 | |
| The Dennytron photos | faceplate | 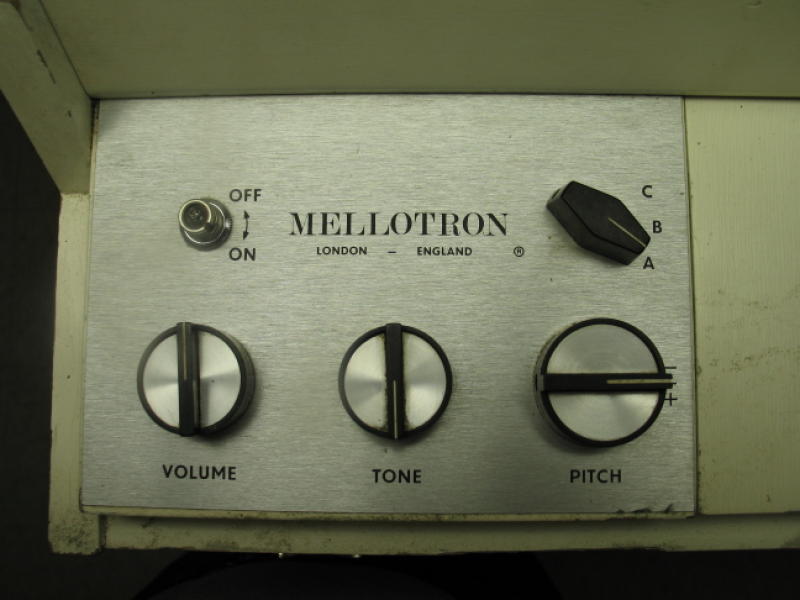 | |
| The Dennytron photos | view across keys left | 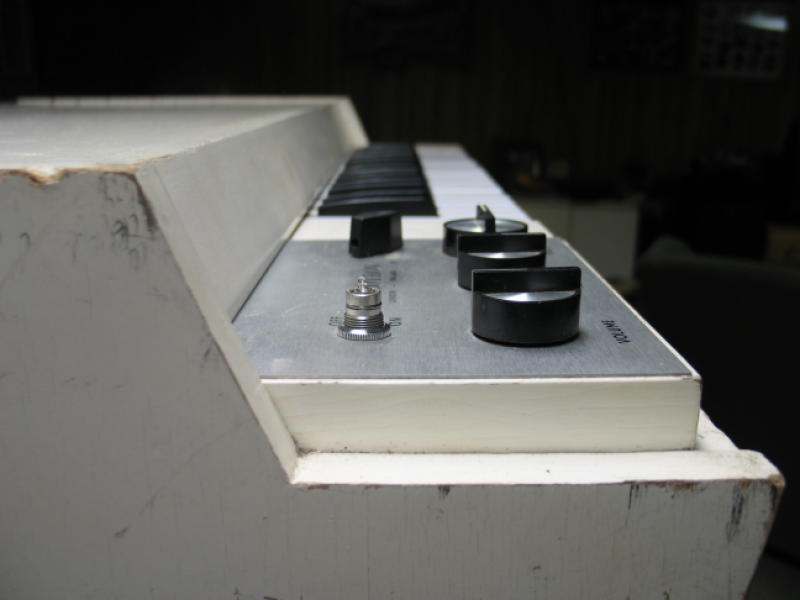 | |
| The Dennytron photos | view across keys right | 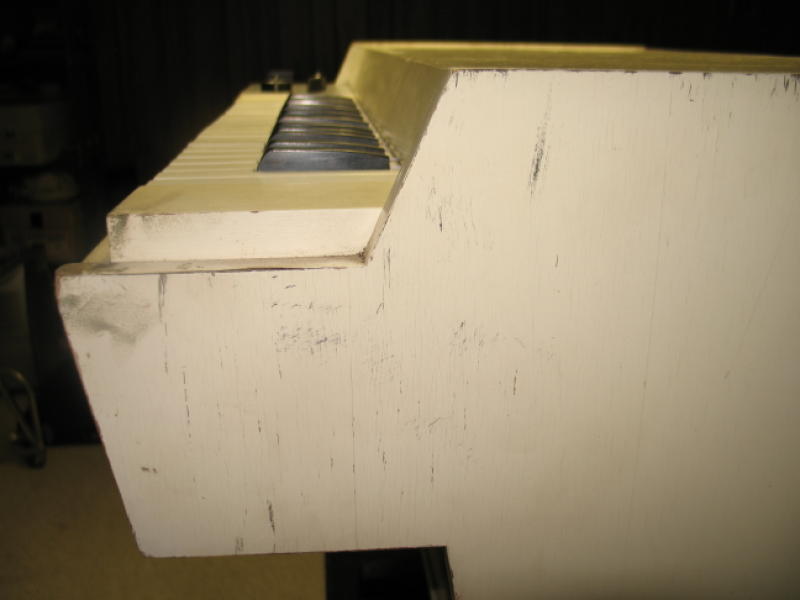 | |
| The Dennytron photos | side view right | 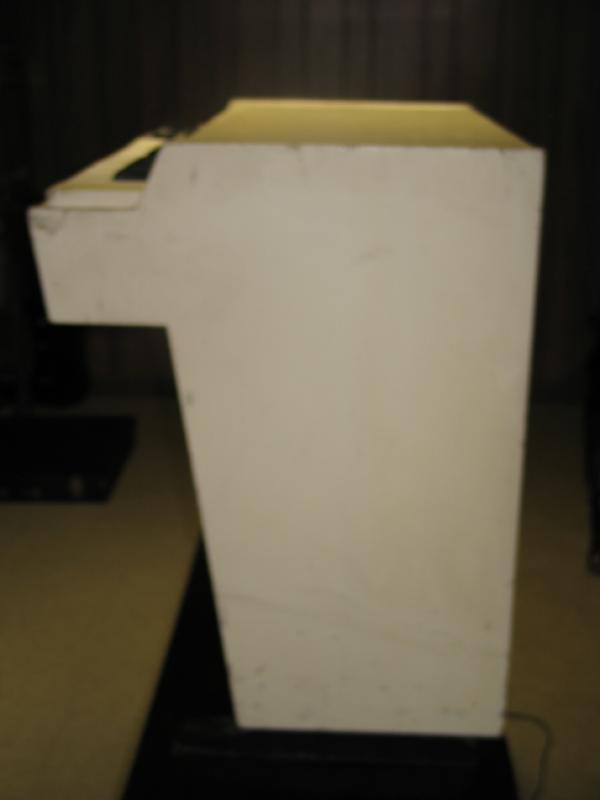 | |
| The Dennytron photos | right back corner view | 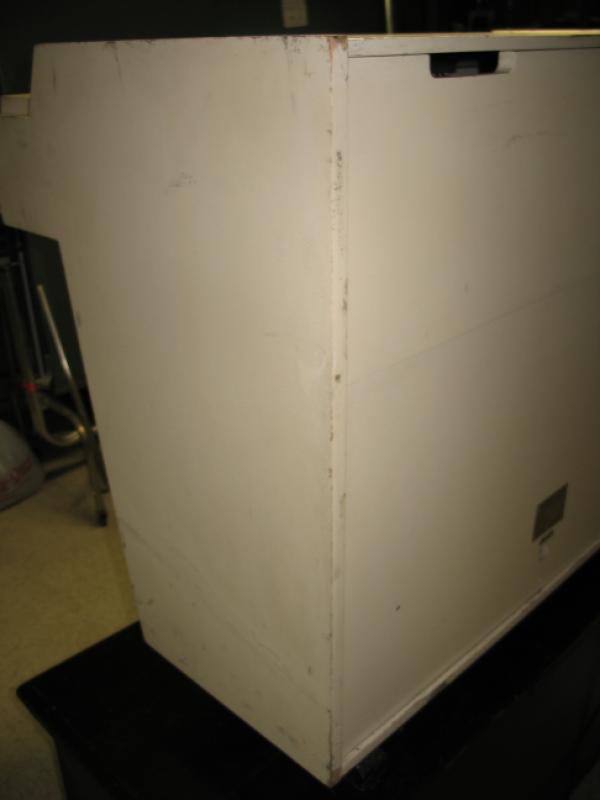 | |
| The Dennytron photos | sn plate | 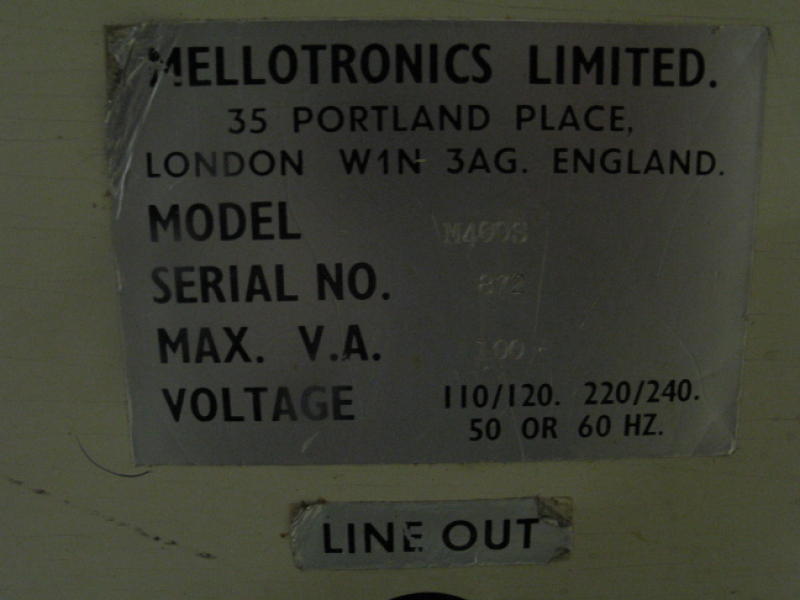 | |
| The Dennytron photos | back view | 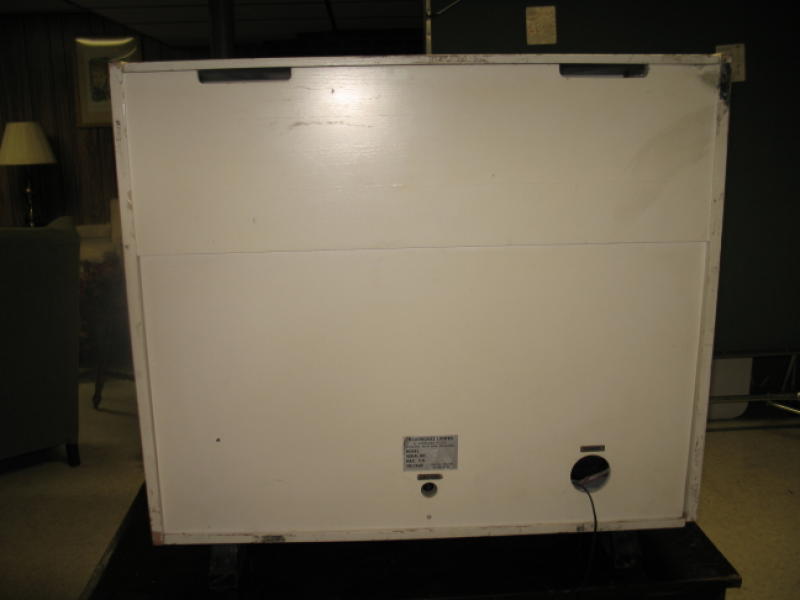 | |
| The Dennytron photos | side view left |  | |
| The Dennytron photos | flywheel | 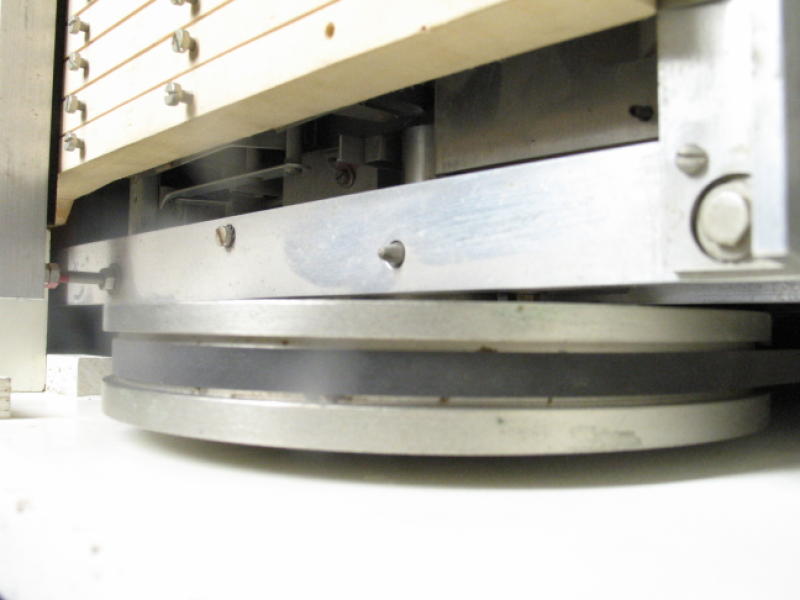 | |
| The Dennytron photos | inside tape rack | 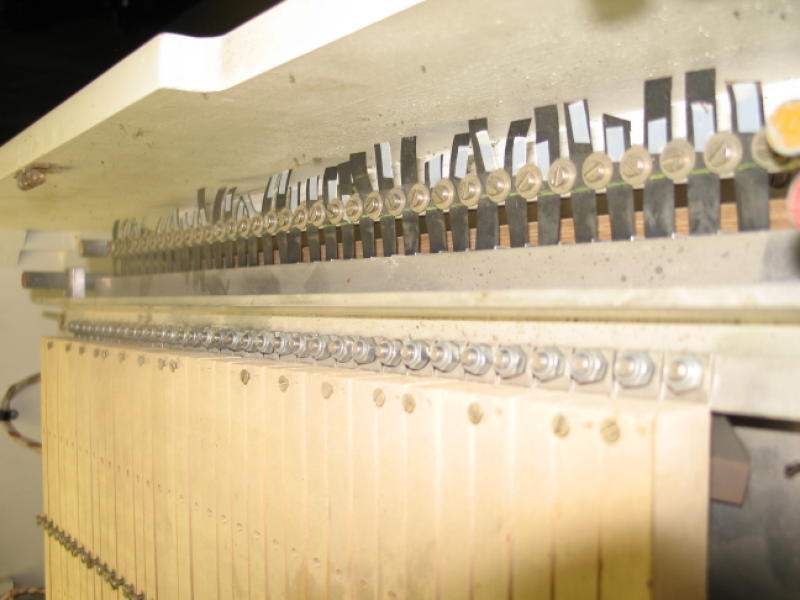 | |
| The Dennytron photos | inside | 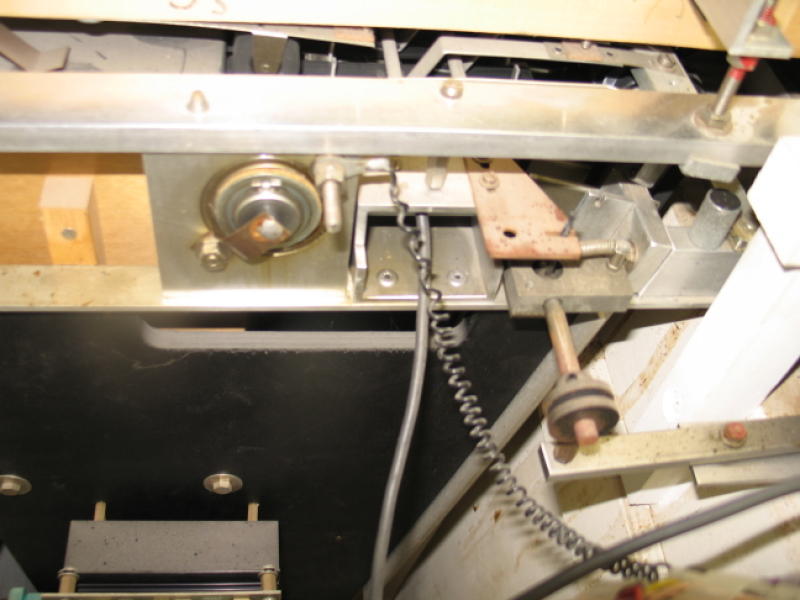 | |
| The Dennytron photos | inside | 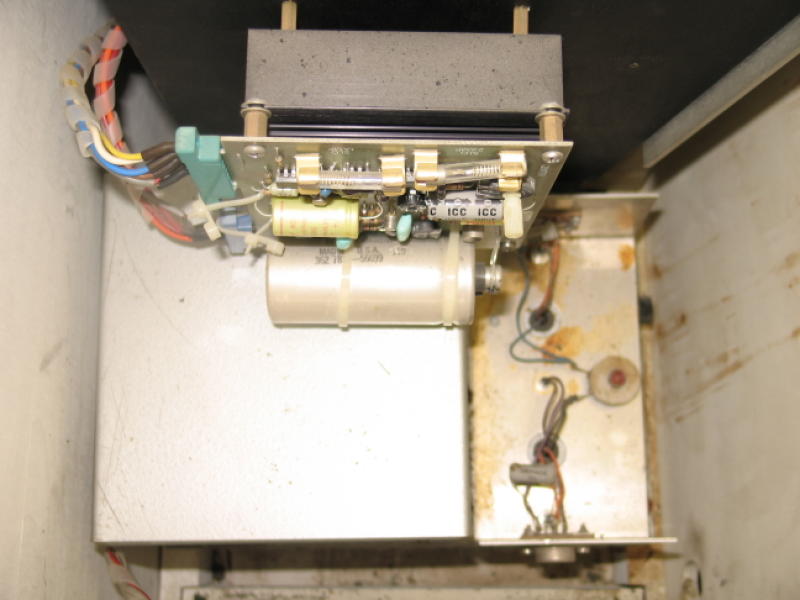 | |
| The Dennytron photos | inside | 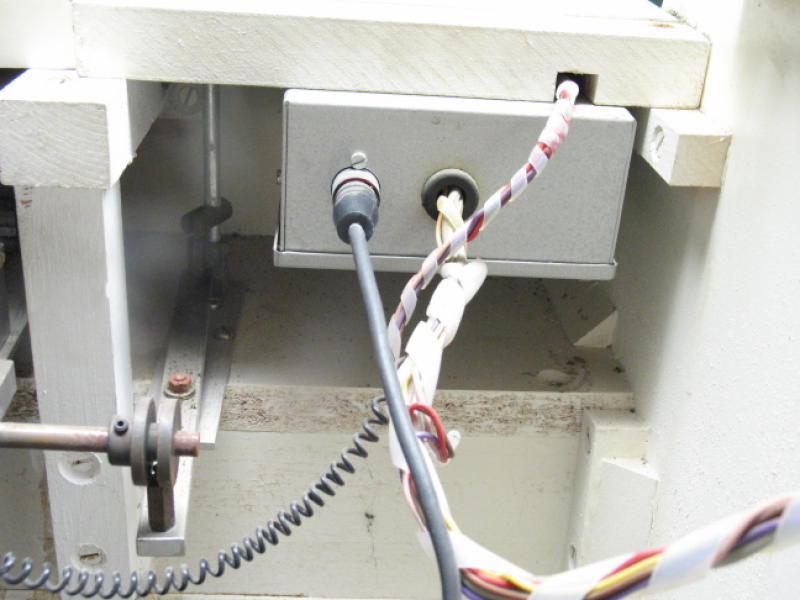 | |
| The Dennytron photos | motor | 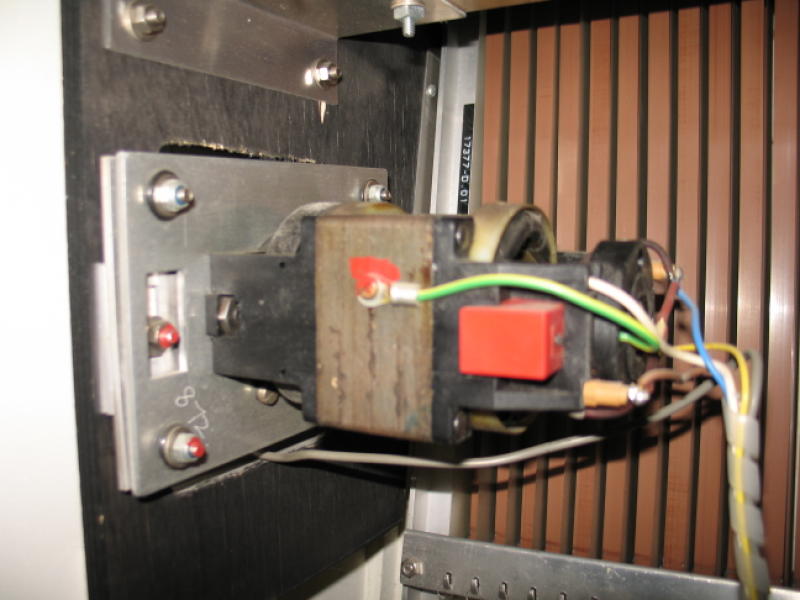 | |
| The Dennytron photos | inside tapes and motor | 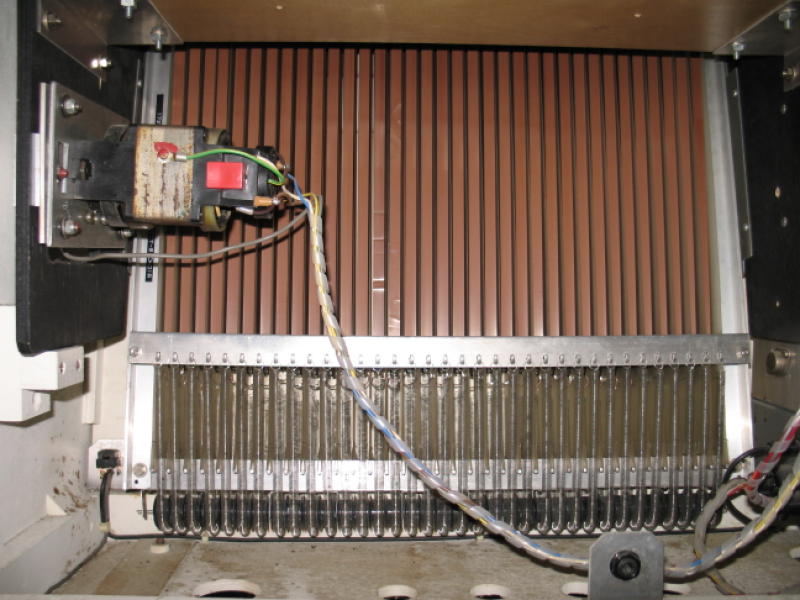 | |
| The Dennytron photos | broken corner joint | 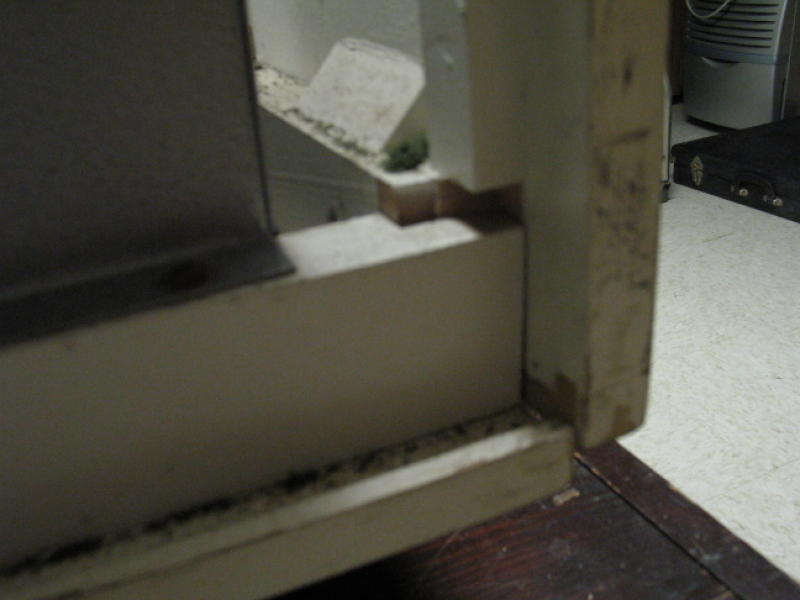 | |
| The Dennytron photos | tapes back view |  | |
| The Dennytron photos | tape rack label | 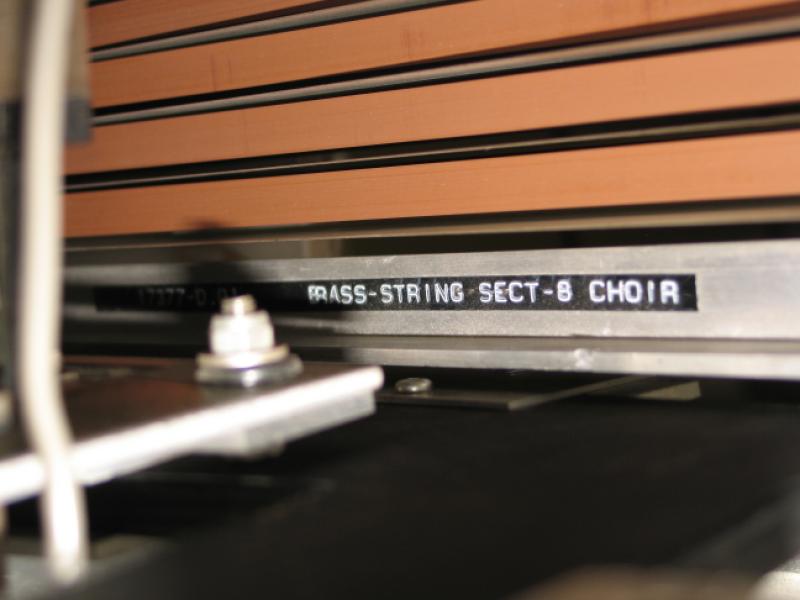 | |
| The Dennytron photos | motor mount | 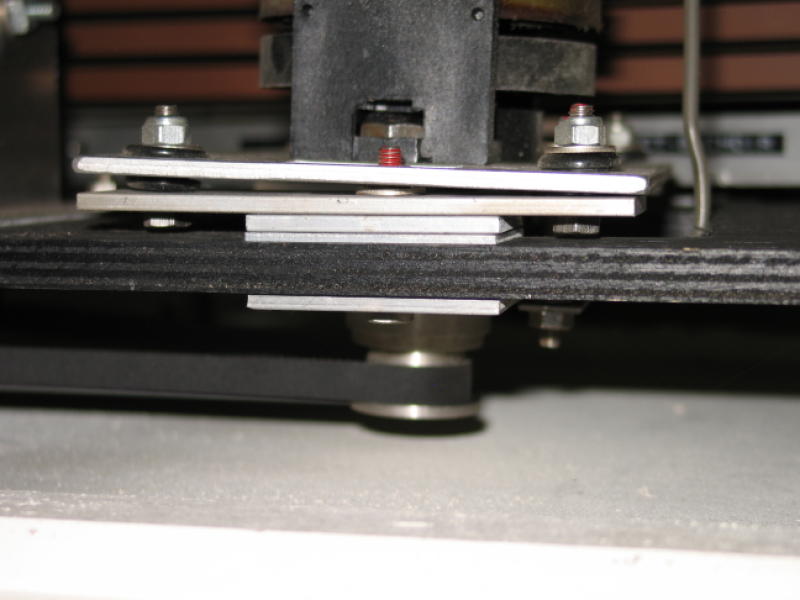 | |
| The Dennytron photos | 2nd tape rack | 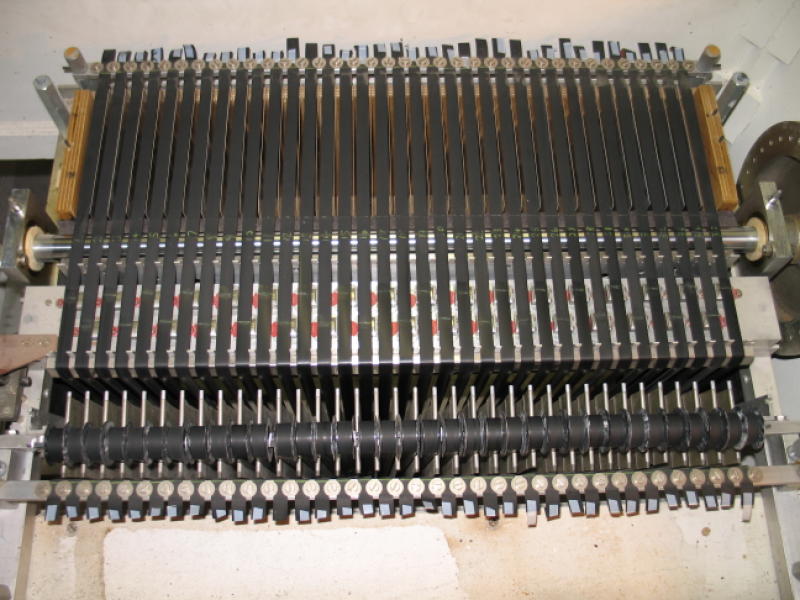 | |
| The Dennytron photos | keyboard removed | 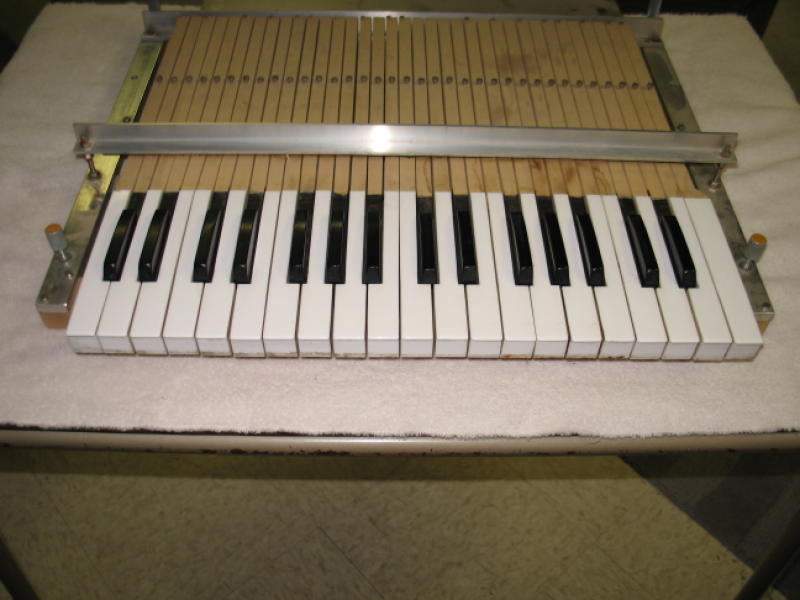 | |
| The Dennytron photos | tape head view | 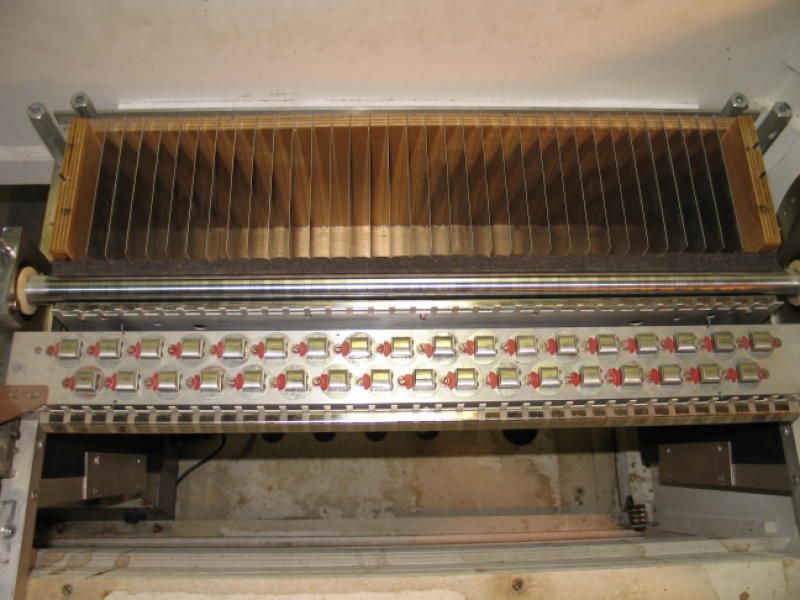 | |
| The Dennytron photos | 2nd tape rack label |  | |
| The Mellotron - oh no - Novatron Manual | 03 |  | |
| The Mellotron - oh no - Novatron Manual | 05 |  | |
| The Mellotron - oh no - Novatron Manual | 16 |  | |
| The Mellotron - oh no - Novatron Manual | 18 |  | |
| The Mellotron - oh no - Novatron Manual | 15 |  | |
| The Mellotron - oh no - Novatron Manual | 07 |  | |
| The Mellotron - oh no - Novatron Manual | 01 |  | |
| The Mellotron - oh no - Novatron Manual | 11 |  | |
| The Mellotron - oh no - Novatron Manual | 13 |  | |
| The Mellotron - oh no - Novatron Manual | 10 |  | |
| The Mellotron - oh no - Novatron Manual | 19 |  | |
| The Mellotron - oh no - Novatron Manual | 08 |  | |
| The Mellotron - oh no - Novatron Manual | 06 |  | |
| The Mellotron - oh no - Novatron Manual | 14 |  | |
| The Mellotron - oh no - Novatron Manual | 17 |  | |
| The Mellotron - oh no - Novatron Manual | 02 |  | |
| The Mellotron - oh no - Novatron Manual | 04 |  | |
| The Mellotron - oh no - Novatron Manual | 12 | 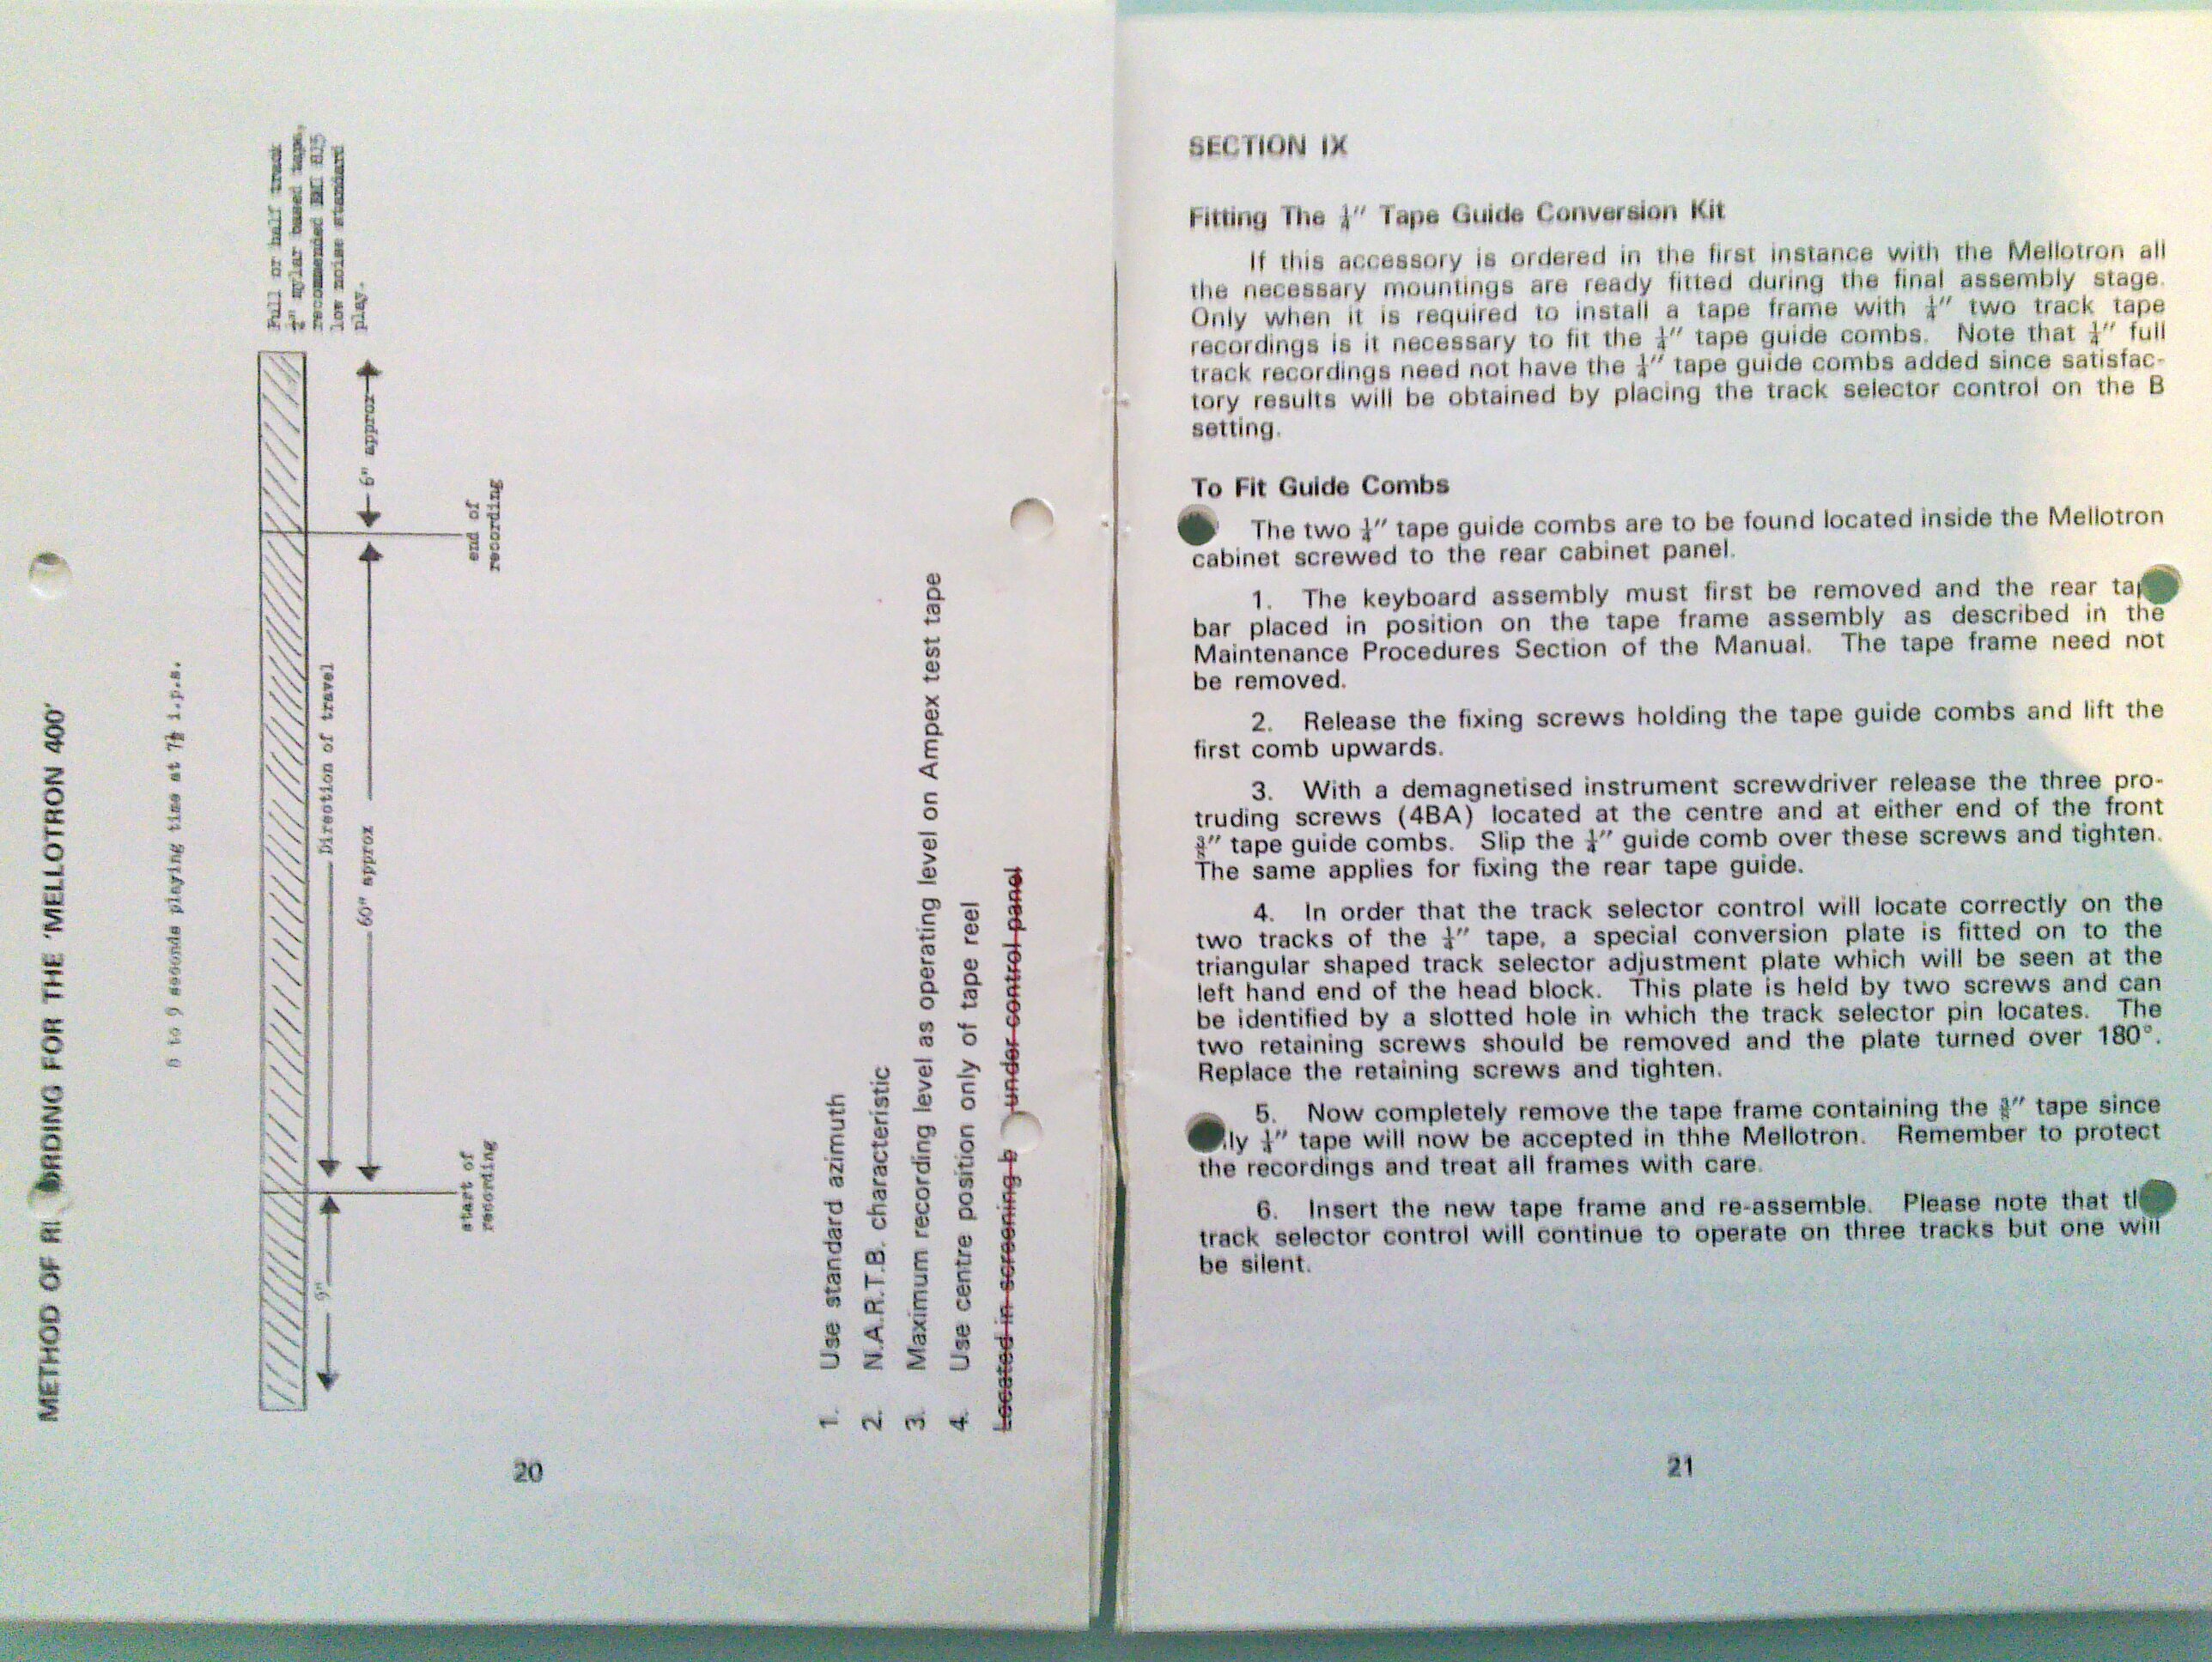 | |
| The Mellotron - oh no - Novatron Manual | 09 | 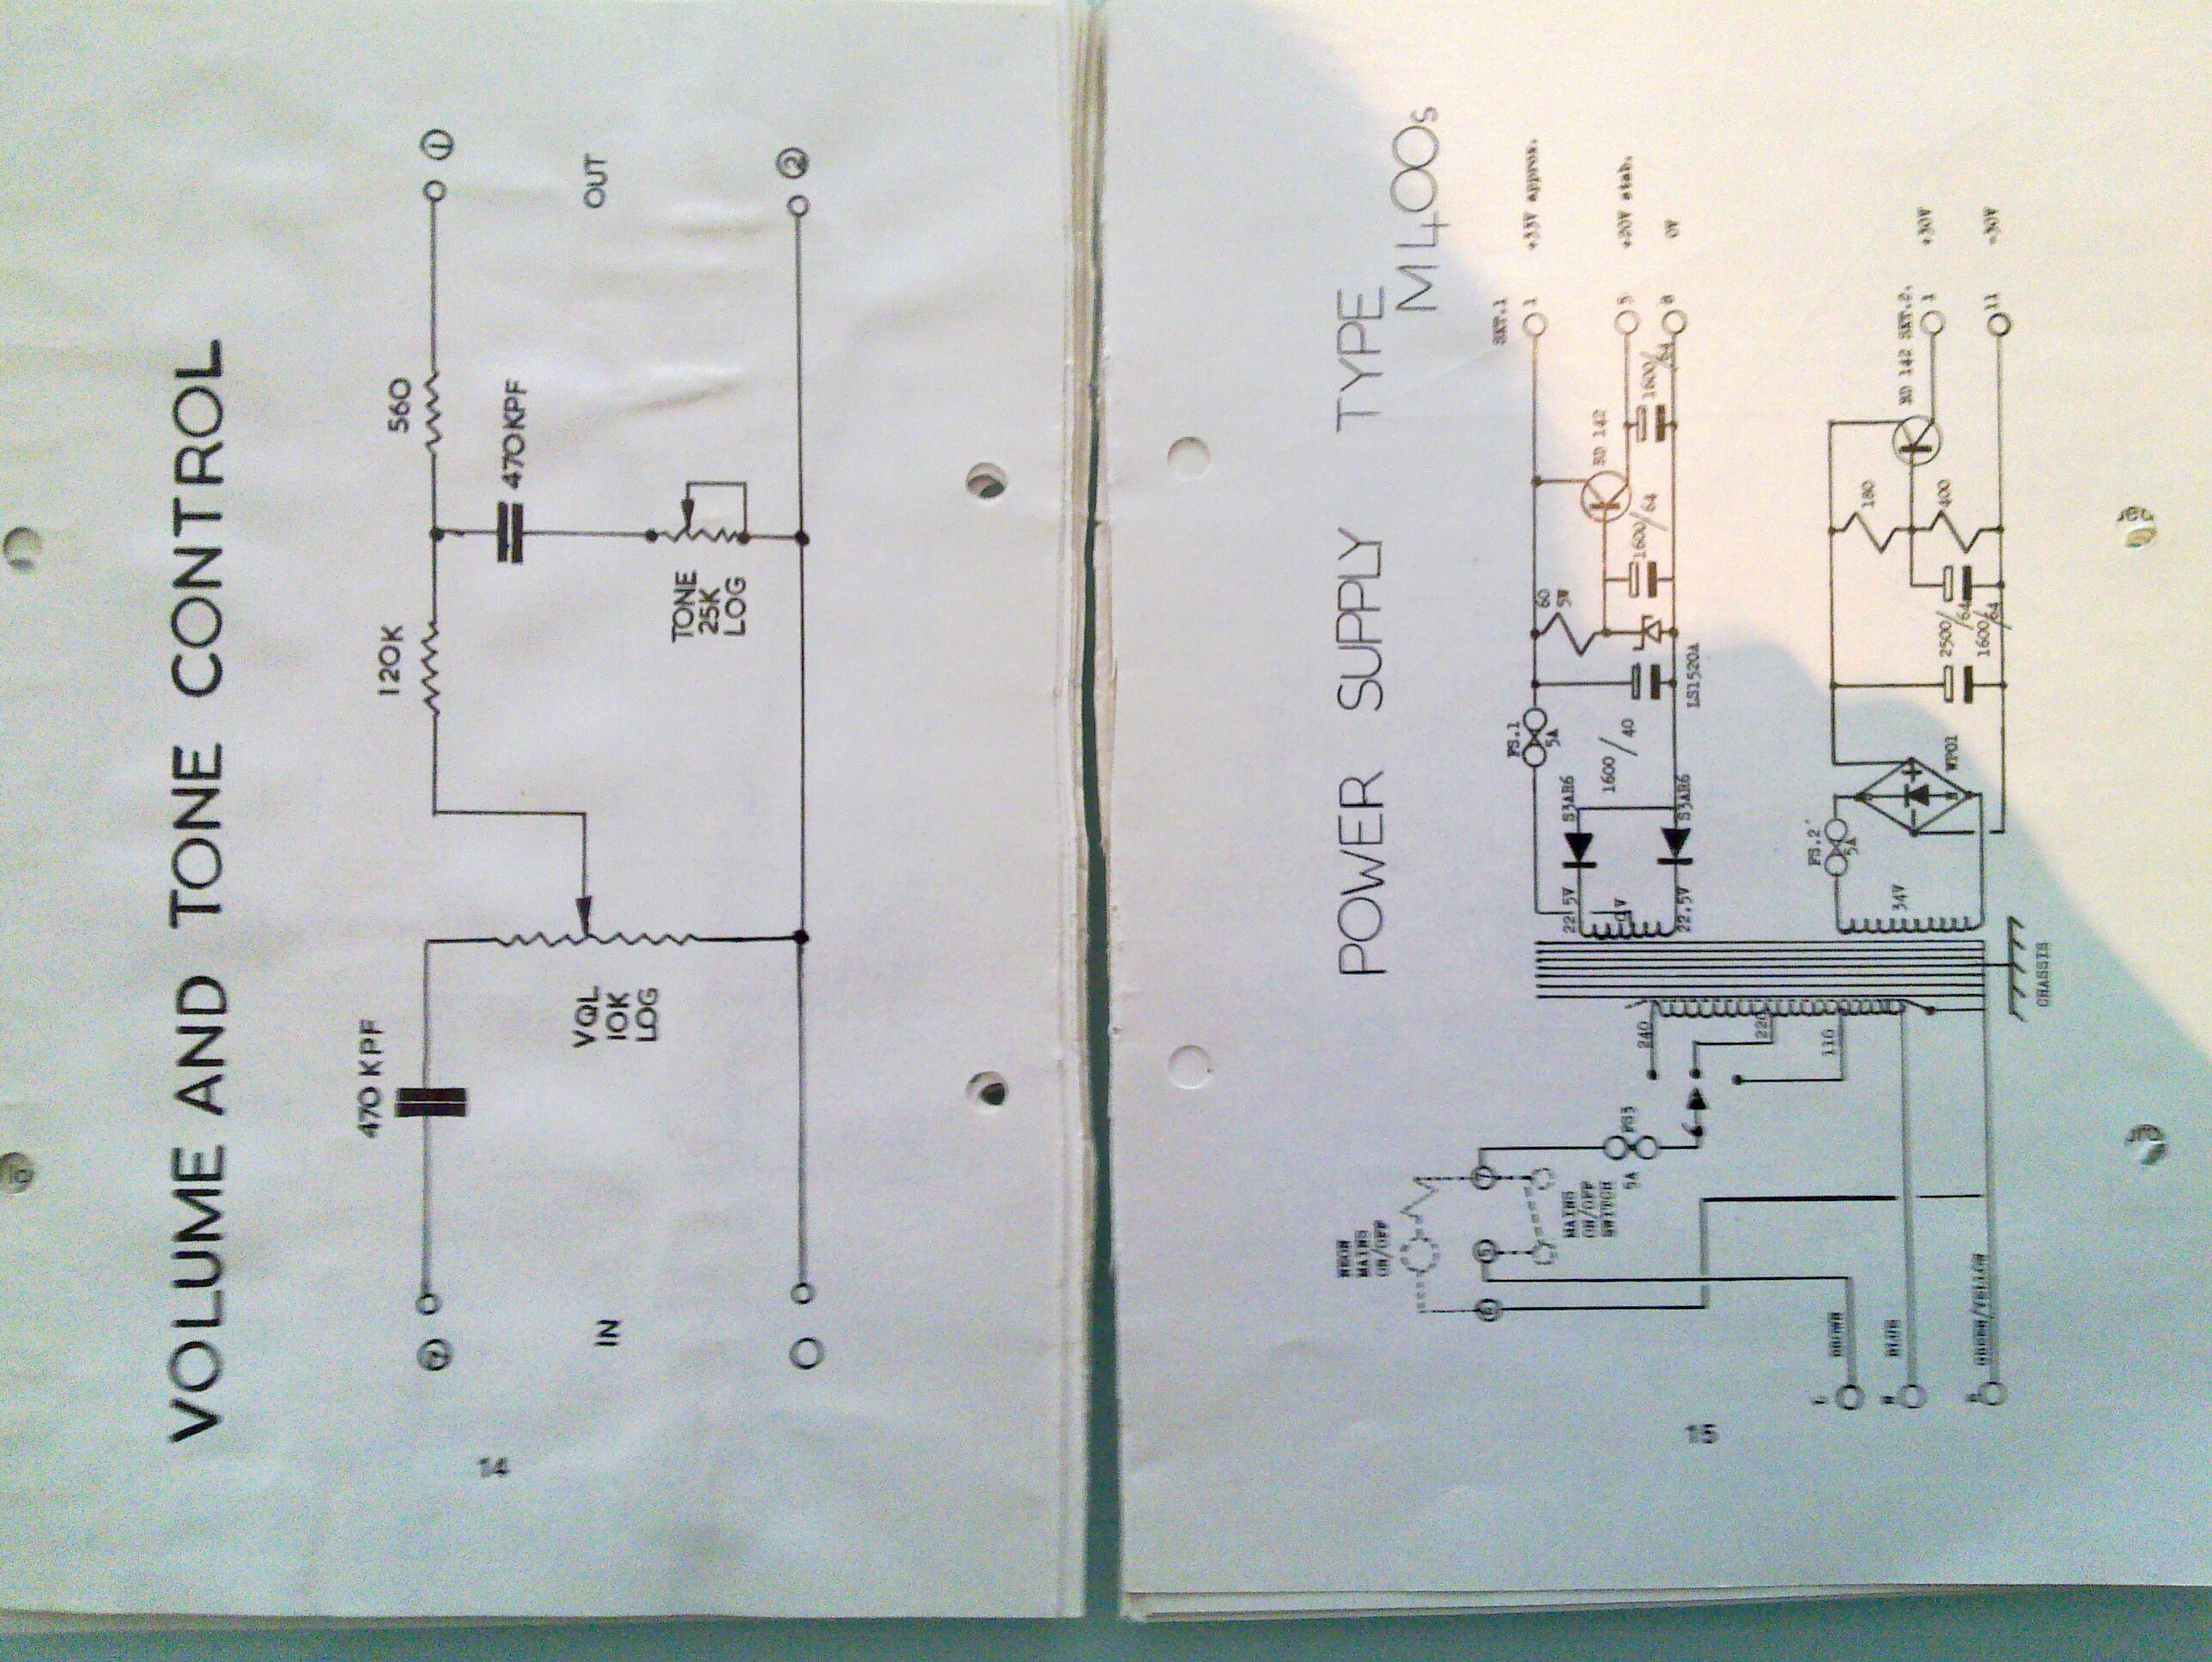 | |
| The slow restoration of #851. | Ebay photo #1 2008. | 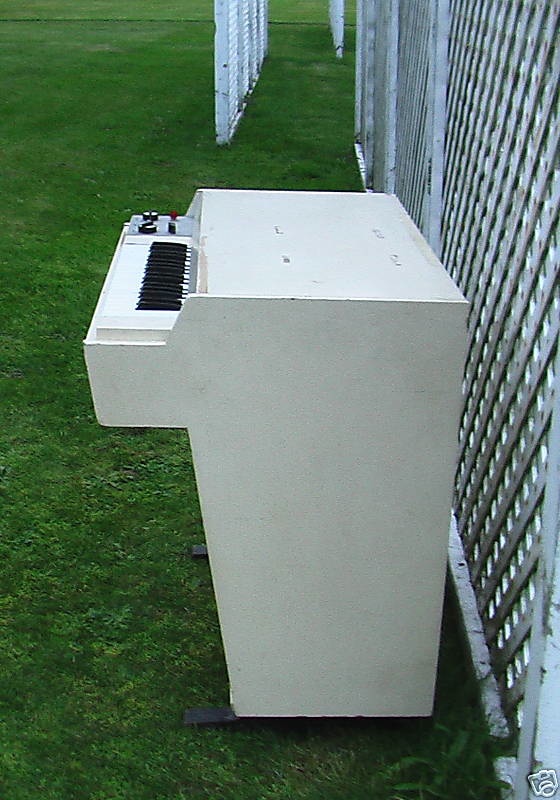 | Wellington, NZ before traveling 18000+ kilometers to Stockholm. Water damaged cabinet refinished beige with a broom. Love it! |
| The slow restoration of #851. | In the jig, courtesy of Ikea. | 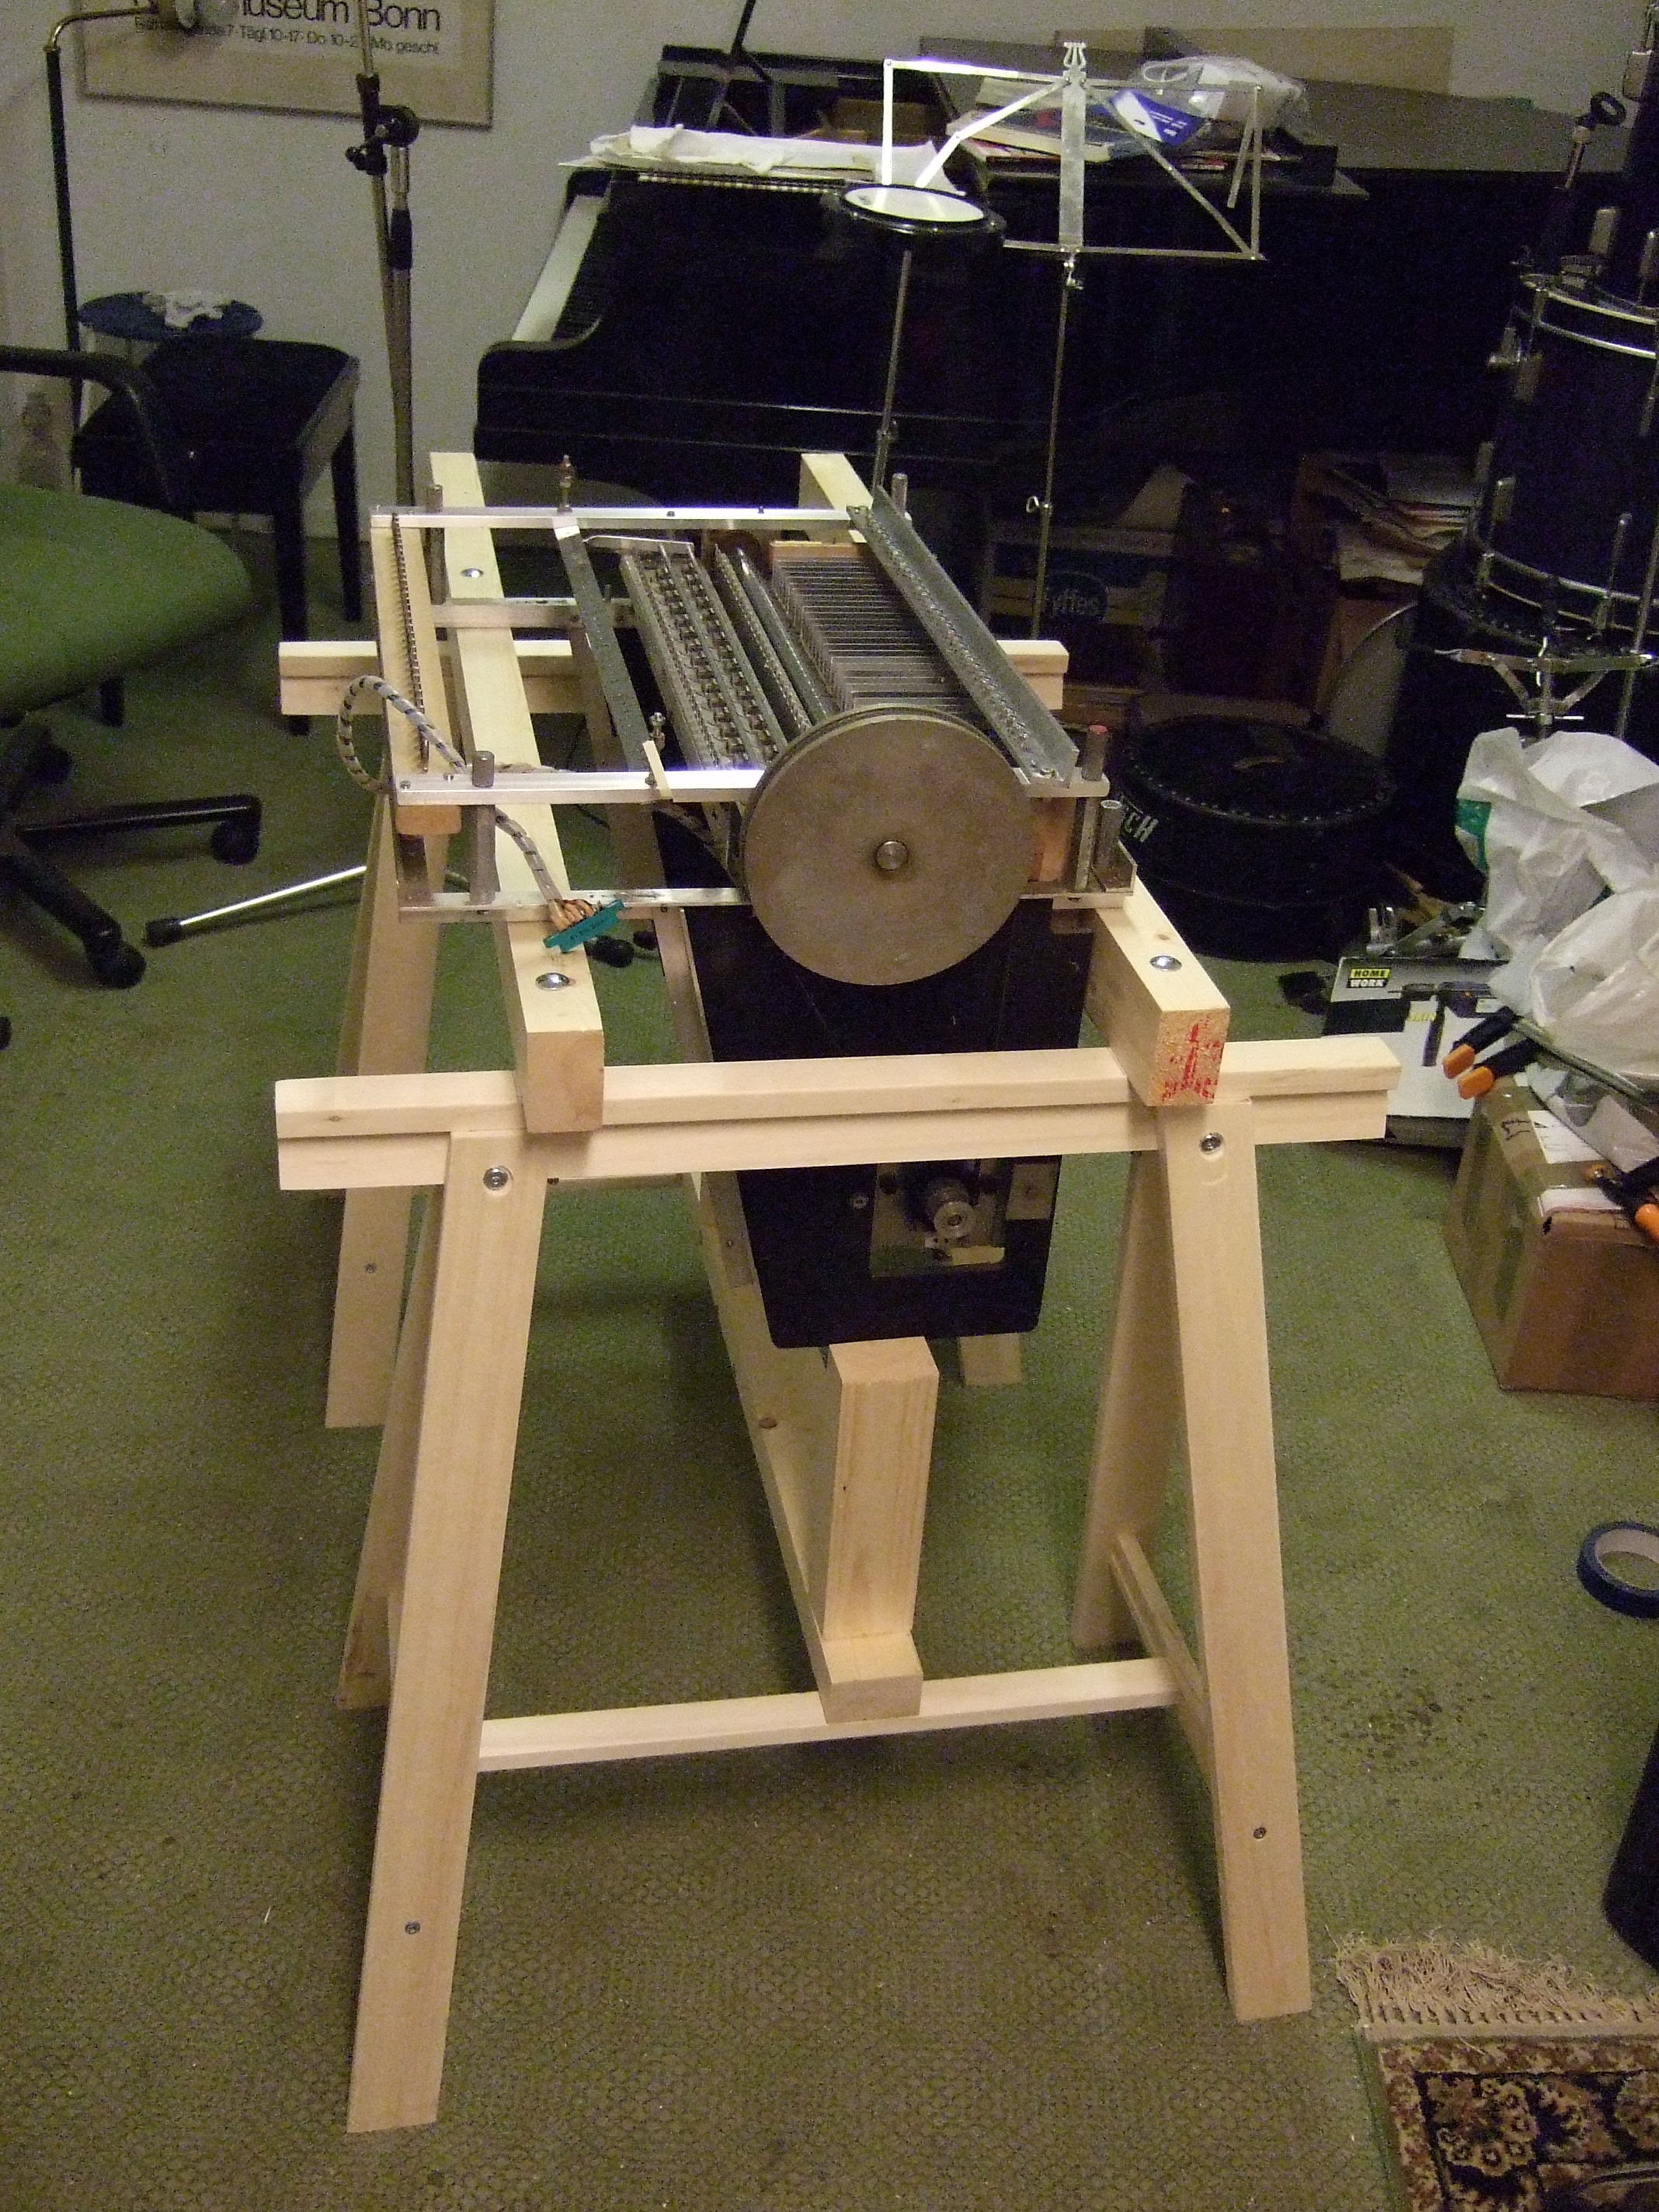 | My Stockholm rehearsal space with an old Steinway and some other stuff. |
| The slow restoration of #851. | Anyone seen this mod before? | 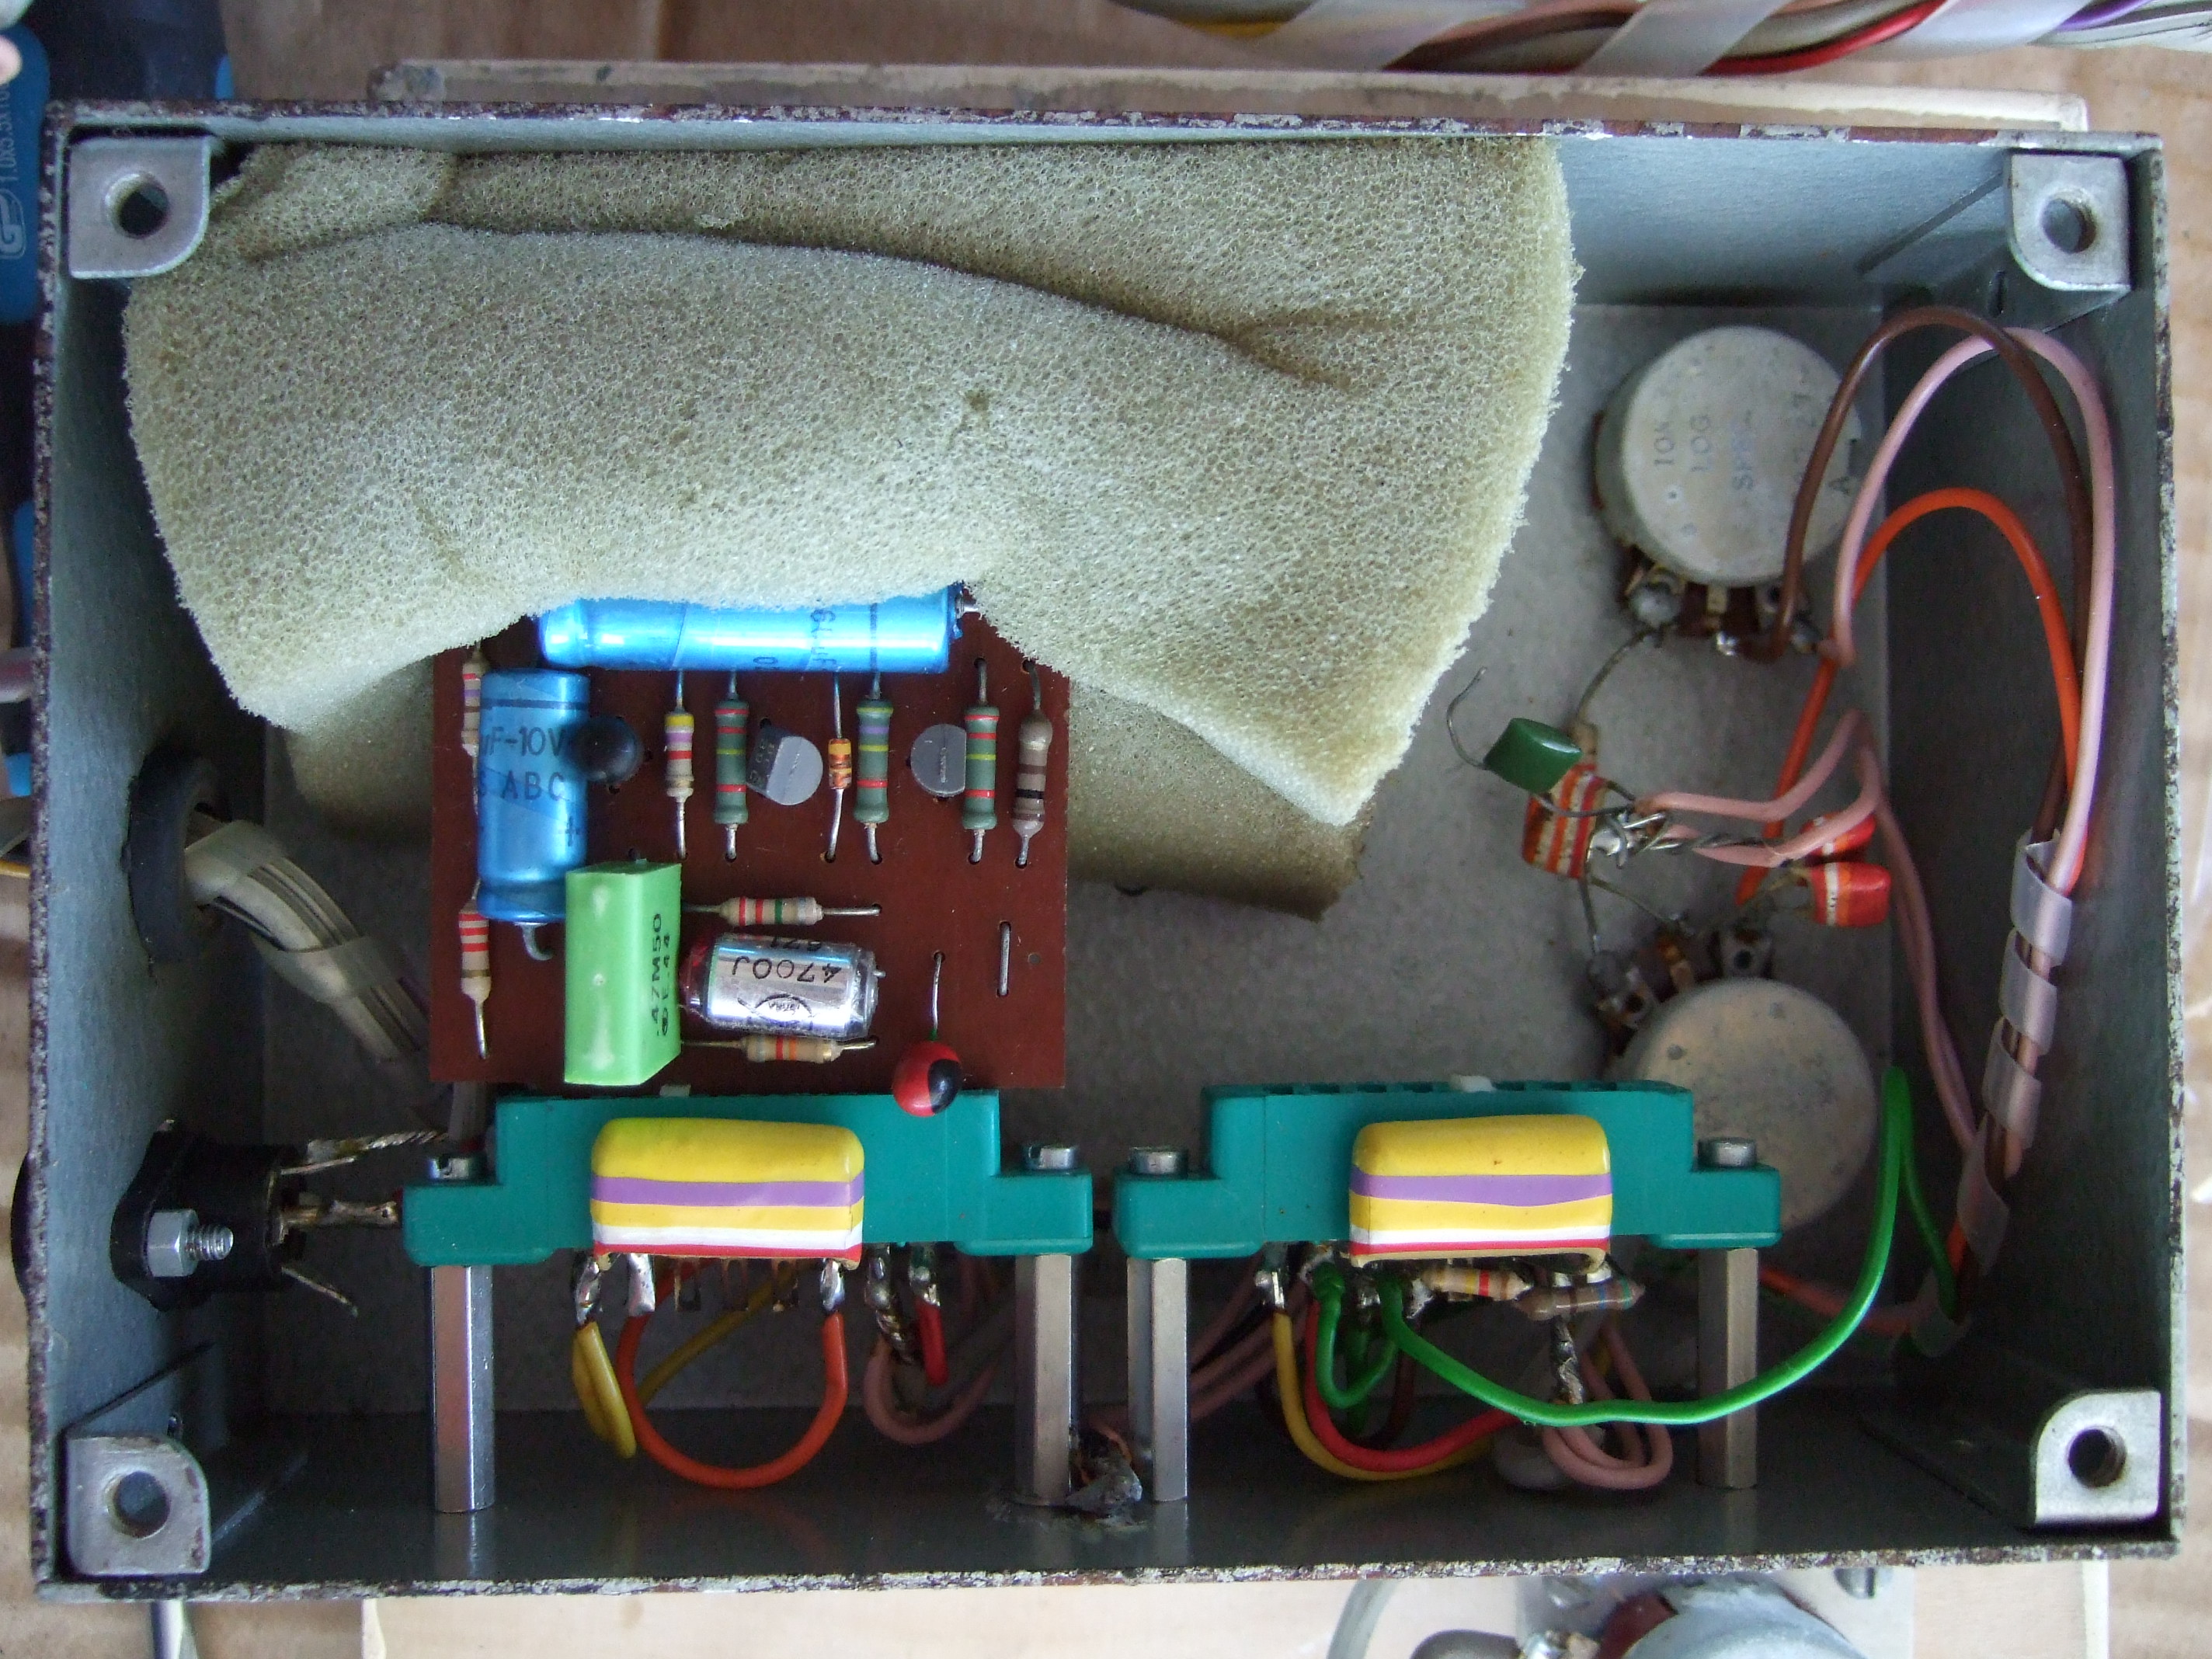 | Sounds fine but a bit quiet. |
| The slow restoration of #851. | NOS Bulgin socket from ebay with .. | 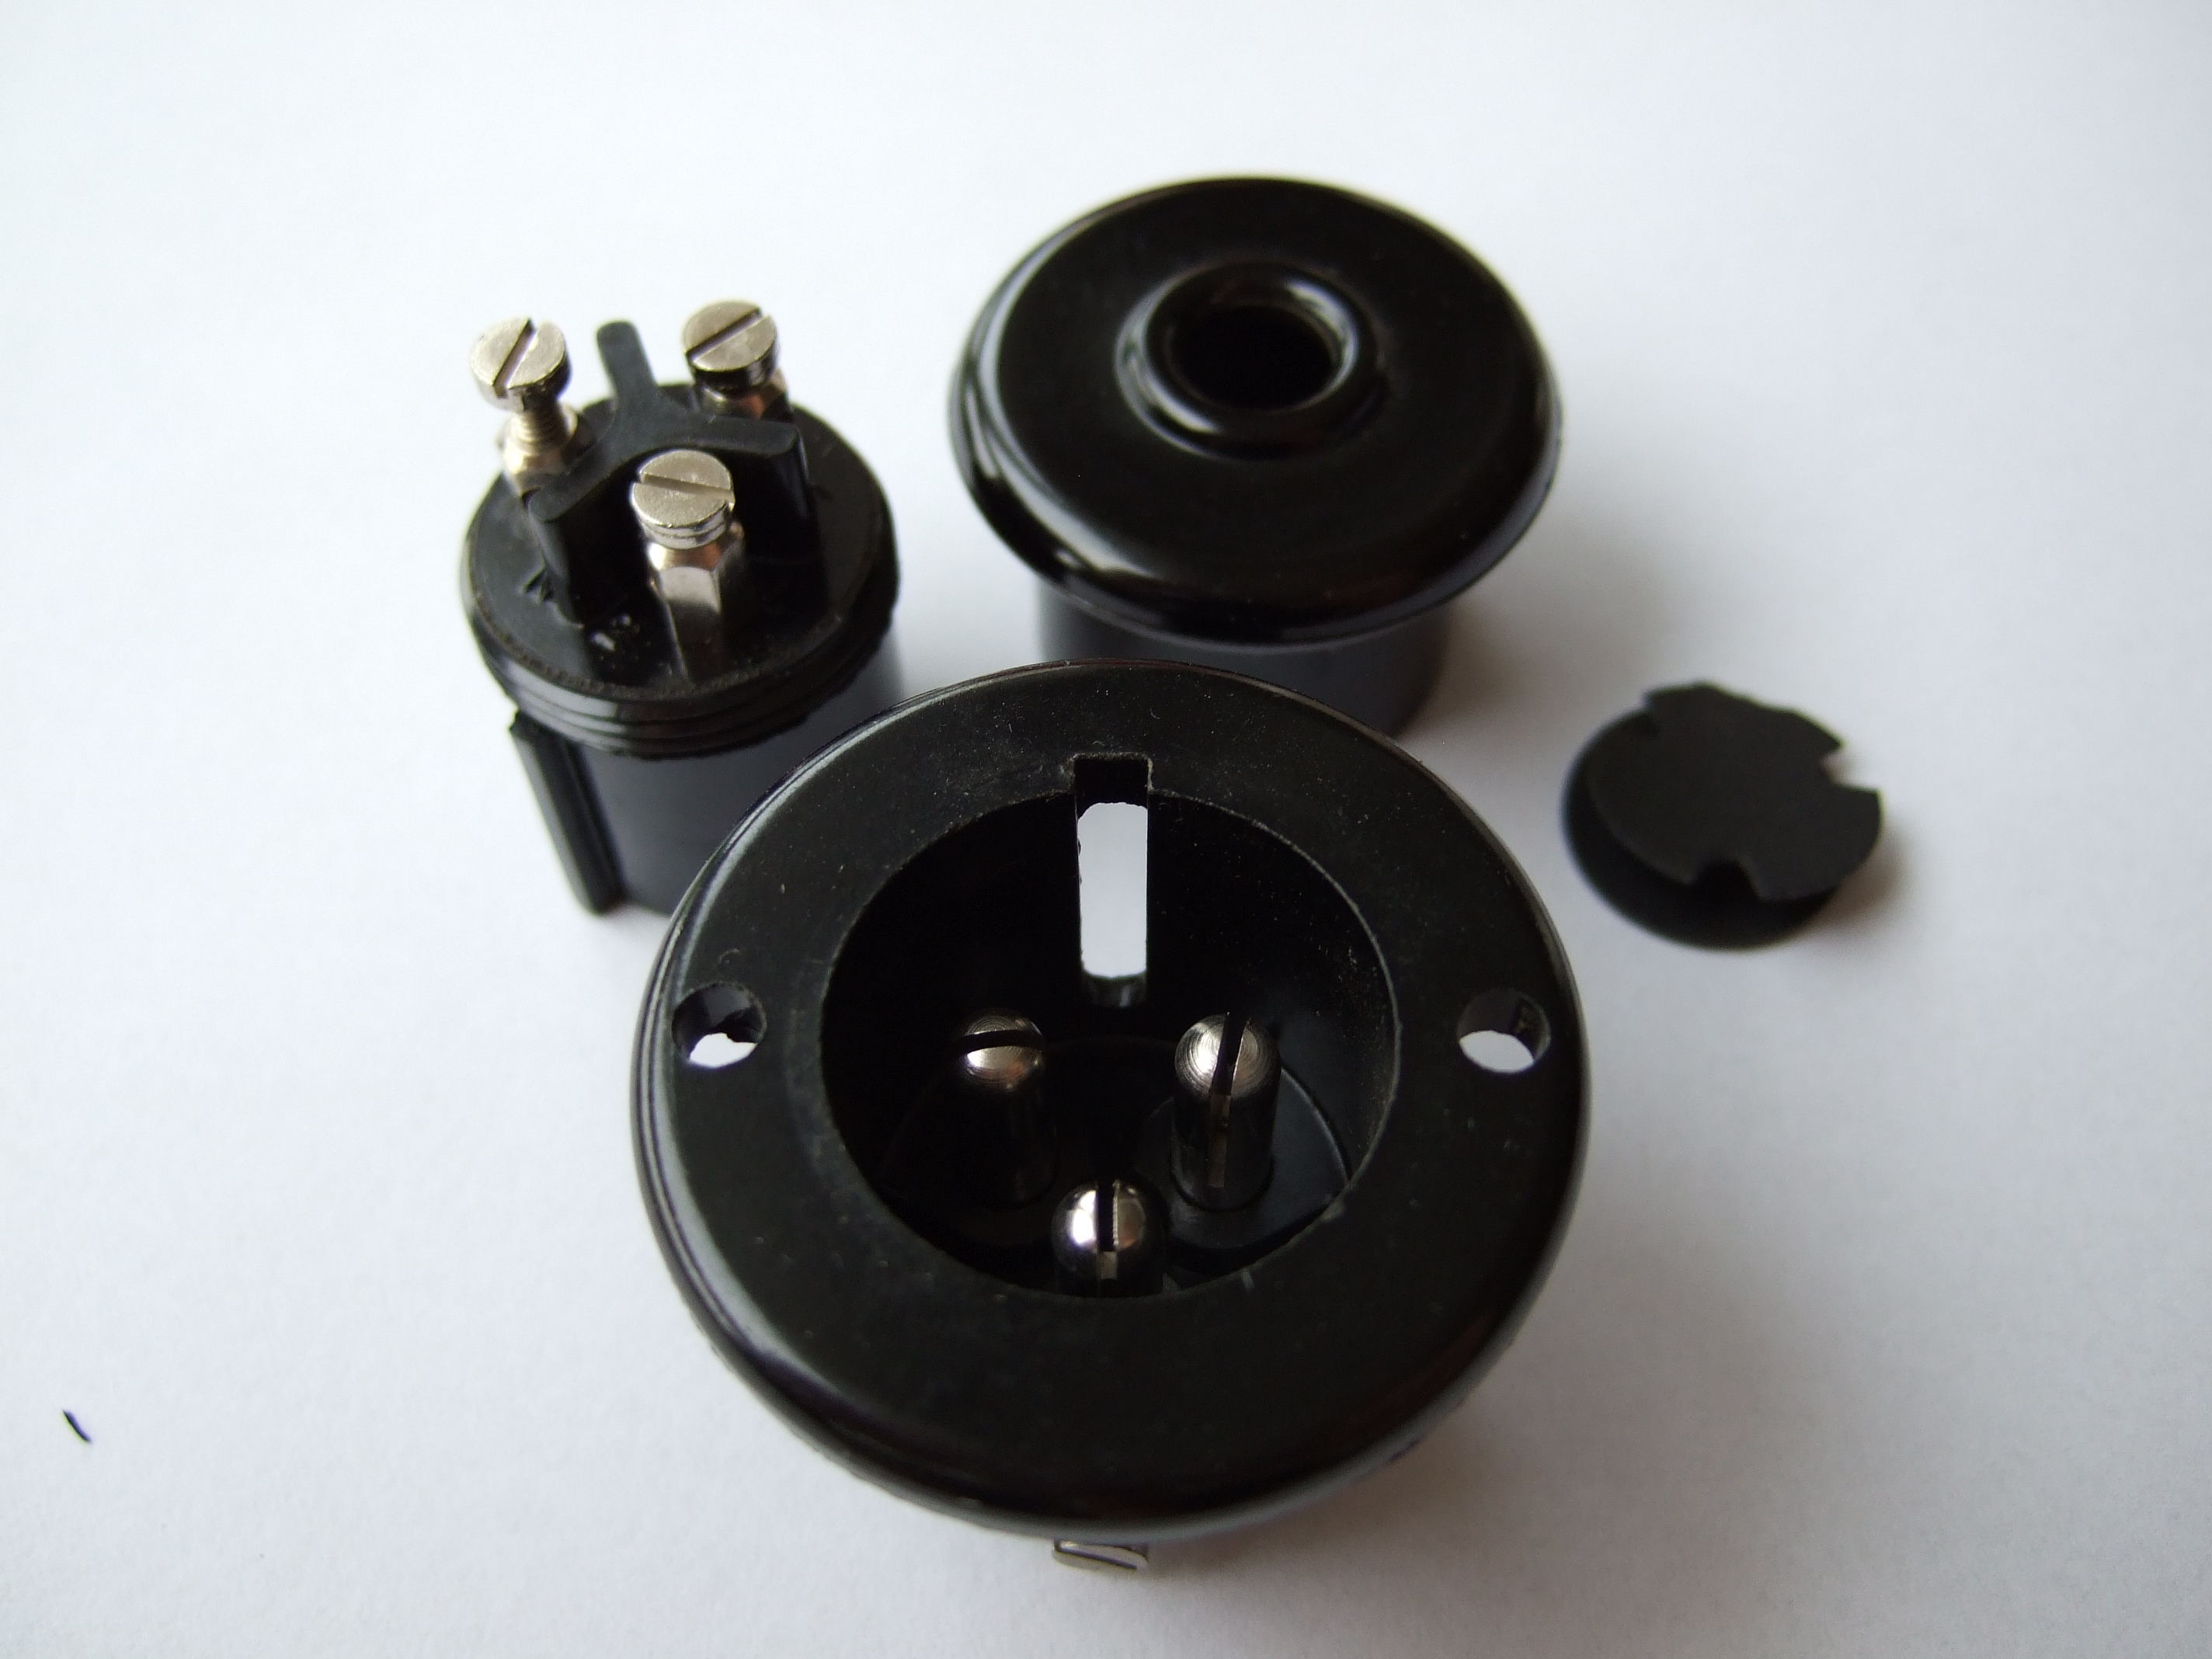 | split pins for better mains connection. |
| The slow restoration of #851. | Before removing original tapes. | 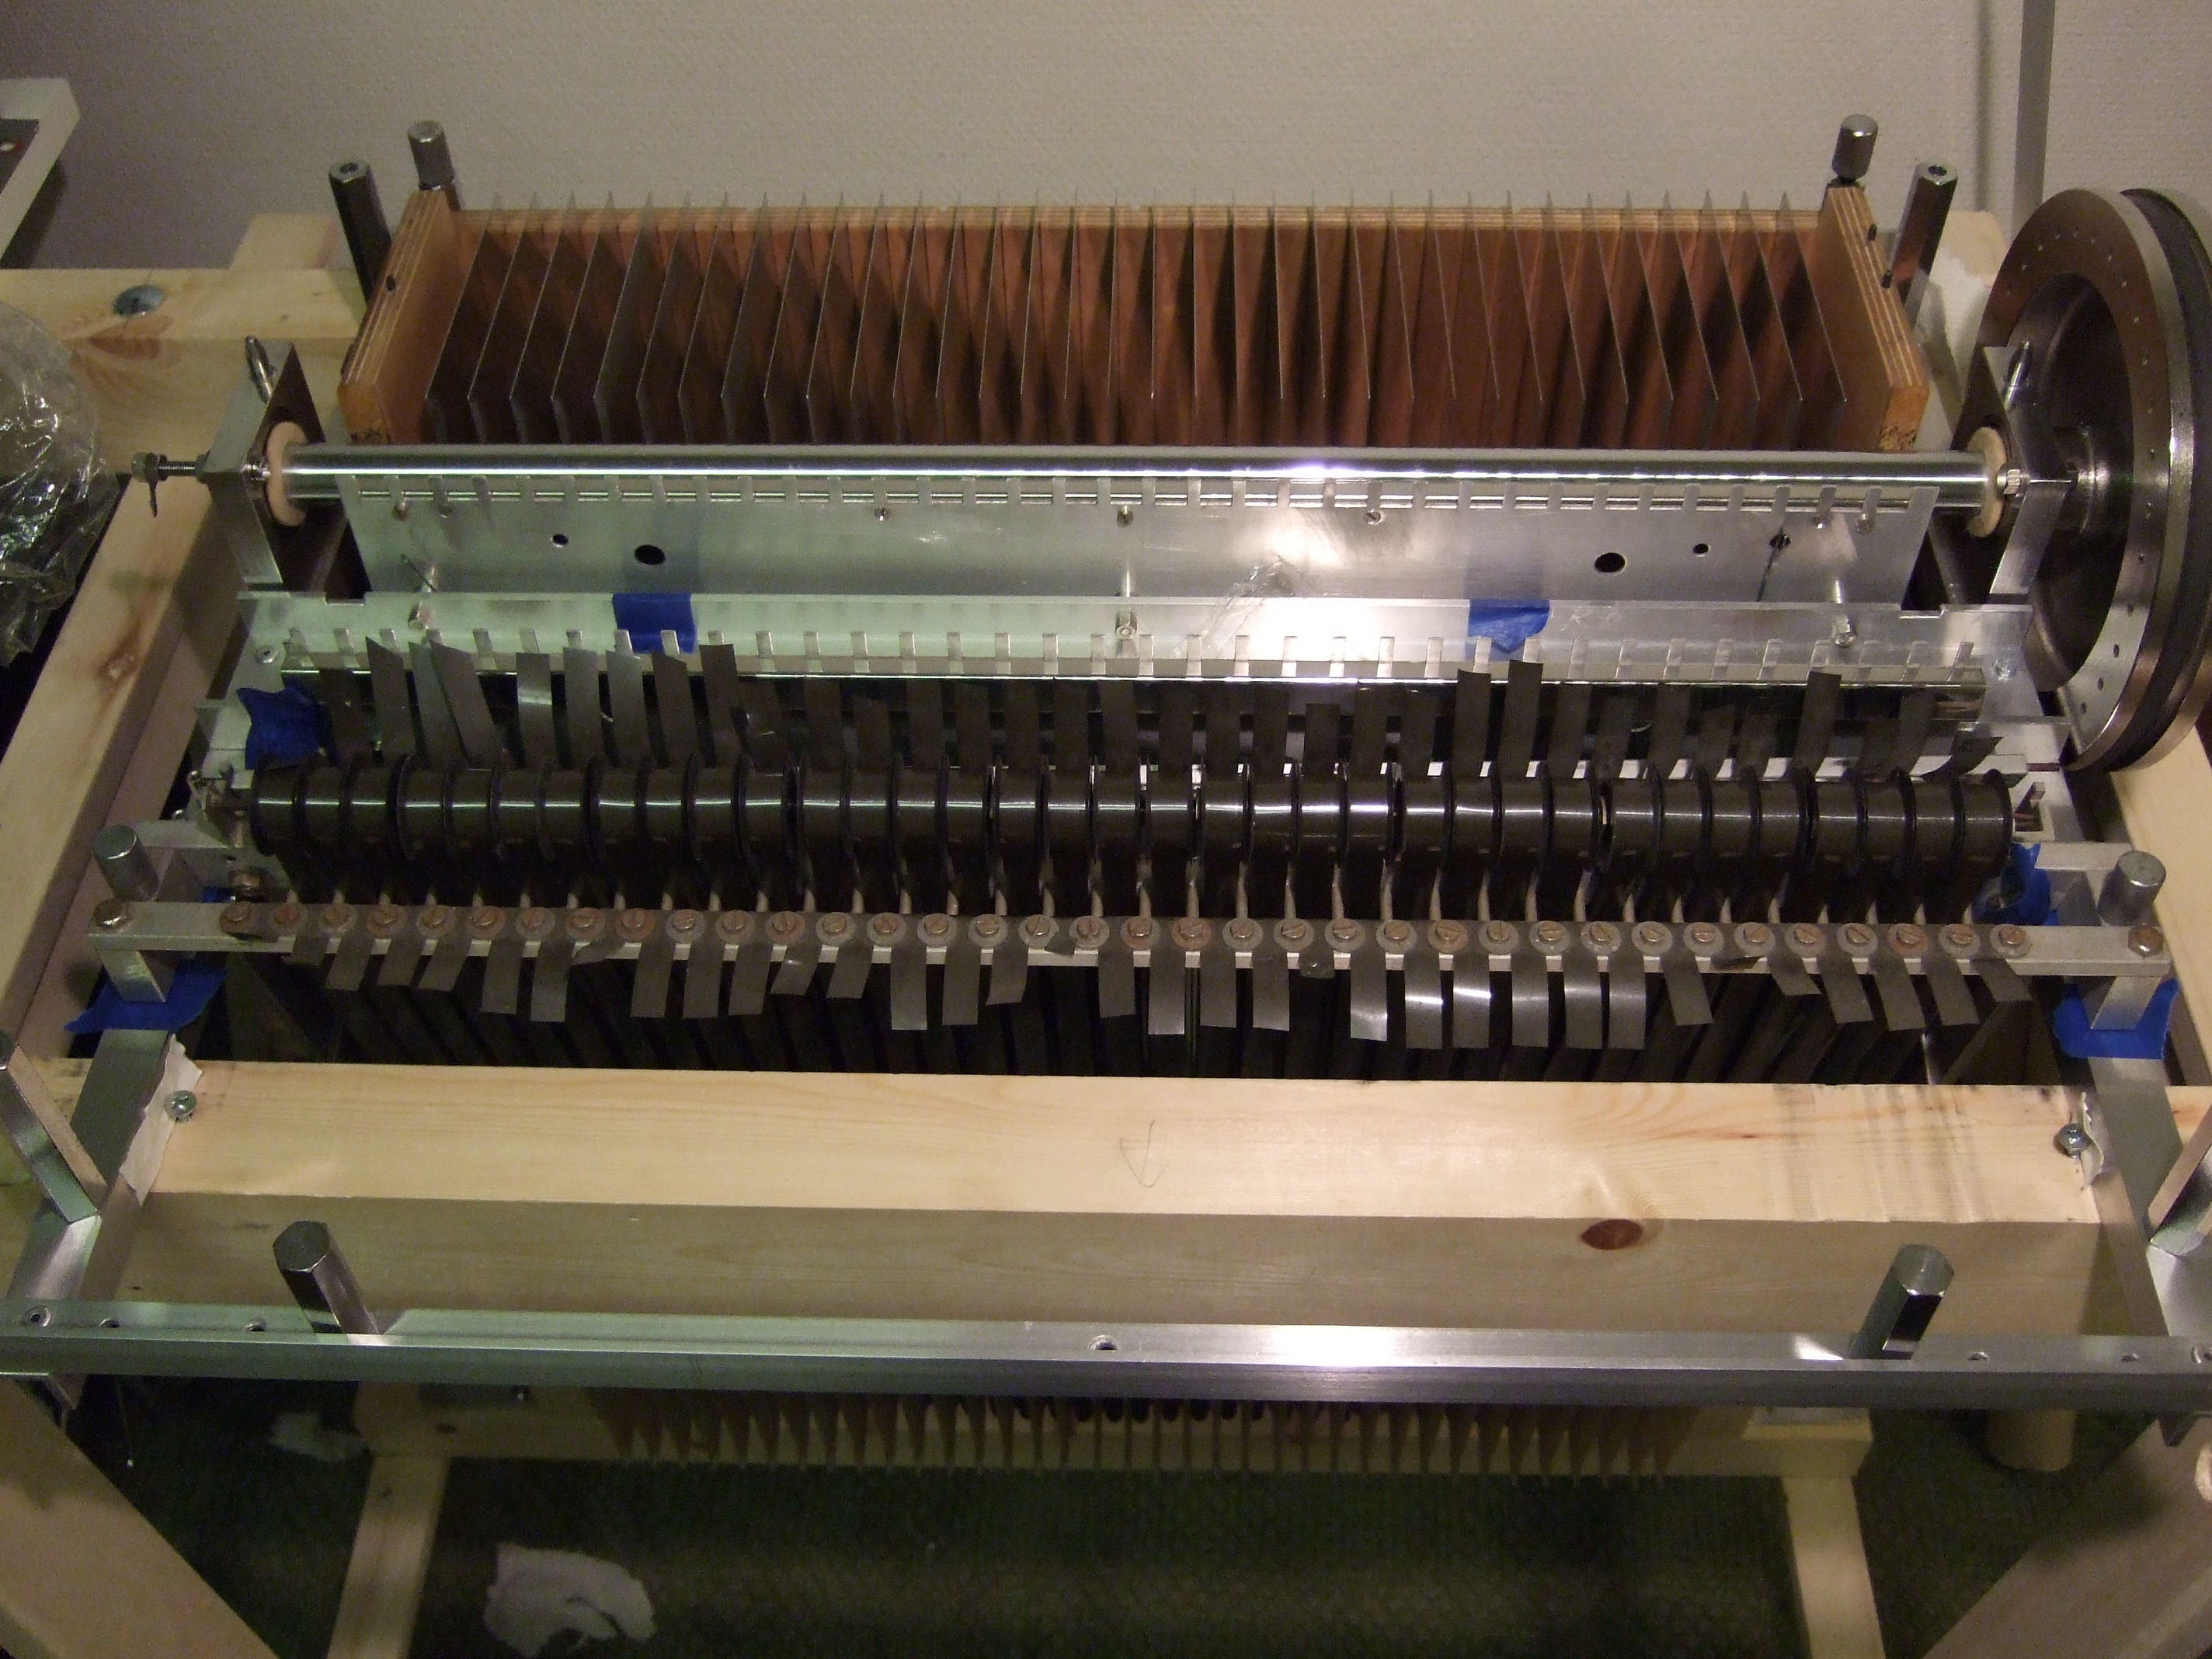 | |
| The slow restoration of #851. | Before restoration. Very smelly.. | 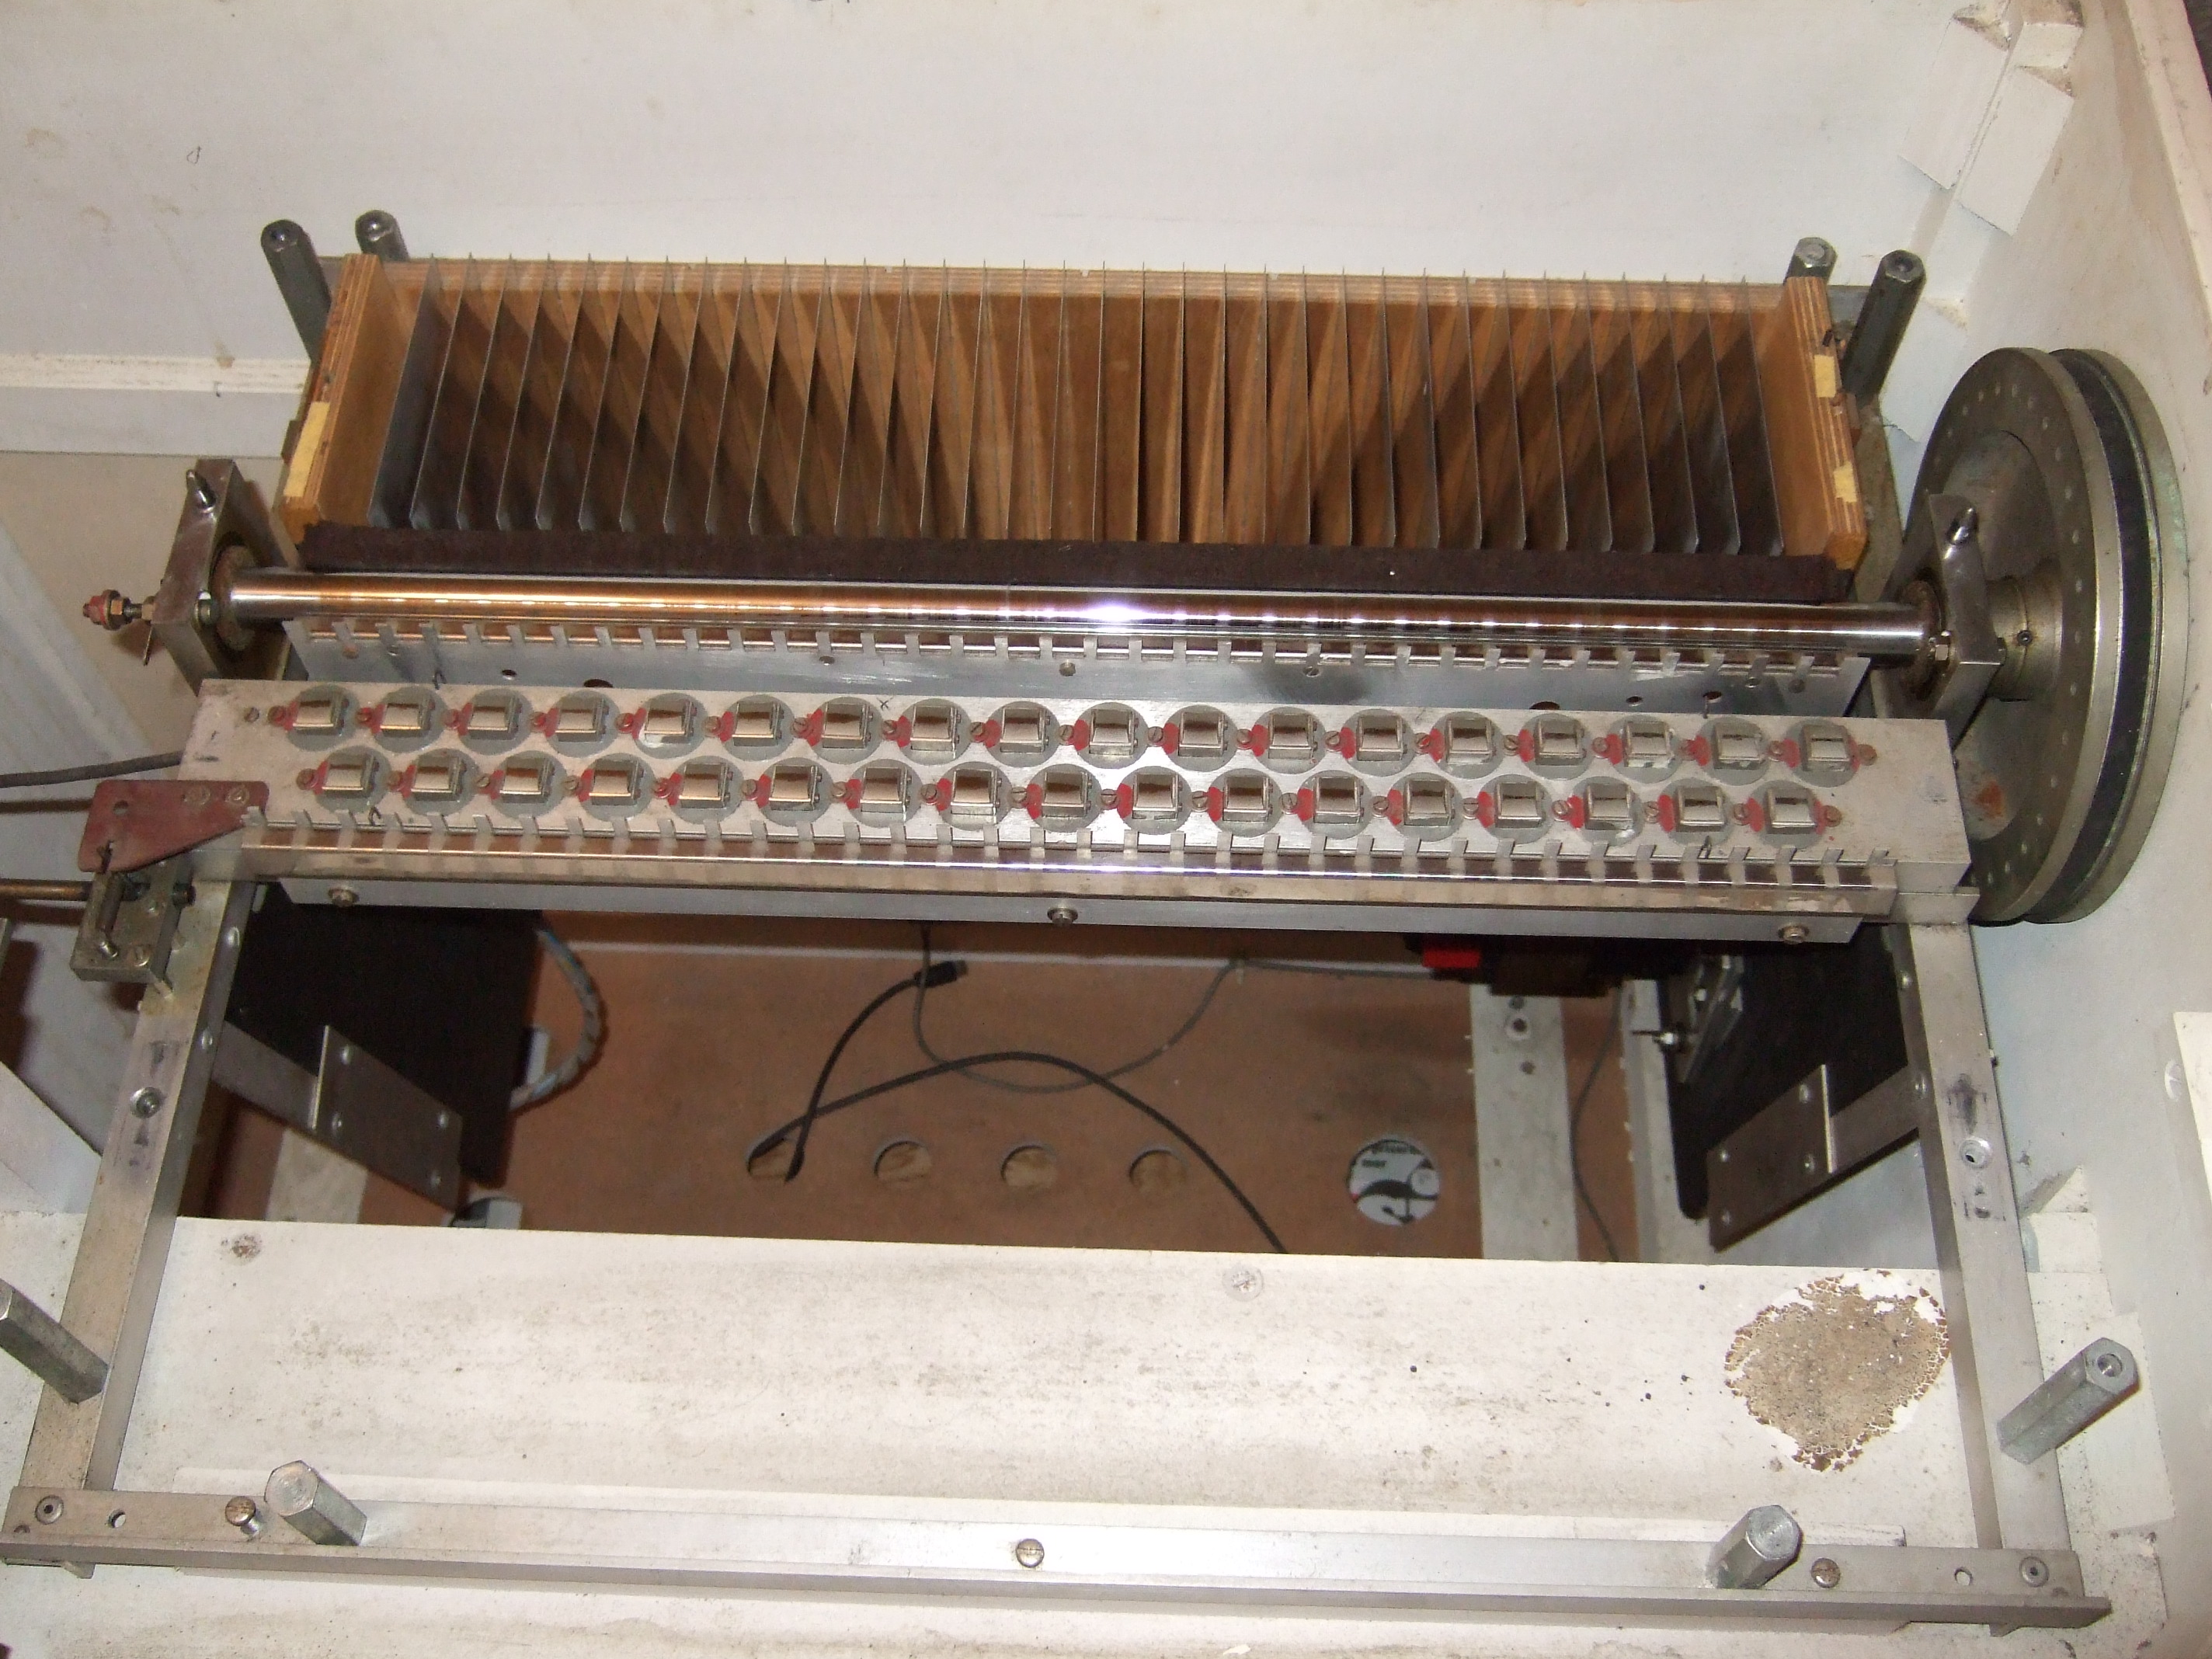 | Taking it apart is easy. Straightening it out and putting it back together is a whole different story.. |
| The slow restoration of #851. | Actually rewired but I kept the.. | 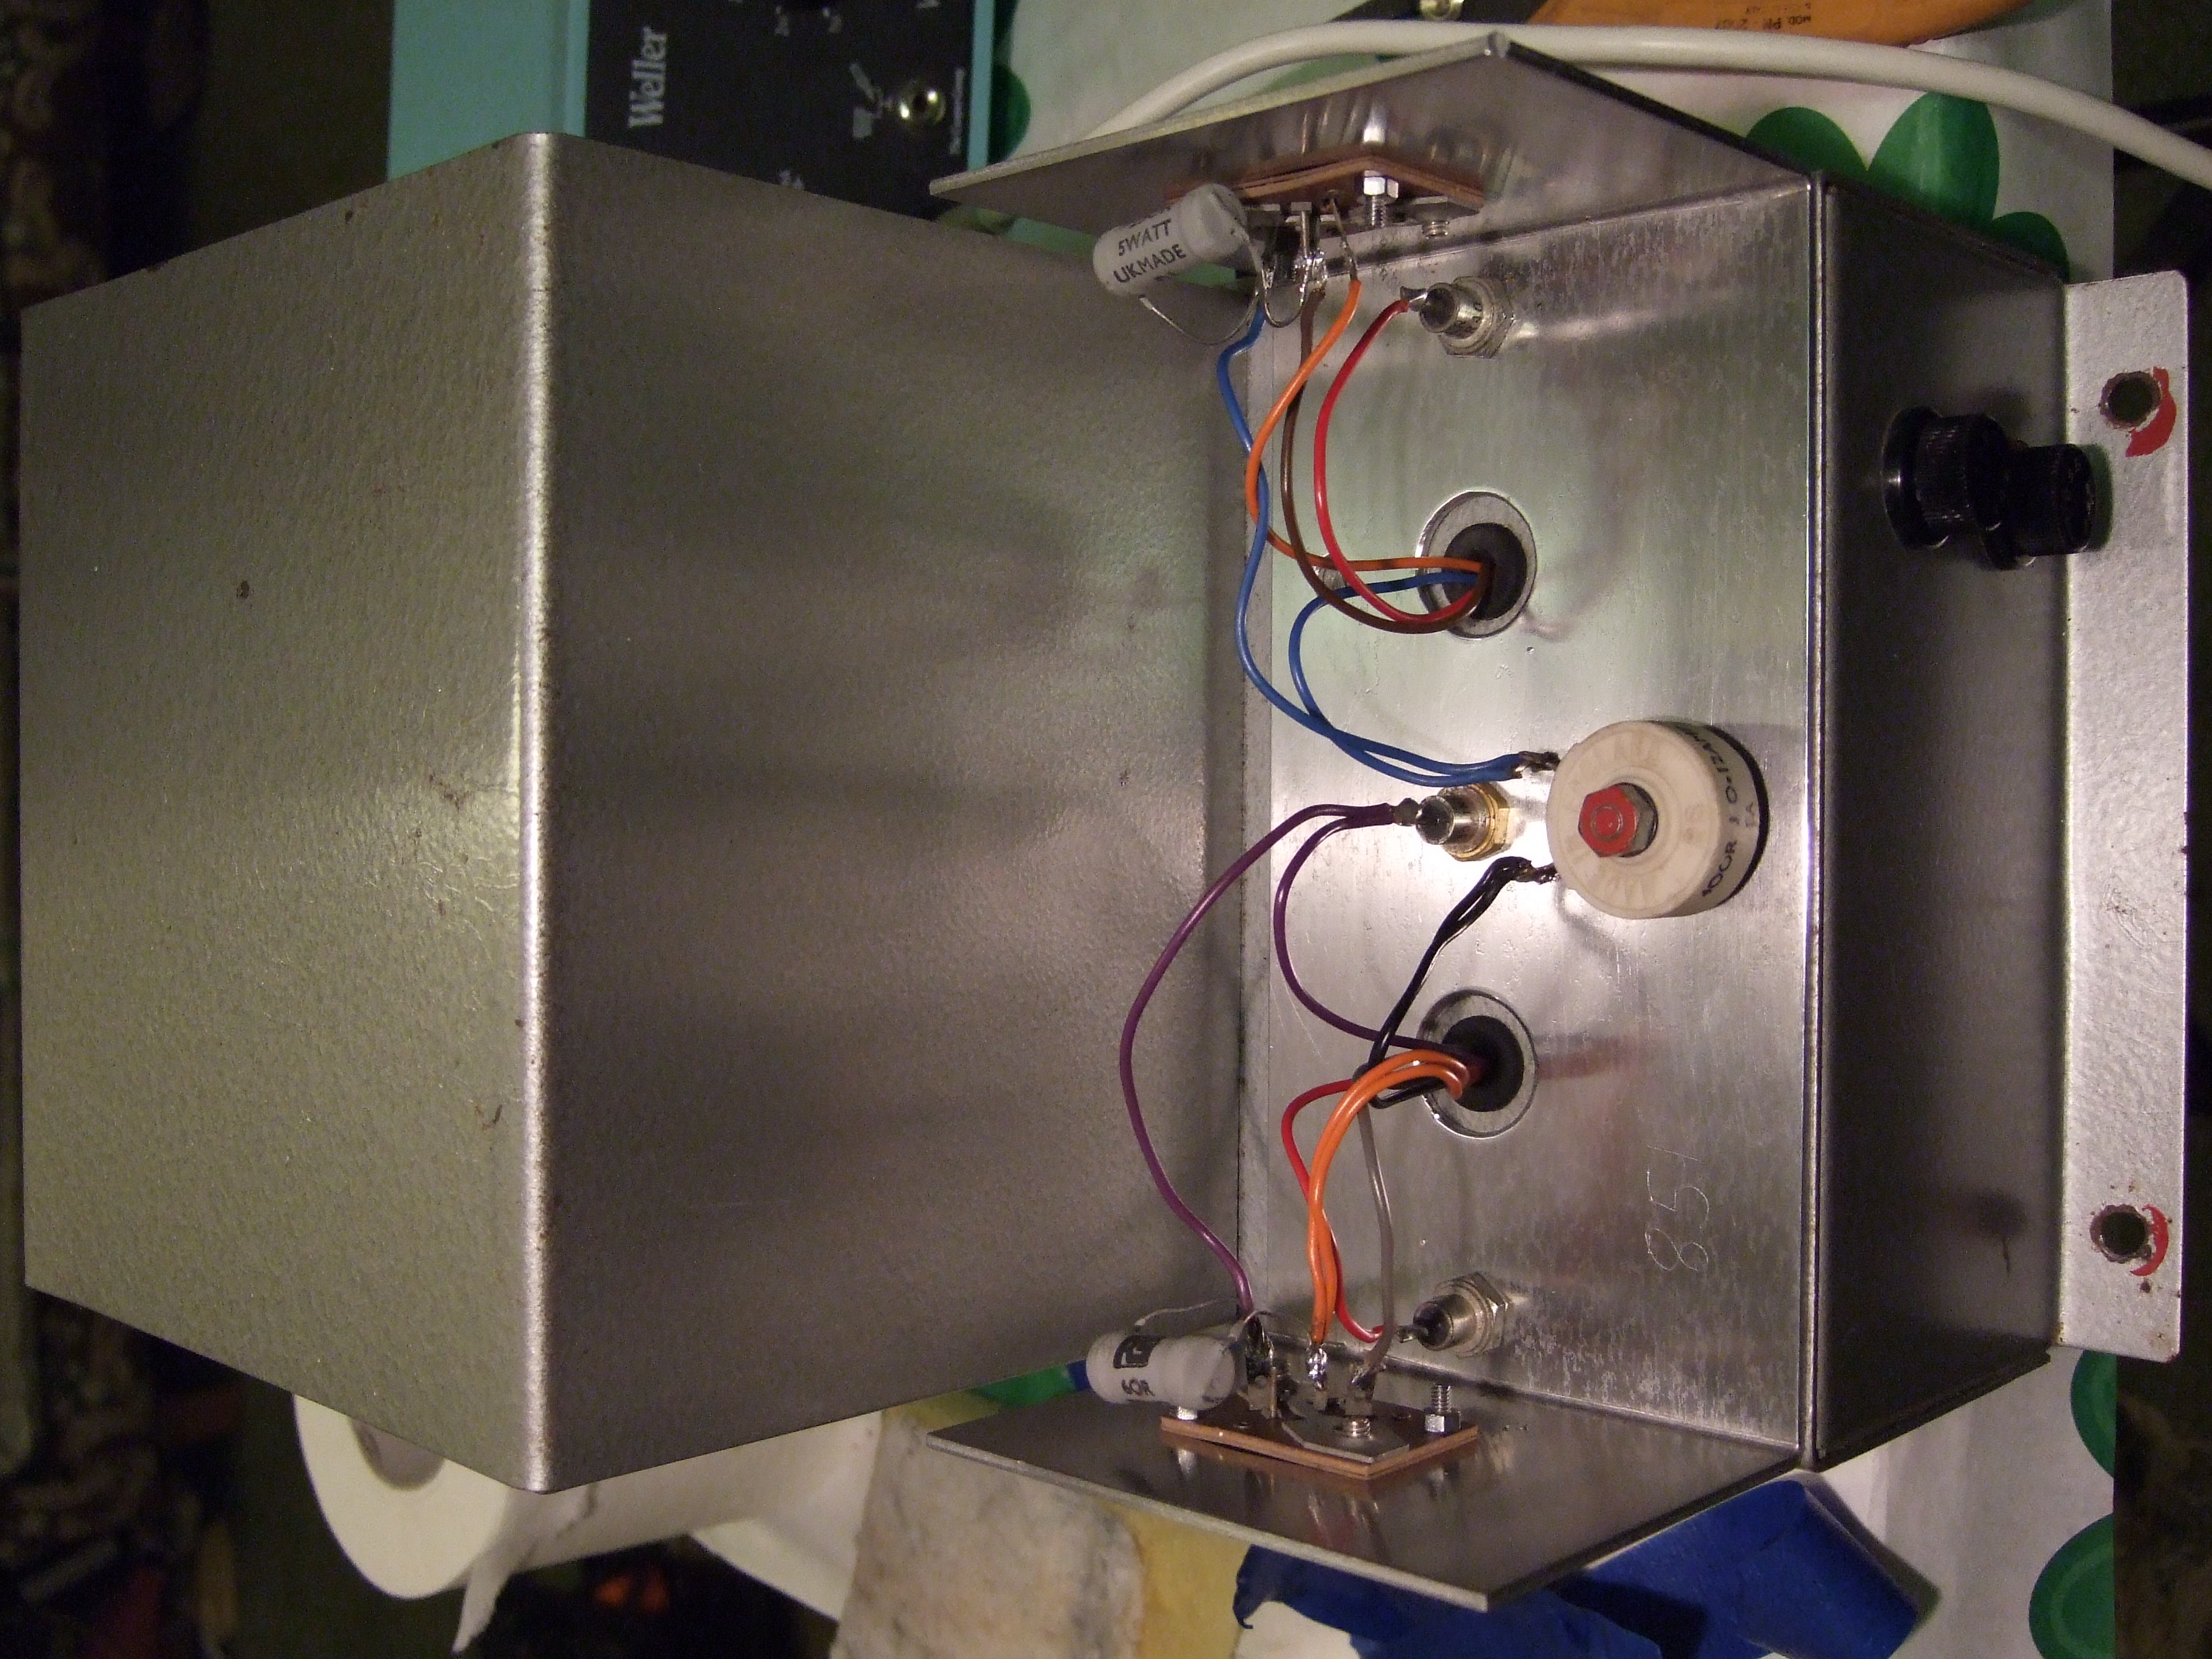 | components and some of the wiring for the original look. I also want to keep the renovation reversible if possible. No extra drilled holes etc. |
| The slow restoration of #851. | Putting things together for the third.. | 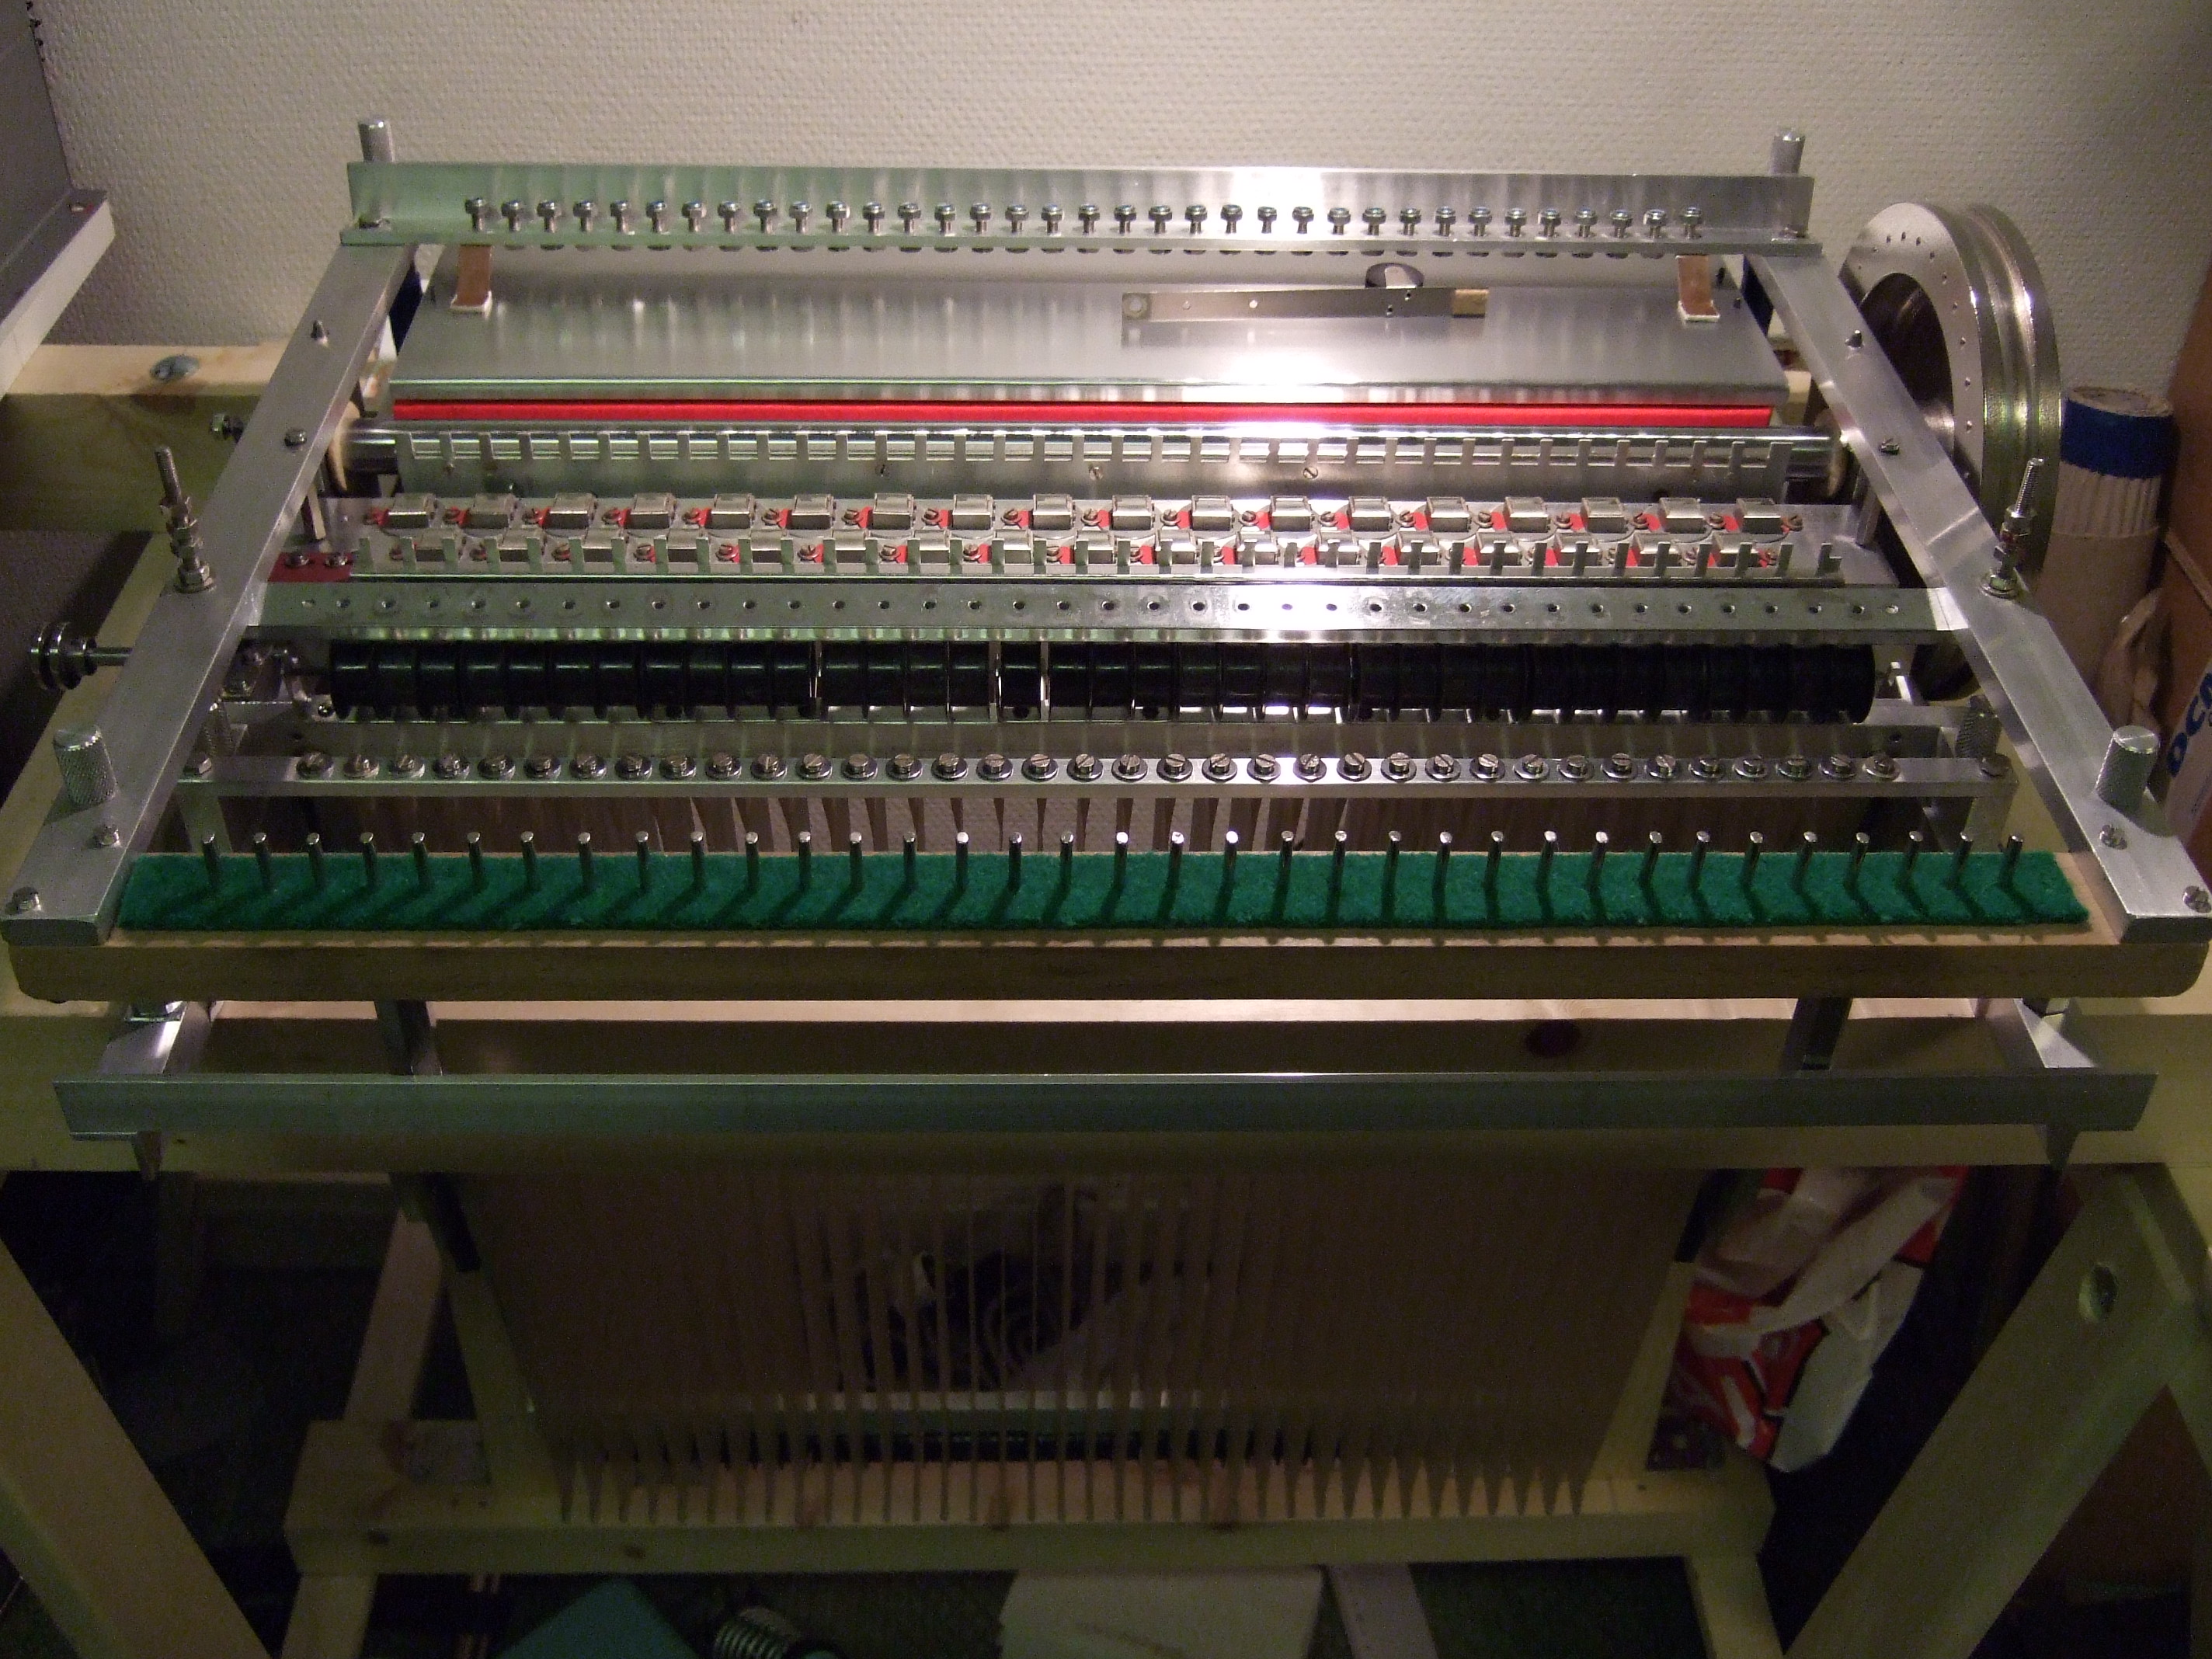 | time and making sure that the tape path is straight. Check out the burn marks on the guide pin board. Managed to straighten it out eventually.. |
| The slow restoration of #851. | Managed to pull some of the wiring.. |  | out of the motor by stepping on the cable.. Repairing that was hell. I'm using a special pure leslie oil for the glide bearings. |
| The slow restoration of #851. | Original felt. | 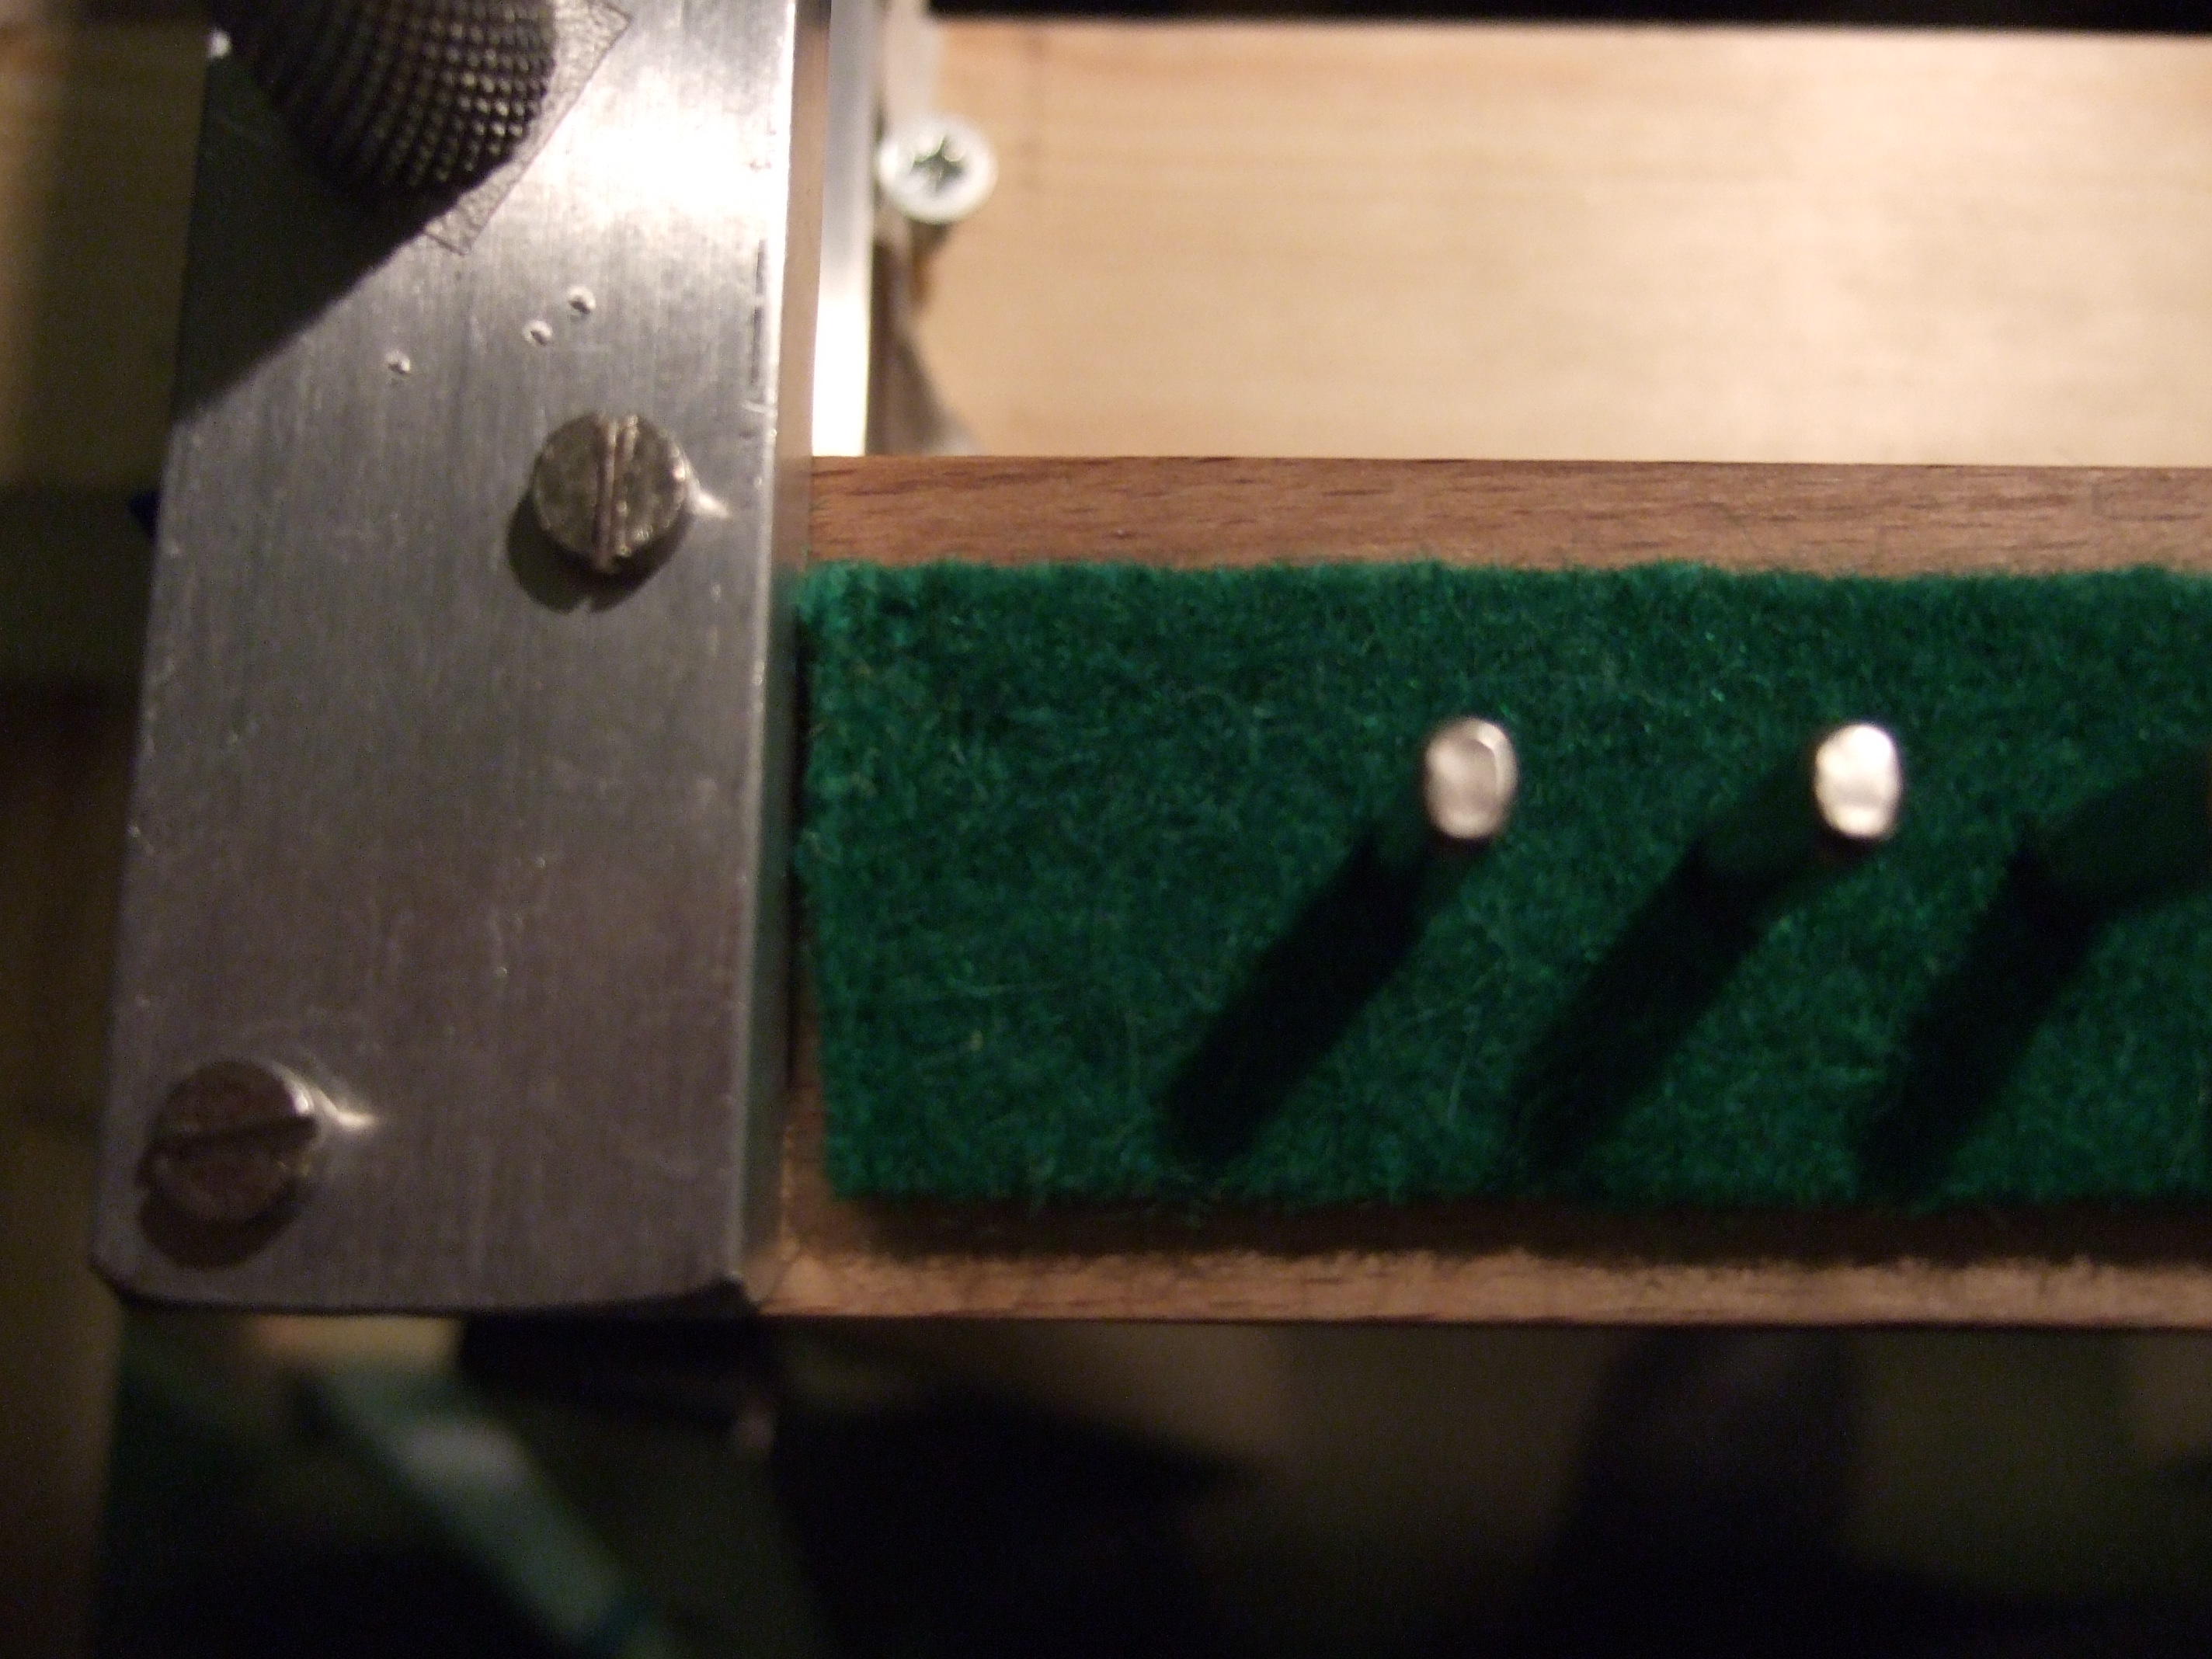 | Now replaced with a thinner strip from Frank which makes pad adjustment easier. |
| The slow restoration of #851. | frame #2: vibes, 8 choir, mkII brass | 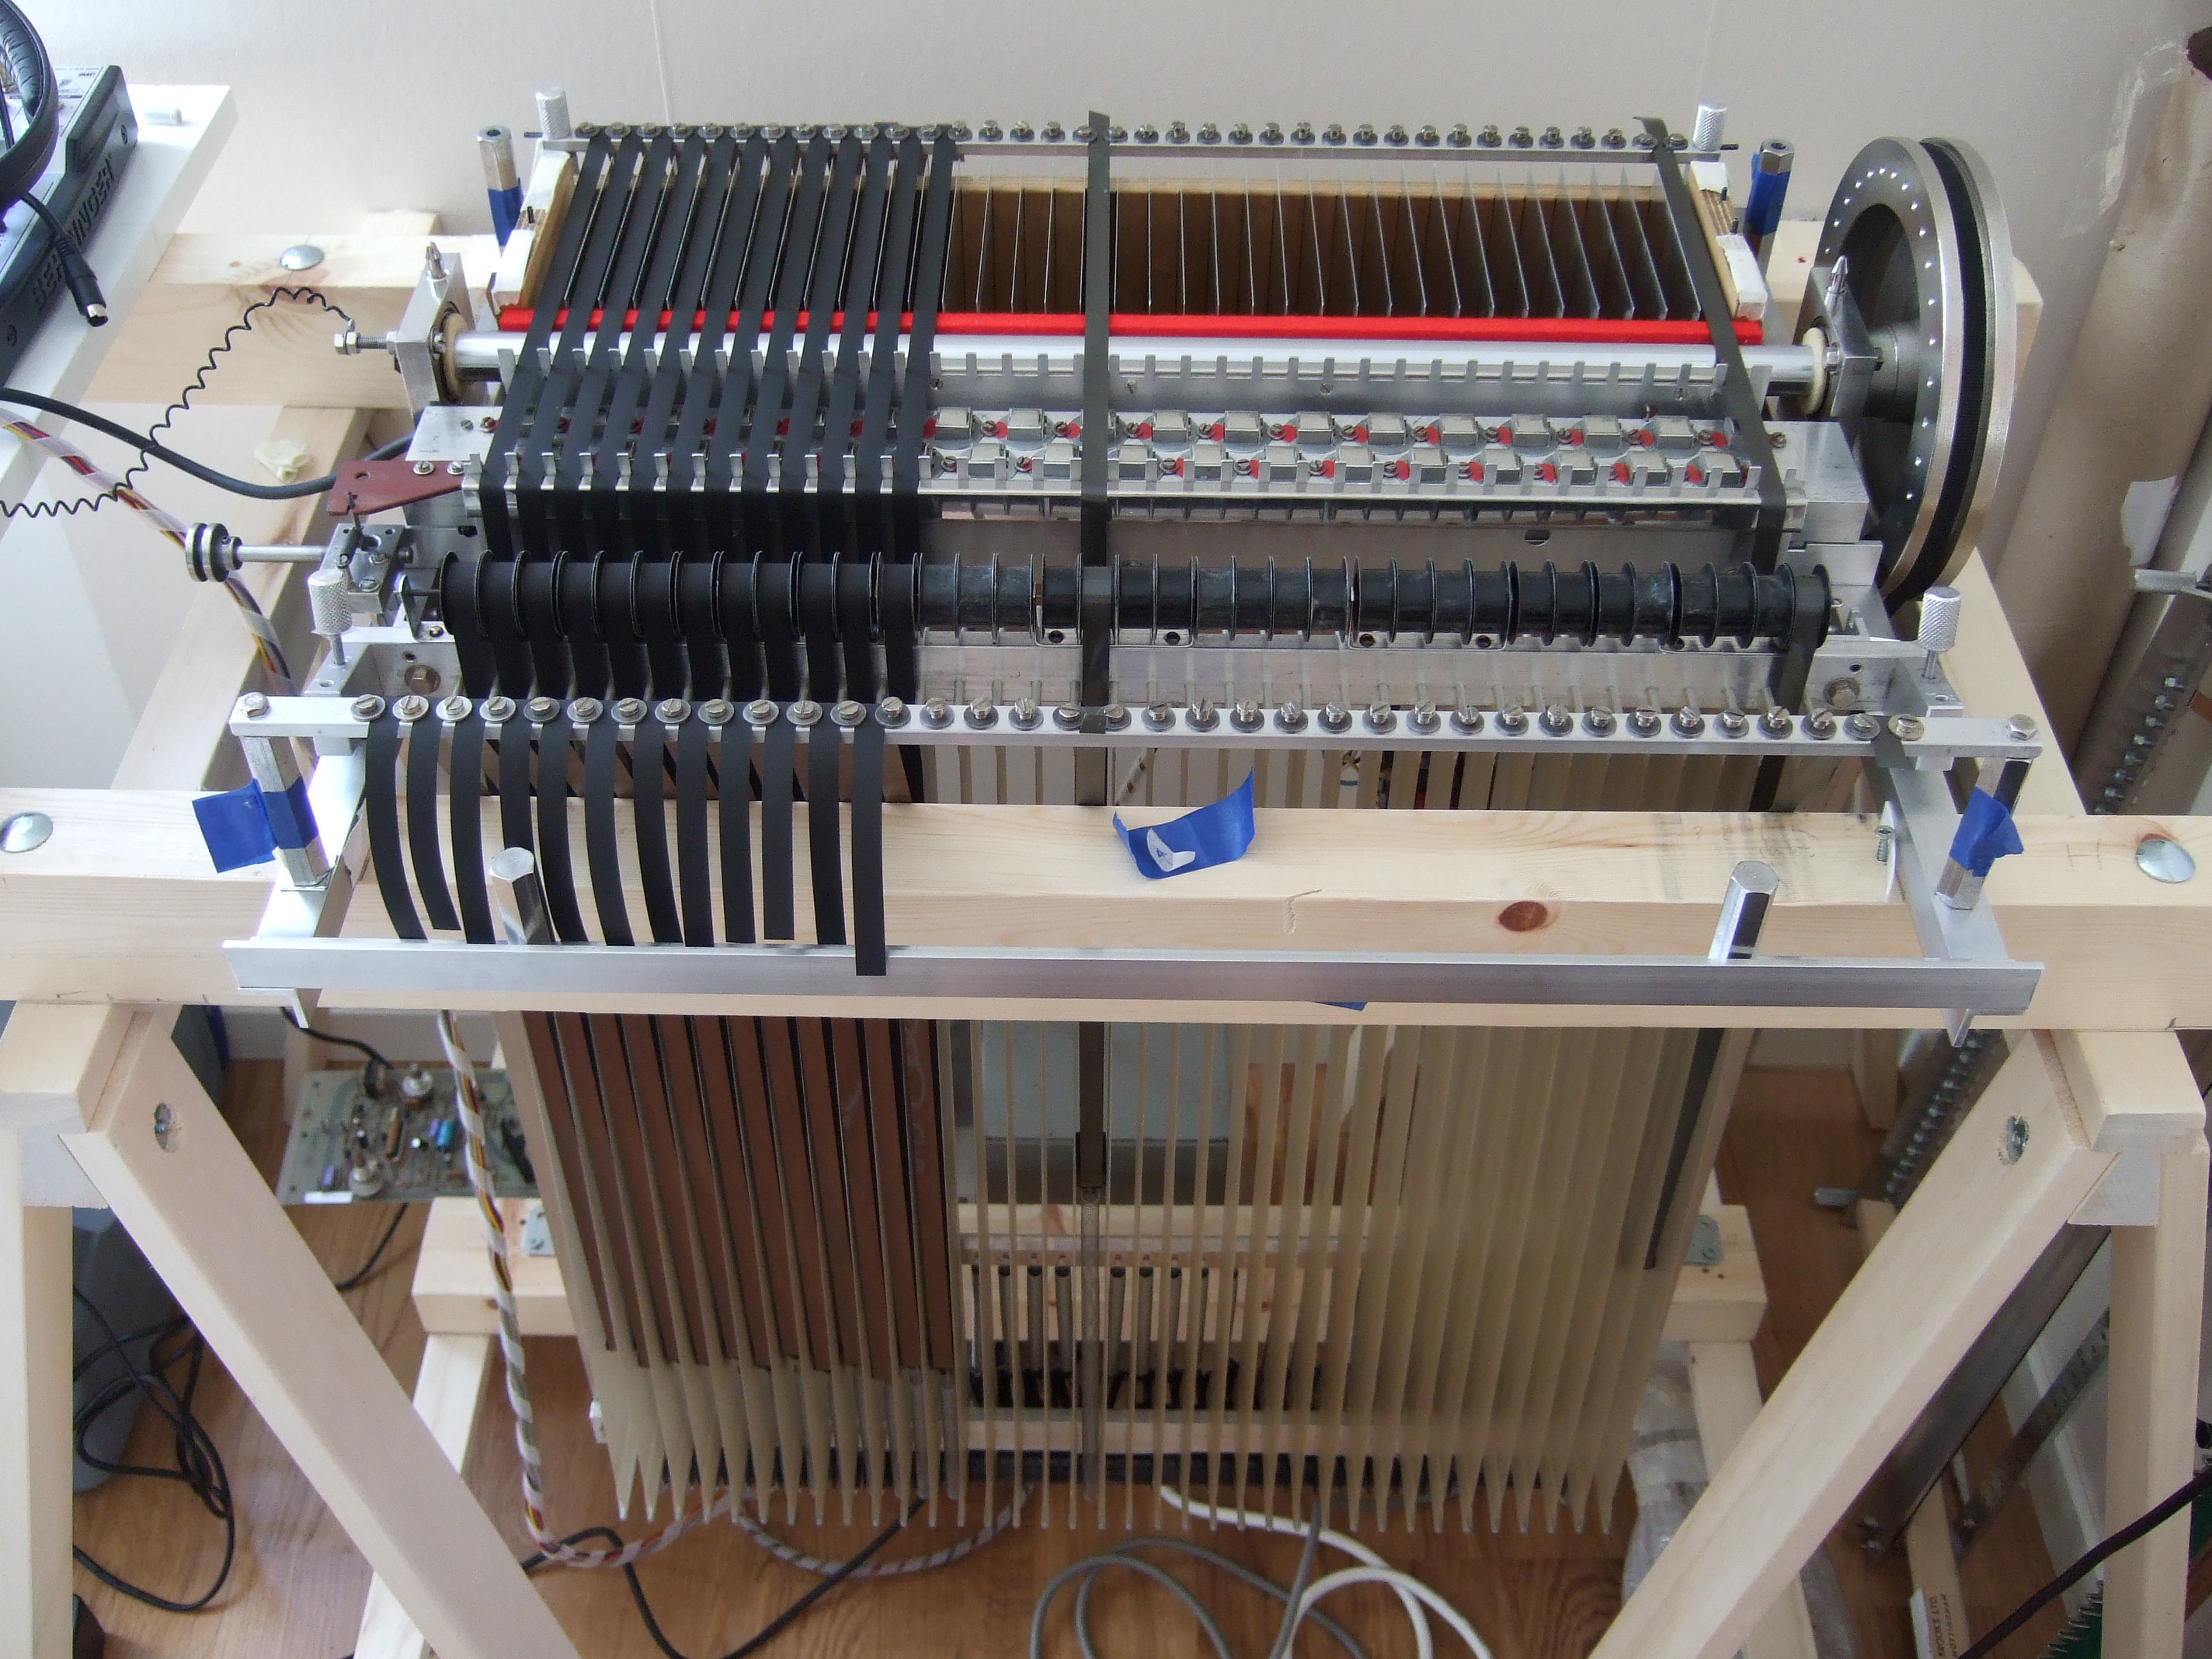 | #1 has flute, 3 violins, cello. At least 4 more to come. |
| The slow restoration of #851. | Be careful when cleaning the brass | 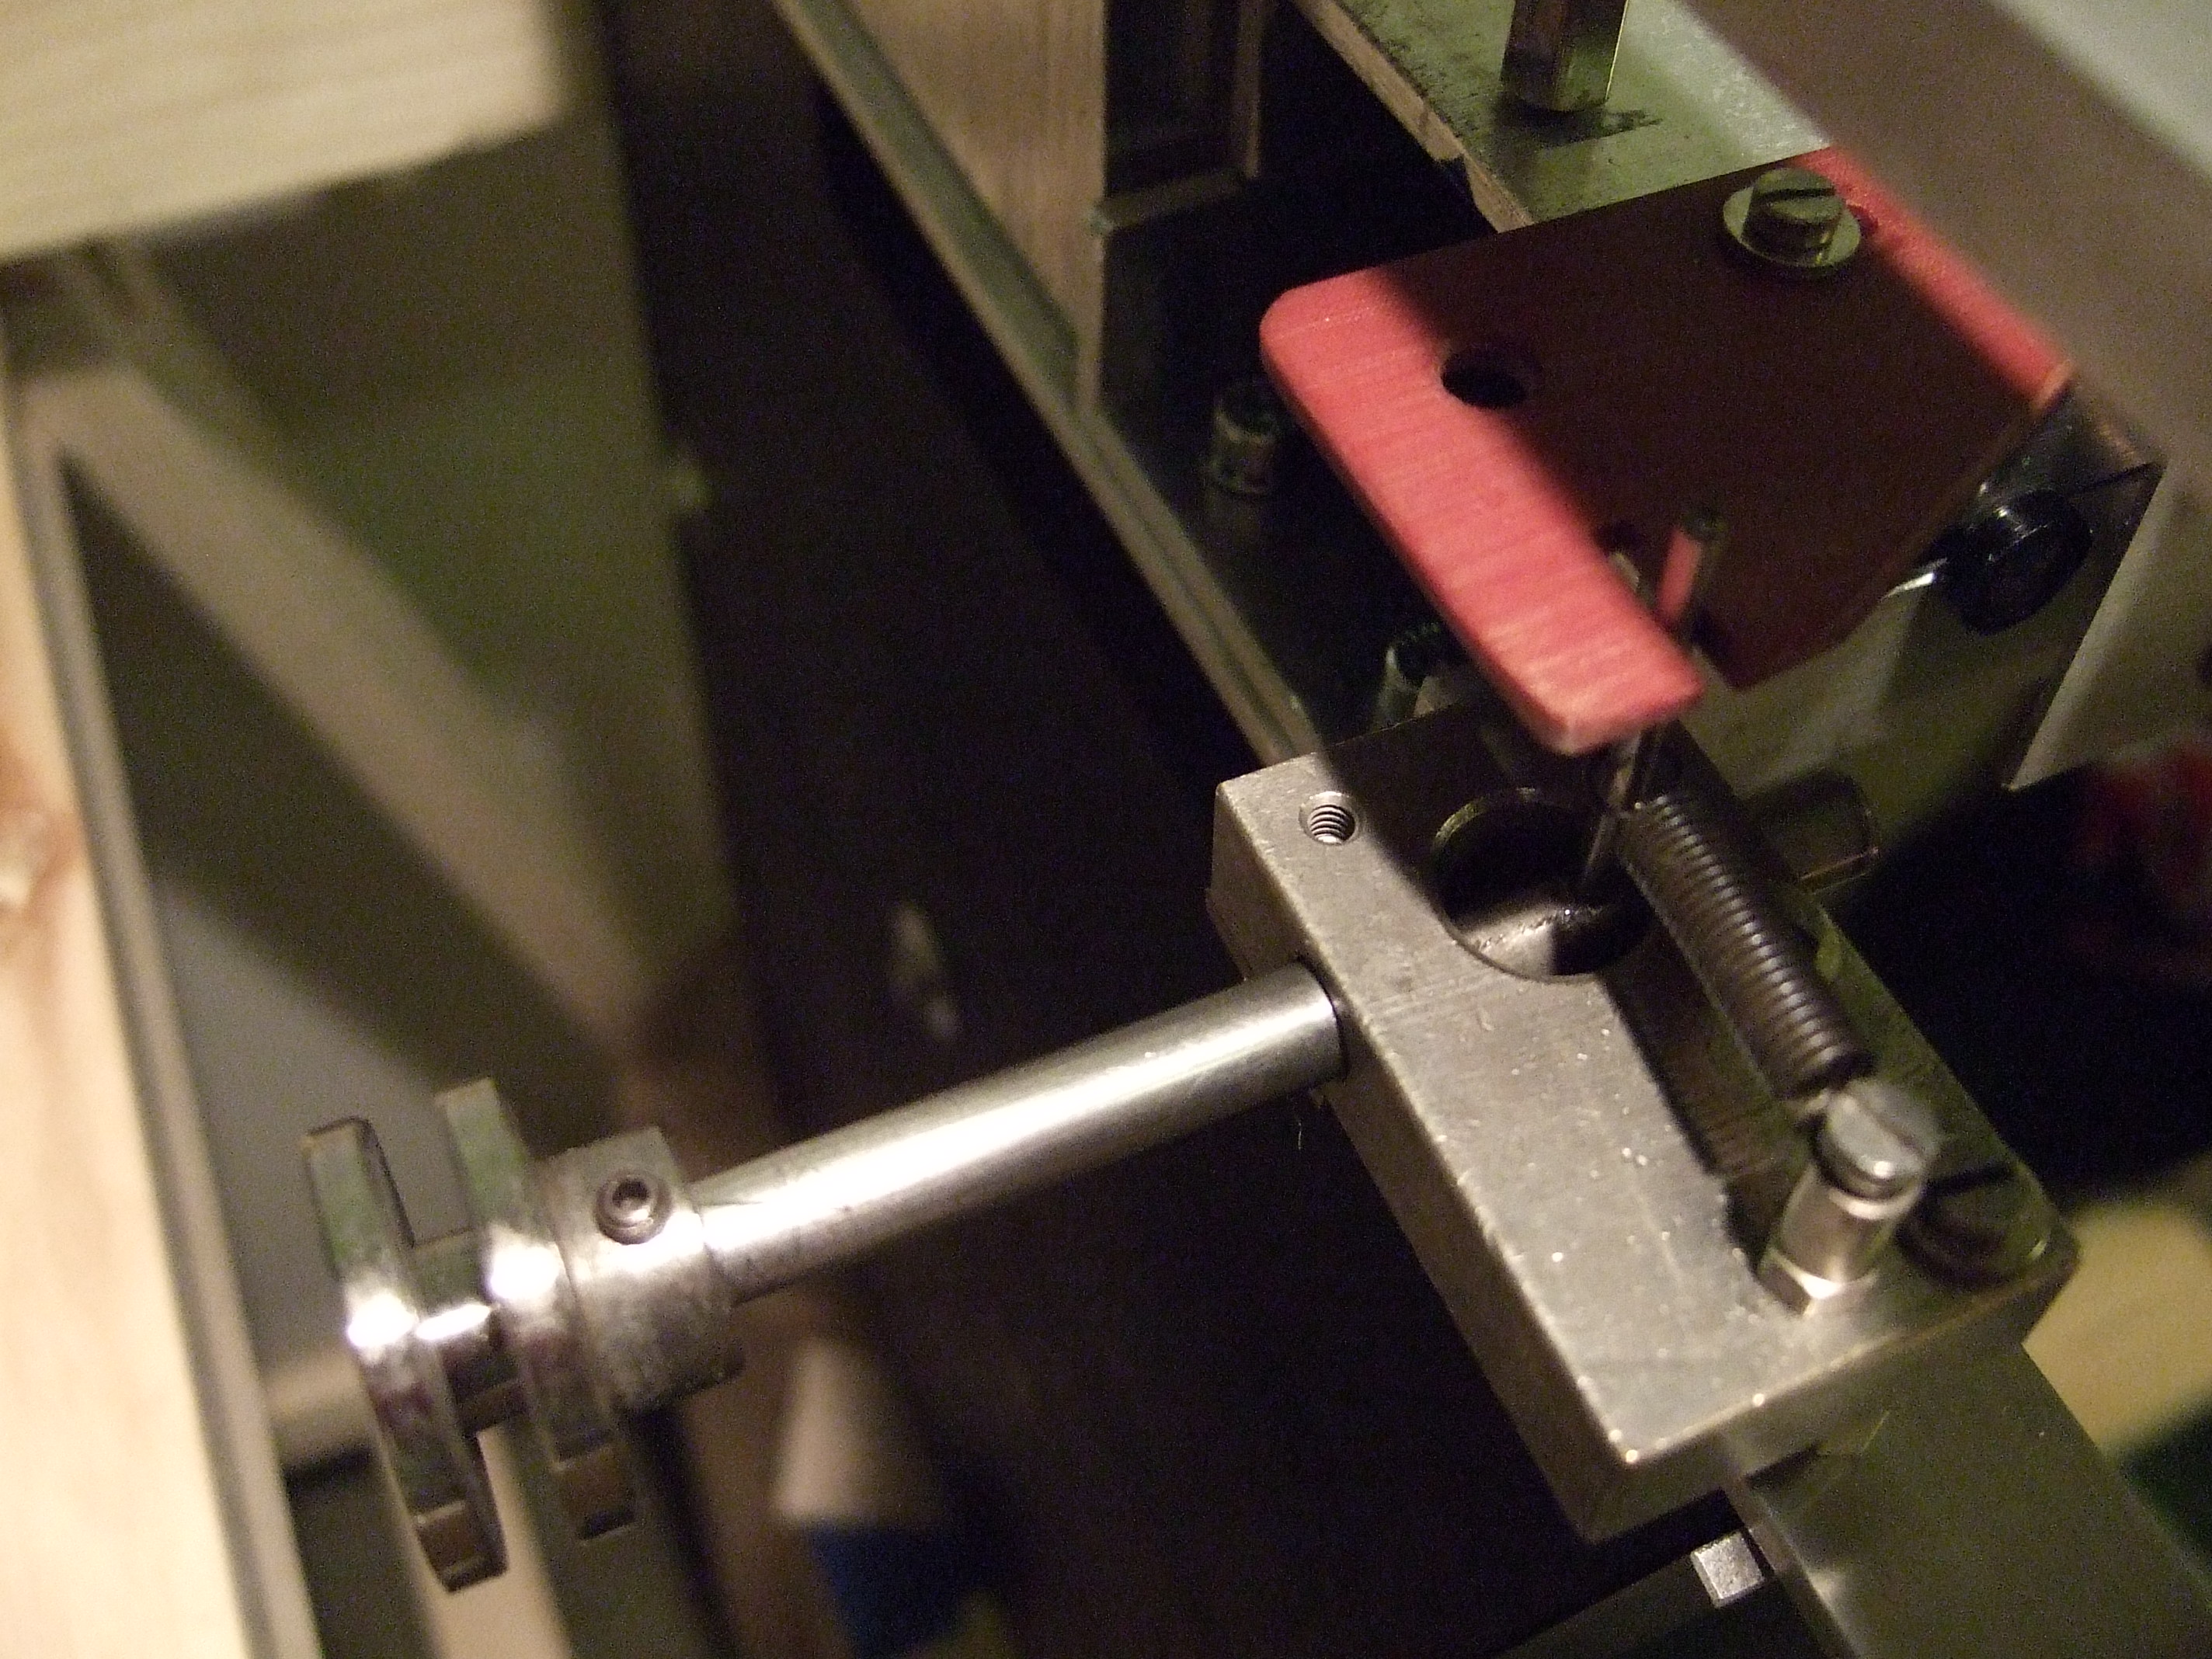 | track selector or the nickel plating will come off. |
| The slow restoration of #851. | Assembled (kind of) keyboard. | 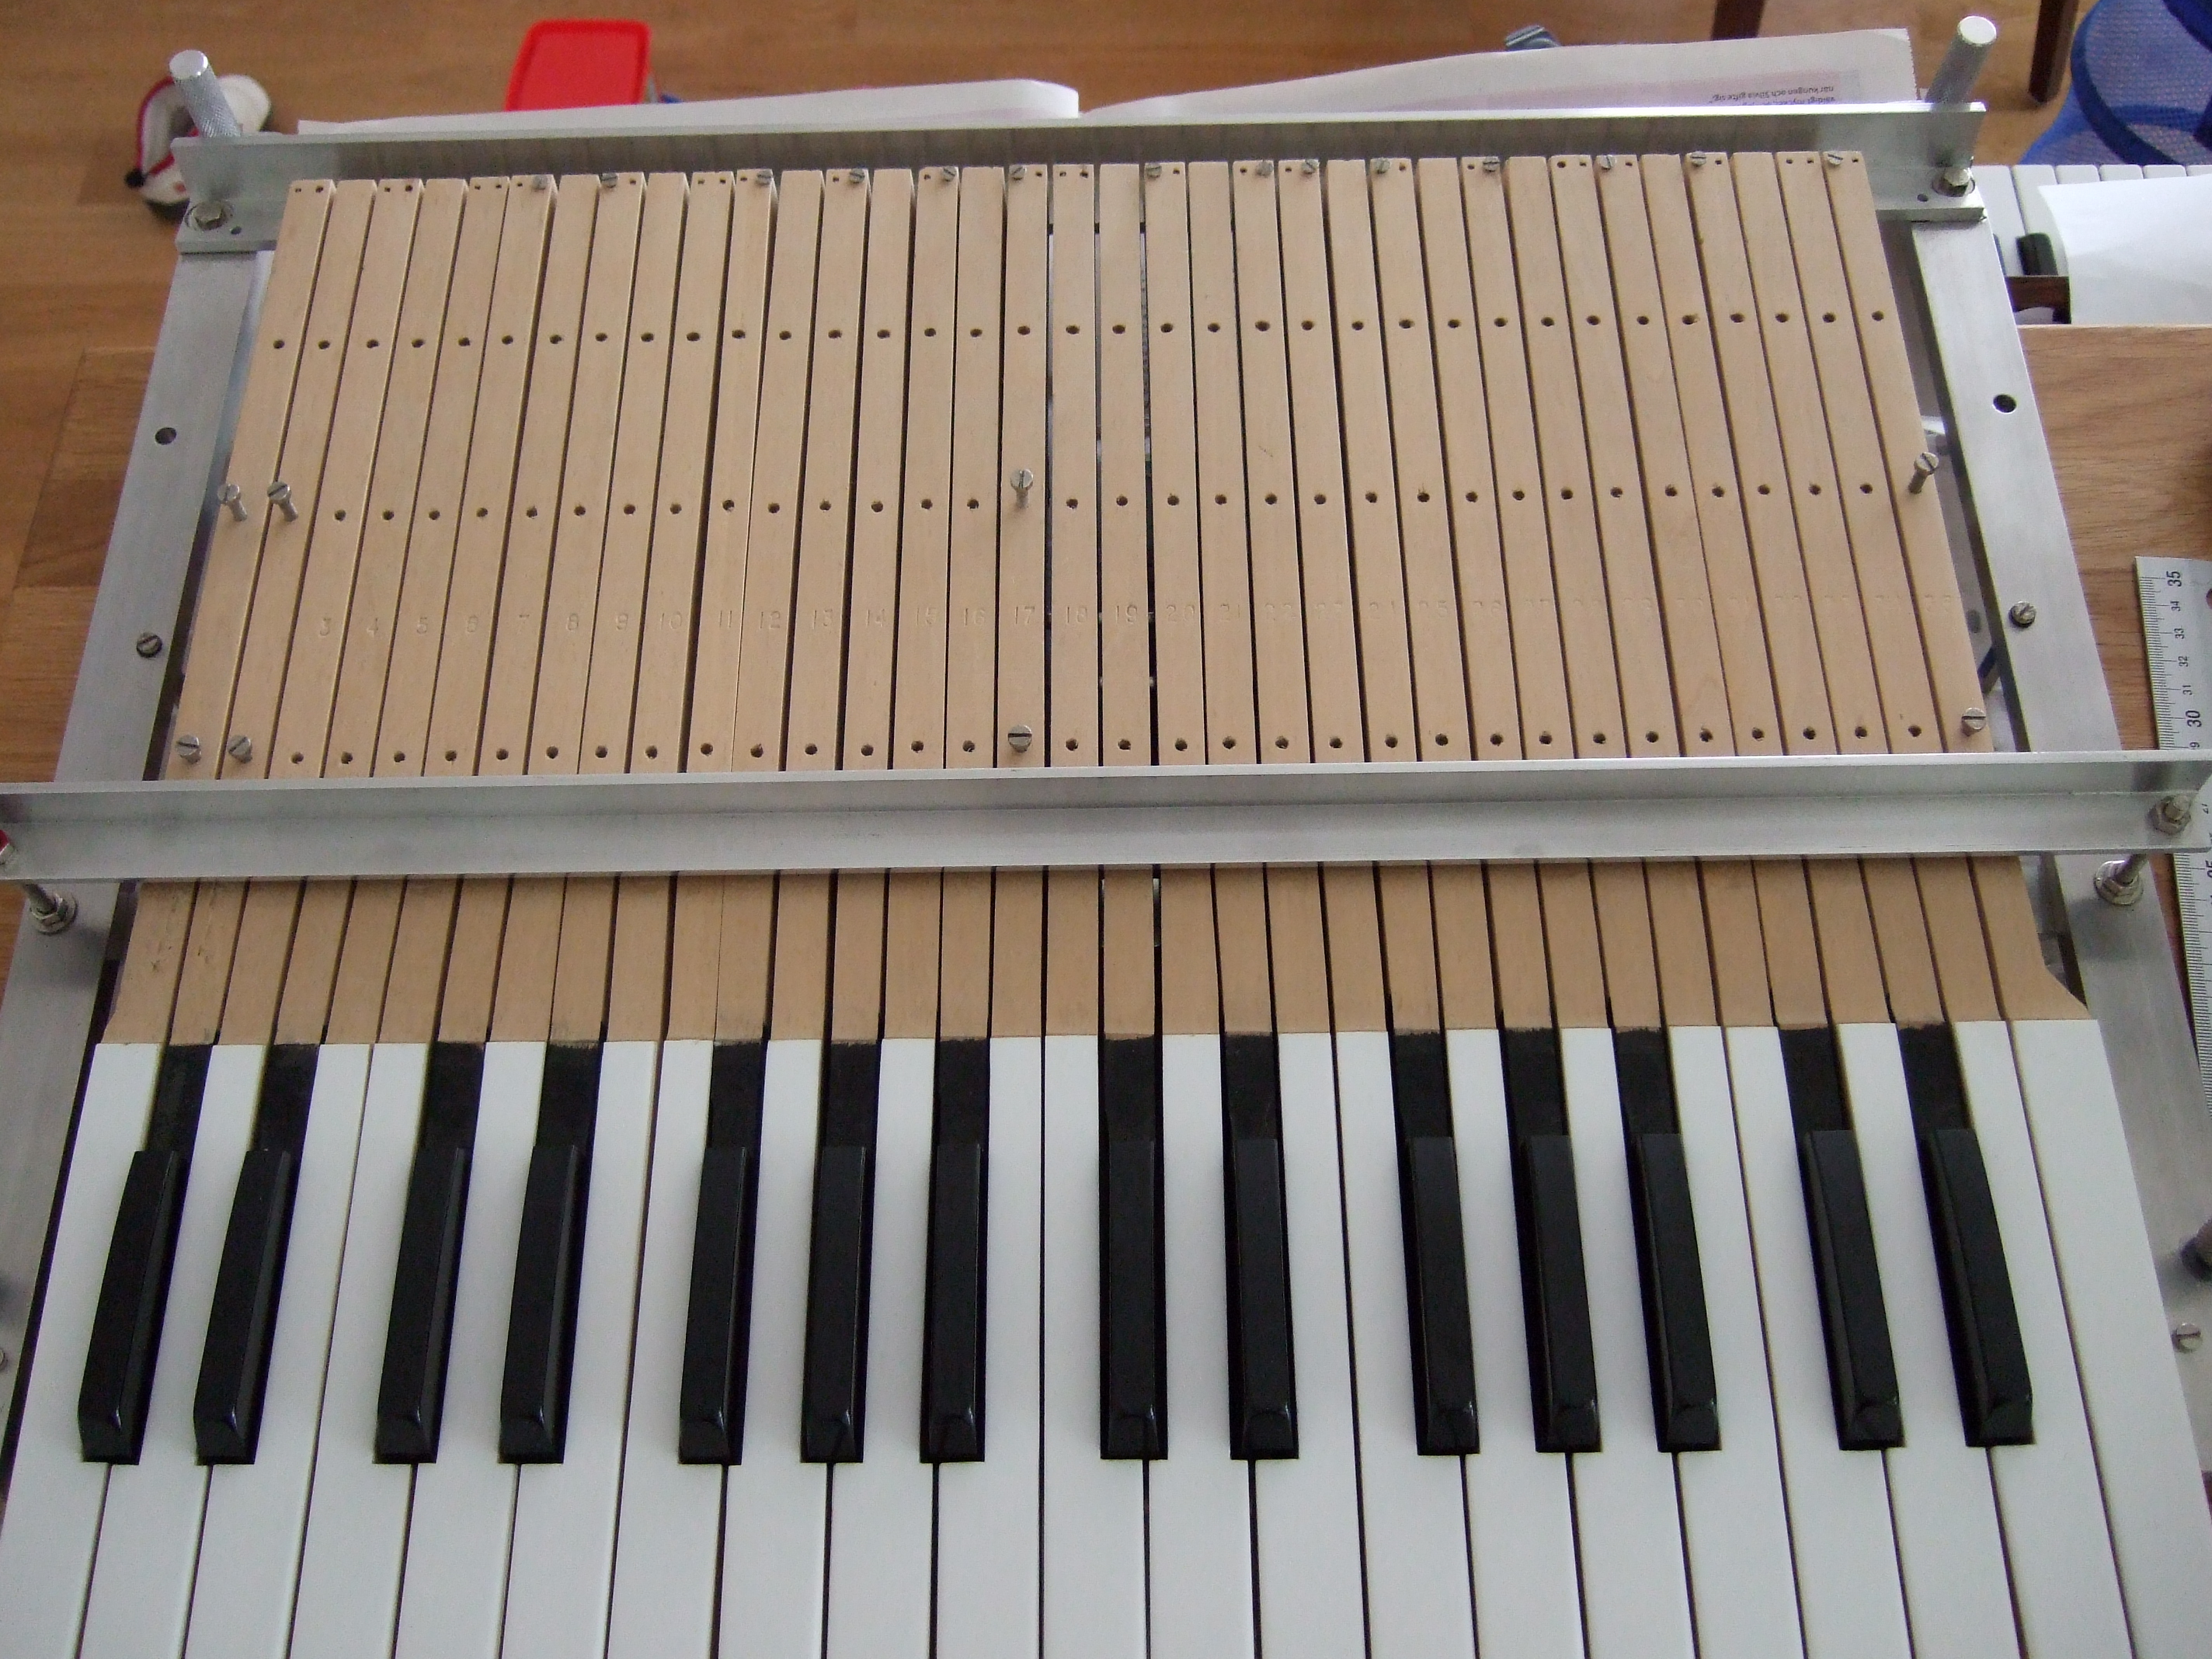 | After some experimentation I cleaned the keys with a lightly damp cloth and then with a hard gum eraser. Sanding is far too drastic. |
| The slow restoration of #851. | Removing the paint. | 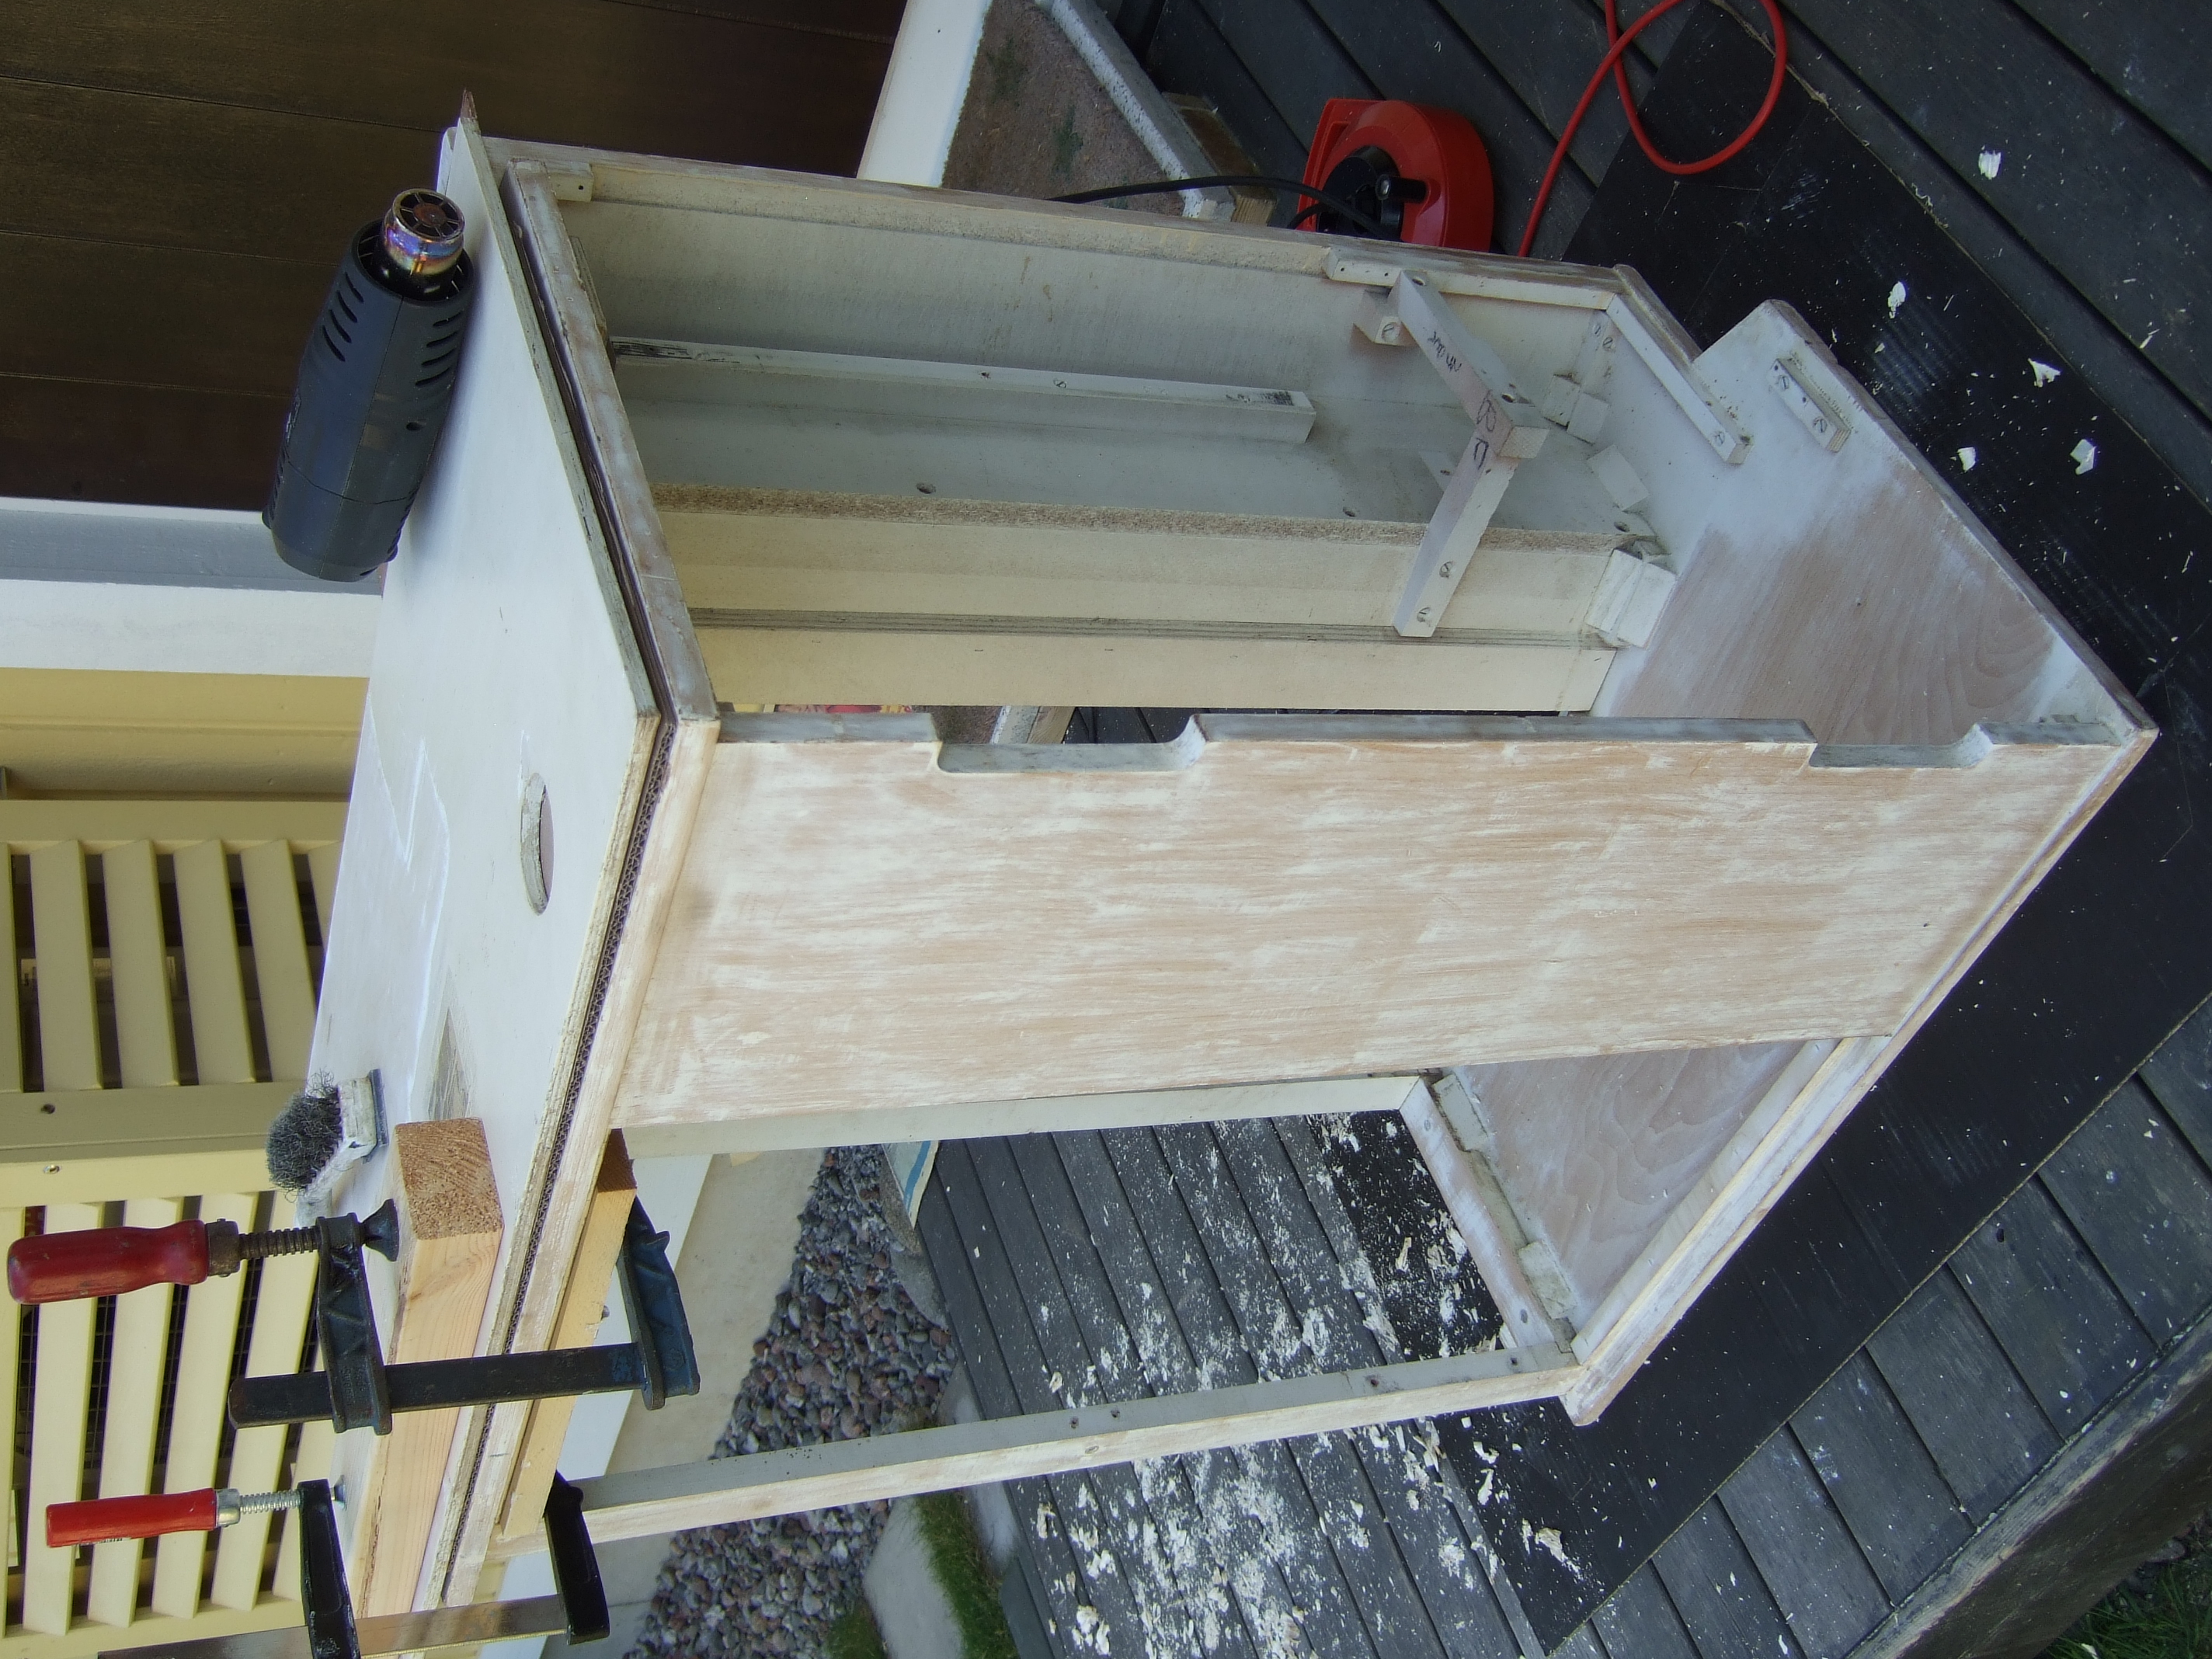 | Very time-consuming.. |
| The slow restoration of #851. | New or replaced stuff from Markus: | 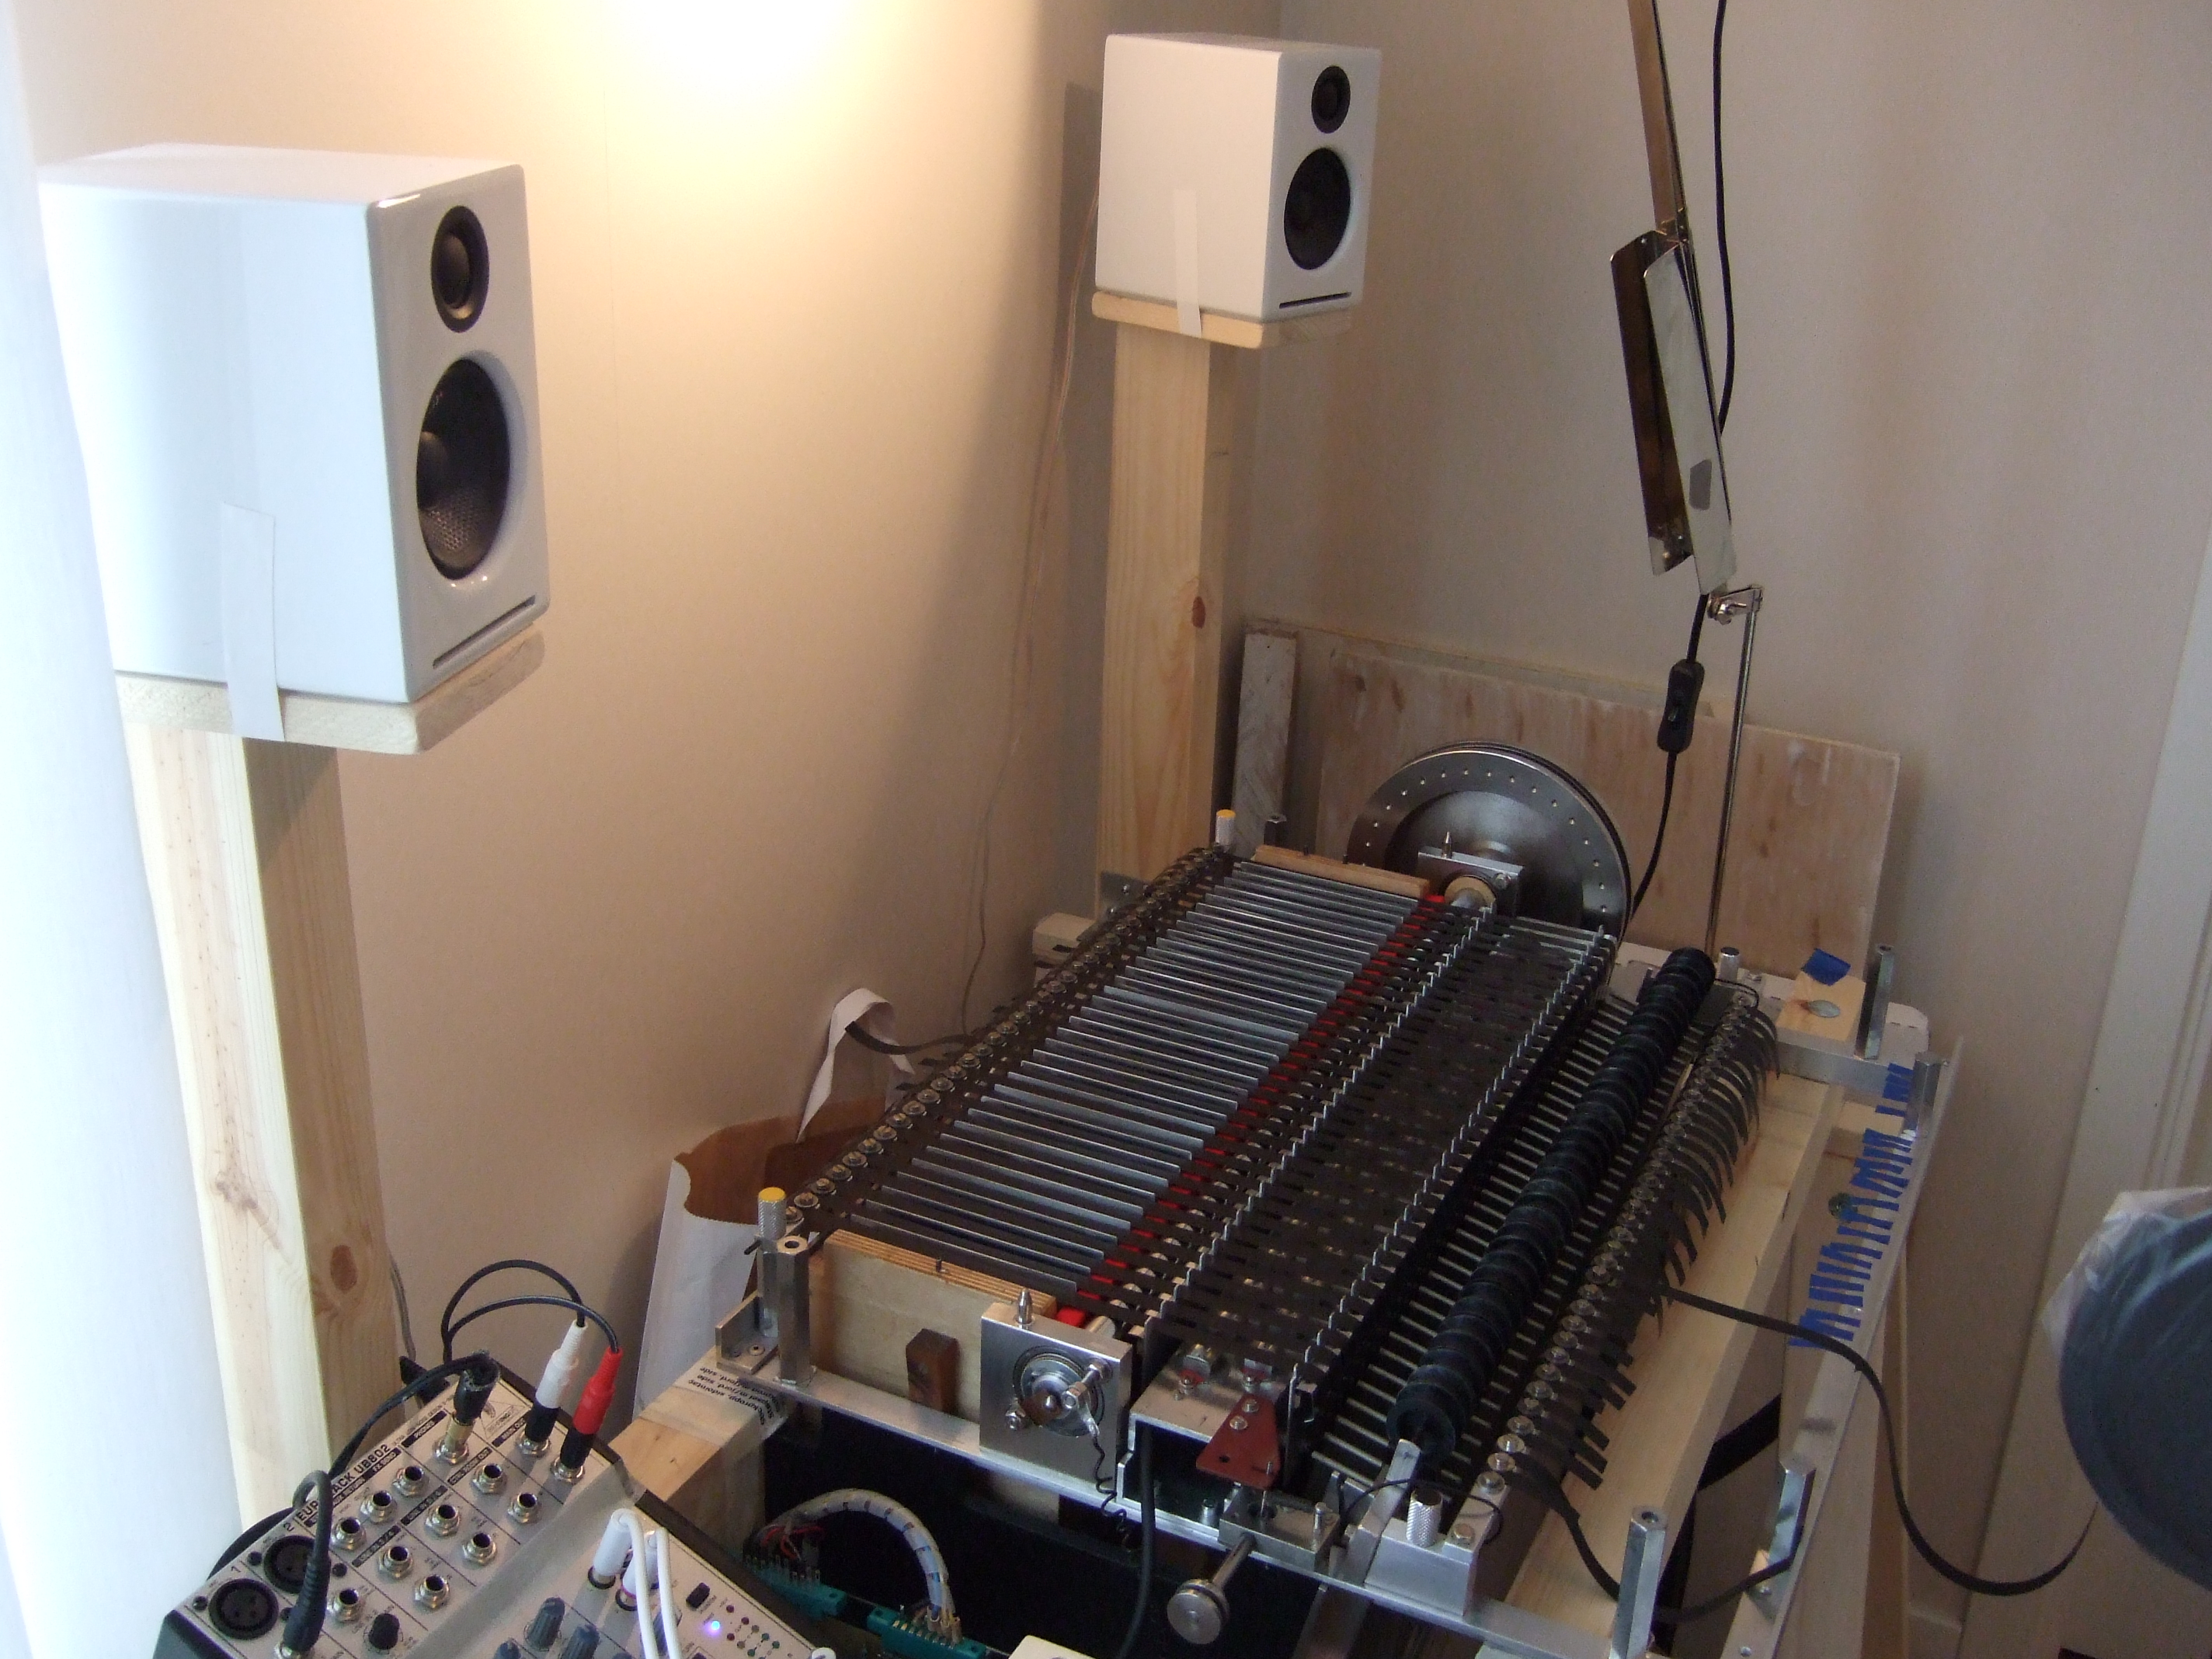 | tapes, rollers, belt, capstan felt, frame springs, pots, some padsprings, sms5 and one replaced head. D';feldt monitors. |
| The slow restoration of #851. | Off to the Mellotron factory.. | 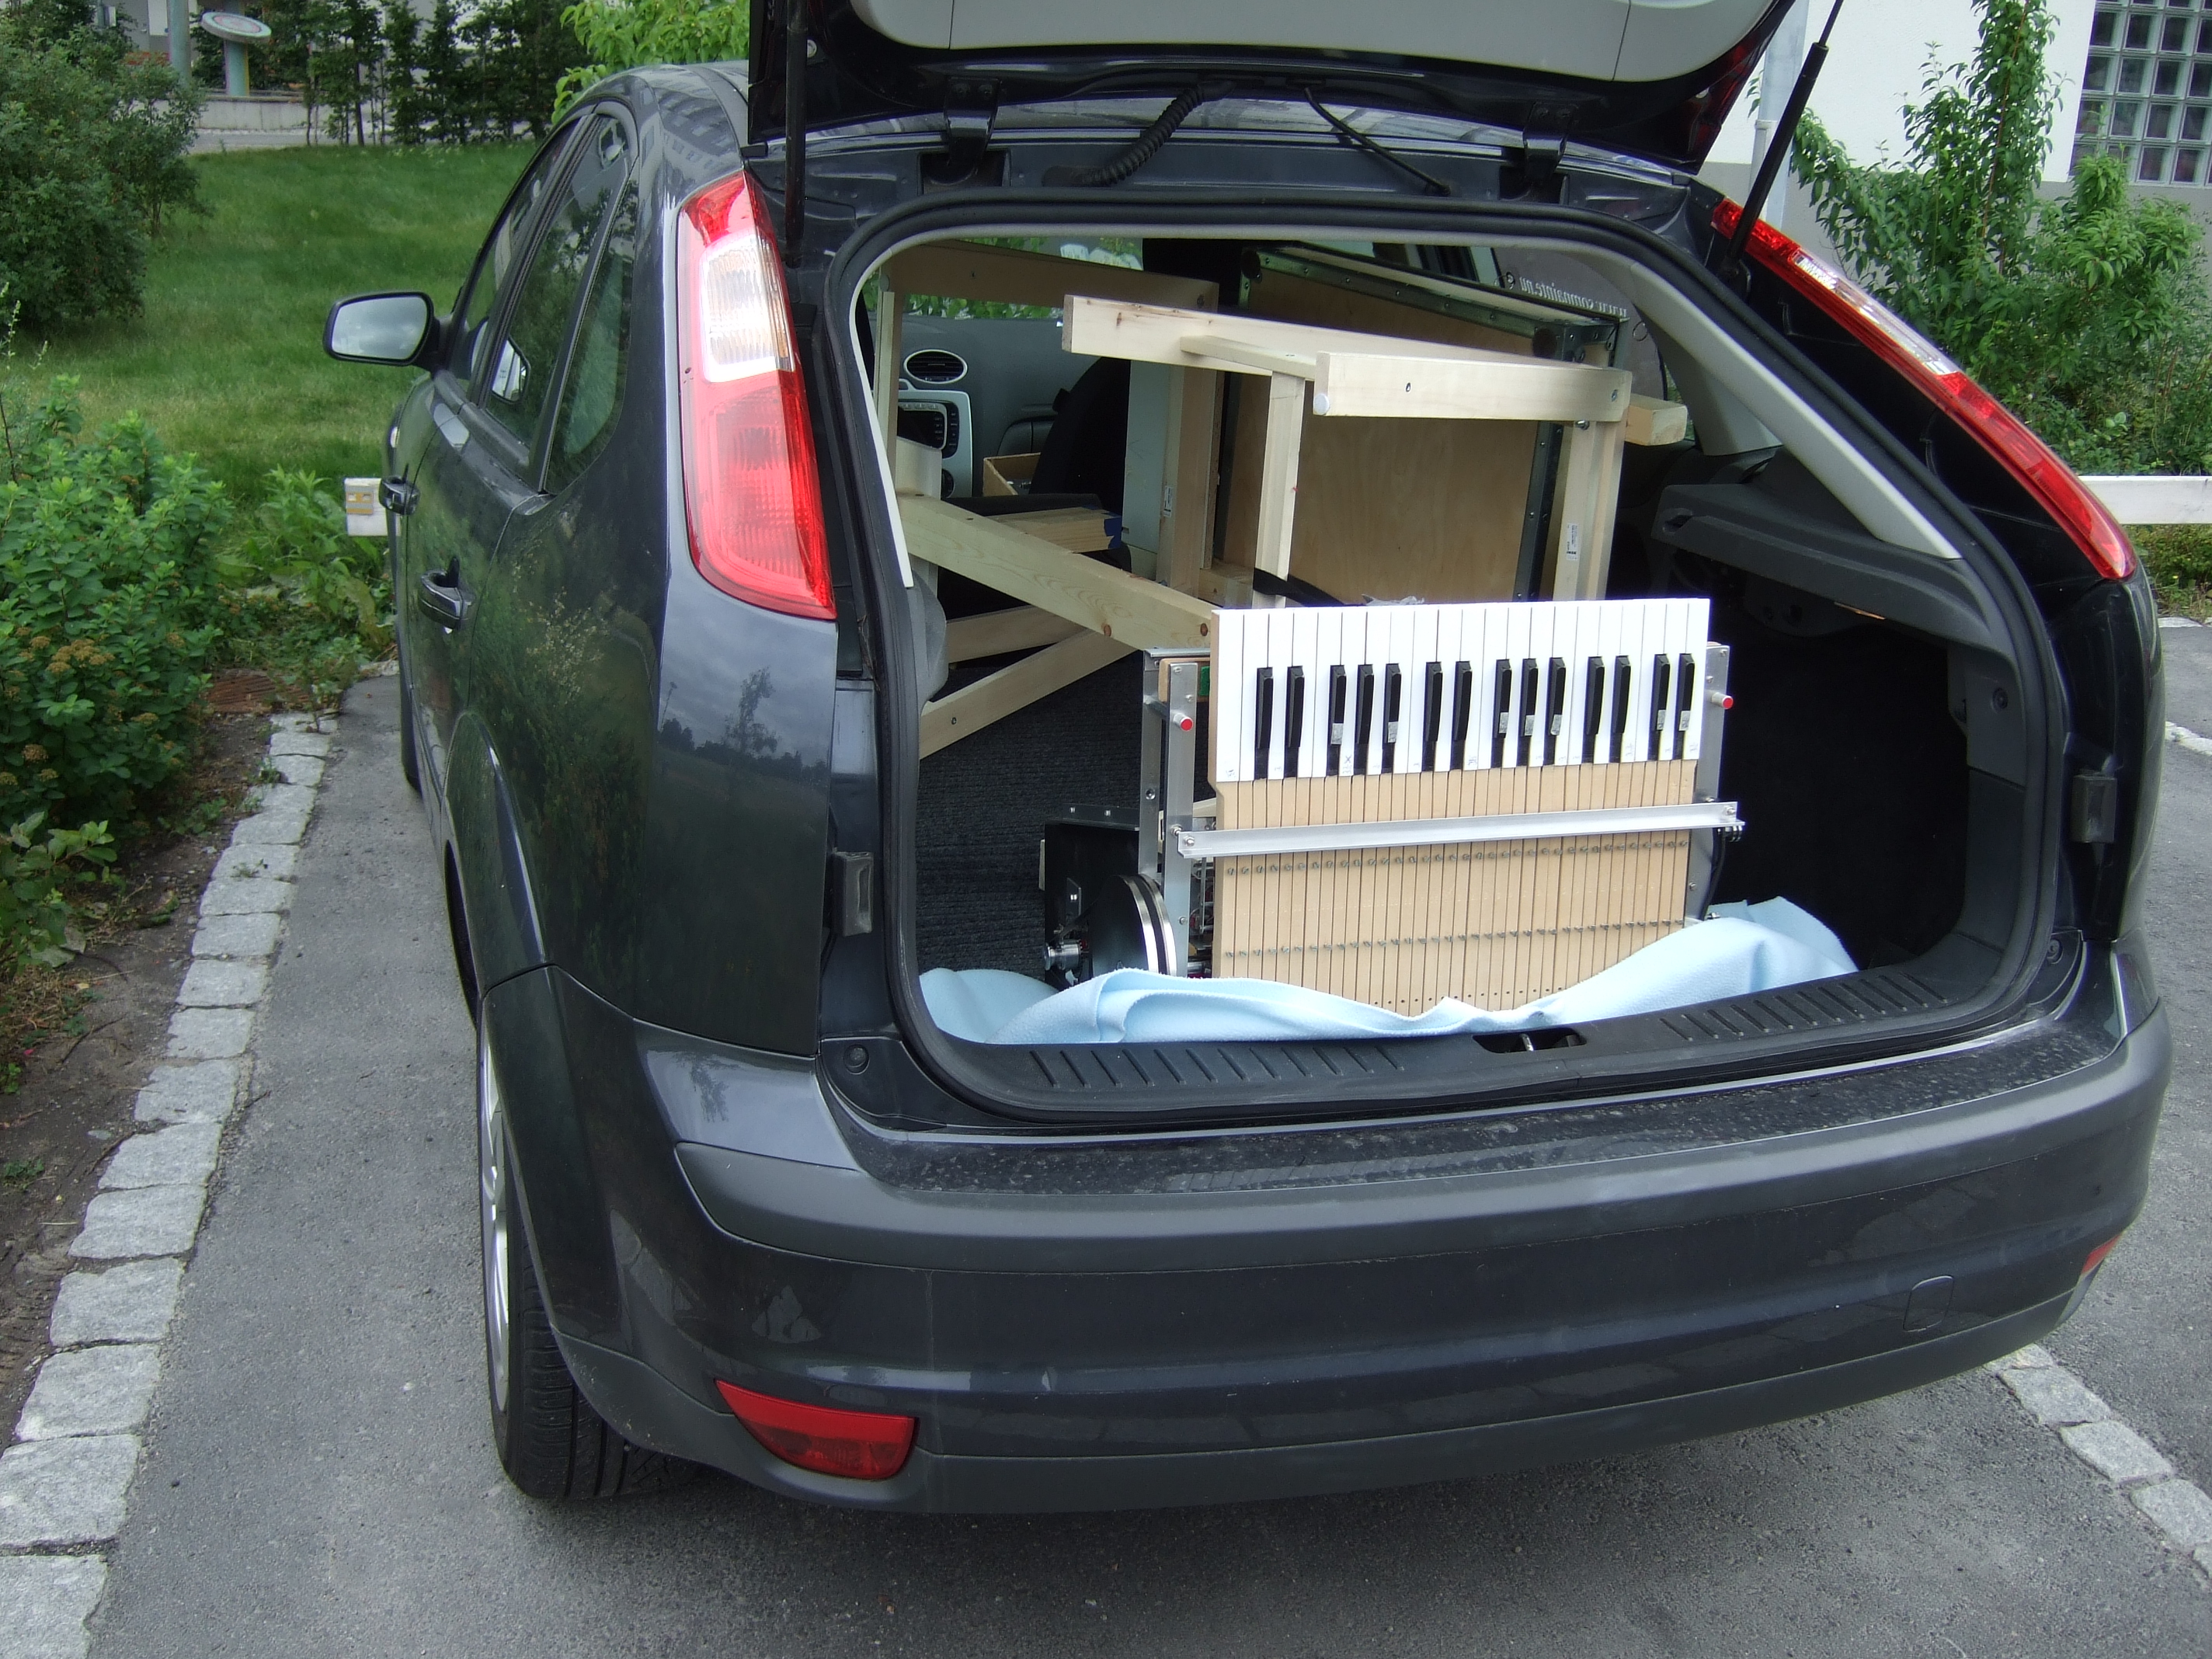 | for azimuthing. |
| The slow restoration of #851. | Ebay photo #2 2008. |  | Warped lid in almost Wurlitzer beige.. |
| The slow restoration of #851. | Adjusting pads for low pressure and.. |  | immediate full sound on all three tracks. Takes forever to adjust.. for me that is. |
| The slow restoration of #851. | New beechwood feet modeled after.. |  | the old twisted and rotten ones. |
| The slow restoration of #851. | painting thumb screws | 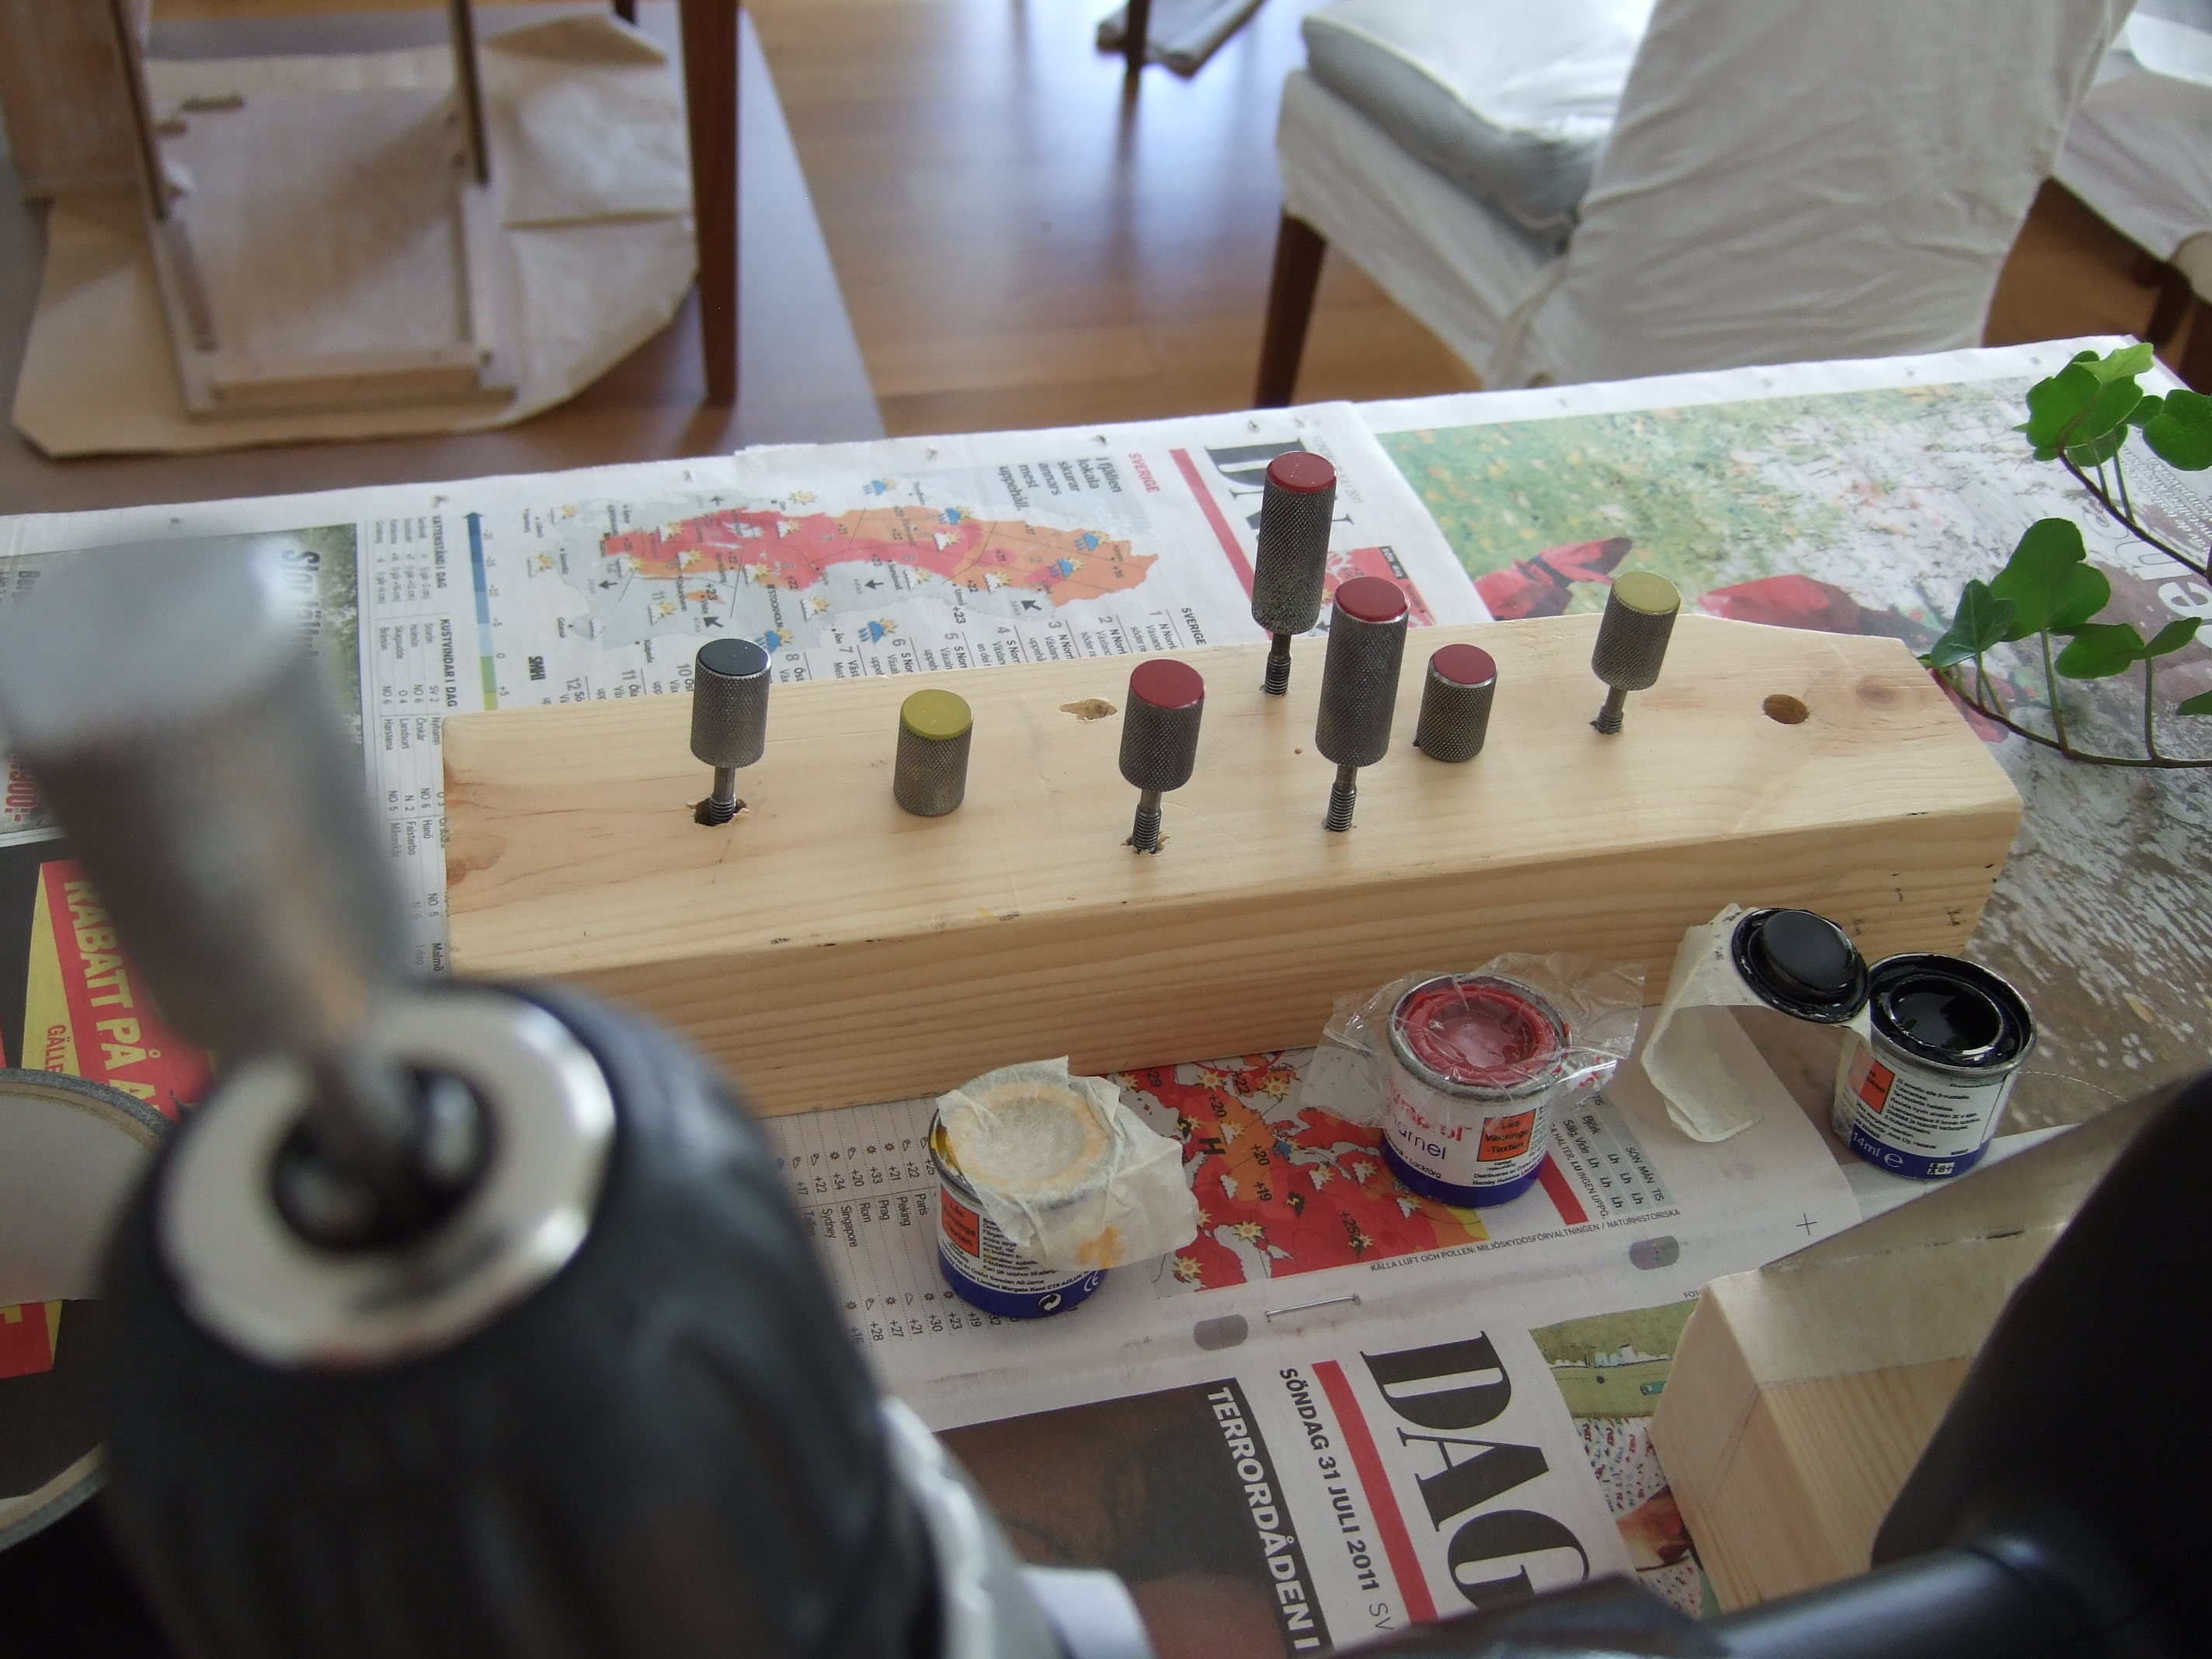 | |
| The slow restoration of #851. | New bottom plate | 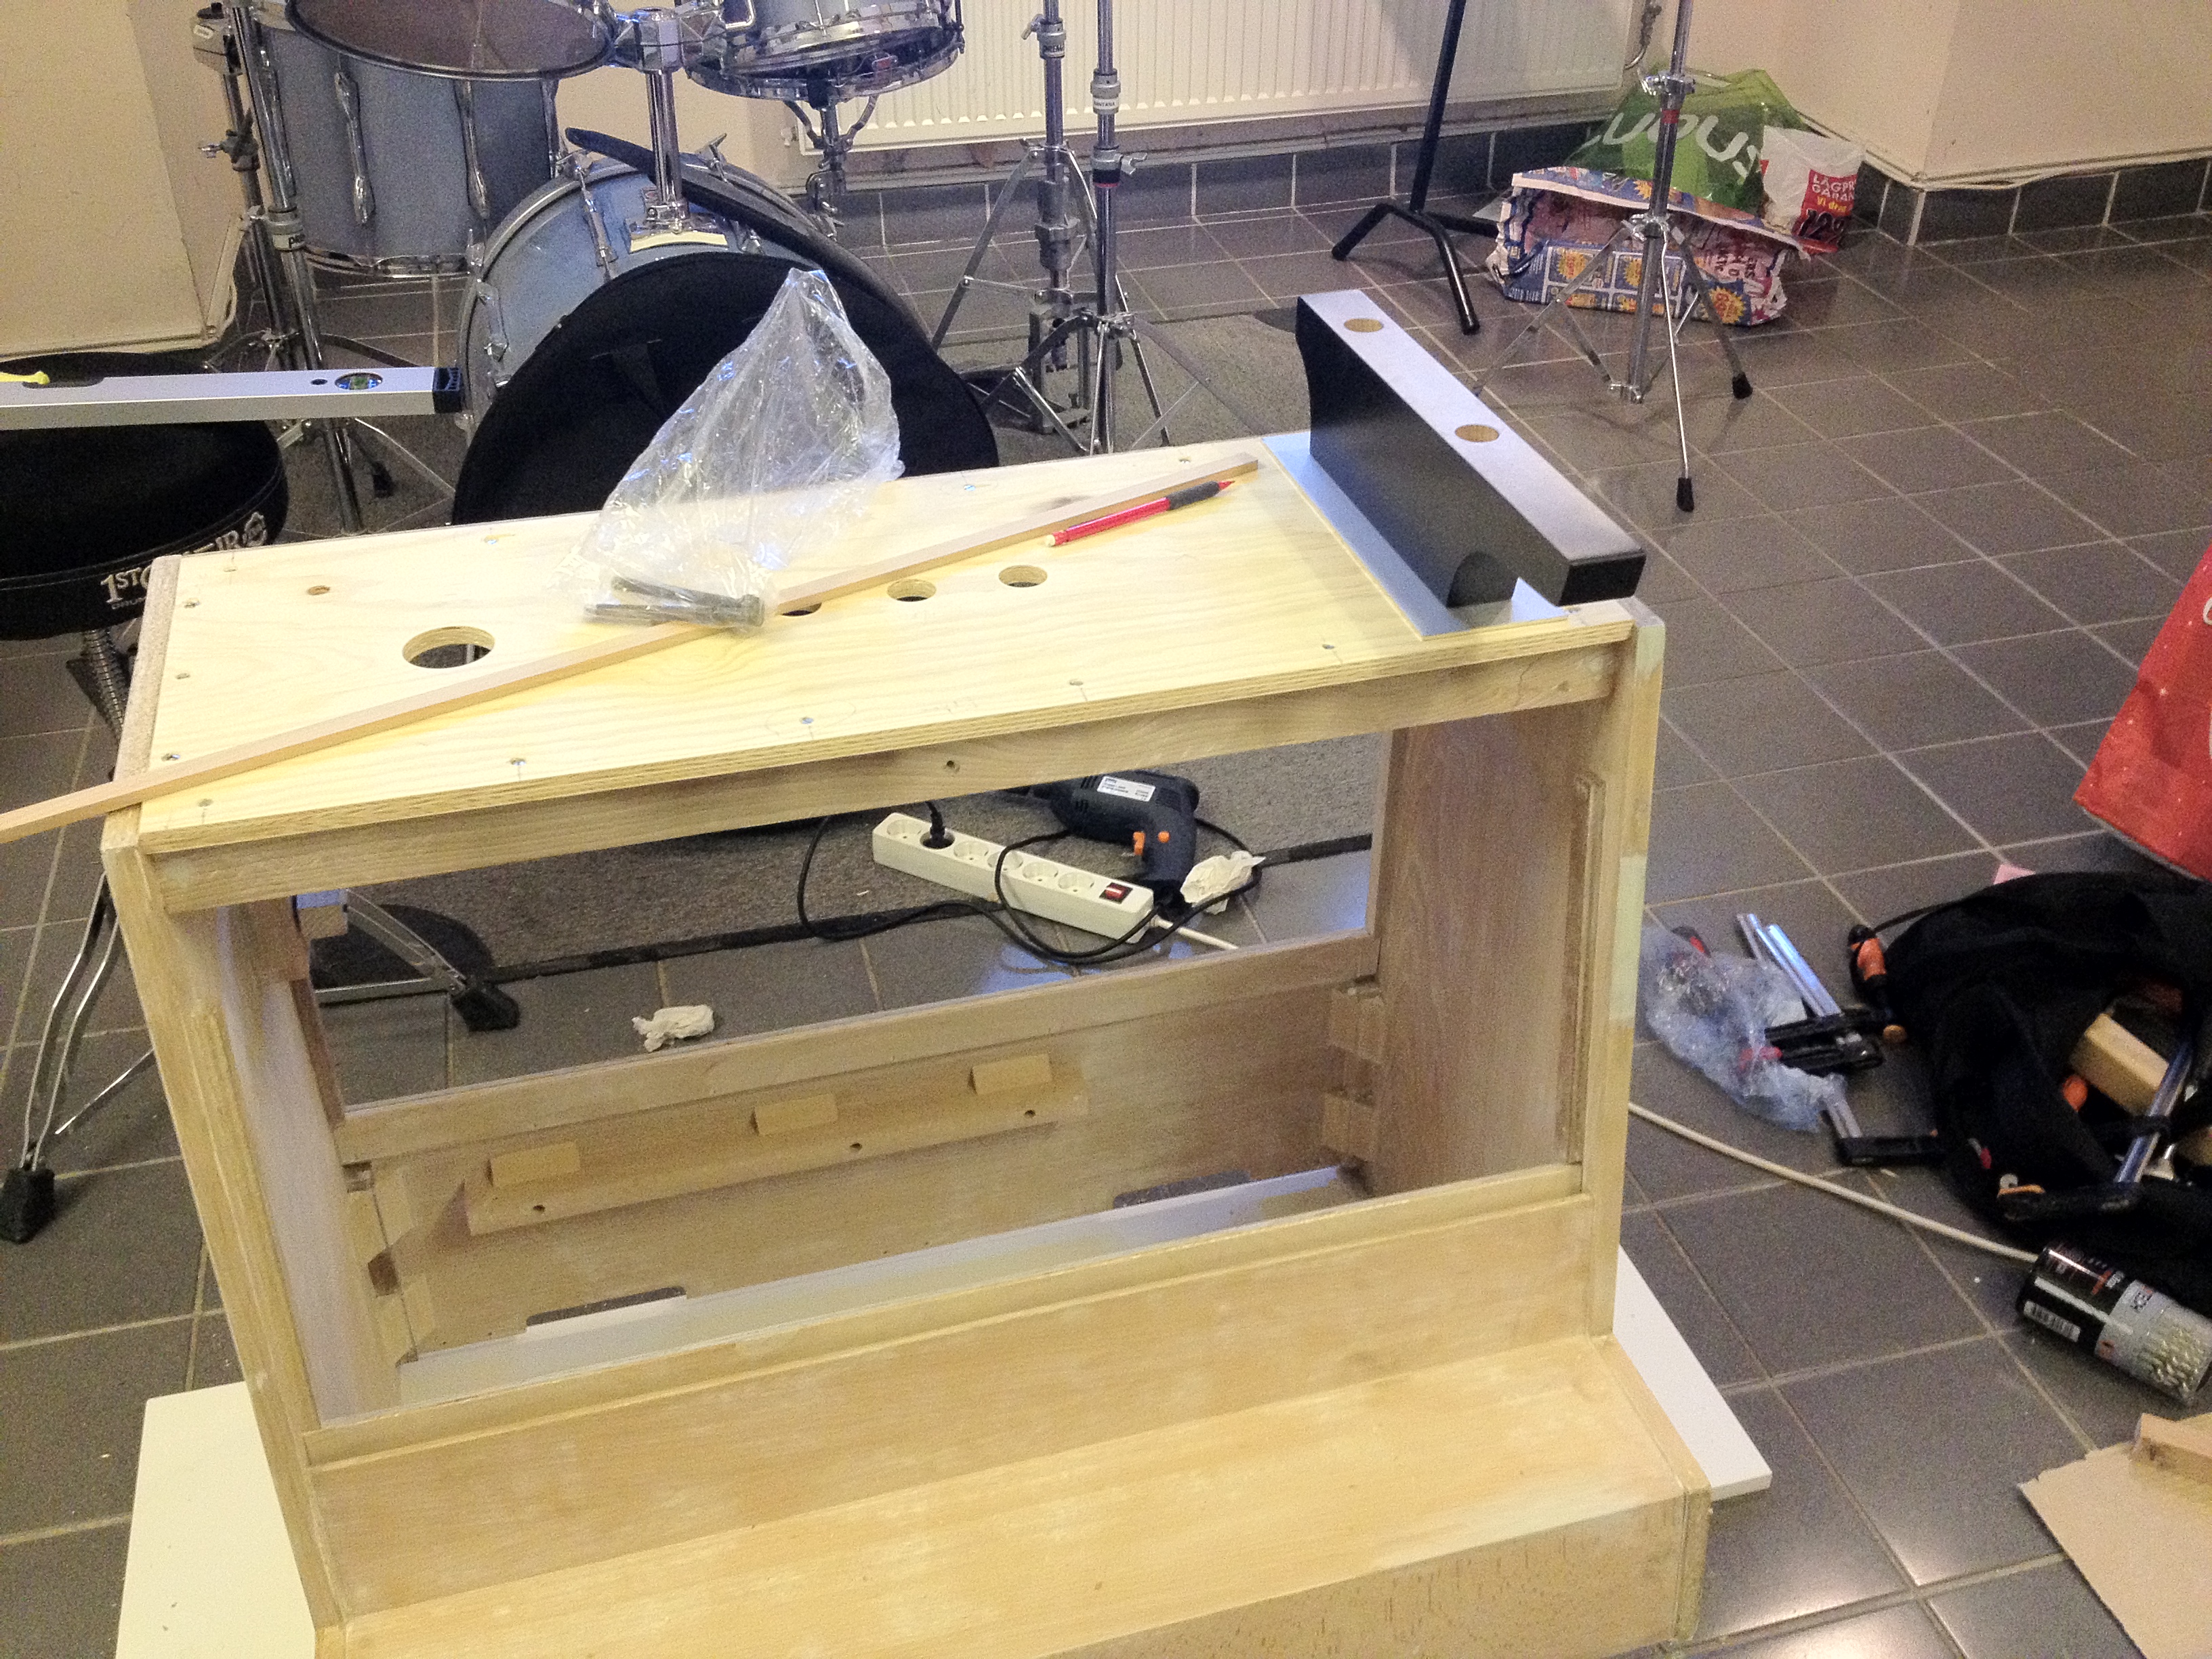 | |
| The slow restoration of #851. | Off to the paint shop! | 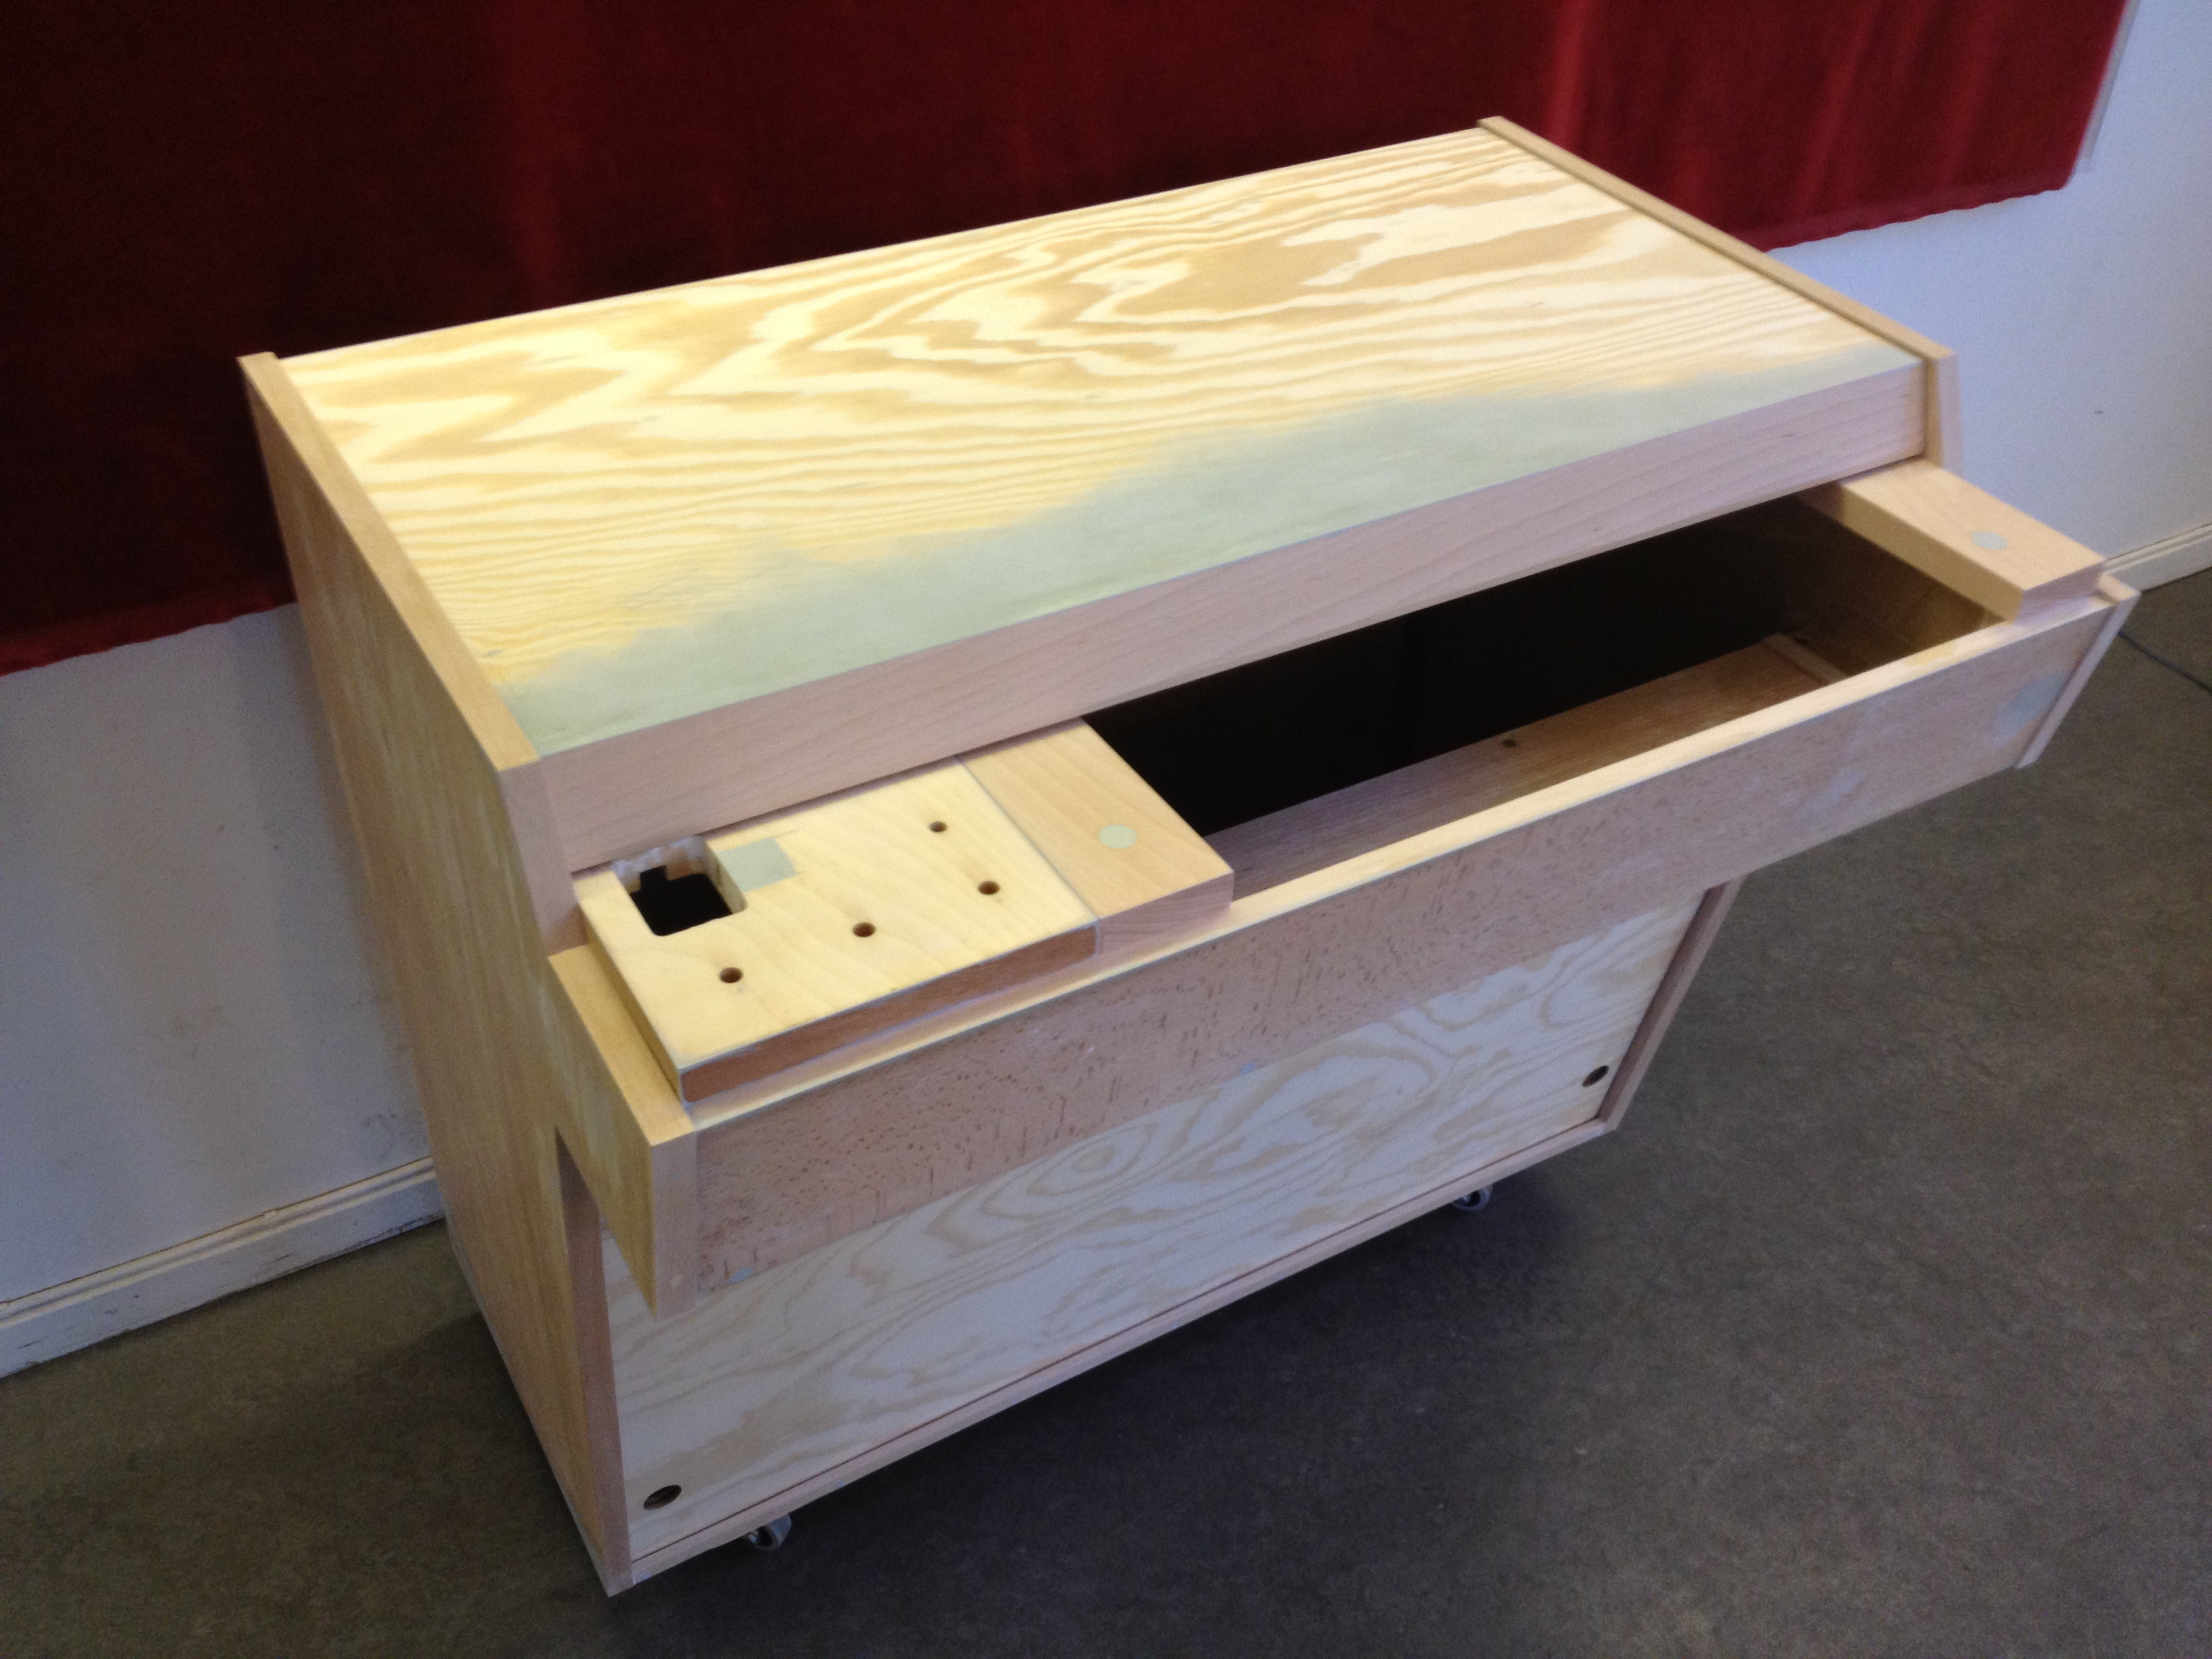 | "Nights in white lacquer, restoration reaching the end.." Sorry for that.. It has been a tough lesson in warping, weather sensitive woods. I'm real nervous about the paint guys screwing it up. |
| The slow restoration of #851. | At last.. | 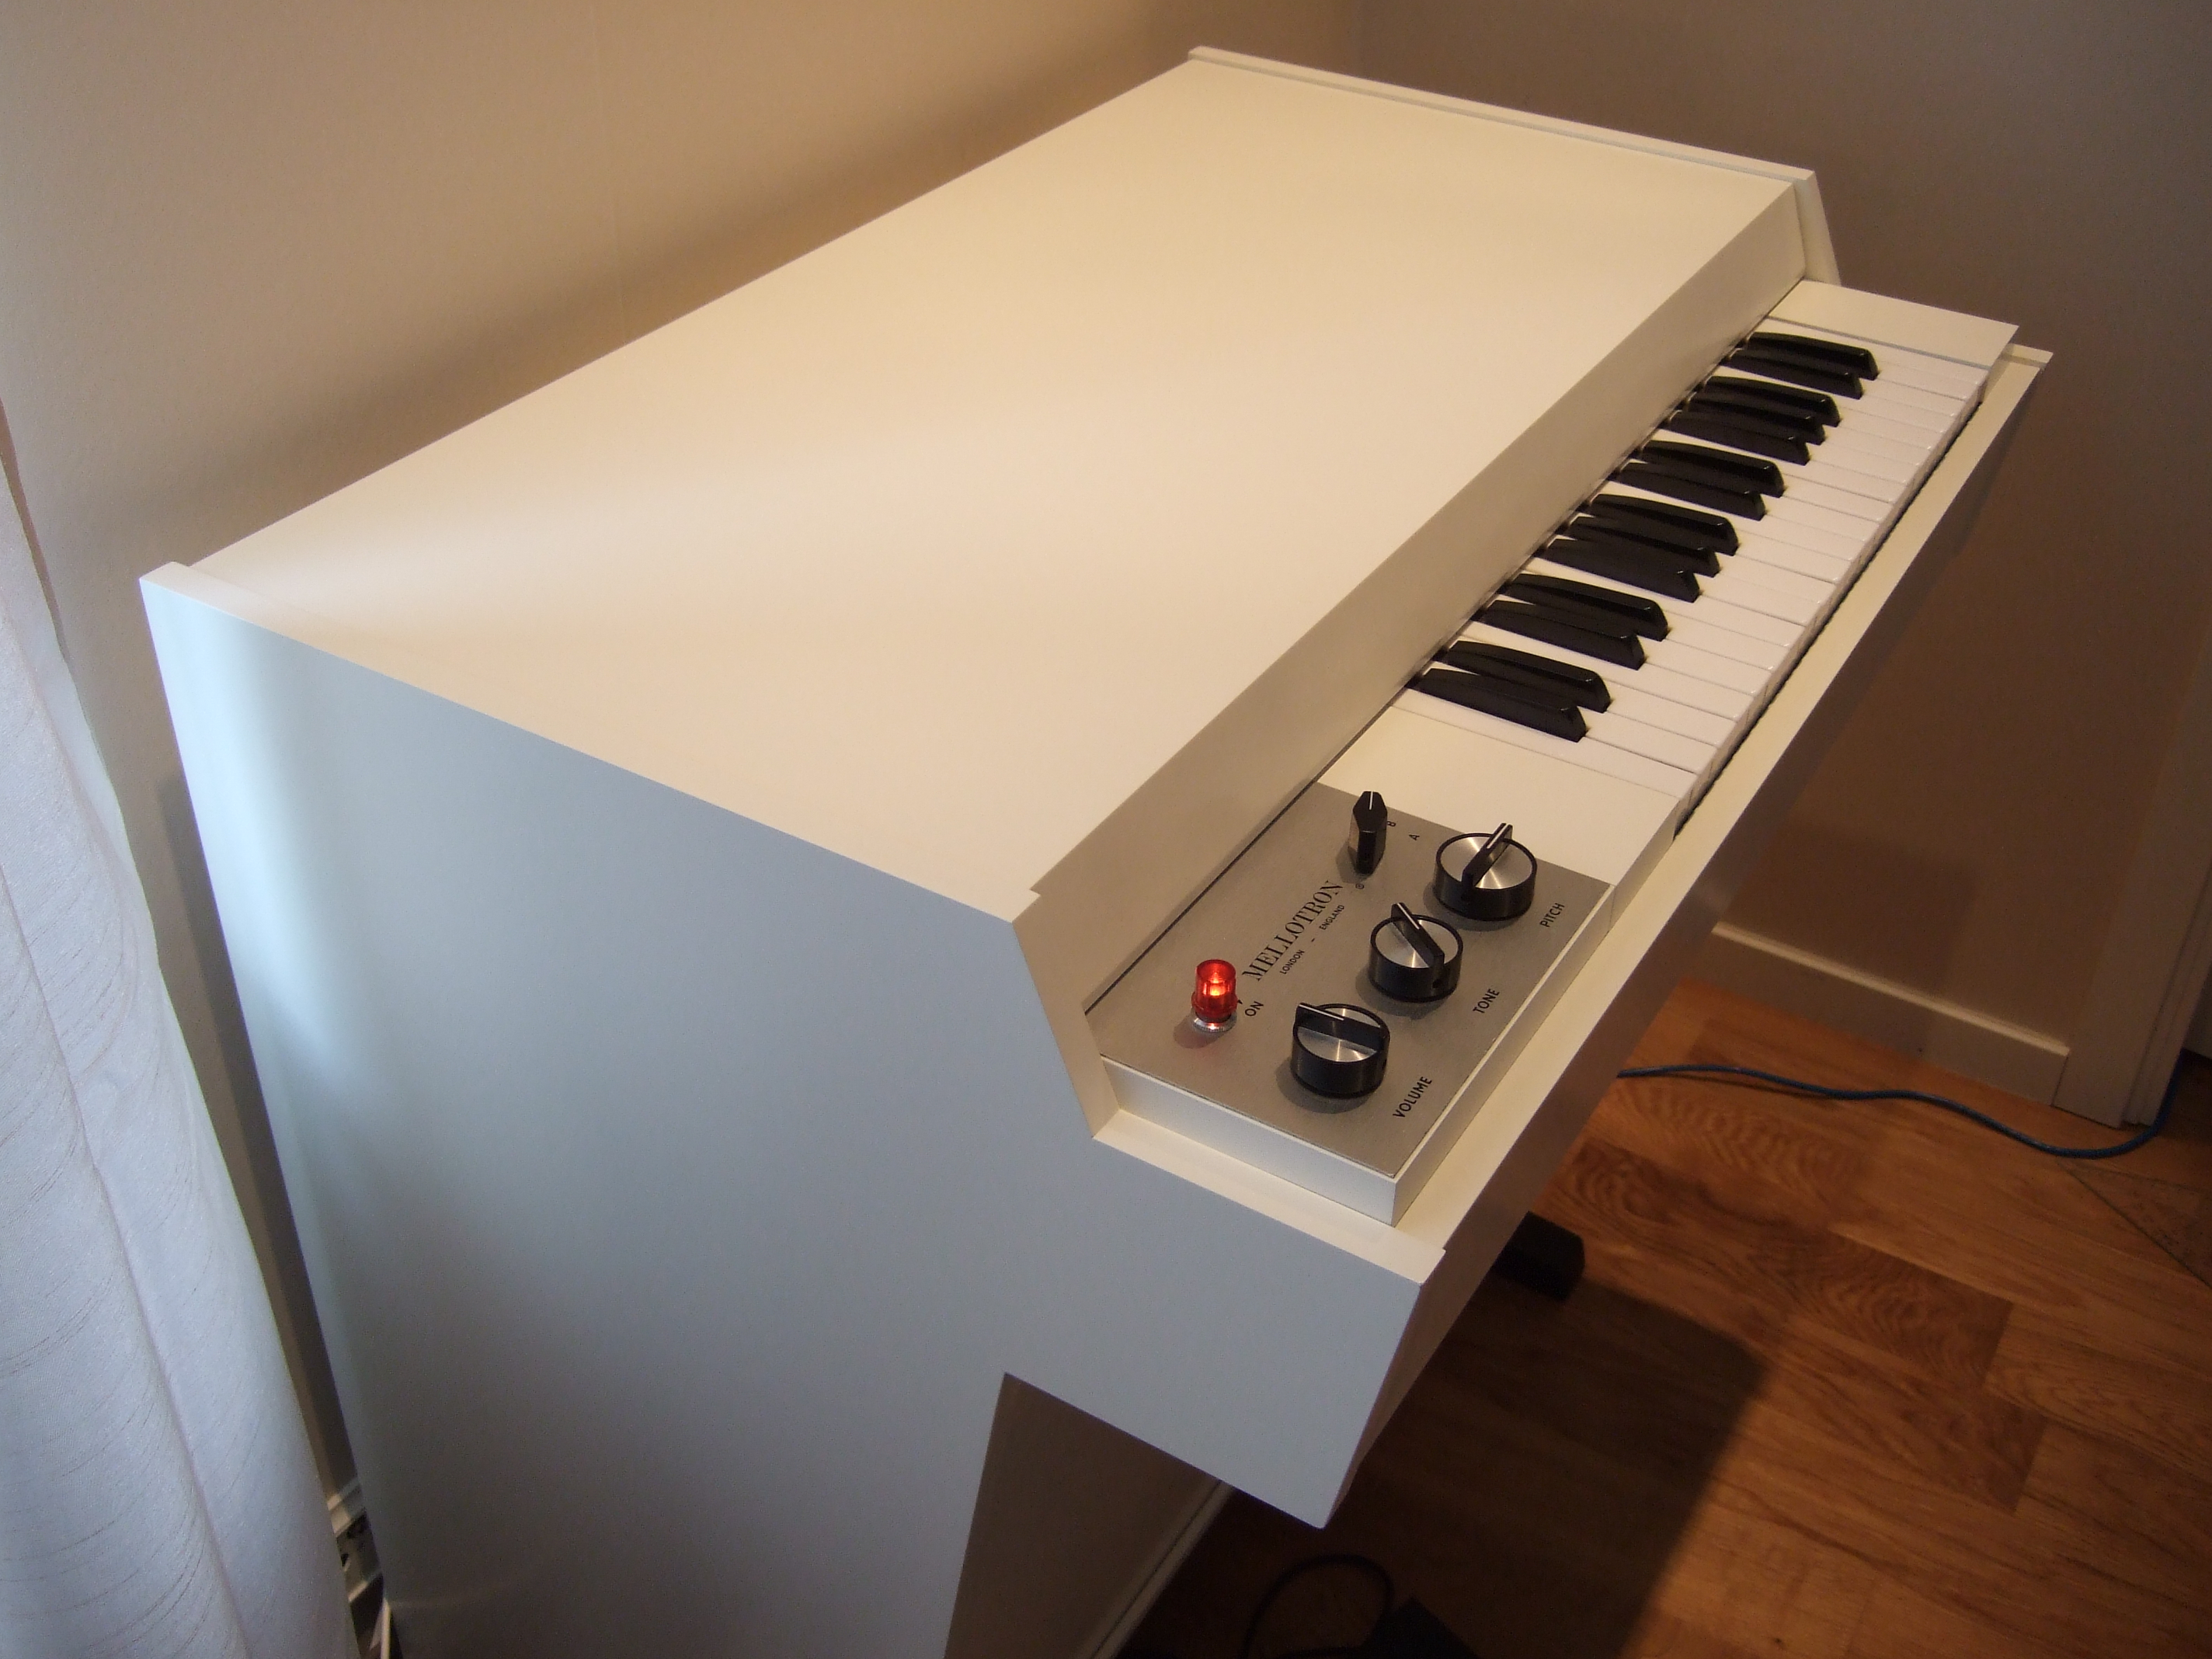 | Thanks Markus R, Frank S, Jerry K and Martin S for support, parts and inspiration. |
| The slow restoration of #851. | ..in MkVI white | 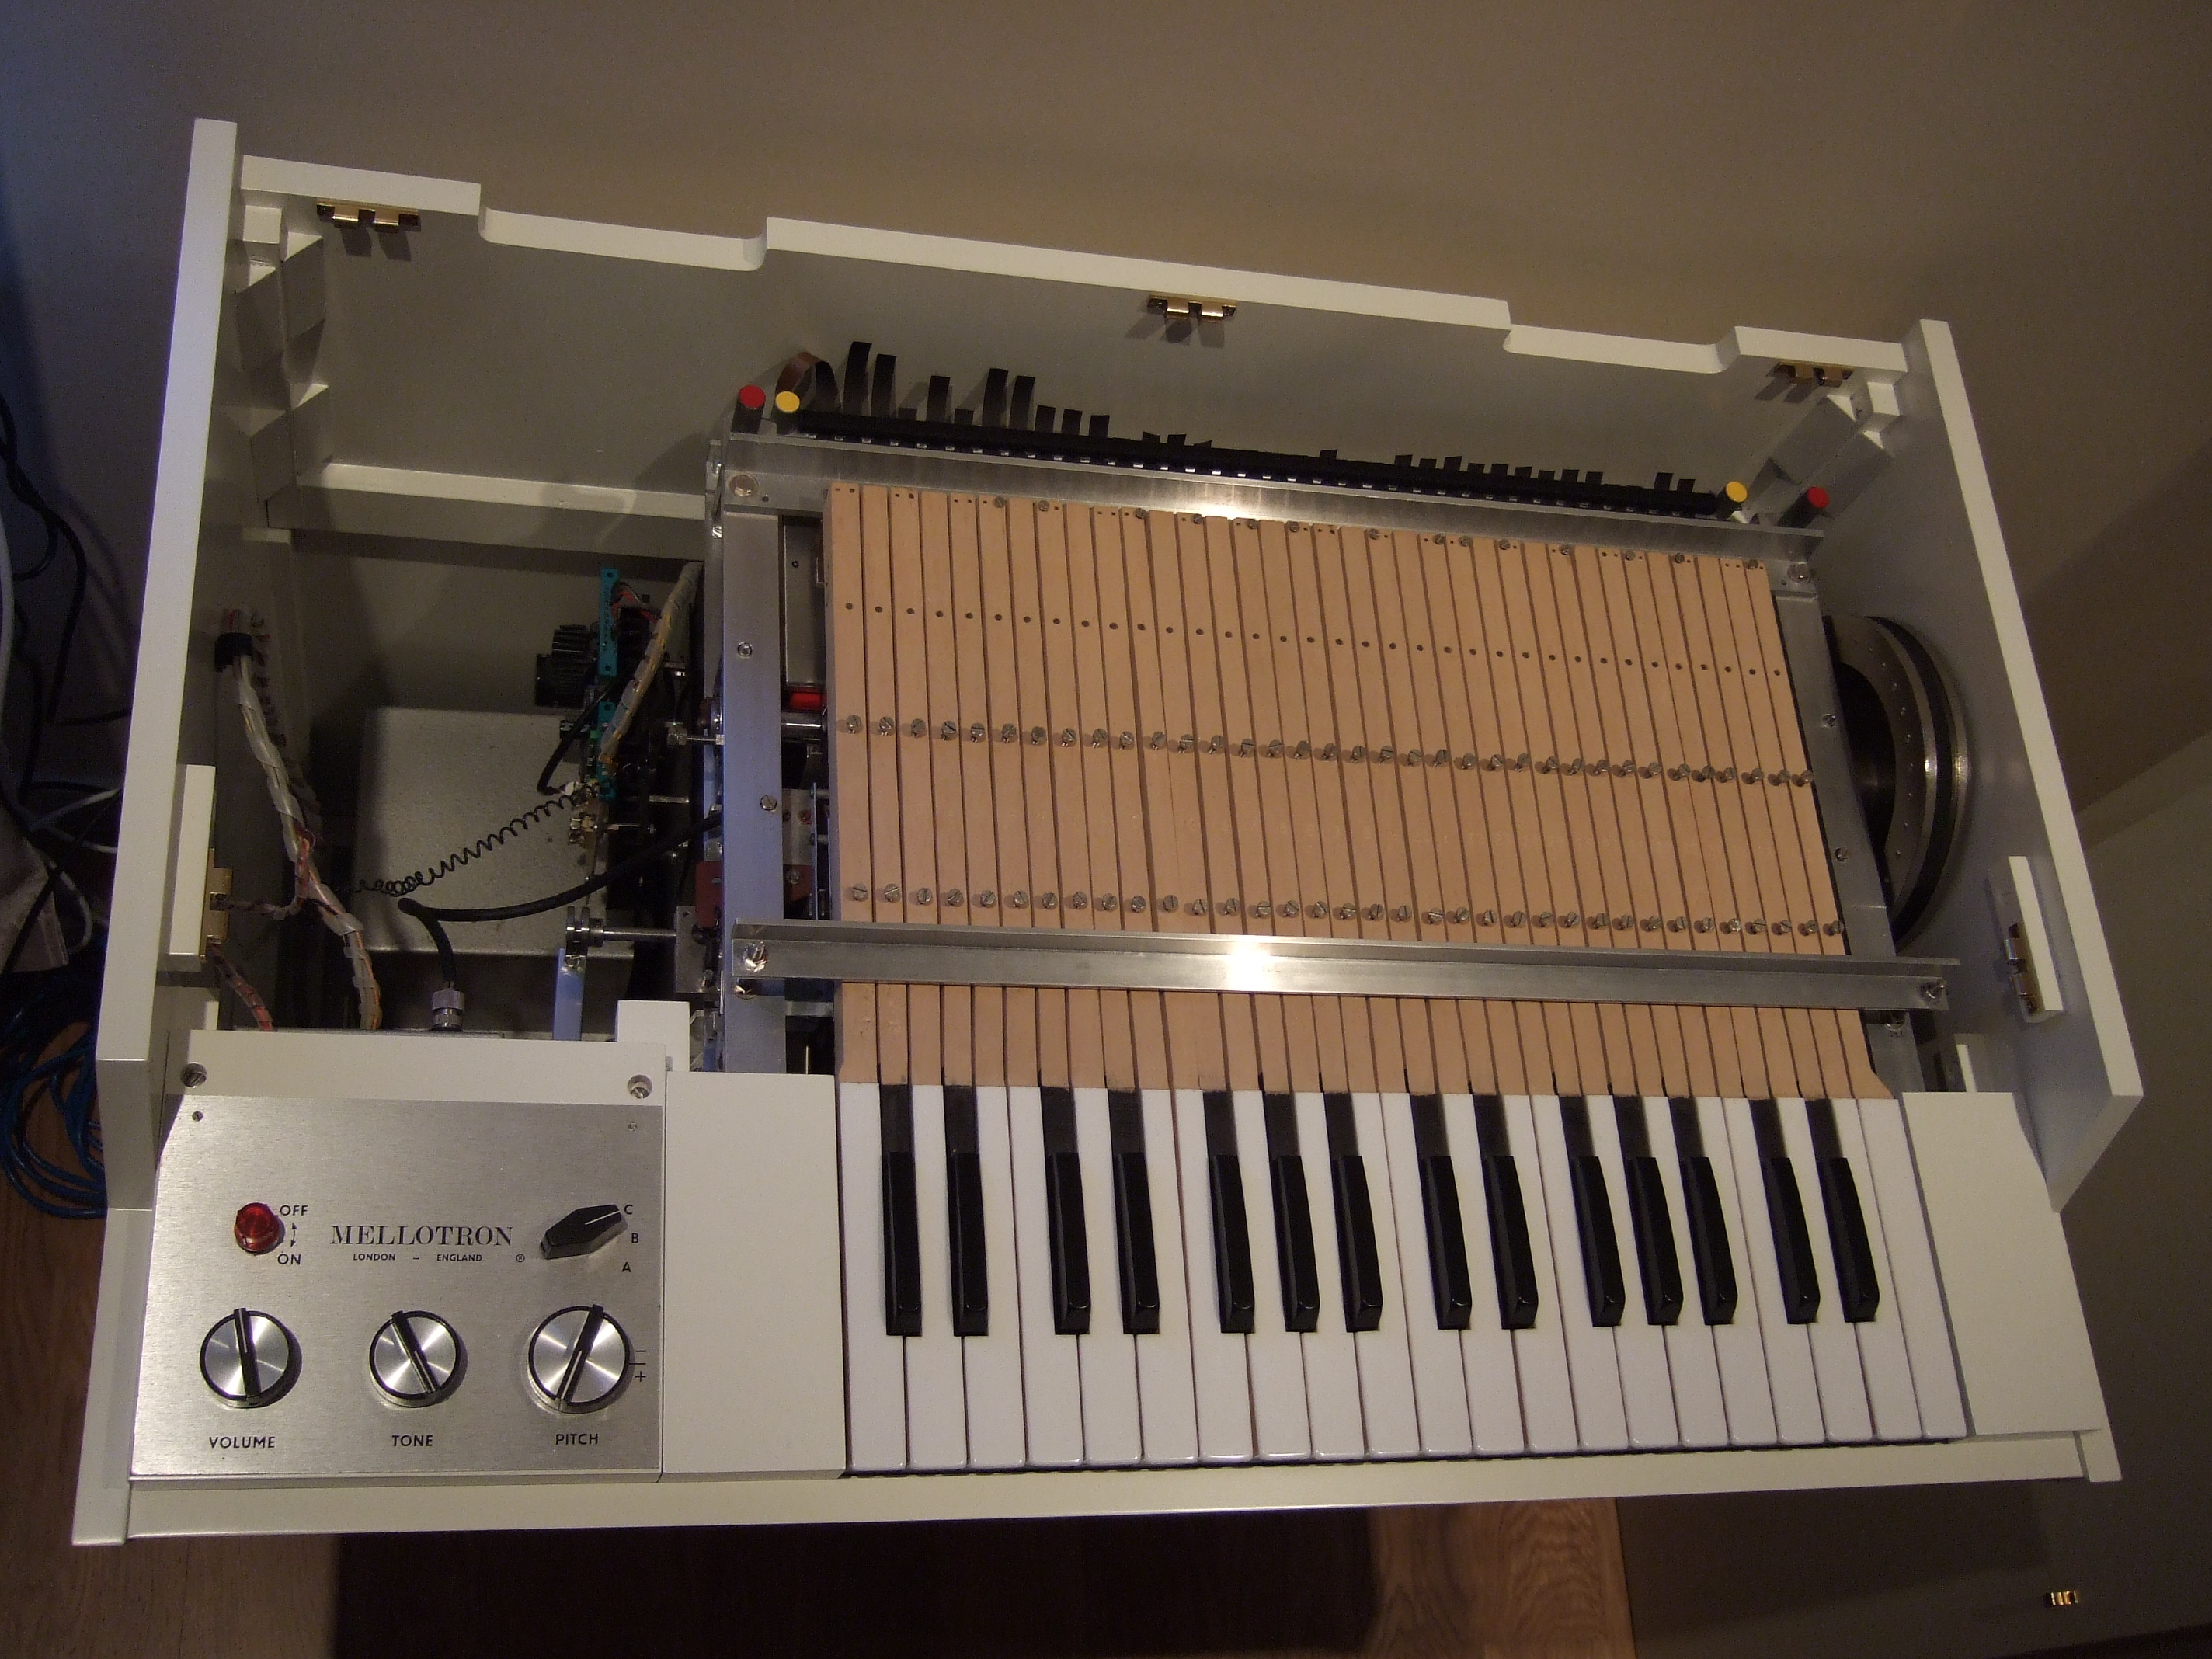 | |
| The slow restoration of #851. | Awesome paint job |  | |
| The slow restoration of #851. | teflon add-on rollers |  | This is how I tackled the horrible turnbuckle/tape-return housing friction. I wanted MkII-type rollers in my frames but settled for these home made rollers instead. I have it on my five frames and it has worked flawlessly for two years now. |
| The slow restoration of #851. | new stainless steel profile |  | I made some new stainless profiles for experiments with new angles to reduce friction. Didn't want to ruin the old one.. It's much better now but I'm still tweaking.. |
| The slow restoration of #851. | Legs for frames | 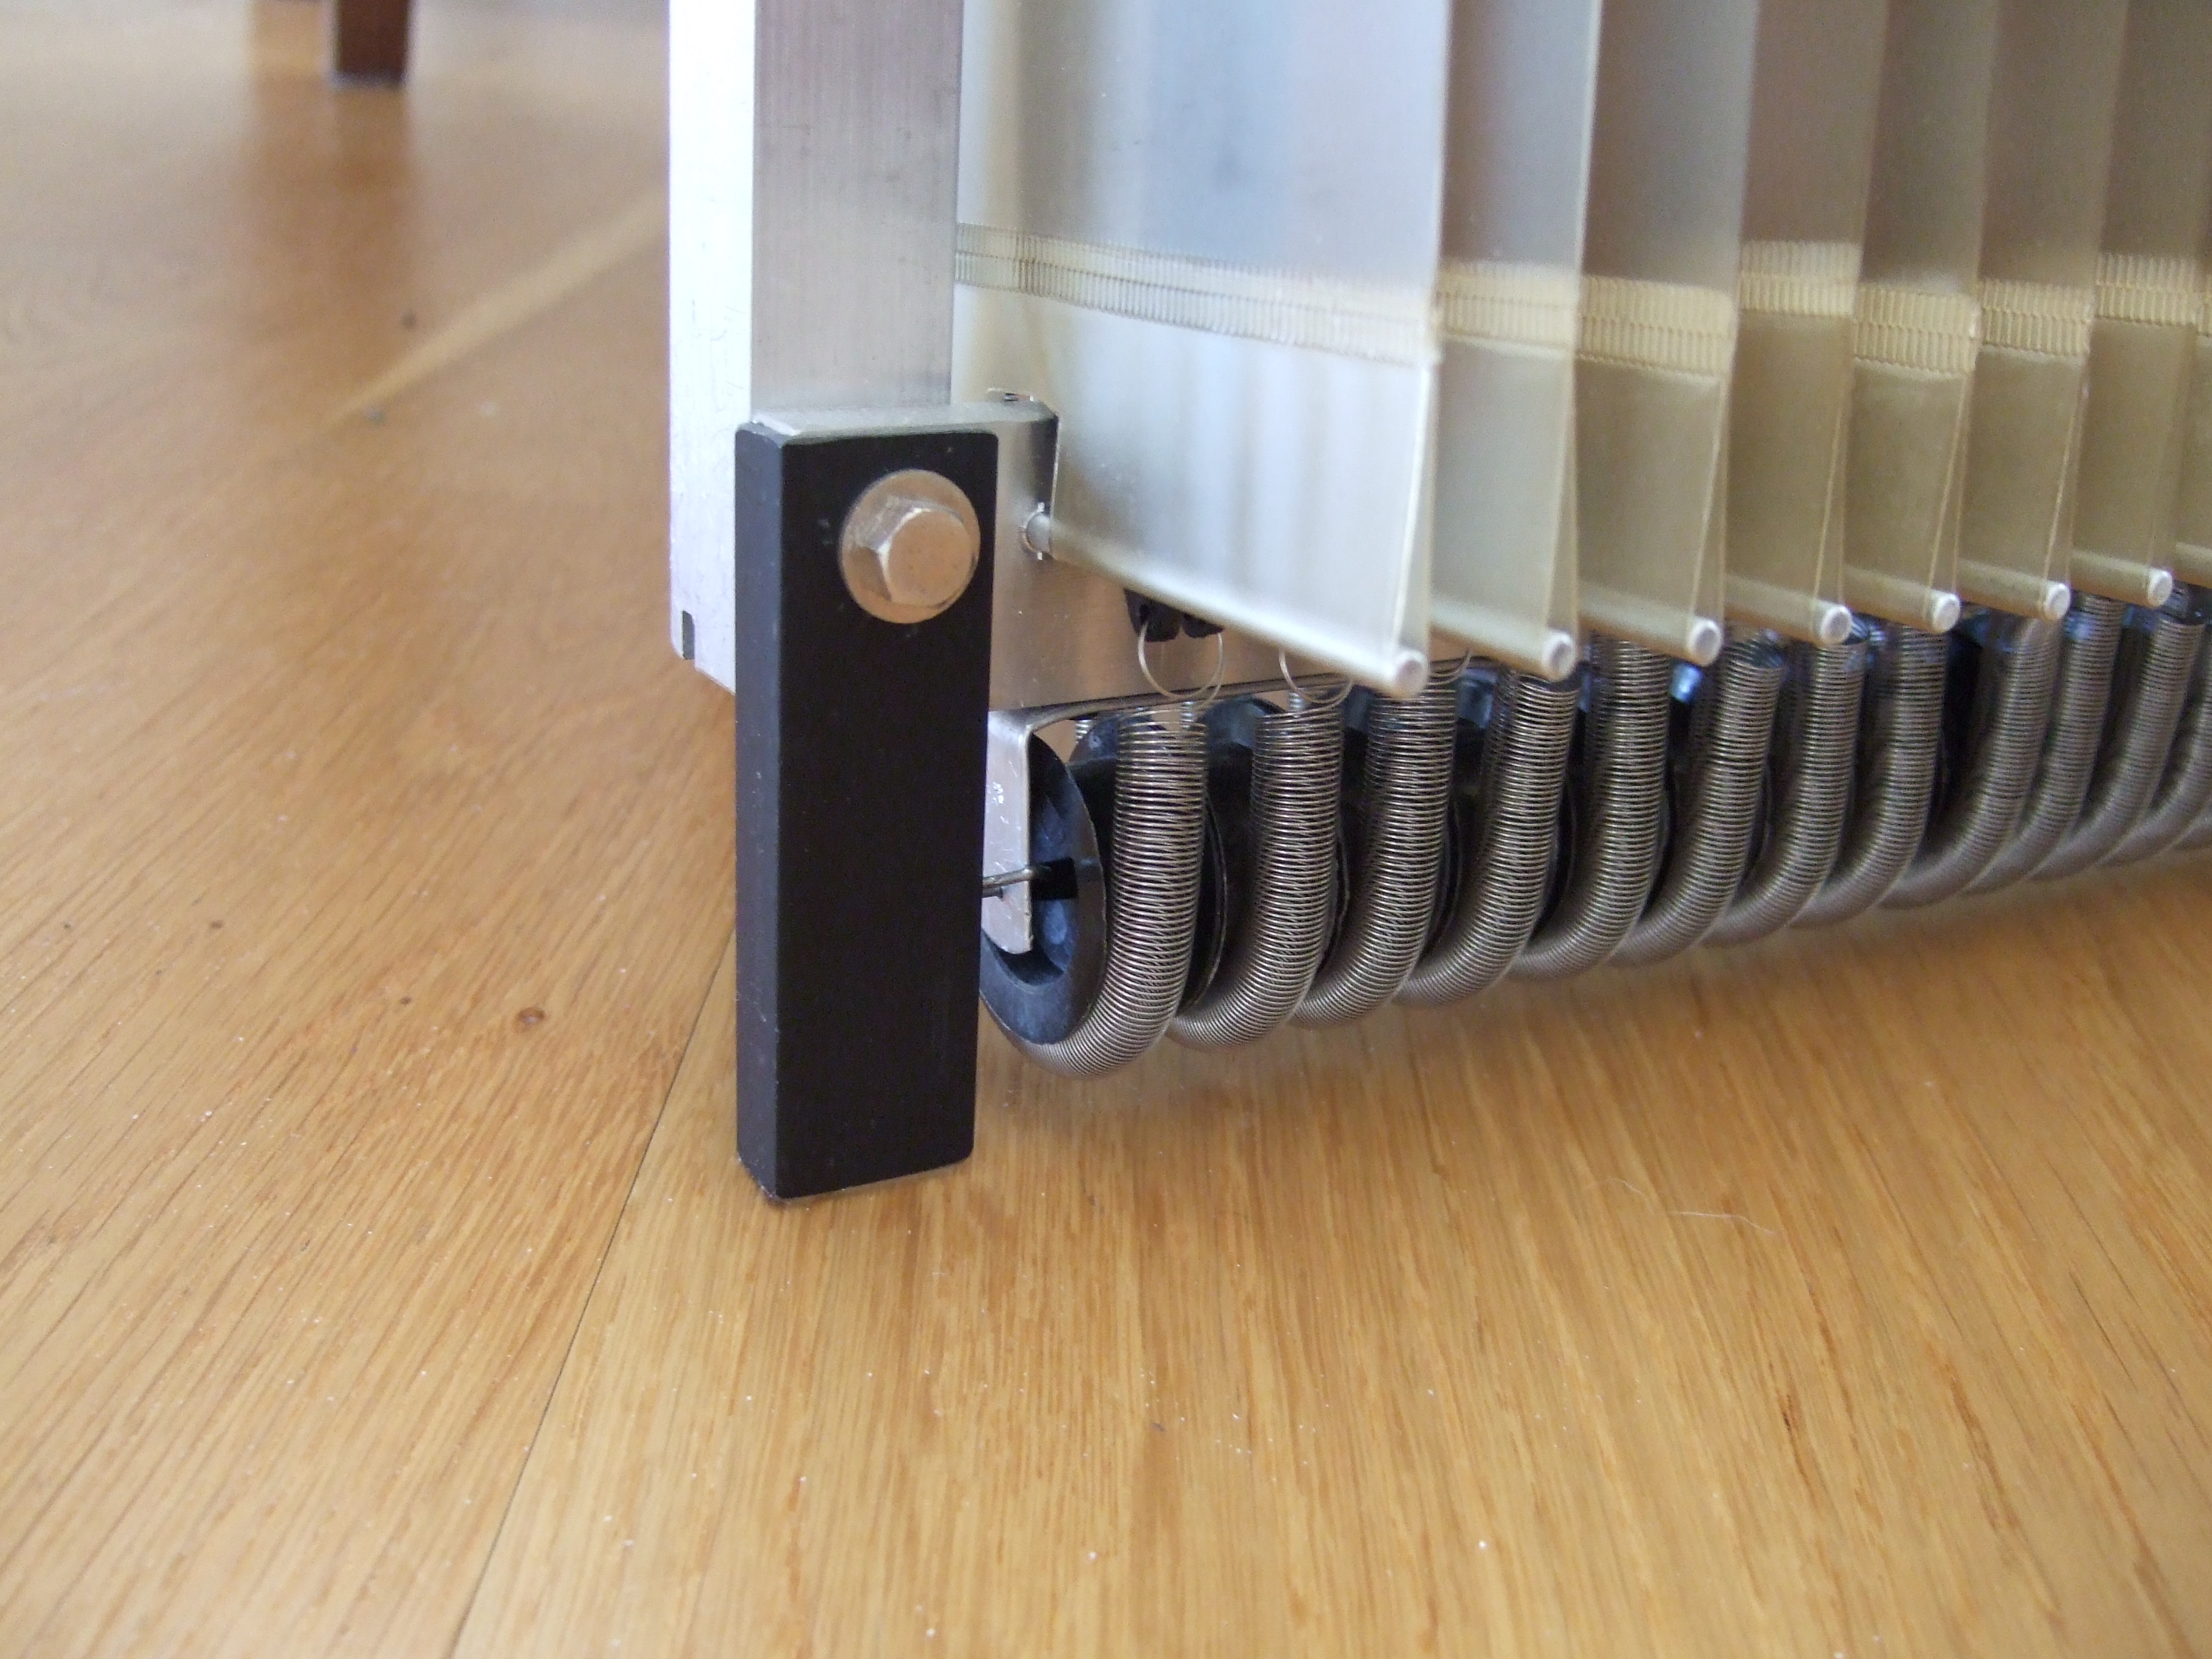 | I don't like the idea to rest the frames on new and expensive springs so I made these add-on legs. Simple and functional. |
| The slow restoration of #851. | Added support blocks | 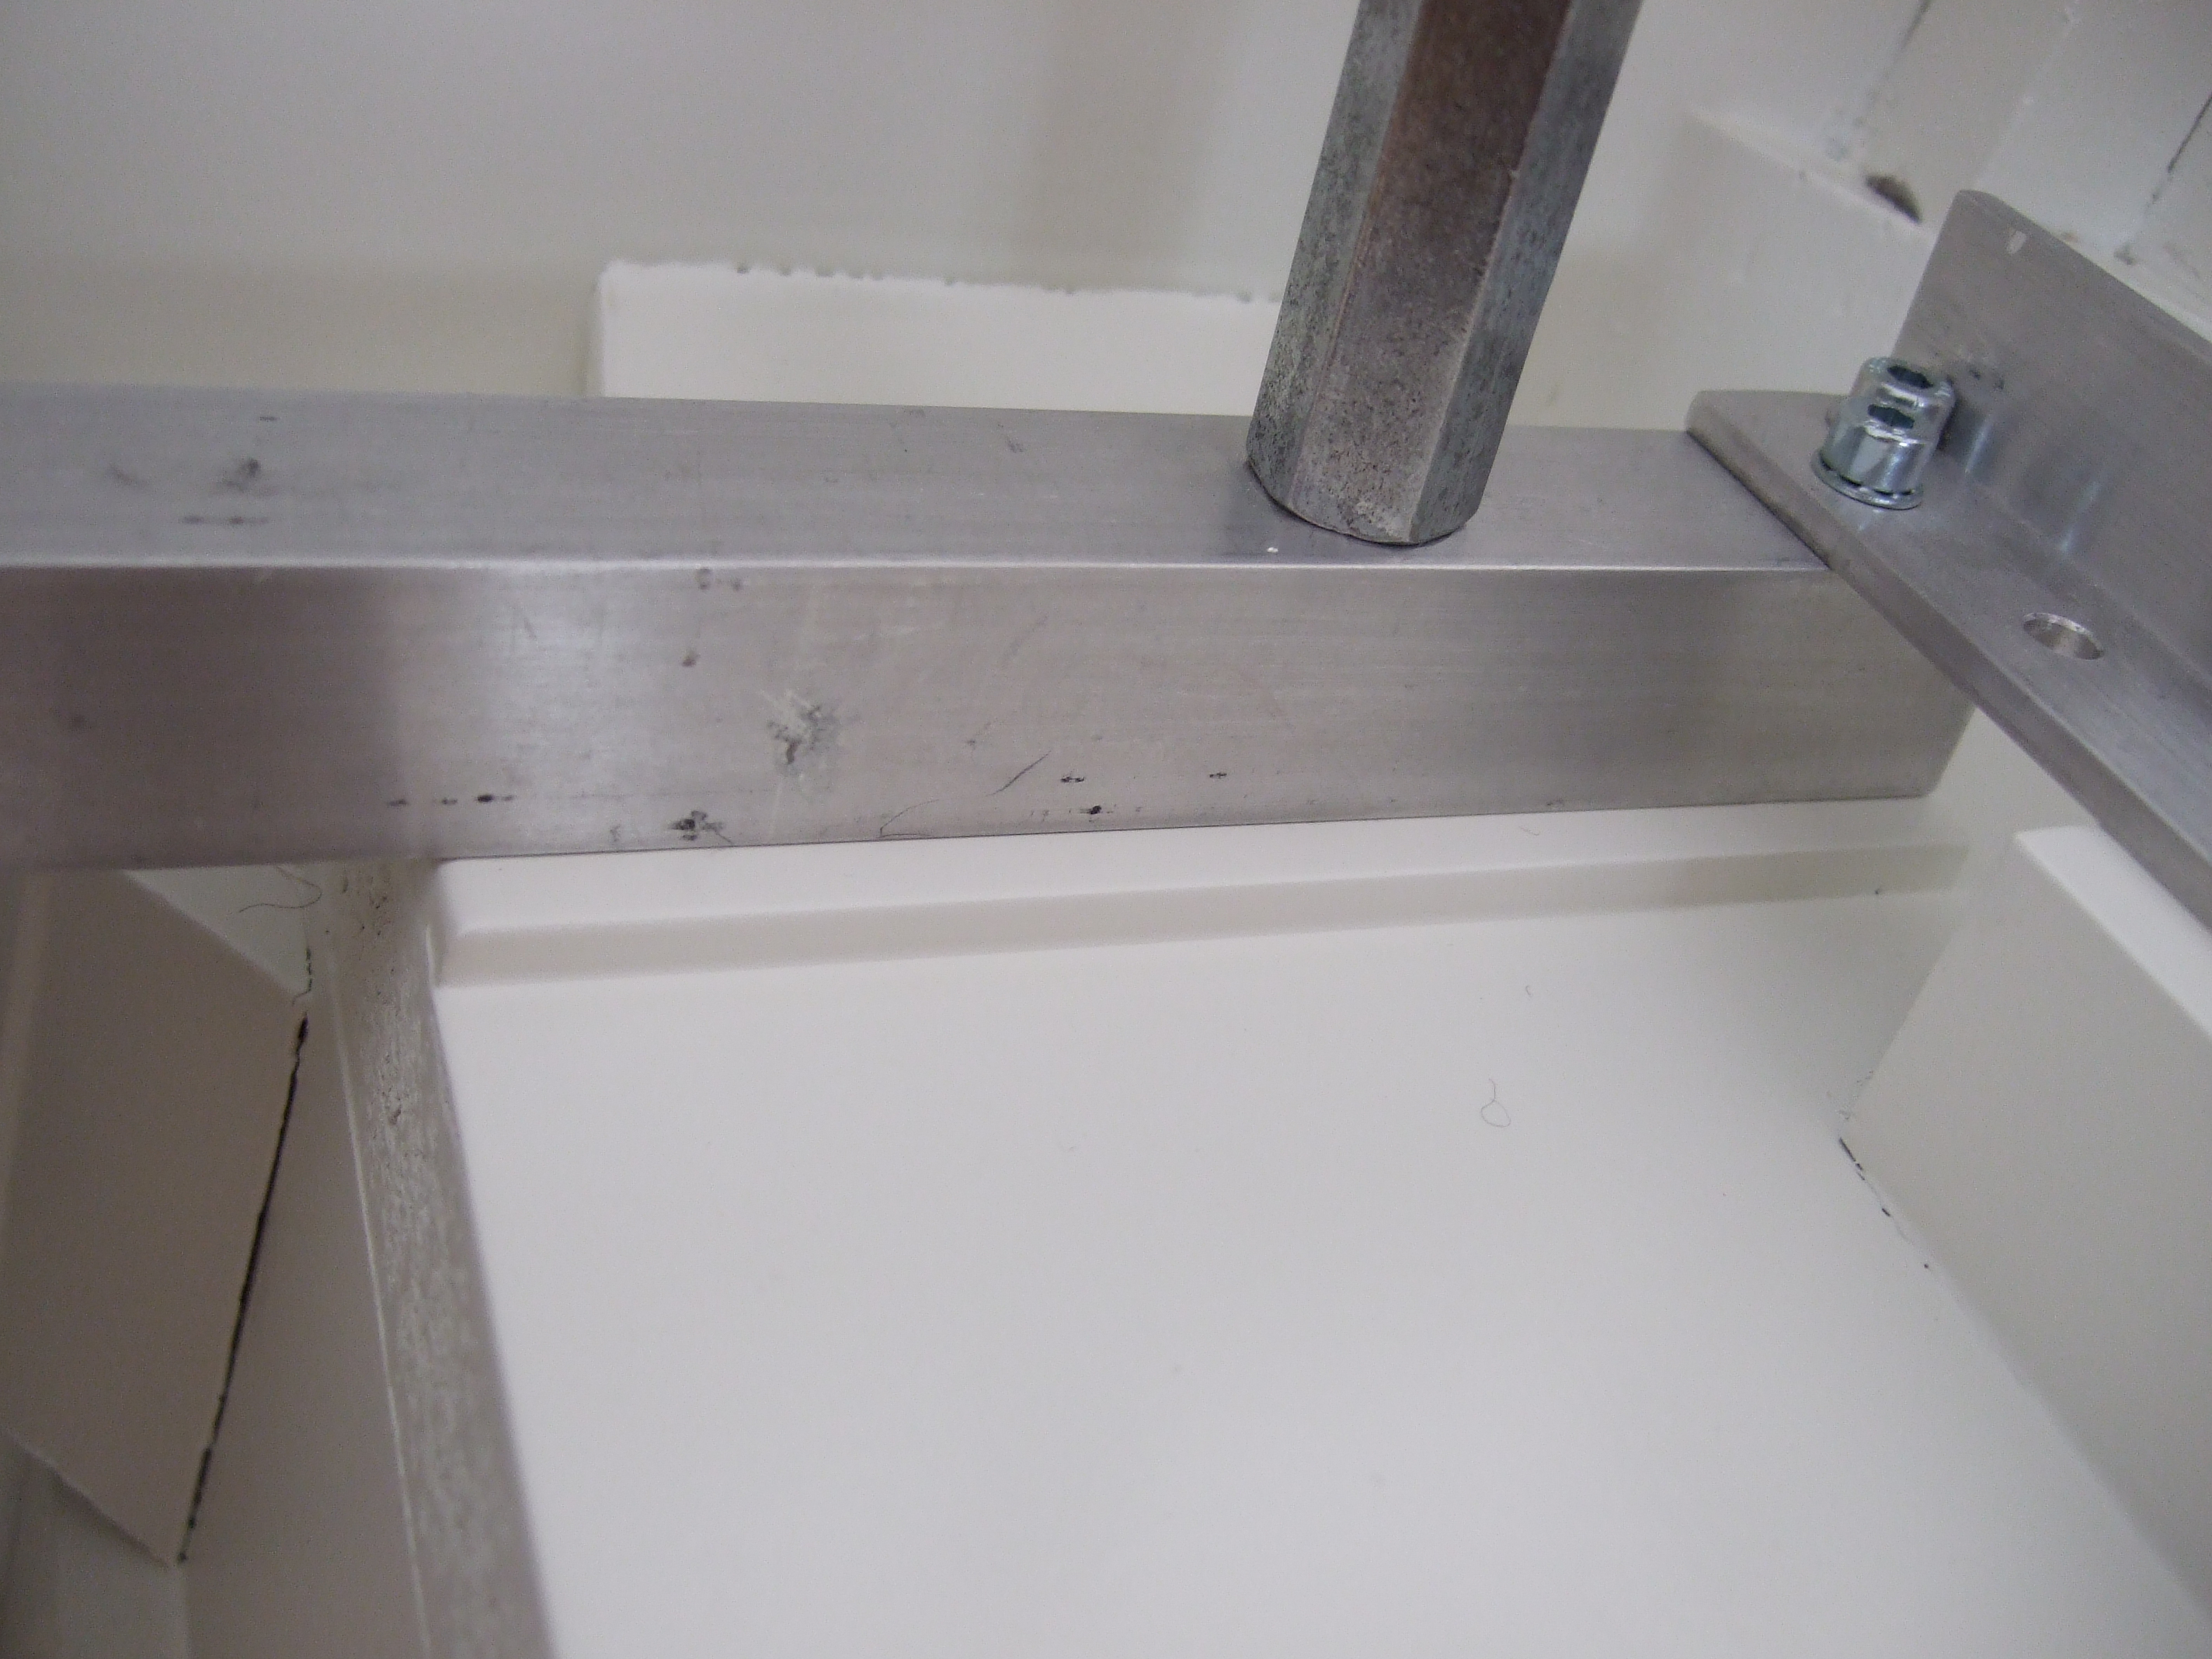 | |
| jrlaudio | My M400 | 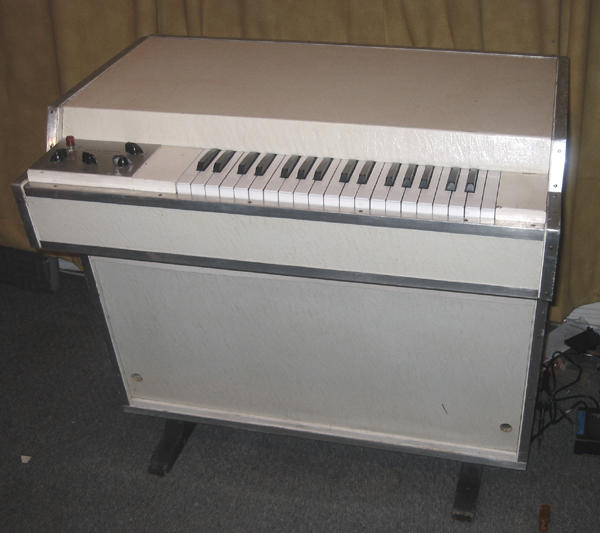 | |
| jrlaudio | My Live Rig from 2007 |  | This is my live rig dating back to 2006 which is a bit larger now, less my Hammond C3 which was just to big to bring into my apartment at the time. M400 seen center. |
| jrlaudio | Inside the Tron | 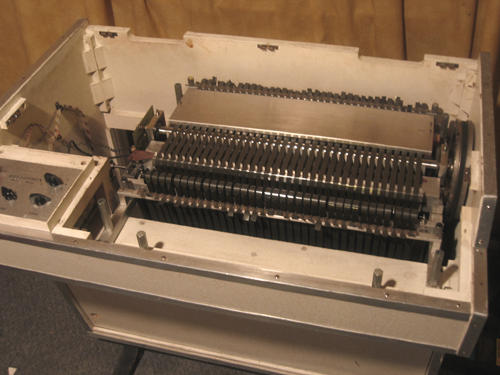 | |
| jrlaudio | The Panel | 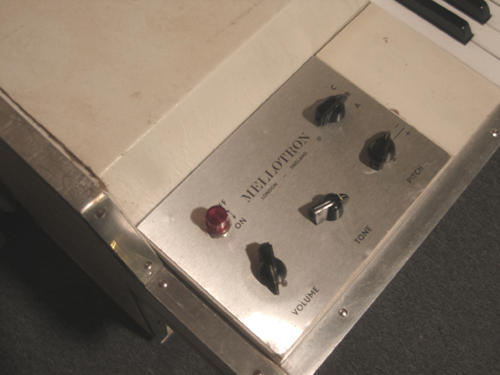 | |
| jrlaudio | The side view |  | This tron is covered with a white vinyl sheeting and aluminium corners. I got it this way back in the 80's. |
| new mini m4000d | nammday1-15-640x425 | 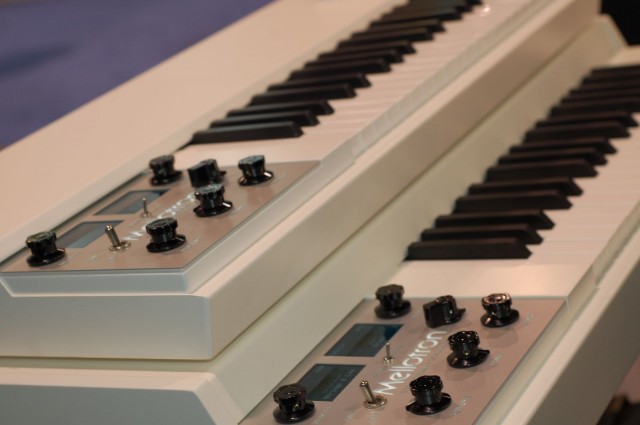 | |
| the purple children studio | tron | 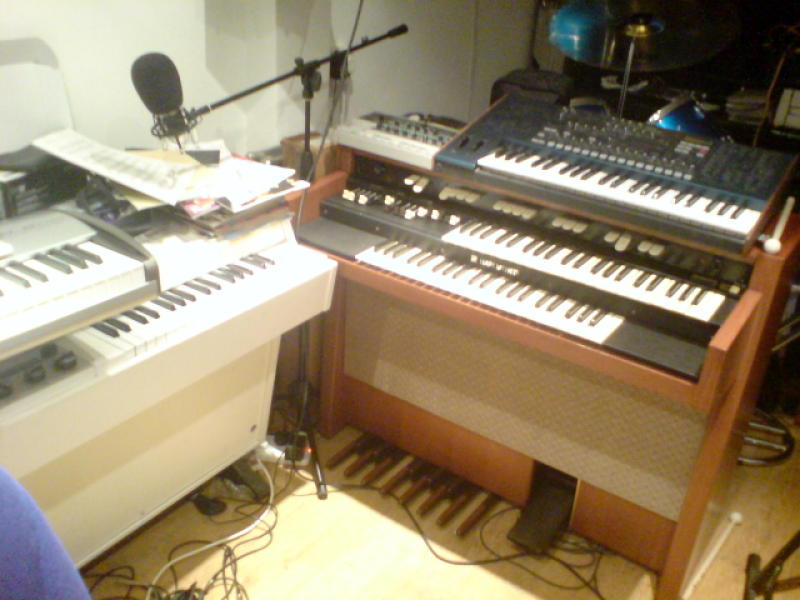 | |
| the purple children studio | other boards | 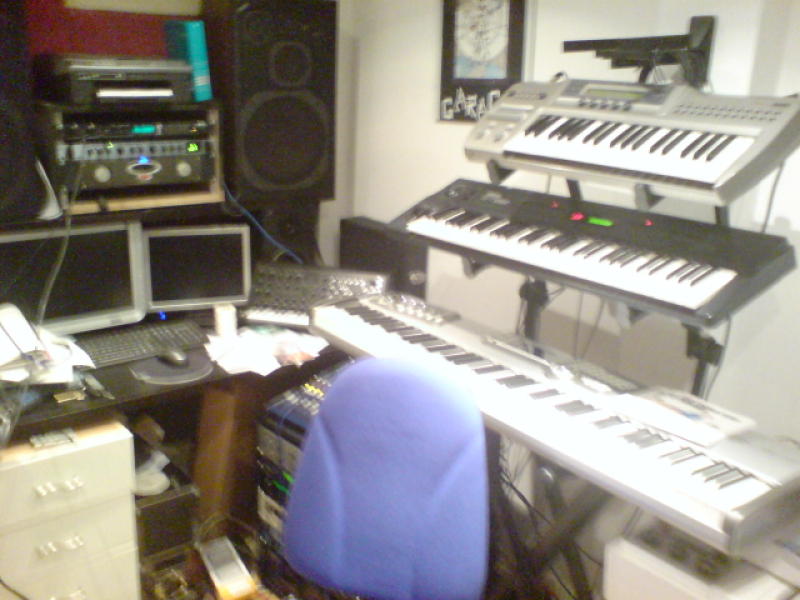 | |
| the purple children studio | guitars | 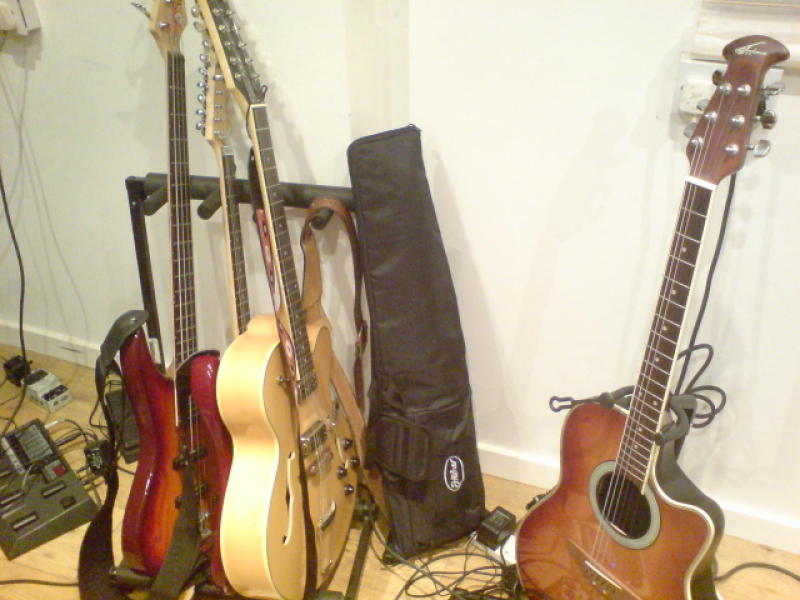 | |