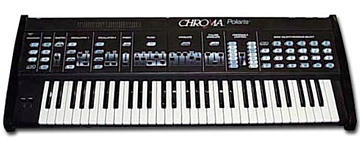
I wanted to report that I sucessfully replaced the membrane buttons
on one of my CPs with panel mounted push buttons.  I expect that
keyboard (which also has this replaced DAC and new s/h caps) to run
until the EPROMS fail.

The whole proceedure took at least 14hrs and should be done only as a
least resort for cases of damaged flex wires, or when you discover
that the actual switch membrane has worn out.  Sooner or later the
control panels will fail on most CPs-- here is how you fix them:

1) Remove control panel PCBs (Chroma Polaris must be open see service
manual).  Cut off or tape down the flex ribbon.

2) Drill holes for every button.  I recommend using the upper right
corner to preserve as much text as possible.  I drilled from the
outside in, several of the labels (eg. "A") ripped free, but I glued
them back down.  Use a large bit to clean the hole on the backside to
provide a flush or bevelled edge for the switches.

2) Switches.  You will need around 60 and the best deal I found was
at www.all-electronics.com for surplus sub-miniature SPDTs.  Solder
leads will be very helpful (there are about 140 wires that need to be
soldered so anything helps!).  I bend the leads prior to mounting so
have as much clearance as possible.

3a) There was still a clearance problem with many buttons hitting a
half dozen or so ICs on the control panel.  I solved this by removing
the offending ICs, desoldering the sockets (requires decent soldering
skills), and then soldering them back down.  I was able to just bend
the PCB to make up the remaining difference.

3b) (optional) desolder old flex connectors

4) Put the PCBs away for a while.  Print out the last few pages of
the service manual with the button wiring chart.  I color highlighted
to save time.  wwww.rhodeschroma.com is hosting the service manual.

5) I used 2 different colors of thin solid-core wire (eg. wire wrap
wire).  One for strobes, one for switch signals.  Wire them all up,
it will take a very long time, be careful with how you run the wires,
try to bend into right angles and run them against the panel to keep
things neat.
6) Don't forget to add a wires that will eventually get solder to the
PCBs and *label them*.  If you look at where they will be going, the
switches you should use as the source of these wires will be
obvious.  Remember that STB0-STB2 go to a different place then the SW
lines.

7) install PCBS and solder the STB and SW lines.  Test it all out--
good luck.  I'm a skilled tech and I had 1 bad solder joint out of
the nearly 200 solder joints but its easy to use a multimeter to
troubleshoot as long as you don't scramble up the connection diagram
(in which case the LEDs will provide some clue).

I will post a picture eventually...
Due to the time this proceedure takes, I don't think it is feasible
to pay someone to do it for you as it would cost at least $400 which
is close to the price of a used Polaris.  I would charge $500 (more
if it needs to be done in less then a month).  Another option is to
have PCBs manufactured, but that also means machining a new panel so
that switches line up.  Given the size of the panel and expected
volume, it would probably also end up in the $500 range.  A final
option is to use MIDI which has performance disadvantages.

-Ben
Message
Panel repair
2005-03-04 by bkuris
Attachments
- No local attachments were found for this message.