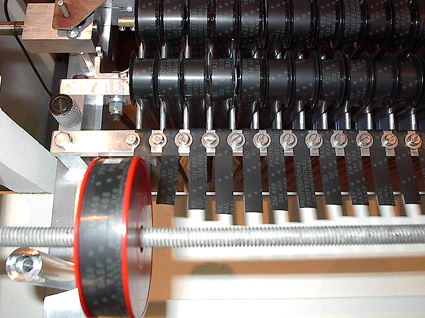
Archive of the former Yahoo!Groups mailing list: The Mellotron Group

previous by date index next by date
previous in topic topic list  

Subject: Re: [newmellotrongroup] Re: Hustling for NEARfest.

From: lsf5275@aol.com
Date: 2012-07-01

It was a bitch getting that cabinet right. There was far more to it than the photos show. Along the way I took it outside and spackled the entire cabinet inside and out, let it dry and then sanded the whole mess off. That appeared to fill the last of the little divots. Then the shellac and rubbing out started. All of the cracks were repaired with West Systems epoxy injected under pressure and clamped. The chip board was strengthened with thin cyanoacrylate in all of the bonding areas not repaired with the epoxy and in any other areas where the material seemed to be crumbling or overly porous. Prior to Bondo being applied, the holes were soaked with cyno to form a structurally sound bonding surface and then a mixture of fiberglass and rovings was applied in the large areas where the back panel had come apart. Then it was all smoothed with the Bondo and sanded to an even surface.  The back panel was replaced with MDF and the edges were reveneered. I'm pretty sure the cabinet is as strong or perhaps even stronger than when it was new.
 
There were a bunch of "pinhole" filling sessions, and I kept finding more. It seemed like an endless task, so...
Finally I decided to spackle the whole thing and sand it off. I've used this technique when filling pinholes in fiberglass before painting.
 
What remained after sanding. This worked.
Finally the shellac gets applied inside and out.
Once I got it into the paint booth and squirted primer on it, I found a few more little spots that needed work, but they were quickly addressed and I could start applying color. The lid, wood blocks and front and rear panels were far easier to prep.
 
 
Looking at it, even up close, it's hard to tell what's under that paint.
If I had it to do over, I think I would probably have applied veneer to the whole outside of the cabinet, but it wasn't originally that way and so I didn't... But then it ended up looking very non-stock when I completed it anyway...
 
If I ever run into anything like this cabinet again, I'll probably follow my original plan and just build an entirely new cabinet out of Baltic Birch plywood and MDF.
 
Frank
 
In a message dated 6/30/2012 12:47:18 P.M. Eastern Daylight Time, tomdcour@amnh.org writes:
That looks like it took alot of elbow grease Frank. Nothing like rubbing out shellac with steel wool to get the blood pumping!! Great work!